


How to Make a Quilted Hammock Cover
Hammock naps are a wonderful thing, but sometimes the weird rope lines on your skin and knots in your back can spoil it. Learn how to transform an old bedspread into a hammock cover to make alfresco snoozing more comfortable.

Rope hammocks look great in any yard. Kicking back in the hammock can be delightful, but the ropes and knots can be a little uncomfortable and leave a weird waffle print on your legs if you stay long enough for a nap. A homemade quilted cover can add comfort and style to a rope hammock, and you can make one easily and inexpensively using a canvas drop cloth and an old quilt or bedspread.

Bob Farley/f8FPhoto
Tools + Materials
Time: 2-3 hours
- canvas drop cloth
- quilt or bedspread
- decorative fabric
- scissors
- measuring tape
- pencil or fabric marker
- pins
- sewing machine
Technically, a quilt is made with three layers: a top layer, a bottom layer and batting in the middle. We used a mattelasse bedspread which is two layers of quilting. We also added a layer of canvas on the bottom of our hammock cover to conceal some damaged sections of the quilt and to make the cover sturdier.
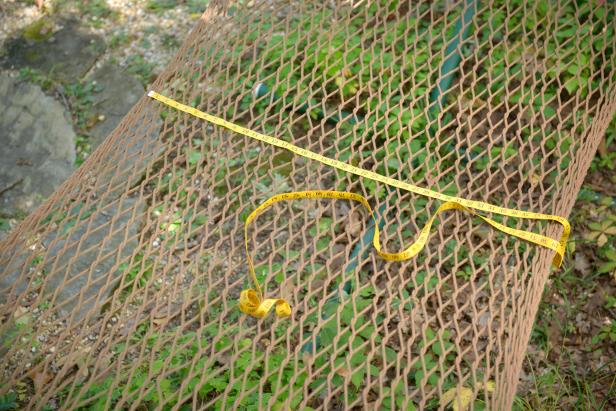
Step 1: Measure Hammock
Hang the hammock and measure the length and width, but instead of the full width, just measure the narrowest part in the center of the hammock. If you make the cover the width of the spreader bars, the excess width will not drape well in the center. Write down the measurement and add your seam allowance. Since you’ll need to sew the layers together using a 1/2” seam allowance, you’ll want to add 1” to the total width and length.
Bob Farley
Step 2: Wash + Prep Canvas
Wash and dry the canvas drop cloth. Remove promptly from the dryer to prevent wrinkling. Cut the hems off and put them aside, you'll use them to make the cover's ties. Also, cutting the hems off will give you straighter edges when it's time to measure and cut the canvas layer.

Bob Farley
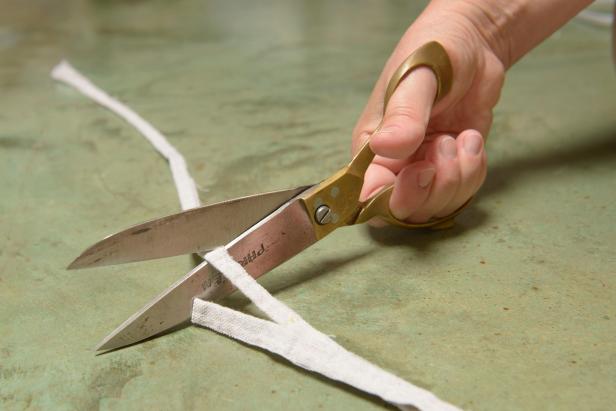
Step 3: Cut Canvas to Size
Measure, mark and cut the top canvas layer making sure you get good squared-up corners and straight lines. Don't fuss too much. You'll find a lot of wonky lines in mass-produced linens.

Bob Farley
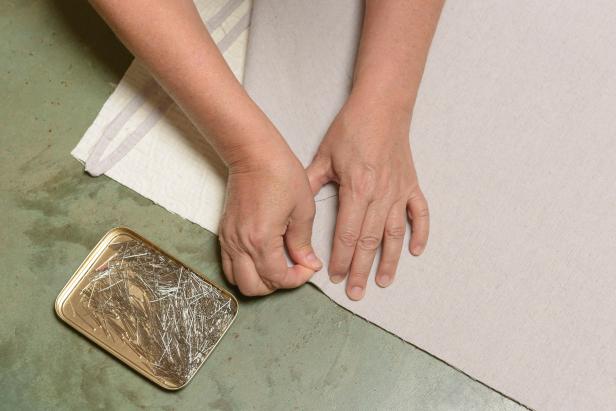
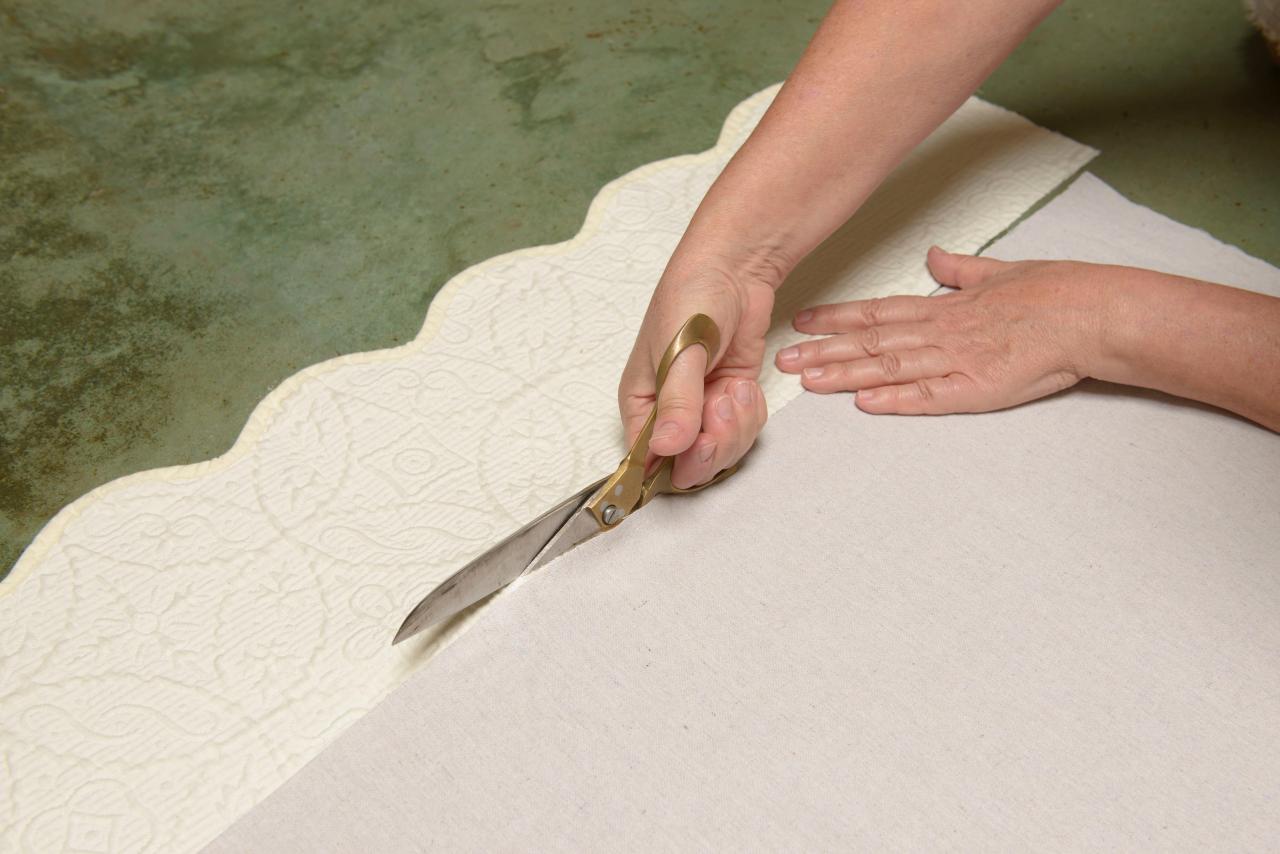
Step 4: Cut Quilt Layer
Place the quilt or bedspread right-side-up on the floor and lay the canvas on top of the quilt making sure to line up all of the edges. Cut all around to match the canvas measurements exactly.

Bob Farley
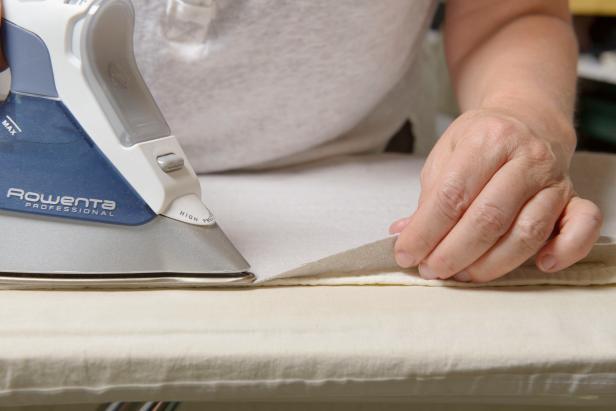
Step 5: Make the Ties
You’ll need six sets of ties (four corners and two sides). For the ties, I made use of the cut-off hems of the canvas drop cloth. Instead of making two ties per set, I just made one long tie and folded it in two. I cut the long hems off, cut the ties to length, and frayed the canvas up to the seam lines. You can do this or, if you want fancier ties, you can use ribbon, bias tape, twill tape or make your own out of decorative fabric. If you make your own, cut the strips 2” wide, fold in lengthways and press. Fold the edges into the centerfold and iron again.
Bob Farley
Step 6: Pin Layers Together
Peel back the four corners and place the ties with the folded part in and the ends out; pin through the layers to hold the ties in place. Insert the other two ties in the middle of each of the sides. Pin all around the edges of the cover leaving at least a 1' opening for pulling the cover right-side-out when you're done sewing.
Bob Farley
Step 7: Sew Canvas + Quilt Together
Sew around the edges using a 1/2" allowance. Continue stitching and be careful not to sew past the last pin for the opening. Always start and stop your seams with a few stitches in forward and in reverse to lock your stitch line. Pro tip: Prep your thread and fill two bobbins before you start sewing so that when you run out of bobbin thread, you can replace the empty bobbin easily and quickly without having to stop and re-spool in the middle of your project.

Bob Farley
Step 8: Turn Right-Side Out
Turn the cover right-side-out and press the seams flat. Fold the edges of the opening in, match them up, iron and pin the opening closed.
Bob Farley
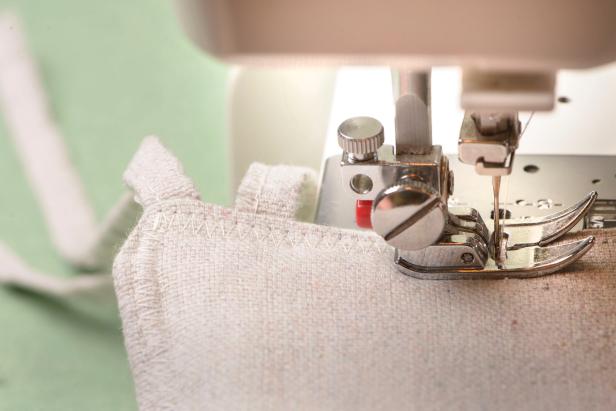
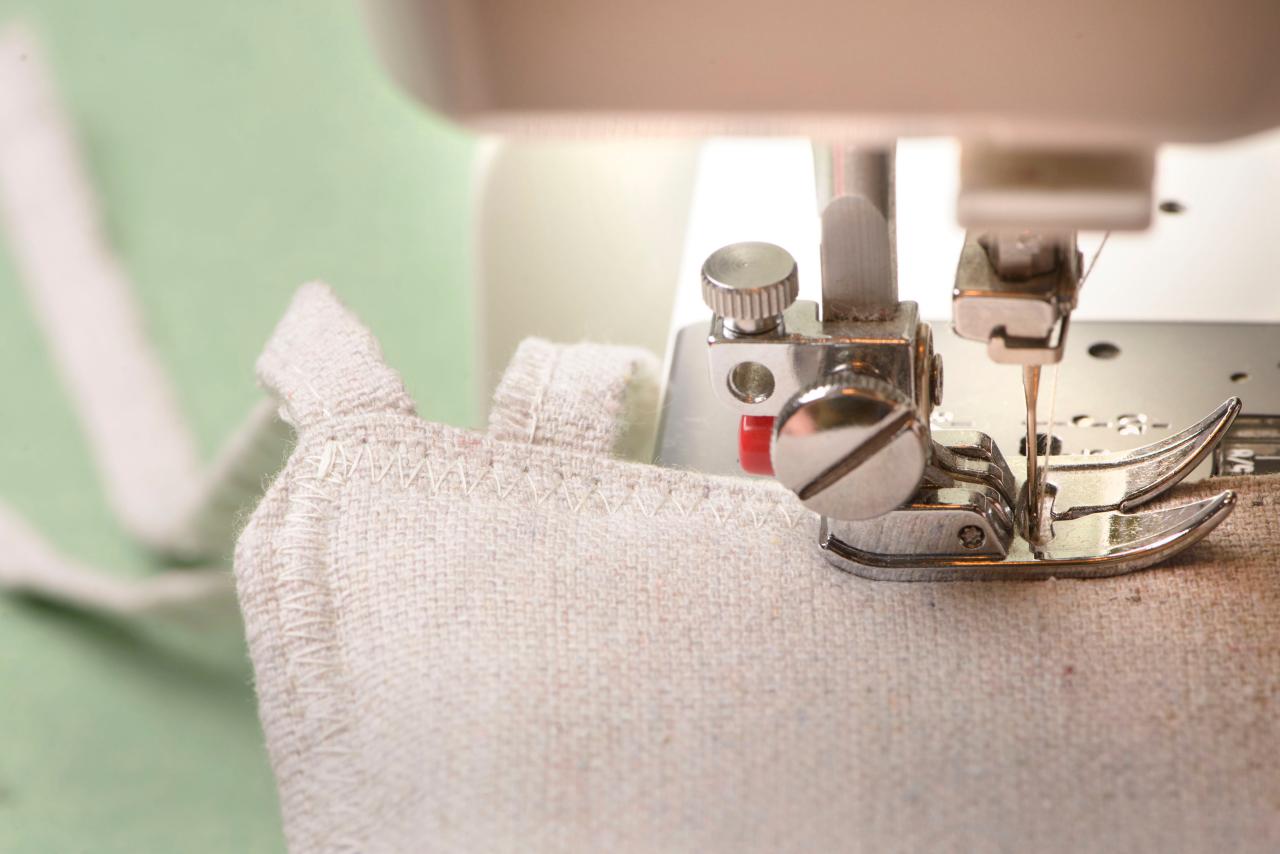
Step 9: Finish Hem
Sew around the finished seams and the pinned opening with a zigzag stitch on top of the canvas side. Locking the edges with the zigzag stitching will ensure the strength of the seams and prevent fraying when you launder the hammock cover.
Bob Farley
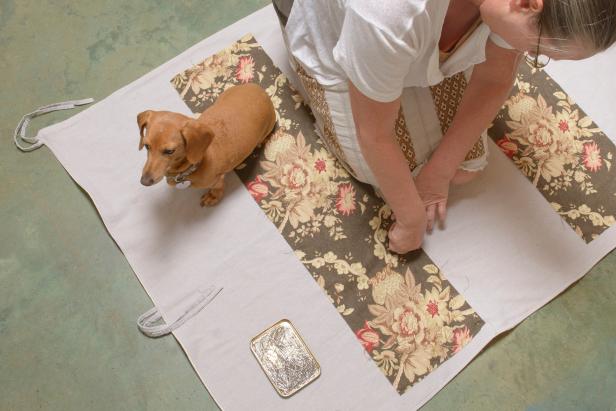
Step 10: Embellish
Design and cut out the appliqué pieces. Choose an easy design. Straight strips of fabric will hold everything together and lend a modern and clean look. Pin the appliqués in place on top of the canvas side. (Note: Don't worry, Lulu gets shooed away when she gets too close to the pins.)
Bob Farley
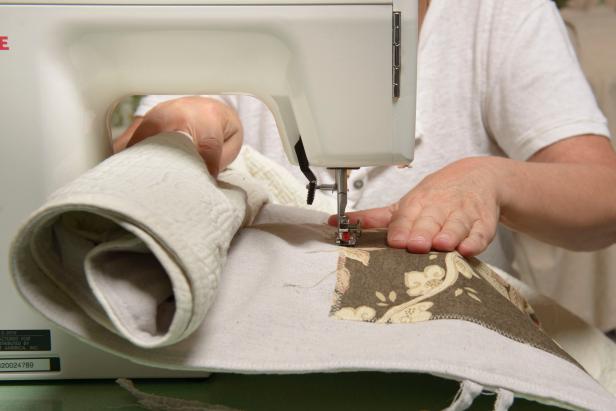
Step 11: Attach Appliqués
Sew the appliqués using a zigzag stitch. If you are not used to sewing large pieces of fabric, it might be difficult to wrestle the cover. Manage the bulk by rolling the piece to easily feed through the machine. Be sure to manage your loose threads by snipping the front and back threads as you finish each appliqué.
Bob Farley
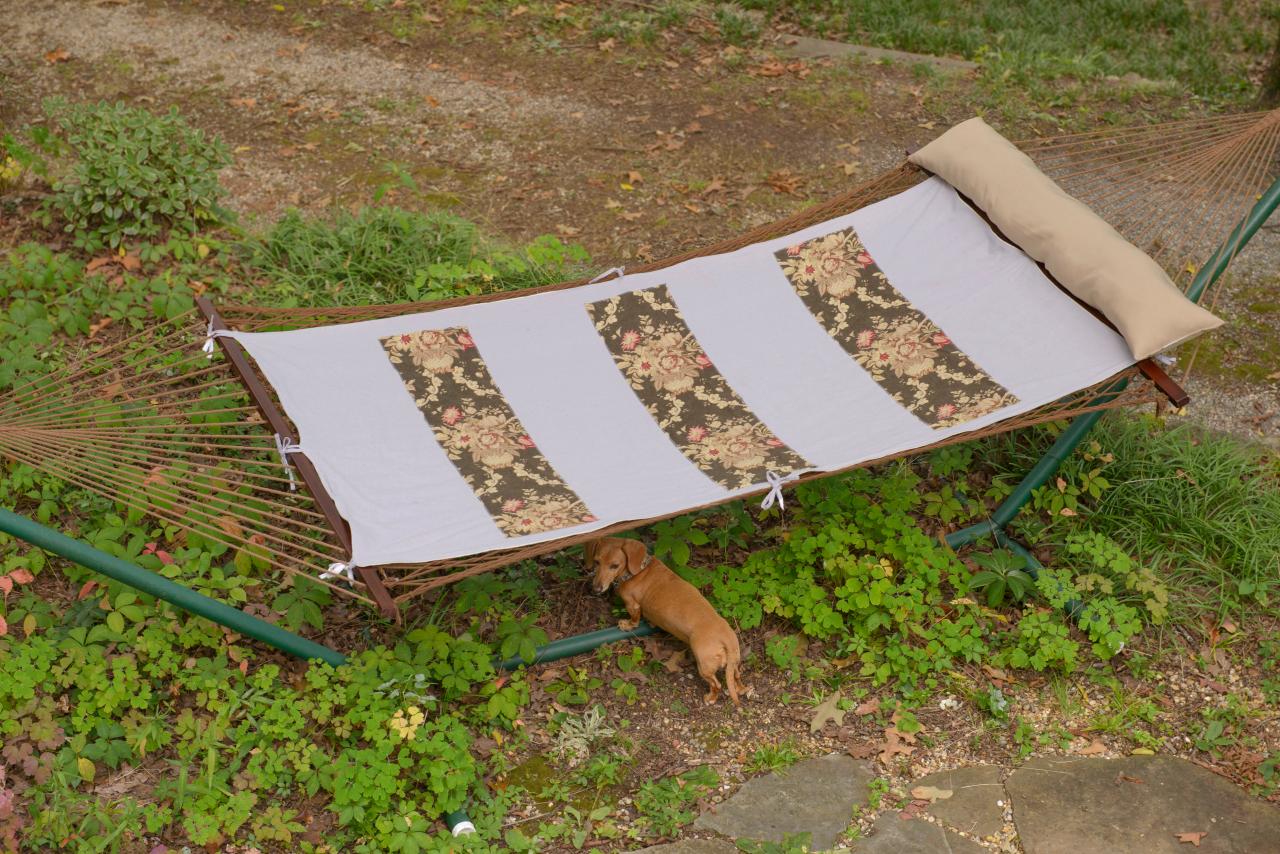
Tie the finished cover onto the hammock then kick back and relax.

Bob Farley


