


How to Make Wire Shelf Covers That Look Just Like Floating Shelves
This renter and homeowner-friendly hack transforms tricky wire shelves into stylish, faux floating wood shelves.

Liz Rishel, Within the Grove

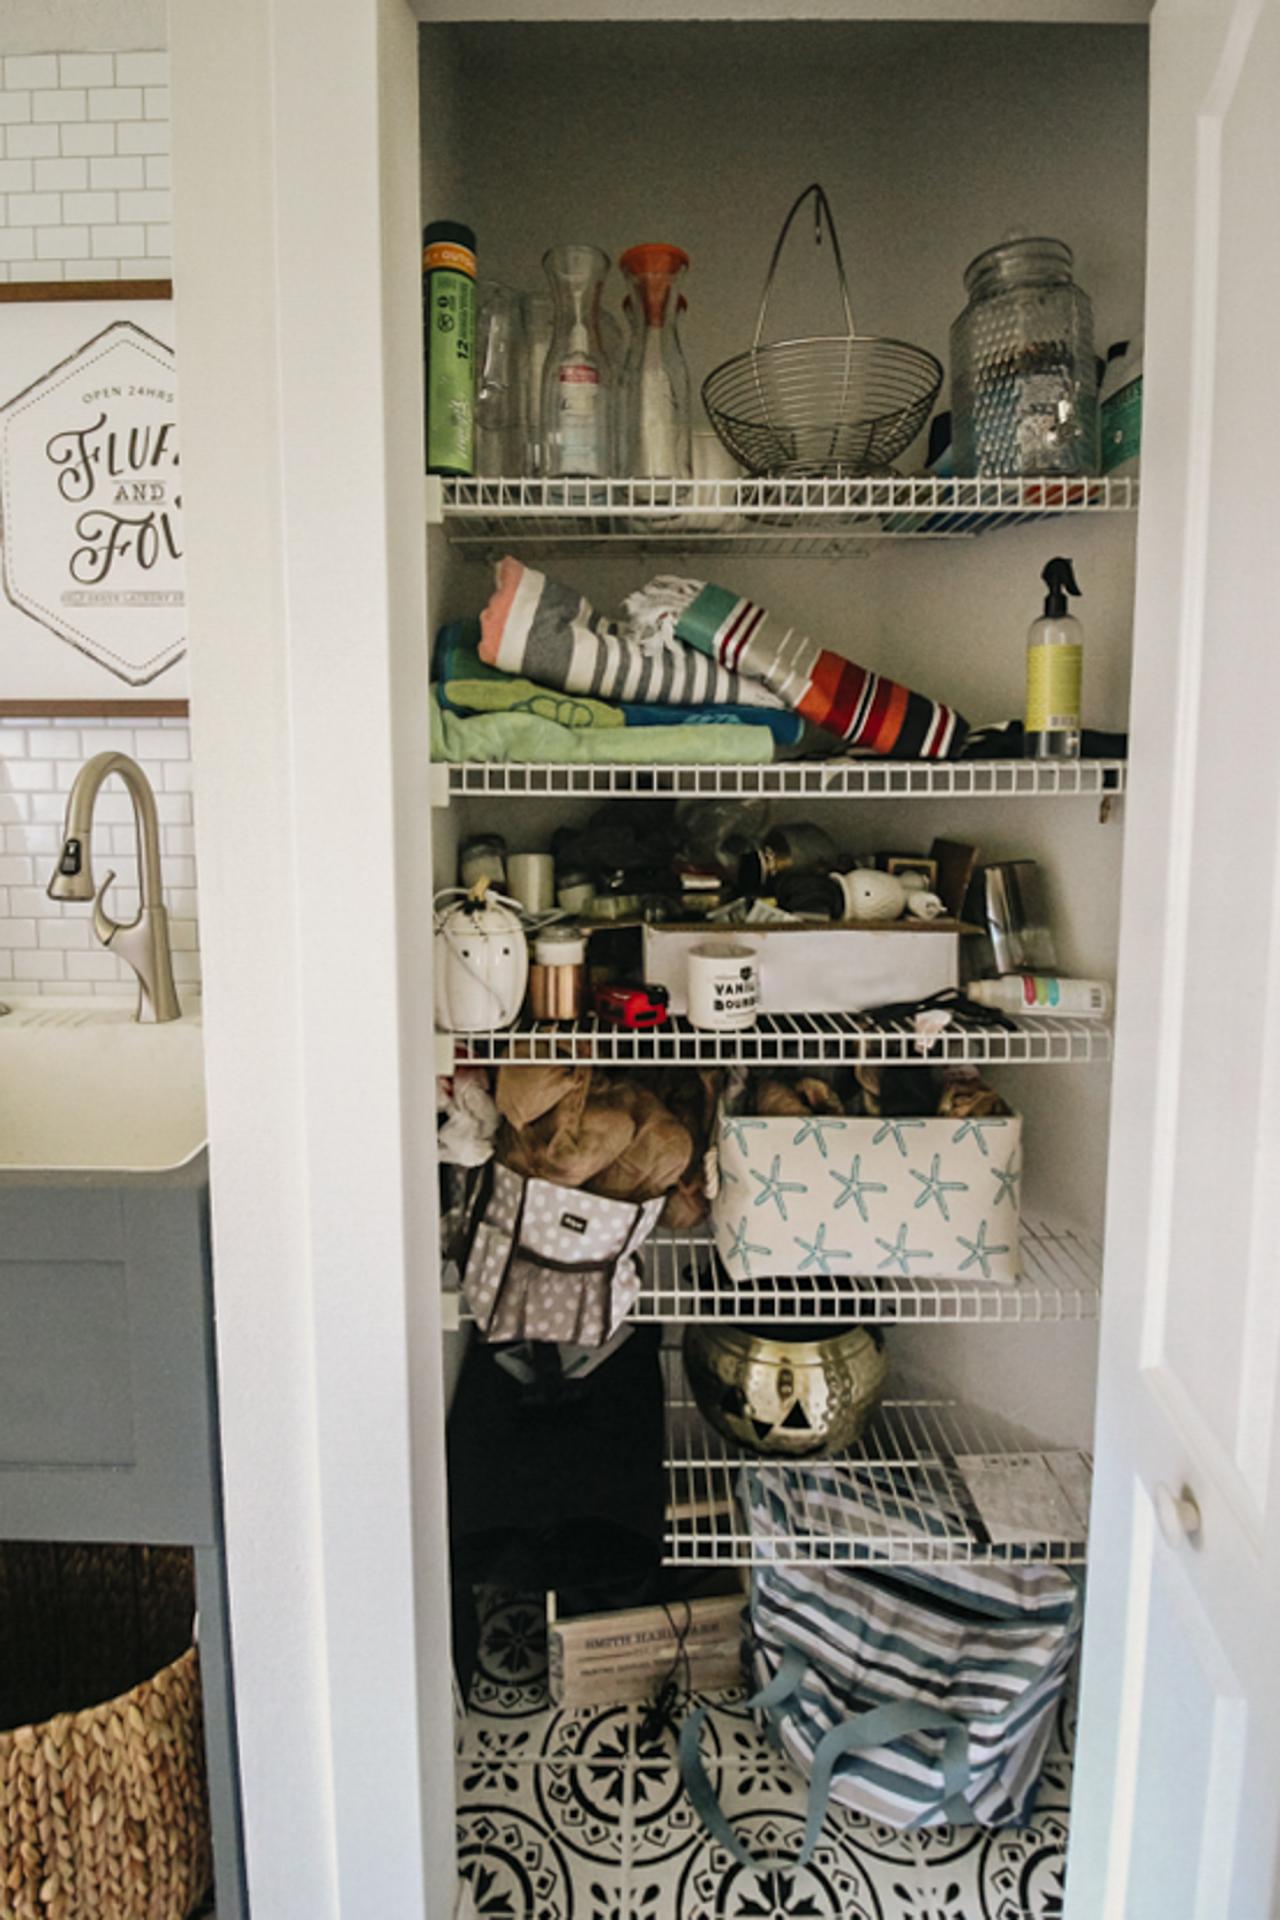
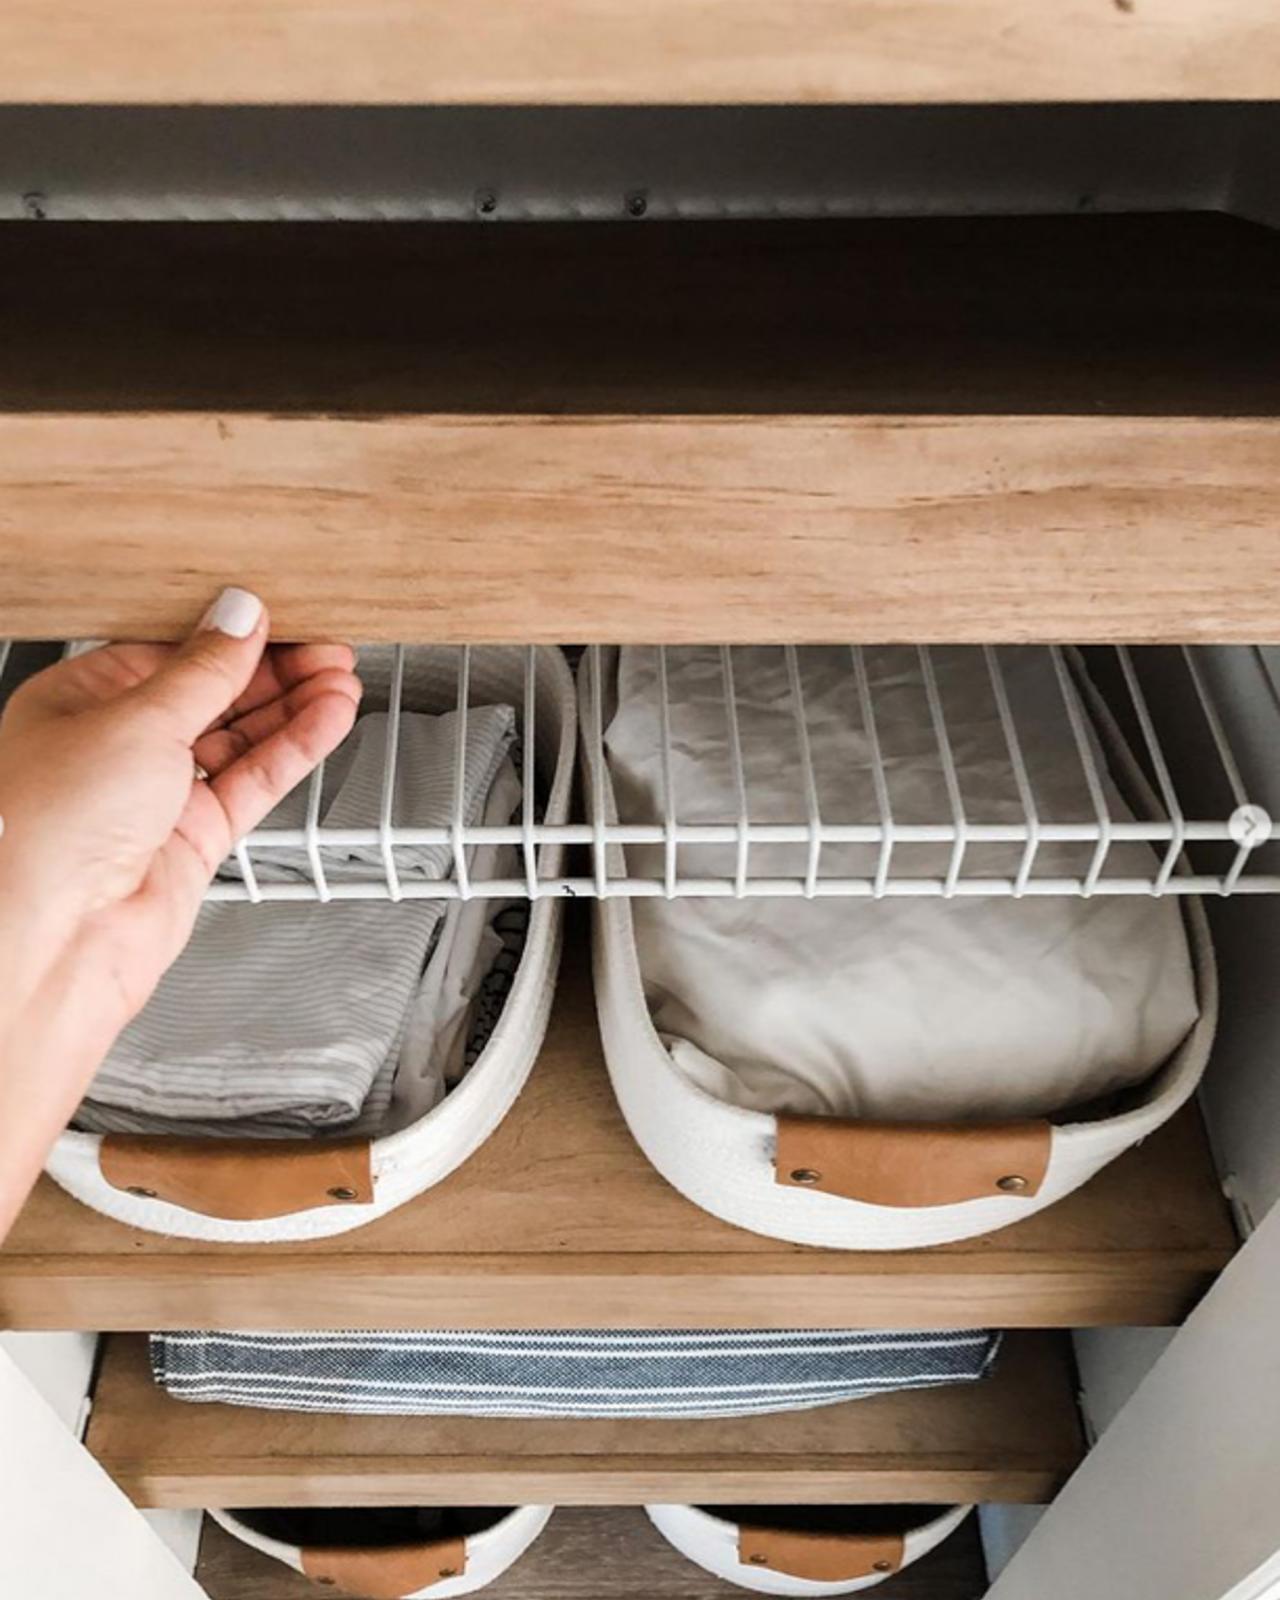
I have a love-hate relationship with wire shelves. You know the kind I’m talking about: the ones where things either fall through or don’t stand up straight, and dust gets stuck in all the little nooks and crannies.

Liz Rishel, Within the Grove
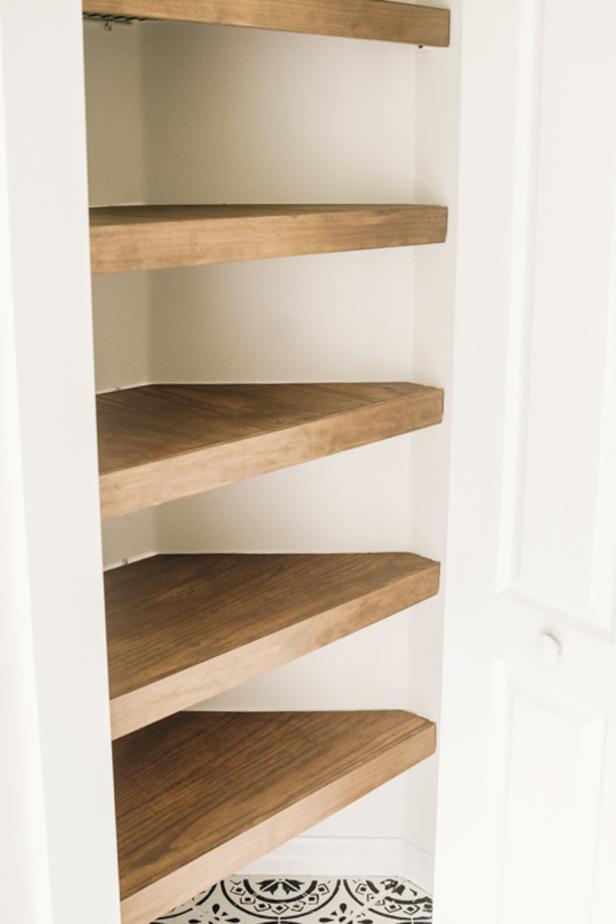
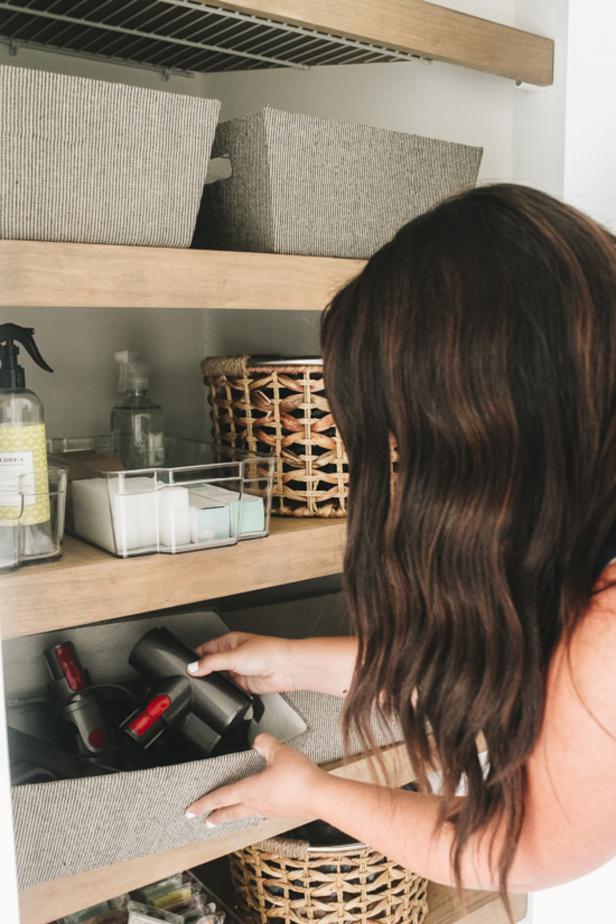
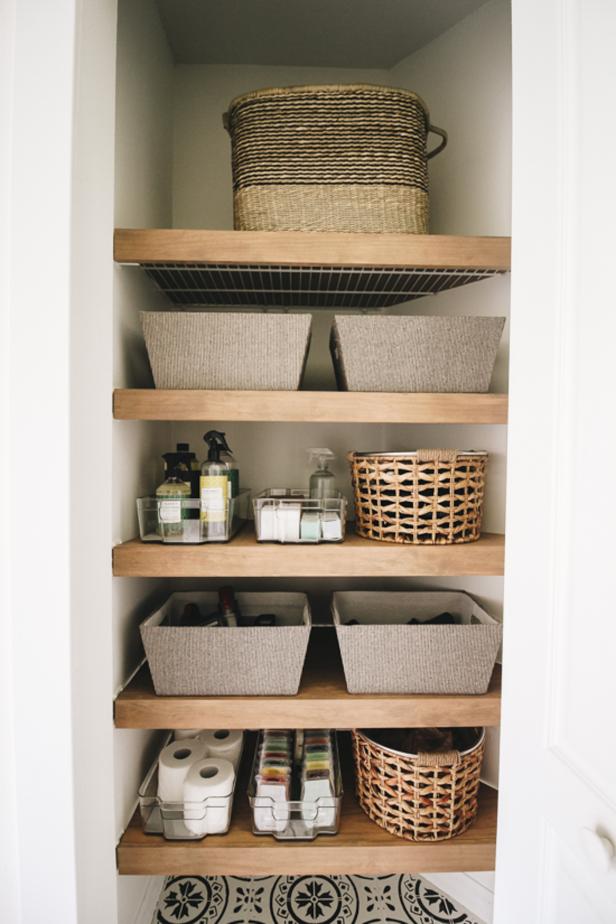
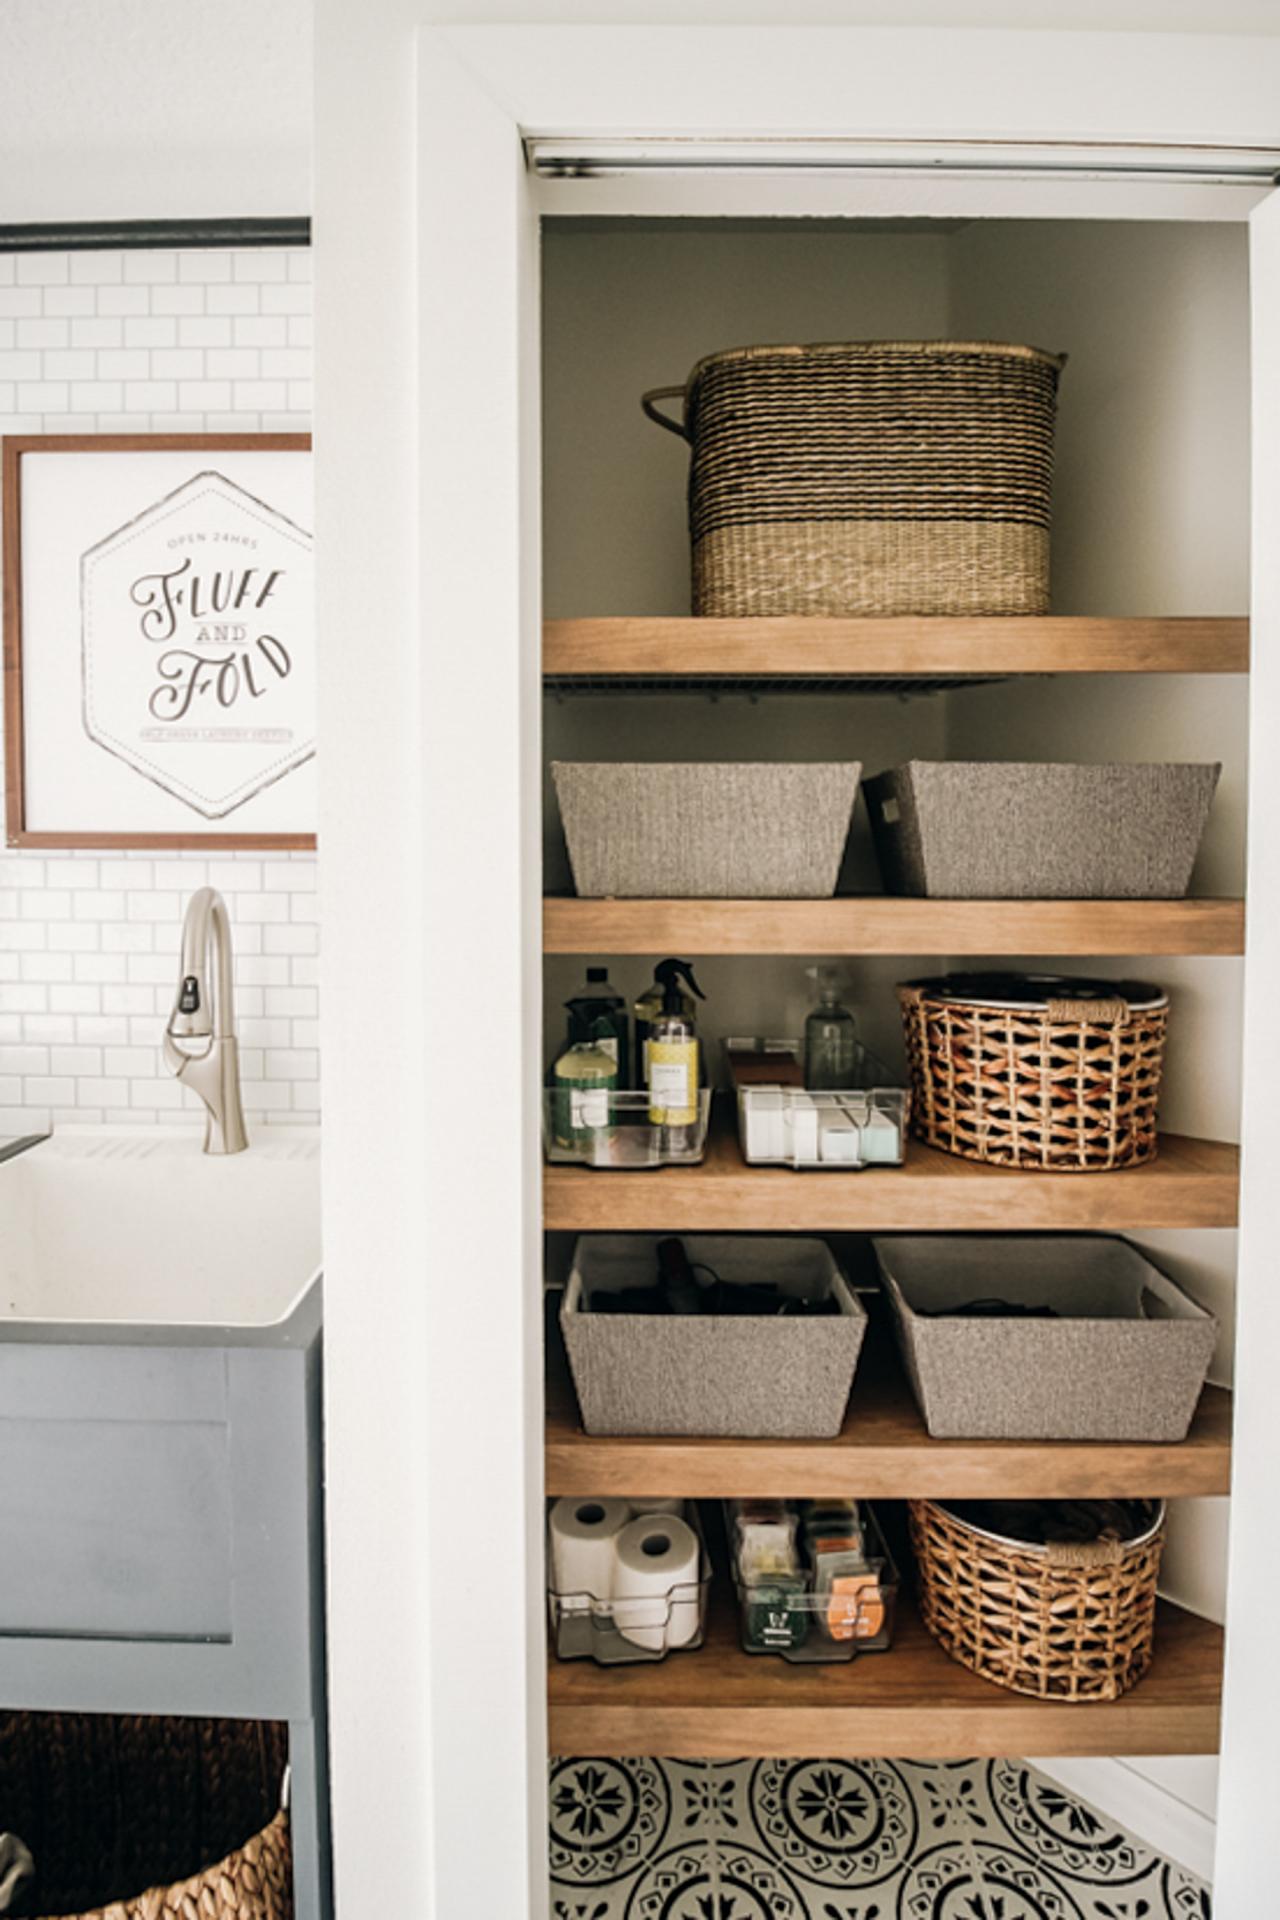
In other words, I love to hate them, especially since that led me to try the best hack yet in our home: building faux floating shelves that slide right over the existing wire shelves. Without having to remove a single wire shelf, I created the look of wood floating shelves that completely transformed this closet.
Liz Rishel, Within the Grove

Liz Rishel, Within the Grove
Liz Rishel, Within the Grove
This stunning hack is a renter- and homeowner-friendly project that will have you running to your local home improvement store. So, if you're wondering how you can “get rid” of the wire shelves haunting you in the closets of your home with an affordable solution, then buckle up — this DIY is a good one!
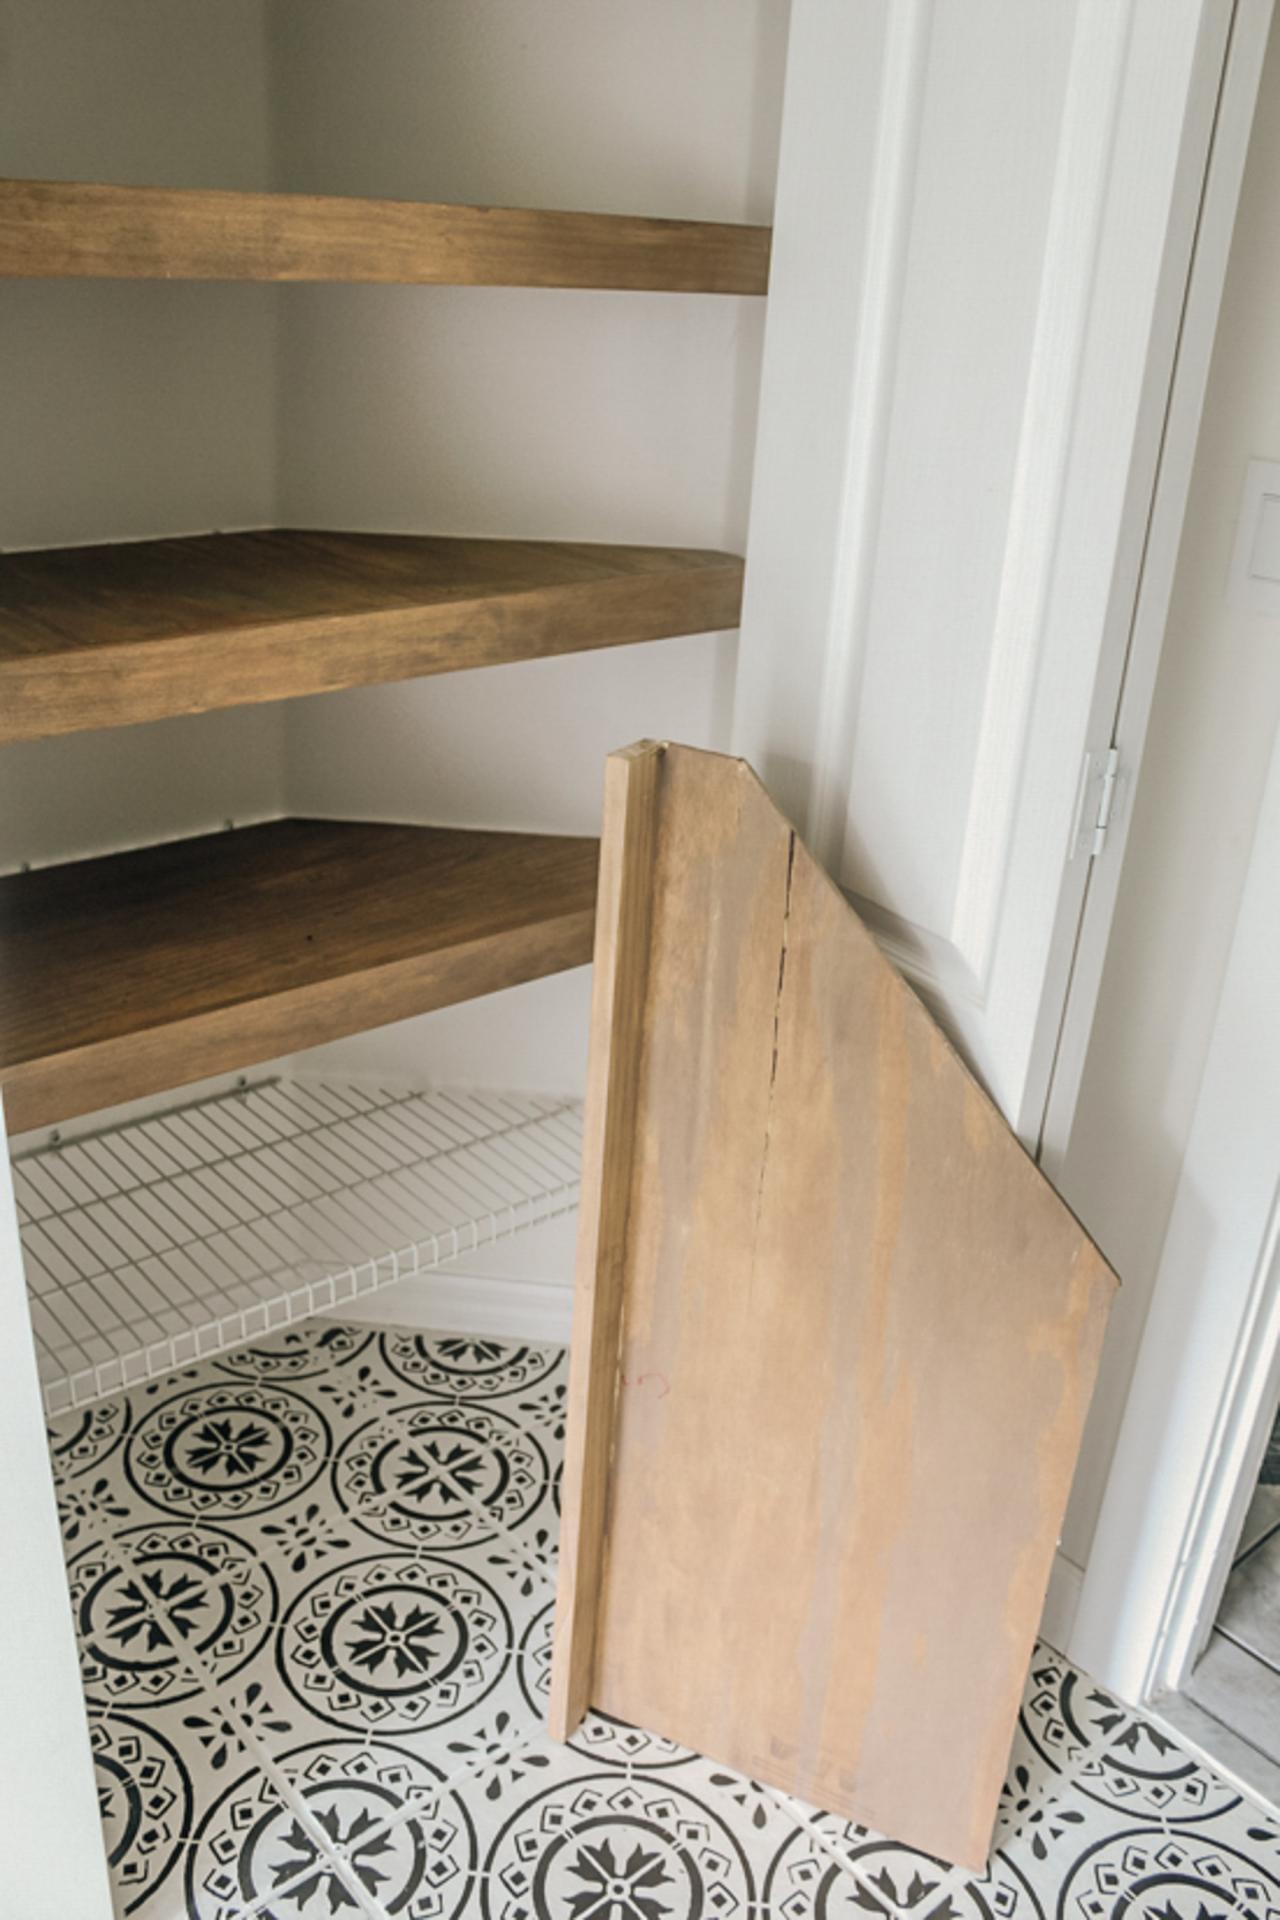
We will place plywood boards, with pine boards attached to the front, on top of the wire shelves. The pine boards will conceal the front of the wire shelves, giving the wire shelves the illusion of wooden floating shelves. Here’s how to build faux wooden shelves that fit perfectly.

Liz Rishel, Within the Grove
Tools + Materials
- 1/4" thick sheet of plywood (I was able to use a 4' x 8' sheet for all five shelves.)
- 1x3 pine (I bought mine in 6' sections. You want to make sure you have enough to fit the front width of each wire shelf.)
- brown general purpose shipping paper
- marker
- scissors
- jigsaw
- tape measure
- miter saw
- router
- wood glue
- brad nailer
- 1″ nails for brad nailer
- stainable wood filler
- 120-grit and 220-grit sandpaper
- wood stain (I used Flagstone by Varathane)
- clear polyurethane in satin finish

Liz Rishel, Within the Grove
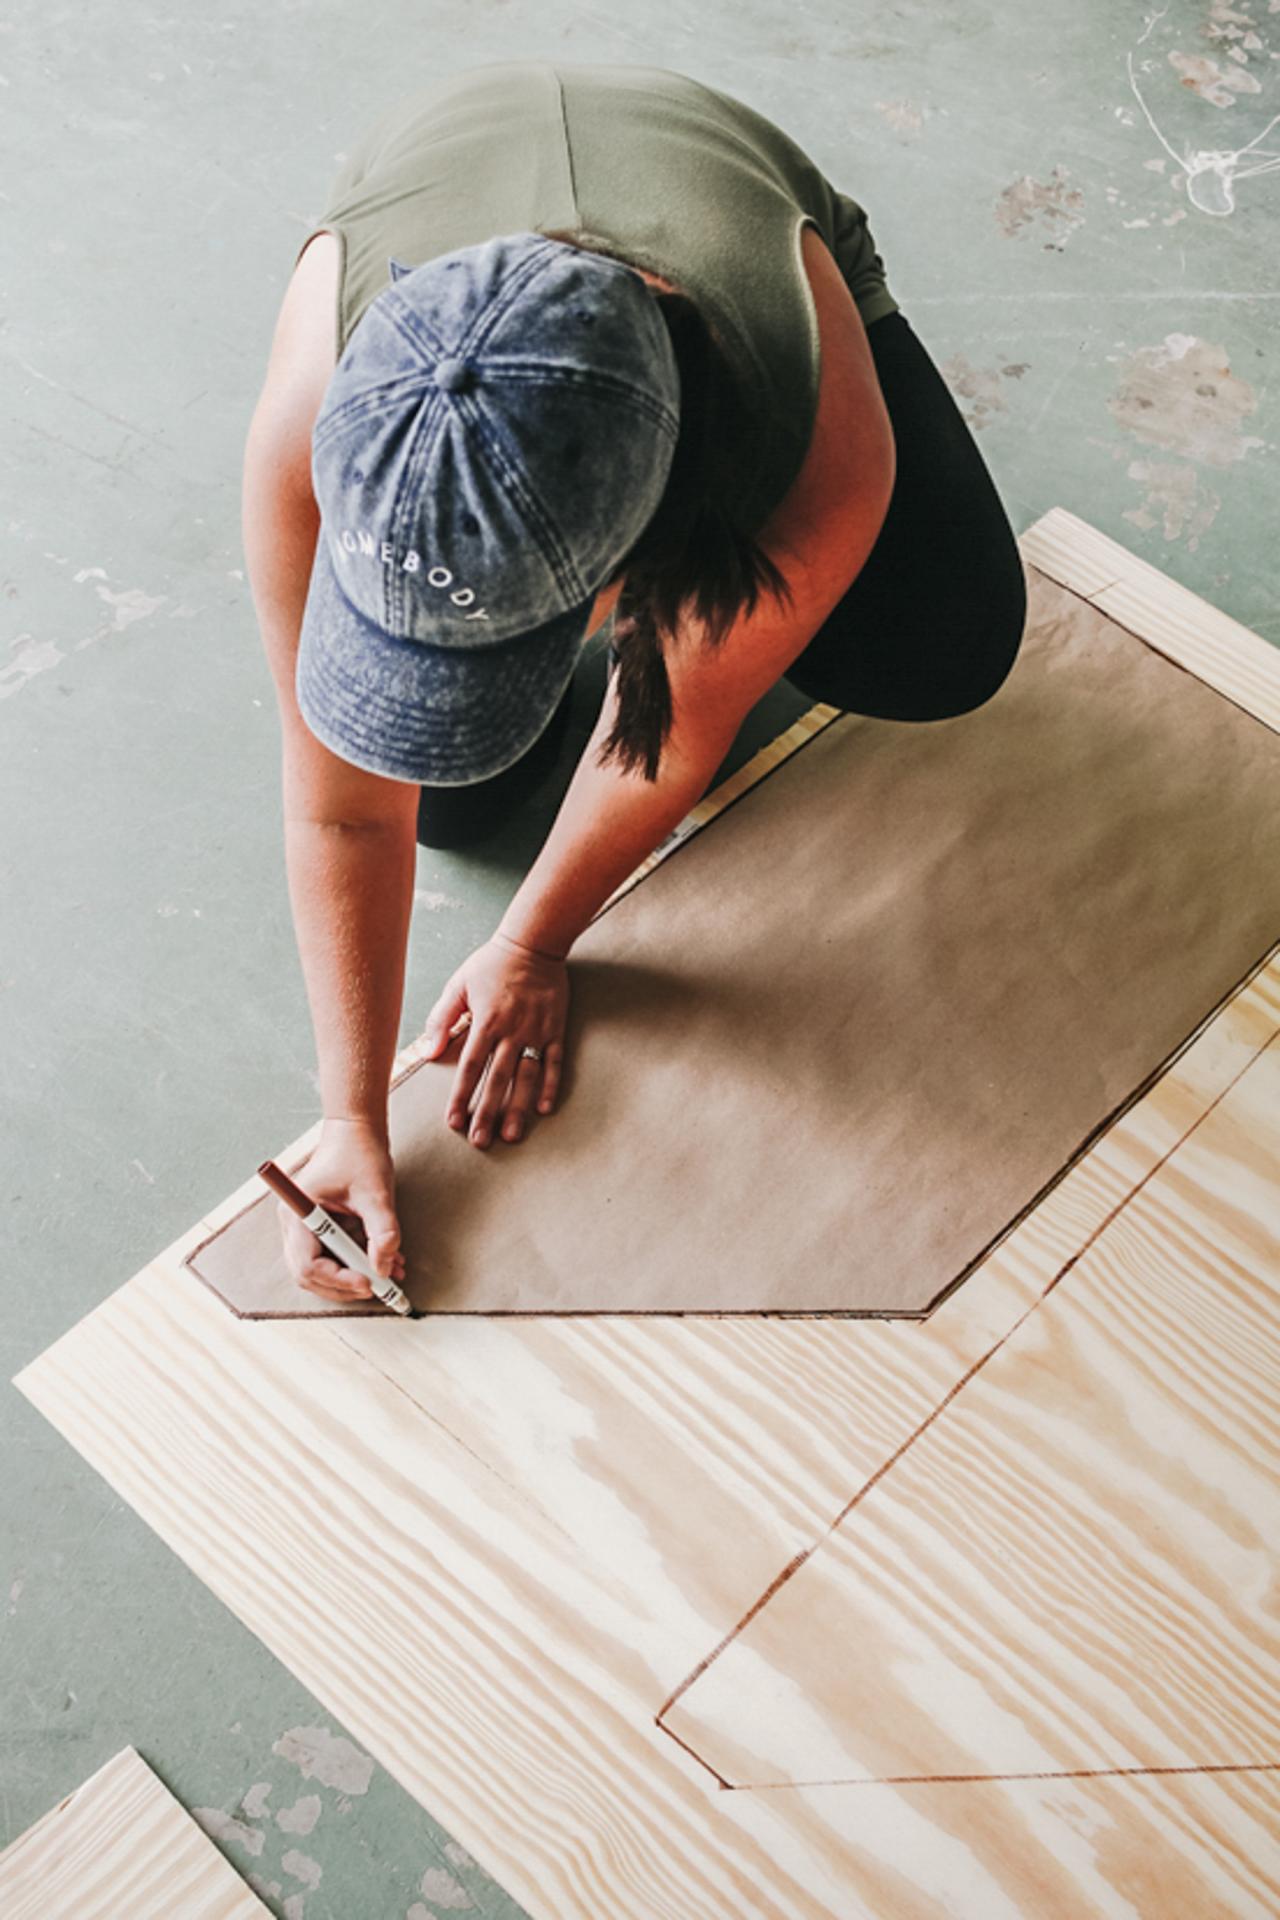
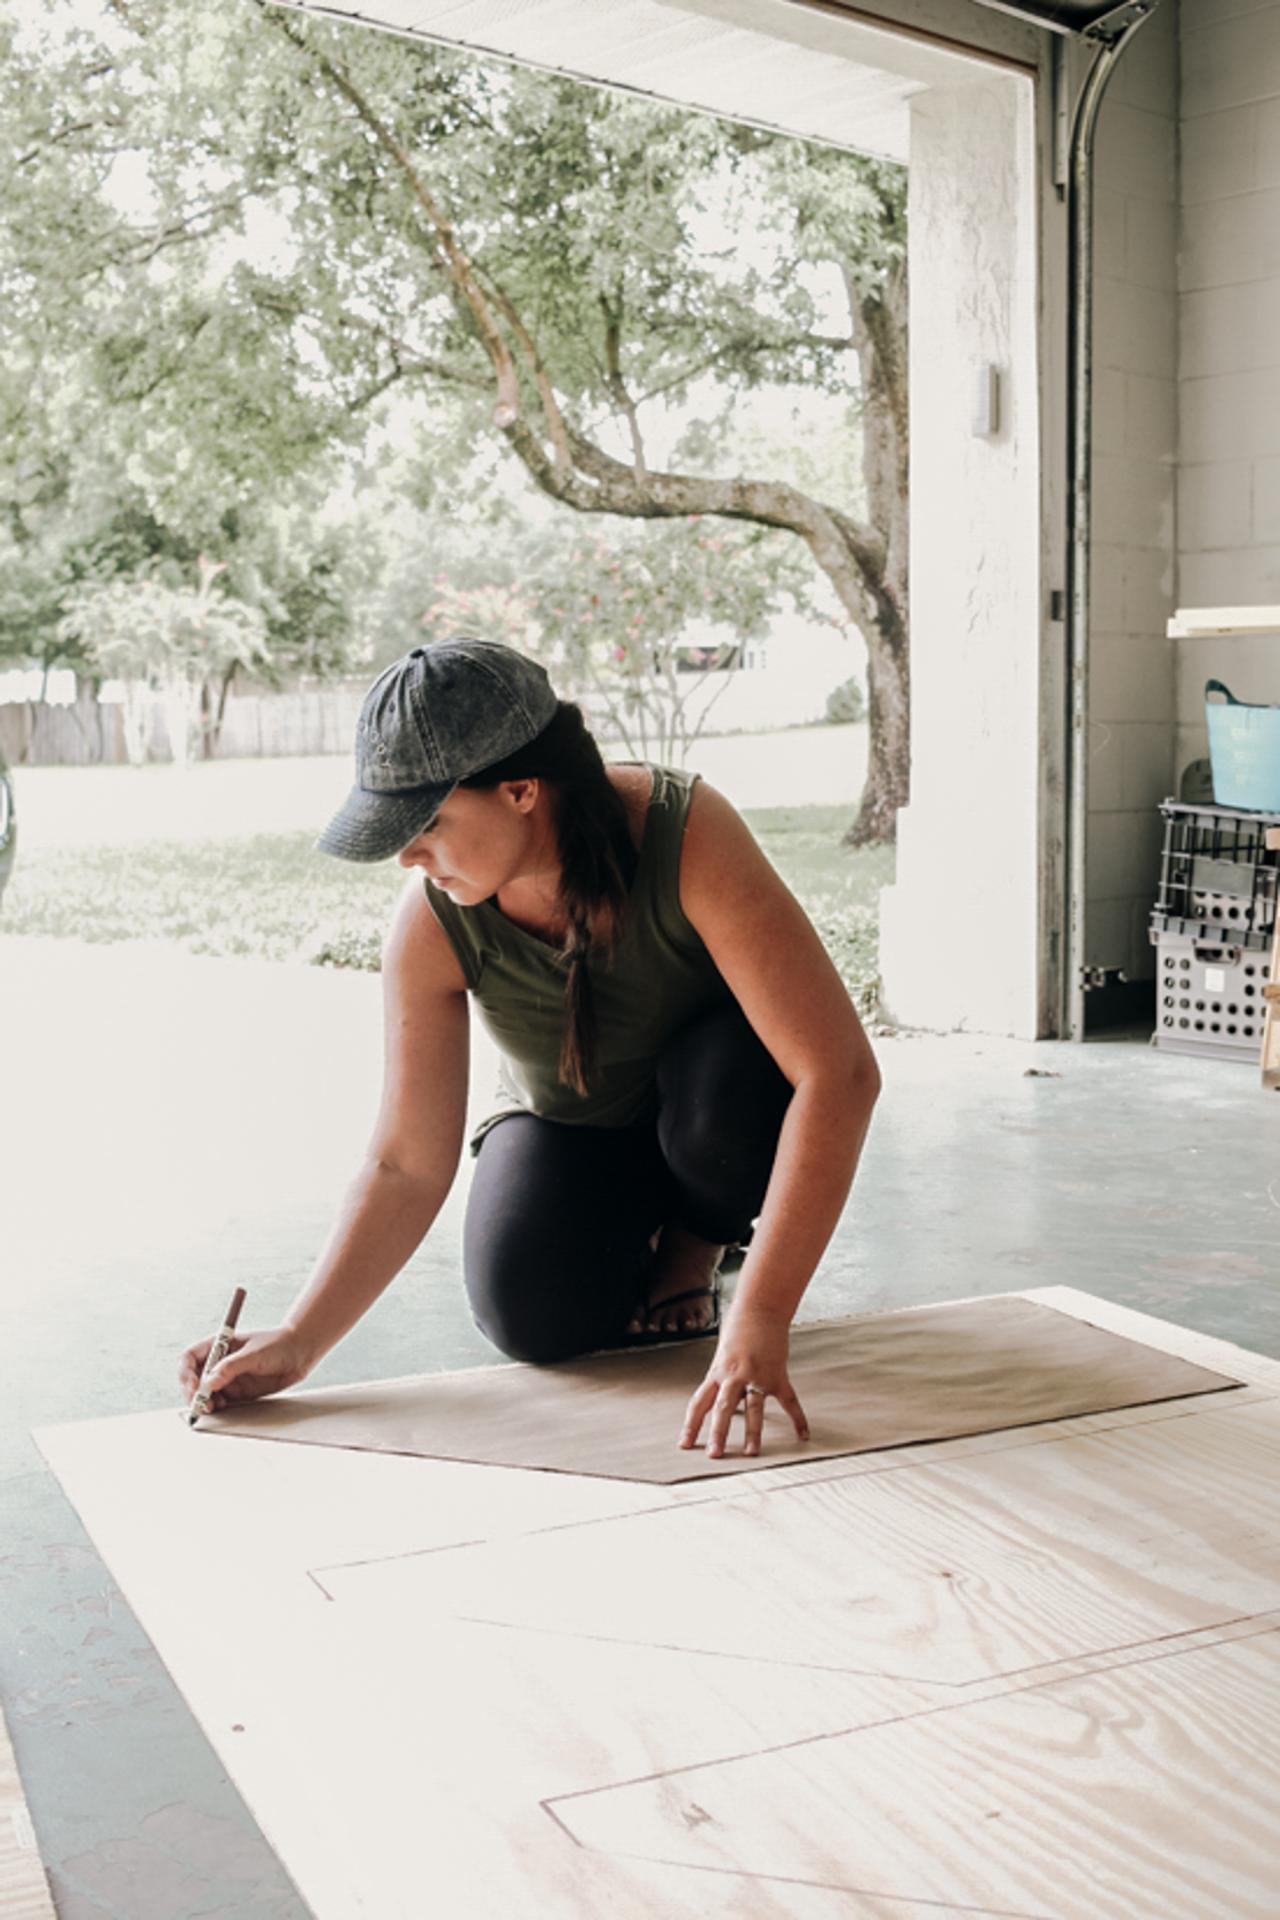
1. Measure Wire Shelves + Create Stencil
The first thing you’ll want to do is take the measurement of each shelf by measuring the width and depth. I saved myself a little time by getting the exact measurement of each side of one shelf and creating a cut-out of those measurements with shipping paper. I made sure my cut-out stencil aligned with every shelf.

Liz Rishel, Within the Grove
2. Trace Onto Plywood
Grab your 1/4-inch thick piece of plywood and trace out the shelves you need using your stencil. These pieces will sit on top of the wire shelves. Be mindful if it's important to you that the wood grain goes the same direction. I had to get creative with mine to make all the pieces fit onto the board, so they didn’t all line up the same way, but I was OK with that.

Liz Rishel, Within the Grove
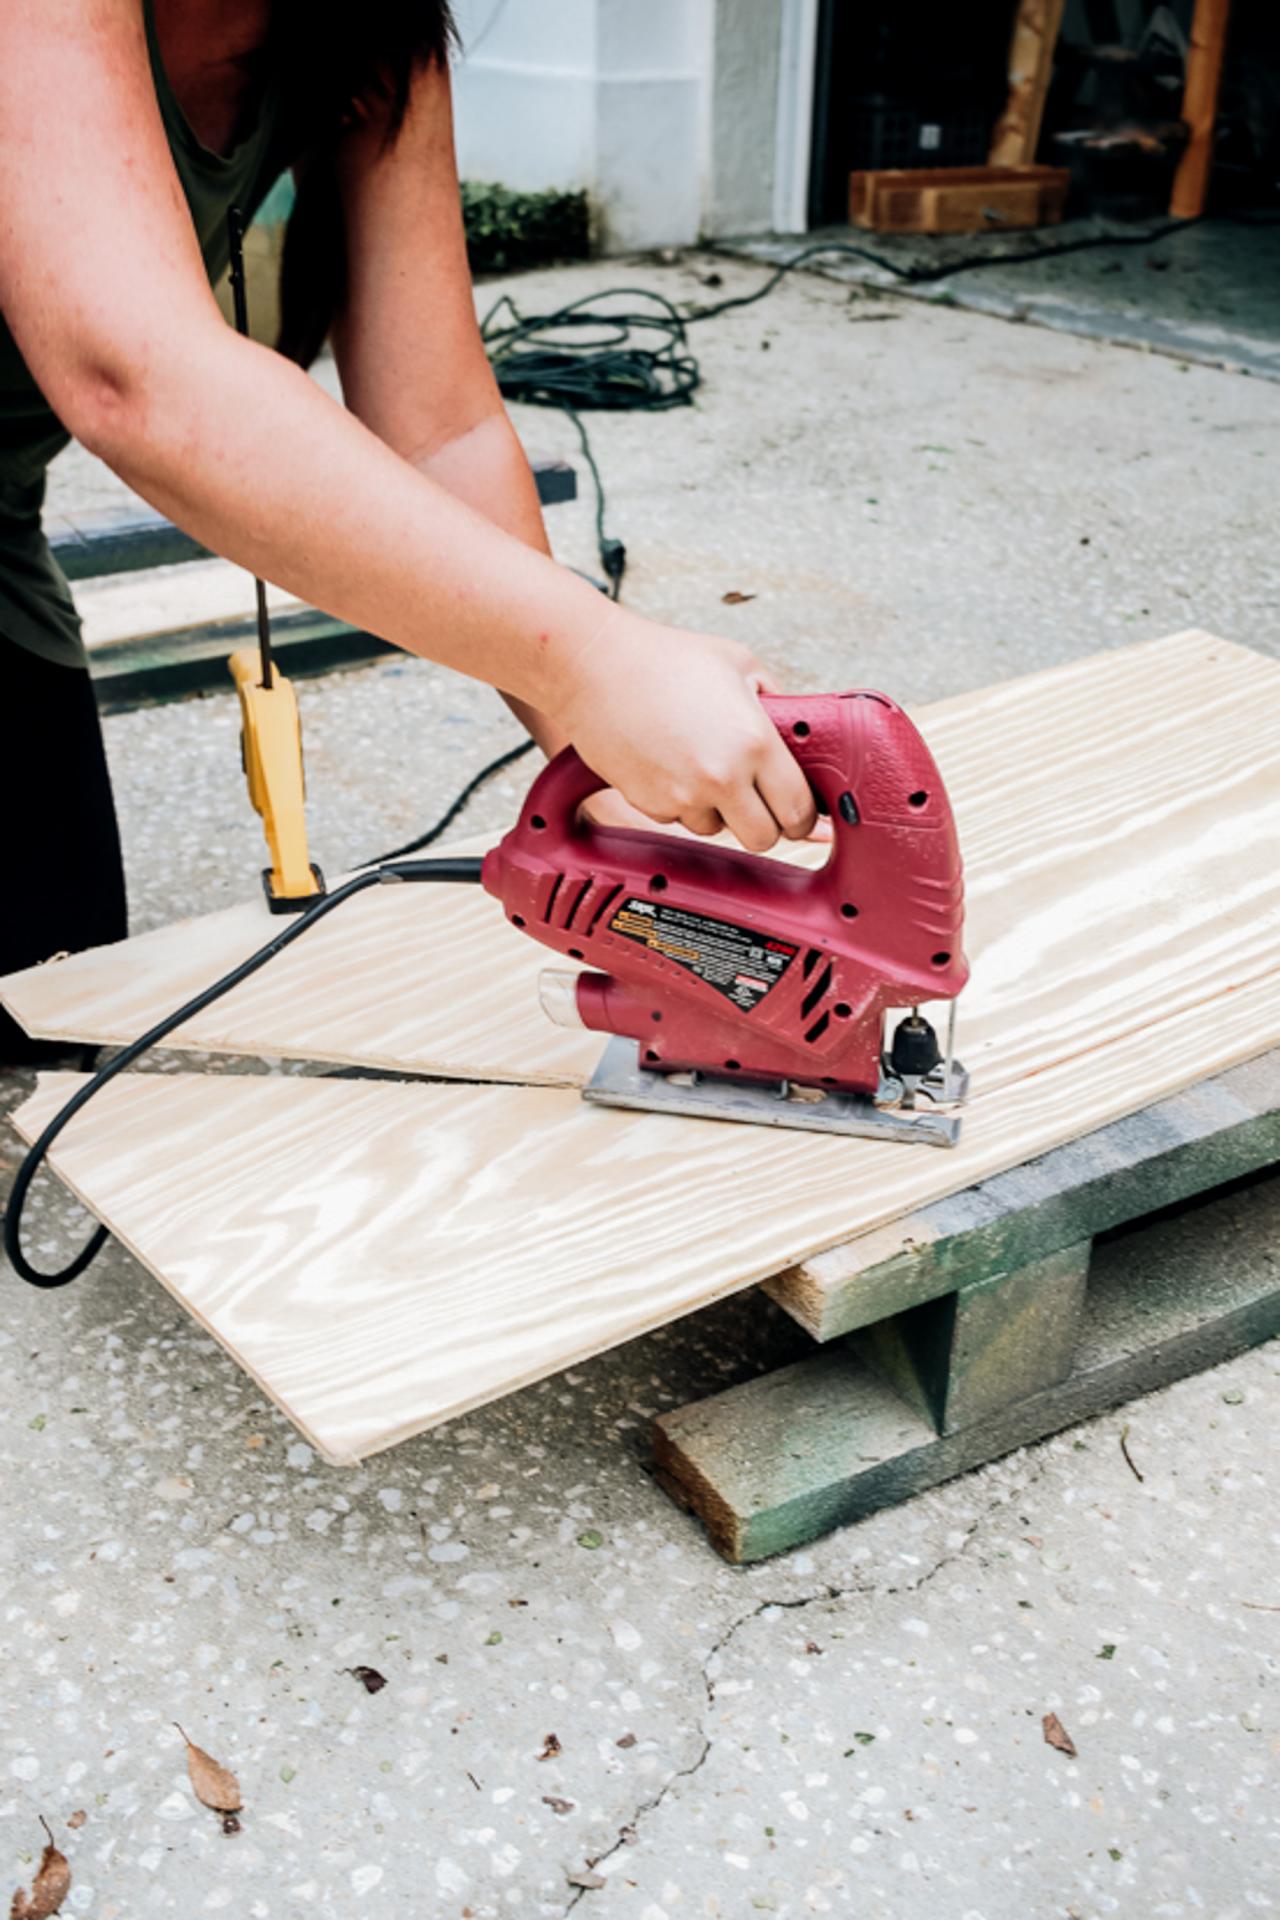
3. Cut Out Plywood Top Pieces
Clamp your piece of plywood down securely. Using a jigsaw or table saw, slowly cut out each piece. You’ll want to take your time with this step so that you cut straight sides. Give the edges a quick sanding after you’re done cutting them out.

Liz Rishel, Within the Grove
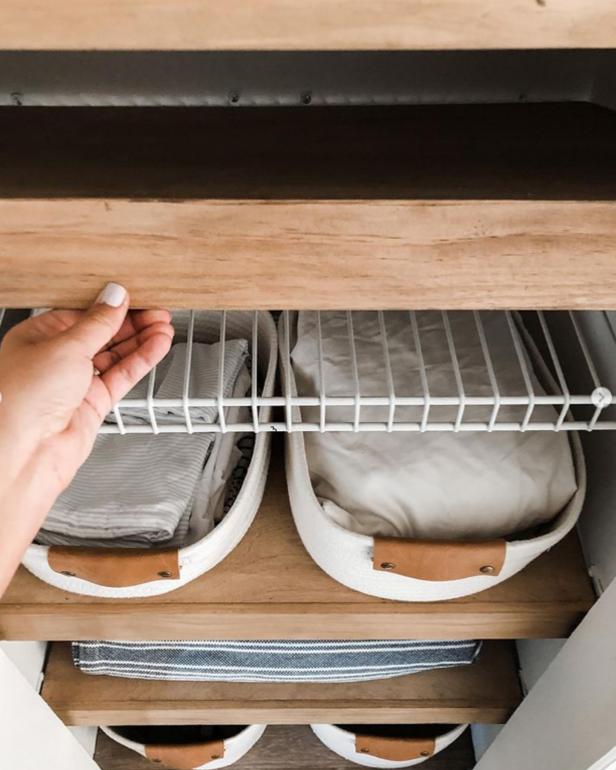
Before moving on, I did a test fit with each plywood piece on a shelf. I was battling the brackets of the wire shelves, so I had to slightly trim the width of each wooden shelf slightly for a snug fit. You’ll also want to number your shelves (you can make a mark with a pencil) so you know which wire shelf it covers.
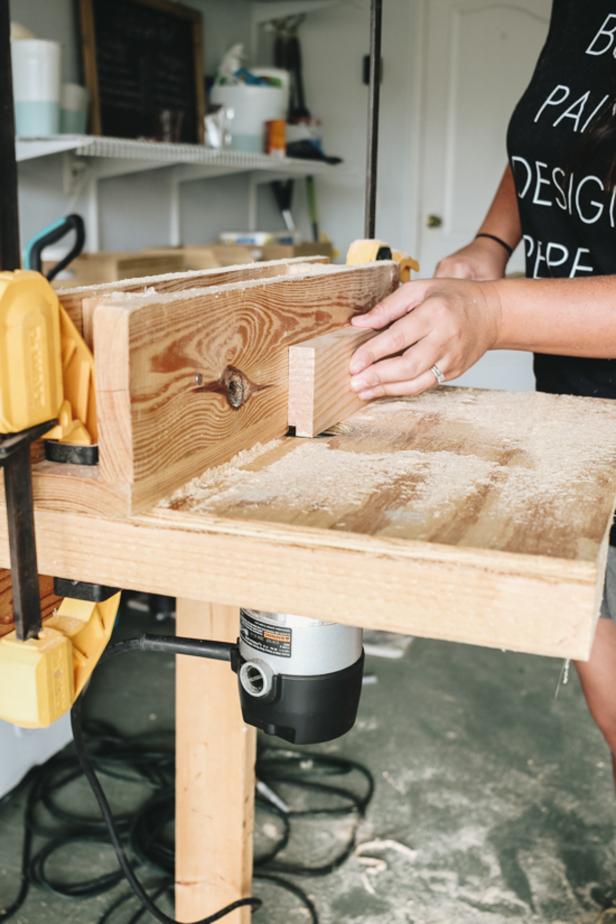
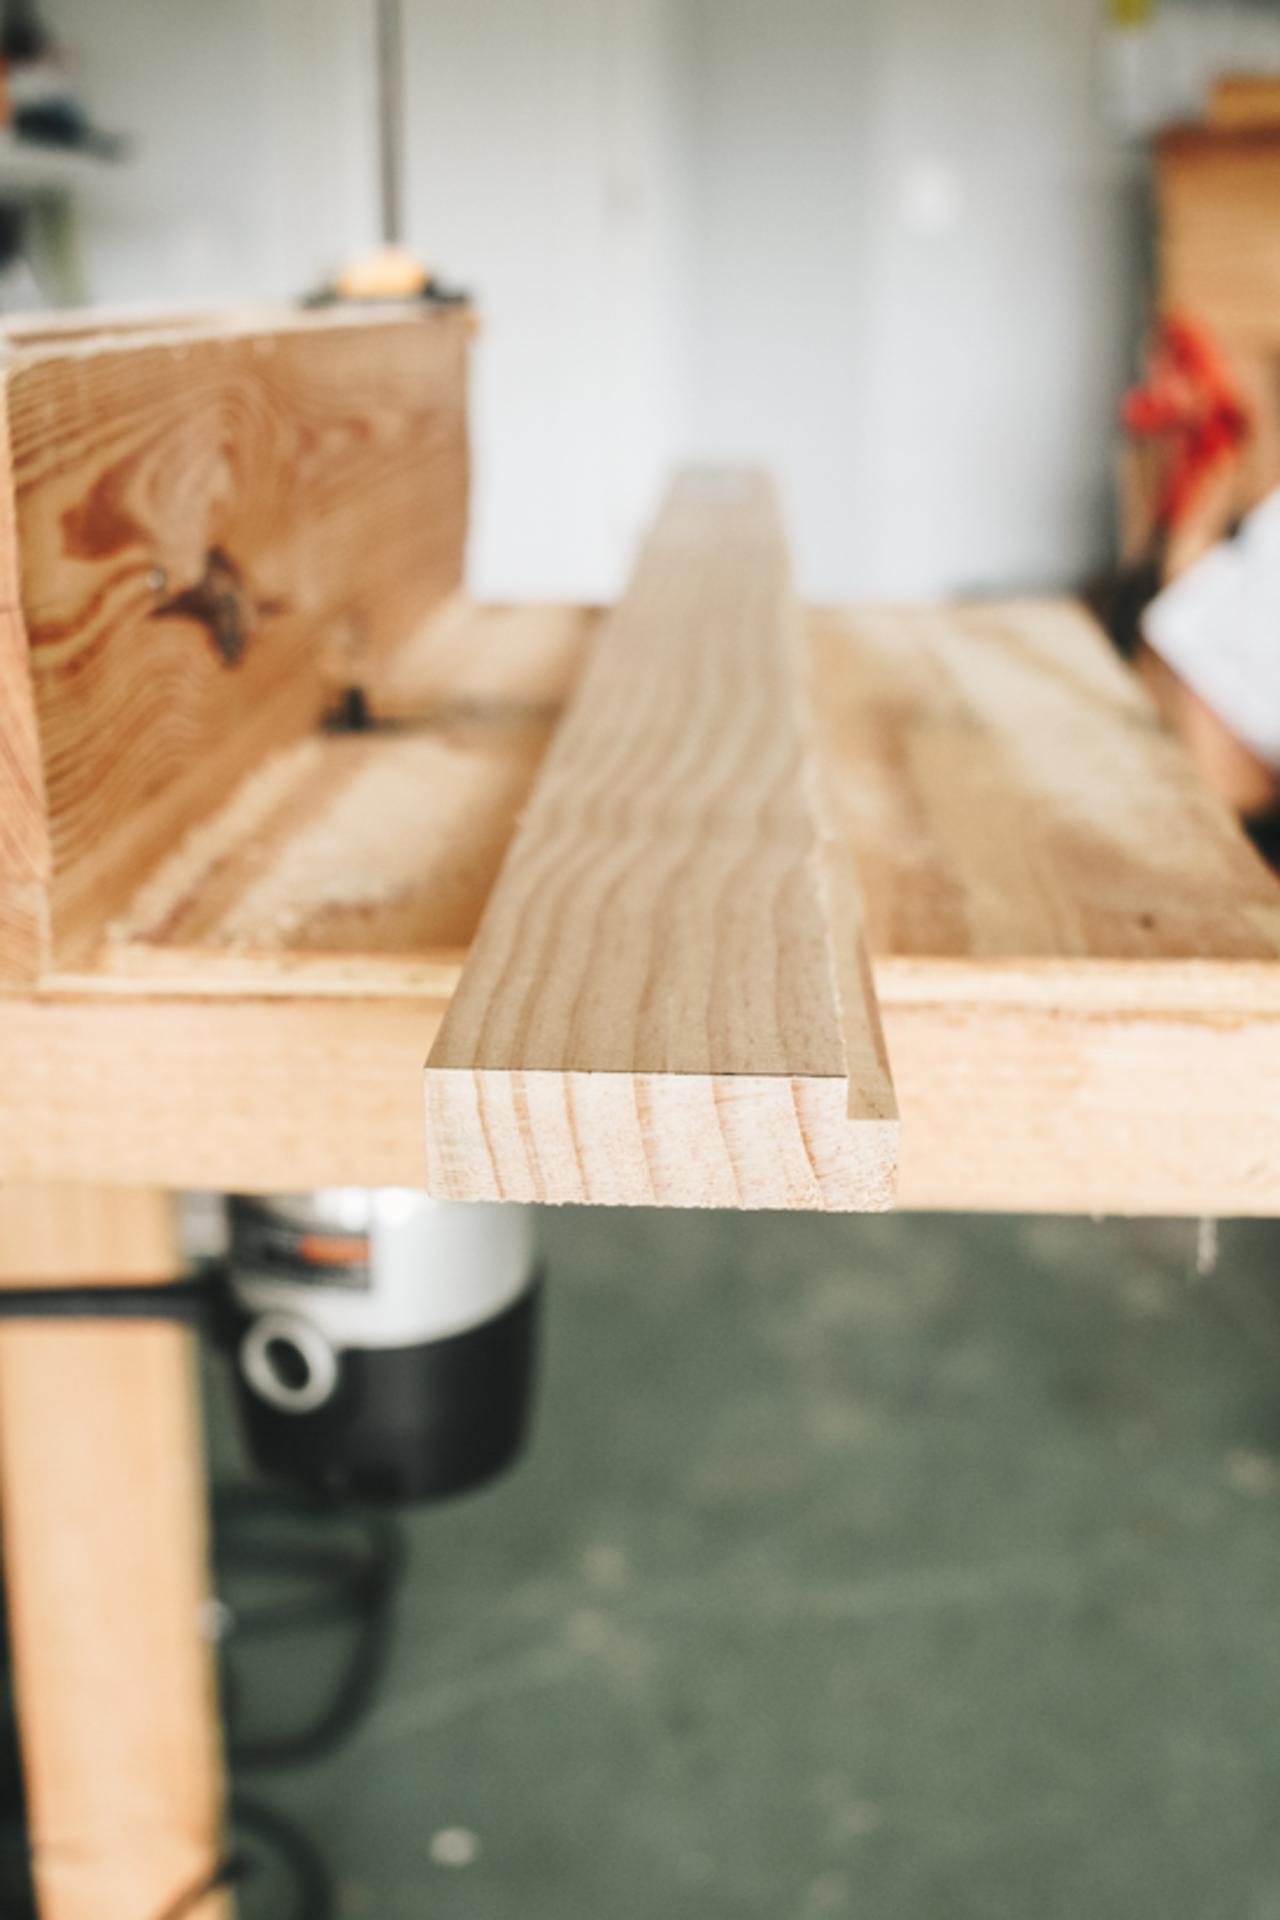
4. Create the Pine Floating Shelf Lip
To create the lip for each shelf, measure the front width of each shelf and cut the piece of 1x3 pine accordingly. Keep the front piece and shelf paired together so you don’t get them mixed up.
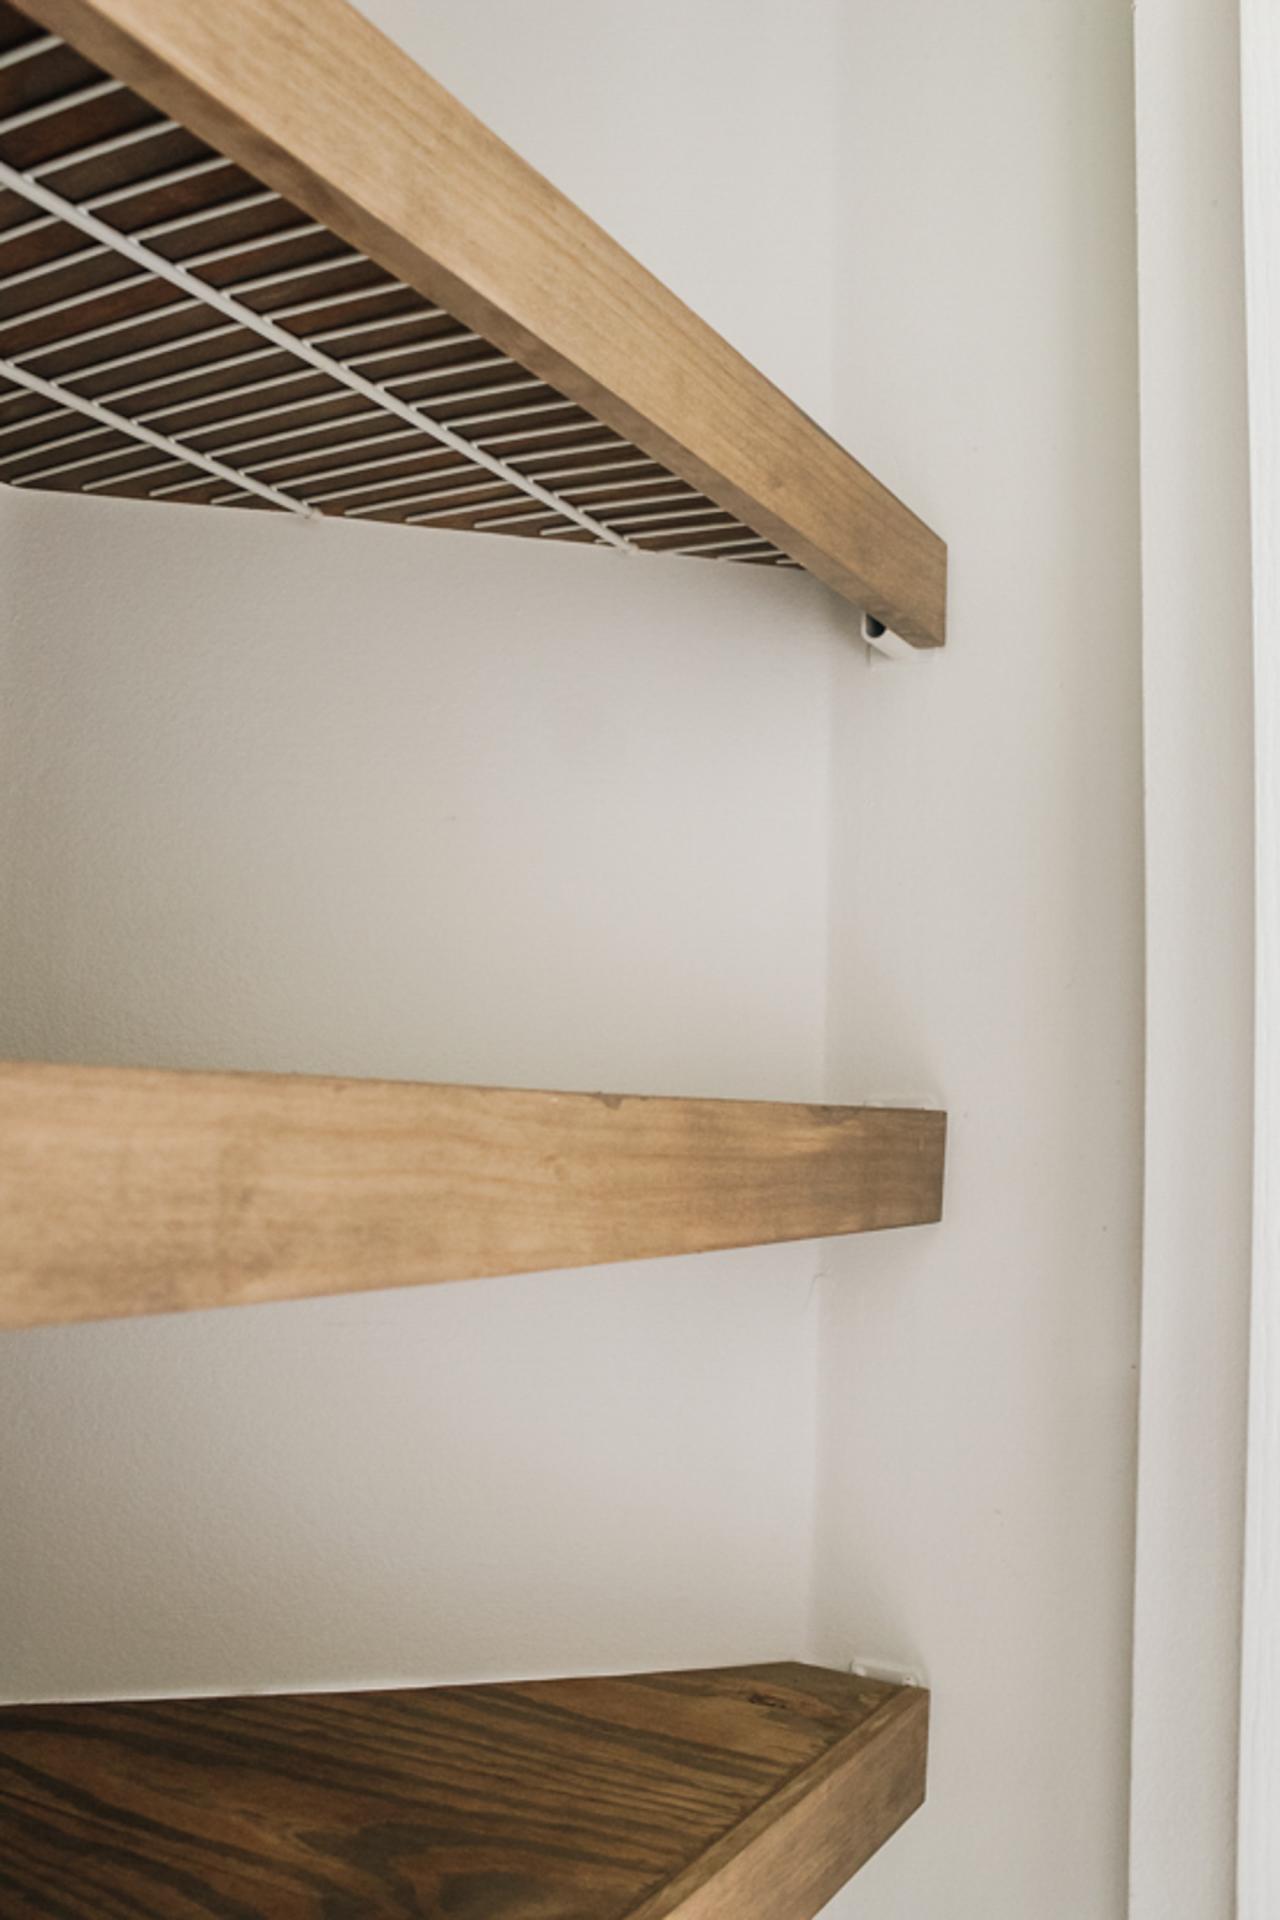
Using a router, you’ll route a ledge along the top, backside of each piece of pine board. You’ll want to route the pine board about half the width of the board and at the same depth of the piece of plywood. This will ensure that the plywood will sit flush with the pine board once they’re placed together. This is the ledge where you’ll place the plywood piece on top. The goal is to hide the piece of plywood from view to create the illusion of a floating shelf.
Liz Rishel, Within the Grove

Liz Rishel, Within the Grove
5. Nail Pieces Together
To piece the faux floating shelf together, apply wood glue along the ledge, put your piece of plywood in place, and secure it using a brad nailer and 1-inch nails. Add nails through the top of the plywood shelf and into the pine board spaced about 8 inches apart.

Liz Rishel, Within the Grove
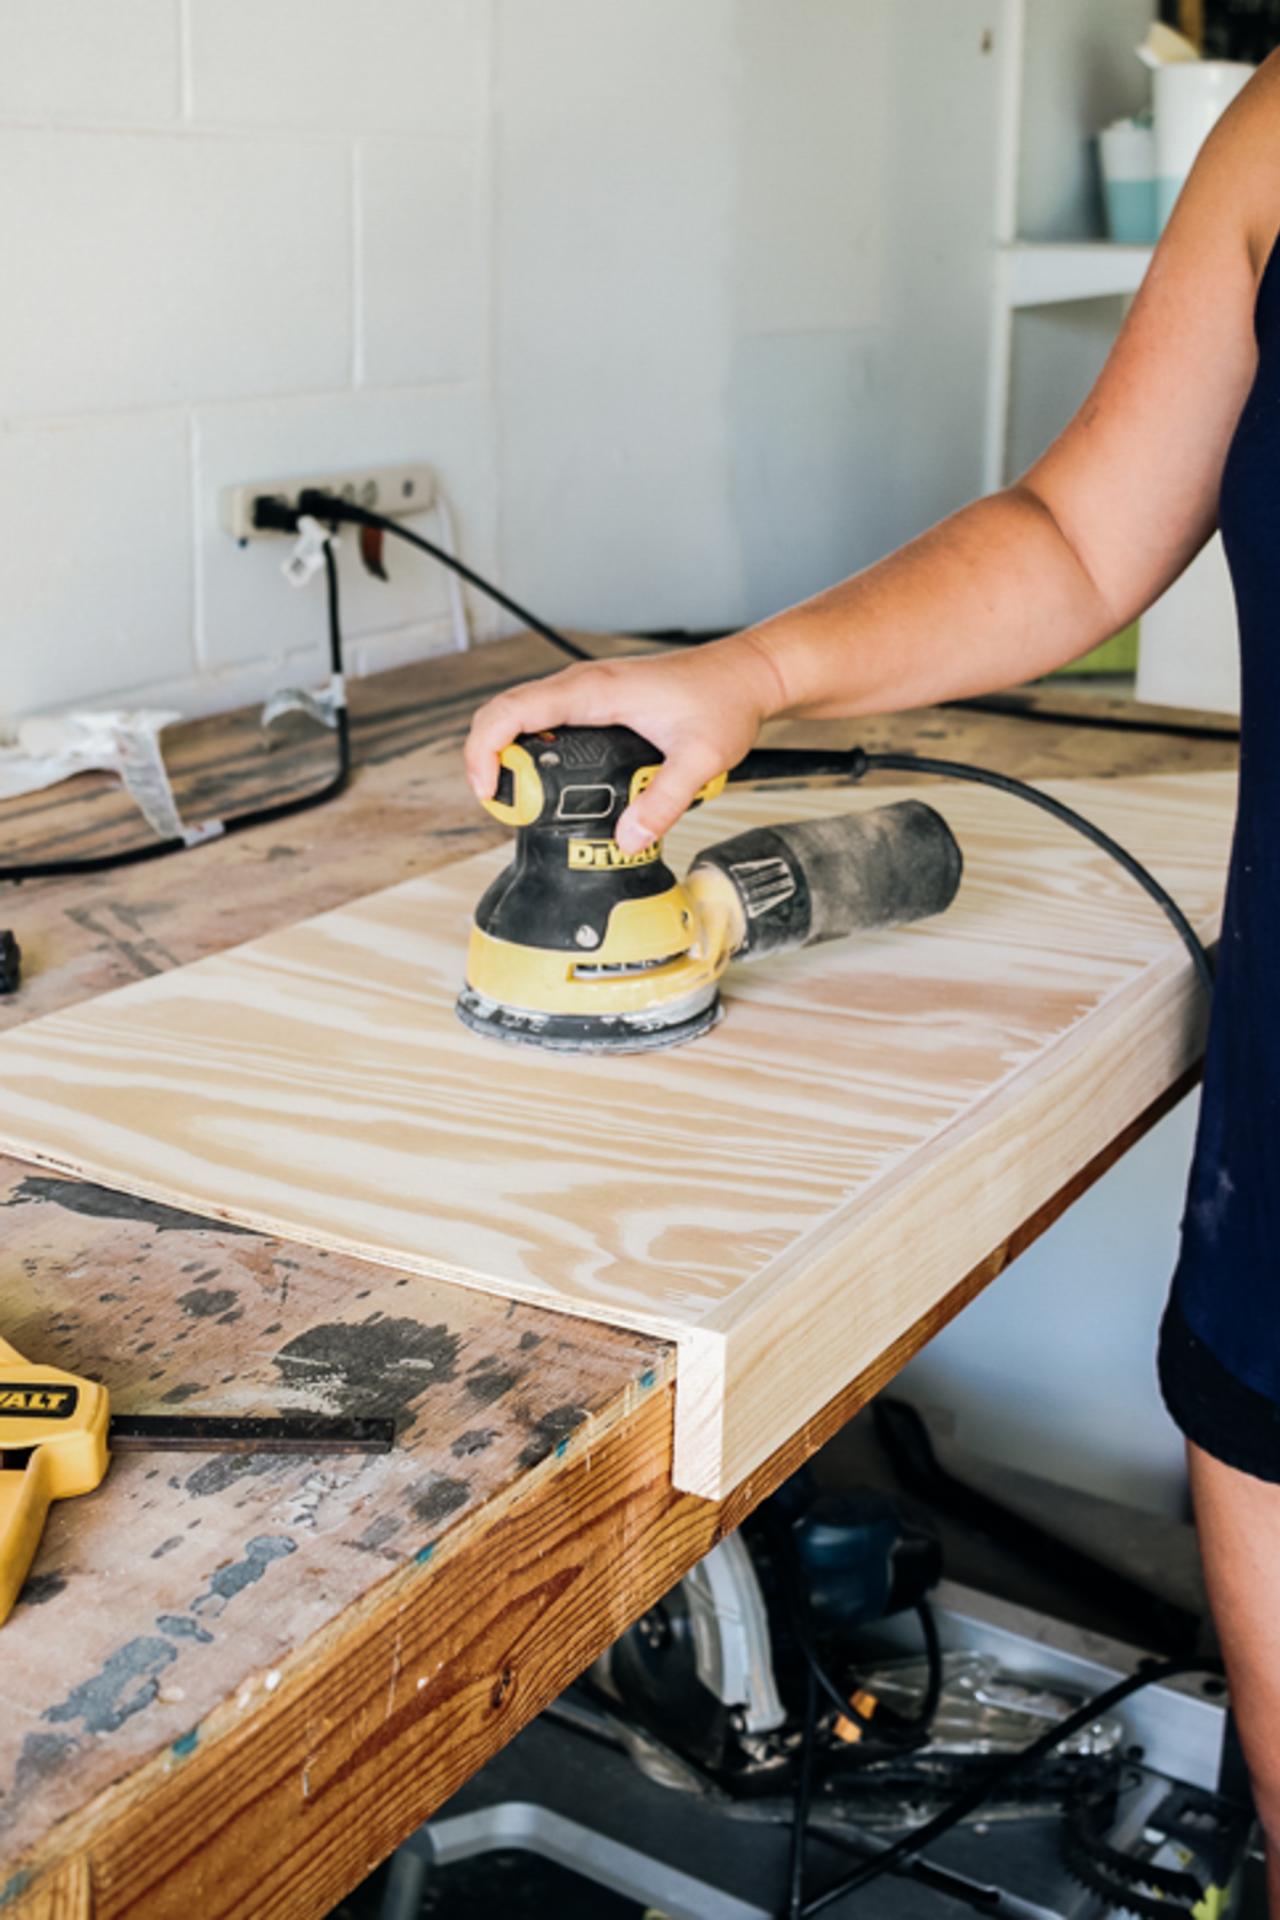
6. Fill Holes + Sand
Once the wood glue is dry, fill in the nail holes with wood filler. This is also a great time to fill in any gaps where the plywood and pine board meet. Let the wood filler cure and harden overnight. Pro tip: Make sure to use wood filler that is stainable! Next, I gave my shelves a good sanding using 120-grit sandpaper for the initial sand and a 220-grit sandpaper for a smooth finish. Make sure that you have smoothed out all of the wood filler so that when you go to stain it, it doesn’t look like it was ever there.

Liz Rishel, Within the Grove
7. Stain
Apply stain on the sides, top and bottom of the faux shelf. I tested three different stains and ultimately went with Flagstone by Varathane. It’s my new favorite stain color. It’s the perfect balance of being a natural wood color mixed with a hint of brown. Keep in mind this stain will look different on different types of wood. You can see the blog post where I chat all about that here. You can also seal your shelves by applying two coats of polyurethane in clear satin. Make sure to lightly sand between each coat. Let dry completely.

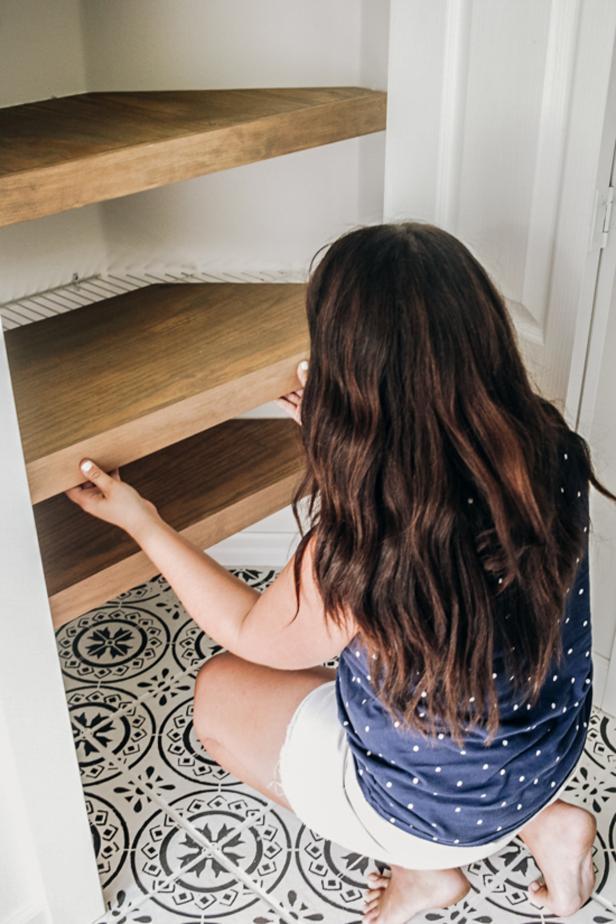
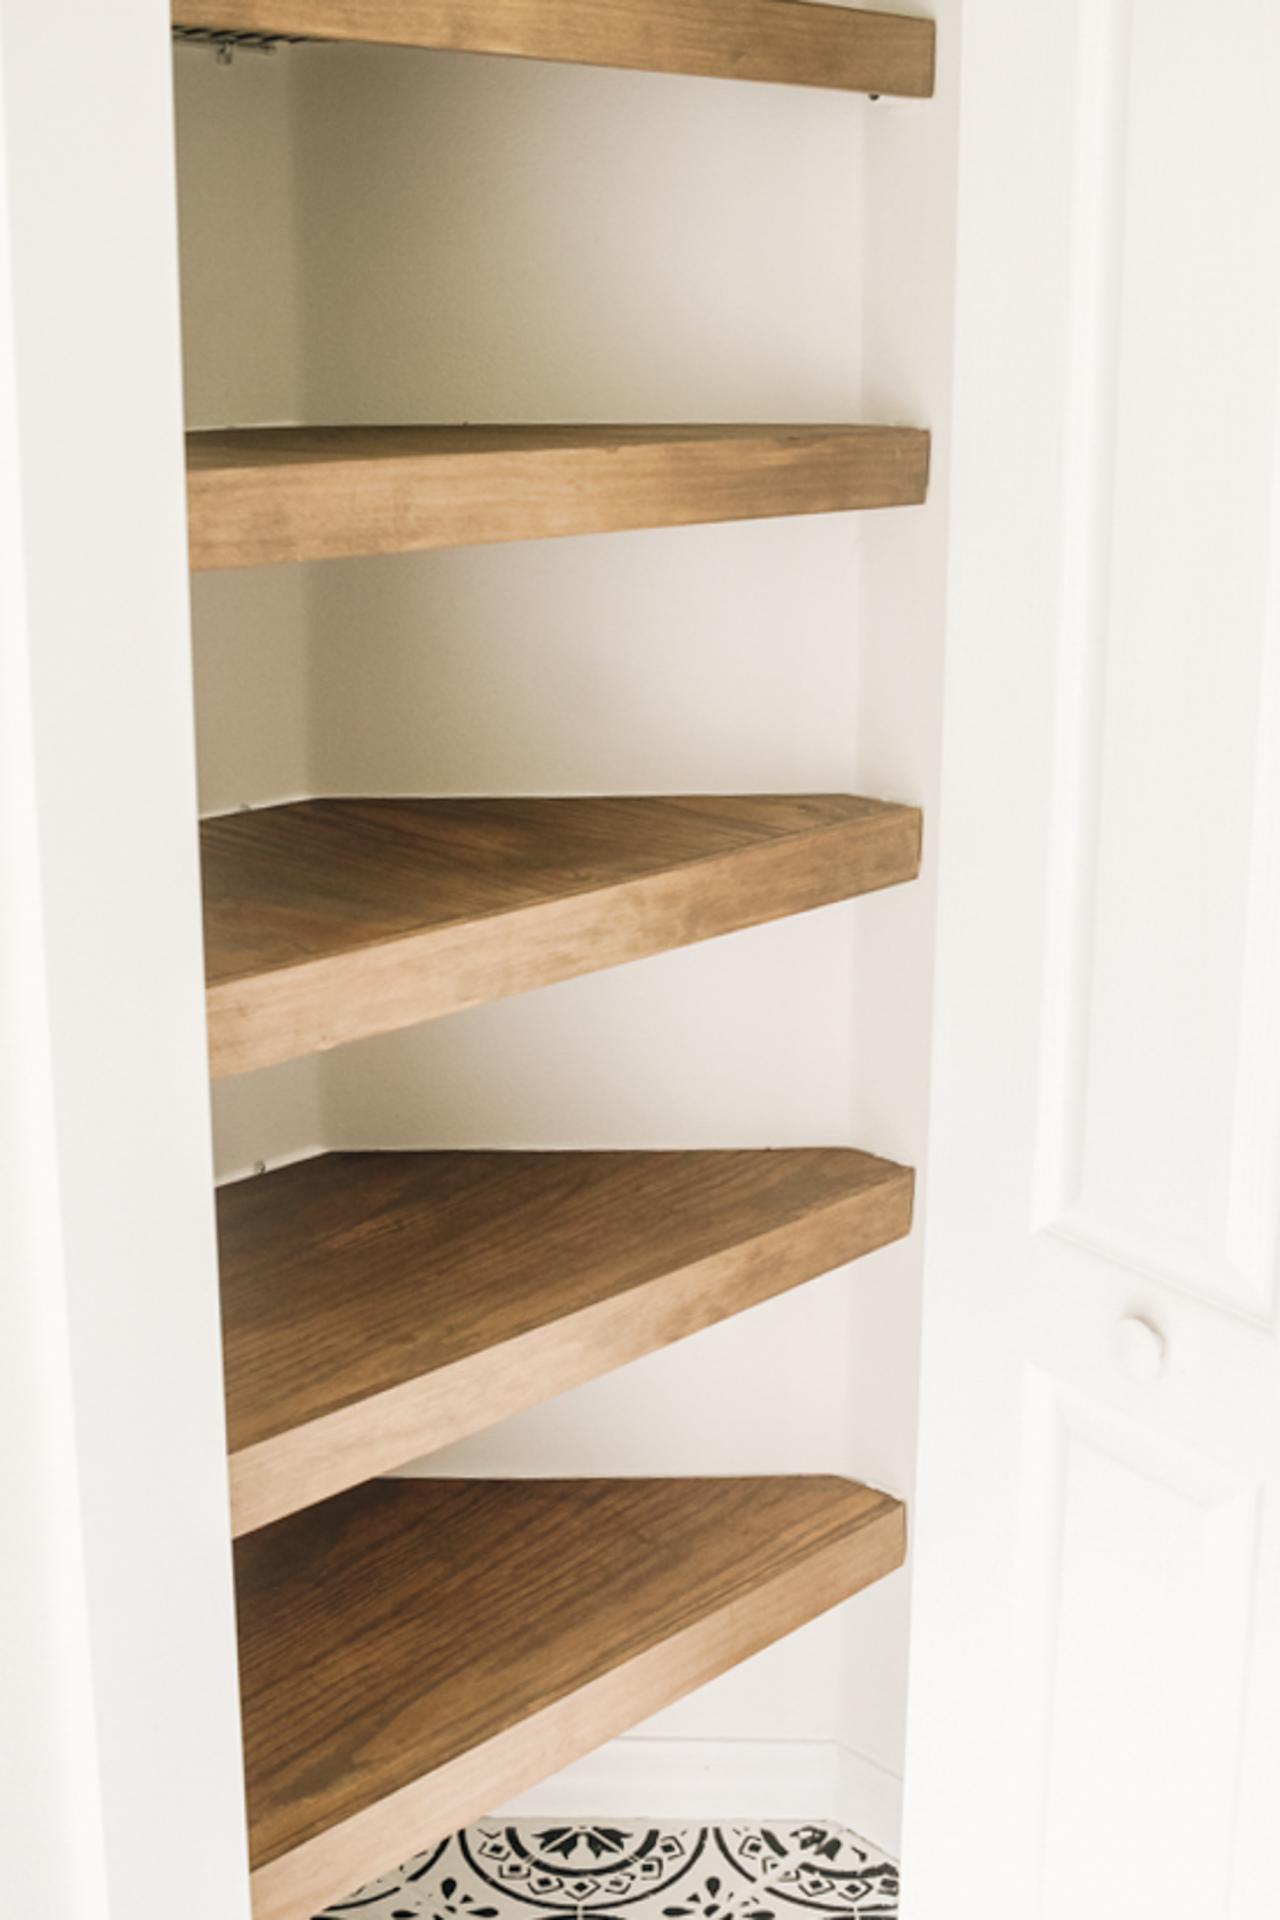
8. Install Wire Shelf Covers
Install your new floating shelves by simply sliding them over the wire shelves.
Liz Rishel, Within the Grove
Liz Rishel, Within the Grove
Liz Rishel, Within the Grove
Liz Rishel, Within the Grove
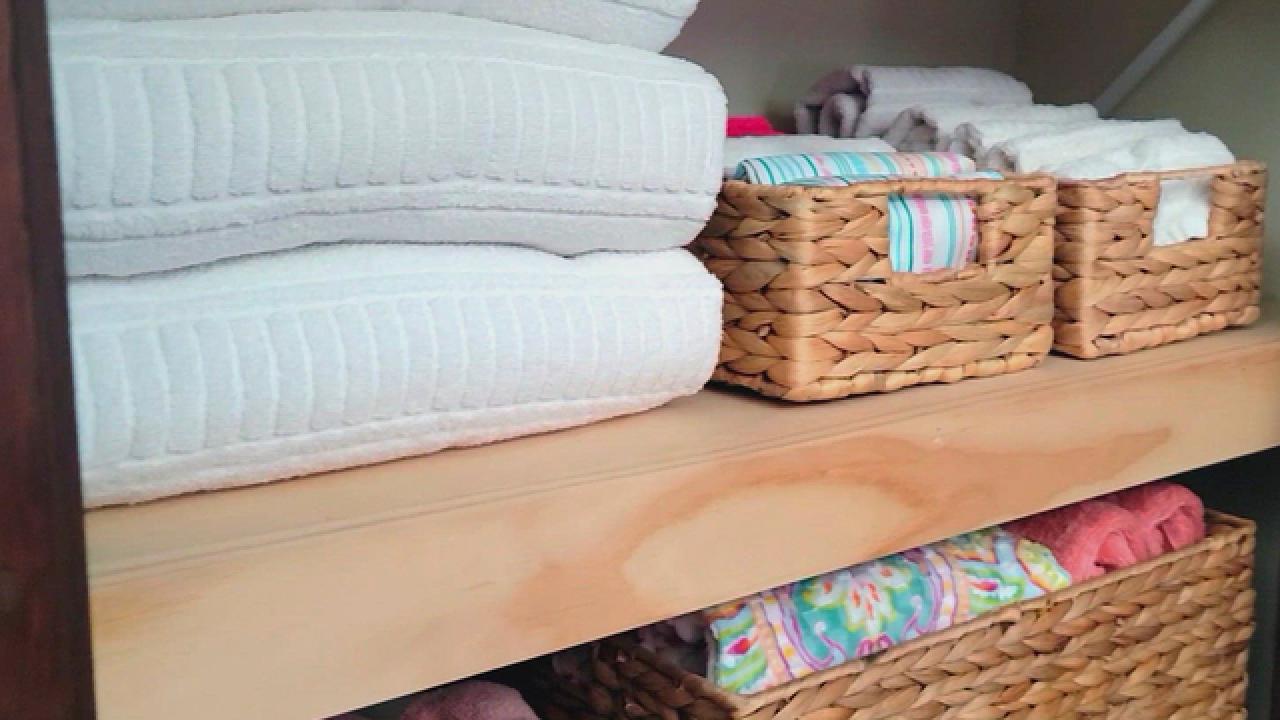
This can be a fun weekend project that completely transforms your closet. I was shocked by the difference it made in ours and can’t wait to see you try these in your home.

Liz Rishel, Within the Grove


