


Block Print Like a Pro: How to Carve Rubber Stamps for Fabric Printing
If you’ve always wanted to create your own T-shirt design, this tutorial by Maine artist Allison McKeen will have you block printing with color in no time. Plus, the tools you need are easy to use and just as easy to find at almost any craft store. Learn how to block print like a pro with this easy beginner’s guide to carving rubber block stamps and using fabric block-printing ink to make your design shine.

Danielle Sykes

What could make that go-to, basic canvas tote even cuter? A custom design, that’s what. Why not try your hand at one of the easiest, oldest — and arguably most relaxing — forms of textile crafting: linocut block printing.
Maine artist and vintage sign collector Allison McKeen and HGTV have everything you need to start block printing like a pro. Watch the video and get the steps to make a custom-designed T-shirt with carved rubber stamps and easy-to-use tools.
What Is Block Printing?
Linocut block printing is a type of printmaking where a linoleum rubber stamp or block is engraved with a carving tool to create a design pattern. The stamp is coated with block-printing ink using a brayer, then pressed onto paper, fabric or wood. It is one of the most popular types of block printing and is commonly considered the oldest form of printmaking.
What Are the Tools for Block Printing?
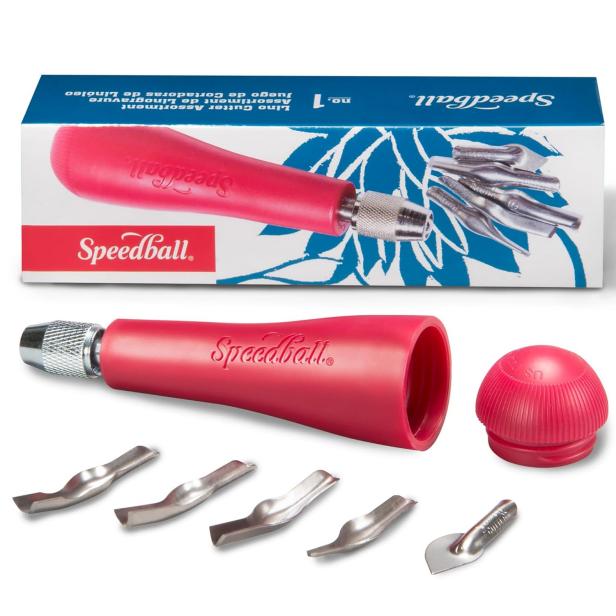
- Interchangeable Linocut Carving Kit: This go-to tool features assorted carving bit sizes inside the handle which makes it easy to change when working on smaller or larger designs.
- Pink Rubber Carving Blocks: These soft rubber blocks are perfect for engraving designs with carving tools, and used by beginners and professionals alike.
- Block-Printing Ink: Use a fabric block printing ink (oil based) if the item you create will need to be washed. Otherwise, use water-soluble block printing ink.
- Brayer: A brayer is a roller used to apply block-printing ink to an engraved stamp.
Tips for Block Printing
1. When drawing your outline, remember the print will be backwards once printed. This is important to note for numbers or letters.
2. Always carve away from yourself. This ensures protection for your fingers and less accidental damage to the block.
3. Carve parallel to your table. Think of the carving as gliding across the surface rather than digging into the block.
4. Anything you carve away will become negative space on your print. The sections left behind will be the printed, solid area.
How to Block Print a Custom Design

Danielle Sykes
Materials + Tools
- interchangeable linocut carving kit
- pink rubber carving blocks
- fabric block-print ink
- brayer
- cotton shirt
- pen
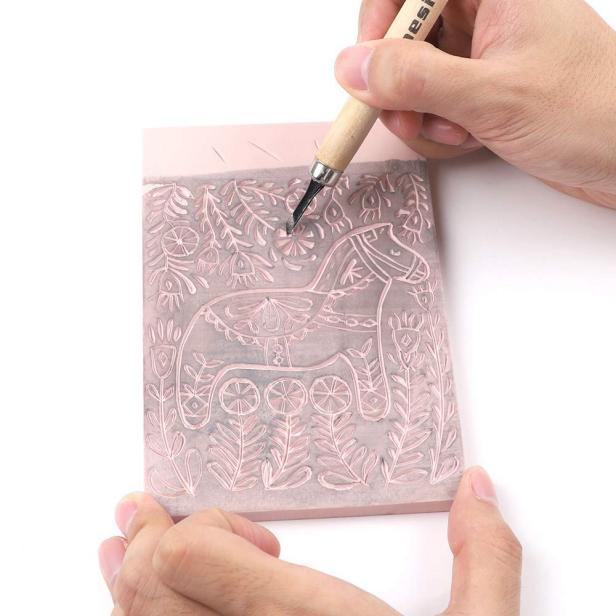
1. Outline Design Onto Rubber Stamp
Draw your design directly onto the rubber stamp with a pen or pencil. For this tutorial, Allison draws a percolator coffeepot onto the pink rubber block stamp.

Danielle Sykes
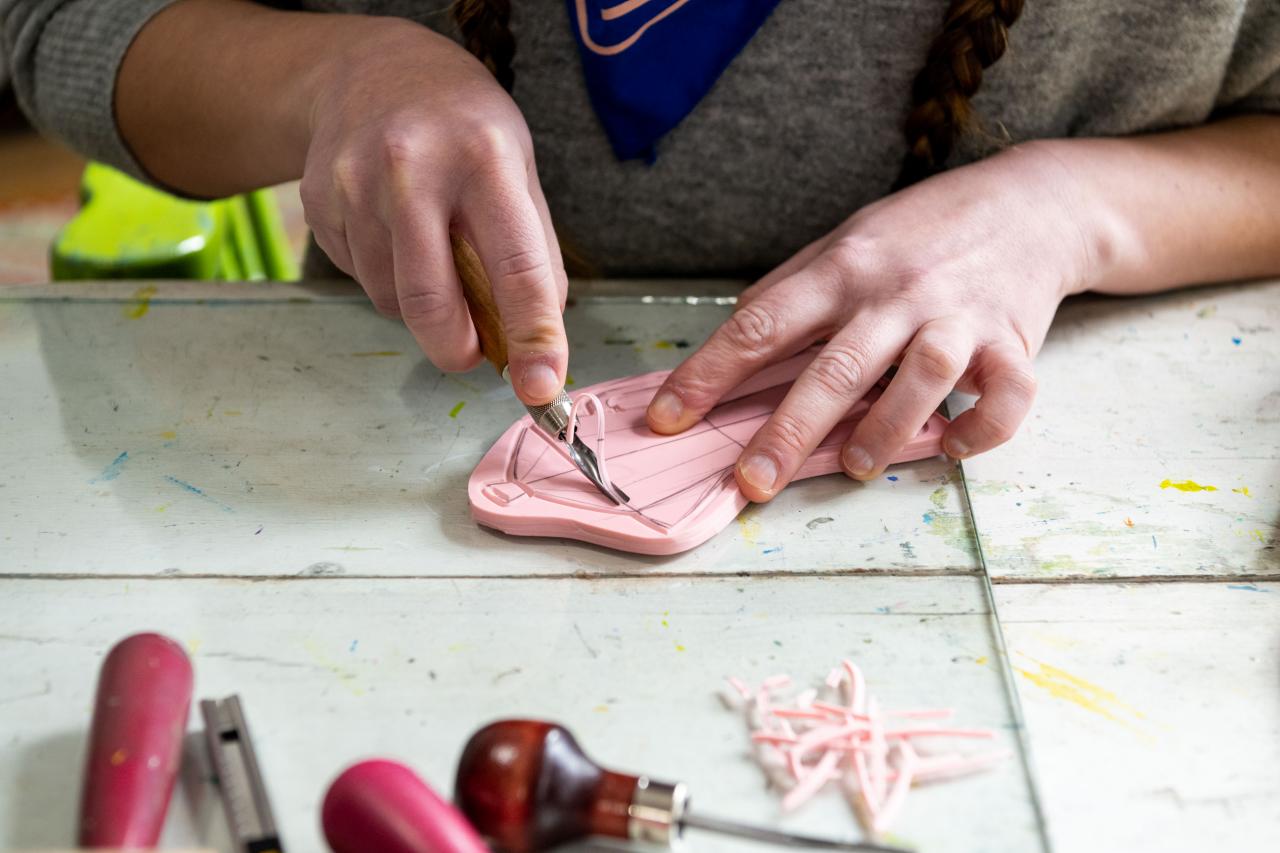
2. Carve the Design
Use an interchangeable carving tool to etch out the design. Start with a larger-gouge carving tool to make the outline, then transition to smaller bits to enchance the details of the design.

Danielle Sykes
3. Mix Paint
Once carved, mix the desired paint color together. For this project, Allison uses yellow and dark-green fabric block-print ink to create an olive-green hue.

Danielle Sykes
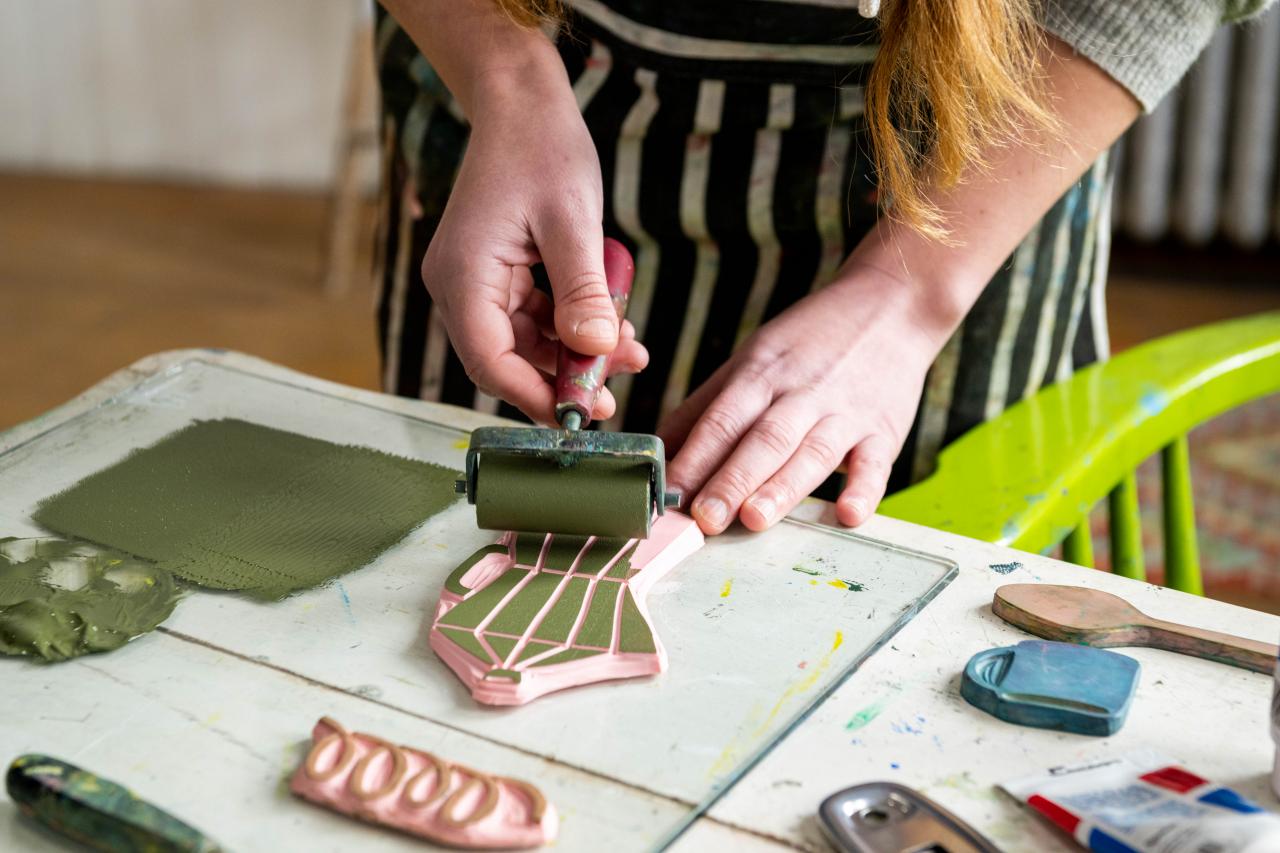
4. Coat the Brayer
Use a brayer to roll on the paint. Coat the rubber stamp design with a thorough coat of color.

Danielle Sykes
5. Press Onto Fabric
Place your shirt on a firm surface. Then, place a piece of thin cardboard between the shirt and surface in case the ink bleeds through. Next, use both hands to press the wet stamp onto the desired location. Lightly peel the stamp up from the corner while holding the shirt in place.

Danielle Sykes
6. Dry + Enjoy
Let the shirt dry for a minimum of 24 hours. For best results, let the design dry for a full week, then use a hot iron to press the design before laundering. Then, wash, wear and enjoy.

Tour This Self-Taught, Maine Artist’s Eclectic, Gallery-Inspired Home 17 Photos
Allison McKeen’s Gardiner, Maine, home is like a rotating art gallery filled with handmade art, one-of-a-kind vintage signs and thrift store finds. This self-taught artist lives and works with her husband Matt who also happens to be a skilled sign maker, artist and collector.


