


Make Clay Pinch Pot Hanging Planters to Display Your Fave Succulents
Learn how to make clay pinch pot hanging planters, perfect for mini succulents, with just a few materials and this easy, step-by-step tutorial.

Jennie Andrews

Nothing brings joy into a space like plants, especially when they’re displayed in colorful pots. These clay pinch pot hanging planters add a little pop of brightness to any space. They are inexpensive to make and fun to personalize with acrylic paint and some creativity. With just a little help, kids would also enjoy this DIY project.
Materials + Tools
- polymer oven-bake clay
- rubbing alcohol
- paintbrush
- wooden skewer
- cotton twine
- small wooden ring
Prep for the Project
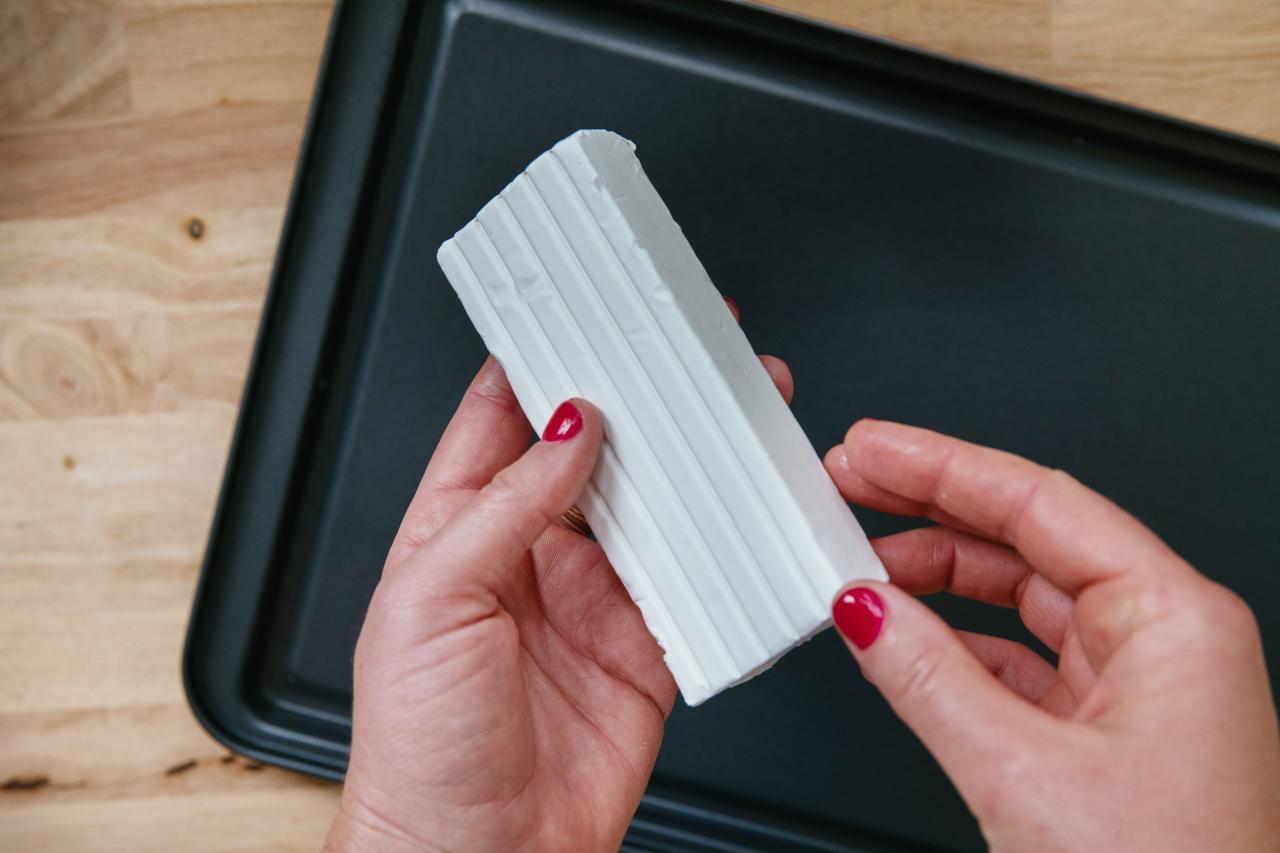
Because this project uses white polymer clay, start with a clean surface and also clean hands. Polymer clay picks up lint and color very easily and this can make your finished project look less polished. Tip: Use a clean baking sheet you’ve designated for baking clay.

Jennie Andrews
Start Shaping Your Pinch Pot
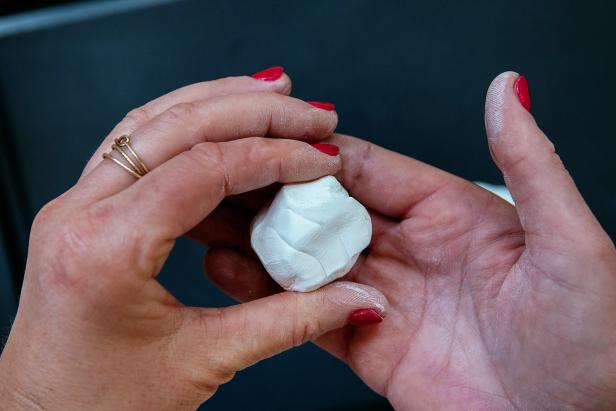
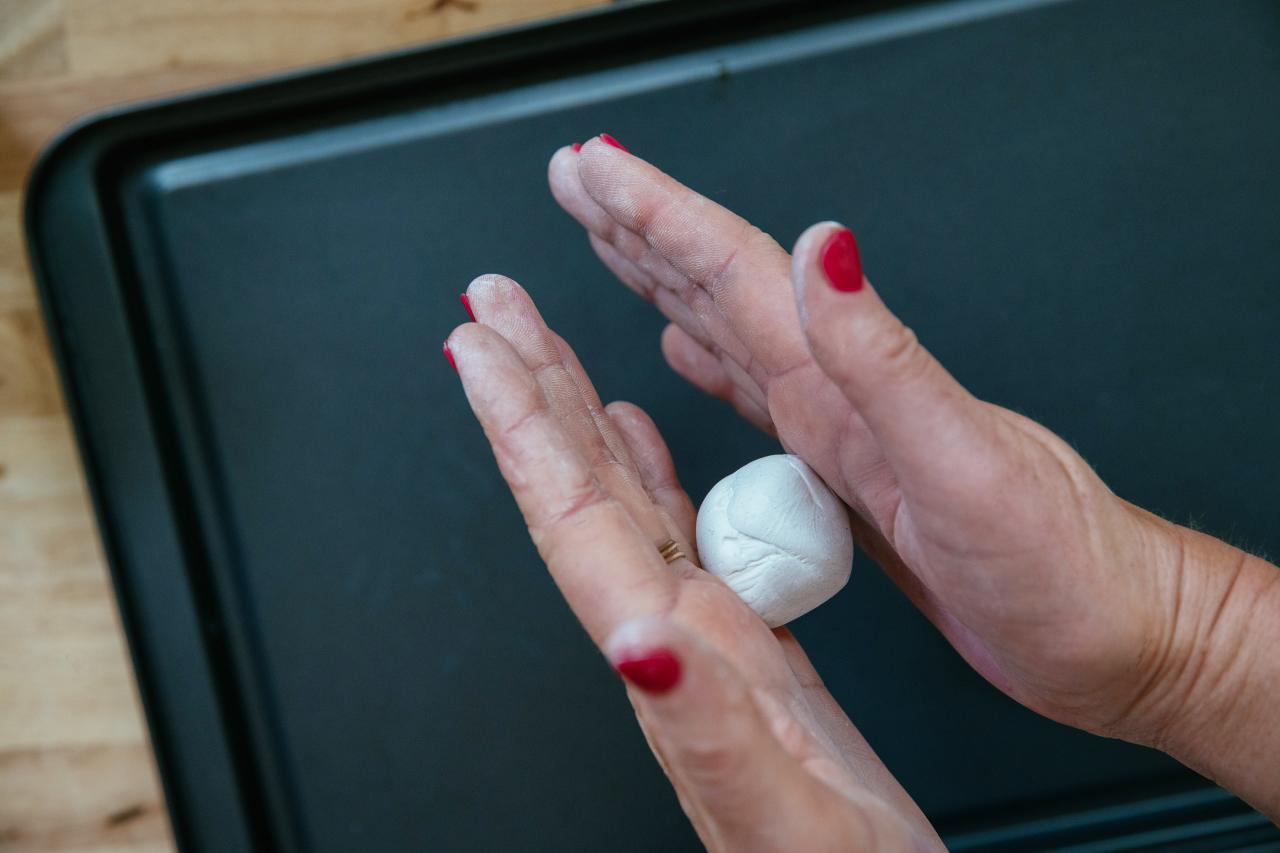
Start by breaking off a chunk of clay a little smaller than a Ping-Pong ball (Image 1). Soften it in your hands and work into a ball (Image 2). Then press your thumbs into the ball and start to form the pot (Image 3). Continue to work with the clay, pressing your thumbs in and pulling up with your other two fingers until the walls are about 1/4-inch thick. Don’t worry about getting the shape perfect. The organic shape is lovely and each one will be totally unique!

Jennie Andrews
Jennie Andrews

Jennie Andrews
Smooth Out the Sides
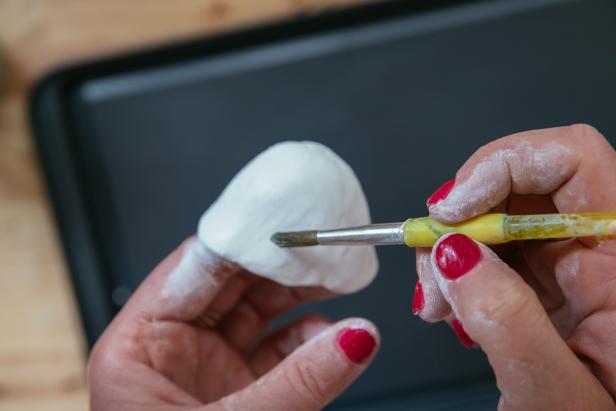
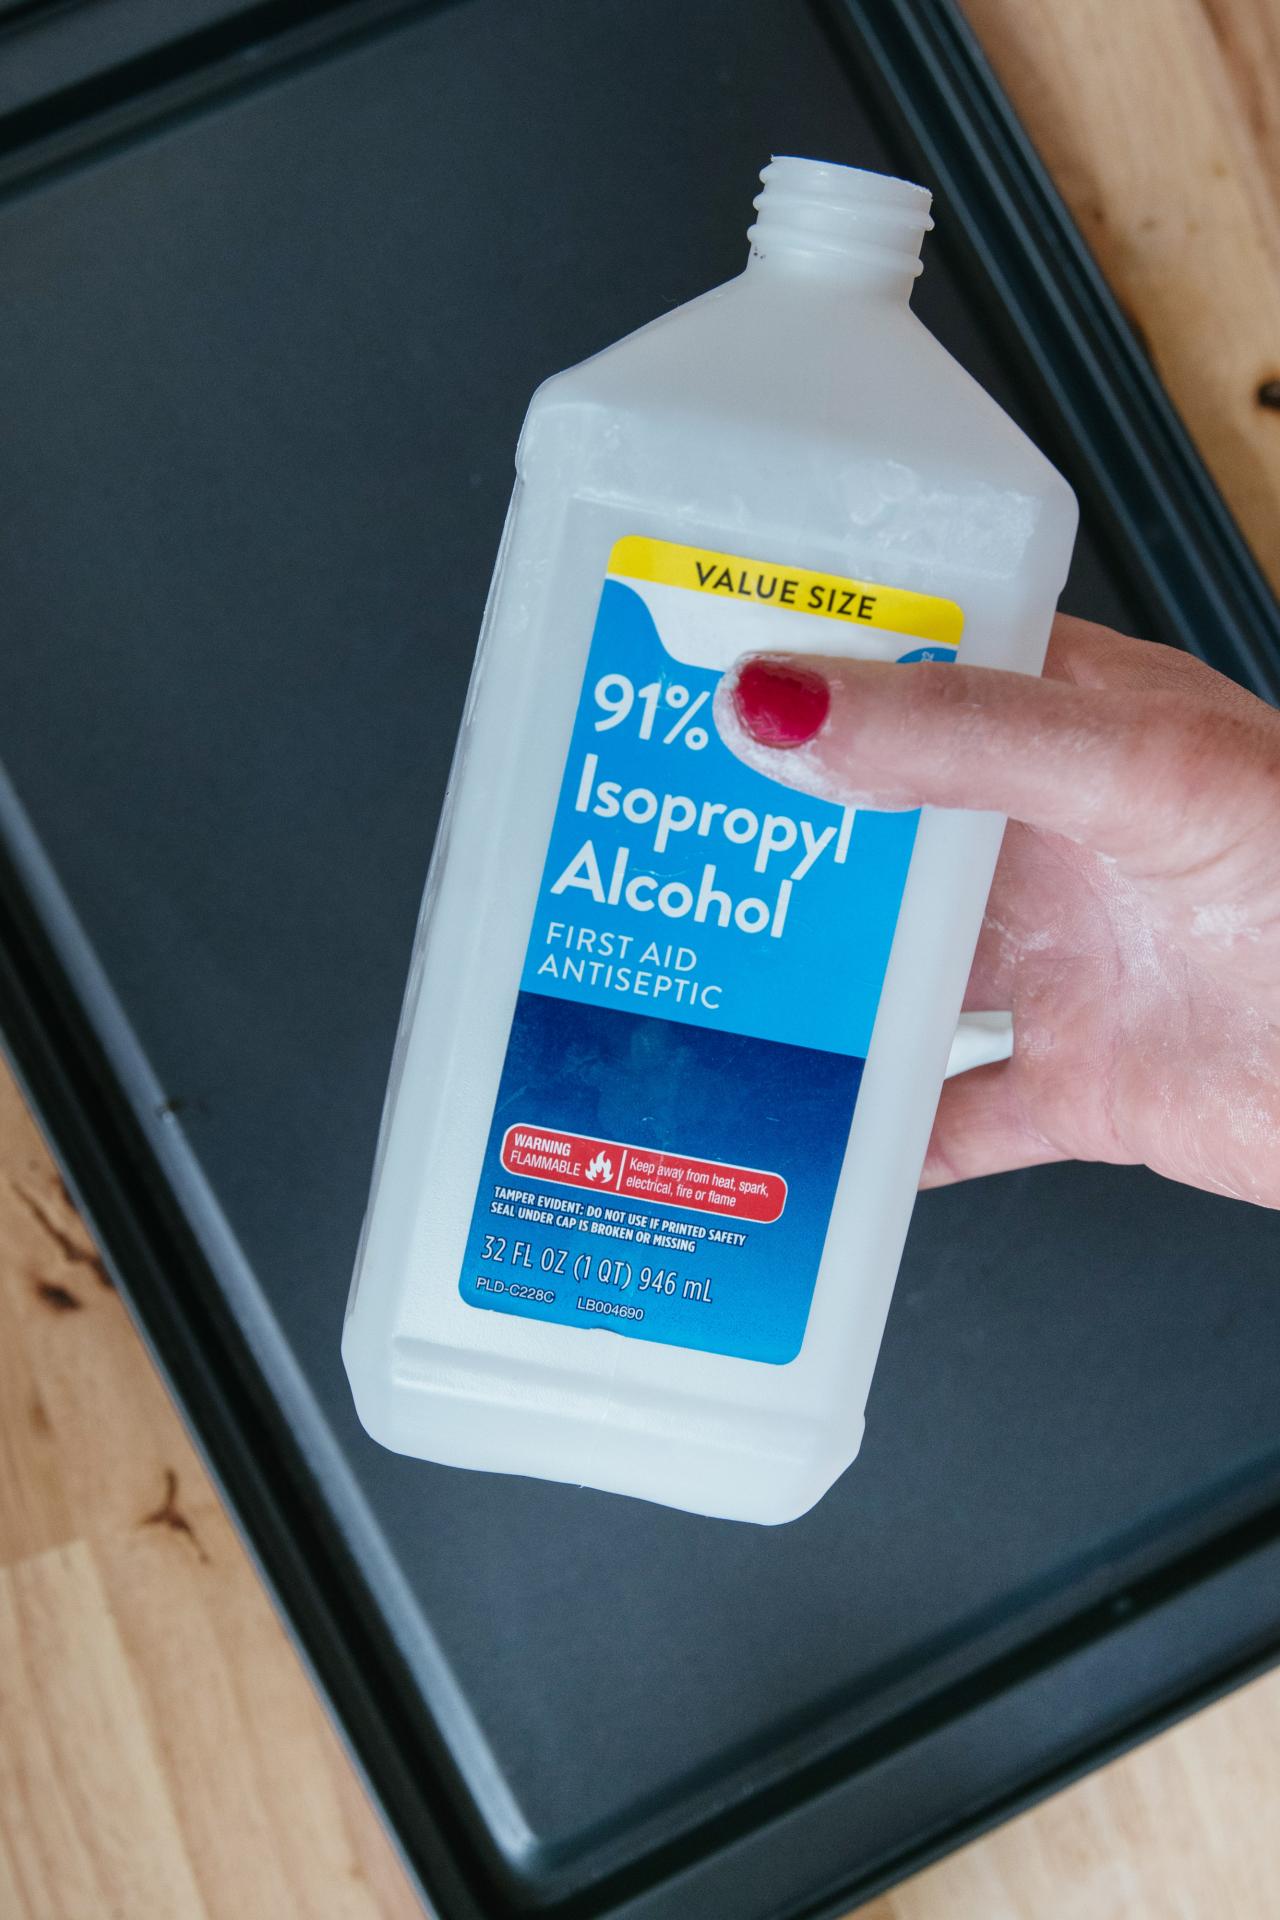
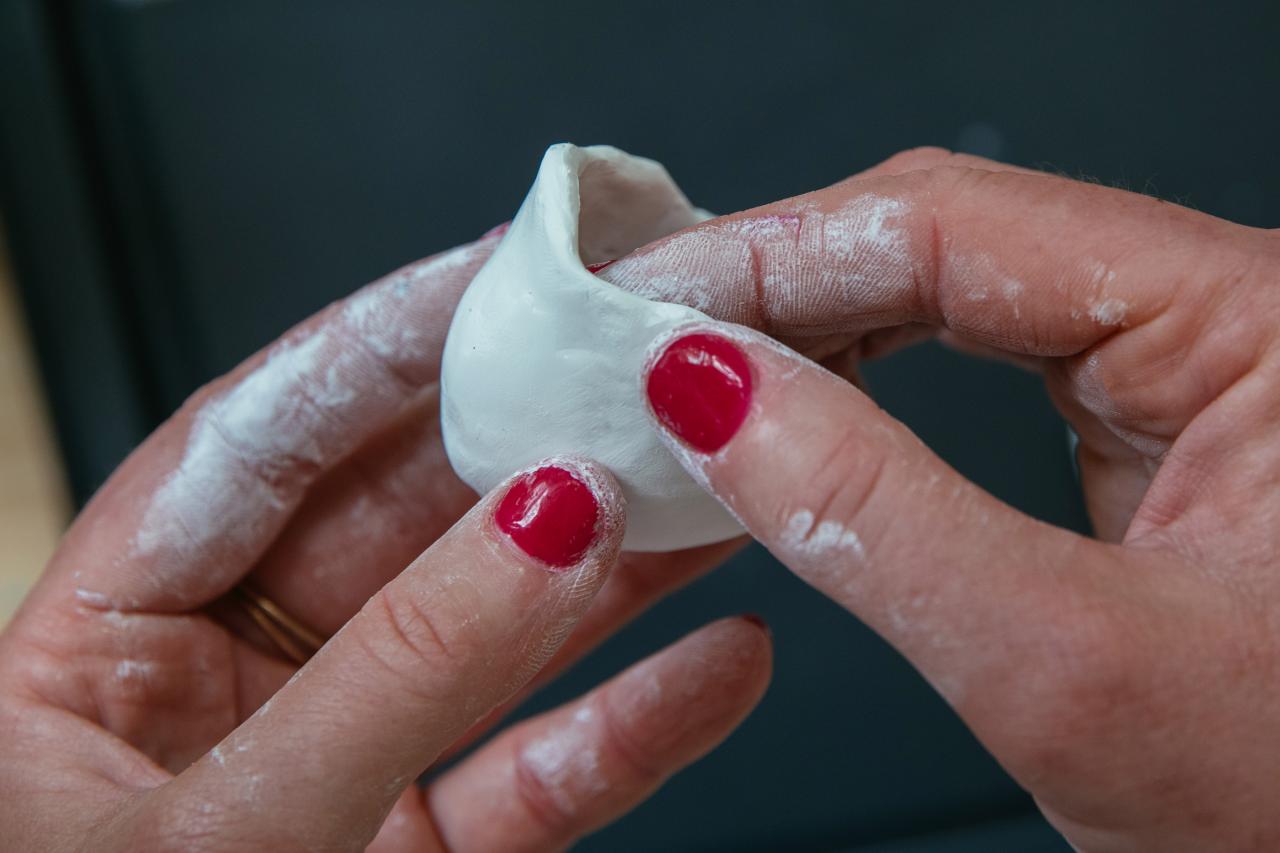
Once you get the shape how you’d like, it’s time for the detail work. As you formed your mini pinch pot, you probably noticed some fingerprints and bumps you couldn’t smooth completely. Luckily, there is a hack for that: Rubbing alcohol (Image 1) melts polymer clay, so simply dip a paintbrush into the alcohol and dab it on (Image 2). Then, gently smooth the surface with your fingertips (Image 3). Go easy — it only takes a small amount, and using too much may cause your pot to crack. Tip: Repeat as needed, but be careful to only use as much alcohol as you need.

Jennie Andrews
Jennie Andrews

Jennie Andrews
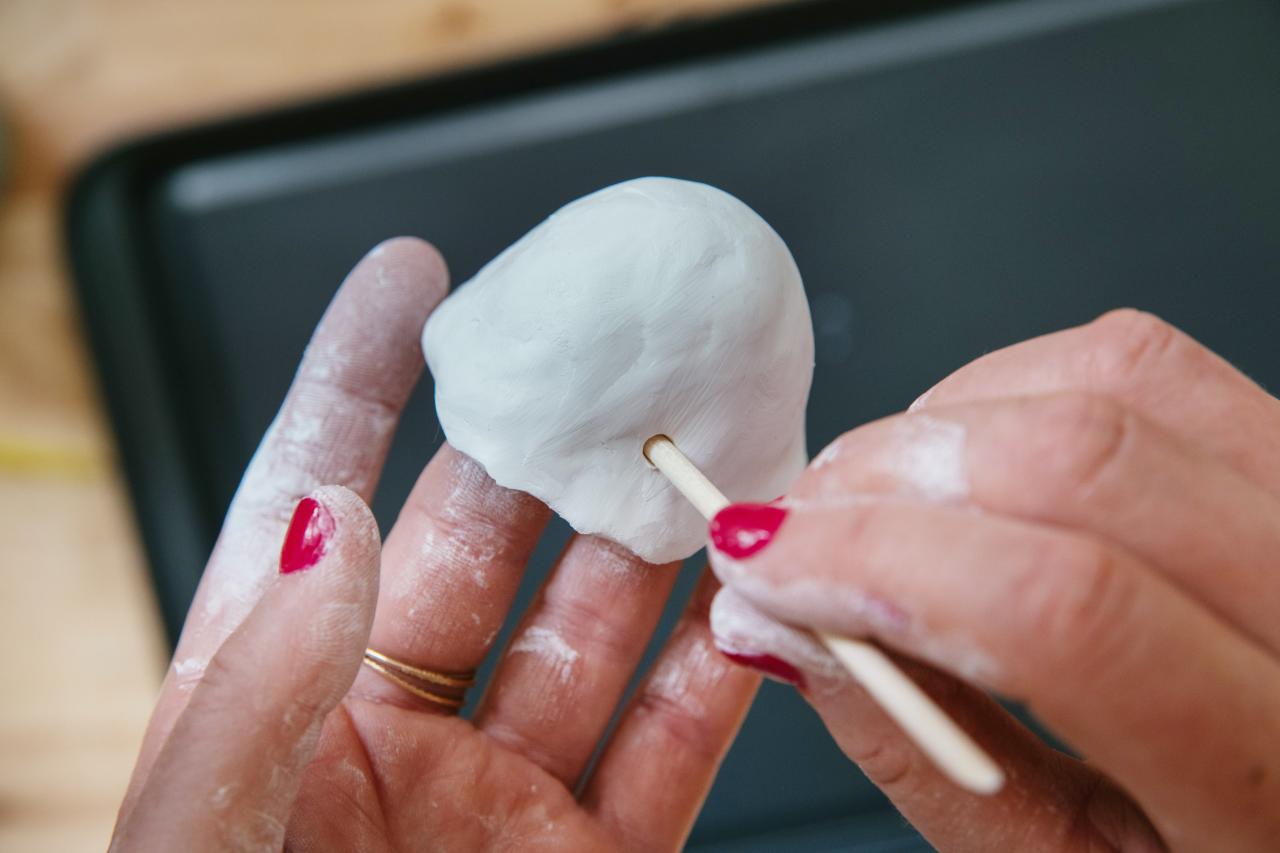
Make Your Holes
Use a wooden skewer to punch three evenly spaced holes in the top of the pot, about 1/2 inch from the top.

Jennie Andrews
Personalize Your Pinch Pots With Paint
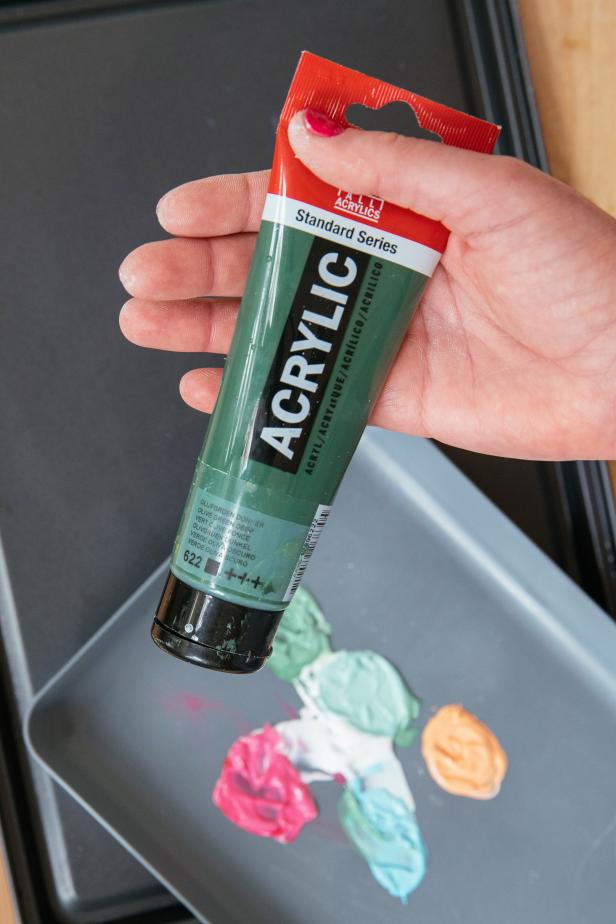
Paint the pot before baking it. Artist acrylics in opaque shades (Image 1) work the best for polymer clay. They stick well to the surface, cover nicely, have a similar sheen and won’t crack while baking. Use a small paintbrush to paint a design directly onto the unbaked pot (Image 2 + 3). When you're done painting, place your clay pinch pot onto a baking sheet and bake according to package instructions.
Jennie Andrews

Jennie Andrews

Jennie Andrews
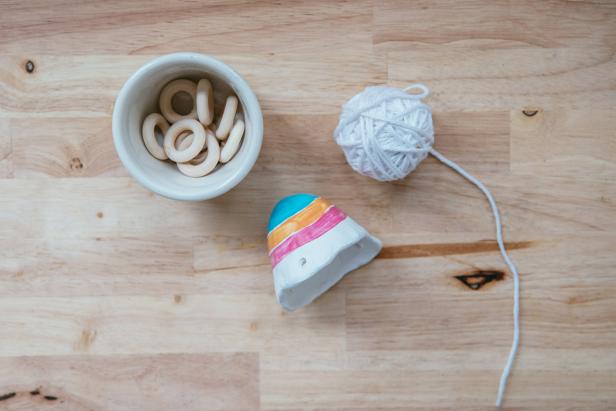
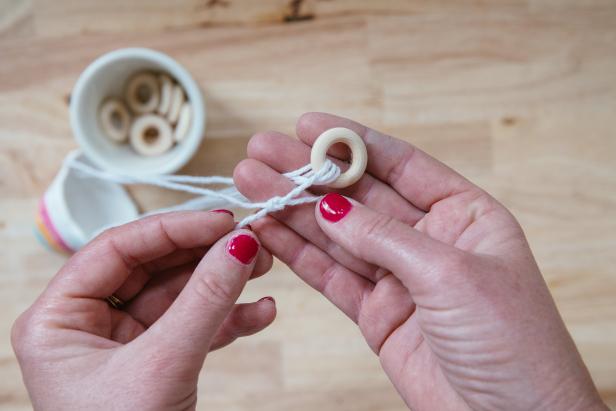
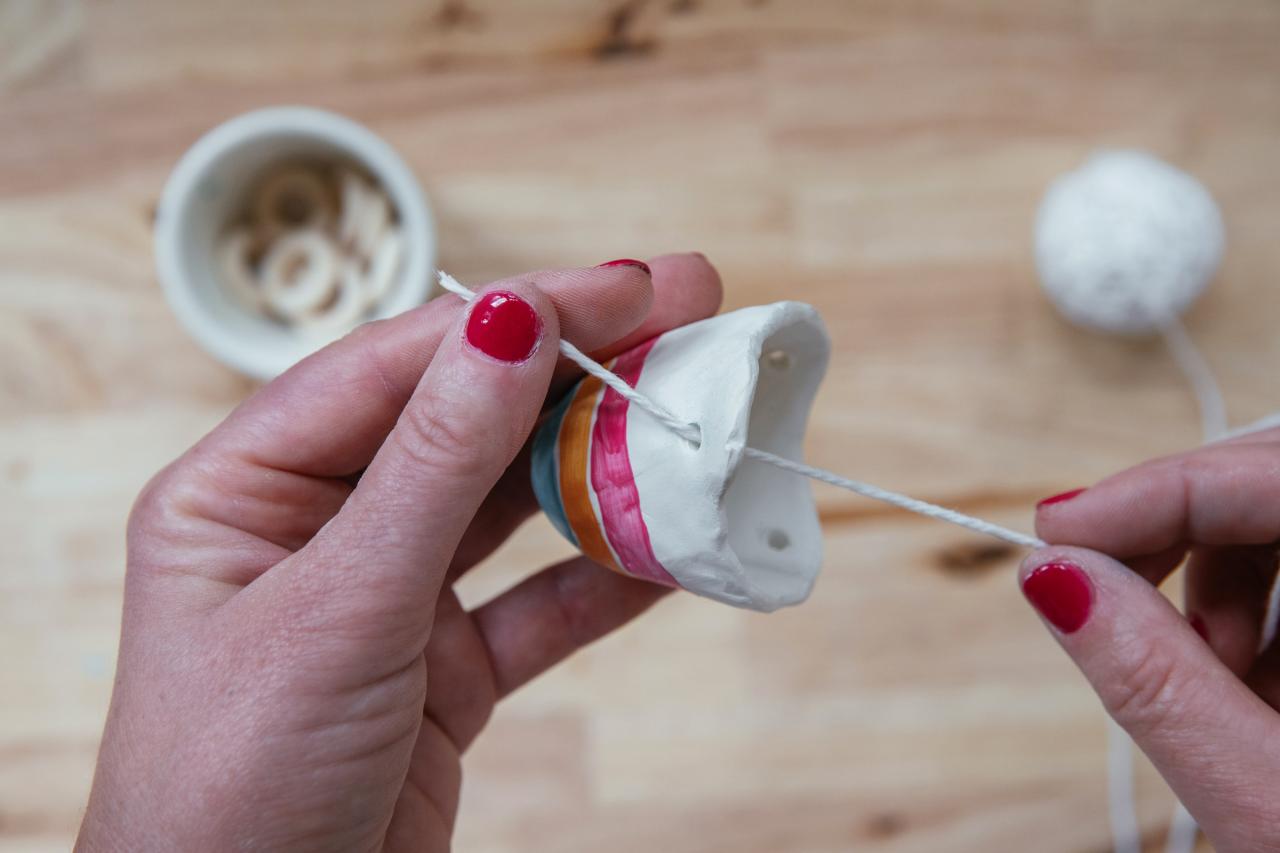
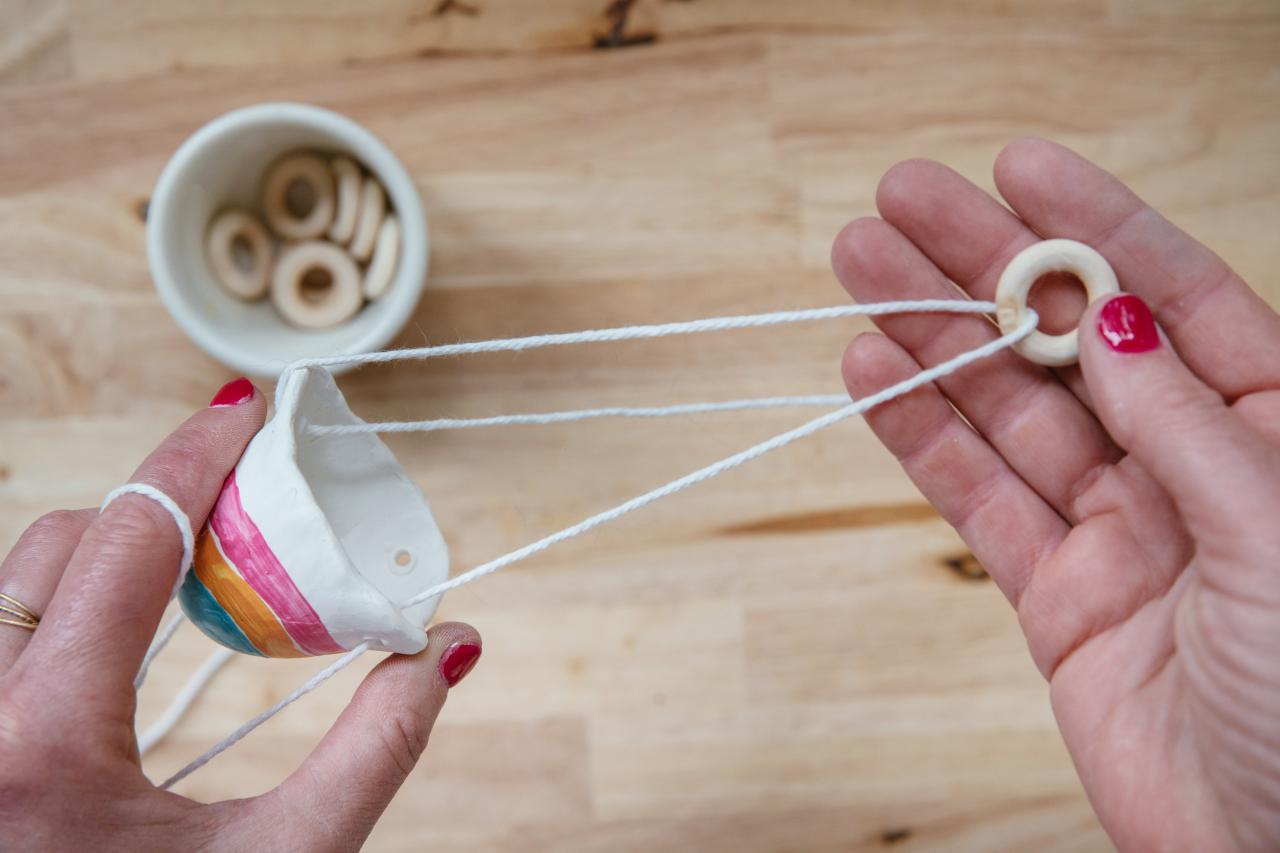
Add Twine to Your Pinch Pot Hanging Planters
Use cotton twine and small wooden rings to hang the pot (Image 1). Thread twine through the first hole and then through the wooden ring (Image 2). Then, thread through the second hole and back through the wooden ring (Image 3). Repeat again with the third hole and tie off to the beginning of the twine (Image 4).
Jennie Andrews

Jennie Andrews

Jennie Andrews
Jennie Andrews
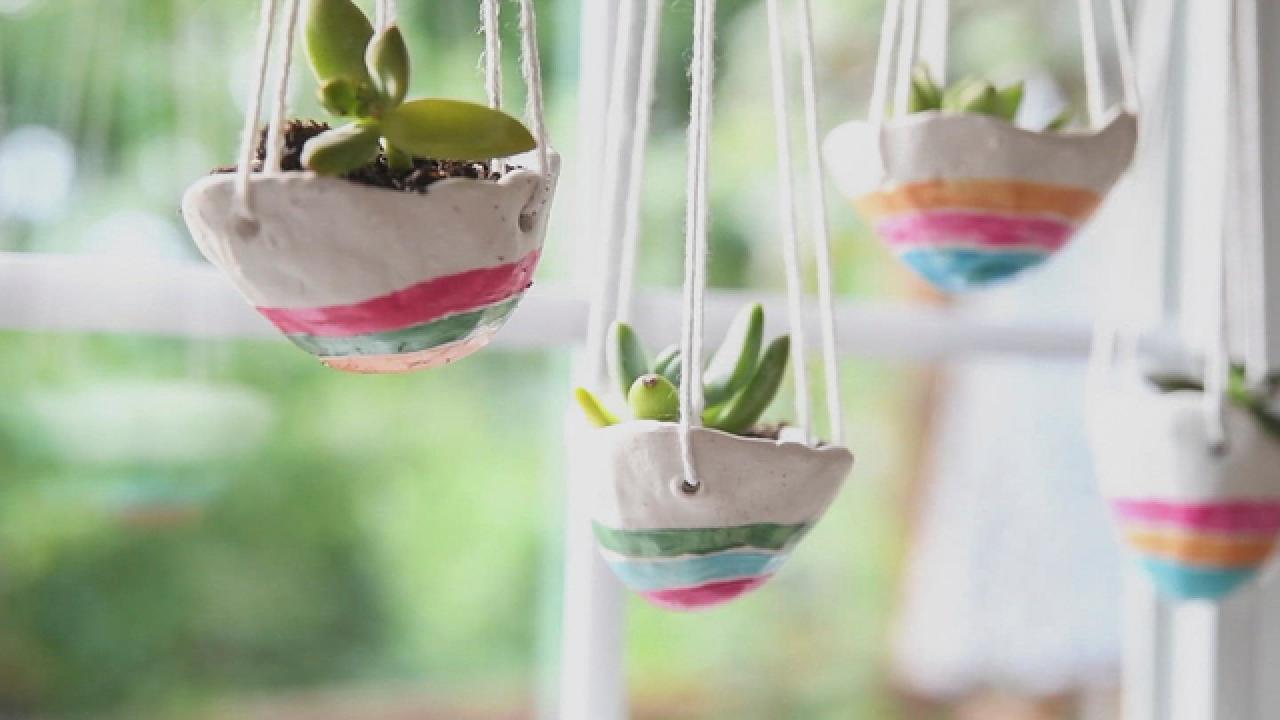
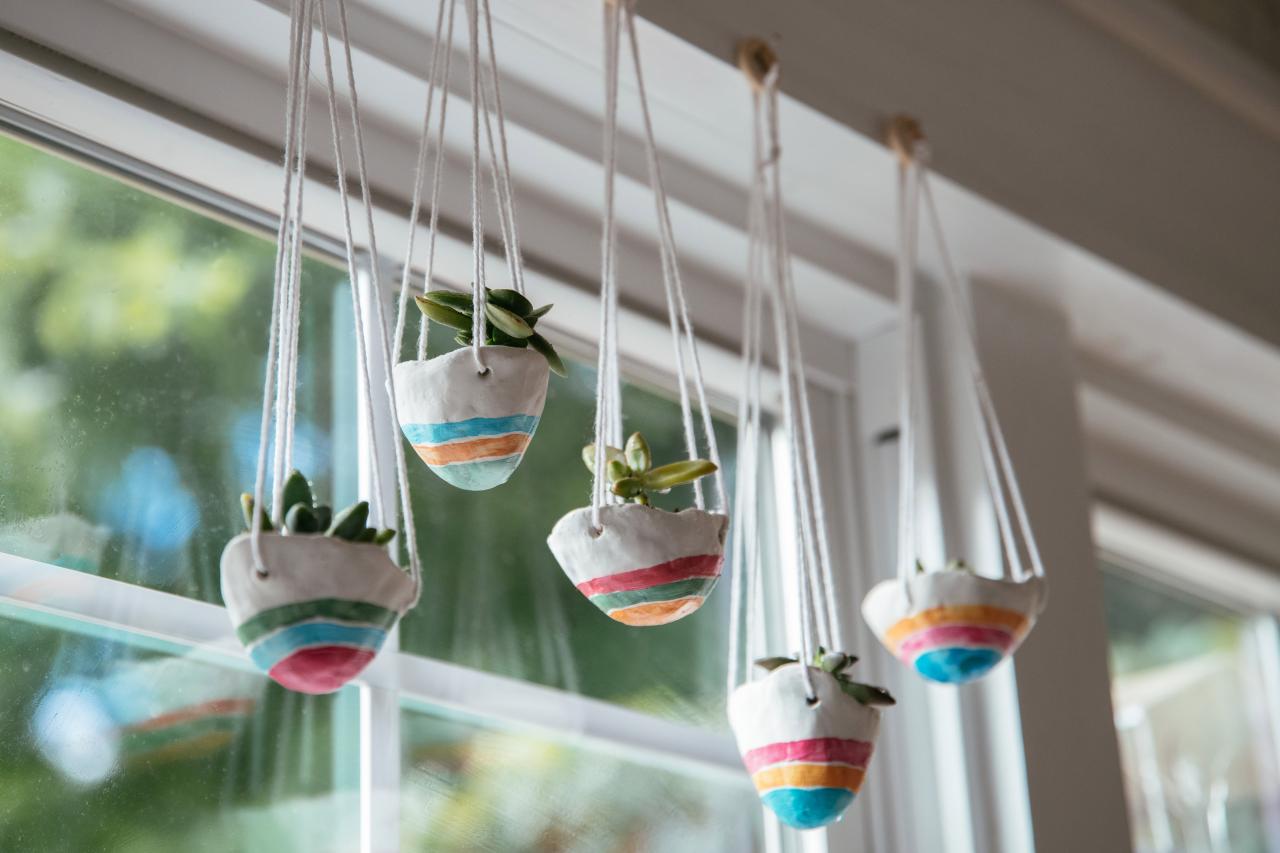
Add Succulents and Enjoy!
Add a tiny succulent and a bit of sandy potting soil and your clay pinch pot hanging planter is complete (Image 1). Water by misting regularly. Hang in a window where they’ll add a little cheer all year long (Image 2).

Jennie Andrews
Jennie Andrews

How to Care for Succulents
Succulents are often regarded as the ultimate low-maintenance plant, but even seasoned gardeners have seen them perish under their care. Read our growing guide to help keep them happy indoors and out.
Show Off Your Succulents With These DIYs

DIY Succulent and Cactus Projects 26 Photos
Here's how to get creative with these drought-tolerant plants by using them in everything from wreaths to hanging wall art.

DIY Concrete Vintage Camper Planter
Vacation starts now. Your plants can hit the road and see the sights in style in this vintage-inspired concrete camper.

How to Make a Metallic Dinosaur Planter
Display an unexpected (and adorable) planter in your home using an animal figurine and metallic spray paint.


