


How to Make a Multi-Faceted Wall Mirror

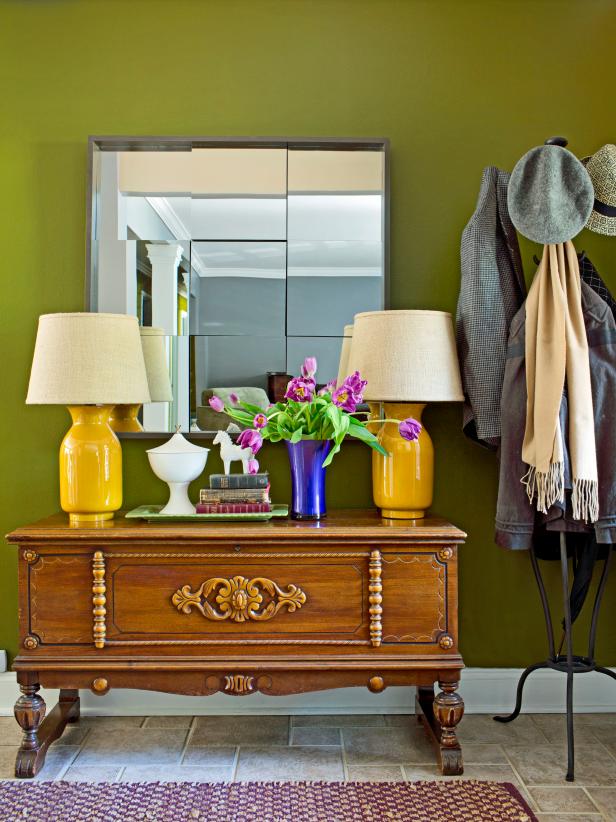
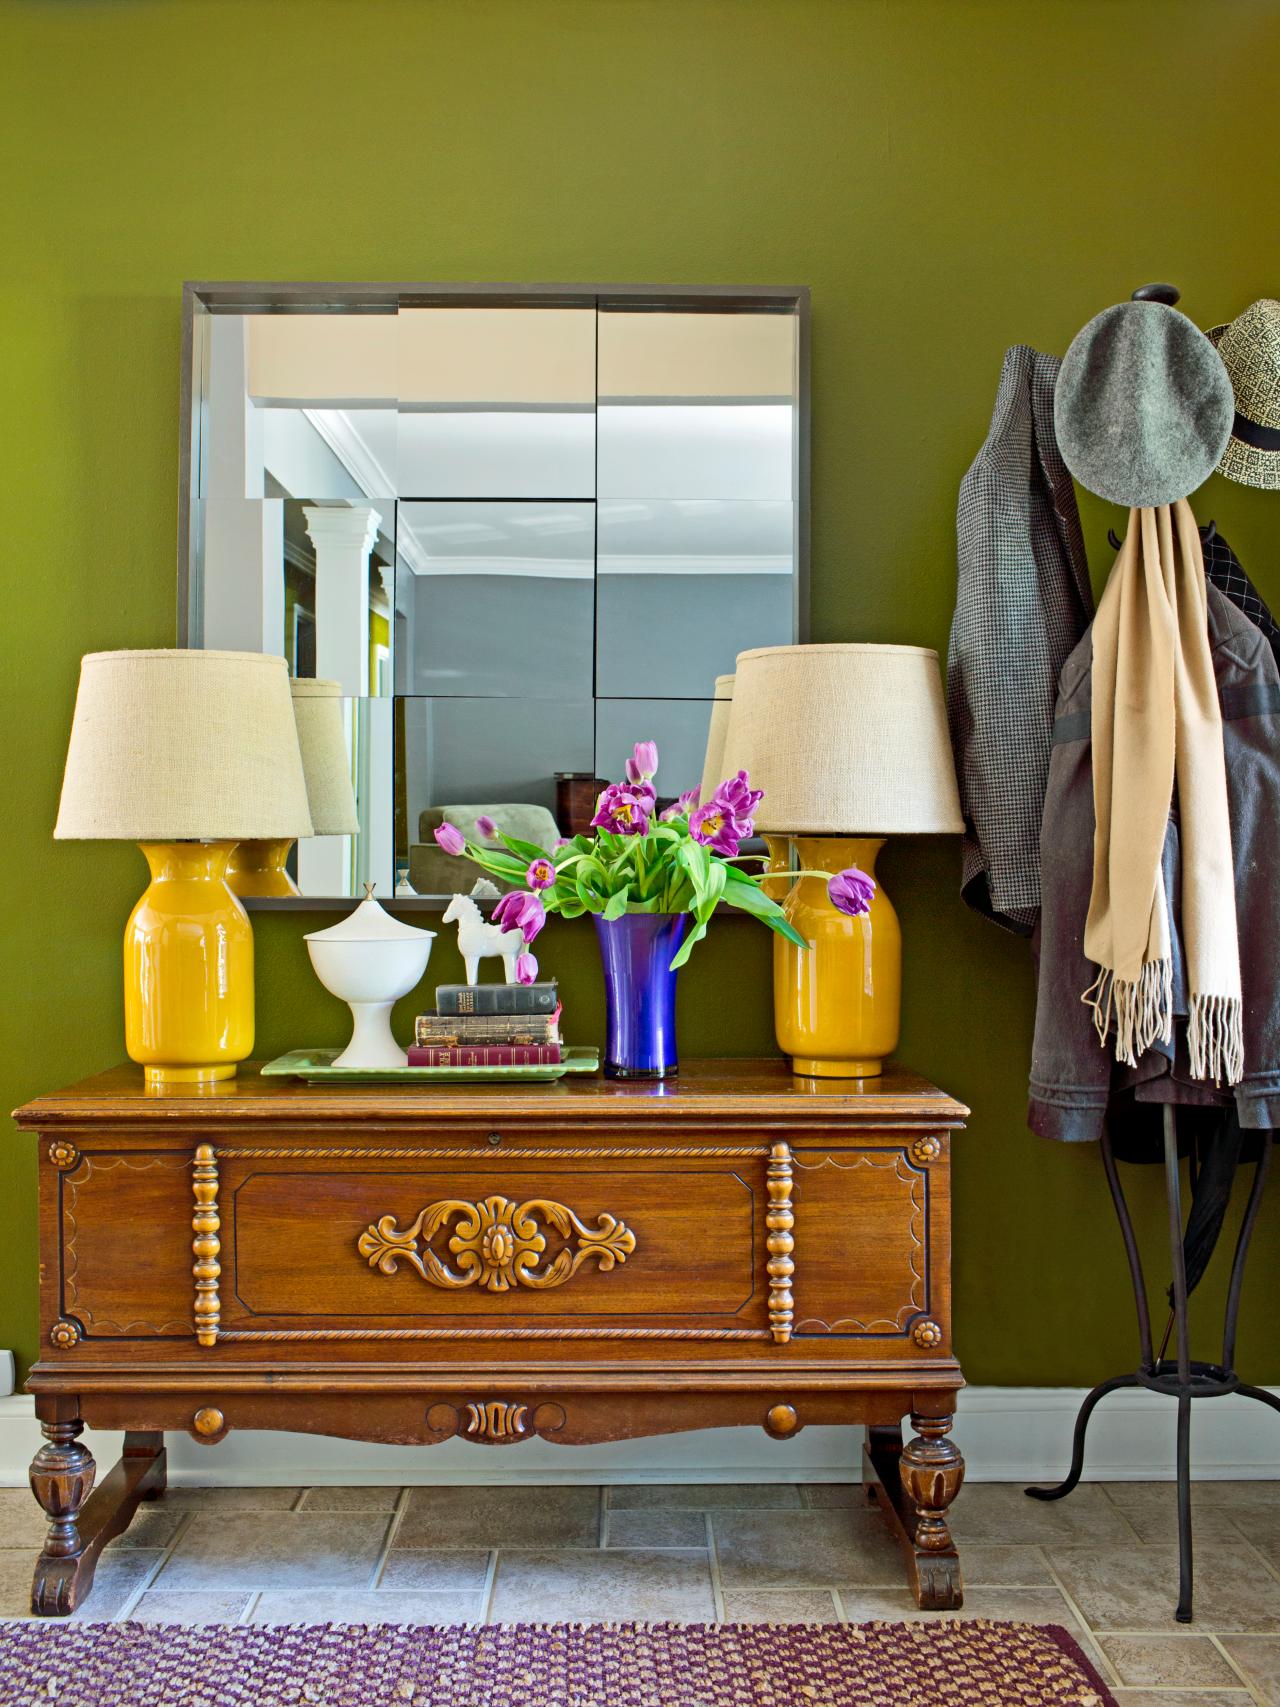
Three-Dimensional Mirror in Bold Green Foyer
The subtle shifting in the square mirrors adds dimension and texture to what is typically a flat surface. The mirror has been hung on a green wall and positioned behind a wood table on which are two yellow lamps, a small silver bucket with pink orchids and a small green tray of knickknacks.

Reflective surfaces are a great way to bring light into a space and make it feel larger. If your room could use a little glamour, this multi-dimensional mirror is for you. It has the look of a high-end accessory, but you can build it yourself in an afternoon.
Materials Needed:
- 9 squares 12x12 mirror
- liquid bonding adhesive
- caulk gun
- 1/2 inch plywood
- 13 linear feet of 1x3 pre-painted pine trim
- nail gun or drill
- nails or screws
- painters' tape
- tape measure
- circular saw
- miter saw
- level
- semi-gloss paint
- paint pan
- paint roller
- roller sleeve
- drop cloth
- note pad
- art-hanging hardware
- picture hangers
Paint Trim
Add paint to paint pan, attach roller sleeve to paint roller, then roll two coats of your chosen finish color on pre-primed trim.

Paint Primed Wood Trim
Apply two coats of your chosen finish color onto your pre-primed pine trim using a roller or brush. The trim will later be used to create the frame to which you will attach a backing and apply your mirrors.
Miter Corners of Trim
Using a miter saw, cut 4 37-1/2 inch pieces of trim on a 45-degree angle.

Miter Corners of Trim
Using a miter saw, cut four 37-1/2 inch pieces of trim on a 45-degree angle. This will create the frame to which you will attach the backing and finally, the mirrors.
Create Frame
Holding each of the four mitered pieces of trim up to one another, fasten them together with liquid bonding adhesive and finishing nails or screws.

Create Mirror Frame
Holding each of the four mitered pieces of trim up to one another, fasten them together with liquid bonding adhesive and finishing nails or screws.
Trace Backing to Plywood
Place assembled frame directly on top of plywood along a flat, solid surface. Using a pencil, trace along all four outside edges of frame. Next, cut along traced line with circular saw.

Trace Frame onto Backing
Place assembled frame directly on top of plywood along a flat, solid surface. Using a pencil, trace along all four outside edges of frame. Next, cut along traced line with circular saw.
Paint and Attach Backing
To prevent warping, and also to ensure the backing disappears once the mirrors are attached, paint the plywood backing to match the frame. Attach the backing to the frame with wood screws.

Paint and Attach Backing
To prevent warping, and also to ensure the backing disappears once the mirrors are attached, paint the plywood backing to match the frame. Attach the backing to the frame with wood screws.
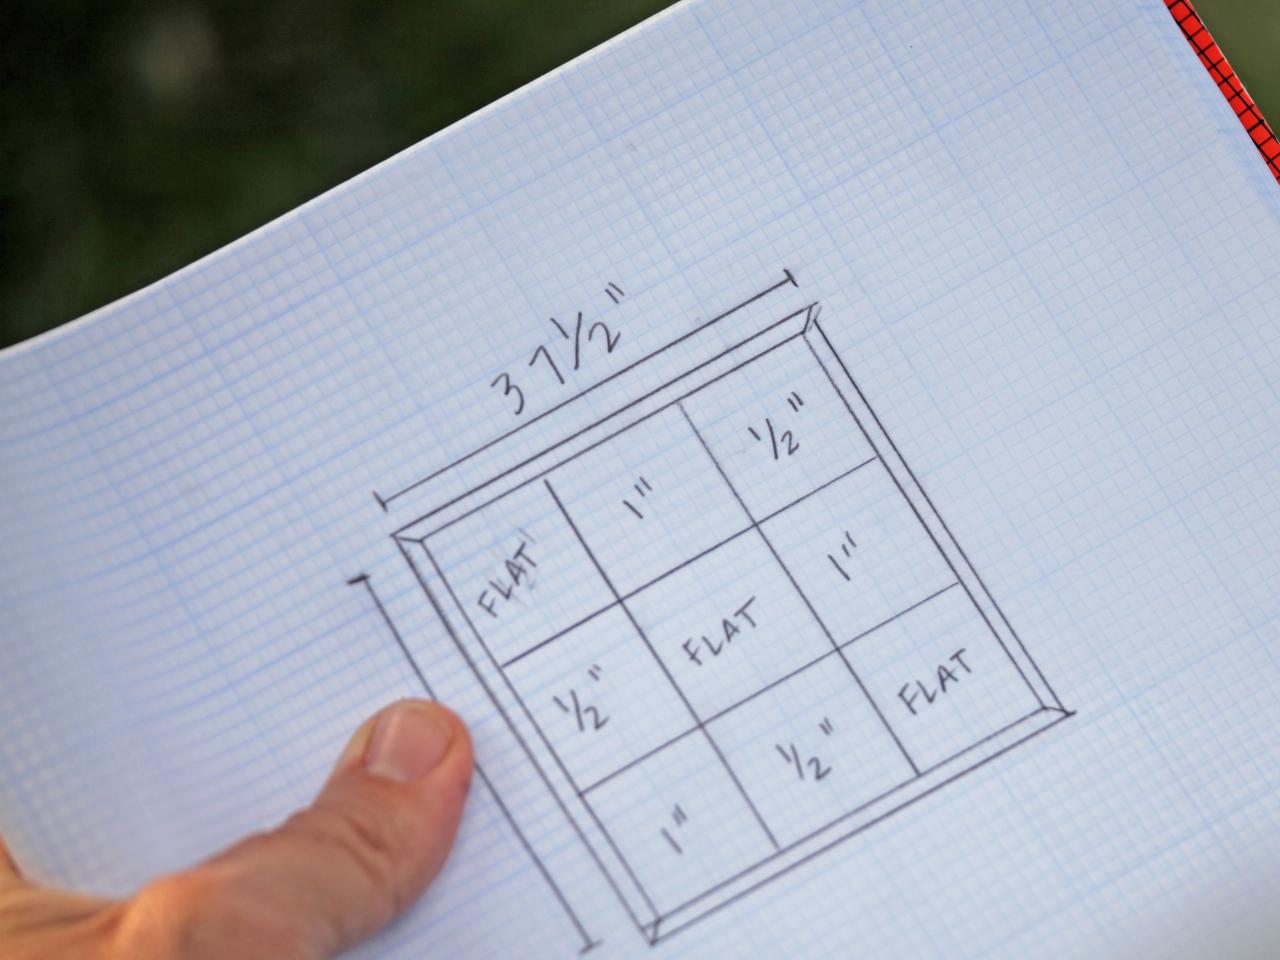
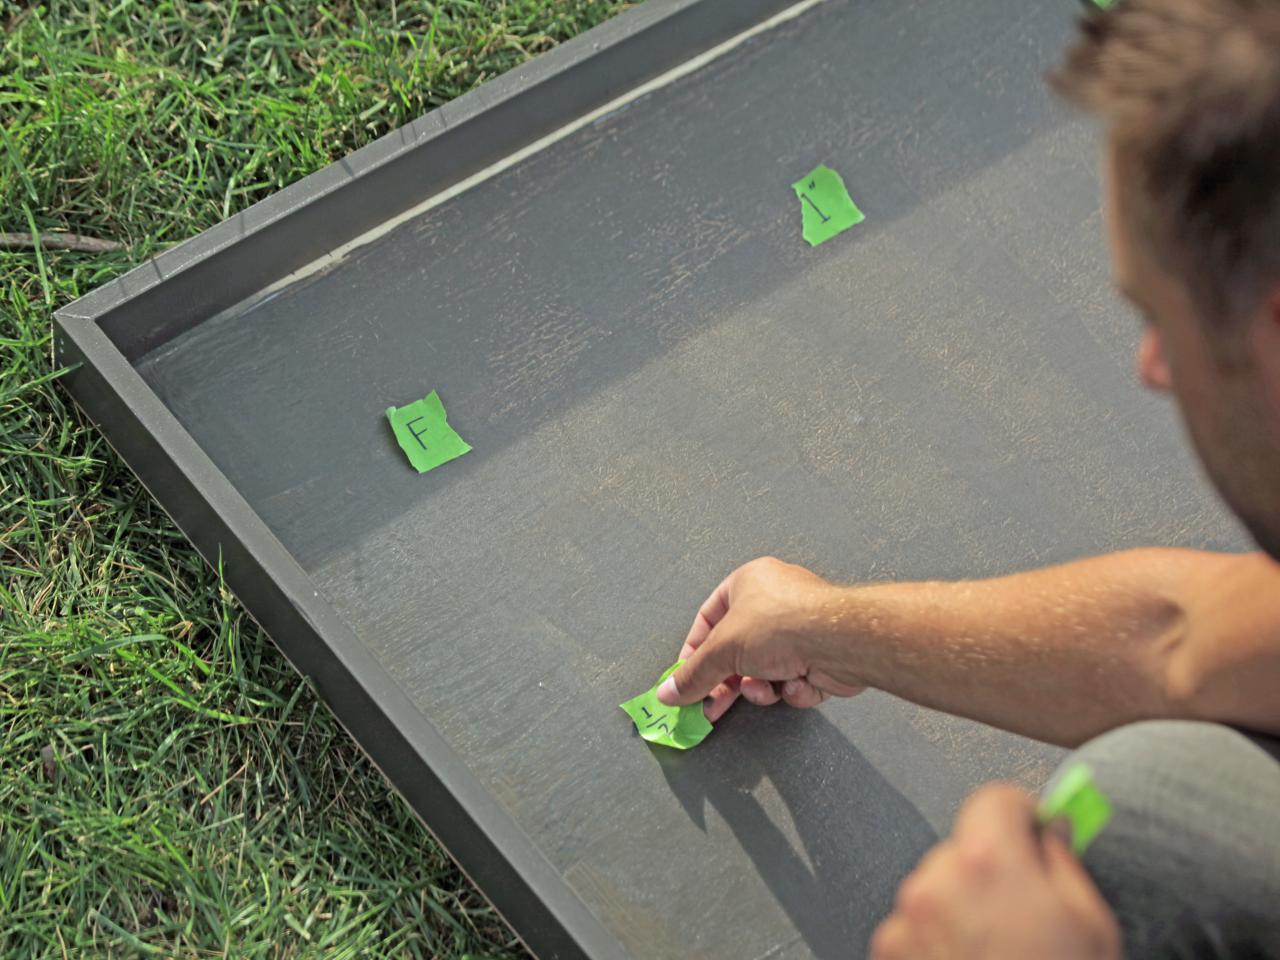
Sketch Placement
Using a pencil and note pad, create a sketch notating the placement of each mirror and its corresponding elevation. To replicate this project, use three different heights: flat, 1/2-inch rise and 1-inch rise. Tip: Keeping the elevations varied within each row ensures a multi-dimensional look. No adjacent mirrors should be placed at the same height.

Sketch Mirror Placement
Using a pencil and note pad, create a sketch notating the placement of each mirror and its corresponding elevation. To replicate this project, use three different heights: flat, 1/2-inch rise and 1-inch rise. Tip: Keeping the elevations varied within each row ensures a multidimensional look. No adjacent mirrors should be placed at the same height.
Create Risers
Using scraps of plywood or trim, create three 1/2-inch risers and three 1-inch risers. Stack wood scraps together, then attach them to one another with liquid bonding adhesive.

Create Risers for Mirror Segments
Using scraps of plywood or trim, create three 1/2-inch risers and three 1-inch risers. Stack wood scraps together, then attach them to one another with liquid bonding adhesive.
Attach Risers
After marking plywood backing with painters’ tape to denote each mirror's placement, attach risers to plywood backing with liquid bonding adhesive.

Attach Risers to Backing
After marking plywood backing with painters’ tape to denote each mirror's placement, attach risers to plywood backing with liquid bonding adhesive.
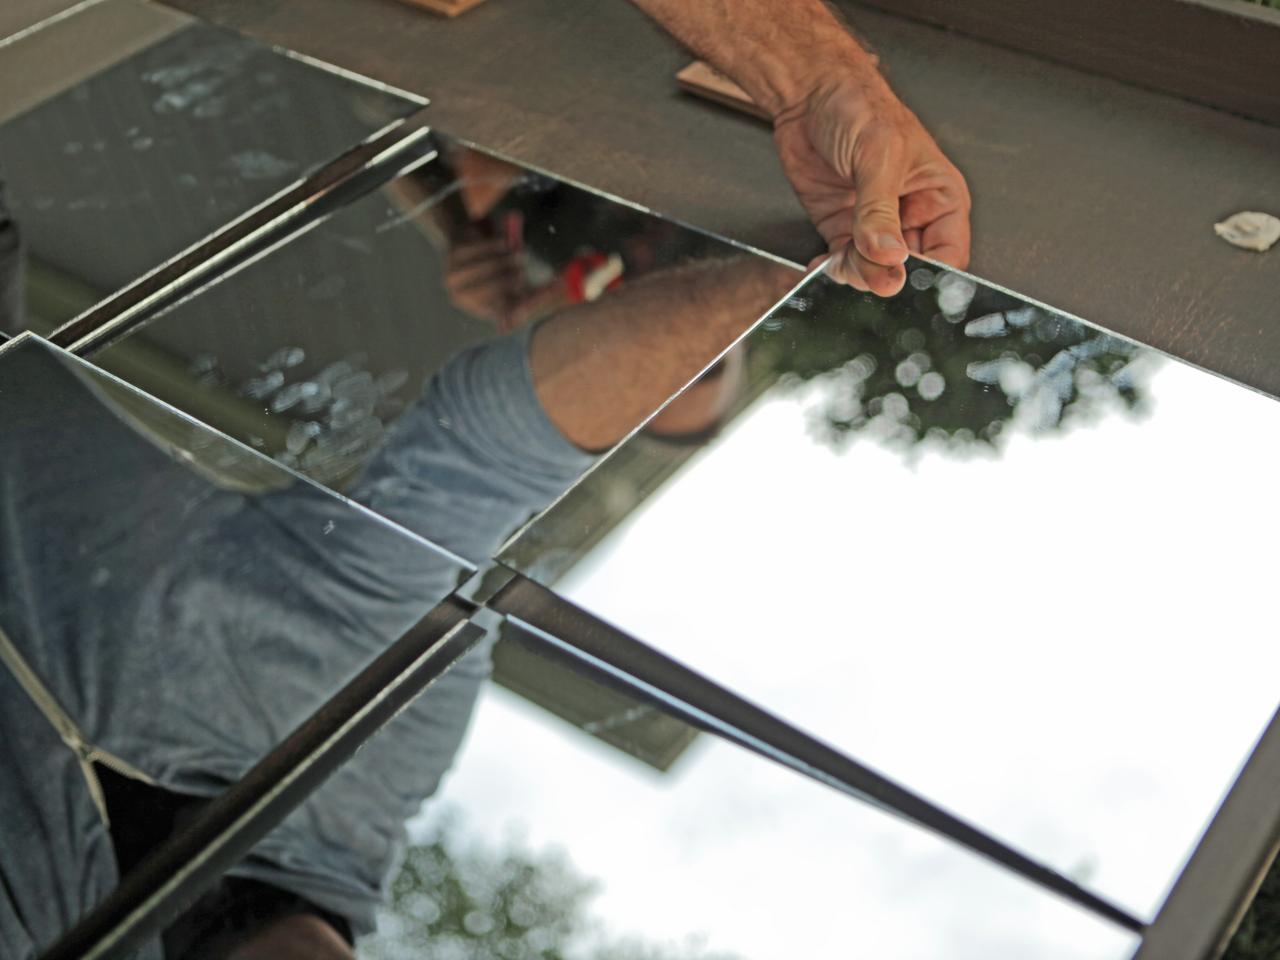
Attach Mirrors
Working one row at a time, attach each mirror to its corresponding riser using liquid bonding adhesive. Use a liberal amount of adhesive on both the mirror back and the center of the riser. Allow at least 24 hours for the adhesive to dry before hanging.

Arrange and Attach Mirrors
Working one row at a time, attach each mirror to its corresponding riser using liquid bonding adhesive. Use a liberal amount of adhesive on both the mirror back and the center of the riser. Allow at least 24 hours for the adhesive to dry before hanging.
Attach Hardware
Using a drill and wood screws, attach picture-hanging hardware and wire to the back panel.

Attach Hardware to Frame
Using a drill and wood screws, attach picture-hanging hardware - hooks and wire to the back panel. Make sure the hardware is rated to support the weight of the completed mirror.
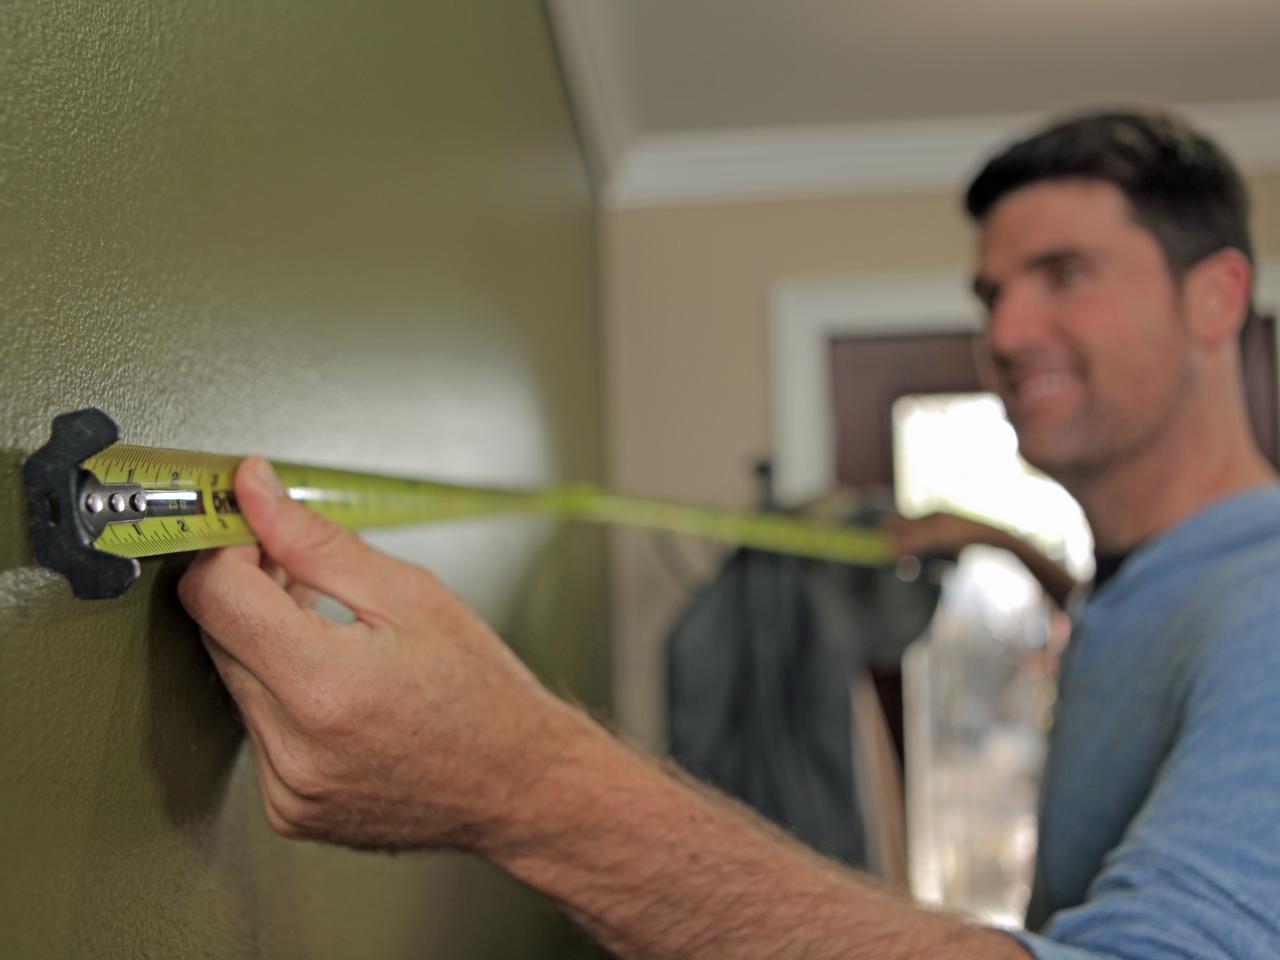
Measure Wall For Proper Placement
Using a tape measure, measure the wall for proper placement; if possible, try to hang directly into a wall stud. Tip: Many designers suggest hanging artwork and mirrors with the center located roughly five feet from the floor.

Measure Wall for Proper Placement
Using a tape measure, measure the wall for proper placement; if possible, try to hang directly into a wall stud. Tip: Many designers suggest hanging artwork and mirrors with the center located roughly five feet from the floor.
Hang Mirror
With proper height marked, add picture hangers to the wall with a hammer or drill, then hang mirror with newly attached hardware.
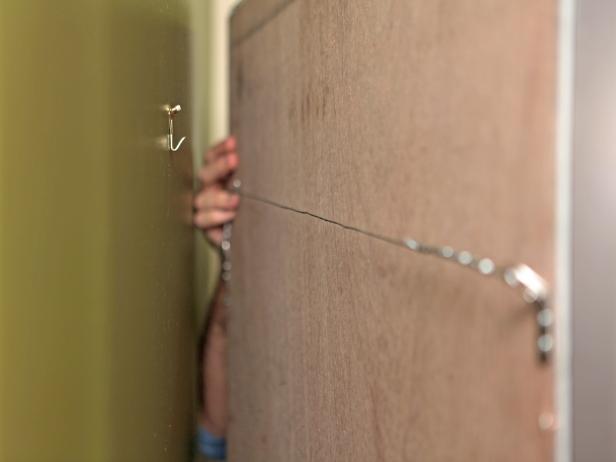
Hang Finished Mirror
With proper height marked, add weight-rated picture hangers to the wall with a hammer or drill, then hang mirror with newly attached hardware.
Bold Green Foyer With Handmade Mirror
Once you've finished and hung up your homemade mirror project, all that remains is to stand back and admire your handiwork. Here, the mirror has been hung on a green wall and positioned behind a side table on which are two yellow lamps, a bouquet of magenta flowers and a small green tray.


