


How to Make a Painted Rope Planter


Materials and Tools:
4" plastic pot
painter’s tape
scissors
3/8" spade bit
3 cans of spray paint in complementary colors
drill
50 feet of 1/4" white-braided rope
hot glue gun
glue sticks
4" potted plant
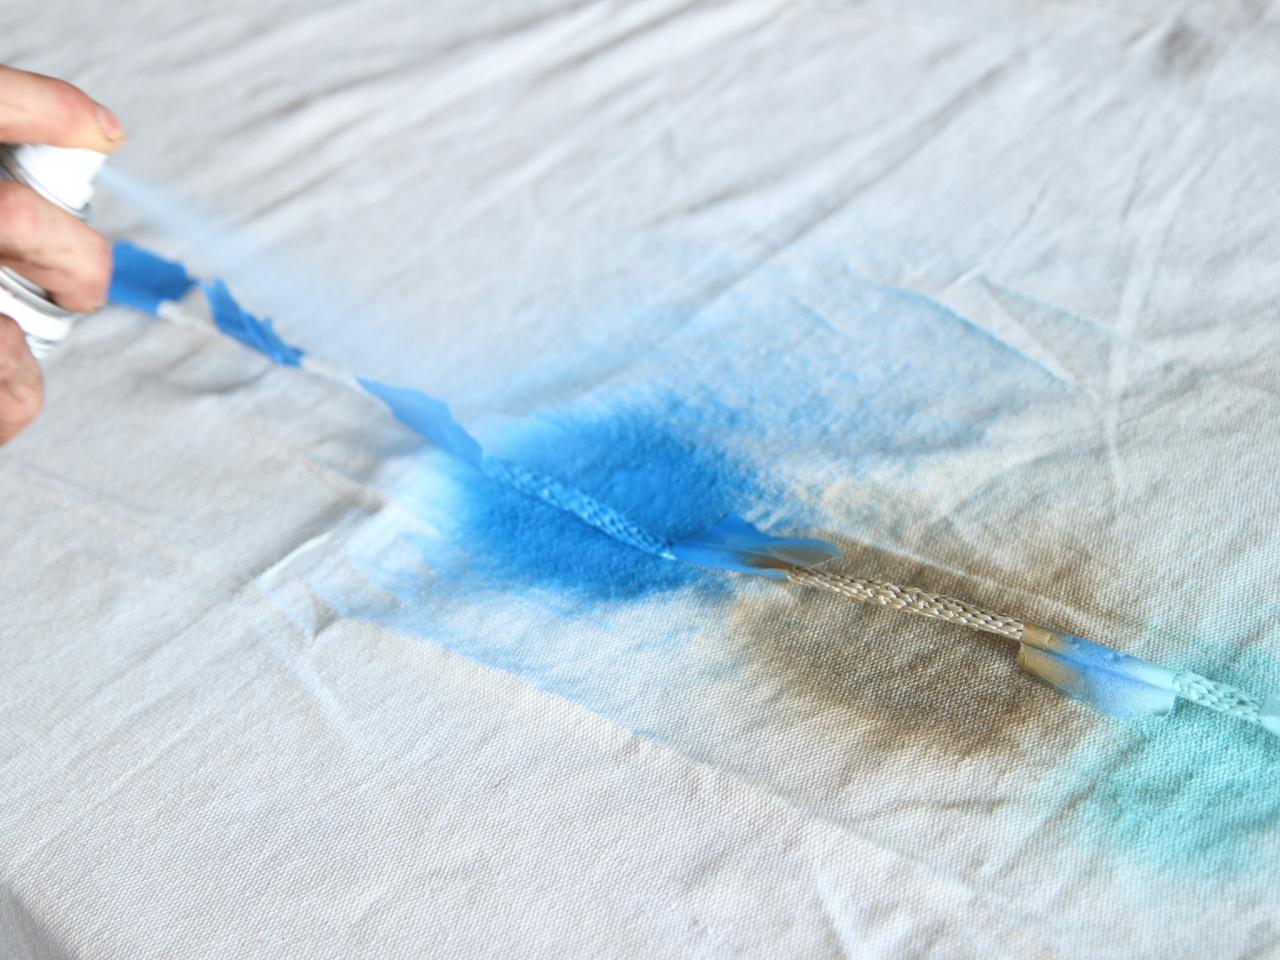
Spray Paint Rope
Wrap the rope with painter's tape in sections, leaving gaps of various widths in between the tape. Spray the rope using alternating colors, and allow time for paint to dry according to label instructions. Remove painter’s tape.
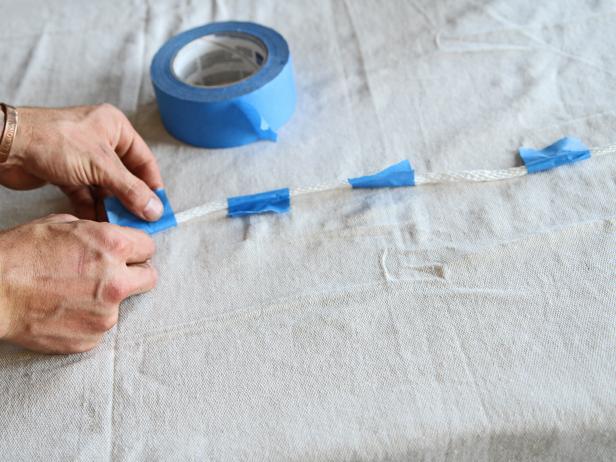


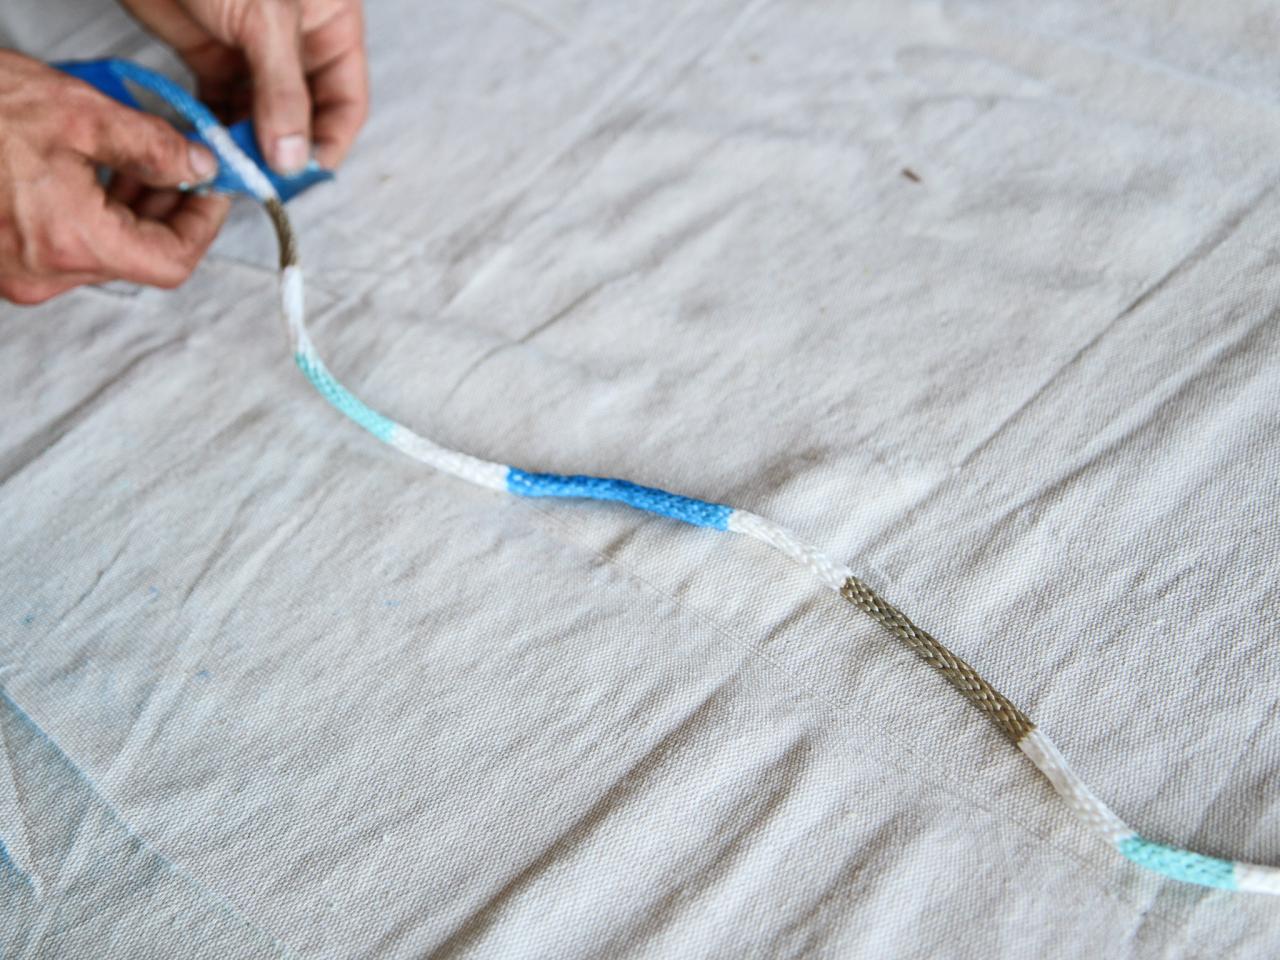
Add Tape
Wrap 1/4” white-braided rope with painter’s tape in sections, leaving gaps of various widths in between the tape.
Spray Paint Rope
Spray the gaps between the tape with alternating colors, allow time for paint to dry.
Drill Holes in Pot
Drill three evenly-spaced holes in the rim of the plastic pot using a 3/8" spade bit.

Drill Holes
Drill three evenly spaced holes in the rim of the 4” plastic pot using a 3/8” spade bit.
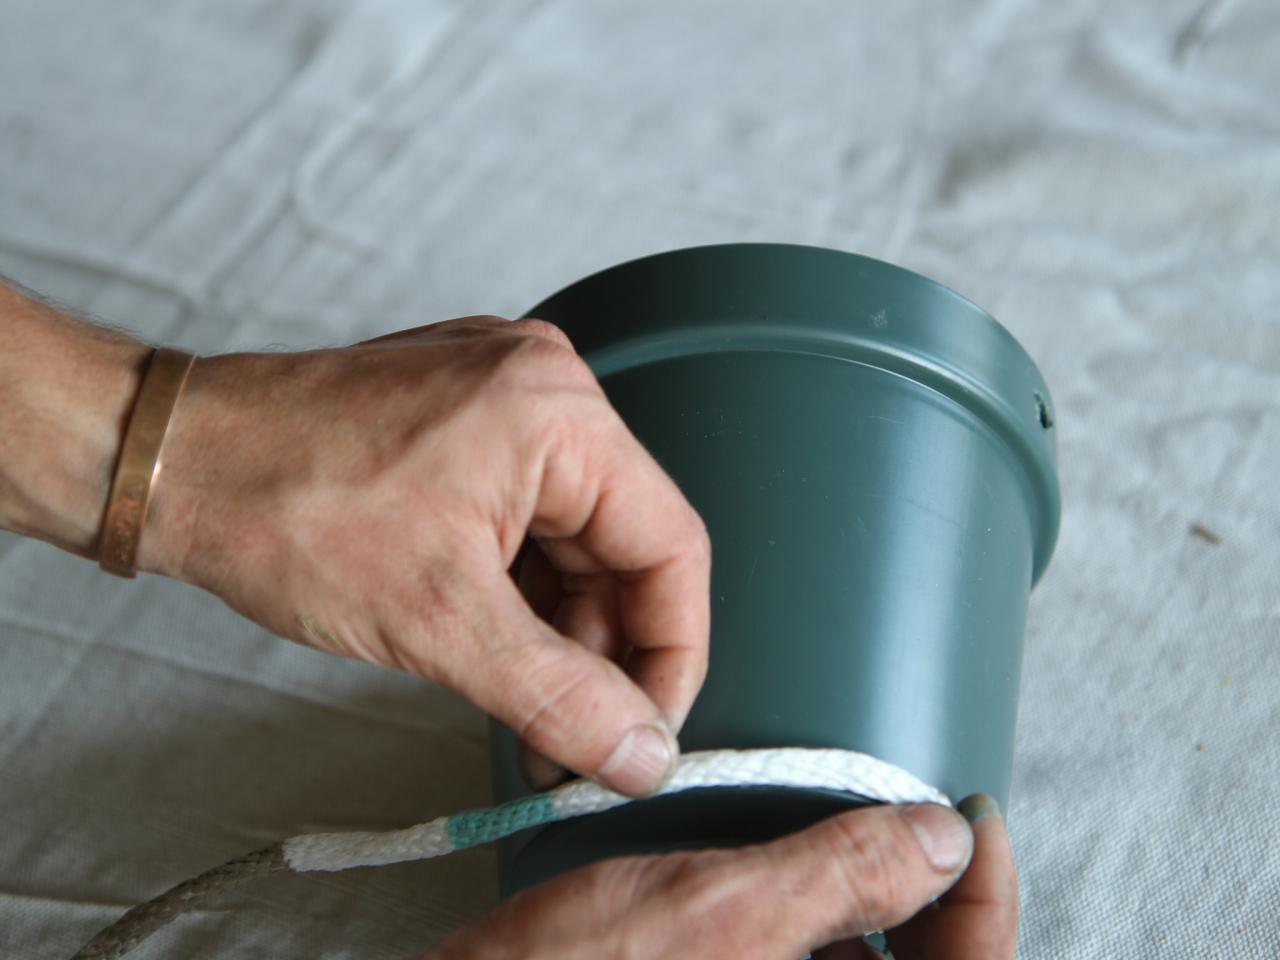
Attach Rope to Pot
Apply hot glue to the bottom edge of the plastic pot. Place one end of the rope onto the hot glue, and allow glue to cool to secure the rope to the pot. Working one section at a time, apply glue and wrap the rope around the plastic pot. Continue wrapping and gluing the entire pot, making sure to glue around the pre-drilled holes in the rim of the pot.
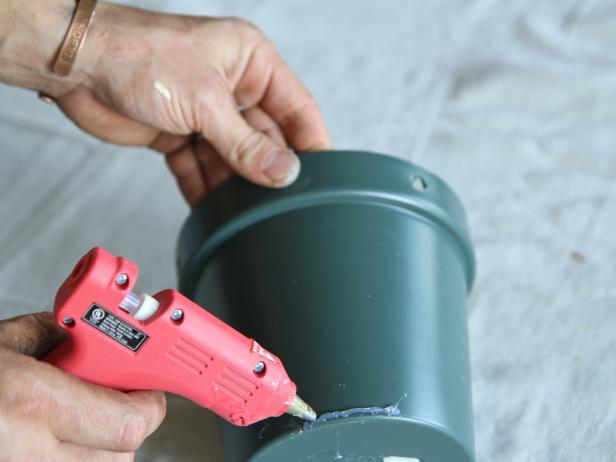

Attach Rope
Apply hot glue to the bottom edge of the plastic pot, and place one end of the rope on top of the hot glue. Allow glue to cool, securing the rope to the pot.
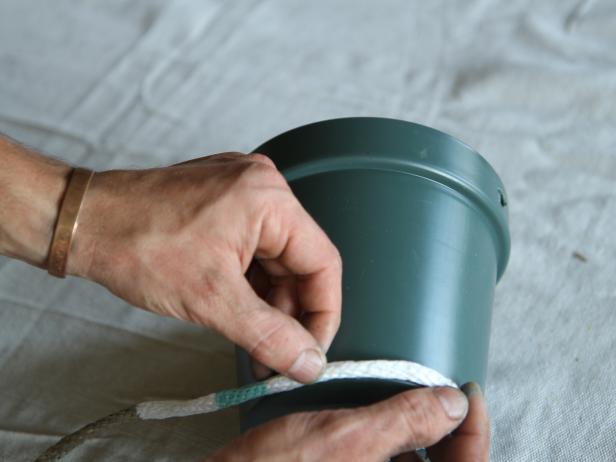
Wrap Pot With Rope
Apply glue and wrap the rope around the plastic pot, working one section at a time.
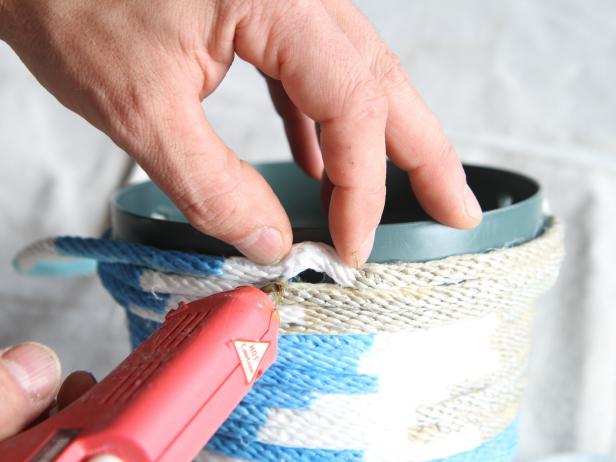
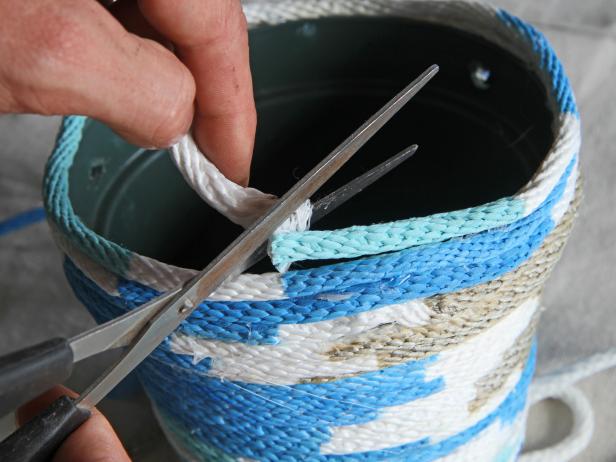
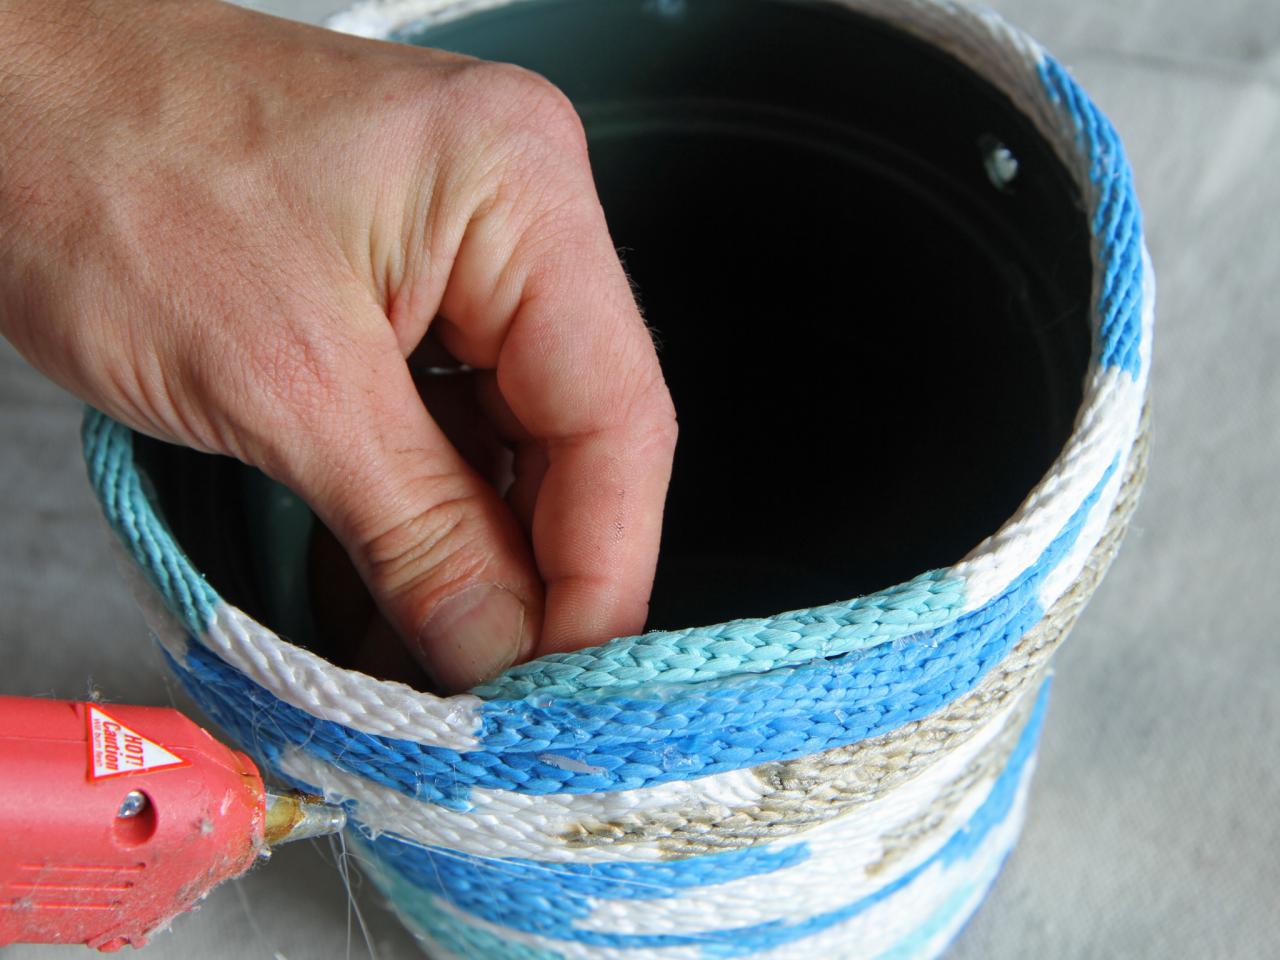
Secure Rope End
Cut off excess rope once the lip of the pot is completely covered. Secure the end of the rope to the inside lip with hot glue.

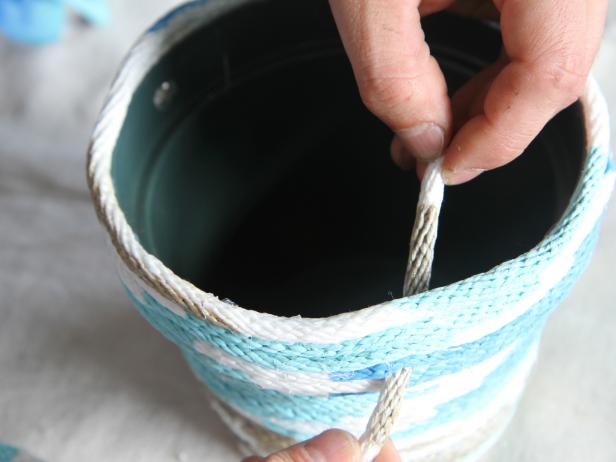
Tie Knots
Insert the rope through a pre-drilled hole in the pot. Tie a knot in the rope on the inside of the pot, leaving approximately three feet of rope to hang the planter. Repeat these steps for the other pre-drilled holes.
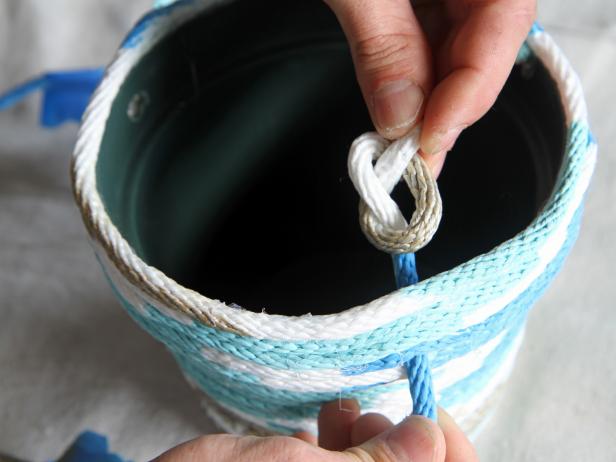
Tie a Knot
Tie a knot in the rope on the inside of the pot, leaving approximately three feet of rope.
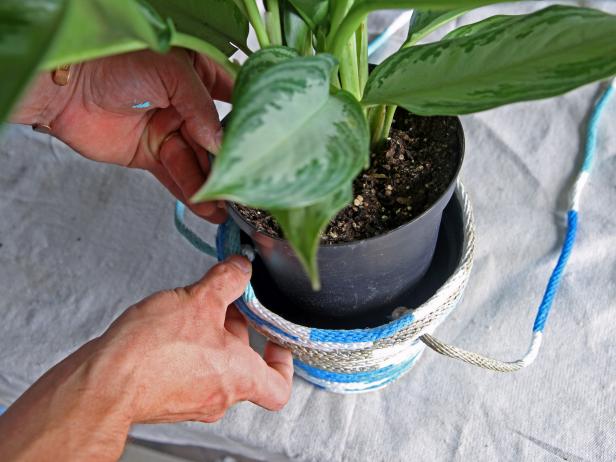
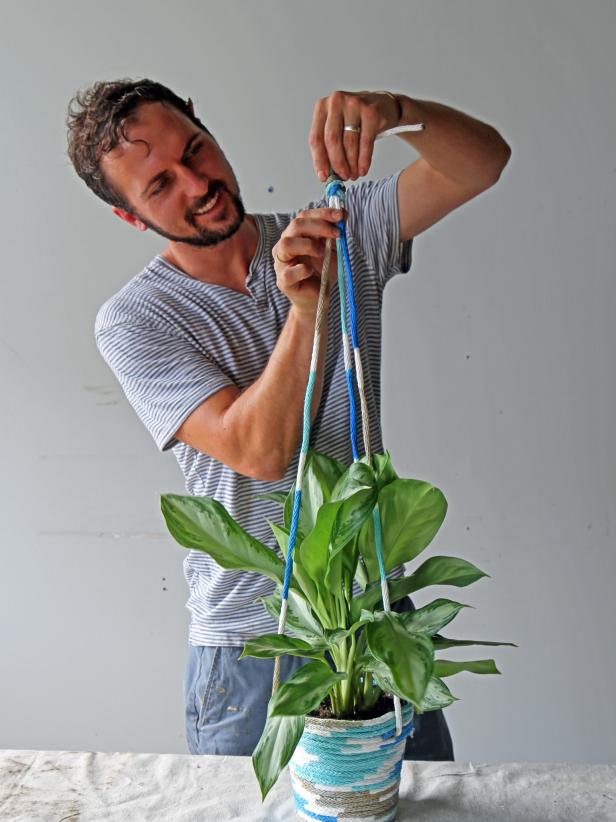
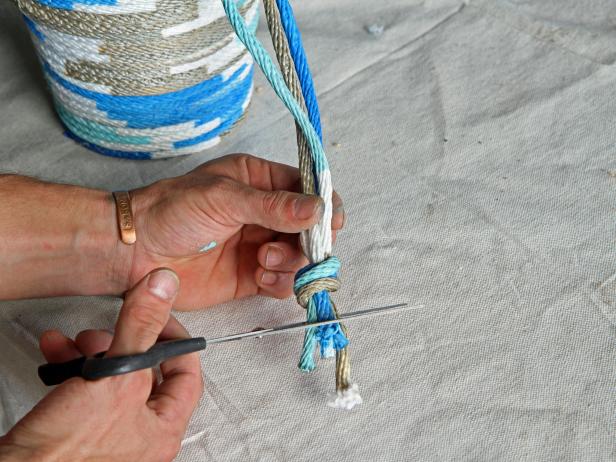
Create Hanger
Insert the potted plant, and tie the three previously-knotted ropes together at the top. Cut off excess rope.


