How to Grow Your Own Wedding Flowers
From planning to walking down the aisle, Jennie Andrews shares her journey of growing and arranging flowers and herbs for her September, East Tennessee wedding. See each stage of the process, learn from Jennie’s mistakes and get gorgeous inspiration to grow your own cut flower garden — whether it's for your wedding or simply for the joy brought by growing beautiful blooms.


Photo By: Kayla Fletcher
Photo By: Jennie Andrews
Photo By: Kayla Fletcher
Photo By: Jennie Andrews
The Motivation
Though a monumental task, growing and designing my own flowers was one of my favorite parts of planning and prepping for my September wedding. Though I’m a lover of all things DIY, I don’t necessarily consider myself a seasoned gardener. I’ve kept a garden for a few years, learning as I go, and I have gotten so much joy from the process. So when my fiancé and I began planning a wedding, I decided to combine my loves of backyard gardening, DIYing something beautiful and a good challenge by growing my own flowers for the bouquets, centerpieces, corsages and flower crowns.
See More Photos: 75 Ultra-Lush Wedding Bouquet Ideas
Garden Game Plan
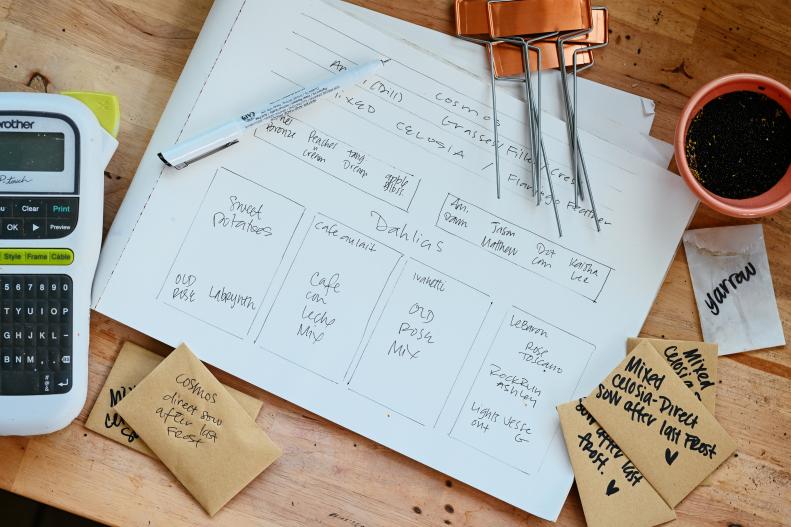
As with any good experiment, I started with a lot of planning. Dahlias, my favorite flowers and the centerpiece blooms of my vision, peak in the late summer/early fall here in Zone 7. We chose a September 25 wedding date to ensure the maximum number of blooms, but with little chance of early frost. For the rest of the flowers and filler, I chose a mix of annuals, including celosia and cosmos grown from seed and easy-to-grow perennials, including sedum and hydrangeas, that come back year after year. The annuals can be sown directly into the soil, while the perennials can be picked up as plant starters, making both options easier for a novice gardener than seeds that need to be started inside and transplanted. Mapping out the locations of the plants made prep much easier and kept me organized as they began to grow.
Learn More: 20 Flowers for a Cutting Garden
The Star of the Show
In Zone 7, Dahlias are planted in the spring as tubers immediately after the last frost. I ordered tubers within a single color palette, but with variation in the flower type and size to maximize my small growing area. Because these were to be the stars of the show, I focused on getting the dahlias planted as soon as I felt we were safe from a late frost. Dahlias can be notoriously slow to bloom, so I wanted to give them ample time. If the wedding date had been any earlier, I would’ve started the tubers inside in pots and transplanted them to give the dahlias some extra time.
Learn More: How to Grow and Care for Dahlias
Prepping the Beds
I planted about 30 dahlia tubers in six raised beds. I built these two beds just for the project. Dahlias love well-drained soil, so they are particularly suited for raised beds. To keep the project manageable, I only planned to grow enough flowers for my bridal bouquet, about five large arrangements, wrist corsages for the mothers and a crown for the flower girl, as well as some extra blooms to add pops of color to the serving table.
Get the How-To: How to Build a Raised Garden Bed Step-by-Step
Planting Time
Labeling each flower is so helpful for planning. In this case, I had a few specific varieties I definitely wanted in my bouquet, but I knew from previous years that a few dahlia tubers could fail to germinate. When one of those varieties failed, I was able to reorder and plant a duplicate tuber to assure I’d have that bloom. Likewise, planting as early as possible also ensured I’d have enough time to germinate a new tuber.
Learn More: How to Grow and Care for Dahlias
Sowing Seeds for Filler Plants and Flowers
For filler plants and flowers grown from seed, I converted an unused section of the garden into rows during the late winter/very early spring. I tilled the soil, added compost and created rows using weed barrier. I sowed seeds directly into the ground depending on the planting instructions for each and when their blooms would be at the peak. For example, celosia does best when planted into warm soil and can take up to 90 days to flower but has a very long bloom window, so I planted about mid-May to give it both nice warm soil and plenty of time to flower. On the other hand, ammi, a type of dill that makes a great filler, has a very short bloom window, so I planted those seeds exactly 75 and 90 days before the wedding. In addition to the celosia and ammi, I also planted bachelor buttons, zinnias, cosmos and a couple decorative grasses.
Learn More: Seed Starting Step-by-Step
The Centerpieces
Space constraints in my garden made it impossible to grow enough flowers to fill every table for our 120-person wedding. I collected pots (thank you, estate sales and thrift stores!) and planted them with herbs, grasses and greenery for an organic vibe. Sage and rosemary were the hardiest options. Keeping almost 100 potted plants alive through the summer was no easy task. Luckily, I had some help in the form of my retired mother, a seasoned gardener who could help me tend to the plants.
The Easiest Flower
Zinnias are revered as one of the easiest direct-sow flowers to grow. In the past, zinnias were only readily available in bright colors that wouldn't be considered traditional wedding colors. However, modern growers have bred new varieties that lend a decidedly more romantic vibe in creams and light pinks, like this zinnia 'Zinderella Lilac.'
Learn More: Planting and Growing Zinnia Flowers
It Wasn't All Perfect
A big part of this process was flexibility. When growing flowers, there is always a chance of something going wrong, no matter how hard you try. Despite their easy-growing nature, I lost all of my zinnias to a fungus. To keep it from attacking any other flowers, I pulled all the zinnias out and disposed of them as soon as I realized the severity of the blight. Luckily, I had planned ahead for the possibility, and by planting more of each variety than I knew I would need, had plenty of other options to fill in the gaps.
Learn More: How to Get Rid of Fungus in Garden Soil
The Perennial Workhorse
Hydrangeas are such a workhorse when it comes to cut flowers for weddings or for everyday arrangements. The perennials come back year after year, bloom all summer and can be cut for arrangements well into the fall. I have been planting hydrangeas for a few years, so I had plenty of blooms to use as filler without the need for much thought or time investment.
Learn More: How to Plant, Grow and Care for Hydrangeas
Instant Gratification
Cosmos are another excellent cut flower. They are very easy to direct sow and add lovely movement and whimsy to arrangements. The cupcake-style cosmos, with their frilly petals, are my favorite for weddings. I used white ones in my wedding bouquet.
Learn More: How to Plant, Grow and Care for Cosmos Flowers
For the Love of Celosia
Learning that I can grow celosia as a direct sown seed was maybe the best thing to come out of this whole experience. Most seed producers recommend starting it inside, so I had never experimented with it in my own garden, but I’m sure glad I did. I have a new love affair with its gorgeous plumes, rich textures and romantic colors. It was easy to grow as a directly sown seed and it added so much life to the arrangements. It will be a forever garden staple for me. Every garden and climate is just a little bit different, so sometimes what doesn’t work right down the street is totally doable in your own yard.
See More Photos: 10 Flowers That Give You Bang for Your Buck
Sunset in the Garden
As the dahlias began to bloom, I let the flowers guide me towards the final design and palette. This pink and orange dahlia became the main inspiration. I had originally envisioned a more dark and moody palette of pinks and dark wine, but this bloom was just so beautiful, I knew I couldn’t leave it out.
See More Photos: 20 Stunning Dahlia Varieties
Dahlias in Bloom
By late summer, the dahlias were putting on a show. I used this time to practice my bouquet-tying and flower-arranging skills. Dahlias produce more blooms the more they are cut, so I had plenty of flowers for this purpose.
See More Photos: 20 Stunning Dahlia Varieties
The Harvest Begins
I harvested all of the blooms the day before the wedding. In hindsight, I would definitely have allotted more time (or more help) for both the harvest and the arranging. Cutting the flowers, stripping leaves to prep the stems, and designing the bouquets was quite time consuming, even with help. I only planned to tackle my bouquet, four to five large arrangements, wrist corsages for the mothers and a crown for the flower girl. As it turned out, that was all I could’ve possibly accomplished with the time I had.
See More Photos: 10 Top-Notch Flower Arranging Tips
The Best Tools
I’m so glad I ordered floral buckets for an easy way to harvest and transport the flowers. They were inexpensive and helped me keep the blooms organized. In practicing the bouquets and arrangements, I came to rely on a few tools over and over, including a good sharp pair of garden snips, floral tape, floral frogs, a floral hydrator to extend shelf life and floral wire. We are also lucky to have a family member with a walk-in cooler, and we were able to store the flowers overnight so they stayed fresh and beautiful.
See More Photos: 10 Top-Notch Flower Arranging Tips
Prepping Stems
Tying bouquets and arranging blooms requires each stem to be prepped. Prepping requires removing leaves, trimming the ends and dunking the stems in a floral hydrator. Having another set of hands or two to prep stems while I designed the arrangement was a big help to keep the process moving.
See More Photos: 10 Top-Notch Flower Arranging Tips
Floral Frog
For smaller arrangements, I used floral frogs, heavy discs studded with spikes for supporting stems, in shallow dishes. They are more eco-friendly than floral foam as they are forever reusable. I even have some antique ones in my collection.
See More Photos: 10 Top-Notch Flower Arranging Tips
Floral Foam
While I try not to use floral foam often, the larger containers I chose for the wedding needed a bit more support than a floral frog could offer.
See More Photos: 10 Top-Notch Flower Arranging Tips
Designing the Arrangements
While I don’t have a background in floral design, I love making arrangements to take to friends and neighbors, so over the years, I’ve developed a little bit of a personal style. I love loose, wild arrangements that don’t require a lot of precision. I started with a couple “showstopper” blooms placed at various heights, and then added filler flowers and greenery.
See More Photos: 10 Top-Notch Flower Arranging Tips
My Bouquet
Learning to hand-tie a bouquet was one of the hardest parts. About 200 how-to videos and 20 practice bouquets later, I settled on a method where one hand essentially becomes a vase and the other hand places blooms into the "vase." Having an extra set of hands for this part was absolutely necessary to prep and hand me the stems. Again, I started with a standout bloom, and then added and rearranged until I got the shape I wanted. I finished it off with floral tape and some silk ribbon.
See More Photos: 10 Top-Notch Flower Arranging Tips
Wrist Corsages
For our mothers' corsages, I ordered slim gold bangles from Etsy and used floral wire to secure a dahlia bloom and a bit of greenery to each. I had the bangles engraved with our wedding date and a message to our moms as a keepsake.
Get the How-To: 3 Totally Unique Ways to Make (and Wear) a Corsage
Organic, Romantic and Eco-Friendly
I love the way the pots looked on the tables. The organic vibes of the herbs in limewashed pots balanced perfectly with the whimsy of the florals. Some of the larger potted plants also doubled as thank you gifts for some of our close friends who helped with the wedding, which also meant very little waste. I love the thought of rosemary or sage from our wedding growing in a friend’s yard.
See More Photos: 63 Gorgeous DIY Wedding Centerpieces
Keeping It Simple
For some of the smaller pots, we didn’t even plant the herbs. We simply waited until 2 days before the wedding and “planted” sprigs into wet soil.
See More Photos: 63 Gorgeous DIY Wedding Centerpieces
Pops of Color
Individual blooms, like this 'Sweet Nathalie' dahlia, paired with a bit of greenery were used throughout the wedding to add texture and splashes of color.
See More Photos: 50 Wedding Table Setting Ideas for Every Season
Perfectly Whimsical
I love how the colors and the containers came together to create such a unique and whimsical look. This concrete planter was one of my favorite finds for the wedding. She looks so pretty with a head full of flowers.
SHOP | GRECIAN BUST POT | ANTHROPOLOGIE: Starting at $28
Special Touches
The larger arrangements sitting around the venue added a special touch and made it feel that much more special. I’m glad I concentrated on a few larger arrangements that everyone could enjoy as opposed to smaller arrangements to spread across many tables.
See More Photos: 50 Wedding Table Setting Ideas for Every Season
If I Could Do It Again
Knowing what I know now, I think I would come up with a better game plan with more help for the actual execution. I would probably focus on tying the bridal bouquet, and to save some time and mitigate some stress, let someone else handle the arrangements and extras. That being said, at my core, I am a creative gal who really enjoys a challenge, so I loved this process and would definitely do it again.
Get Inspiration for the Big Day: HGTV's Ultimate Wedding Guide