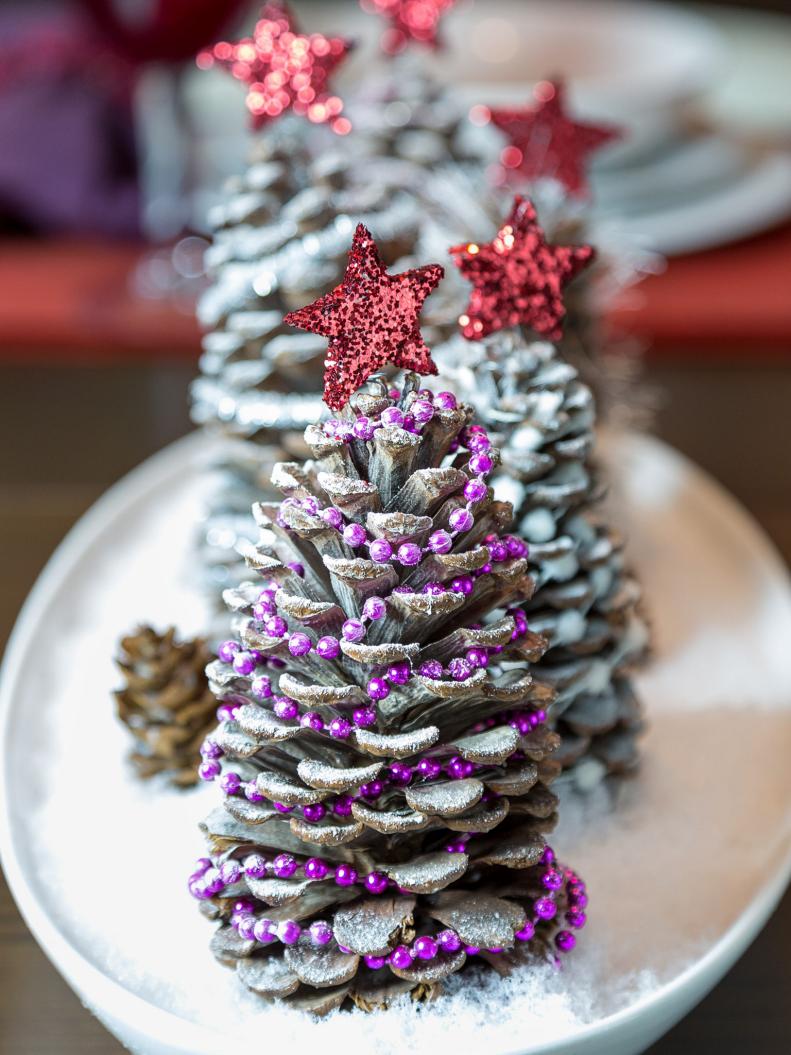
Pinecone Christmas Tree Centerpiece
Create a fun and simple pinecone Christmas tree centerpiece. This kid-friendly craft is a great way to dress up your holiday table.

By:
Sam Henderson
Related To:
Kid-Friendly Holiday Craft
Create a pinecone Christmas tree centerpiece for your holiday table. This craft is adorable and simple enough to get the kids involved.
From:
Sam Henderson
Gathering Your Materials
You will need: marker/ foam core/ craft knife/ cutting board/ fine gauge wire/ medium gauge wire/ wire cutters/ chopstick or pencil/ glitter/ craft glue/ beads and/or gift wrapping trim/ pine cones/ puffy craft clay/ platter/ spray snow/ artificial snow flakes
From:
Sam Henderson
Cutting Out the Tree Toppers
Use a marker to hand-draw star shapes (no need to make them perfect) on foam core. Place the foam core on a cutting board on a flat surface and carefully cut out the shape with a craft knife. NOTE: For best results, do this in at least two passes, roughly slicing the shape the first time and then making complete cuts on the second round. Repeat the process for as many trees as you are making.
From:
Sam Henderson
Preparing the Wire
Cut a piece of medium gauge wire at least 3 inches long. Wrap the wire around the end of a chopstick or pencil to make it spiraled, leaving one end straight. Set aside.
From:
Sam Henderson
Coating the Star
Completely cover the star shape with craft glue. Be sure to get glue into the corners on the edges of the stars. Sprinkle liberally with glitter on all sides and gently shake excess off onto a sheet of paper. Return the excess to the glitter container for the next star. Allow the glue/glitter to dry completely before proceeding.
From:
Sam Henderson
Adding the Wire
Insert the straight end of the wire into one of the corners of the edge of the star. Set aside.
From:
Sam Henderson
Attaching the Beads
Twist a 4-6” length of fine gauge wire to one end of the beads. Use the tail of the wire to wrap and twist it around one of the scales of the pinecone securing the beads in place.
From:
Sam Henderson
Wrapping the Pinecone
Wrap the beads around the pinecone filling in as much of the space between the layers of scales as possible. Cut the beads at the top of the pinecone and use another piece of fine gauge wire to secure it at the top.
From:
Sam Henderson
Giving the Tree a Base
Roll a ball of white puffy clay in the palms of your hands. Press the tree firmly into the ball, making the tree stand straight or leaning slightly for a touch of whimsy.
From:
Sam Henderson
Adding the Trees to the Platter
Add the trees one by one to the platter either in a straight line or slightly askew for variety.
From:
Sam Henderson
Dusting the Trees With Snow
Very lightly spray just the outside tips of the scales on the pinecones to make it appear as if they have a light dusting of snow. Use paper towels to wipe away any excess that has gotten on the platter while it is still wet.
From:
Sam Henderson
Adding the Stars
Use the curly end of the wire attached to the stars to wind them around the tops of the pinecones. Adjust the stars by bending the wire as needed.
From:
Sam Henderson
Filling the Platter
Fill the space between the pinecone trees with artificial snow flakes. TIP: Use a drinking straw to gently blow the snow into hard to reach places. This is also useful for blowing excess snow off of the pinecones without disrupting the rest of the snow.
From:
Sam Henderson
Festive and Fun
This craft is a fun and easy way to get the kids involved in decorating for the holidays.
From:
Sam Henderson

Photo By: Sam Henderson