DIY a Trendy Corkboard Wall Mural for a Tween Homework Station
Paint fun stripes on the wall then add cork to it to make a mural that is totally cool and functional too.

Photo By: Jennifer Ramos
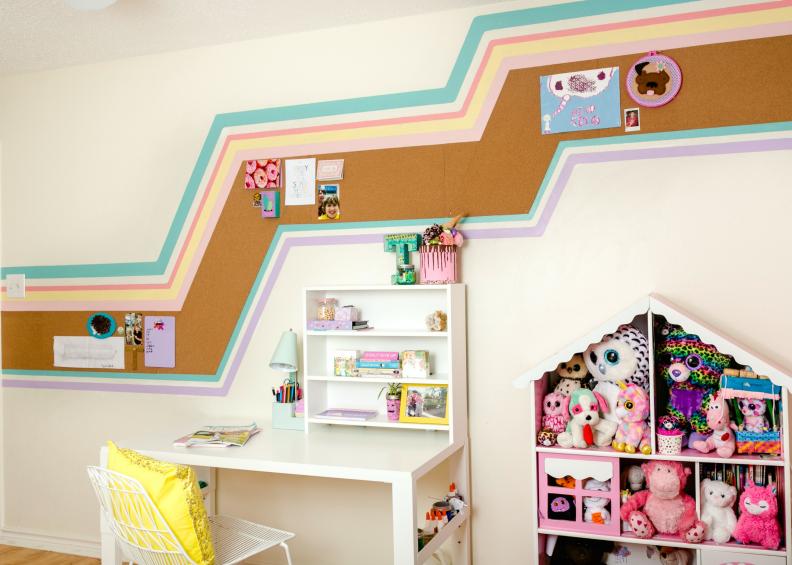
Turn Your Tween's Wall Into a Functional Mural and Study Spot
The homework gig starts to get serious for kids around the 3rd grade. When your tween asks for a study desk, what is a DIY obsessed parent to do but oblige? Not just a well-styled desk, but a matching mural and handy cork board too.
Make the Corkboard Part of the Design
Tweens love to hang things on their walls - kitten posters that say "hang in there”, ukulele chords to practice and pictures of classmates. Give them a place to study, but also an inspiring place to hang their accolades and reminders.
Gather the Supplies
Most of the supplies are contingent on the style of the mural and the size of the desk. Paint and paintbrushes, a level, ruler, pencil, painter's tape,double-sided adhesive and cork on a roll are all recommended.
Lightly Draw the Design With a Pencil
Using a ruler, level and pencil, outline the striped pattern. Our mural goes the length of the entire wall. Plan the design around the furniture that will against the wall. If it’s a desk, consider the height of the desk and make the corkboard easy for your child to reach.
Apply Painter's Tape for Clean Lines
To make sure your lines are straight and clean, apply painter’s tape along the pencil lines. One color at a time, fill in lines using a small roller brush. Allow each stripe to dry before placing painter’s tape onto the next stripe.
Curved Edges
To curve the corners of the lines, paint the rounded edges by hand using a smaller paintbrush. Use something like a small cup or glass to trace the rounded edge.
Plan for the Cork Stripe
Plan where the strip of corkboard will go, make that striped section extra wide so that color will show above and below the cork. Also, if any pencil lines are still visible remove with cleaner when the paint has completely dried.
Hang Corkboard
Measure and cut cork roll to the desired size. Take into account corners and curves when applying the roll of corkboard. Attach the roll of cork using strong double-sided adhesive.
Finishing Touches
If you’re concerned that the cork won’t hold up, use finishing nails around the edges of the cork, especially at the corners to make sure everything is secure. If the cork is thinner than your push pins you can always double it up.
No Excuses!
Kids will have no excuse not to do their homework now! As a matter of fact, with a study station this cute, they will want to do their homework.