


Celebrate Macrame Monday: Join a Twine and Wine Party
See how a group of friends gather at a hair salon to create, sip and enjoy each other's company.
Macrame is a craft that is worldwide and age-old, an art that fades out of fashion for decades and is resurrected again by new generations and fresh eyes.

Bob Farley
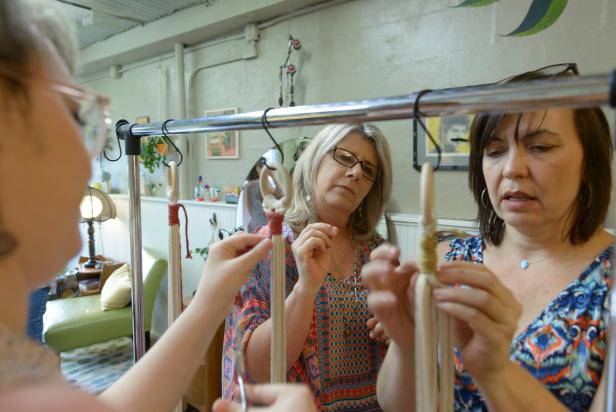
Rhonda Dodd is the sole proprietor of Parkside Salon, a super cool midcentury modern shop in the quaint village of Homewood, Alabama. On Mondays, after business hours, Rhonda leads friends in making macrame plant hangers.

Bob Farley
Rhonda learned to macrame a little over a year ago. Watching videos and learning to incorporate several decorative knots into one piece, she made a small wall hanging, splitting strands and tying knots as she went. Over the next few weeks, she posted pictures on social media documenting her progression and obsession along with alliteration captions like macrame madness, macrame meltdown, and macrame meditation. Soon, she got the hang of it. As the pieces became more patterned and complex, she brought them into her business, mixing commissions with hairdos. Rhonda is now thinking about teaching workshops — Twine N Wine — and this Monday gathering was a good trial run.

Bob Farley
As the workshop began, Rhonda rolled out clothes racks to the center of the salon. Hanging from hooks, wooden rings and long strands of cotton twine were prepped and ready, six cords per hoop. The group was instructed to take a length of twine, fold it in half, wrap the folded loop end around the wooden hoop, pull the trailing twine through the fold and then tug it tightly to secure the twine onto the hoop. This step — a larks head knot — was repeated until all six strands were affixed to a hoop.The doubling of the six strands gave each person twelve strands (three groups of four) to make their plant hanger.

Bob Farley
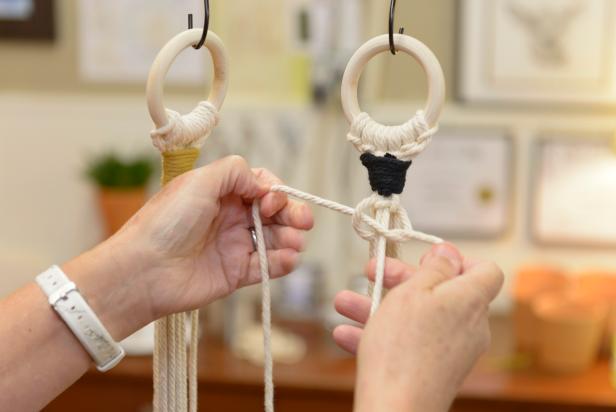
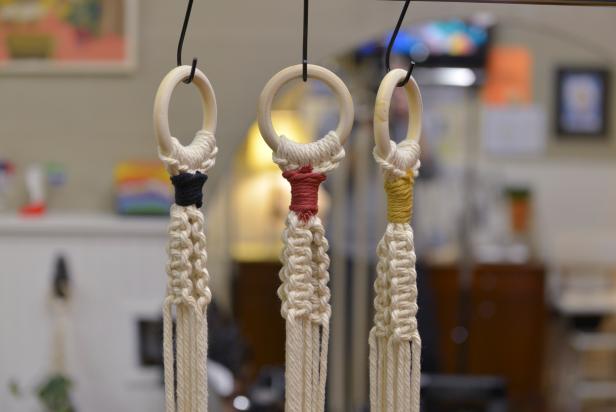
Next, Rhonda gave everyone cords to tie a gathering knot just underneath the larks head knot. Leaving a two-inch tail at the top, dropping down a couple of inches, and looping the cord back up to the top; she showed the group to pinch and hold all of their strands including the loop and to start wrapping the cord around tightly, winding around towards the bottom loop until gaining the desired look. Feeding the end of the cord through the bottom loop, both bottom and top tails were then pulled taught. The gathering knot tightened as they pulled the tails, and the ends were simply snipped with scissors to finish.
Bob Farley
To begin the square knots, Rhonda told her friends to start with any four strands and to think of the set of four as two outside and two inside strands. With the left outside strand, make a "4" shape and pinch. Then with the right outside strand, bring it in front of the horizontal part of the "4", back behind the two inside strands, and through the opening of the "4". Tighten the knot all the way up to meet the bottom of the gathering knot. This completes one half of a square knot. To tie the next half of the square knot, mirror the step on the right side.
Bob Farley
Watching Rhonda from the other side of the rack, half of the gals mirrored her moves starting with the outside strands on the opposite side. "It doesn't matter which side you start with as long as your square knots look nice and neat," Rhonda encouraged.

Bob Farley
The group continued to tie knots until they tied five complete square knots into each set of four strands.
Bob Farley
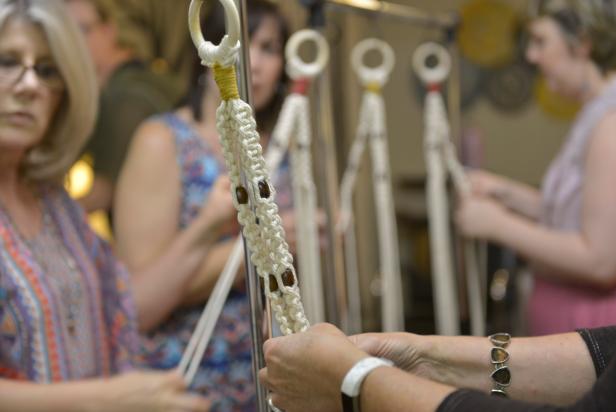
Rhonda then gave everyone a crochet needle and three wooden beads. The crochet needle helped with feeding the twine through the beads. "Feed the crochet needle through the bead, catch the twine, and pull it through," Rhonda directed.

Bob Farley
Once the beads were in place and secured with a square knot, the group continued to tie another set of five square knots, another bead, and another set of five square knots on each arm of the plant hanger.
Bob Farley
"After all of that tying of the outside strands, you're left with long inside strands and short outside strands," Rhonda said. "It's now time to split the strands and make the basket. Taking an outside strand from one set and the outside strand from the adjacent set, those become the inside strands, and bringing over the long strands next to them, they become the outside strands," she told the group. Two to three square knots were tied, another split was made, and then another two or three square knots.

Bob Farley
Rhonda gave everybody another short strand to make a gathering knot to finish the plant hangers. She instructed them to measure a hand's length, grab all the strands, and tie the gathering knot.

Bob Farley
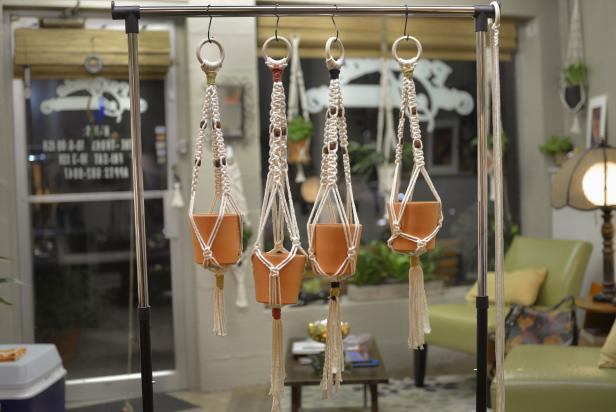
The group of friends tested out their macrame plant hangers with clay pots, hung them side by side on a rack, and were all pleased with the results. A good time was had by all, promises were made to fill the pots with plants, and plans were made to gather again.
Bob Farley


