


Upcycle Reclaimed Doors Into a Custom Storage Cabinet

How to Build a Cabinet Around Reclaimed Doors
Many beautiful antique doors and windows are orphaned from their original cabinetry, furniture pieces or homes. There are thousands of ways to repurpose them decoratively, but this project shows how to make them functional again as doors to a cabinet.

Photo by: Marian Parsons
Marian Parsons
Materials and Tools:
3/4" cabinet-grade birch plywood for cabinet sides, top and shelves, cut to desired dimensions
1x4 pine or poplar boards for top and bottom cabinet trim, left and right sides of face frame
1x6 pine or poplar boards for top, bottom and center of face frame
1x2 boards for shelf supports and shelf edging
(4) 4x4 boards, cut to 3" blocks
tongue-and-groove beadboard for cabinet's back
trim/molding for top and bottom of cabinet
4 wood tulip bun feet
1-1/4" pocket-hole wood screws
pocket-hole jig
screwdriver with drill and driver bits
1-1/4" and 3/4" brad nails
3" wood screws
brad nailer (or hammer and nails)
miter saw
table saw (or have plywood cut to size at hardware store)
straight edge
tape measure
pencil
paint, stain and/or wood finish (optional)
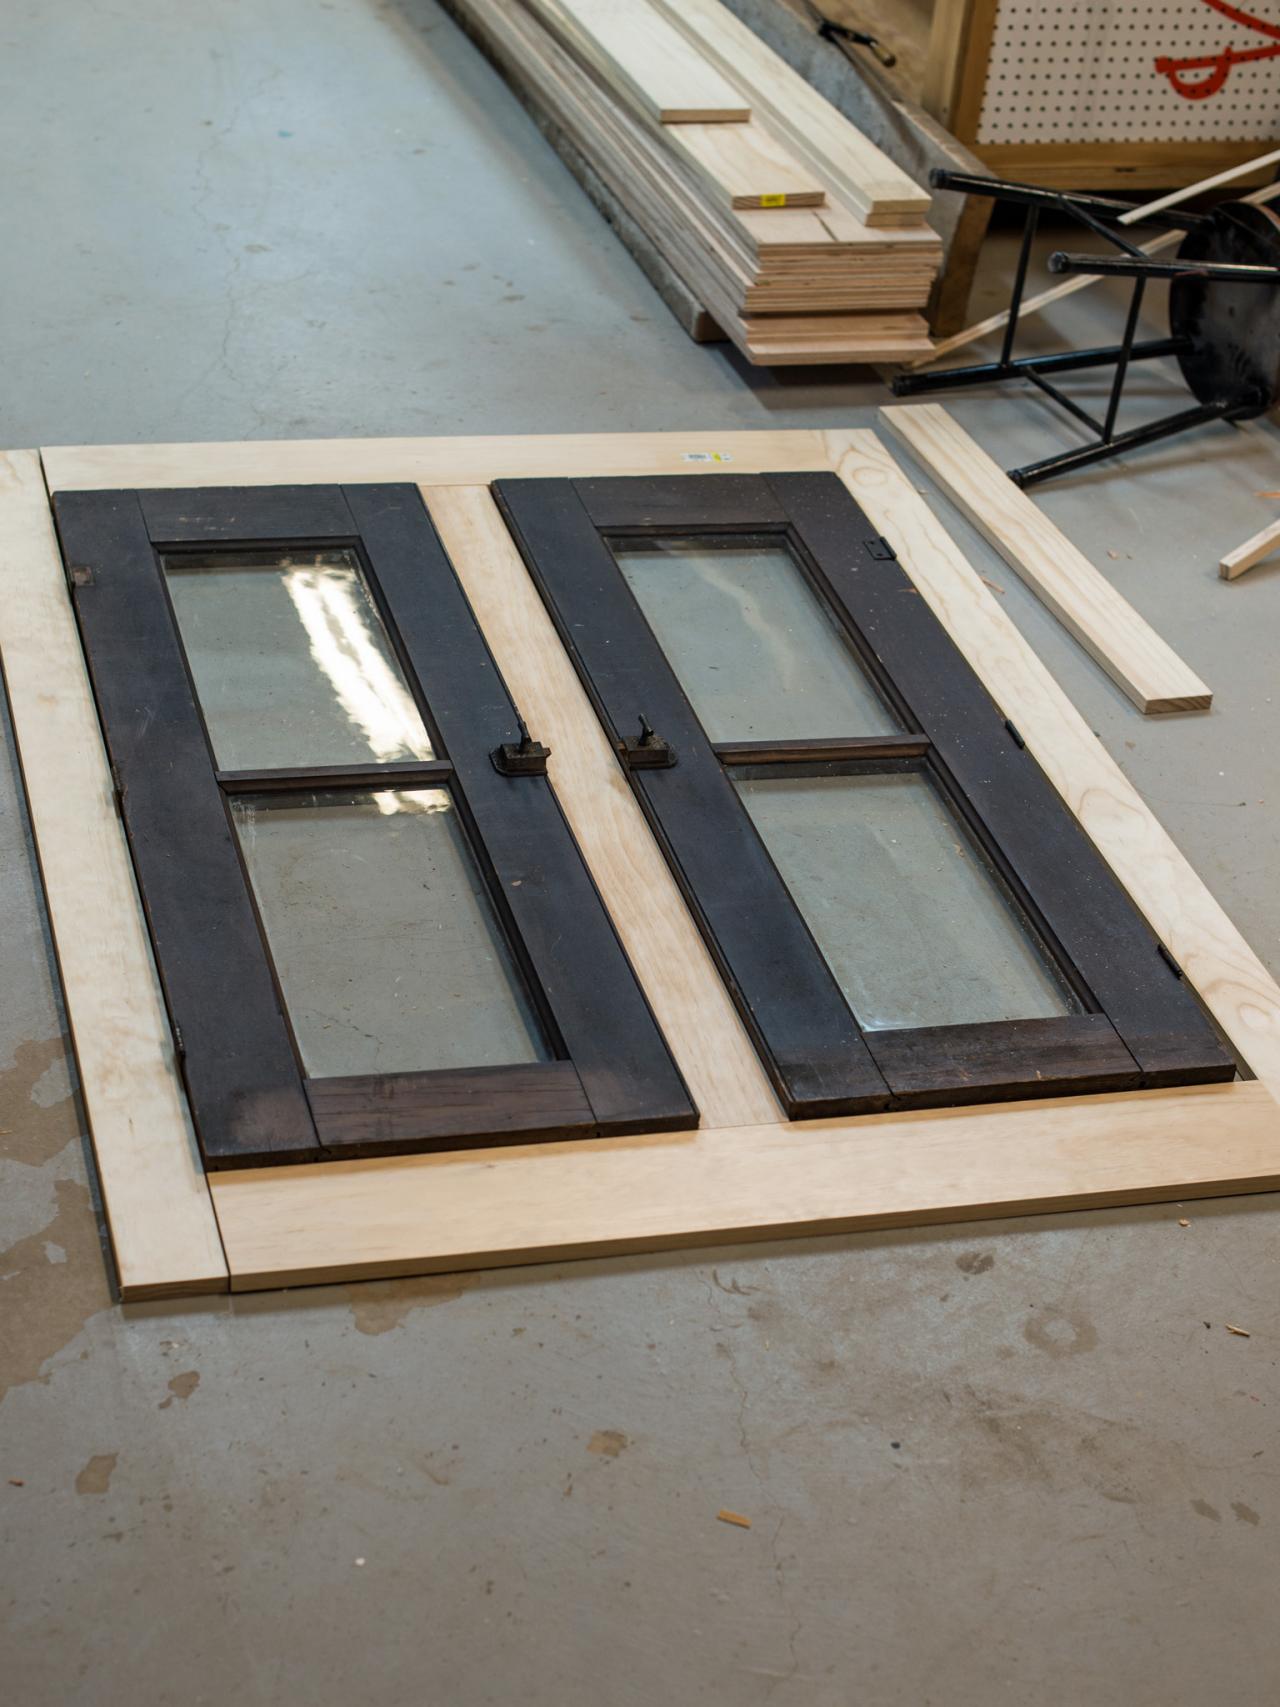
Dry Fit and Cut Cabinet's Face Frame
Lay salvaged doors flat on floor or work surface. Measure height and width of doors and calculate needed width and height of boards for cabinet's face frame. Use 1x6 boards for top and bottom of face frame and 1x4 boards for sides and center. Add an extra 3/16" to the measurement of each door on all sides, to allow for easy opening and closing. Cut to size and position around doors on work surface to ensure proper fit.

Dry Fit and Cut Face Frame
Lay salvaged doors flat on floor or work surface. Measure height and width of doors and calculate needed width and height of boards for face frame. Use 1 x 6” boards for top and bottom of face frame and 1 x 4” boards for sides and center. Add an extra 3/16” to the measurement of each door on all sides, to allow for easy opening and closing. Cut to size and position around doors on work surface to ensure proper fit.
Photo by: Marian Parsons
Marian Parsons
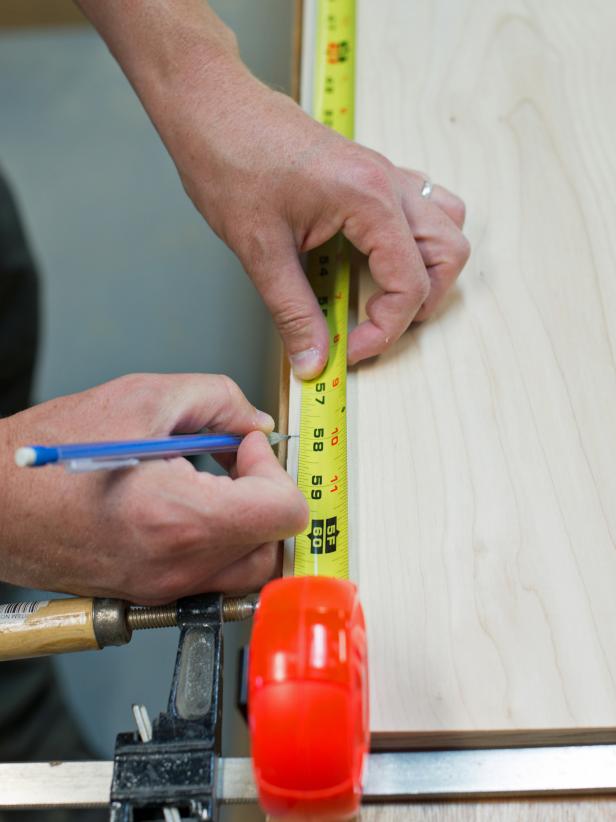
Mark Shelf Position on Cabinet Sides
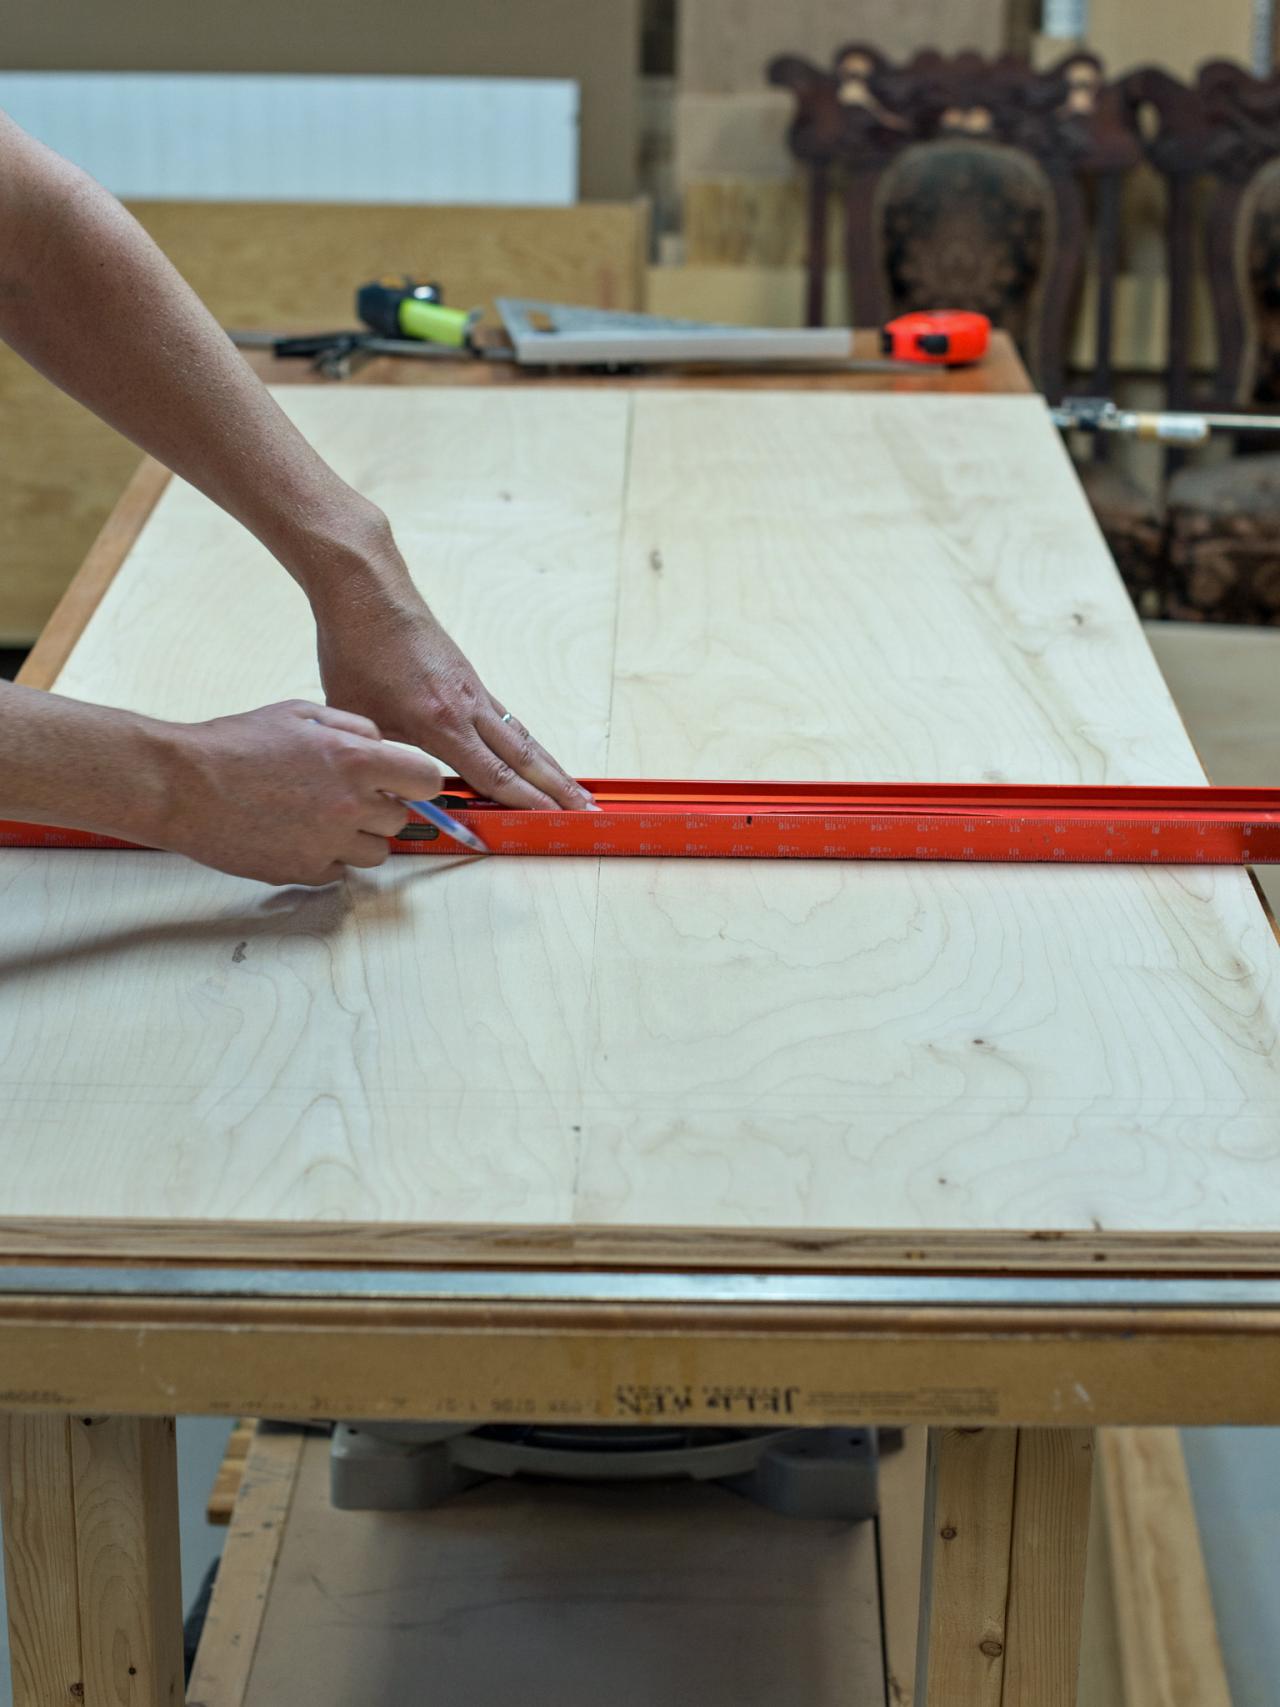
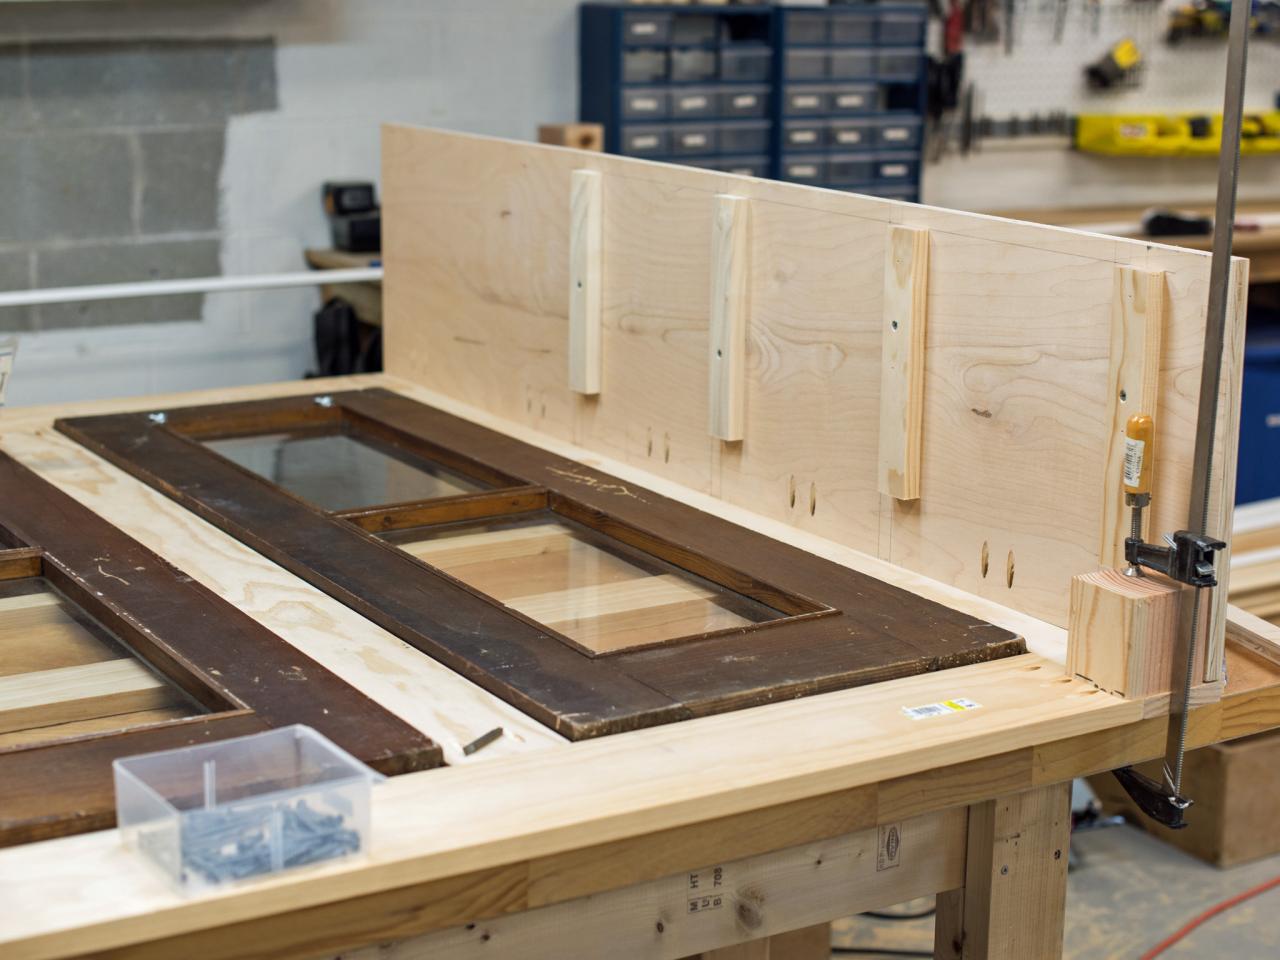
On a flat work surface, lay both sidepieces of cabinet side-by-side and clamp together. Starting from the top, measure and mark desired placement of shelves (Image 1). Mark top and bottom edge of shelf (which is 3/4" thick.) Keep in mind the face frame and how shelves will be visible though glass doors. Make corresponding marks on other sidepiece. Use a straight edge to connect marks, clearly showing where shelves and supports will be installed (Image 2).
Marian Parsons

Marian Parsons
Mark Shelf Position on Cabinet Sides
On a flat work surface, lay both sidepieces of cabinet side-by-side and clamp together. Starting from the top measure and mark desired placement of shelves. Mark top and bottom edge of shelf (which is ¾” thick.) Keep in mind the face frame and how shelves will be visible though glass doors. Make corresponding marks on other sidepiece. Use a straight edge to connect marks, clearly showing where shelves and supports will be installed.
Photo By: Marian Parsons
Cut and Attach Shelf Supports to Cabinet Sides
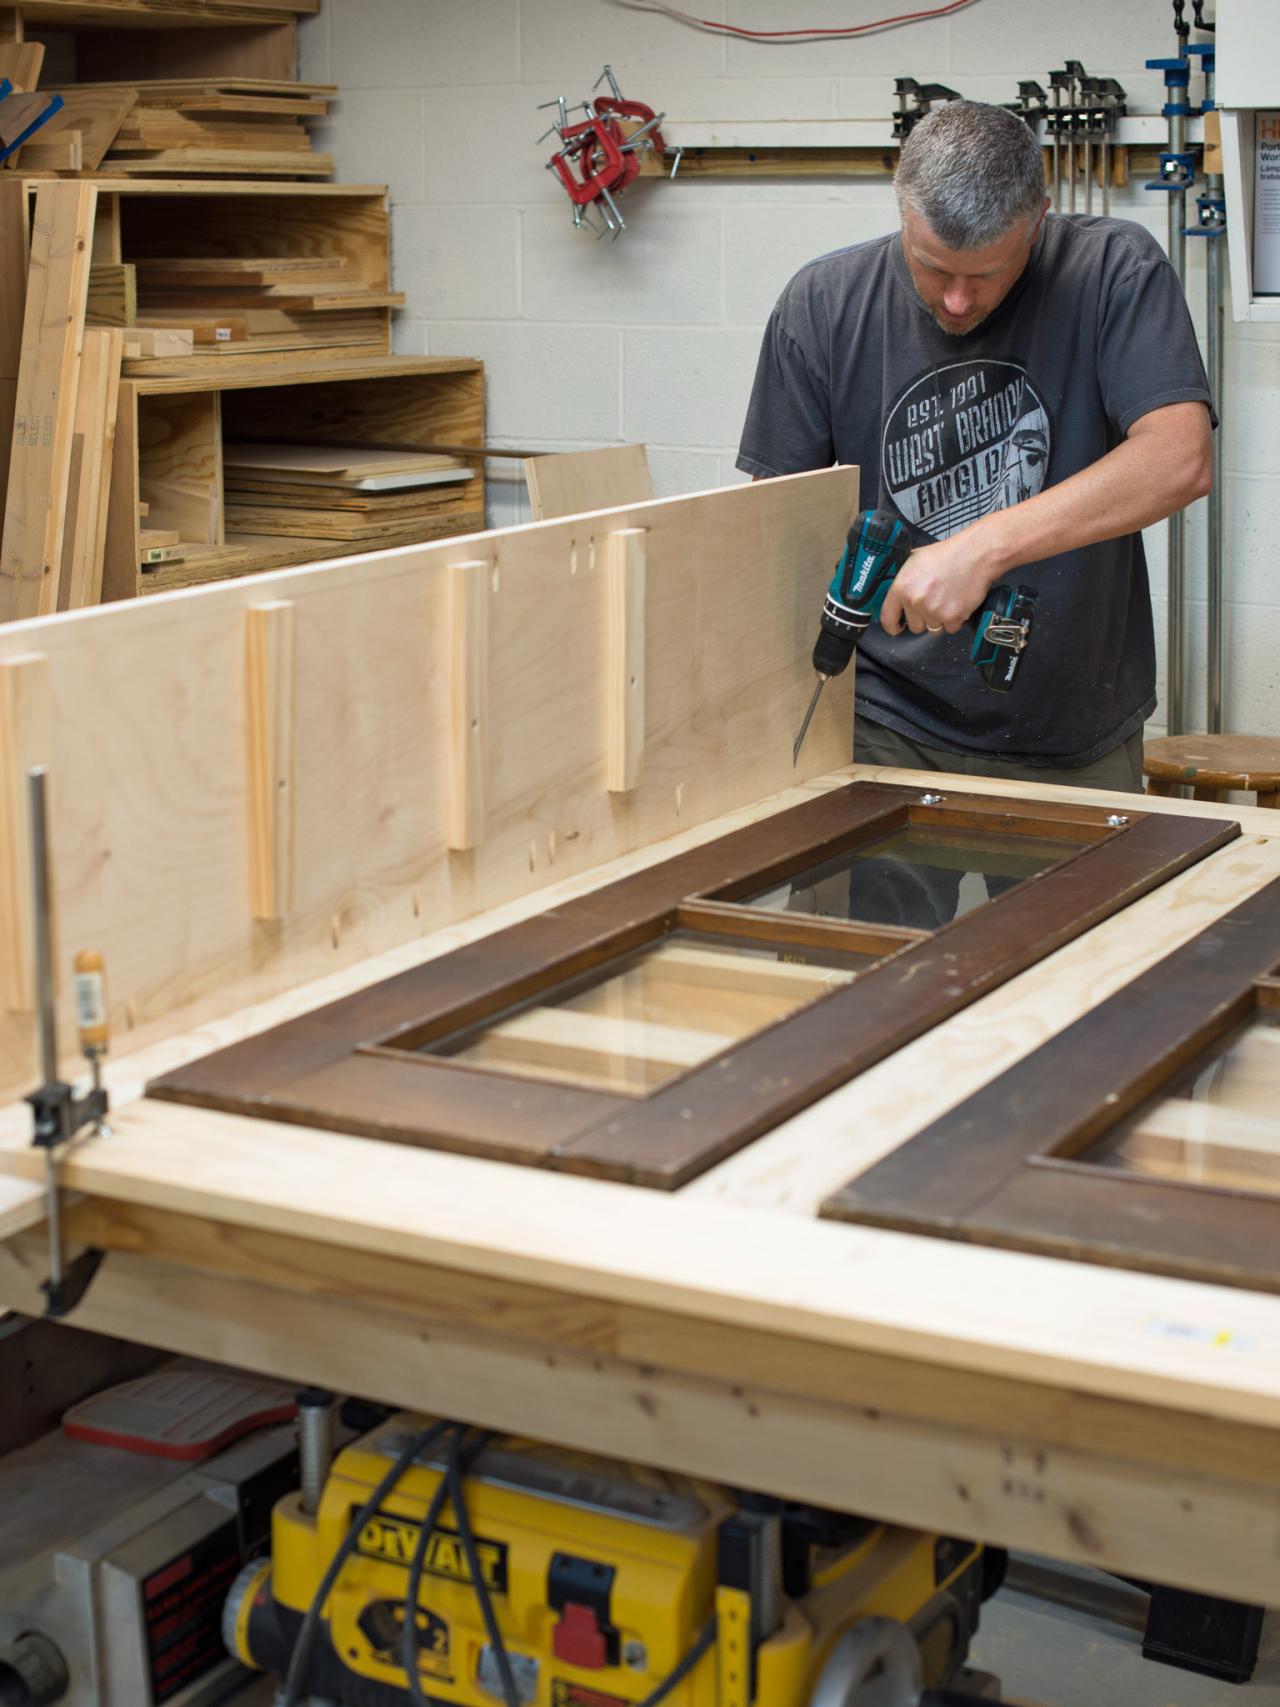
Determine width of shelves and needed supports, taking into account cabinet back (3/4" thick) and trim to cover raw plywood edge on shelf front. In this case, the sideboard depth is 14", shelf depth is 11" and the supports are 10-1/4" long, allowing for cabinet back and shelf trim in front. Cut shelf supports for each side out of 1x2 boards on a miter/chop saw to desired length. Position supports along marked lines and tack into place with 1-1/4" brad nails. Insert screws to secure even further.

Cut and Attach Shelf Supports to Cabinet Sides
Determine width of shelves and needed supports, taking into account cabinet back (3/4” thick) and trim to cover raw plywood edge on shelf front. In this case, the sideboard depth is 14”, shelf depth is 11” and the supports are 10 ¼” long, allowing for cabinet back and shelf trim in front. Cut shelf supports for each side out of 1 x 2” boards on a miter/chop saw to desired length. Position supports along marked lines and tack into place with 1-1/4” brad nails. Insert screws to secure even further.
Photo by: Marian Parsons
Marian Parsons
Assemble Face Frame
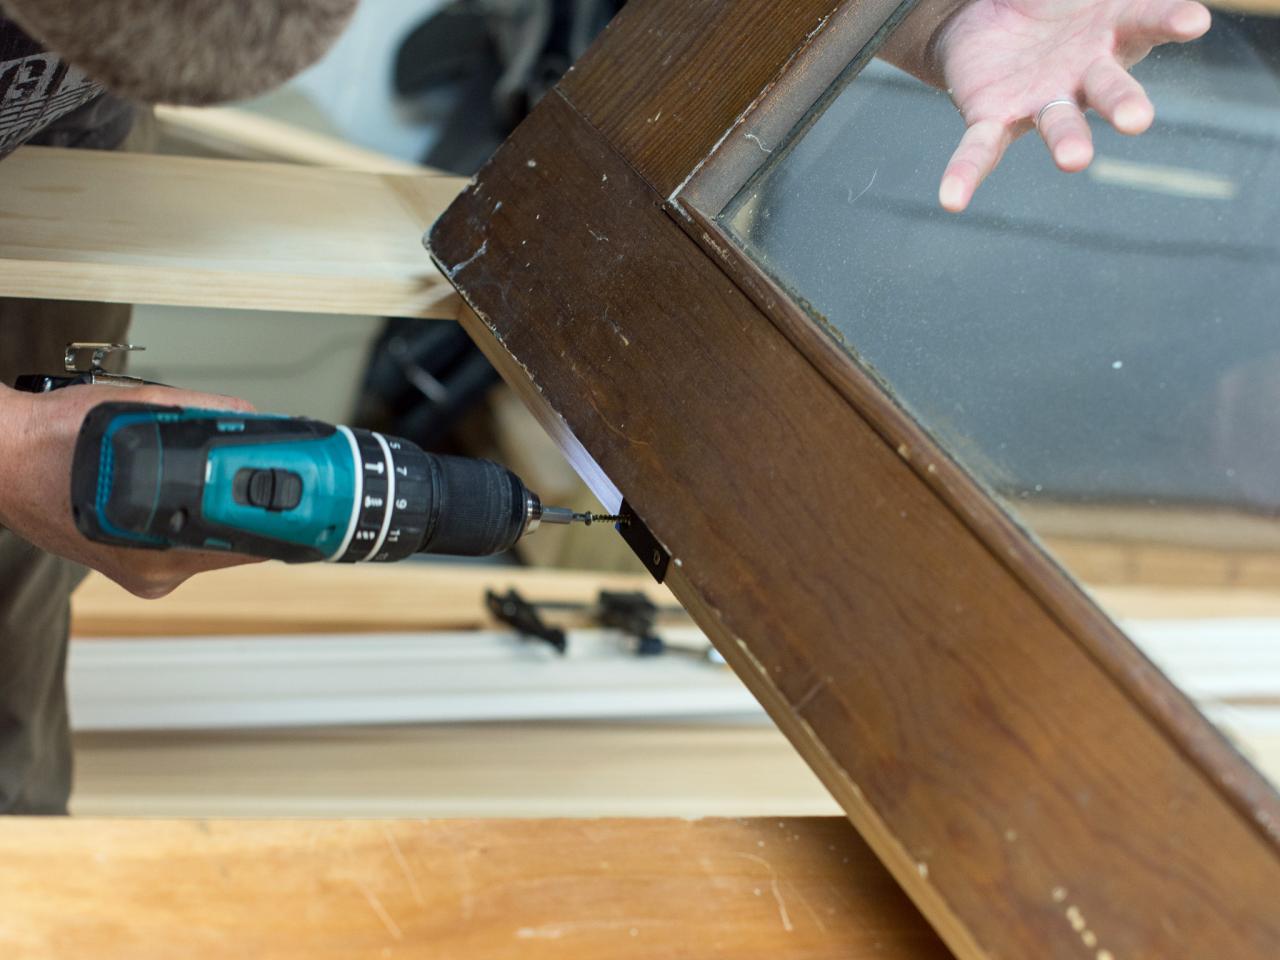
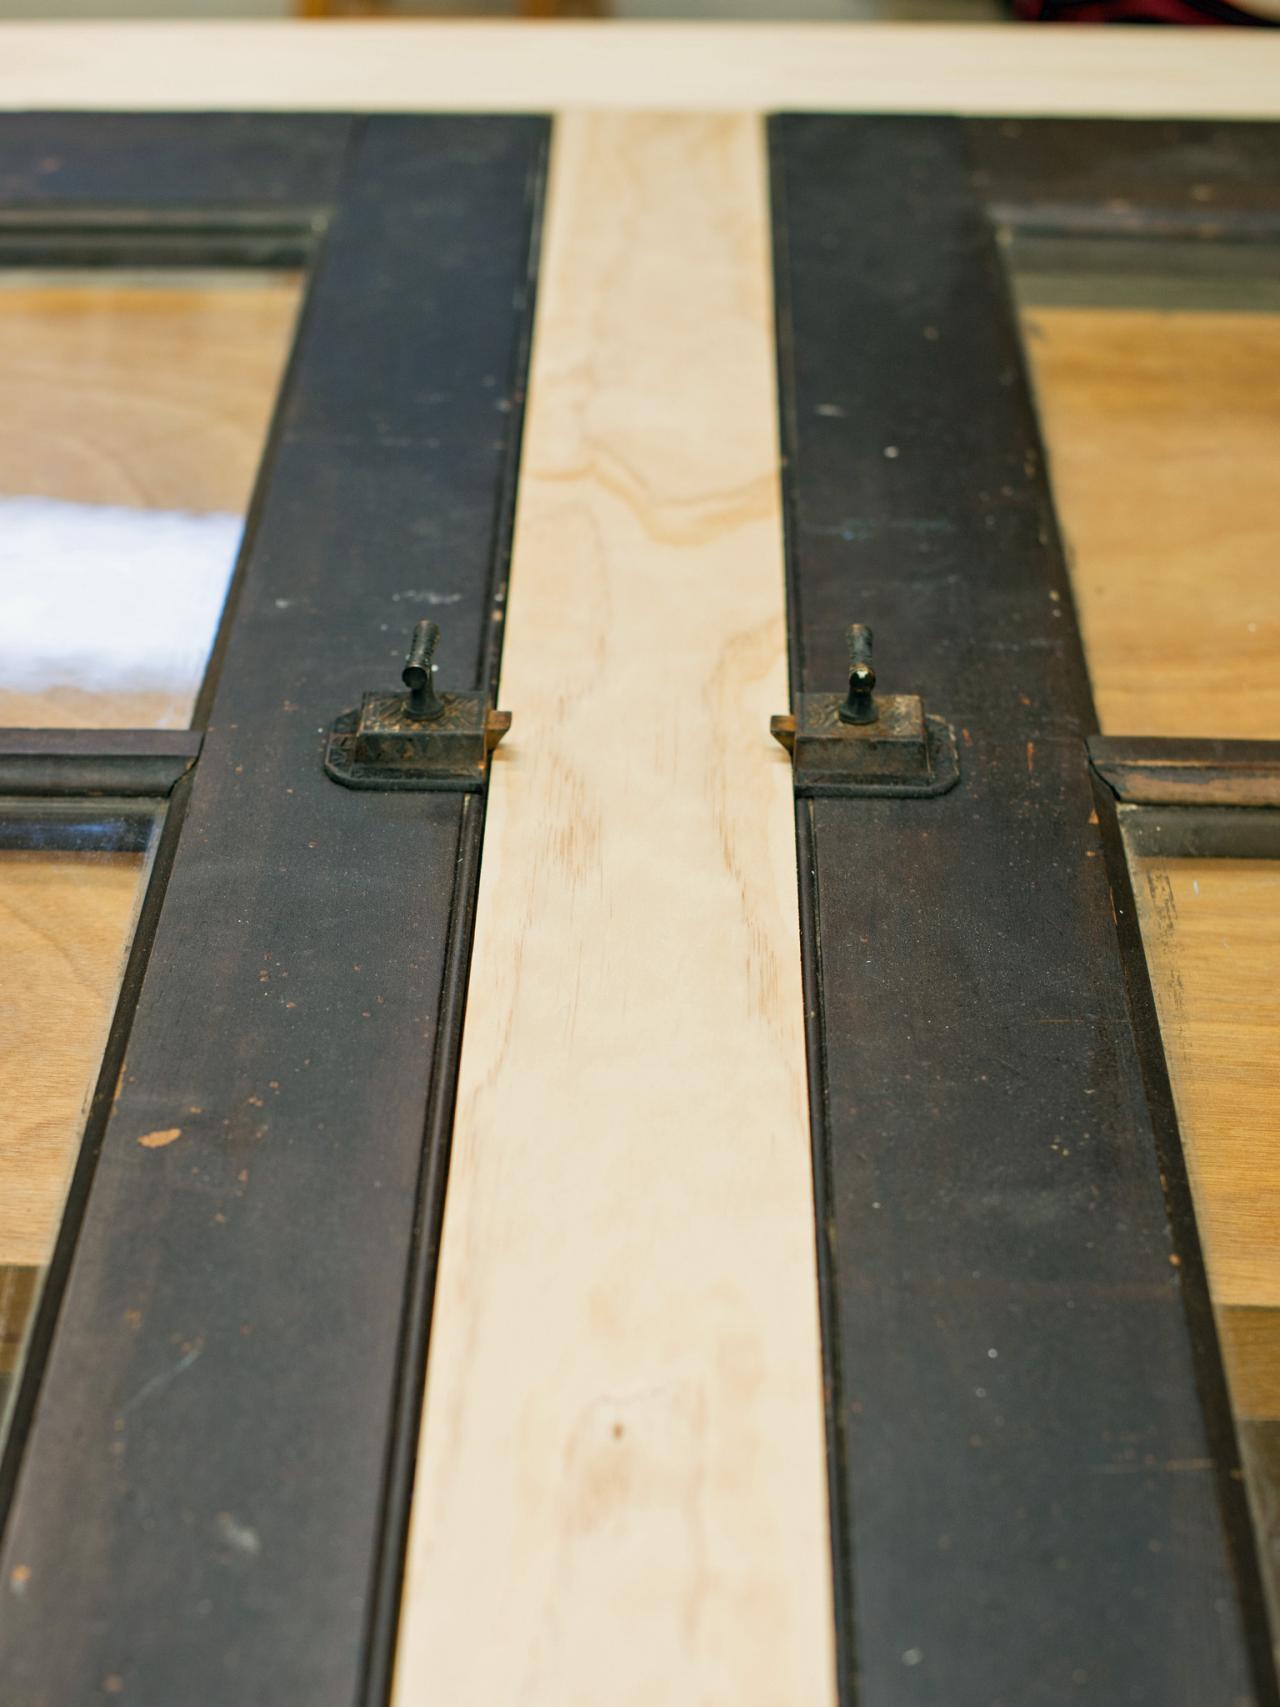
Assemble top and sides of face frame with screws from the backside, using a pocket-hole jig and 1-1/4" wood screws (Image 1). Lay doors, one at a time, inside face frame (Image 2) and attach to frame with hinges (Image 3), making sure front of the door sits flush with face frame. Insert center of face frame between doors and attached from back with pocket hole jig and 1-1/4" wood screws (Image 4).
Marian Parsons

Marian Parsons

Marian Parsons

Marian Parsons
Assemble Face Frame
Assemble top and sides of face frame with screws from the backside, using a pocket-hole jig and 1-1/4” wood screws. Lay doors, one at a time, inside face frame and attach to frame with hinges, making sure front of the door sits flush with face frame. Insert center of face frame between doors and attached from back with pocket hole jig and 1-1/4” wood screws.
Photo By: Marian Parsons
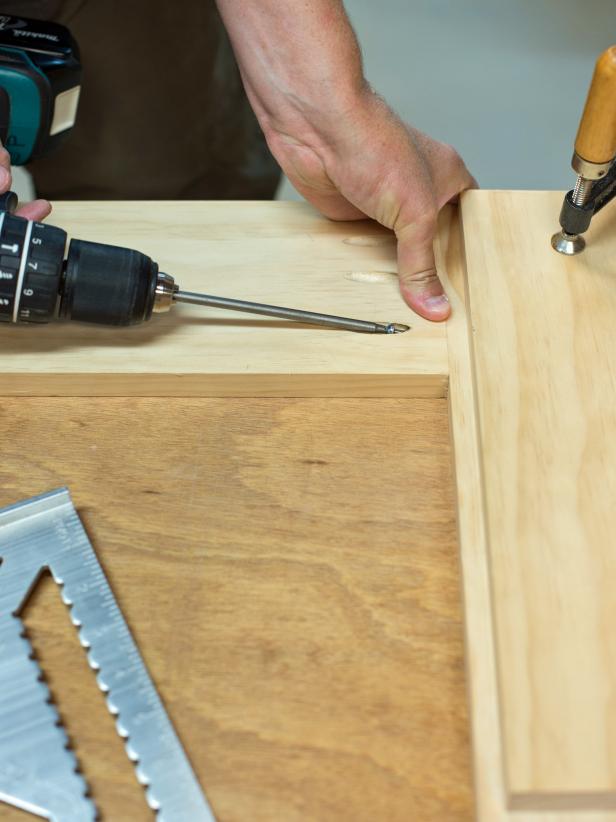
Attach Cabinet Sides
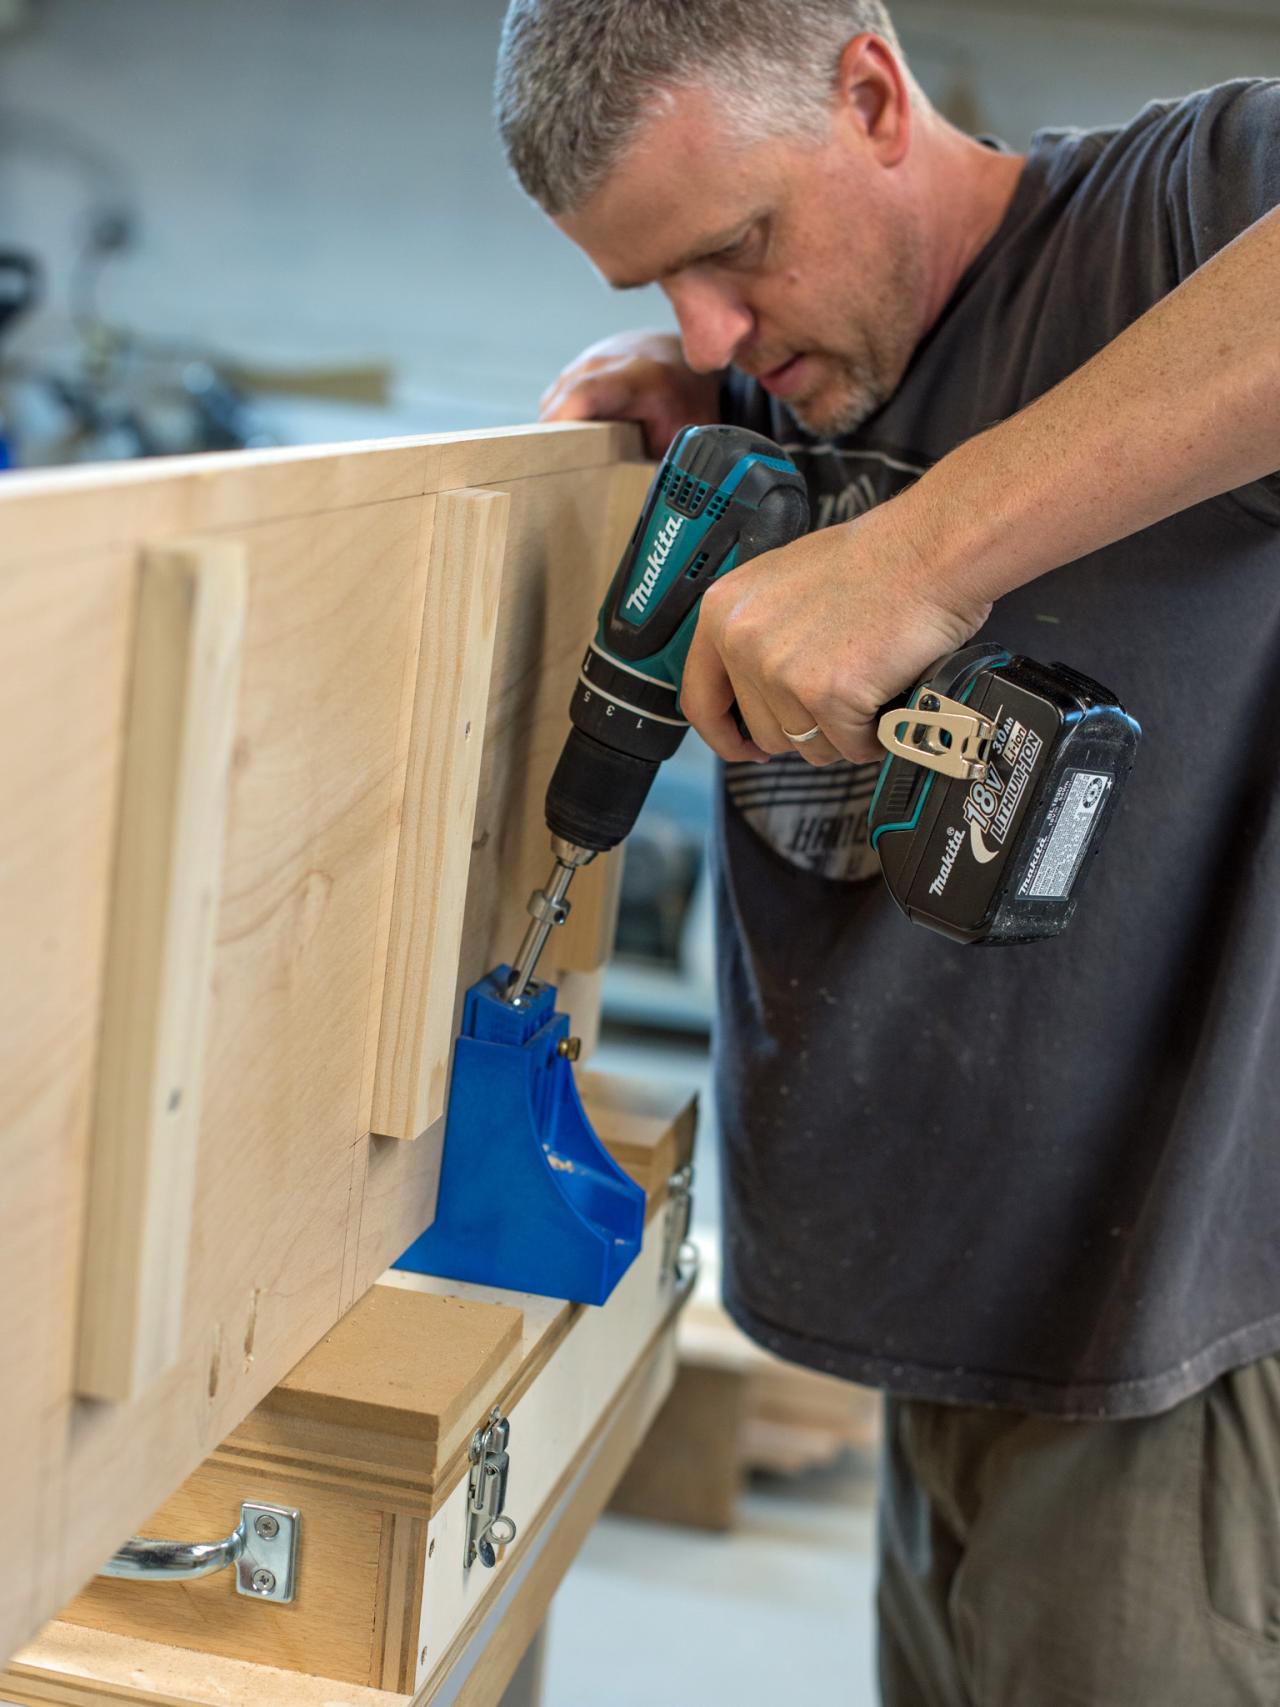
Attach one side of cabinet with pocket-hole jig and 1-1/4" wood screws to back side of face frame (Image 1). Using 3" wood screws, attach 4x4 wood block from front and side where two boards meet (Image 2). This will add stability and provide a place to attach cabinet feet. Screws will be hidden with trim. Repeat on second side (Image 3).

Marian Parsons

Marian Parsons

Marian Parsons
Attach Cabinet Sides
Attach one side of cabinet with pocket-hole jig and 1-1/4” wood screws to back side of face frame. Using 3” wood screws, screw 4 x 4” wood block from front and side where two boards meet. This will add stability and give a place to attach cabinet feet. Screws will be hidden with trim. Repeat on second side.
Photo By: Marian Parsons
Attach Top
Fit cabinet top inside sides and face frame. Attach with 1-1/4” wood screws from front and sides of cabinet. These screws will be hidden with trim.

Attach Top
Fit cabinet top inside sides and face frame. Attach with 1-1/4” wood screws from front and sides of cabinet. These screws will be hidden with trim.
Photo by: Marian Parsons
Marian Parsons
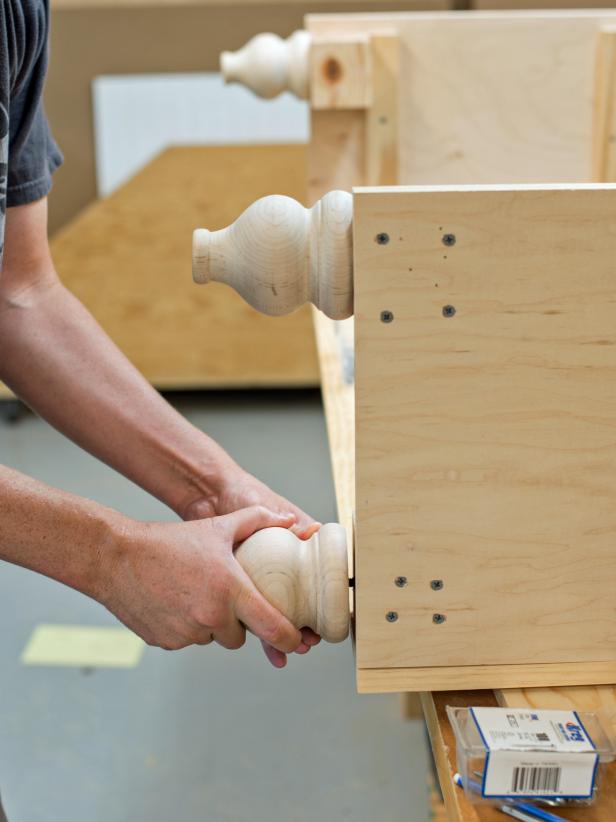
Install Support for Feet
Position one 4x4x3 block on inside of front corner, so it is flush with bottom. Insert 3" wood screws through side and front of cabinet into block (Image 1). Repeat on four other corners. Since back of cabinet is not on at this step, leave 3/4" space for back of cabinet. Wood screws will be hidden with trim. Screw tulip bun feet into wood blocks (Image 2).

Marian Parsons
Marian Parsons
Install Support for Feet
Position one 4 x 4 x 3” block on inside of front corner, so it is flush with bottom. Insert 3” wood screws through side and front of cabinet into block. Repeat on four other corners. Since back of cabinet is not on at this step, leave 3/4” space for back of cabinet. Wood screws will be hidden with trim. Screw tulip bun feet into wood blocks.
Photo By: Marian Parsons
Assemble and Install Shelves
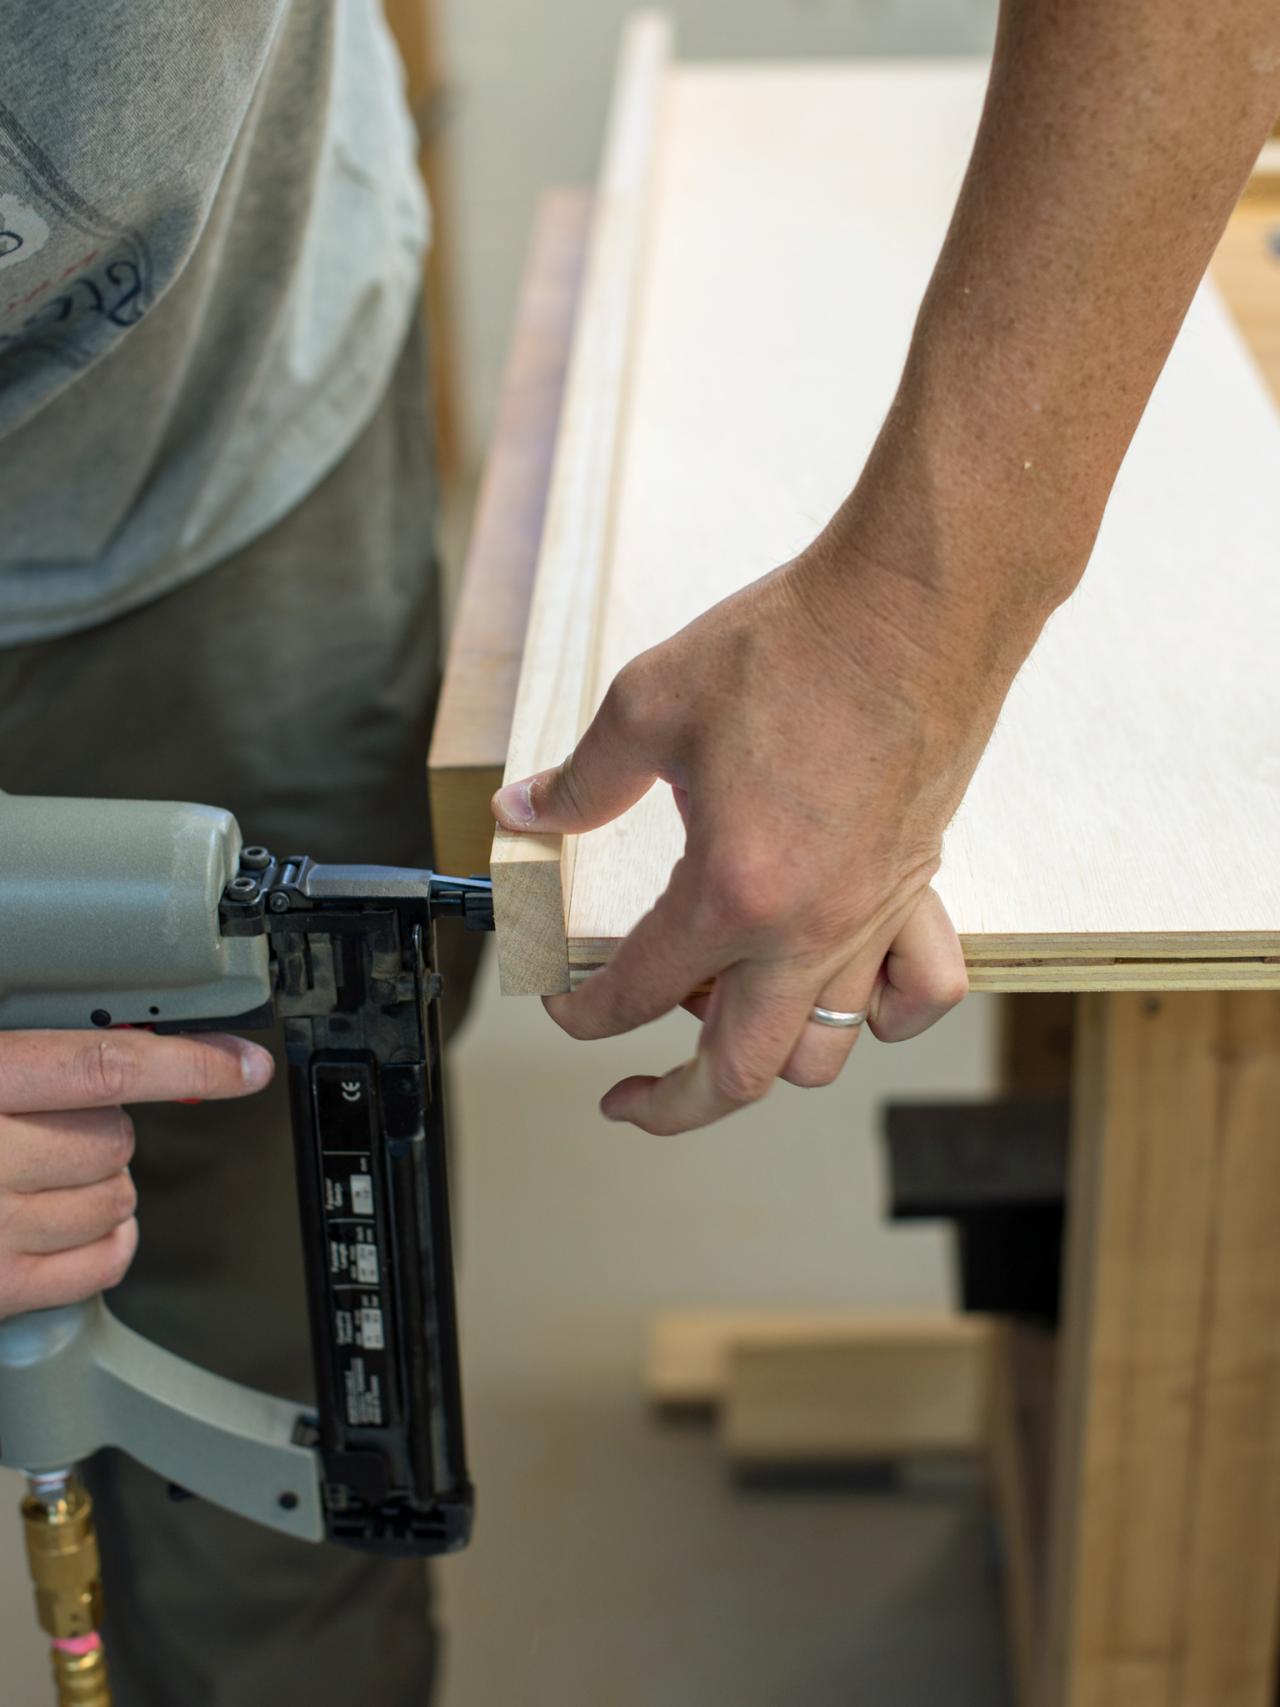
Cut 1x2 boards to width of shelves. Tack to the front of each shelf with 1-1/4" brads to cover raw plywood edge (Image 1). Position shelves on shelf supports and nail into place with brads (Image 2). Bottom shelf can be full width and depth of cabinet and does not require trim.

Marian Parsons

Marian Parsons
Assemble and Install Shelves
Cut 1 x 2” boards to width of shelves. Tack to the front of each shelf with 1-1/4” brads to cover raw plywood edge. Position shelves on shelf supports and nail into place with brads. Bottom shelf can be full width and depth of cabinet and does not require trim.
Photo By: Marian Parsons
Assemble and Install Shelves
Cut 1 x 2” boards to width of shelves. Tack to the front of each shelf with 1-1/4” brads to cover raw plywood edge. Position shelves on shelf supports and nail into place with brads. Bottom shelf can be full width and depth of cabinet and does not require trim.
Photo By: Marian Parsons
Attach Back
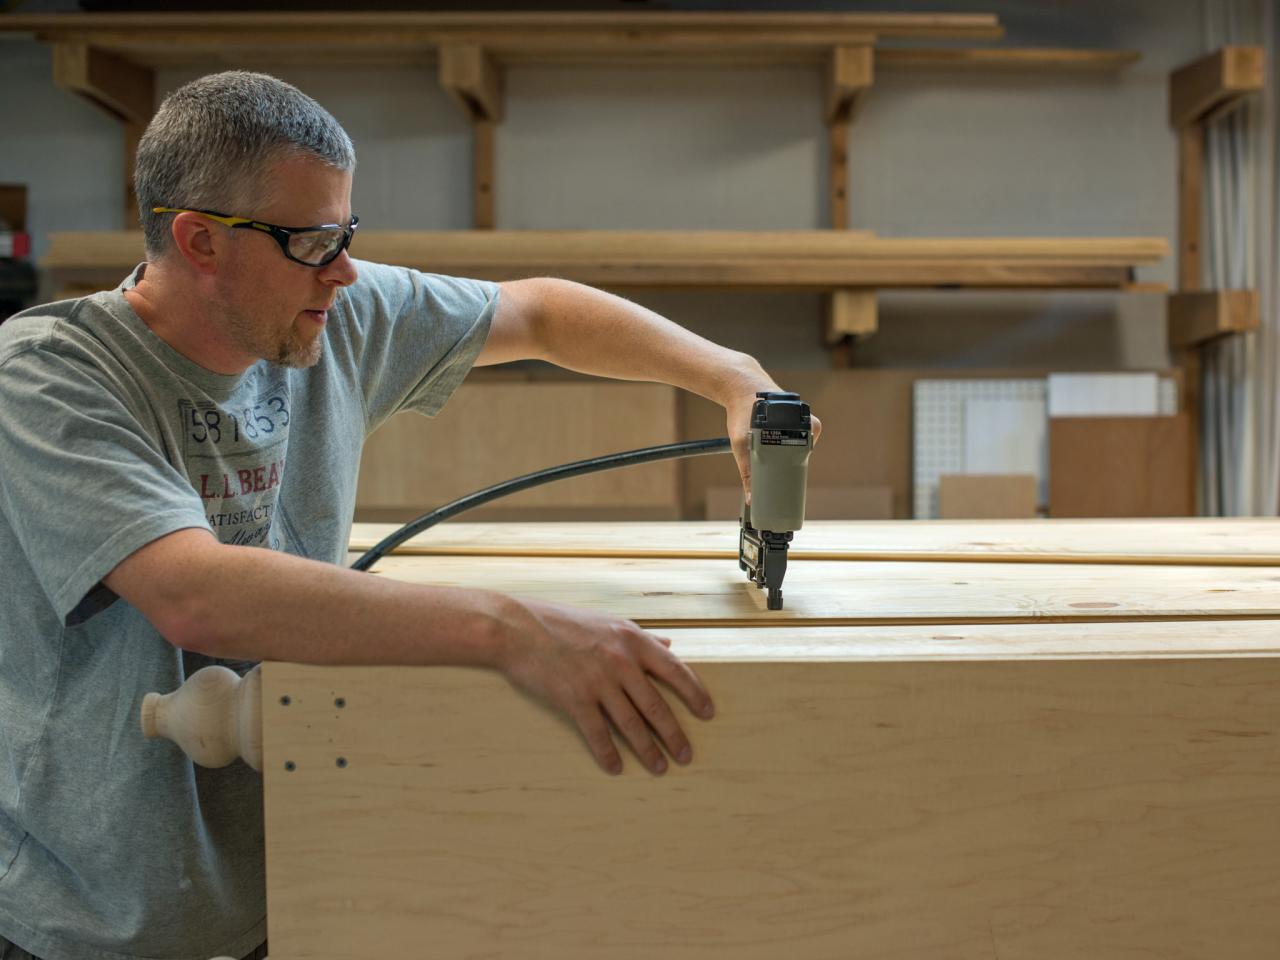
Measure, mark and cut tongue-and-groove bead board planks to size. Tack onto back through shelves, top and bottom of cabinet with 1-1/4" brads. Insert 3" wood screws through back into bottom wood blocks (foot supports) for additional support.

Marian Parsons
Attach Back
Measure, mark and cut tongue and groove bead board planks to size. Tack onto back through shelves, top and bottom of cabinet with 1-1/4” brads. Insert 3” wood screws through back into bottom wood blocks (foot supports) for additional support.
Photo By: Marian Parsons
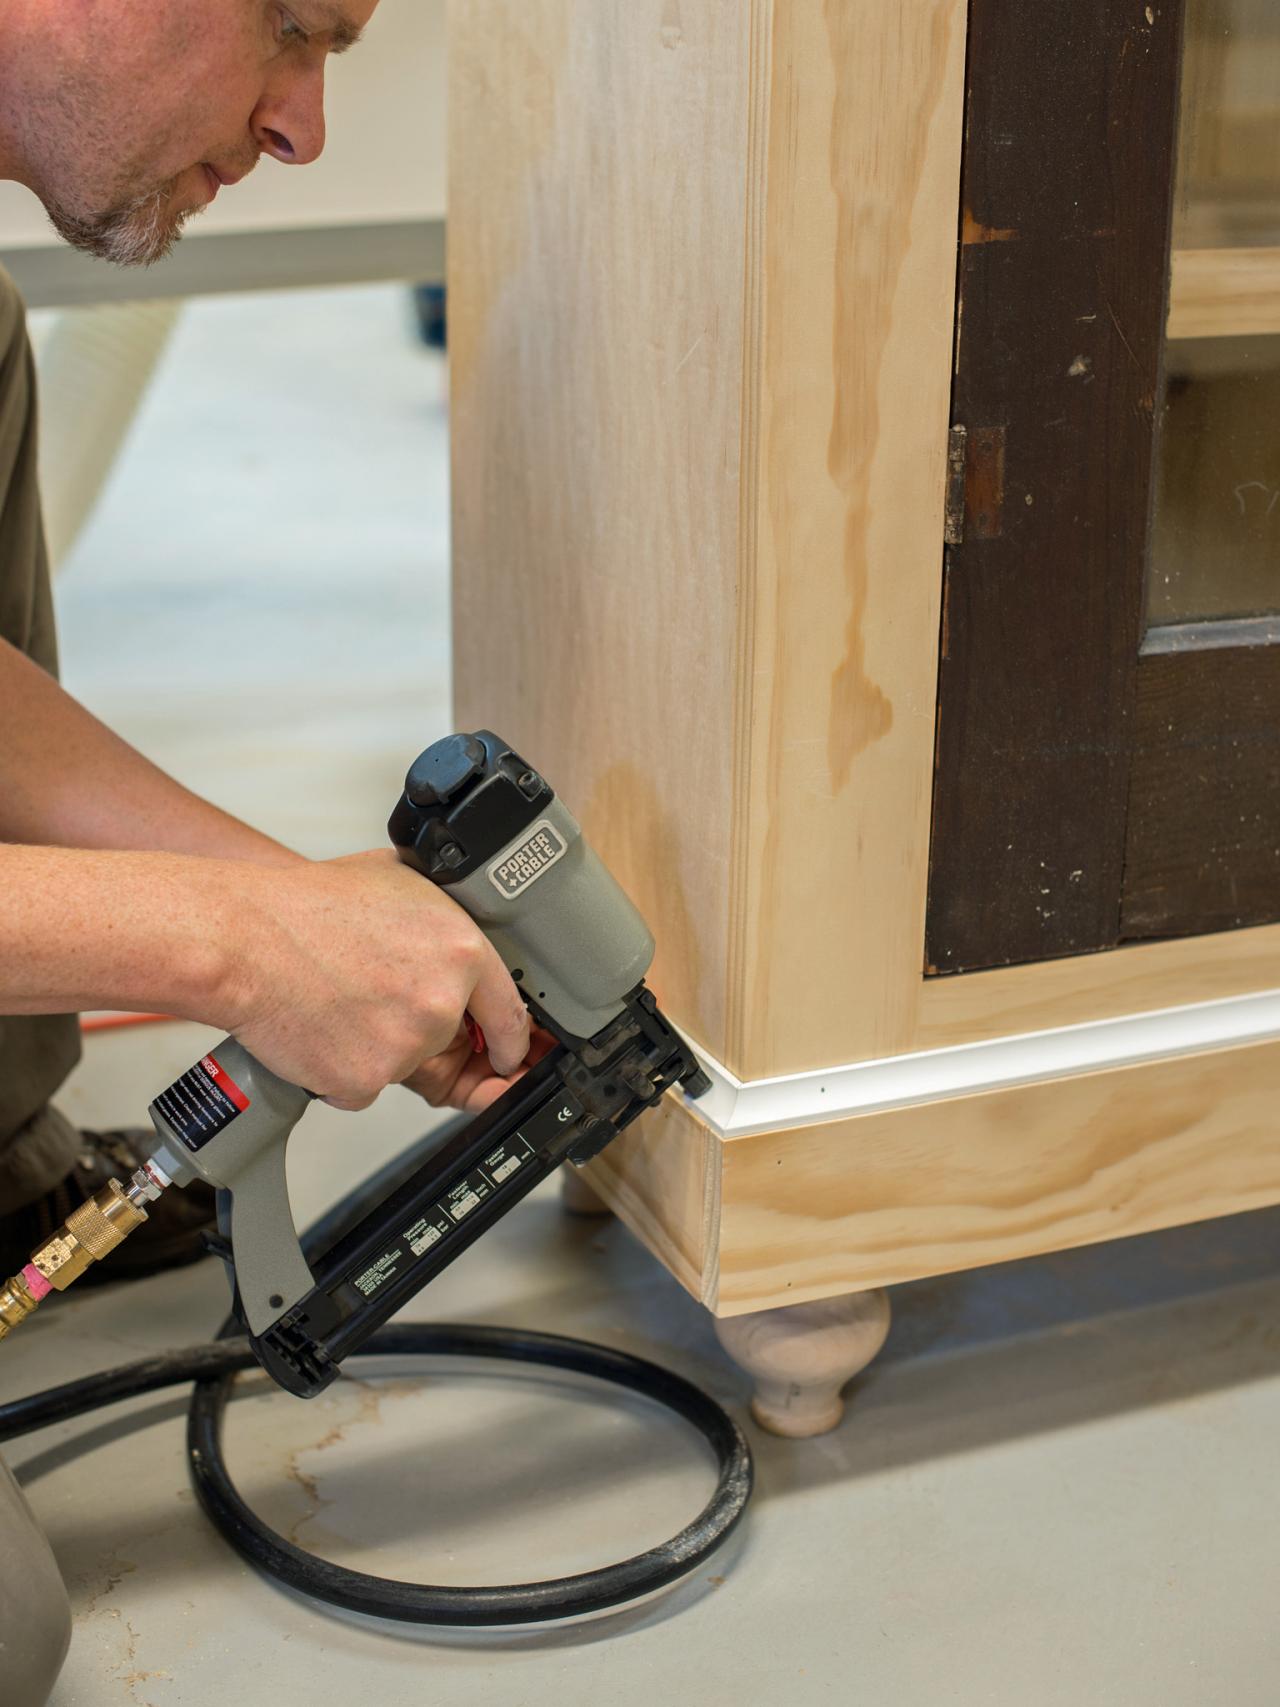
Add Decorative Trim and Finish
With brad nails (1-1/4" or 3/4" depending on size of trim), tack in 1x4 boards, cut to size, into top and bottom of cabinet (Image 1). Add decorative molding as desired, cutting to size of a miter saw (Image 2). Paint, stain or finish as desired (Image 3).

Marian Parsons

Marian Parsons
Marian Parsons
Add Decorative Trim & Finish
With brad nails (1-1/4” or 3/4” depending on size of trim), tack in 1 x 4” boards, cut to size, into top and bottom of cabinet. Add decorative molding as desired, cutting to size of a miter saw. Paint, stain or finish as desired.
Photo By: Marian Parsons
Add Decorative Trim & Finish
With brad nails (1-1/4” or 3/4” depending on size of trim), tack in 1 x 4” boards, cut to size, into top and bottom of cabinet. Add decorative molding as desired, cutting to size of a miter saw. Paint, stain or finish as desired.
Photo By: Marian Parsons
How to Build a Cabinet Around Reclaimed Doors
Many beautiful antique doors and windows are orphaned from their original cabinetry, furniture pieces or homes. There are thousands of ways to repurpose them decoratively, but this project shows how to make them functional again as doors to a cabinet.
Photo By: Marian Parsons


