


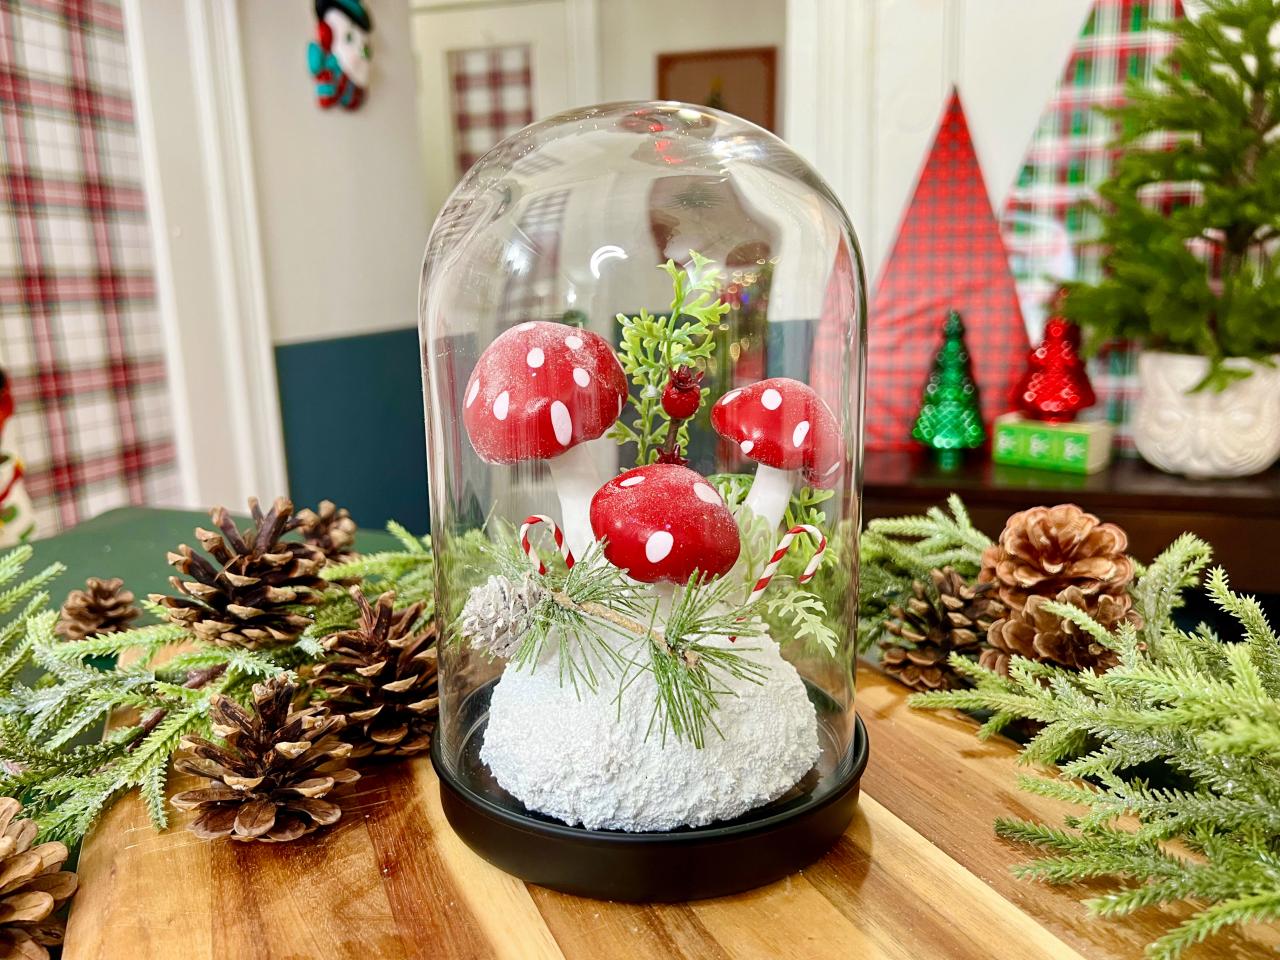
Make a Winter Woodland Mushroom Cloche Decoration
Use clay to create adorable mushrooms to welcome in winter this holiday season. Turn them into gift toppers, ornaments or add to your traditional holiday decor with this unique winter woodland mushroom cloche.

Put together the cloche
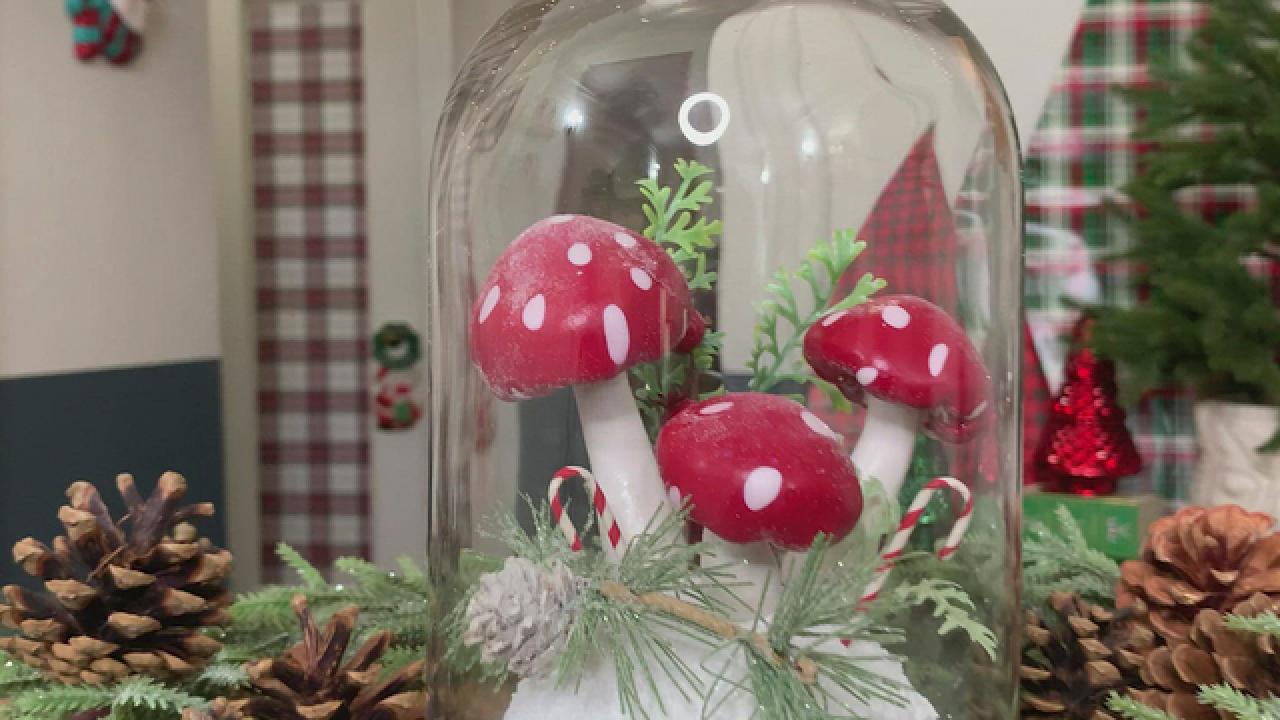
Place the floral ball inside the base of the cloche. Press the mushrooms on top of the floral foam by sticking in the toothpicks until the stem meets the snow. Add other wintery faux flashes to really complete the look, add the glass, and enjoy!

Photo by: Crafty Lumberjacks
Crafty Lumberjacks
The German tradition of decorating with mushrooms during the holidays has become a huge trend all over the world. Create a winter woodland mushroom cloche filled with whimsy and sparkle. These clay mushrooms also make great ornaments or present toppers. Get crafty and fill your holidays with some woodland love this season.
Materials + Supplies
- red and white polymer clay
- clay rolling pin
- butter knife
- toothpicks
- parchment paper
- baking sheet
- oven
- round floral foam half balls
- textured snow paint
- fine glitter
- super glue
- glossy sealant
- clear glitter paint
- glass cloche
- faux greenery & festive flourishes
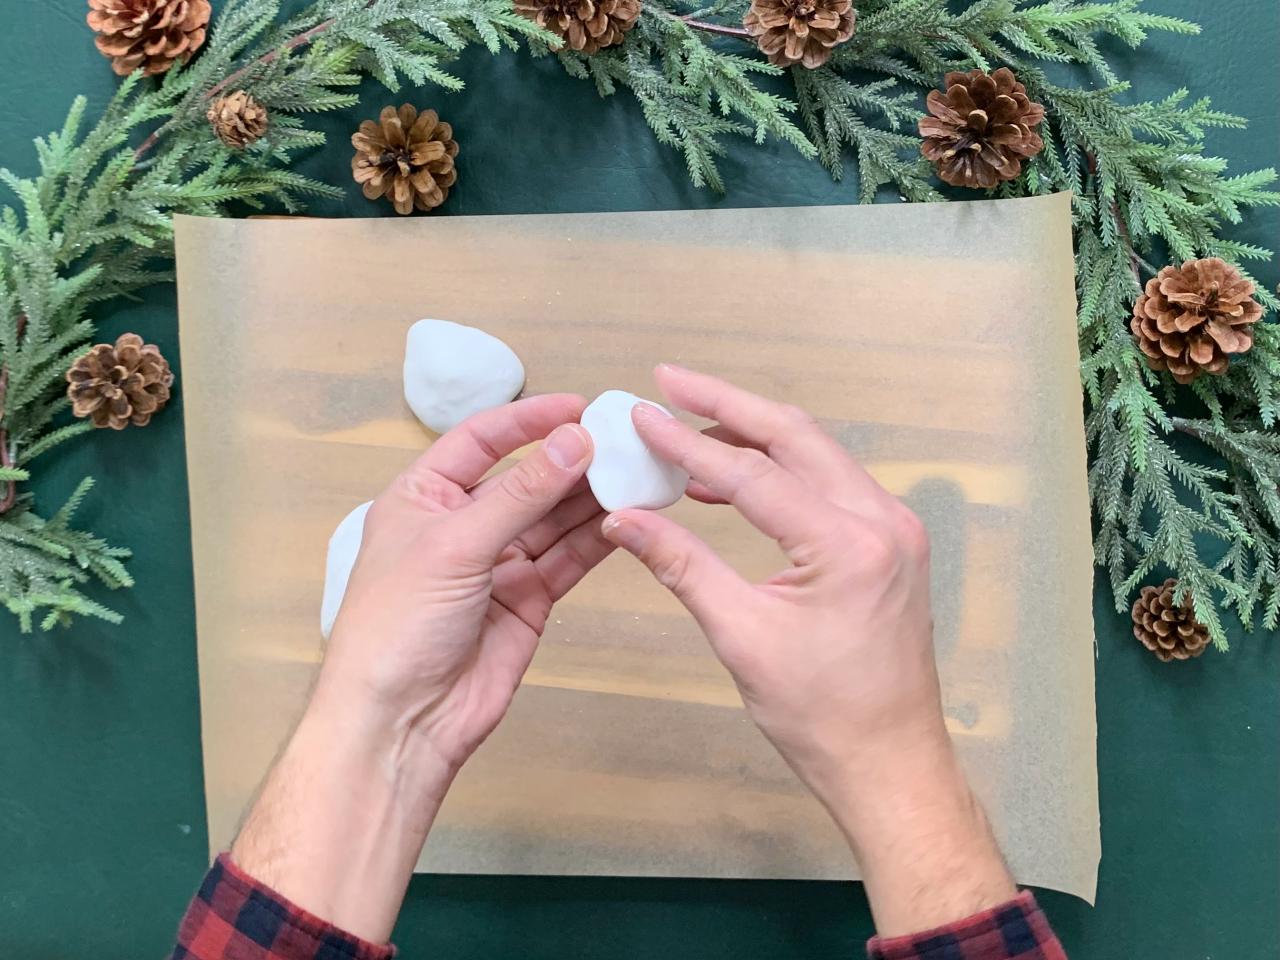
Condition the Clay + Create the Caps
Condition the white clay by ripping off a small piece and kneading it with your hands until soft. Rip off another small piece, roll it into a ball and press your thumb in it to form a mushroom cap. It should look like the top of an umbrella. Next, create two other mushroom caps in different sizes.

Condition the clay and create the caps
Condition the white clay by ripping off a small piece and kneading it with your hands until soft. Rip off a small piece, roll it into a ball and press your thumb in it to form a mushroom cap. It should look like the top of an umbrella. Create two other mushroom caps in different sizes.
Photo by: Crafty Lumberjacks
Crafty Lumberjacks
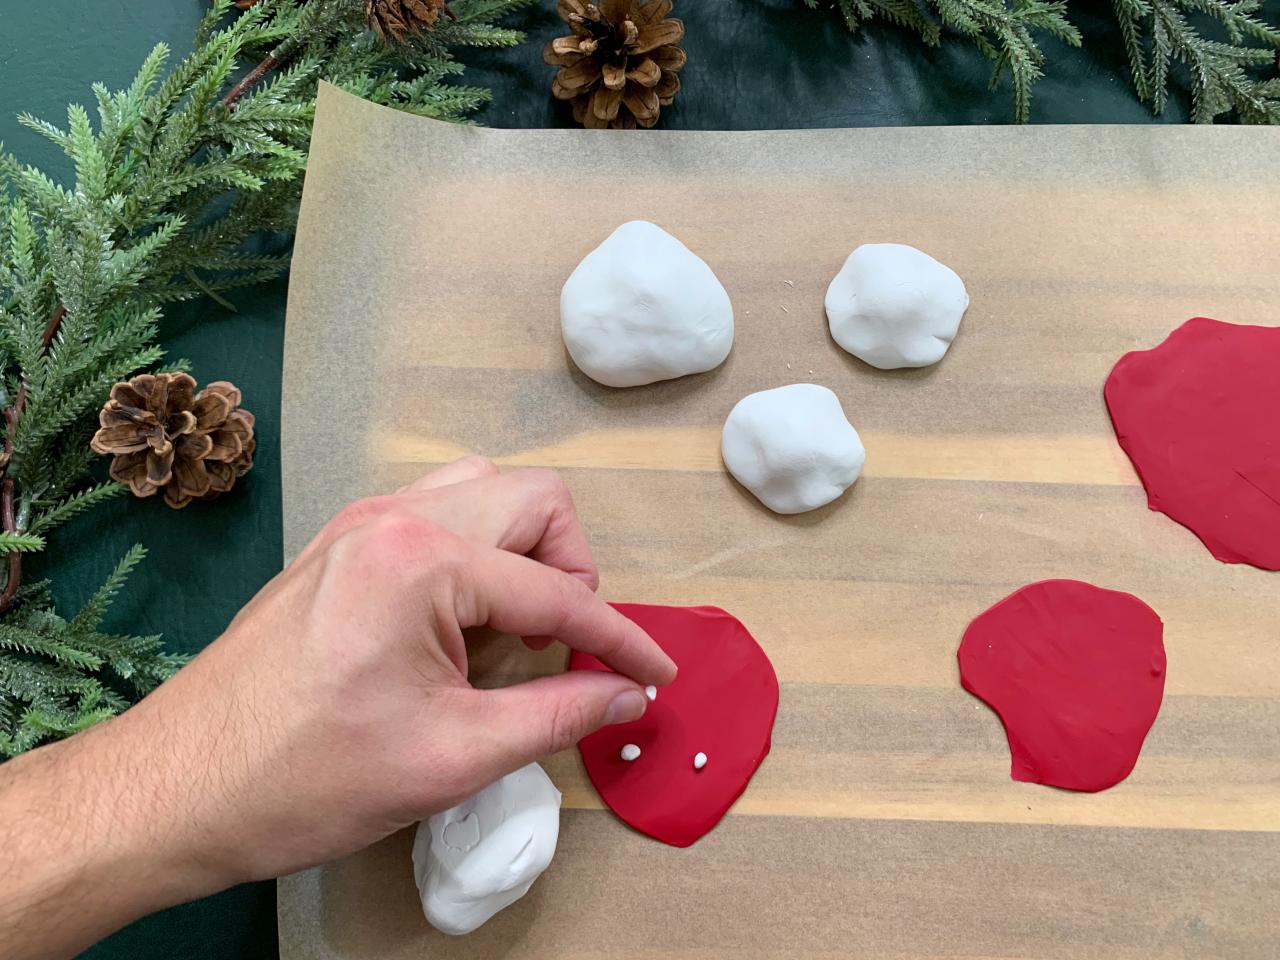
Roll Out the Decorative Top
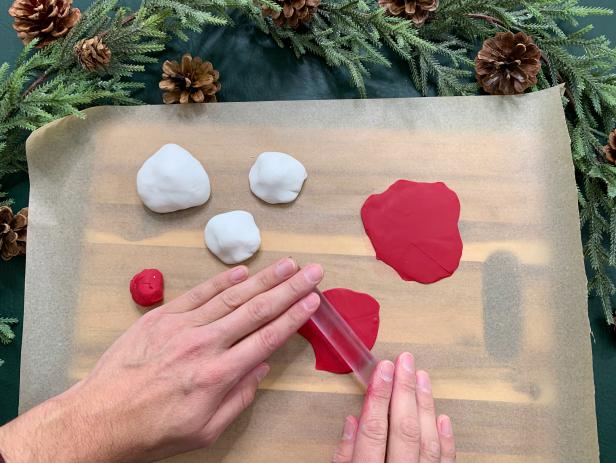
Rip off a piece of red clay and condition it with your hands. Roll it out with a clay rolling pin to a 1/4-inch thickness (Image 1). Rip apart tiny pieces of white clay and place them on top of the rolled-out red clay to create the spots (Image 2). Roll out the clay again to push the white clay into the red clay. Repeat this process for each mushroom (Image 3). Tip: Wash your hands while you work with the red clay; it can stain your fingers and the white clay.
Crafty Lumberjacks

Crafty Lumberjacks

Crafty Lumberjacks
Roll out the decorative top
Rip off a piece of red clay and condition it with your hands. Roll it out with a clay rolling pin until it is about a quarter of an inch thin. Rip apart tiny pieces of white clay and place them on top of the rolled-out red clay to create the spots. Roll out the clay again to push the white clay into the red clay. Repeat this process for each mushroom. Tip: Wash your hands while you work with the red clay, it can stain your fingers and get all over the white clay.
Photo By: Crafty Lumberjacks
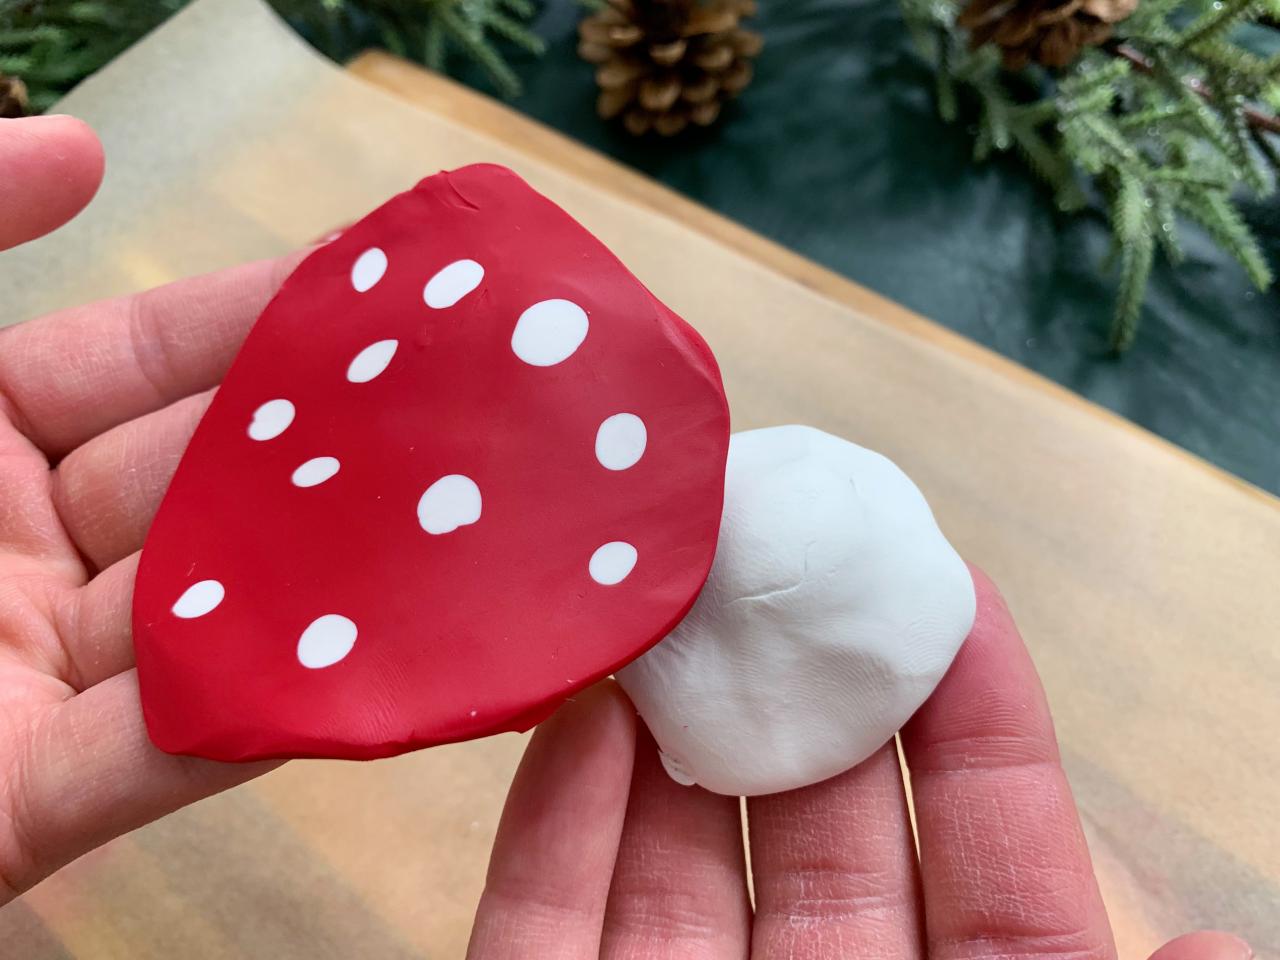
Finish the Clay Mushroom Cap
Place the rolled-out red piece on top of the cap and carefully curl the edges into the bottom of the cap. Turn the cap over and use a butter knife or clay tool to create ridges into the clay by pushing the knife into the clay. Be careful not to push too hard or the knife will go through the top.

Finish the cap
Place the rolled-out red piece on top of the cap and carefully curl the edges into the bottom of the cap. Turn the cap over and use a butter knife or clay tool to create ridges into the clay by pushing the knife into the clay. Be careful not to push too hard or the knife will go through the top.
Photo by: Crafty Lumberjacks
Crafty Lumberjacks
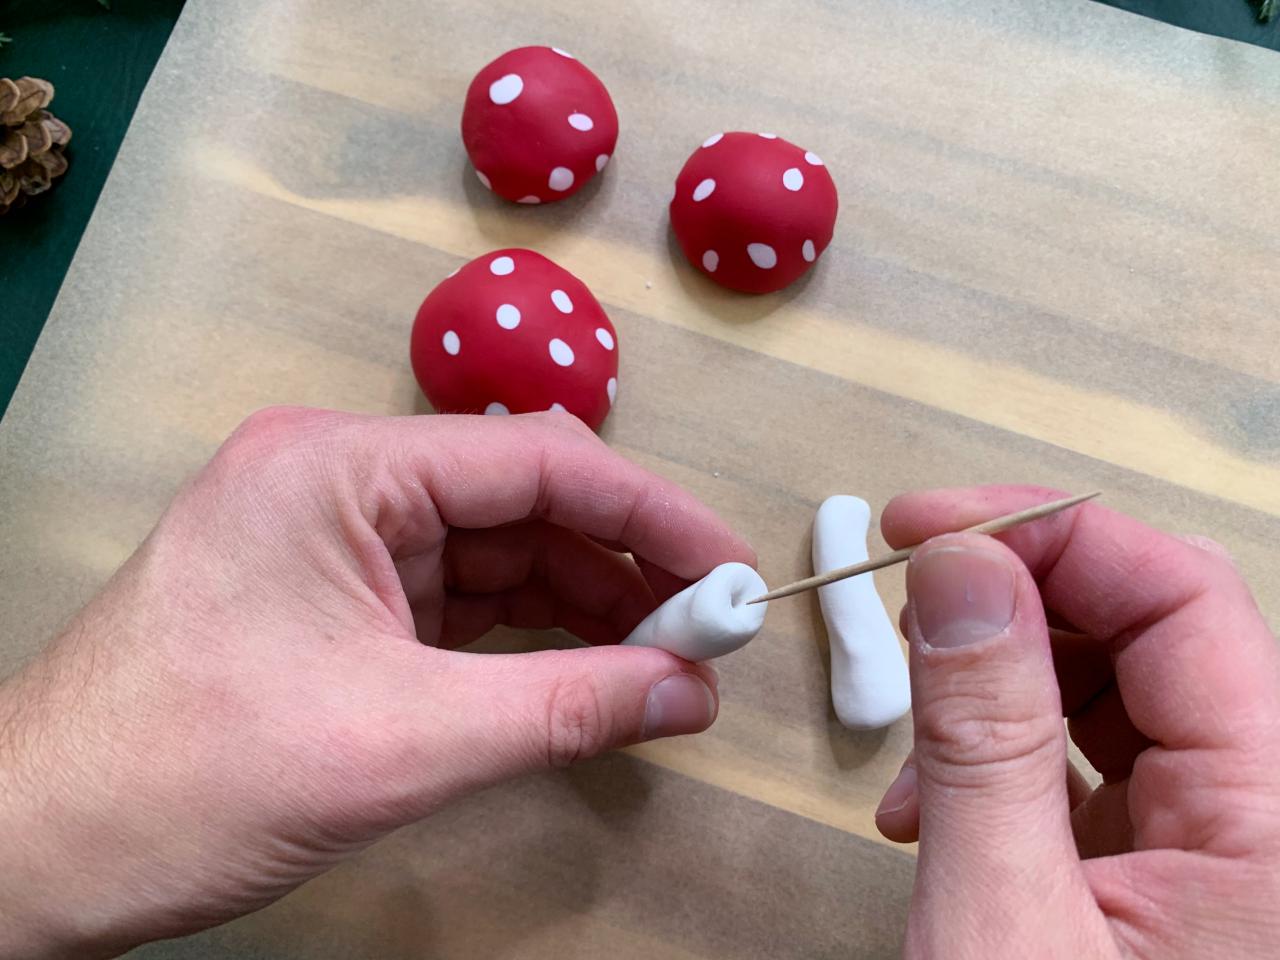
Roll Out the Stem and Bake
Pull off another piece of white clay and roll it in your hands like a snake. Push the ends of the clay to create a flat edge. Push a toothpick about 1 inch deep into the bottom of the stem and pull it out.
Place the mushroom caps and the stems onto a baking sheet lined with parchment paper. Follow the directions on the packaging of the clay you’re working with and allow the clay to fully cool down before moving on to the next step.

Roll out the stem
Pull off another piece of white clay and roll it in your hands like a snake. Push the ends of the clay to create a flat edge. Push a toothpick about an inch deep into the bottom of the stem and pull it out.
Photo by: Crafty Lumberjacks
Crafty Lumberjacks
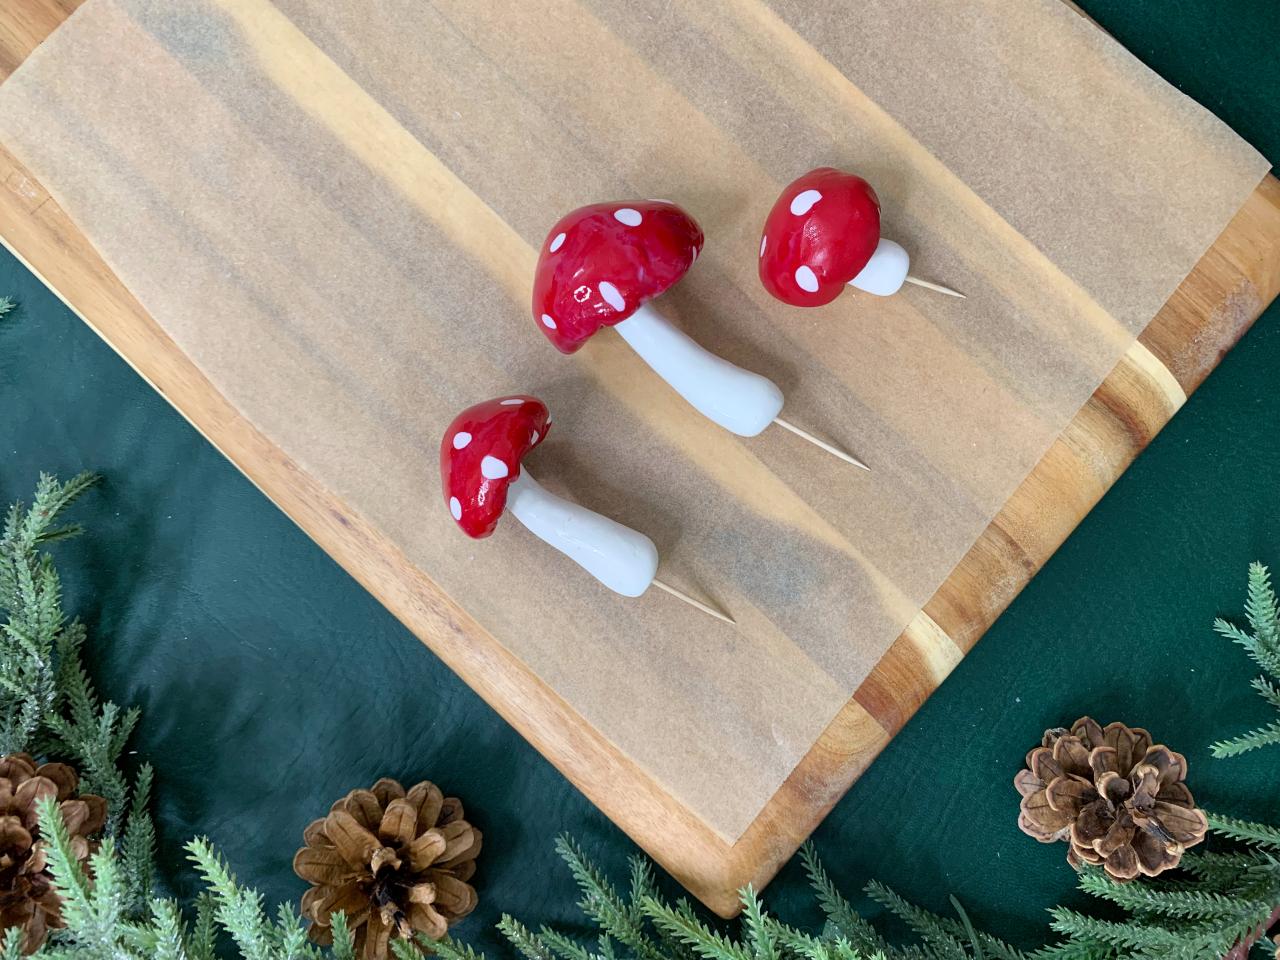
Put the Clay Mushrooms Together + Add a Top Coat
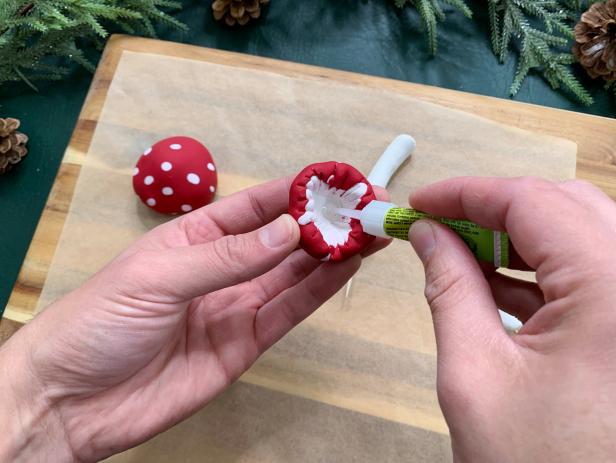
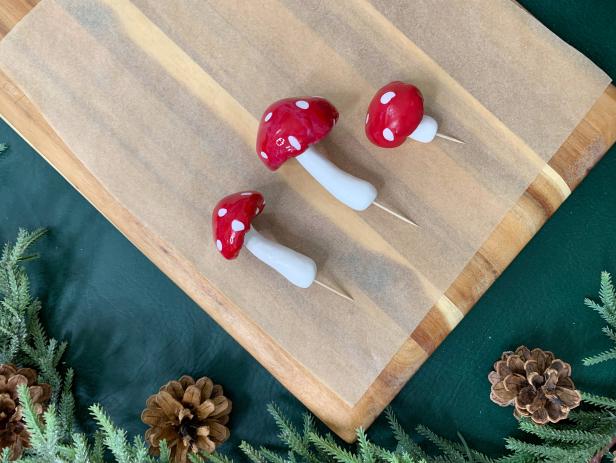
Once baked and cooled, add a little super glue to the bottom of the mushroom cap and press the stem on it (Image 1). Hold it in place until it fully adheres. Place a toothpick into the bottom of the stem in the pre-made hole (Image 2). If it does not fit tightly, add a little super glue to the tip of the toothpick before sticking it in. Add a glossy top coat to the mushrooms to really make them pop. Sprinkle on glitter to the tops and sides to give it a frosted winter look.
Crafty Lumberjacks
Crafty Lumberjacks
Put the mushrooms together and add a top coat
Once baked and cooled, add a little super glue to the bottom of the mushroom cap and press the stem on it. Hold it in place until it fully adheres. Place a toothpick into the bottom of the stem in the pre-made hole. If it does not fit tightly, add a little super glue to the tip of the toothpick before sticking it in. Add a glossy top coat to the mushrooms to really make them pop. Sprinkle on glitter to the tops and sides to give it a frosted winter look.
Photo By: Crafty Lumberjacks
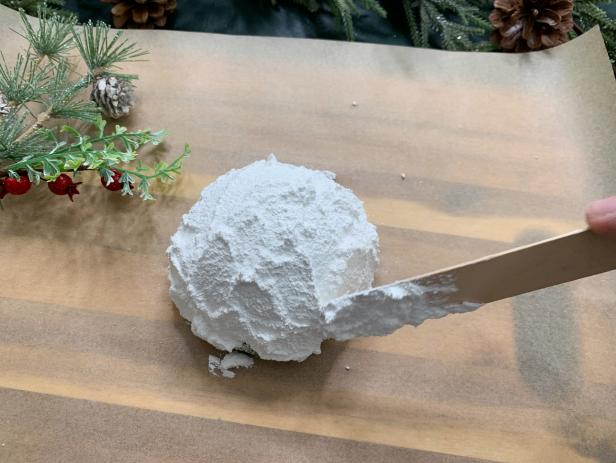
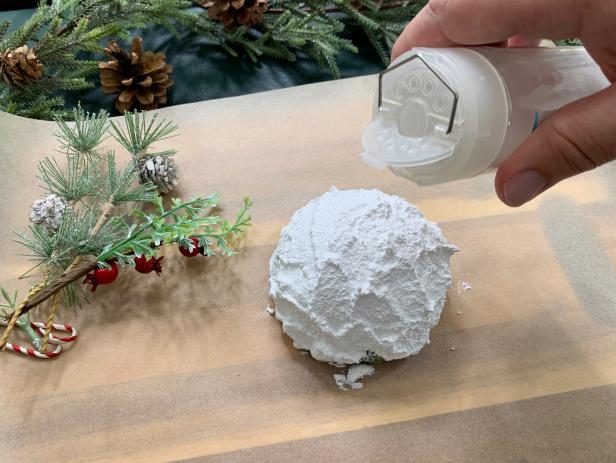
Paint Your Floral Foam
Add a snowy look to your floral foam half ball with textured snow paint. Use a lot of paint and apply it to the foam with a craft stick for a truly organic look (Image 1). Once done, add a sprinkle of glitter for some extra sparkle (Image 2). Tip: If you have trouble finding textured snow paint, add baking soda to acrylic paint for some texture.
Crafty Lumberjacks
Crafty Lumberjacks
Paint floral foam
Add a snowy look to round half floral foam with textured snow paint. Use a lot of paint and apply it to the foam with a craft stick for a truly organic look. Once done, add a sprinkle of glitter for some extra sparkle. Tip: If you have trouble finding textured snow paint add baking soda to acrylic paint for some texture.
Photo By: Crafty Lumberjacks
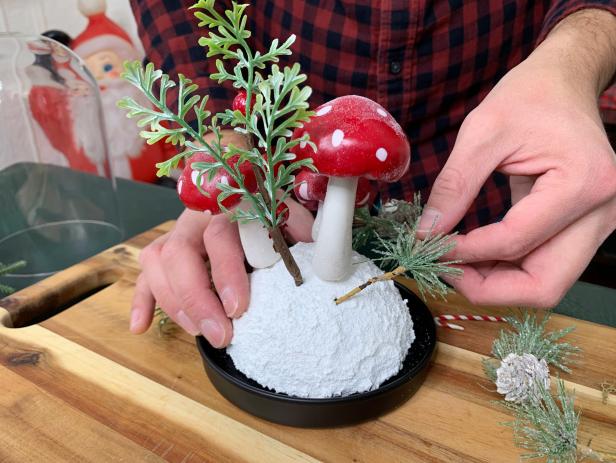
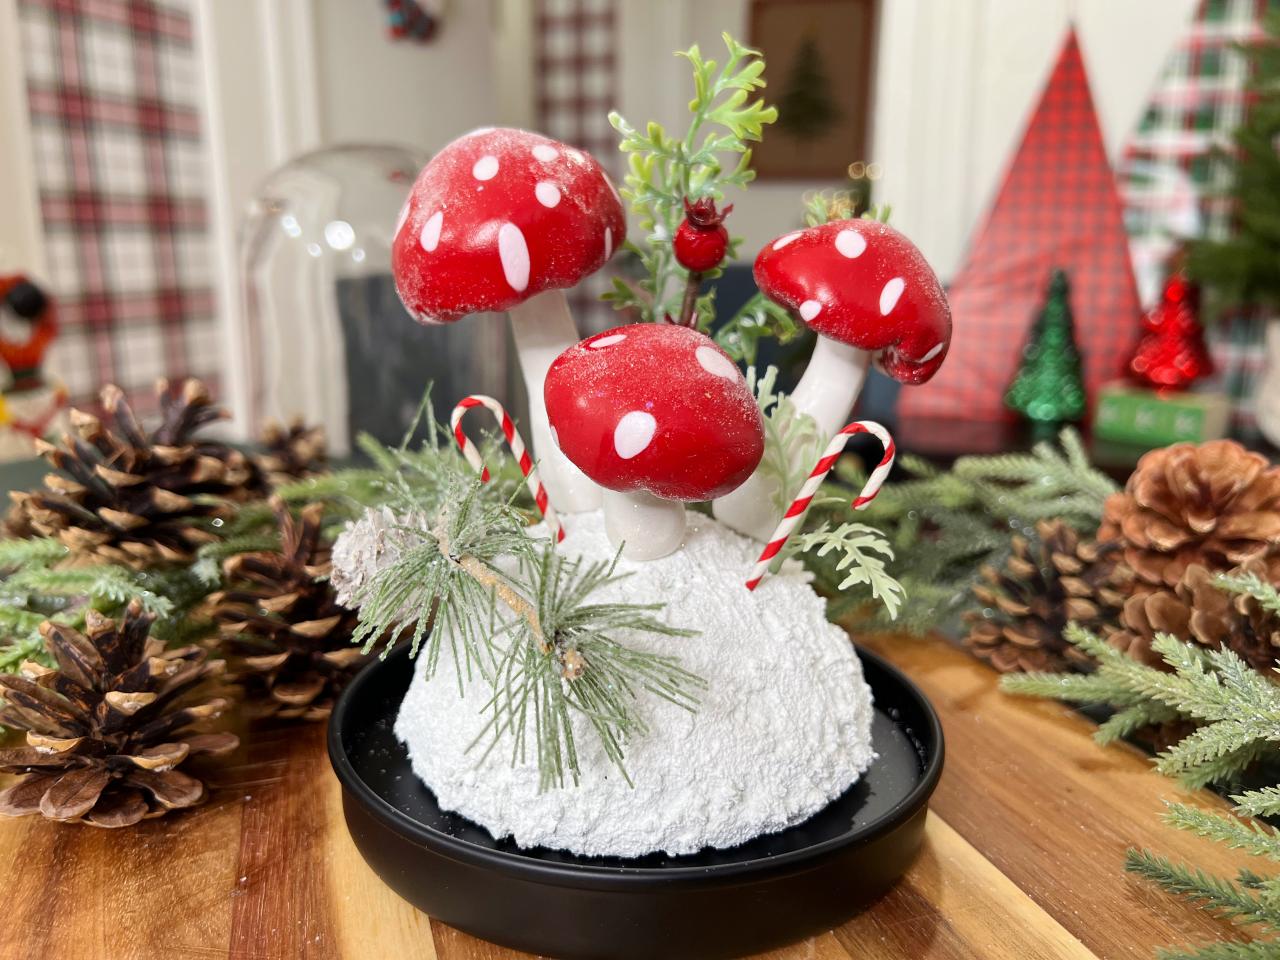
Put Together Your Winter Woodland Mushroom Cloche
Place the floral ball inside the base of the cloche. Press the mushrooms on top of the floral foam by sticking in the toothpicks until the stem meets the snow. Add other wintery faux flashes to really complete the look (Image 1). Add the glass, sit back, relax and enjoy your new decor (Image 2 + 3).
Crafty Lumberjacks
Crafty Lumberjacks

Crafty Lumberjacks
Put together the cloche
Place the floral ball inside the base of the cloche. Press the mushrooms on top of the floral foam by sticking in the toothpicks until the stem meets the snow. Add other wintery faux flashes to really complete the look, add the glass, and enjoy!
Photo By: Crafty Lumberjacks
Put together the cloche
Place the floral ball inside the base of the cloche. Press the mushrooms on top of the floral foam by sticking in the toothpicks until the stem meets the snow. Add other wintery faux flashes to really complete the look, add the glass, and enjoy!
Photo By: Crafty Lumberjacks
Put together the cloche
Place the floral ball inside the base of the cloche. Press the Mushrooms on top of the floral foam by sticking in the toothpicks until the stem meets the snow. Add other wintery faux flashes to really complete the look, add the glass and enjoy!
Photo By: Crafty Lumberjacks
More Whimsical Holiday Ideas

No-Bake Mini Toadstool Cookie Treats
Cookies get a woodland makeover and are transformed into spotted mushrooms.

How to Make Personalized Clay Gift Tags
Take your gift over the top this year by adding a handmade gift tag that can even double as an additional present.


