


How to Make a Custom Sticker With Cricut Maker
Decorate your car, computer, phone case, walls and any other smooth surface with vinyl stickers designed by you and the Cricut Maker.


If you've ever seen a funny phrase or an intricate design and thought, "that would look great on my laptop," or "I need that on my bumper," then the Cricut Maker is the tool for you. Make stickers (and more!) for almost any surface with this wildly versatile addition to your craft room.
What Is a Cricut?
The technical term for the Cricut Maker is “Electronic Die Cutting Machine.” For crafters, die-cutting is the process of cutting perfect, uniform shapes from various materials like vinyl, paper, fabric, plastic or chipboard. You might remember the old, analog technology from your school teachers’ workroom: a large, metal contraption with a swinging arm — basically a cookie-cutter for paper. Remember all the little construction paper footballs stuck to lockers at your high school for spirit week? Totally made with a manual die-cutter. There were also clunky handheld versions of die cutters that scrapbookers, homeschoolers and other crafters used.
What Is the Cricut Maker?
The Cricut Maker is an electronic die-cutting machine that interfaces with your tablet, phone or laptop, and it can cut, score, emboss and engrave hundreds of materials up to 2.4 mm thick — including paper, fabric, vinyl, cardboard, wax paper, aluminum foil and balsa wood.
I've personally used the Maker not only to cut fabric for sewing projects, vinyl for a variety of applications (car decals, sarcastic tea towels or matching vacation shirts, anybody?) and card stock for greeting cards, but I've also used it to draw pictures, cut quilt fabric and write cute notes to friends.

Cricut Maker cuts over 300 materials, from card stock to leather. This bundle comes with the Cricut Maker in Rose plus tools and materials to get you crafting right away.
Let's walk through a super simple sticker project. I am really into Tennessee decor right now. I grew up here, and in the last year, I have cross-stitched the Knoxville skyline and done some blackwork embroidery of the entire state map. Recently, I got a Tennessee tattoo. Let’s do a Tennessee sticker that says “home” on the inside.
Beth Braden
Materials + Tools
- Cricut Maker with the knife blade – this is standard and should have come with the Maker
- regular grip 12x12 Cricut mat
- permanent (or removable) adhesive vinyl
- computer, tablet or phone
- scraper
- weeding tool
- transfer paper
- scissors
Open Cricut Design Space
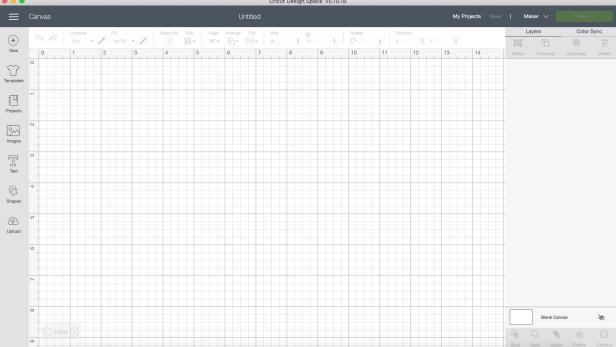
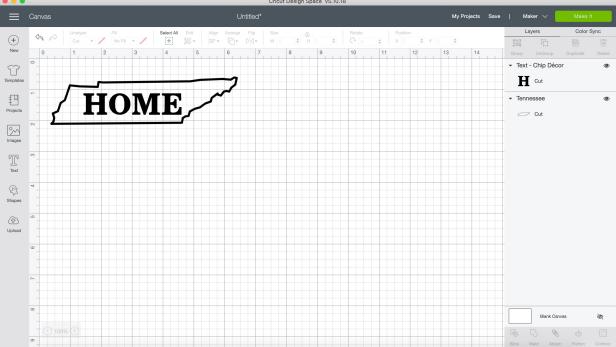
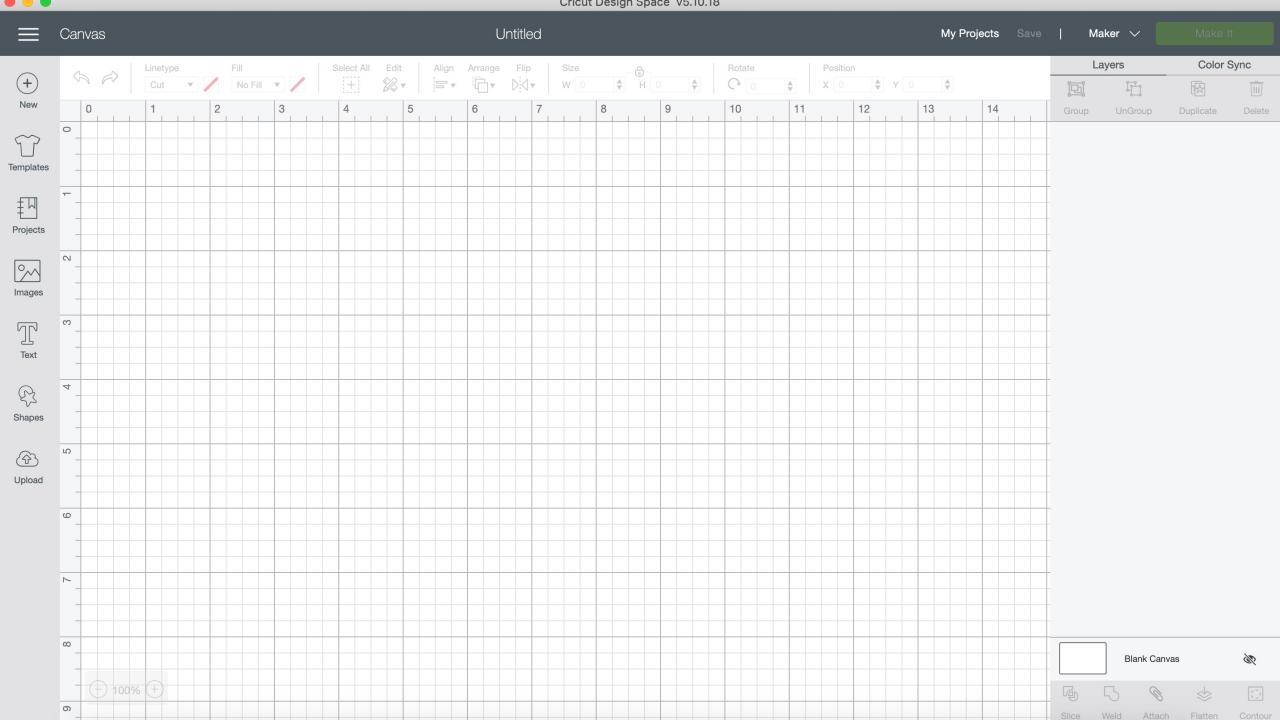
Cricut's proprietary software, Cricut Design Space (Image 1), allows you to create your projects with a variety of fonts, images and materials. Some of the fonts and images available by default are free, but users can subscribe to the Cricut Access library. For about $10 a month, users can access the entire library, which has more than 100,000 images and more than 400 fonts.
You are not, however, limited to the 100,000 images. Design Space can handle any vector file, so users with graphic design chops can do even more with a vector software program like Adobe Illustrator (subscription-based) or Vectornator (open-source). If you can create it and turn it into a vector, the Maker can probably cut or draw it.
Design Space operates from your tablet, computer or phone and sends information to the Maker via Bluetooth or USB. I prefer to use Design Space from my laptop just because I prefer a bigger screen.
Decide on Your Design
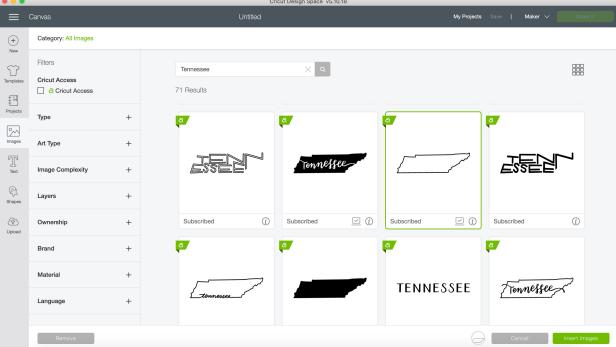
We already know we want to create a Tennessee sticker that says “home” on the inside. On the left side of the screen, click images and then you can search the Cricut Access library for "Tennessee" (Image 1). The selected outline is perfect.
Assemble the Pieces
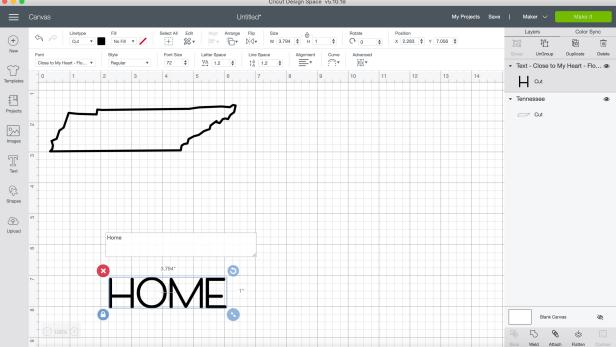
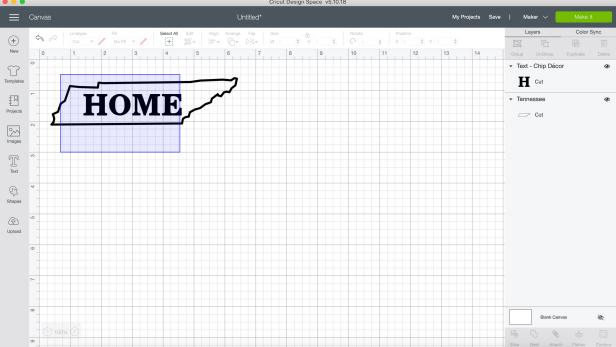
Once you’ve selected your image, click the resize arrows at the bottom right of the image to size it down to about 6 inches wide. Use the text tool to draw a text box. Type “home” and choose your typeface (Image 1). Drag your text over the Tennessee logo and make some adjustments so it is centered (Image 2). I like to do my design work in the middle of the design field and then move it to the top right just before I tell the machine to begin cutting because otherwise, the text menu covers up the top inch of the design area.
Fine Tuning
The software needs a few more instructions before you can proceed with cutting. Click and drag to select the image and text, and then go and click “attach” on the bottom right side of the screen (Image 1). The “attach” tool tells the software that the text is supposed to be in the image. If you don’t click “attach,” the machine will cut out the outline of Tennessee and it will cut out the word “home” right next to it.
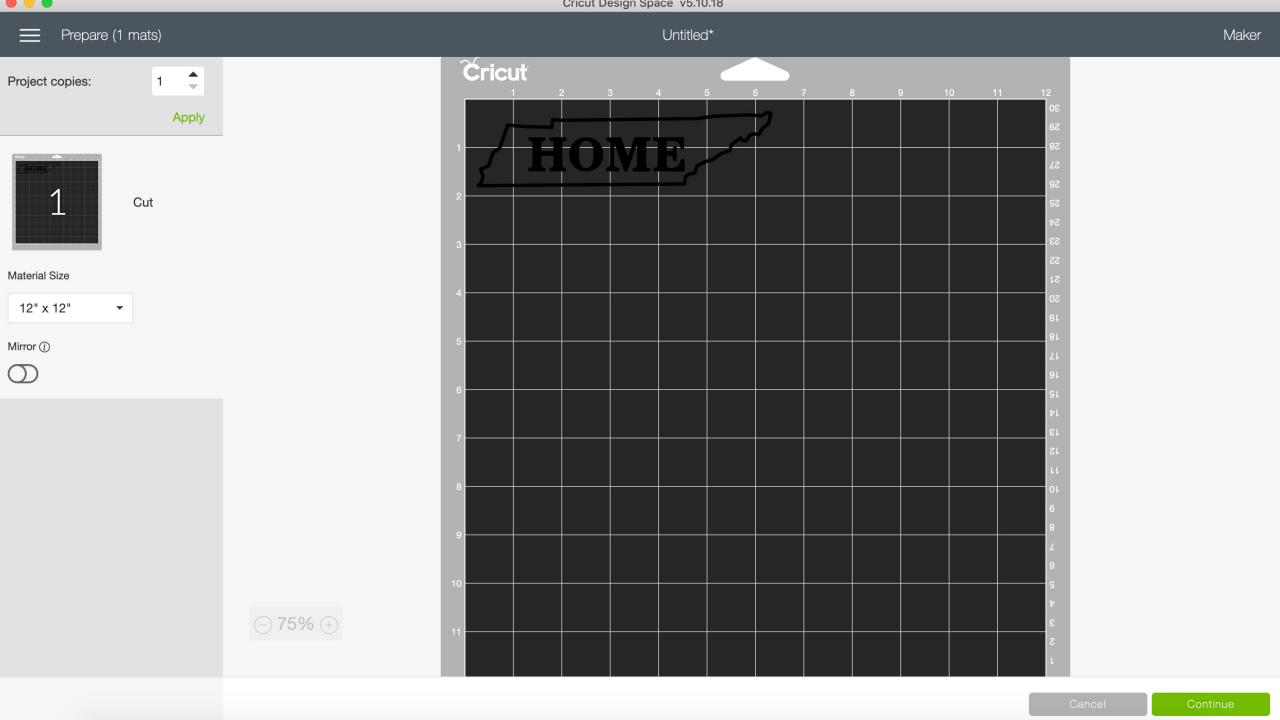
Make It
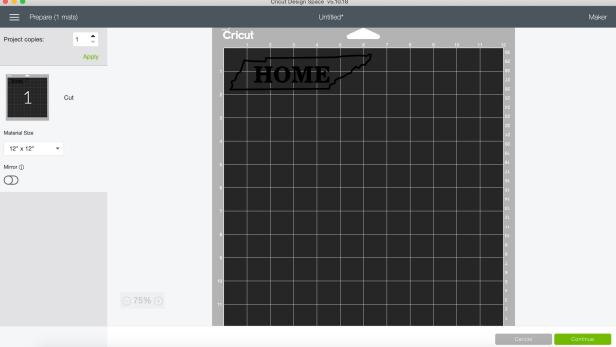
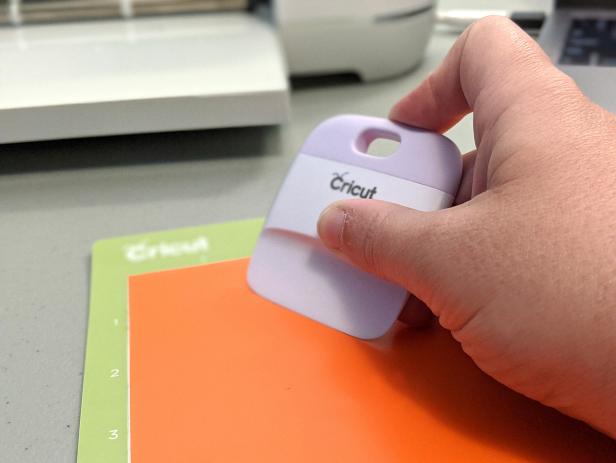
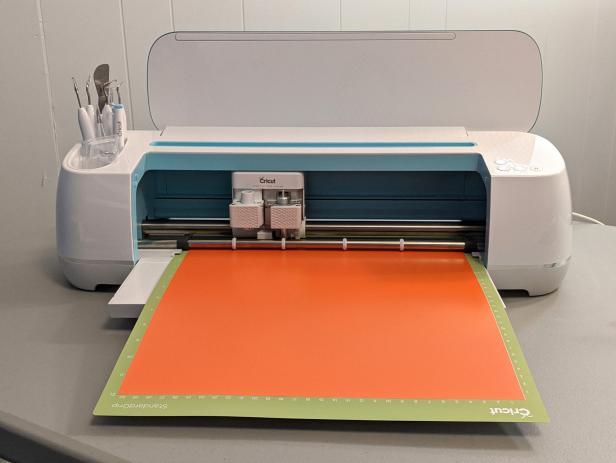
Click the green “Make it” on the top right of the program. You should see the design on the top left corner of the mat, and it should look exactly like it did in the design field (Image 1). Make sure your Maker is turned on and ready. The software will detect its presence and ask you what material you are using (Image 2). In this case, I am using permanent adhesive vinyl because I'm going to put the sticker on a tablet case. If you're using outdoor vinyl for car stickers, choose that from the menu. Place your vinyl sheet on the mat with the vinyl side up. Line the top left corner of your vinyl square up with the grid on your mat and smooth it over the mat. Use your scraper accessory to force any air bubbles out from underneath the vinyl sheet (Image 3). Follow the instructions on the screen to load the mat into the machine (Image 4) and press the Cricut logo button to begin cutting. After the cutting is done, press the eject button on the Maker, and it will give your mat back.

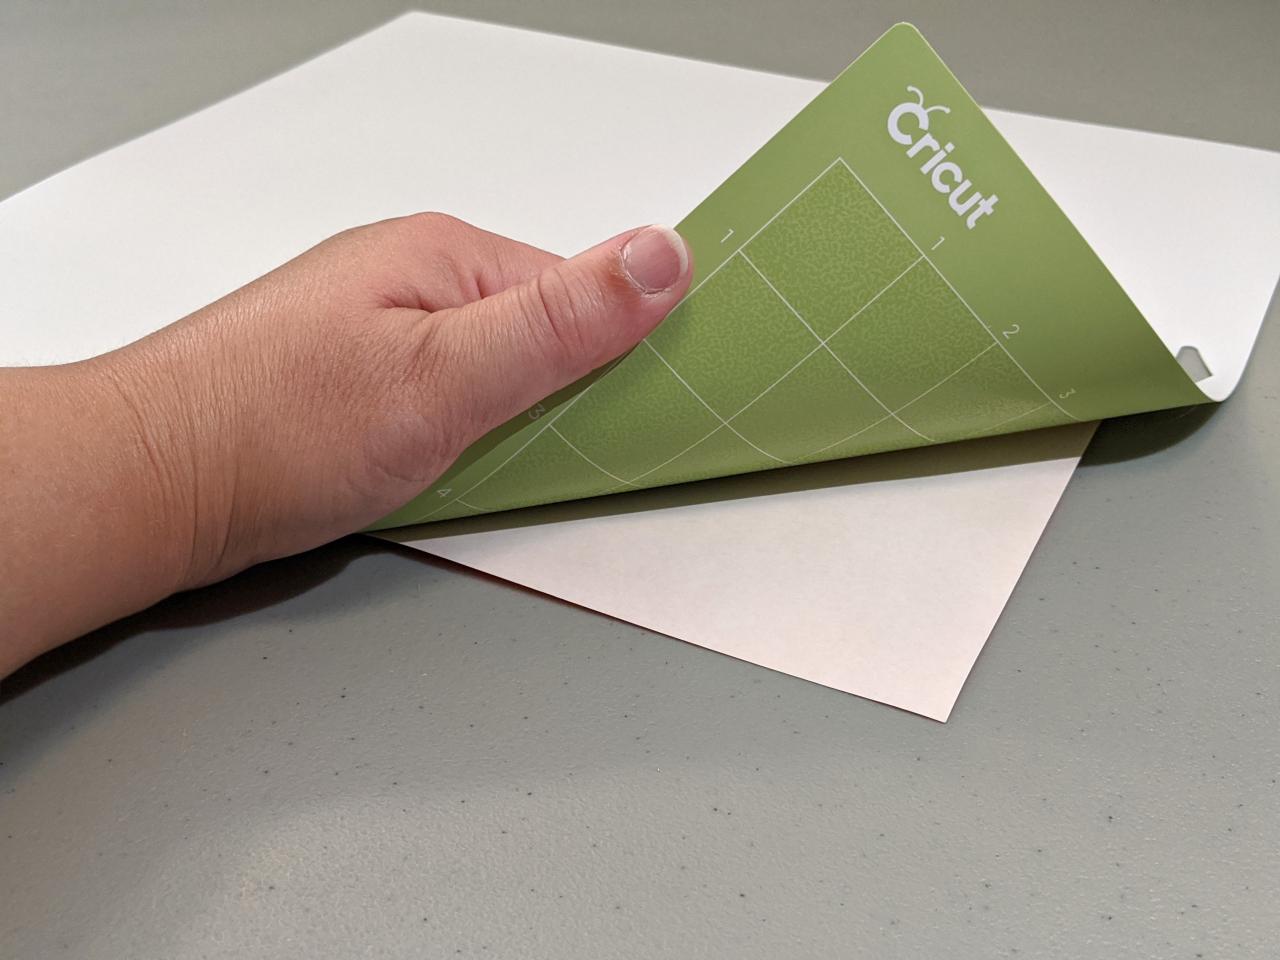
Remove the Vinyl From the Mat
To get your vinyl off the mat without warping, lay it vinyl side down on your work area and peel the mat off the vinyl (Image 1) instead of the vinyl off the mat. Use scissors to cut around the edge of the sticker. Preserve the rest of that vinyl sheet for your next project!

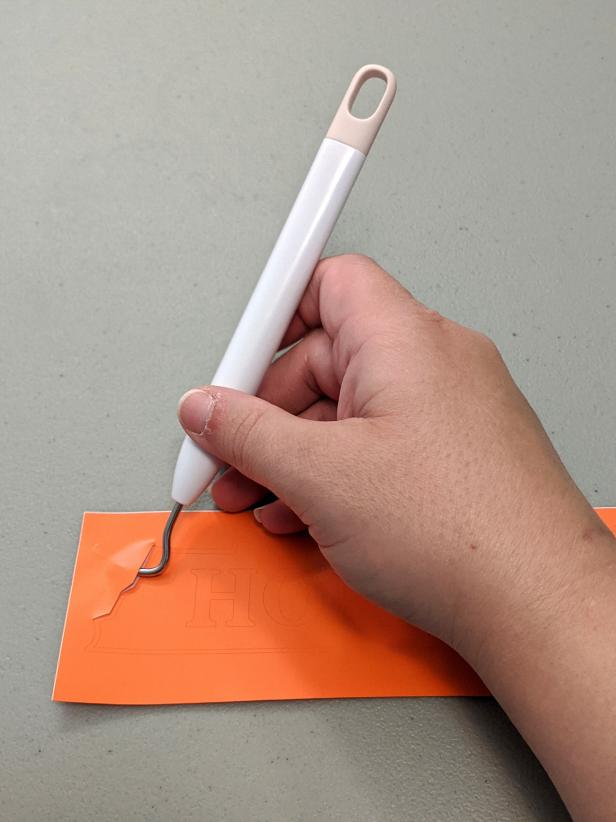
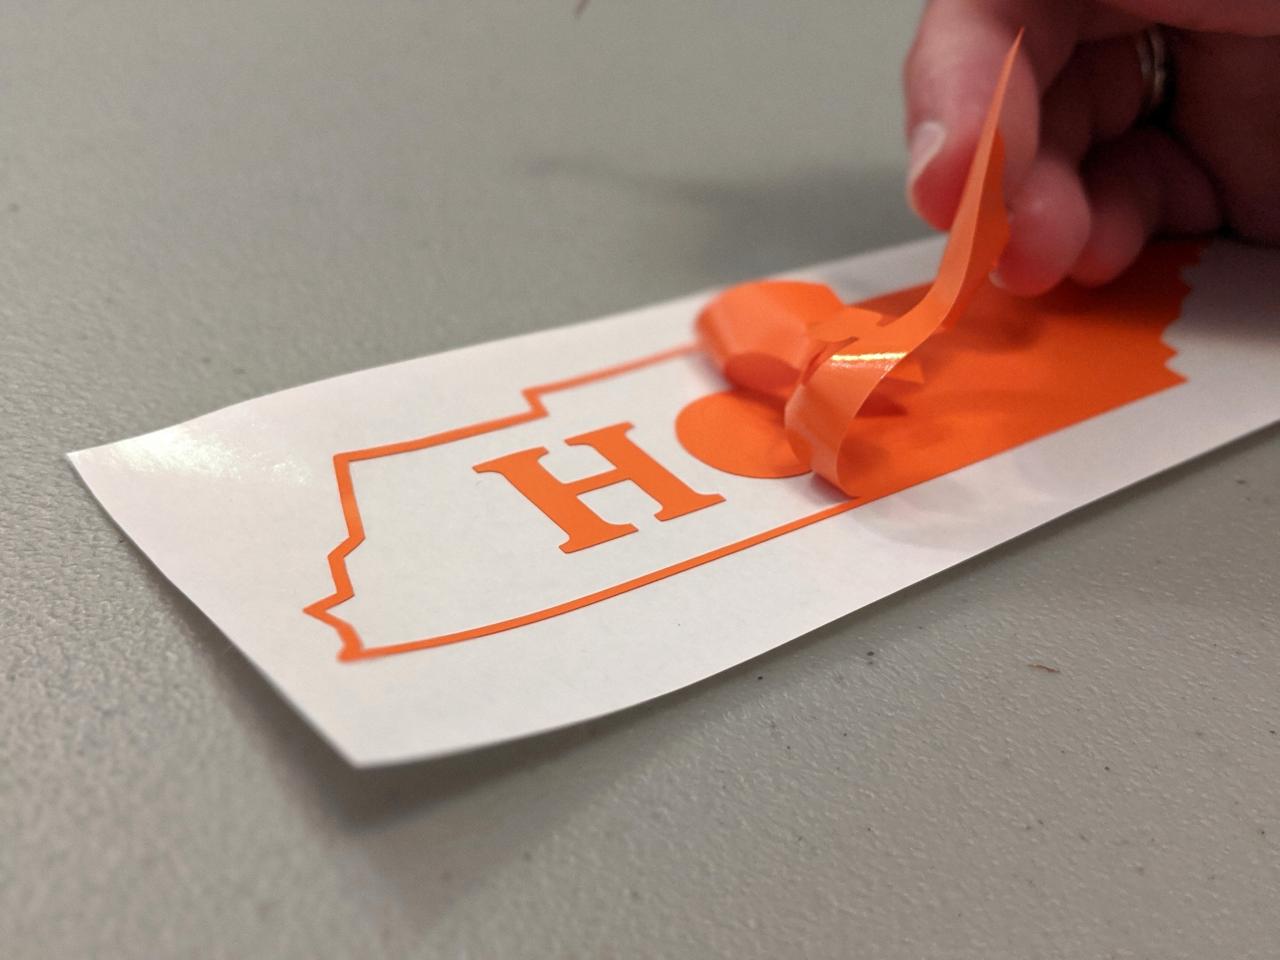
Weed Out the Negative Space
This is the most therapeutic part of the whole process. Grab your weeding tool and pull at the negative space around the sticker (Image 1). That outside edge needs to come out from around the state, and the space around the letters has to come out as well (Image 2).


Stick It
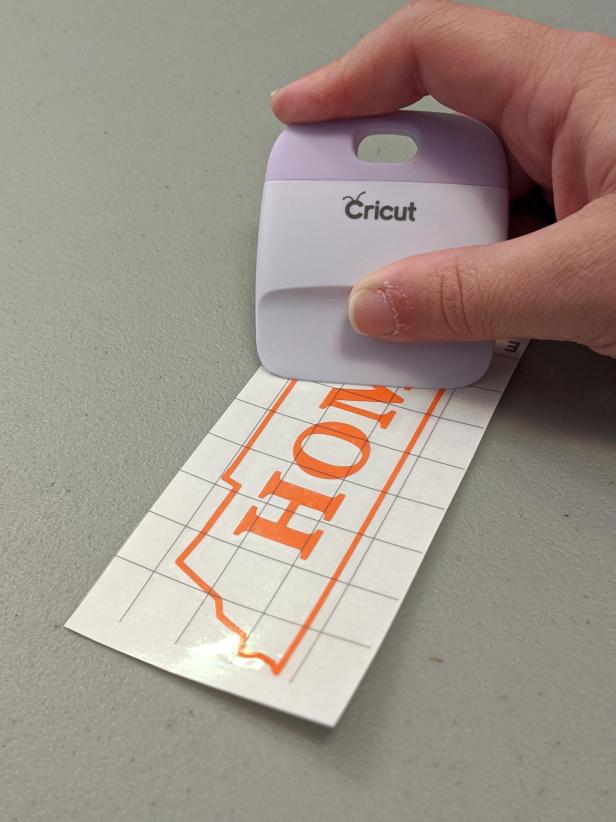
Once your design is weeded out, you will need transfer paper to move the vinyl from its carrier sheet and onto the item to be decorated. Transfer paper holds your cut design so you can keep the sticker pieces in the right place when you pull the sticker paper off. You will need a piece of transfer paper that is big enough to cover your entire design.
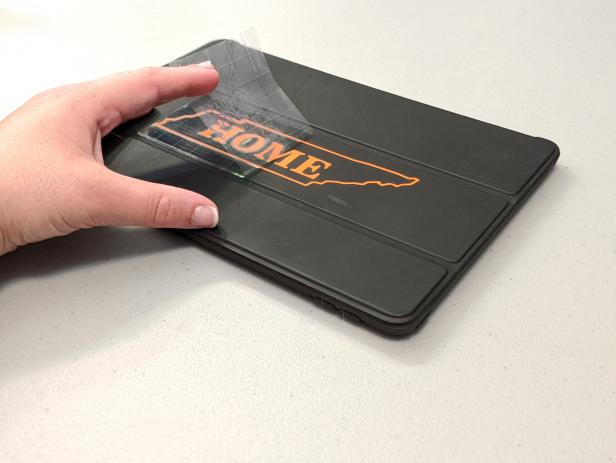
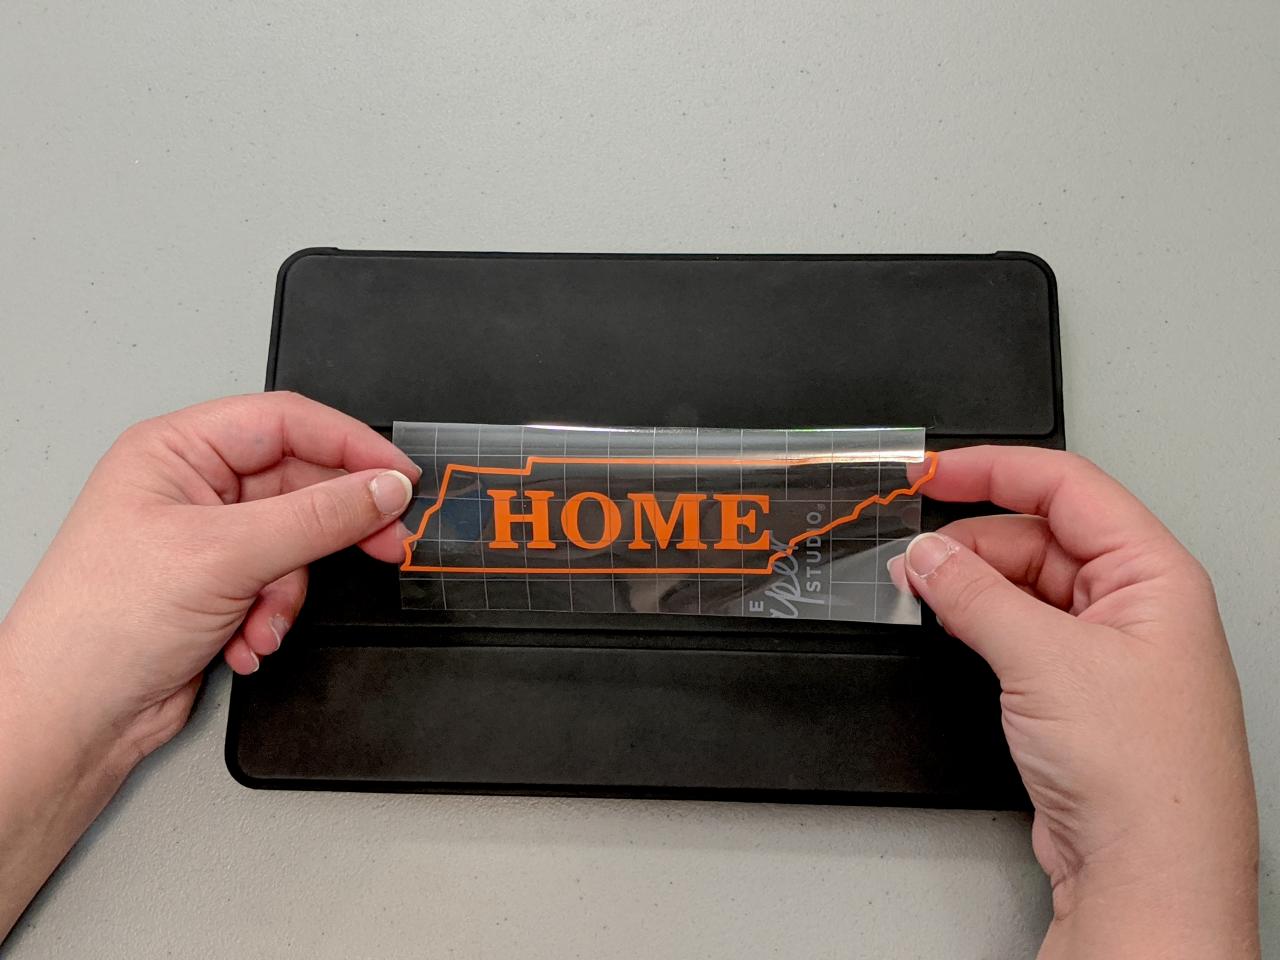
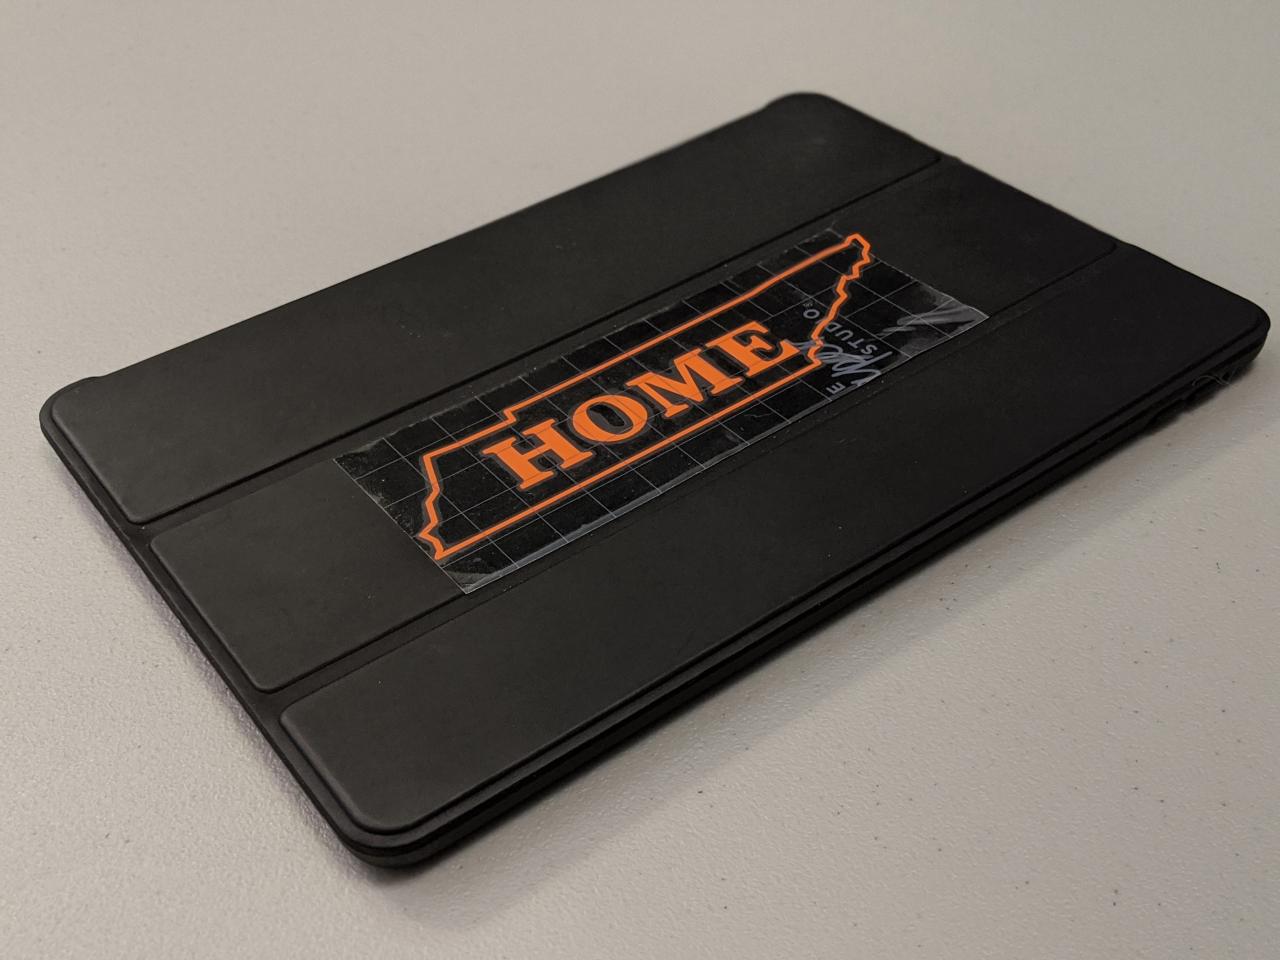
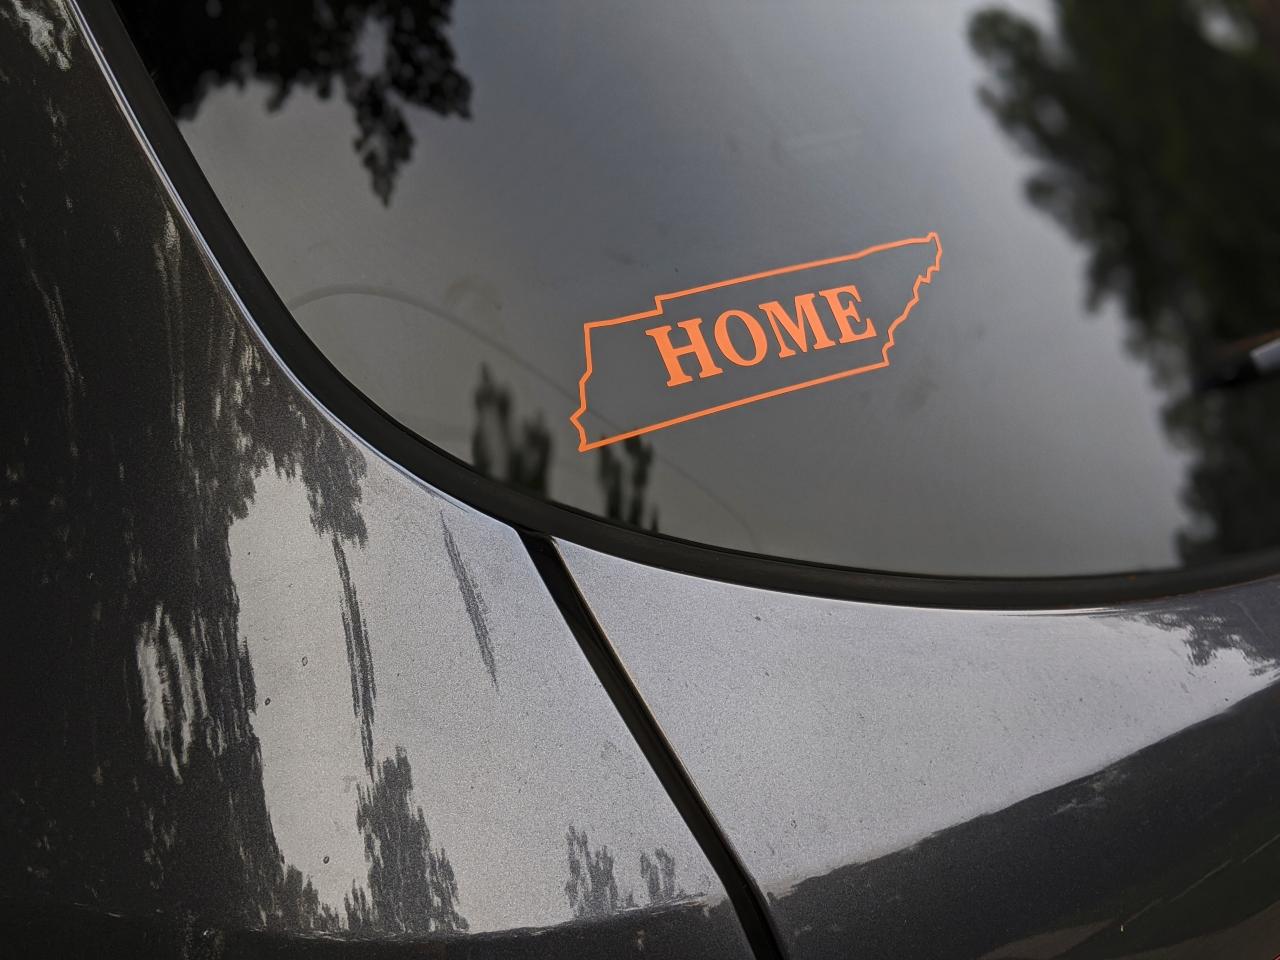
Remove the backing from the transfer paper and then smooth the transfer paper over your design. Use your scraper to make sure there are no air bubbles between the transfer paper and the vinyl (Image 1). I like to run it over both sides of the sticker (transfer paper side and sticker paper side). When you are ready to apply the sticker to its final destination, you can peel the backing off the sticker and the vinyl will be stuck to the transfer sheet (Image 2). Carefully apply the sticker to its new home (Image 3) and then run the scraper over the transfer paper to ensure that the vinyl has adhered (Image 4). I also used outdoor vinyl to make the same logo for my vehicle. Application steps are the same for car windows, but you should be sure to clean the area with rubbing alcohol to ensure there is no dirt or pollen before you apply your design.


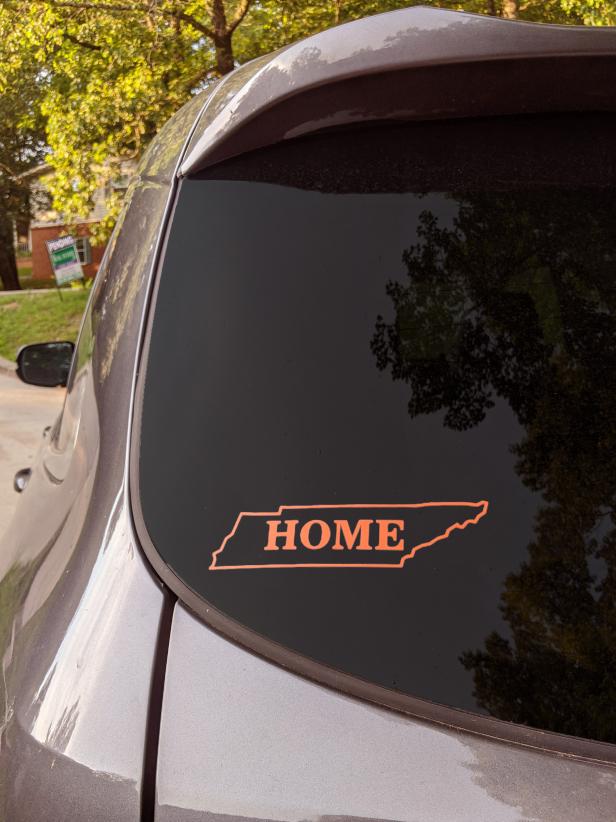
Admire It
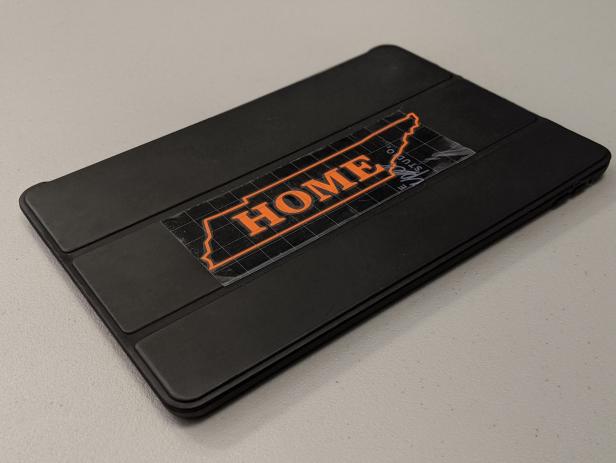
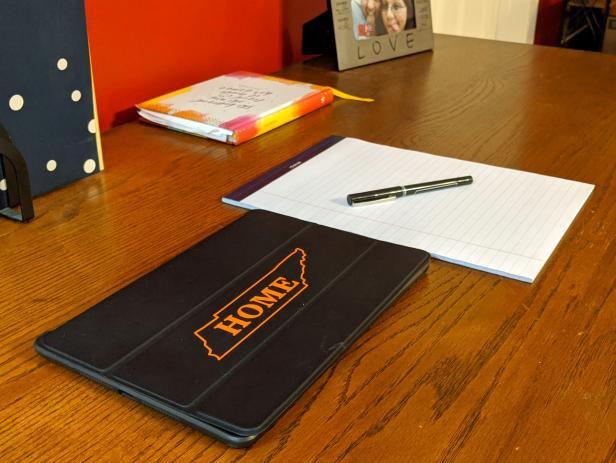
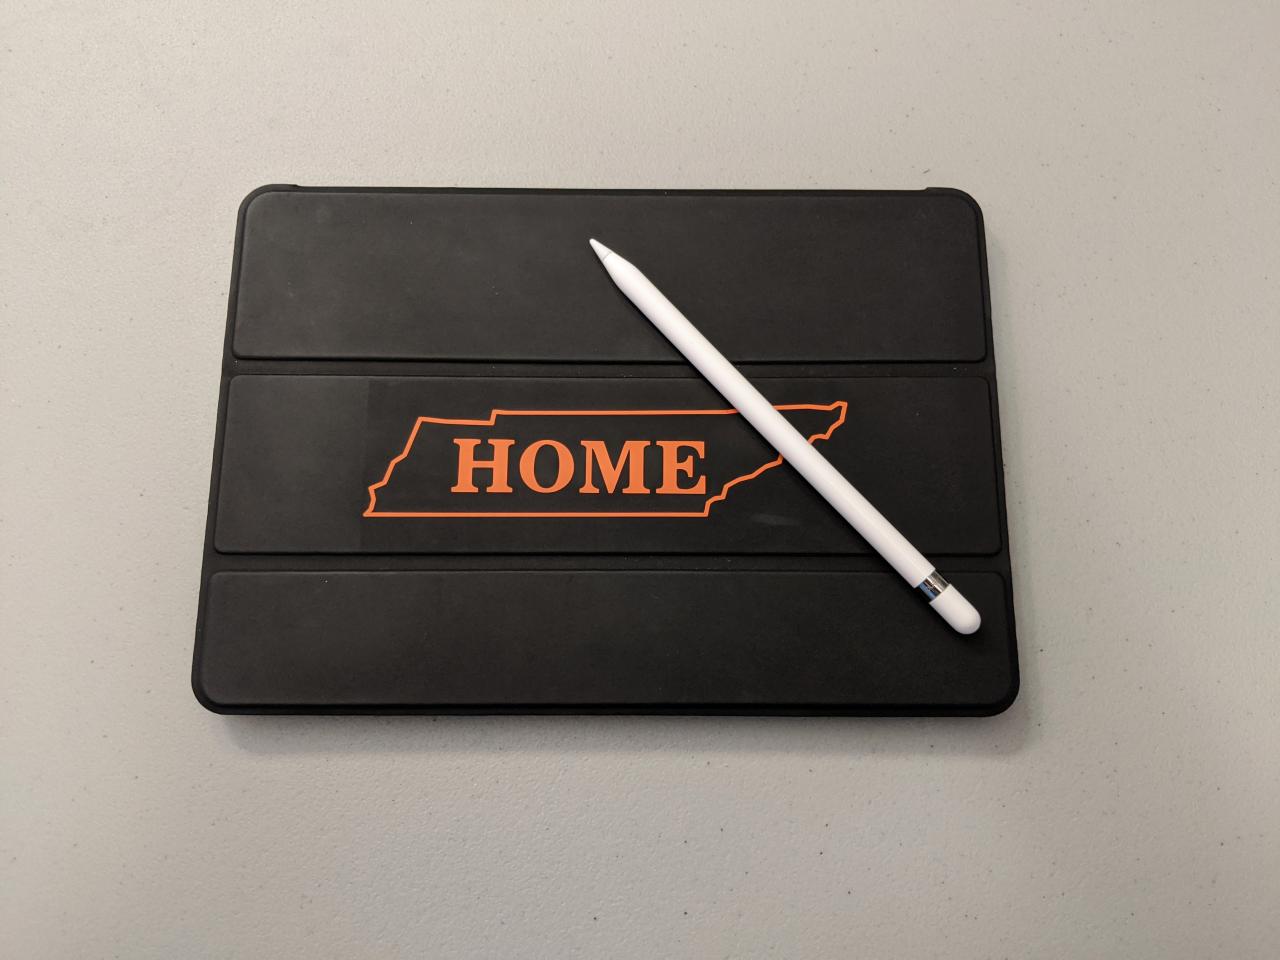
Remove the transfer paper from the vinyl (Image 1), and admire your sticker. Check out how sweet it looks on either the tablet case (Image 2) or on the car (Image 3).

Sticker and Decal Projects

5 Ways to Decorate With Decals 10 Photos
HGTV Magazine reinvented some basic items with fun and easy decal projects.
Free Printable Labels for Pantry Organization
Give your pantry a makeover with labels to match any kitchen's style.

Revive an Old Painting
HGTV Magazine transforms an old, discarded painting with free, printable letter stickers and a fresh coat of paint.


