


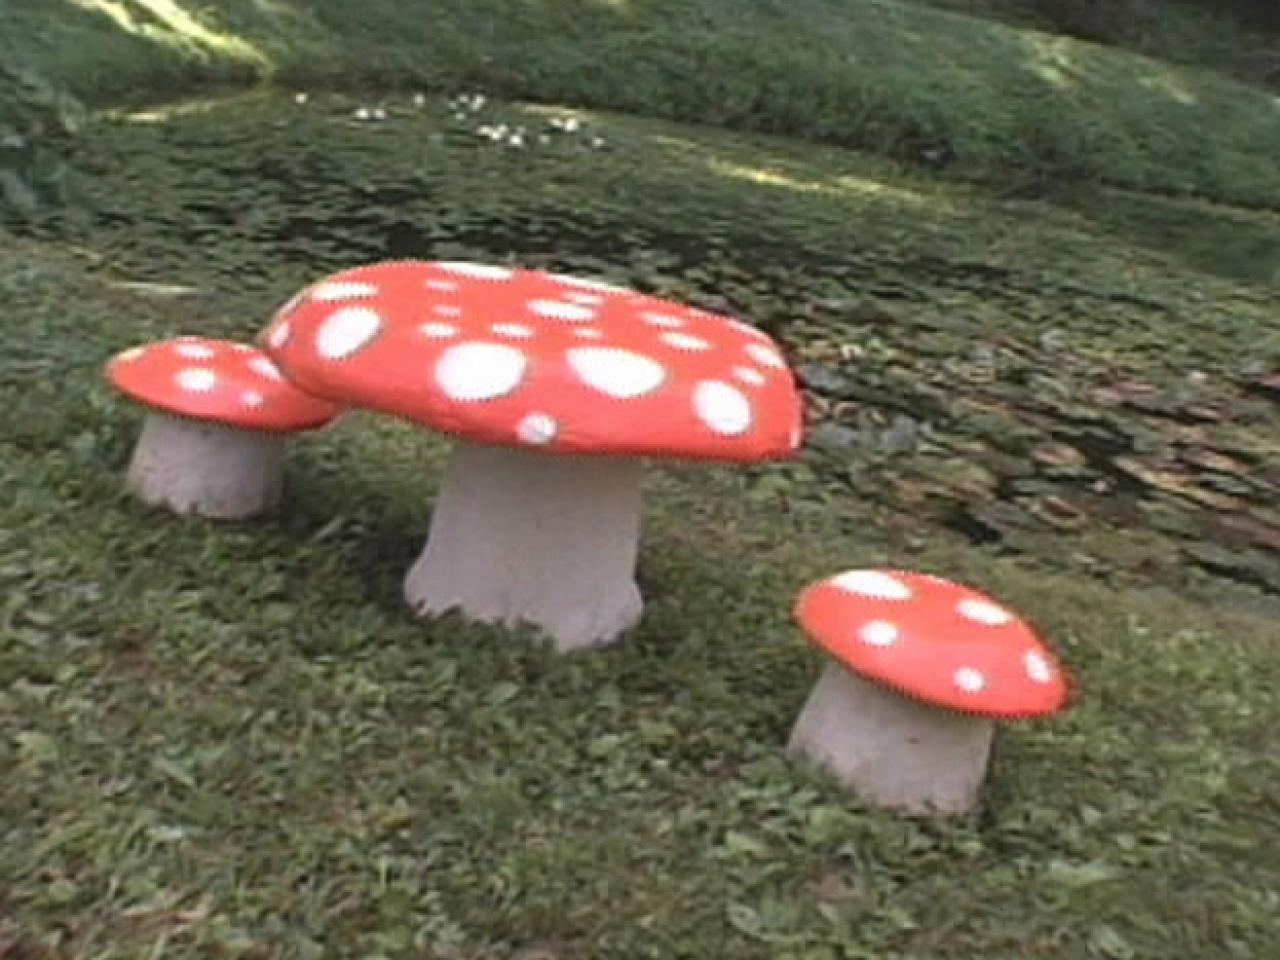
How to Make Toadstool Table and Chairs

Note: This process takes about two weeks to complete, but the concrete application requires only a short time each day.
Materials and Tools:
14-gauge wire or 3 tomato cages
22-gauge wire
¼-inch wire mesh
wire cutters
2 pairs of pliers
surface-bonding cement
trowel
rubber gloves
large waterproof vessel for mixing cement (wheelbarrow, large bucket or mixing trough)
hand aerator (small gardening implement with a handle and claw)
garden hose with nozzle
level work surface
concrete or masonry paint
level
old carpet (optional)
silicone glue (optional)
utility knife (optional)
Steps:
1. Build the frame for the table by turning a tomato cage upside down and bending the spikes perpendicular to the base. Construct the frame for each stool from another tomato cage by cutting the top of the cage off and using the long spikes to form the seat.
2. Cover the entire frame with ¼-inch wire mesh, being careful not to cut yourself on the sharp bits of wire. Cut pieces of wire mesh off the roll. The size and shape of the pieces don't matter as long as they fit snugly when tied down with twisted pieces of 22-gauge wire. Clip pieces of mesh off to keep them from sticking up too far. Create ribs of wire mesh on the underside of the mushroom. The ribs should be hollow and should form large cavities under the mushroom cap. The table should have a minimum of four ribs, and a stool should have two or three, depending on the diameter. The ribs make the top stronger and help to make its attachment to the base cover a larger area. Note: A stool with an extremely small diameter stool doesn't require ribs.
3. Mix the cement, wearing rubber gloves, following the manufacturer's directions and being careful not to breathe in the dust. Add water to the cement and mix with the trowel until the powder is wet but won't drip out of your hand while holding a blob. Break up any globs of dry cement with the hand aerator and mix until the concrete is uniform in consistency. The mix should have the consistency of thick pudding. Mix the cement in very small batches because it will dry quickly. Note: Water can't be added to the concrete once it has begun to harden, and the trough should be washed out between mixes to keep hardened chunks of concrete out of future mixes.
4. Using the trowel or a gloved hand, apply concrete in thin coats to the undersides of the mushrooms and the bases (inside and out). Push the concrete through the mesh so that it grips it.
5. Before coating the undersides and bases again, lightly spray them with water from a hose and let it soak in for a few minutes. This will prevent the dried concrete from leaching the moisture out of your application of wet concrete and causing it to cure too quickly and therefore weakly. Repeat this each time a new coat is applied to any dried concrete.
6. Coat the bases several times until they're fairly thick, especially where they will touch the ground. The concrete should be no thinner than ½-inch in any spot. Ensure that the rim of the base is level with a leveling tool. Add concrete where needed to make it level and where needed to beef up a thin spot or cover sharp pieces of wire sticking out. Mix a soupy mixture of concrete and smooth it all over the base with gloved hands to create a finished coat. Note: You can add texture with your hands by swirling hands from the bottom of the base; you can also use your hands to smooth the coat instead. Remember that the bottom of the base is up in the air and the top is at the bottom at this point. Let dry overnight.
7. Flip the mushrooms over. Coat the tops of the mushrooms in the same manner as the base. Keep the tops as flat and level as possible. A slight variation can be corrected by sitting the finished product on a sand bed. The flat surface should be large and flat almost to the edge, where you slope it down to the rim of the cap. With each coat, be sure that the rim of the cap has no sharp edges and that the concrete is blended with the finished underside.
8. Run your cupped hand around the rim to ensure that there are no sharp edges and the underside is smooth.
9. Finish with a finishing coat after at least three coats have been applied and the coats are thick enough.
10. Add a swirled texture to the top, starting in the center, or smooth the coat as desired.
11. Allow the mushrooms to dry for two days before painting. Lightly spray it with water several times during this drying period to slow the curing time. This builds a stronger table.
12. Paint the mushroom as desired, with one or two coats of paint. Or, for a natural look, leave the mushrooms unpainted.
13. If you'll use the table and chairs inside, you can cover their feet with carpet and silicone glue. Place old carpet upside down under each piece and use a utility knife to cut circles, using the feet of the bases as the size guide. Apply silicone-based glue around the edge of the undersides of the carpet circles (you want the pile of the carpet to be the part touching the floor) and place the mushrooms on them. If you'll use the set outdoors, you can create a level place for it by creating a sand bed just under the table. Dig a hole 2 inches wider than the base and 2 or 3 inches deep and fill it with sand. Tamp it a bit and place your table, using a level. Rock it slightly in the sand bed to make it level.


