Custom Chicken Coop Plans
Construct a beautiful and efficient backyard coop to suit any style — from fancy to rustic — with these step-by-step instructions for how to build a chicken coop.

Related To:

Photo By: Photo by Mick Telkamp
A Coop and Run to House Six Chickens
Raising backyard chickens is more popular than ever. It's an enjoyable hobby that pays off in fertilizer, pest control, companionship and, of course, fresh eggs. Raising chickens starts with the right housing, but finding a coop that is appropriate for the flock, easy to maintain and still looks good in the yard can be a challenge.
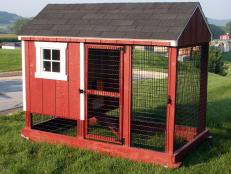
HGTV has got you covered with these plans for a DIY coop and enclosed run with a small footprint to fit any yard. This raised-coop enclosure offers room for six chickens, a walk-in run, built-in storage, an observation window, external egg collection and the simple design only takes up a 6-foot by 10-foot area.
Download our free, detailed chicken coop plans and explore this gallery to see this efficient design customized four ways, including a basic coop, elegant and rustic modifications and a plan to convert this sturdy structure into an attractive and spacious garden shed should a backyard chicken coop no longer be necessary.
Prepare Materials
Before assembling the frame for your chicken coop and enclosed run, measure and cut the necessary lumber as shown in the detailed plans in the previous slide. Be sure to select pressure-treated lumber wherever possible. Materials have been calculated to minimize waste, so keep in mind when cutting.
Materials Needed
(8) 2x4 x 8’ pressure-treated lumber
(6) 2x4 x 10’ pressure-treated lumber
(14) 2x4 x 12’ pressure-treated lumber
(2) 1x2 x 6’ pressure-treated lumber
(2) 1x4 x 12’ pressure treated lumber
(4) 1x4 x 8’ pressure-treated lumber
(1) 1x4 x 10’ pressure-treated lumber
(1) 1x6 x 8’ pressure-treated lumber
(1) 5/4x6 x 10’ pressure-treated lumber
(1) 1x5 x 8’ pine board
(15) 1x6 x 8' primed trim boards
(6) 1x6 x 10' primed trim boards
(4) 26” x 8’ ribbed roof panels
(1) 26” x 12’ ribbed roof panels
(8) 3/4” x 36” square dowels
(1) 4’ x 8’ x 3/4” plywood sheet
(1) 2’ x 4’ x 3/4” plywood sheet
(2) 4’ x 8’ siding panels
(3) 1/4” x 1-1/2” lattice molding
(1) 4’ x 50’ hardware cloth roll
(1) 20” x 33” single hung window
(1) 36” screen door
3/8” galvanized staples
roofing screws
2” exterior wood screws
2-1/2" deck screws
2” finishing nails
(8) 3” T-hinges
(3) door pulls
miter saw
jigsaw
circular saw
reciprocating saw
chalk box
drill + bits
hammer
level
measuring tape
pencil
speed square
staple gun
safety glasses
gloves
Mark Notches
Cut Notches
Arrange Front and Back of Frame
Assemble Front and Back of Frame
Once all pieces are in place, use 2-1/2-inch deck screws to assemble.
Position Frame
Lay two 6-foot lengths of 2x4 parallel on the ground spaced 10 feet apart. Position assembled front and rear of frame in place with corners touching the ends of placed 2x4s. Lift the assembled components to stand vertically and stabilize using two lengths of 2x4 temporarily screwed in place.
Attach Sides
Have a helper on hand to once more ensure all sides are plumb and check that corners are square. Using 2-1/2-inch screws, secure the bottom and middle side supports. Note side supports are of double thickness for stability.
Attach End Joists
Remove Temporary Supports
Add Roof Joists
Trim Vertical Posts
Use a reciprocating saw to roughly trim vertical posts on the front of the structure to match the slope of the joists. This cut will allow roof panels to lie flat when attached.
Attach Roof
Roofing is available in corrugated or ribbed styles made of galvanized steel or polycarbonate in a variety of colors. Here we use ribbed steel roof panels painted black. Cut panels to length and start at one end to attach panels one at a time using roofing screws. Allow an overhang of 1-1/2 inches on the sides, 4 inches at the front and 2-1/2 inches at the rear. Make sure the roof is square with the frame when attaching the first roof panel. Use raised ribs to overlap each panel with the previous and continue until all five panels are in place and secure.
Assemble Coop Enclosure
Place and attach elements of the inside face of the coop enclosure. Once the enclosure frame is complete, place and secure the floor of the coop. A healthy flock requires four square feet of coop space and 10 square feet of run per chicken, which can result in a sprawling enclosure. The elevated floor of this coop design allows space below to serve as run space for the chickens, reducing the footprint of the overall structure.
Attach Door Header
Position and attach header at the door opening. This can be adjusted as needed to accommodate the height of the screen door.
Attach Run Fencing
Cut panels of hardware cloth to fit run and attach to frame. Use a helper or clamps to position and secure using staples. Make sure panels lie flat and have no gaps. Despite its name, chicken wire is not the best choice for the enclosure. Although it would likely keep chickens in, the weak wire and loose weave is no match for a hungry predator. Instead, use 1/4-inch hardware cloth and use plenty of staples to keep it secure.
Add Siding
Assemble and Attach Nesting and Storage Bump Out
The bump out makes it easy to store chicken feed and allows eggs to be collected without entering the coop. Once the bump out has been assembled, attach to the side of the coop with the right side lined up with the pass-though opening in the siding. The nesting boxes are not attached to either the bump out or coop, but fit snugly and are easily removed to clean or to change bedding. Hinges and door pulls may be selected by preference. A barrel bolt at the top of each door is recommended to keep out predators.
Frame Window
If your window does not have a prefabricated frame, one may be created using 1x2 lumber. If needed, add face trim using 1x6 lumber.
Insert Window
Secure the single-hung window in the opening on the front of the coop. These plans are written to use a 20-inch by 33-inch window but are easily adapted to fit a larger or smaller window. The window makes it easy to watch your flock inside the coop and provides plenty of light.
Add Coop Access Doors
These wide doors are attractive and provide easy access to the inside of the coop for cleaning or access to the chickens within. Use the siding cut from this opening in the assembly of the doors. Hang doors with 3-inch T-hinges and add a barrel bolt at the top of each door to keep doors secure.
Add Trim
Measure and cut desired trim boards to cover all external corners, frame lines and to border all openings. Attach using finishing nails to give your coop a clean, polished appearance.
Hang Screen Door
Hang a 36-inch screen door in the prepared opening. The screen typically found in store-bought doors is no match for an intrepid predator and it is strongly recommended that a layer of hardware cloth be added before installation.
Install Chicken Ramp
Add a Roost
Chickens like to sleep off the ground and will seek the highest roost when bedtime rolls around. Install a roosting bar inside the coop using a piece of scrap lumber attached 8 inches from the back of the coop above the nesting boxes. Unlike most birds, chickens sleep flat-footed, so a round dowel is not advised.
Add Outdoor Roost
Give your chickens a place to perch in the run by mounting a scrap lumber bar at the outside corner between the middle frame supports. To give your run a more natural look, a wide tree branch cut to length may be substituted.
The Finished Coop
Remove the props under the corners and use ground anchors to secure the coop in place. A ground barrier is strongly recommended to prevent predators from digging their way into the enclosure. To create a ground barrier, bury a course of hardware cloth 12 inches deep around the perimeter. Add a hanging feeder and waterer to the run and fill the nesting boxes with bedding material. If the ground at your site is rocky or otherwise inhospitable, consider spreading a layer of sand, dirt, straw to the run for the comfort of your flock. Once the amenities are in place, your enclosed coop and run is ready to house up to six chickens of any size or breed. If raising only bantam breeds, the coop may support up to two additional birds, but resist overpopulating the coop, which can result in problems regarding the health and harmony of the flock.
Customizing an Elegant Coop
More Options for an Elegant Coop
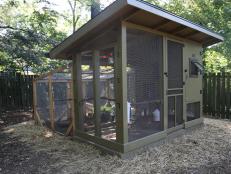
A slate walkway and a functional coach light complete the modification. Note that the basic coop doesn’t require electrical service. Running power for a “porch” light or a single caged bulb inside the coop itself can add both function and style to a well-maintained coop.
A Rustic Modification
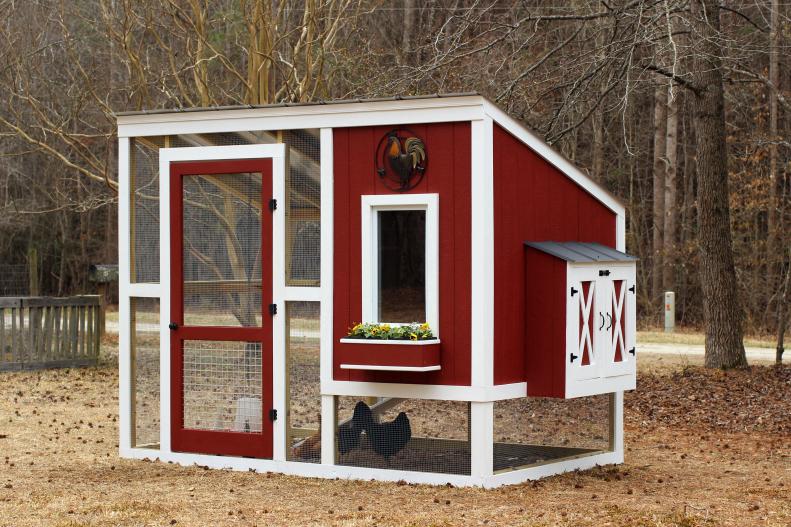
Our rustic modification incorporates elements of classic rural style. “Barn Red” paint with contrasting white trim gives the coop a clean look reminiscent of farm living. Add a splash of color with a matching window box, which cradles a standard plastic planter box for easy management. A metal grid on the lower panel of the screen door and an artistic flourish mounted over the observation window adds to the style of this modification.
Crossbucks
Crossbucks (inset “X” frames on the coop doors) are a signature element of farm style.
Garden Shed Modification
If chickens are no longer part of your backyard experience or a growing flock requires a larger coop, there’s no need to tear down this well-built structure. Instead, remove the coop floor and inside facing, nesting and storage bump-out and run fencing. Inexpensive siding and a solid door convert the structure into a spacious and attractive garden shed to store tools, equipment and gardening supplies. Here we use 1x4 lumber and siding to create a functional door without the added expense of a store-bought door.