Next Up

25+ Fun and Easy Easter Egg Decorating Ideas

March 05, 2024

Take your Easter egg decorating to the next level by adding jewels, washi tape, colorful dip-dyed designs and more. Your spring tablescape will never be the same.

Price and stock could change after publish date, and we may make money off these affiliate links. Learn more.
Scroll For More Photos
1 / 27

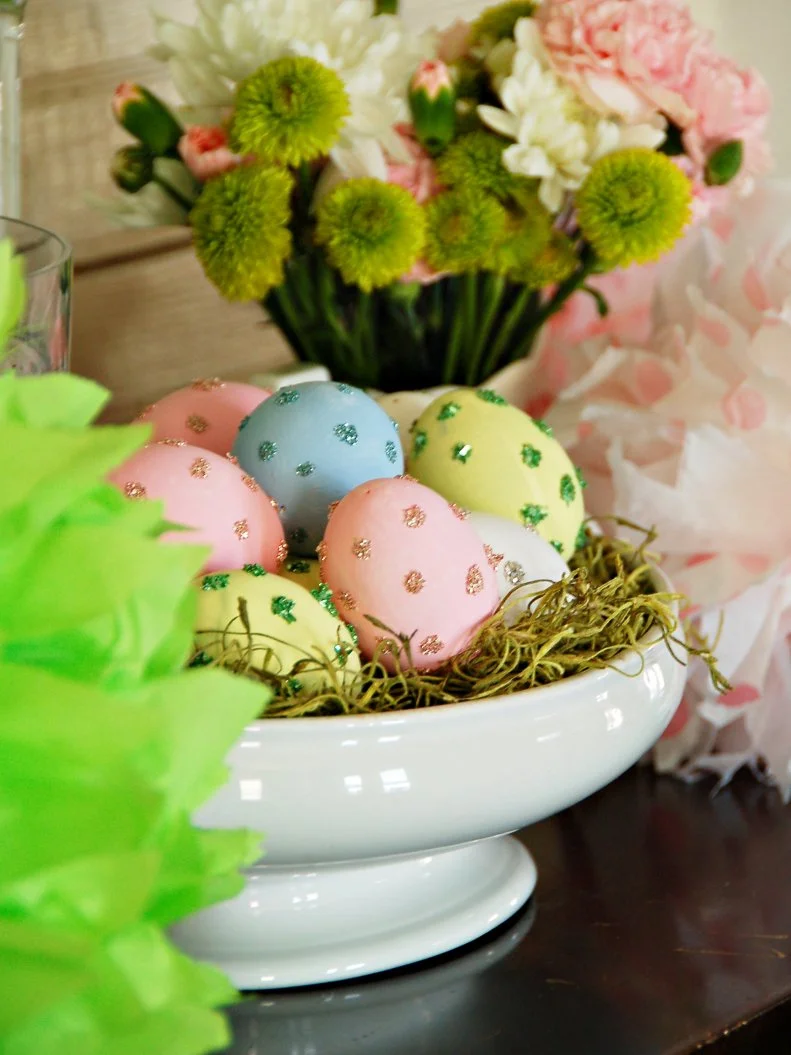
Paint + Glitter Polka-Dot Eggs

Want to preserve your Easter eggs for years to come? Blow out the interiors of each egg before decorating, then hand-paint with various shades of acrylic paint. Once dry, use a liner brush to paint polka dots, swirls or other designs with glue onto painted eggs. Then sprinkle the wet glue with glitter. The end result will be a batch of glamorous and glittery eggs to display for spring guests.
More photos after this Ad

Photo: H. Camille Smith. From: H. Camille Smith
2 / 27

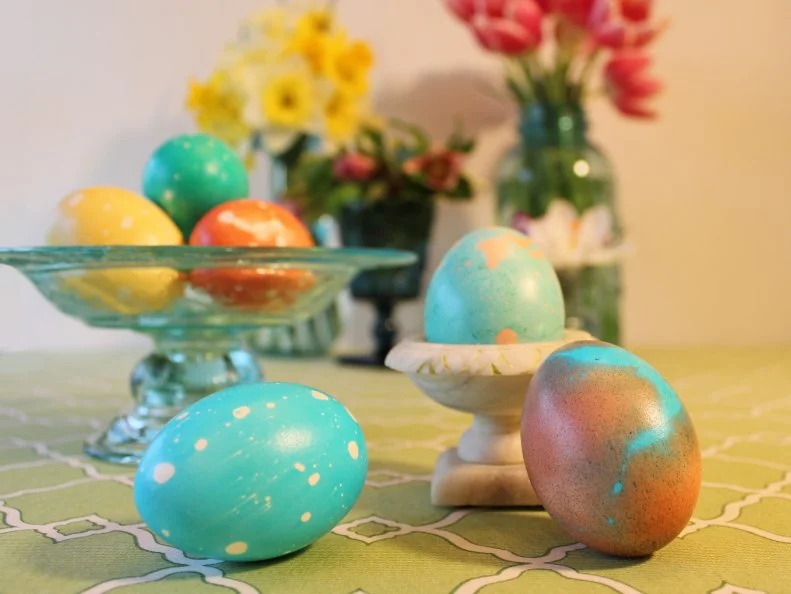
Marbleized Eggs

Add a fun, multicolor twist to plain eggs with a marbleized effect. Simply add olive oil to the dye solution to create an unpredictable, mottled look to your eggs.

More photos after this Ad

3 / 27

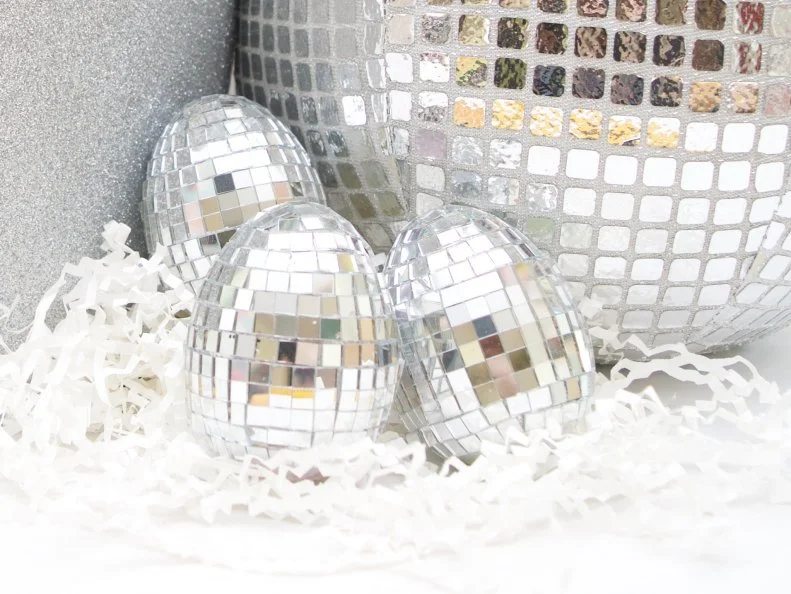
Disco Ball Mirrored Easter Eggs

Whether you refer to them as mirror balls or disco balls — you can’t escape the popularity of these shiny orbs. You might get lucky enough to find readymade mirror-covered Easter eggs perfect for that disco-ball-themed basket, but if not, never fear you can make your own. These tiny glass mirror tiles are stickers. You cut the strips to the amount you need and adhere. They even stick to plastic Easter eggs.

Find Themed Easter Basket Ideas

More photos after this Ad

4 / 27

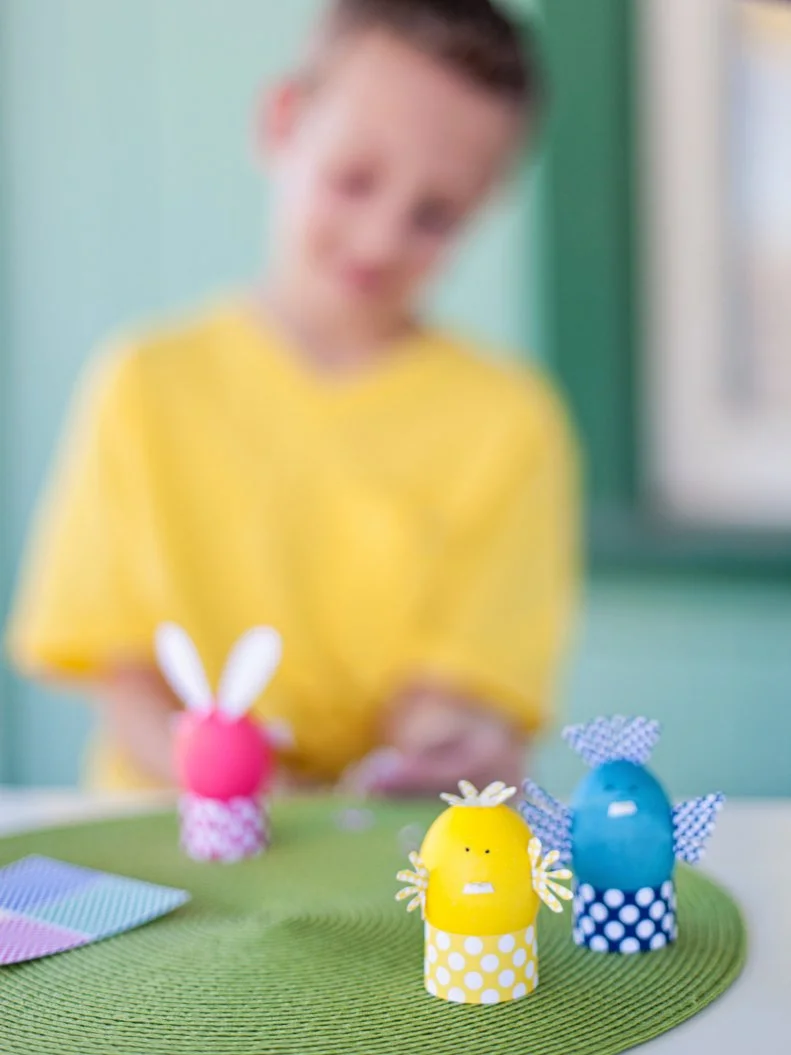
Easter Egg Animals

Let crafty little hands get creative by turning colorfully dyed Easter eggs into adorable bunnies, chicks, sheep and birds. Download and print patterned paper stands and the polka-dotted paper so kids can cut out ears, beaks, feathers, whiskers, etc., to create springtime animals.

More photos after this Ad

5 / 27

Thread-Wrapped Eggs

Use baker's twine to add a trendy look to your eggs. First, dab a fast-grab tacky glue to the bottom of a paper mache egg and coil the string around. To change colors, trim the first color and glue the end of the second color. For a seamless finish, coil the string around the top, trim and dab on some glue.

More photos after this Ad

6 / 27

Perler Bead Eggs

Perler beads are typically melted and fused together using a warm iron. However, when it comes to decorating Easter eggs, your best bet is to glue them on. Use a hot-glue gun on the lowest setting, you don’t want to accidentally melt the plastic egg underneath or the beads. Create patterns and designs like rainbows and flowers.

60 DIY Easter Craft Ideas For Kids And Adults

More photos after this Ad

7 / 27

Doodled Eggs

Calling all artists! Freehand your favorite patterns, designs and words onto plain or dyed eggs for a one-of-a-kind look. Here, trendy ikat and floral designs provide a sophisticated look in metallic gold.

45 Themed Easter Baskets for Kids That Aren't Filled With Candy

More photos after this Ad

From: Kayla Kitts
8 / 27

Washi-Taped Eggs

Washi tape can be used for both decorative and everyday uses, but now, it's being used on Easter eggs, too. To get the look pictured, simply use a standard roll of washi tape in the color or pattern of your choice and begin cutting small pieces at a diagonal. Adhere the pieces to form a mosaic effect. You can also use strips of washi tape and overlap them vertically at the top and bottom.

Easter Cupcake Decorating Ideas

More photos after this Ad

9 / 27

Foiled Easter Eggs

All you need to make these metallic beauties is foiling glue and papers and a paintbrush.

Get the How-To

More photos after this Ad

10 / 27

Chick Eggs

Bring a classic Easter look to your home with adorable chick eggs. First, dye the eggs yellow and let dry. Once dry, use a permanent marker to draw on eyes, beak and wings. Chirp, chirp!

60 DIY Easter Craft Ideas For Kids And Adults

More photos after this Ad

11 / 27

Mermaid Eggs

Year after year mermaids still resonate with kids (and adults). If you are putting together a mermaid-themed Easter basket it only makes sense to include matching scales on your eggs. Wrap plastic easter eggs tightly in fishnet stockings or a mesh bag. Cut the mesh into sections and wrap each egg up using a rubber band at one end. Coat the eggs in spray paint; several light coats are best allowing for drying time in between. When the paint is dry remove the eggs from the mesh.

Non-Candy Easter Basket Ideas

More photos after this Ad

12 / 27

Bejeweled Eggs

Add some glitz and glam to your Easter eggs with sparkling rhinestones. First, if you want, paint your eggs with acrylic paint and let dry. Then place stick-on rhinestones in various colors and sizes to create the pattern of your choice.

More photos after this Ad

13 / 27

Paint Pen Eggs

A plastic Easter egg is a blank canvas just waiting for the right theme. Grab the paint markers and go wild. You can make the eggs as intricate or simplistic as you want. Permanent markers and many gel pens also work great. Don’t forget to get the kids involved in the DIY egg fun.

More photos after this Ad

14 / 27

Speckled Eggs

Create natural and classic-looking faux eggs by applying a splatter effect to paper-mache eggs. Use an artist's brush to apply beige acrylic paint to paper-mache eggs. Mix dark brown acrylic paint with a water-based faux glaze. While wearing gloves, dip a toothbrush into the mixture and run your thumb through the bristles to splatter the dark glaze onto the eggs.

More photos after this Ad

15 / 27

Neon Dip-Dyed Eggs

Match your eggs to top design trends. Dip eggs in your favorite color dyes, leaving part of the shell exposed. Use strips of washi tape to help keep lines clean and straight. Allow colors to overlap to vary looks and styles.

More photos after this Ad

16 / 27

Narwhal Easter Eggs

Often referred to as the unicorn of the sea these majestic animals deserve a DIY Easter egg of their own. Gather supplies like permanent markers, tiny shells and little flowers. First, draw a face onto the larger end of a blue egg. From there glue a pointy horn-shaped shell onto the upper forehead area. Embellish with other small shells, pearls and flowers.

More photos after this Ad

17 / 27

Glue-Strip Dyed Eggs

Use plain hard-boiled eggs and stick on glue strips where desired. You can create a planned pattern or stick them in unexpected places for a surprising finish. Dye your eggs, then peel off strips when cool and dry to reveal overlapping white lines.

More photos after this Ad

18 / 27

Glittered Sticker Eggs

Adhere glue dots and glue strips to plain or dyed hard-boiled eggs. Fill a sandwich bag with glitter, place egg inside and shake to coat glue dots or strips. Rinse the excess glitter from the egg in a sink under cold water.

More photos after this Ad

19 / 27

Dinosaur Dig Egg

You know what goes great with a dinosaur themed Easter basket? Actual dinosaur eggs that kids can crack open! To make these, you will need 1 cup flower, 1 cup dried coffee grounds, 1 cup of playground sand, 1/2 cup water and 3/4 cup salt — plus small dinosaur toys. Mix the dry ingredients then add water a little bit at a time until you have a clay like consistency. Mold the clay into an egg shape around the toy dinosaur and set aside to dry out for 1-2 days. When dry, the kids can do their own Easter excavation.

Easter Basket Ideas for Kids of All Ages

More photos after this Ad

From: Kayla Kitts
20 / 27

Temporary Tattooed Eggs

Using pre-bought rub-on transfers or temporary tattoo paper, cover eggs in edgy graphics or words of your choice. To get the look pictured, cut out various rub-on transfers and overlap on the eggs. It's OK if certain images don't transfer perfectly; it will provide a more distressed look.

More photos after this Ad

21 / 27

Tie-Dyed Eggs

Tie-dyeing your Easter eggs is much easier than it seems. Lay out a paper towel and spray with white vinegar. Then, place several drops of food coloring (two to three colors) all over the paper towel. Place the egg in the middle, gather the edges of the paper towel, hold tightly and spray with vinegar until the paper towel is wet. Secure the top of the paper towel with a rubber band. Allow the colors to soak into the egg for at least two hours. When ready, remove the paper towel to reveal your beautiful, color-infused egg.

50 of Our Favorite Easter Recipes

More photos after this Ad

22 / 27

Glittered Eggs

To cover your Easter eggs in a layer of glitter, simply coat the entire surface of painted or unpainted eggs with all-purpose white glue. Place the eggs in a bowl of glitter and spoon glitter over wet glue until fully covered. Once dry, sit back and admire.

More photos after this Ad

23 / 27

Puffy Paint Eggs

Puff paint did not go away after the 80s — it is still going strong and is now being used on things like plastic Easter eggs. The difference between puff paint and regular craft paint is the raised shiny texture and ease of creating designs like flowers and dots. When painting eggs like this it is best to do a section at a time so as not to smear the paint.

More photos after this Ad

Photo: Alison Gootee. From: HGTV Magazine
24 / 27

Gold-Dipped Eggs

To brighten up your Easter decor, dye eggs in a neon color like bright pink. Let dry, then dunk the bottom or top halves of the eggs in gold craft paint. Once it's completely dry, display them in a white egg tray or as part of a centerpiece. Photo courtesy of HGTV Magazine

60 DIY Easter Craft Ideas For Kids And Adults

More photos after this Ad

25 / 27

Decoupage Eggs

Sometimes festive napkins are almost too cute to wipe your mouth with. Good thing they make perfect decoupage material. Napkins are usually two- or three-ply, meaning you can peel off a few layers of white paper. All you want is the paper with a design. Using a decoupage medium, cover real, wood or plastic Easter eggs for a fun new spin on egg decorating.

More photos after this Ad

26 / 27

Eco-Friendly Eggs

These eggs are surprisingly dyed with items in your pantry. It's just as affective and has no toxicity, is eco-friendly and easy to do. The best options are yellow onions, beets, turmeric and other herbs. Try them with your kids! Photo courtesy of Kim Foren

More photos after this Ad

27 / 27

Mix and Match Faces

Besides saving them for next year, many people are never sure what to do with all the leftover plastic eggs after Easter. Keep the fun going year-round with this entertaining project. If the kids are old enough, they can do it themselves, for younger children, parents may need to help. Using permanent markers or paint pens add facial features onto two-part eggs that kids can mix and match and make different faces with. All the faces and eggs need to be the same size and scale. On the top of the eggs paint hair, eyes and noses. The bottom egg parts will get mouths. The more eggs you decorate the more fun faces that can be made.

45 Themed Easter Baskets for Kids That Aren't Filled With Candy