How to Assemble a Wedding Cake
Skip the bakery and learn how to assemble your own gorgeous wedding cake.
Homemade Wedding Cake
Homemade wedding cake can be a real money saver and adds an impressive personal touch to the big day. Making your own wedding cake is easier than it sounds!
Bake in Advance
Cake and filling can be made in advance to ease the process. In addition to the ingredients, a piping bag and tips, wooden or plastic dowels, cardboard cake rounds, a lazy Susan and a large, sturdy cake platter will be used to construct your homemade wedding cake.
Make Icing
Icing should be made fresh when it is time to build your cake. Adjust consistency with milk until a smooth and easily spread texture is reached.
Bottom layer
Use a dollop of batter to secure a 12” layer of cake to a 12” cardboard round and place on cake platter. Coat top with a layer of filling, leaving ½” uncovered at the outer edge.
Add a Layer
Place second 12” layer on top of bottom layer and top with filling. Each tier of the cake will be built and iced before assembly.
Apply Crumb Coat
Place the top layer of the 12” tier on top and coat cake with a thin layer of icing. This coat is called the “crumb coat” and prevents crumbs from clumping in the final coat. Once coated, place tier in refrigerator and continue to the second tier.
Second Tier
Build a 9” tier in the same manner as the 12” layer, including a cardboard round beneath bottom layer. These rounds will stay in place throughout construction and give each tier a stable base on which to rest. Place the 9” layer in fridge and continue to the 6” layer.
Top Tier
Assemble and crumb coat the 6" layer and refrigerate. When adding layers, placing them bottom-side-up will ensure the top of the tier is perfectly flat.
Icing the Cake
Remove bottom layer from refrigerator and place on cake platter positioned on a lazy Susan. Apply final coat of icing using a long icing knife. Rotate the lazy susan as you work to help create a smooth and even coat. Repeat the icing process on the 9” and 6” tiers.
Add Stabilizing Dowels
Dowels hidden within the bottom and middle tiers will keep the cake stable and prevent possible collapse. Cut four dowels to the height of the bottom layer. Use a cake round to approximate placement of next tier and press dowels into the cake below until level with the top of the cake. Repeat this process with the middle tier, using a 6” cardboard round to approximate the placement of the top tier.
Assemble the Cake
Time to put it all together! Carefully center and place the 9” tier on top of the 12” tier, using a cake lifter or cake round to gently slide into place. Add the top tier to the cake and gently adjust as needed to make sure the cake is level and even.
Pipe Trim
Use a piping tool to decorate the cake as desired. Icing used to decorate may need to be thicker than the icing used to coat the cake. Add powdered sugar as needed to reach desired consistency.
Using Different Piping Tips
Different piping tips can be used to create different looks. Practice using tips on a piece of cardboard before applying to cake. This step goes a long way in reflecting your personal style to this elegant cake.
Decoration
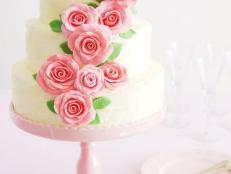
If desired, give your cake in impressive splash of color using fruit, silk or cut flowers or a classic “bride and groom” figurine. If flowers are inedible, consider plastic holders or barriers to prevent contact with the cake. Be creative. Once the bride and groom have cut the cake, remove accessories before cutting the cake into slices for guests.
Serving Wedding Cake
Disassemble the tiers and remove dowels and any decorations before preparing to serve. Disassembling a wedding cake isn’t always a pretty process and is usually done “behind the scenes.” Don’t forget to save that top tier to be enjoyed on the first anniversary. Freeze uncovered for about an hour before wrapping in plastic to make sure your beautiful piping remains intact.