Fall Party Decorating Ideas
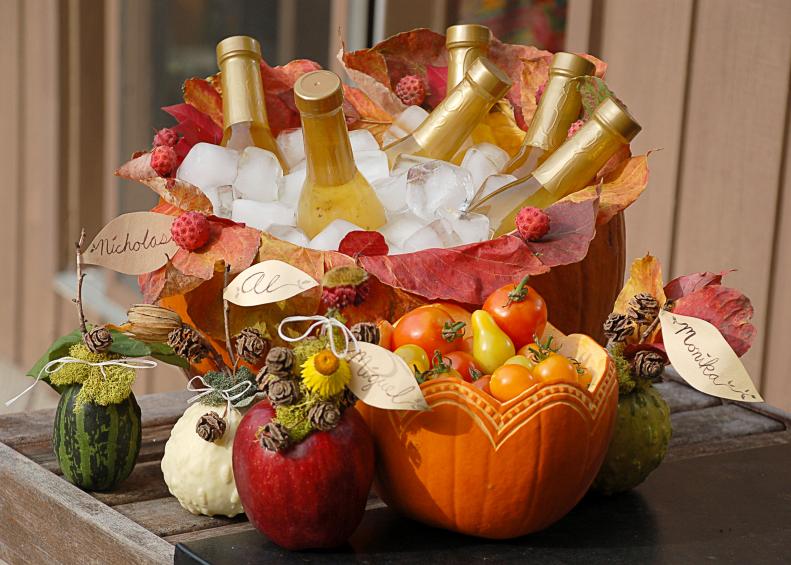
These beautiful pumpkin bowls and decorative gourds are perfect additions to any fall party.

By:
Ruth Meharg
Related To:
Fall Party Fun
Grab a couple of pumpkins, gourds, crisp fall apples and lots of beautifully colored leaves to make these beautiful bowls and name card holders for your next fall party. A big pumpkin bowl is great for serving cold drinks, and you can use a smaller pumpkin for dips or veggies.
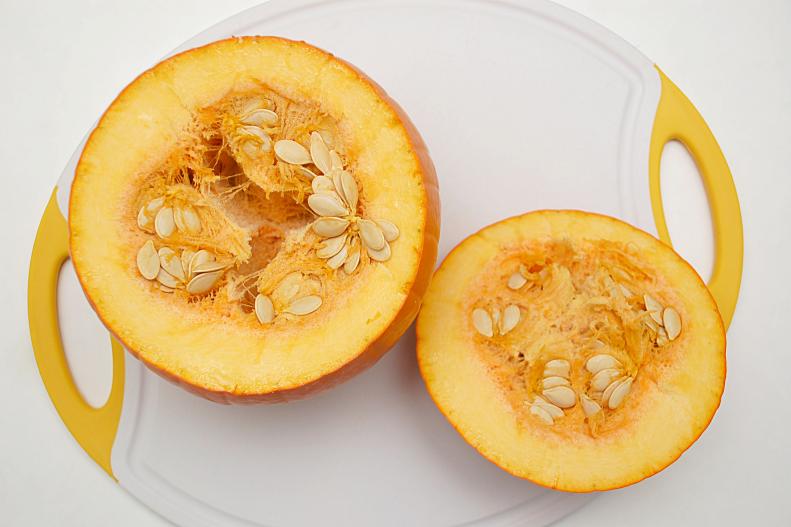
To make a pumpkin dip bowl, cut the top off a small pumpkin. It's best to do this at or just above the widest part of the pumpkin. You won't need the seeds or the top for this project, but you can always save them for roasting later.
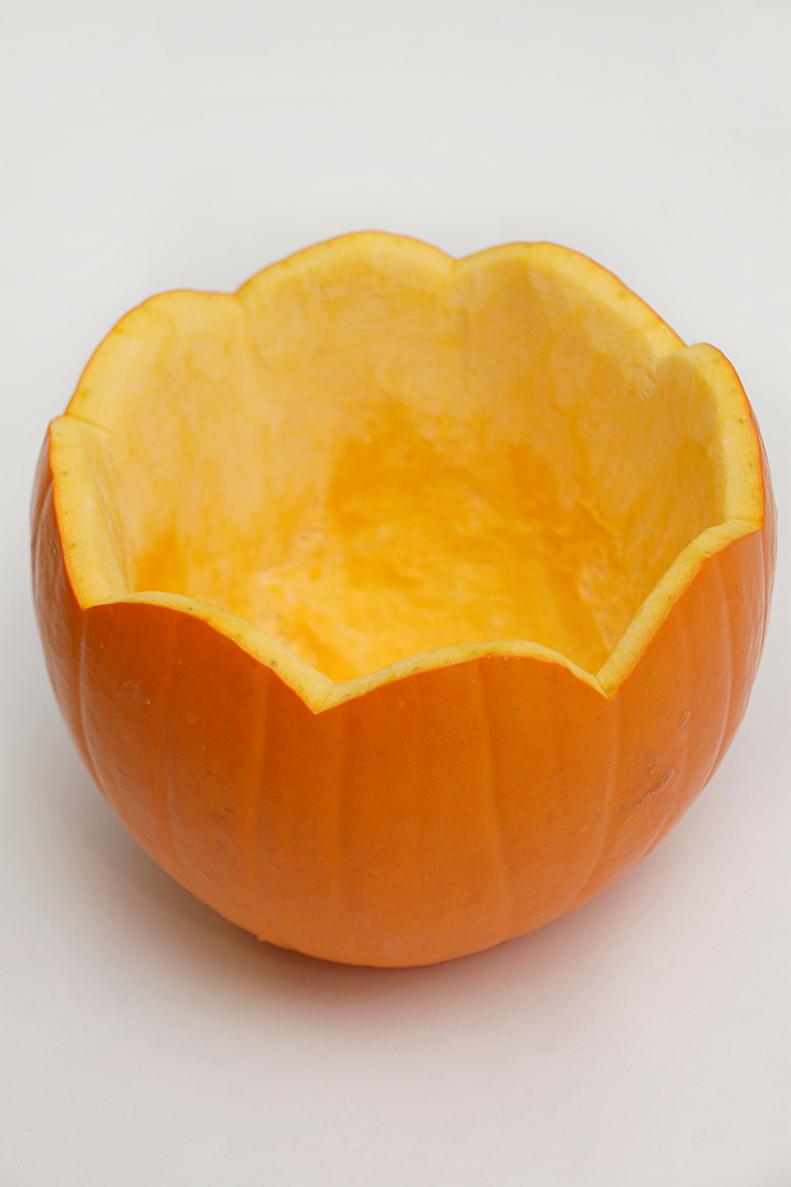
Scrape down the inside of your pumpkin until you are left with only the firm, pale yellow flesh. Cut the flesh away from the top edge of your pumpkin bowl to create the illusion that the walls are thin. You can leave the top flat, or you can cut decorative scallops or other shapes into the top of your pumpkin.
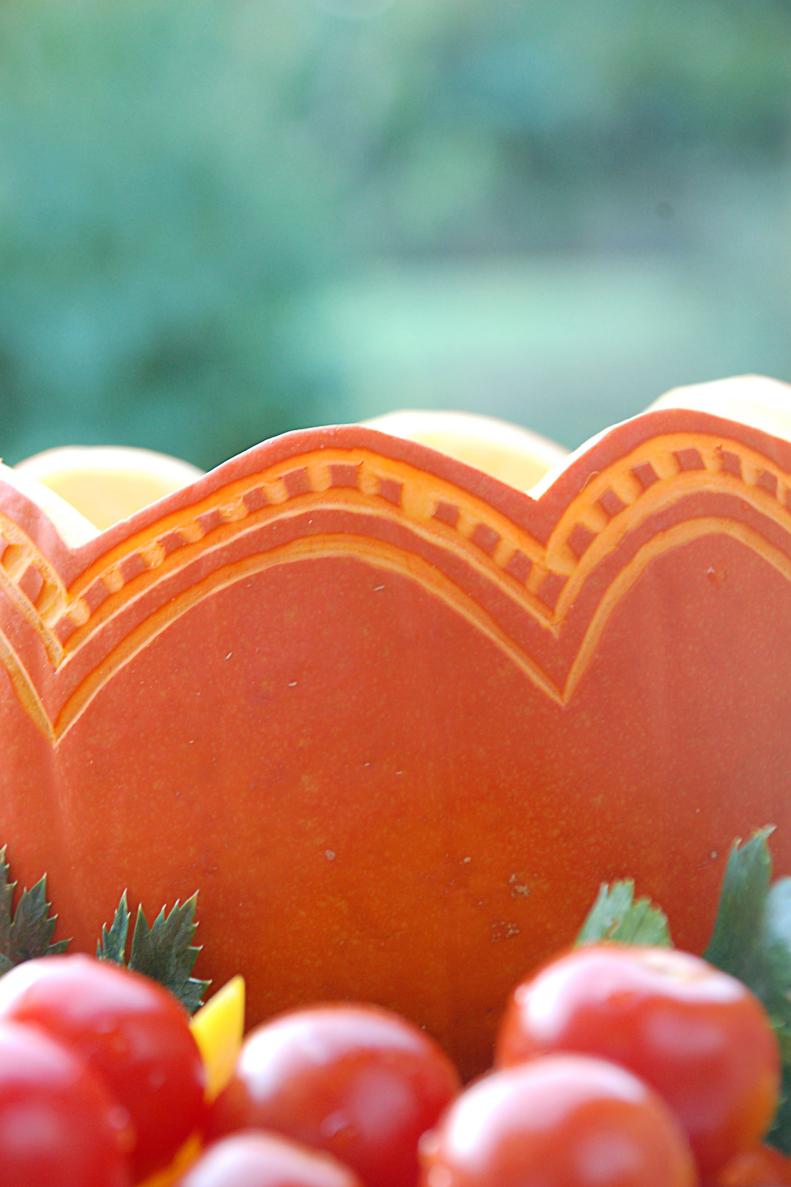
If you'd like to add a little extra flourish, you can add detail to your pumpkin with pumpkin carving tools. Carve out little decorative designs or create a full jack-o'-lantern! Just be sure to only carve away the skin of the pumpkin. If you carve all the way through your bowl won't hold be watertight.
Add Dip and Serve!
Now that your bowl is finished, all you need to do is add some dip. A container of hummus fit perfectly into our pumpkin, but if you'd like you can pour dip straight into the pumpkin bowl. It may take on a subtle pumpkin flavor if it is in direct contact with the flesh of the pumpkin, so keep this in mind when choosing your dip. Place your pumpkin on a platter and surround it with fresh veggies for a beautiful and tasty display.
To create a large pumpkin bowl you will need a large pumpkin. The average pumpkin you can buy in the grocery store will hold about 6 half liter bottles. You'll also need fall leaves and any other flora you'd like to decorate with, staples and carving tools.
To create your pumpkin bowl you will need to cut the top off the pumpkin. We cut ours off at a slight angle, so the back of the pumpkin is higher than the front. This creates nice sweeping edges and will display your leaves better later on. When the top is off, pull out all of the seeds and scrape the walls of the pumpkin until they are about an inch thick.
To decorate the edge of your pumpkin, take colored leaves and arrange them so that they cover the cut edge. Secure them as you go by pushing staples through the leaves into the flesh of the pumpkin. You can do this easily by hand since the pumpkin flesh is soft. We used colored staples to blend in with the leaves, but you can use any kind you like.
Once all the leaves are in place, you can add more decorations using seeds, berries, flowers or just more layers of leaves. Just secure them with staples as you go. The staples won't hold anything very heavy, so keep it light or use multiple staples.
Serve!
Your pumpkin bowl is now complete. Fill your finished bowl with ice, add drinks and set it out for your guests to enjoy.
To create your name card holders you will need small decorative gourds or fresh apples, leaves, flowers, pinecones, moss, and whatever other fall plants you would like, string or twine and a little bit of masking or floral tape.
To create your name card holder, begin with the name. Print or write the names on paper and glue them to twigs or sticks. Place the other end of the stick next to the stem of your apple or gourd, and wrap it securely with tape. We used a narrow masking tape, but floral tape will work as well.
Add leaves, dried flowers, little pinecones, acorns and whatever else you would like around your name flag, taping them onto the gourd stem as you go. When you're happy with your arrangement, wrap the base in moss to cover the tape. Tie the moss on with string or twine for a decorative finish.
Your decorations don't all need to blossom up from the gourd, you can add pieces around the body. Continue to tape pieces to the stem, but face some downwards rather than upwards. Wrap moss around the middle to finish.
Apples work just as well as gourds for name card holders, but they won't last quite as long. Encourage your guests to take them home and enjoy the crisp fall flavor when your party is over.
If you are creating these name card holders for a party where you know the guests well, you can tailor your decorations to fit different personalities. Use bold colors for your outgoing friends, a sculptural arrangement for an architect, or lots of little pieces for the friend who loves delicate things. Have fun and enjoy creating them!