How to Build a Wine-Storage Unit
Carve out a miniature wine cellar, complete with the perfect temperature and humidity level, with this project.

Materials and Tools:
¾-inch oak plywood
oak 1x2-inch boards
oak 1x3-inch board
oak 1x6-inch board
¾-inch particleboard underlayment
slate tile
thin-set mortar
black grout
wood glue
220-grit sandpaper
brad nails
bullnose trim
table saw
miter box
nail gun
staple guns
4-inch hole saw
5-inch hole saw
1½-inch hole saw
drill
screw gun
wet tile saw
grout float
notched trowel
router
Steps:
1. Measure dimensions for the cabinets. If building in an alcove, measure the alcove and subtract the width of the chosen wine cooler. Divide the measurement by 2 to get the width of each cabinet.

2. Cut the top and bottom to the desired width and depth. The sides need to be 1½ inches shorter than the height of the cabinet. Cut the back piece to the width and height that the finished cabinet will be. Assemble by gluing and nailing the top and bottom to the sides.
Nail and glue the back on, aligning the side and bottom panels with the edges of the back to be sure the box is square. Face the cabinets with oak 1x2’s. Butt or miter the corners of the face frame, depending on the desired style.

3. To make the wine-bottle inserts, cut a piece of oak 1x6 to fit inside the width of the cabinet. Draw a line down the center of the 1x6. Using a 4-inch hole saw, cut a series of holes along the center line. After all the holes are drilled, cut the board down the middle with the table saw. This should give you two identical boards with half-round cutouts for the bottoms of the bottles (the back of the rack). Repeat this process with an oak 1x3 using the 1½-inch hole saw. These pieces will be for the top of the bottle (the front of the rack). Use the router to round edges and add decorative touches.
4. To shape the stemware racks, cut an oak 1x3 to match the depth of the cabinets. Then cut an angle on one face with the table saw. Set the saw blade to about 10 degrees and run the piece through, leaving a ¾-inch flat spot after the angle is cut. This will give you a stable place for screwing the stemware rack to the shelf.
5. To save time and effort, sand and stain all the wine-bottle racks and stemware racks before installing them in the cabinet.

6. Stain cabinets and face frames as desired. Using the nail gun and brads, nail the wine bottle and stemware racks into place from the outside of the frame. Make sure the spacing on the racks fits your bottles and stemware.
7. Install cabinets by screwing to the wall studs through the back of the box. Make sure to leave the correct amount of space in the middle for the wine cooler.
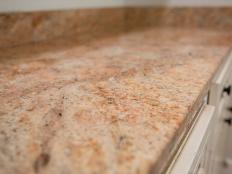
8. Measure and cut the particleboard underlayment for the countertop. It needs to be ¼-inch deeper than the cabinets. Nail the underlayment into place on the top of the cabinet.
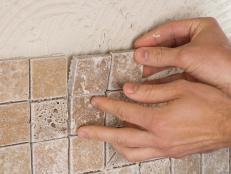
9. Spread the thin-set mortar on the underlayment with a notched trowel. Lay the tile in place, starting at the center of the front edge and working outward. Cut the side and back tile to fit, using the wet tile saw.
10. Mix grout according to the manufacturer’s instructions and spread onto tile with a grout float. Scrape as much off the tile face as possible with the grout float. After the entire top is grouted, wipe it down with a damp sponge.

11. Nail bullnose trim piece into place with a nail gun and brad nails.
12. Install the wine cooler according to the manufacturer’s instructions.


