


How to Build Rolling Garage Storage Shelves
Custom garage storage can cost a pretty penny. Luckily, we’ve got the perfect DIY garage shelves project for you.
Keeping a garage organized is easier than it seems. It just takes a little discipline and, most importantly, the right shelves. This DIY rolling garage shelf unit is the custom garage shelving solution you’ve been looking for at a fraction of the cost of your retail options. Plus, we have a hunch it will suit your needs perfectly.

Shain Rievley
Materials Needed
- (2) 4x8 sheets 3/4” plywood
- 4x8 sheet 1/2” plywood
- clamp
- router + 1/2” bit
- wood glue
- 1-1/4” wood screws
- 2-1/4” wood screws
- 1” lag bolts
- 1 gallon of paint in desired color
- (2) 3” rigid casters
- (2) 3” swivel casters
- (1) 2x6 x 8’ pine board
- 2-1/4” wood screws
- drill + bits
- ratchet + sockets
- shelf pins
- 3/16” drill bit
- (4) laminate white shelves
- (2) 3/4” x 1/4” x 8’ pine screen bead casing
- shelf liner roll
- brad nail gun
- cabinet pull
- metal file drawer tags
Cut List
- front and back: (2) 84” x 20” 3/4” plywood pieces
- top and bottom: (2) 23-1/2” x 20” 3/4” plywood pieces
- middle partition: 84” x 24” 1/2” plywood piece
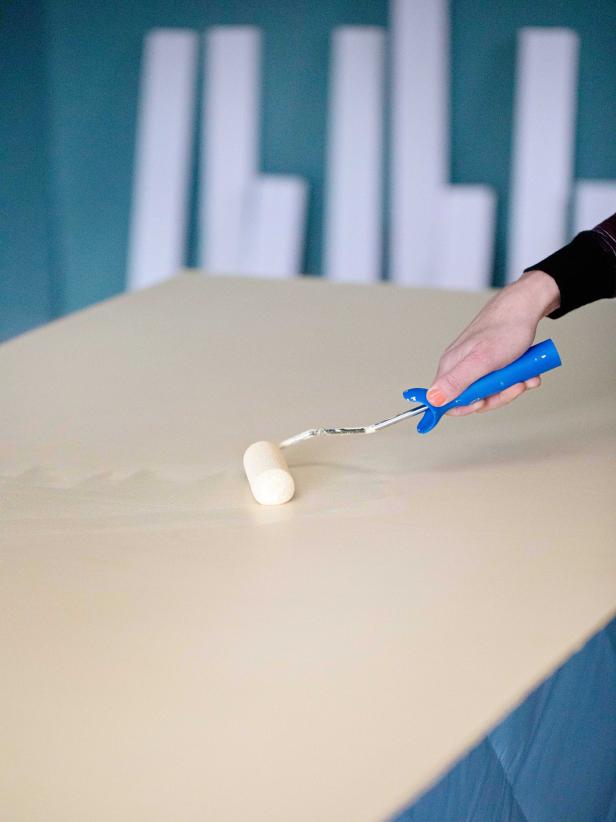
Prep/Paint Plywood
To begin, we recommend having your plywood precut at your local hardware store following the provided cut list above. Once the plywood has been cut, wipe with a dry cloth to ensure no sawdust remains and paint the pieces in your desired color. Multiple coats may be necessary to achieve the desired look.
Shain Rievley
Route Plywood
Next, create a groove for the middle partition piece to sit in. To do this, draw a line down the centers of both 84-inch front and back pieces. Use a clamp to place a scrap piece of plywood right against the centerline. Use the straight edge as a guide as you route the long pieces.

Shain Rievley
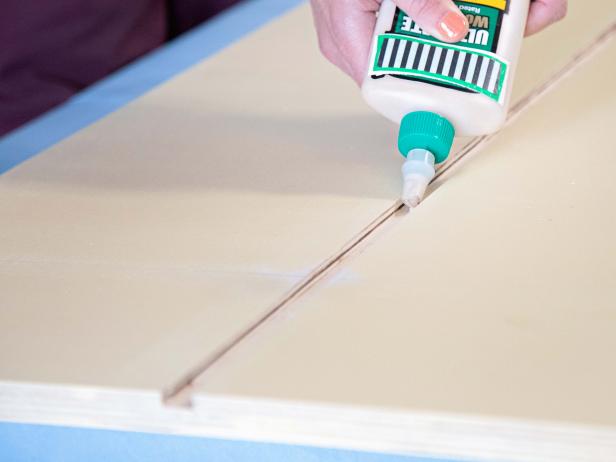
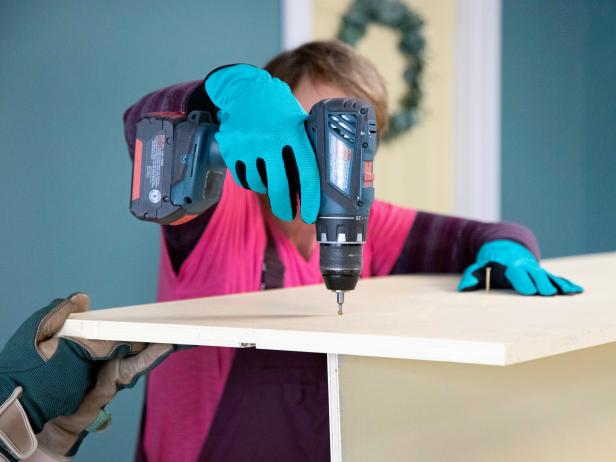
Attach Plywood Sides Together
The pieces will all be held together with wood glue and screws. To prevent splitting and aid in knowing where to screw, start by pre-drilling your screw holes in the two grooves (Image 1). Once all holes are drilled, run a bead of wood glue down the routed line (Image 2). Place the partition piece in the grooves, positioned six inches from the bottom of the front and back pieces (Images 3 & 4). Secure with wood screws (Image 5).

Shain Rievley
Shain Rievley

Shain Rievley

Shain Rievley
Shain Rievley
Secure Top and Bottom
Wedge the top and bottom pieces in place and secure with wood screws.
.jpg.rend.hgtvcom.616.462.suffix/1556796650963.jpeg)
Shain Rievley
Attach Casters
On each side of the base, attach two 20-inch 2x6 boards you cut from the 2x6 x 8' pine board in the materials list (Image 1). This adds stability and a place to secure the casters. Once attached, set the casters in place. Place the two swivel casters on the front and the two rigid casters on the back. Mark and pre-drill your holes, then use a socket to secure the casters with lag bolts (Image 2).
.jpg.rend.hgtvcom.616.822.suffix/1556796651137.jpeg)
Shain Rievley

Shain Rievley
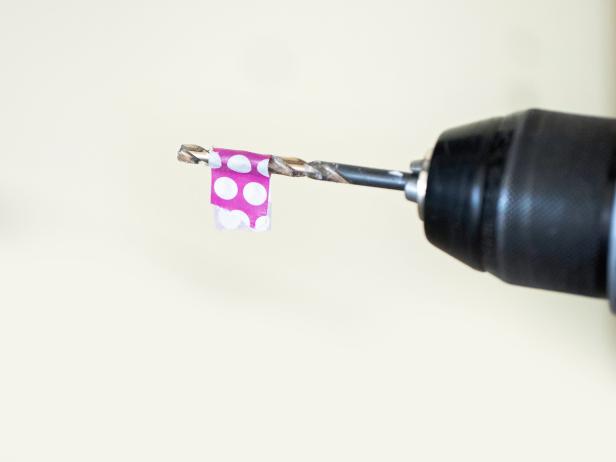
Add Shelving
Cut shelves and bead casing (also known as moulding) to 24 inches wide and paint. Attach the casing to shelves to form a lip (Image 1). This prevents the shelf contents from falling when rolled in and out. Drill holes in the cabinet at your desired height for shelving and place shelf pins in the holes. Place the shelf on the pins (Image 2) and finish off with a shelf liner (Image 3).
Pro Tip: Use tape to mark the depth you are drilling on your bit (Image 4). This keeps you from drilling too far.

Shain Rievley

Shain Rievley

Shain Rievley
Shain Rievley
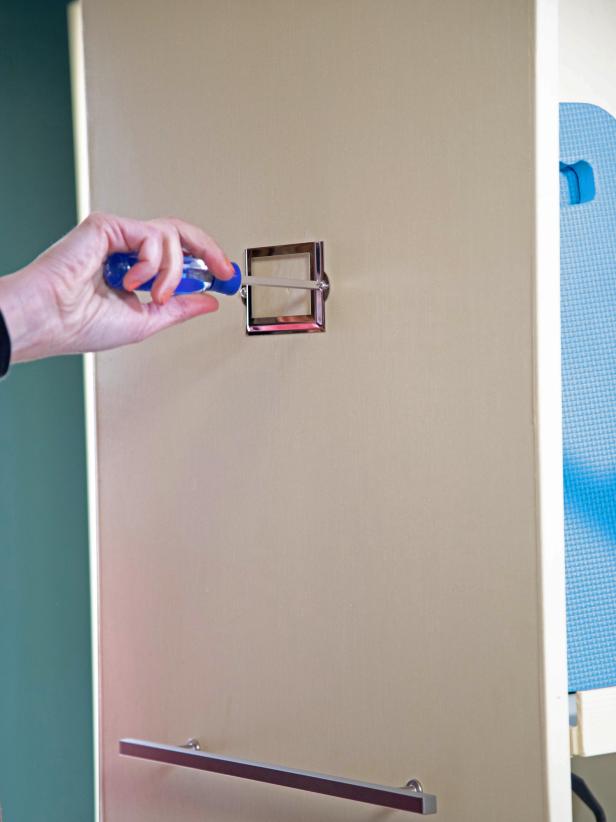
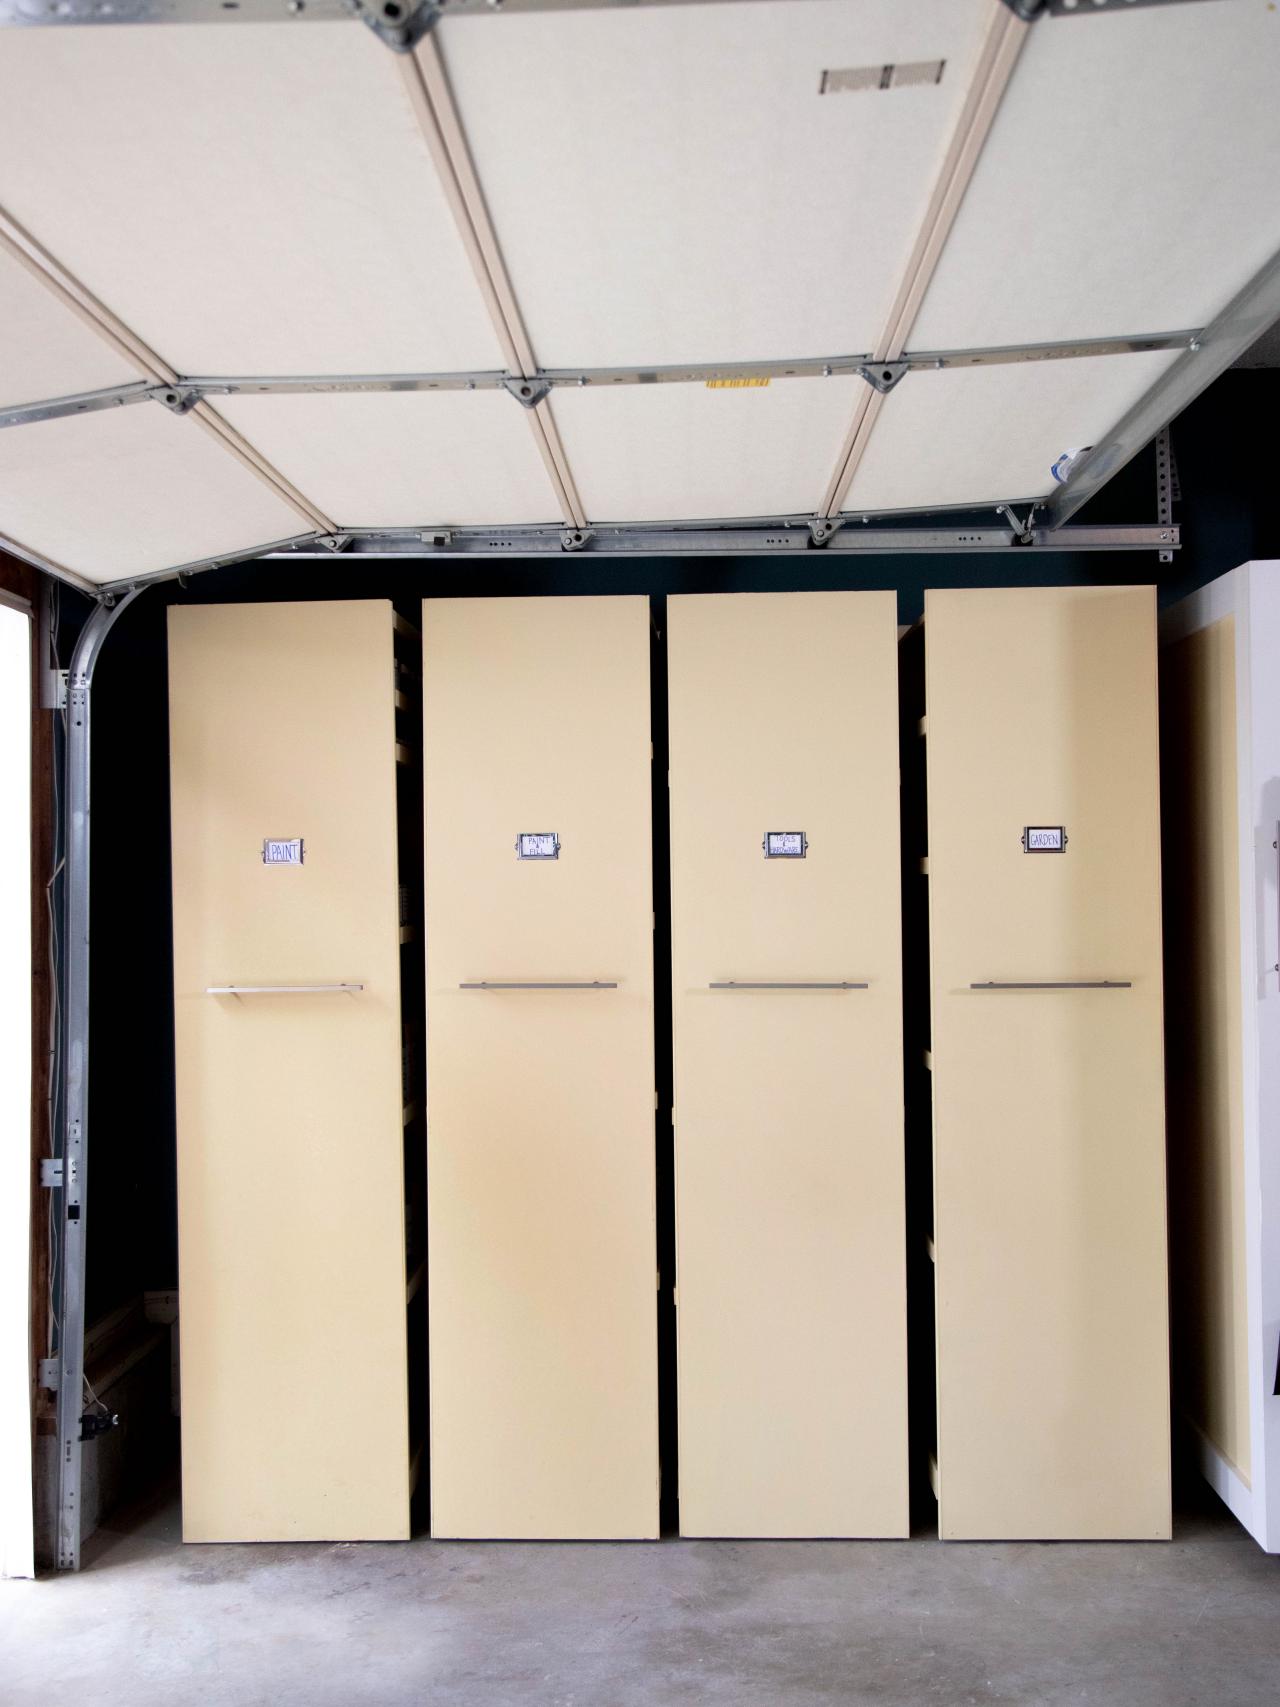
Final Touches
Finalize the rolling storage with a large cabinet pull (Image 1) and a metal file cabinet tag (Image 2) so you always know everything is in its place.
Shain Rievley

Shain Rievley
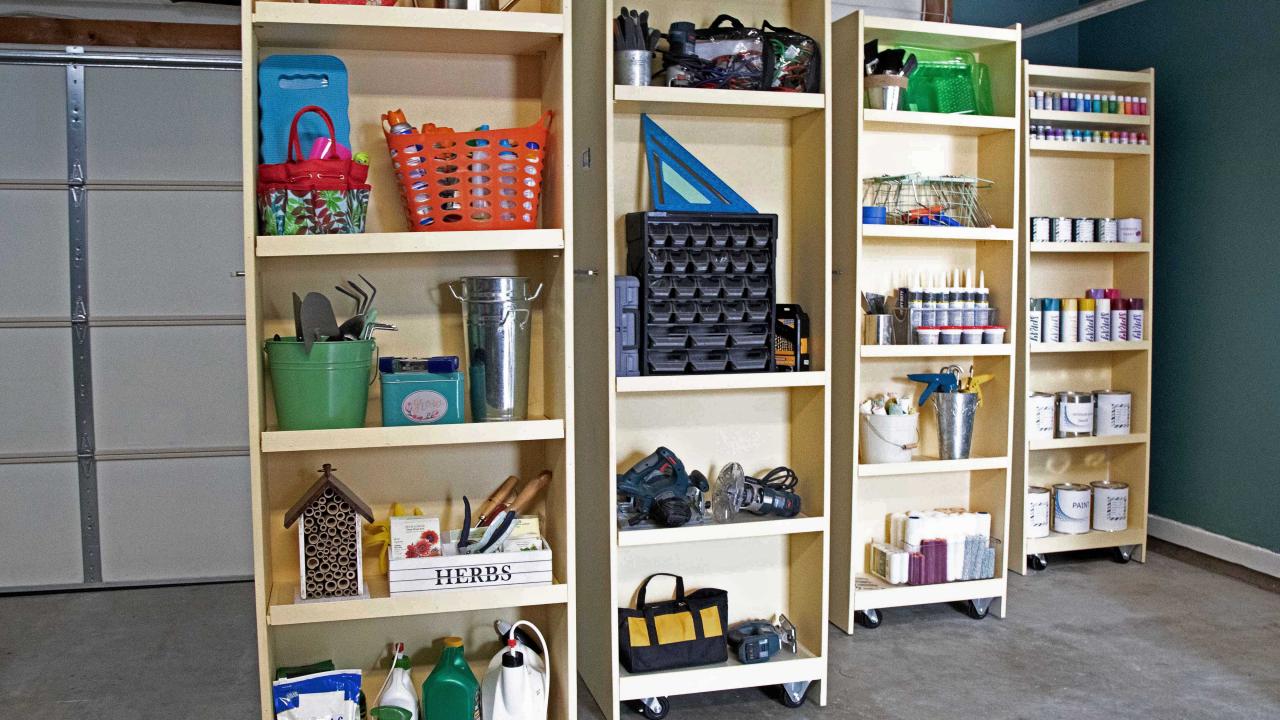
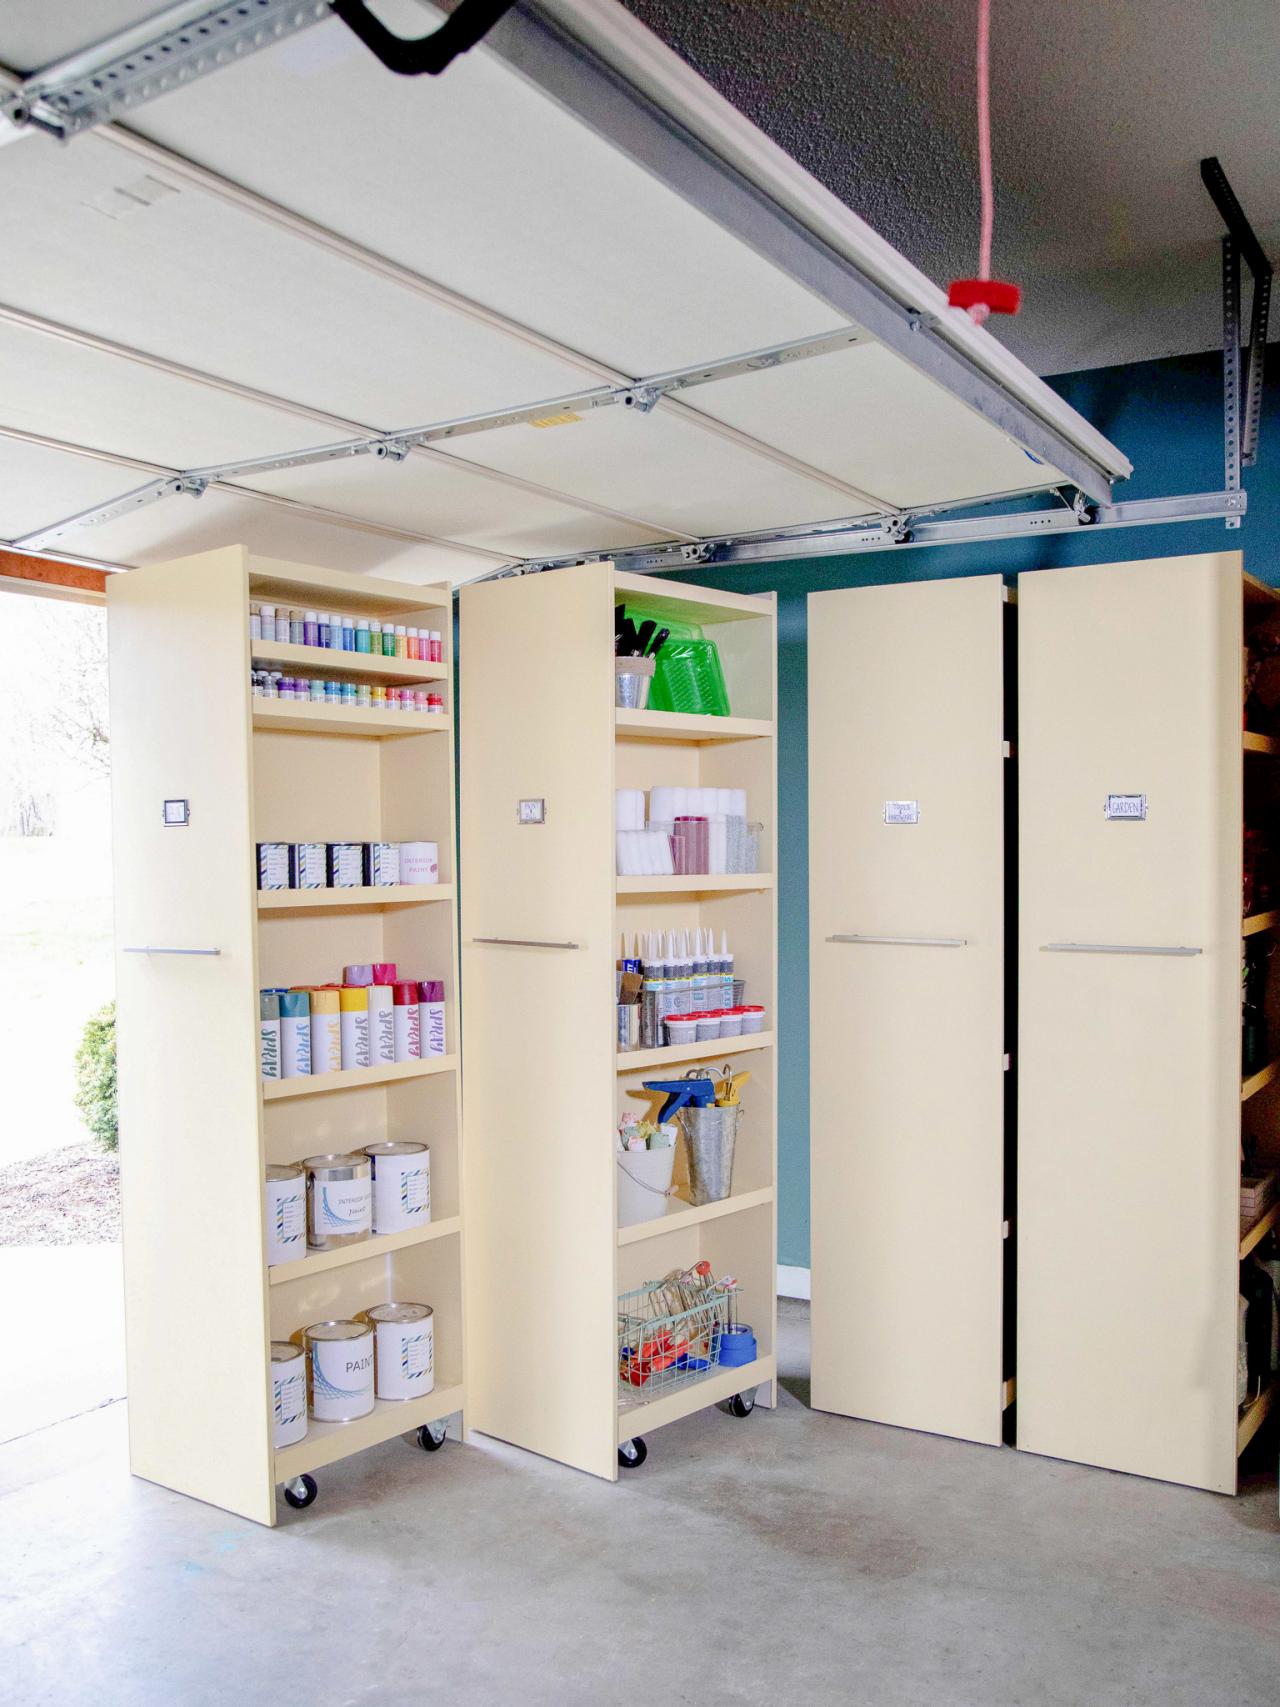
Store Stuff on Your New Shelves
No more searching for tools. Now you'll know just where your tools and supplies are every time you need them.

Shain Rievley

Shain Rievley
Shain Rievley
Watch: Get Step-by-Step Instructions


.jpg.rend.hgtvcom.1280.960.suffix/1556796650963.jpeg)
.jpg.rend.hgtvcom.1280.1707.suffix/1556796651137.jpeg)