


How to Make Quilted Wall Art
Fair warning: This ultra-easy, old-school sewing project will change the way you think about leftover fabric (and quilting) forever. Once you get the hang of the technique, you can turn anything into pro-level, utterly modern art.
Lauren Oster

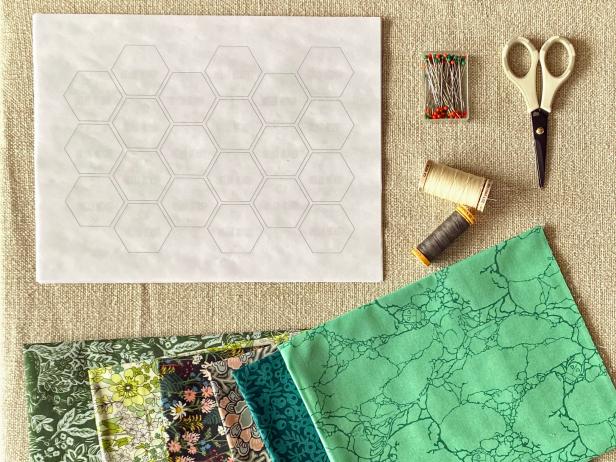
Materials Needed
- paper quilting template
- scissors
- cotton fabric scraps
- straight pins
- cotton thread
- embroidery needle
- frame
- optional: iron
- optional: packing tape
Lauren Oster
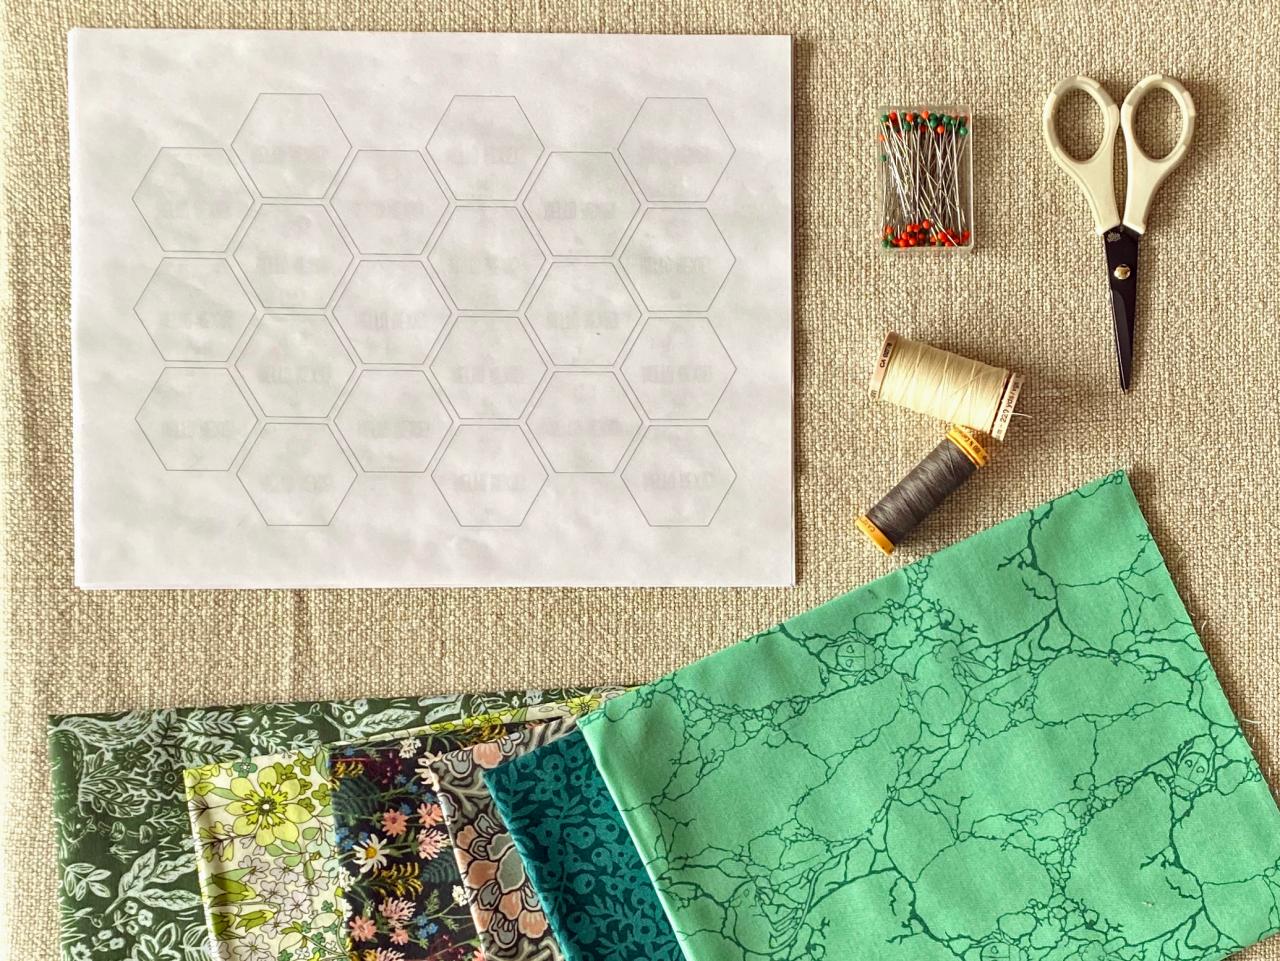
Measure and Cut Fabric Scraps
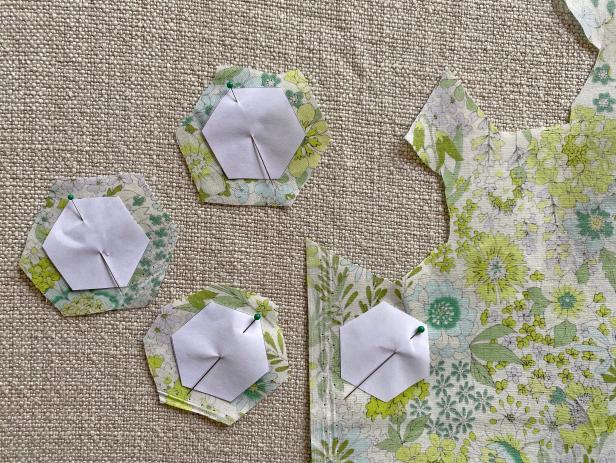
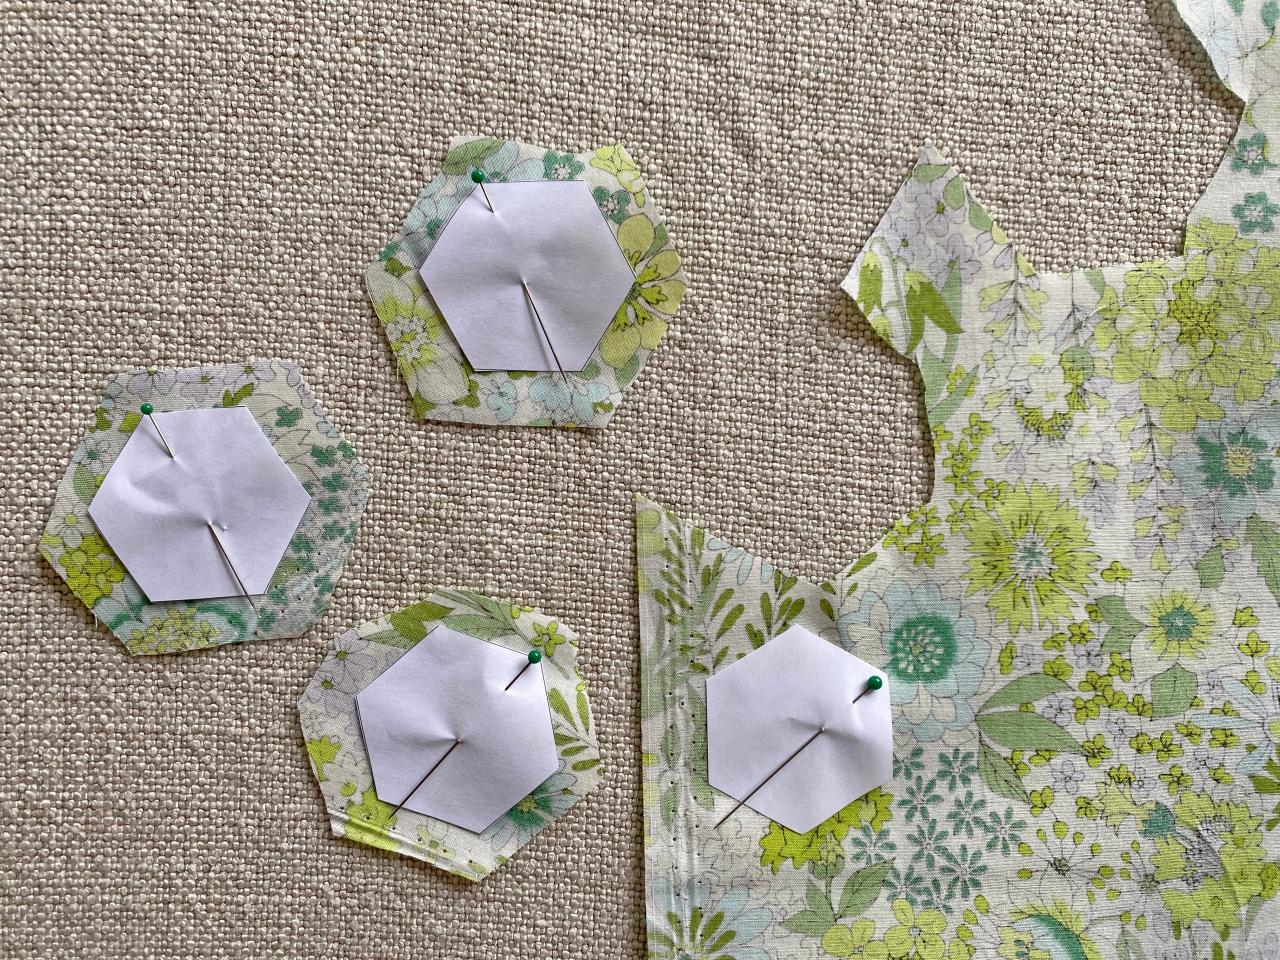
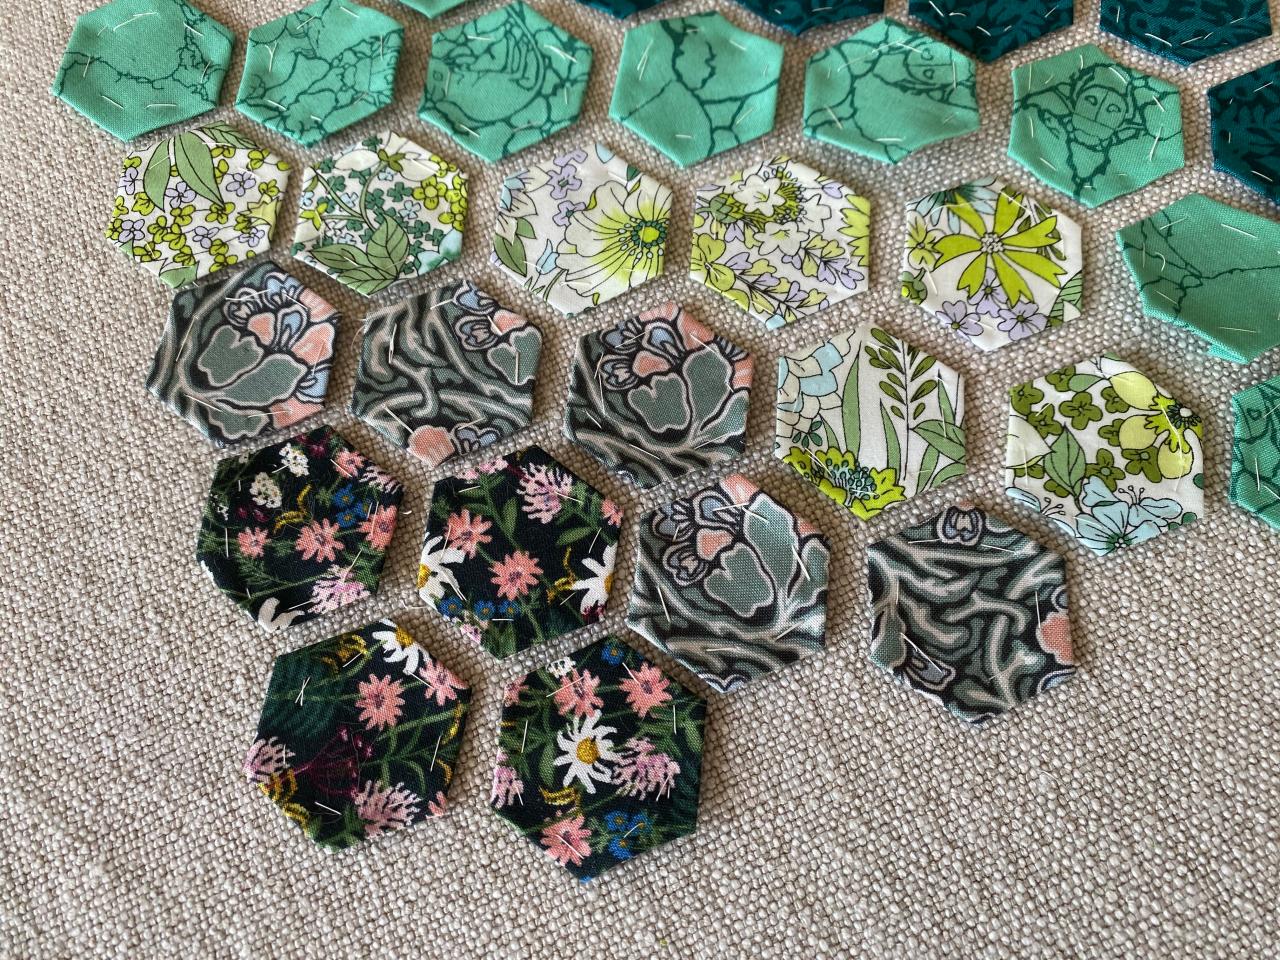
Download, print and cut out hexagon templates in the size of your choice. We used just over two sheets of the 1-inch hexagons available for free here to create our finished 8”x10” framed artwork (Image 1). Tip: Double down on your upcycling by printing or tracing your hexagons on scrap computer paper. (There’s historical precedent for that: when this technique first became popular in the early 19th century, quilters re-used letters, catalogs and newspapers.) Pin the templates to the back side of fabric scraps, then cut around each template, leaving a 1/4" border on all sides (Image 2).

Lauren Oster
Lauren Oster
Baste Fabric to Templates
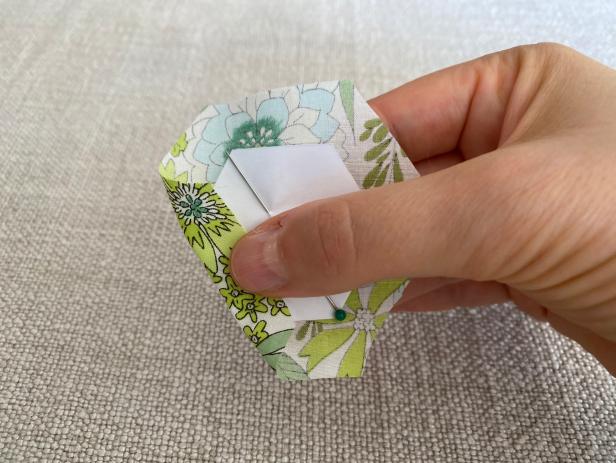
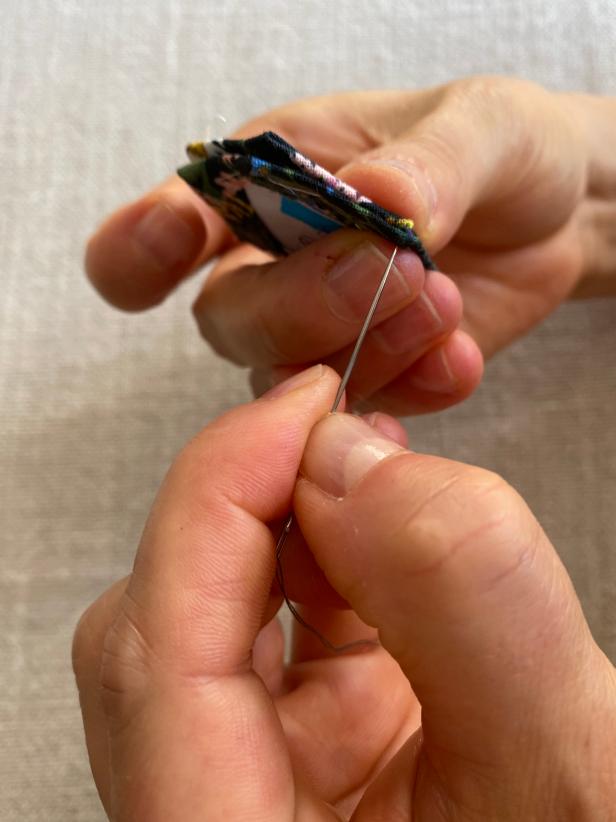
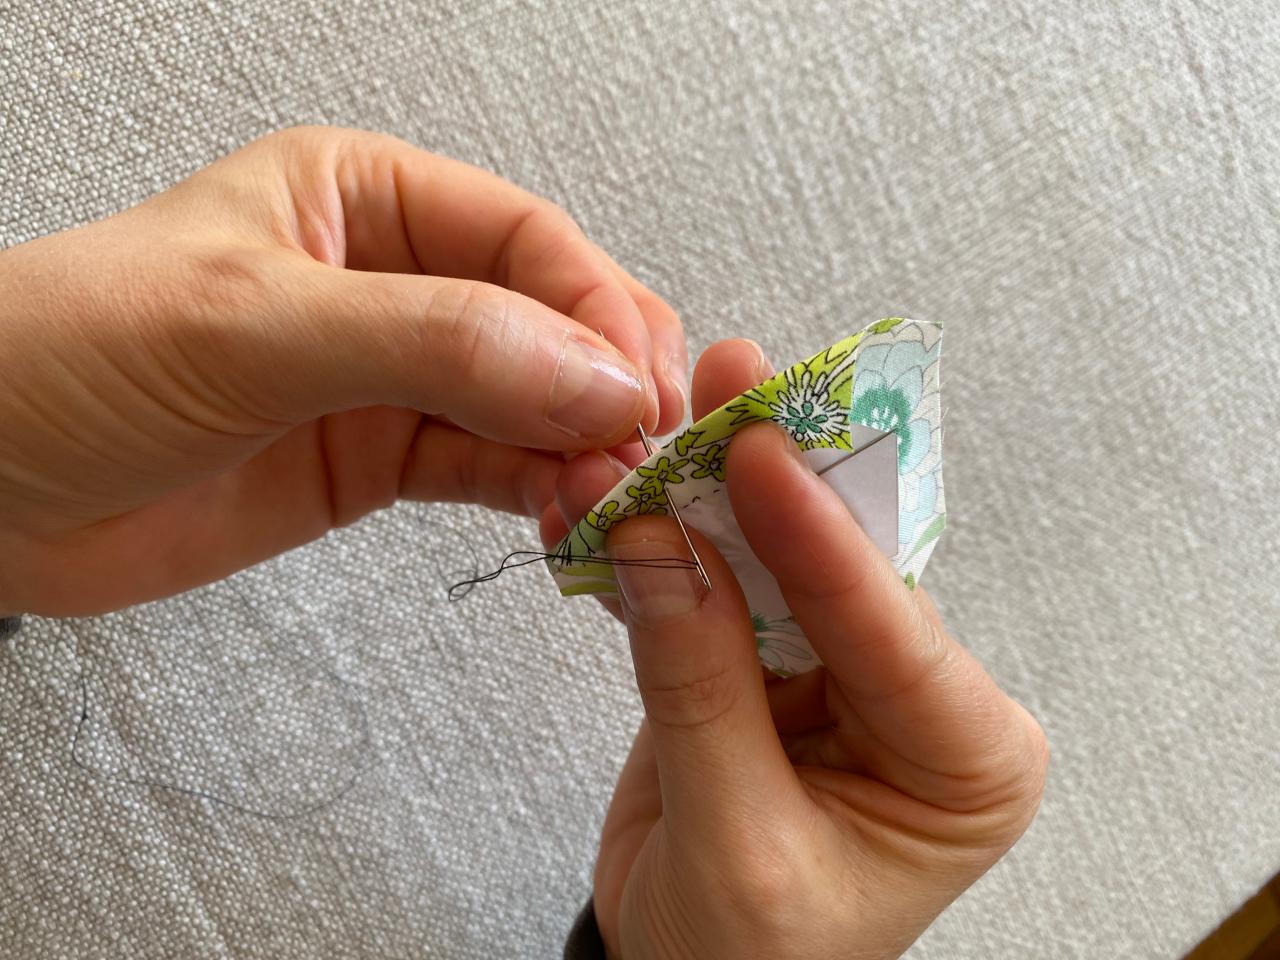
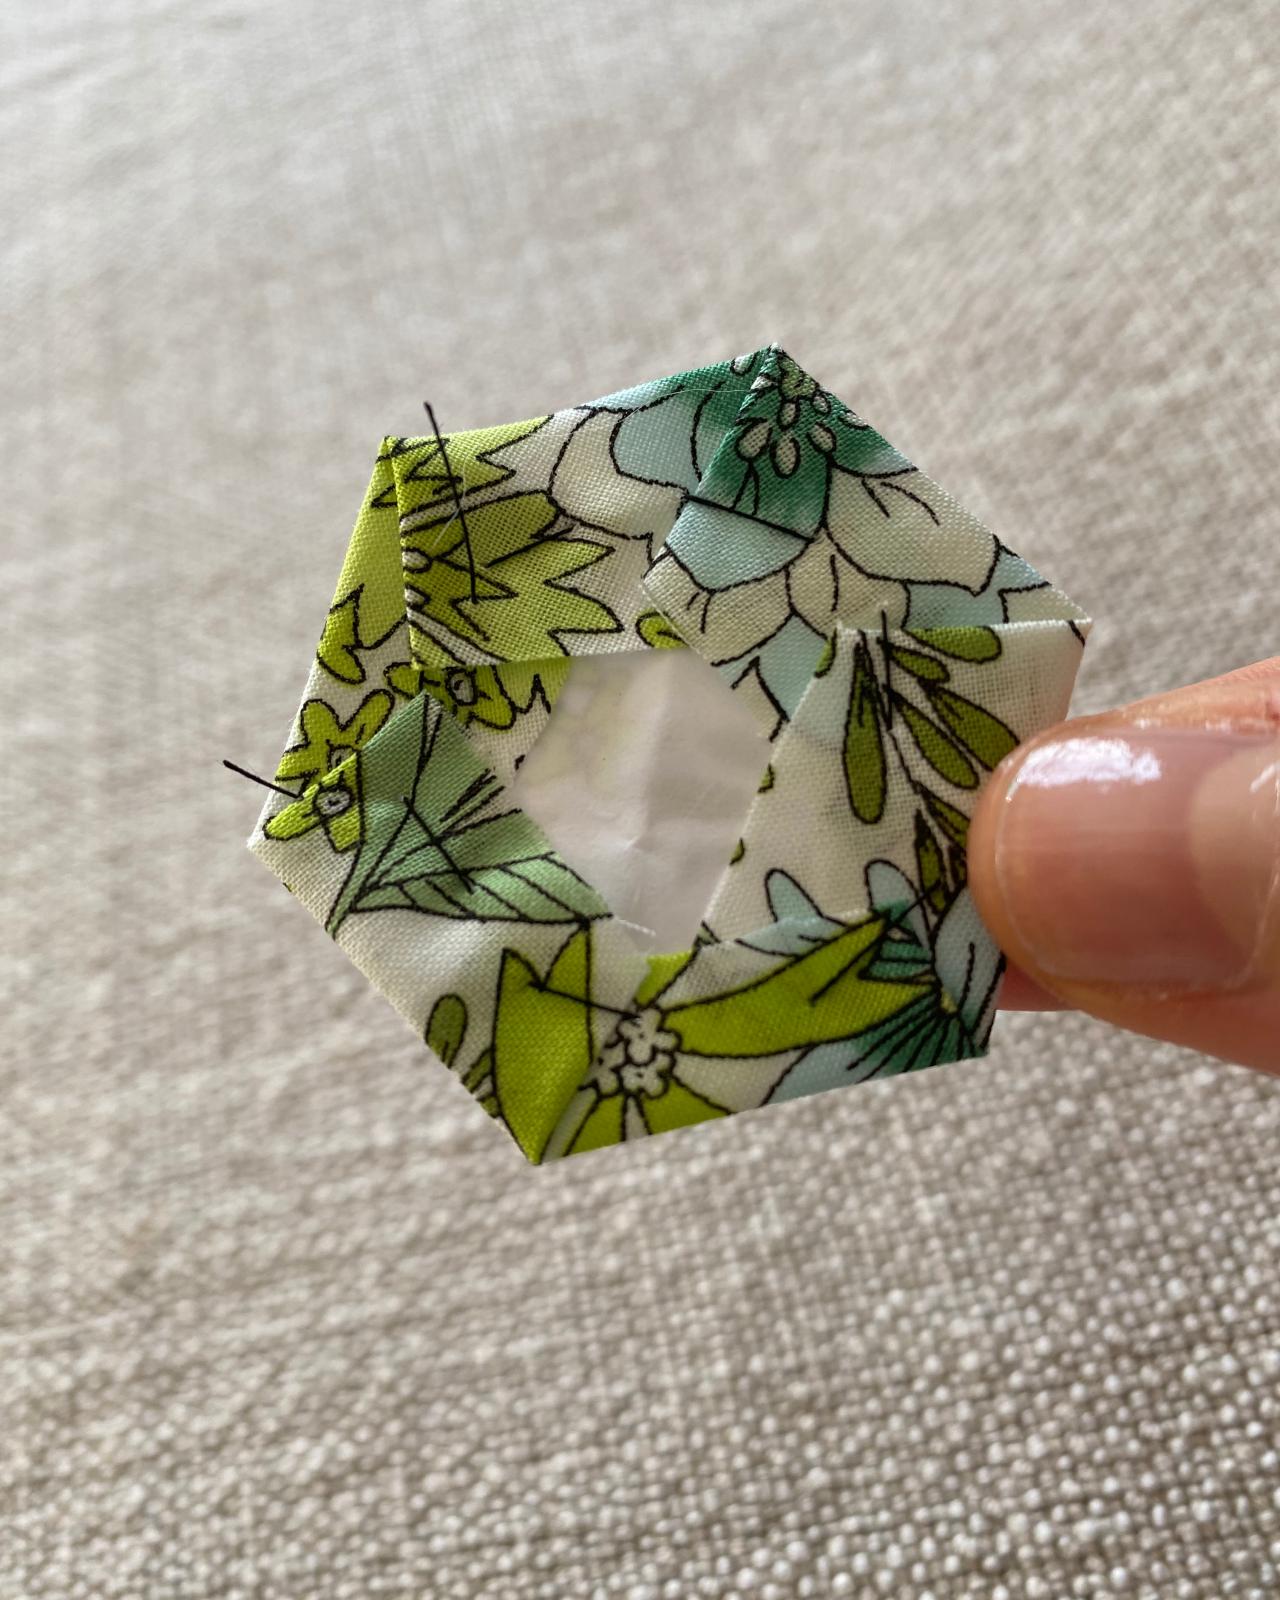
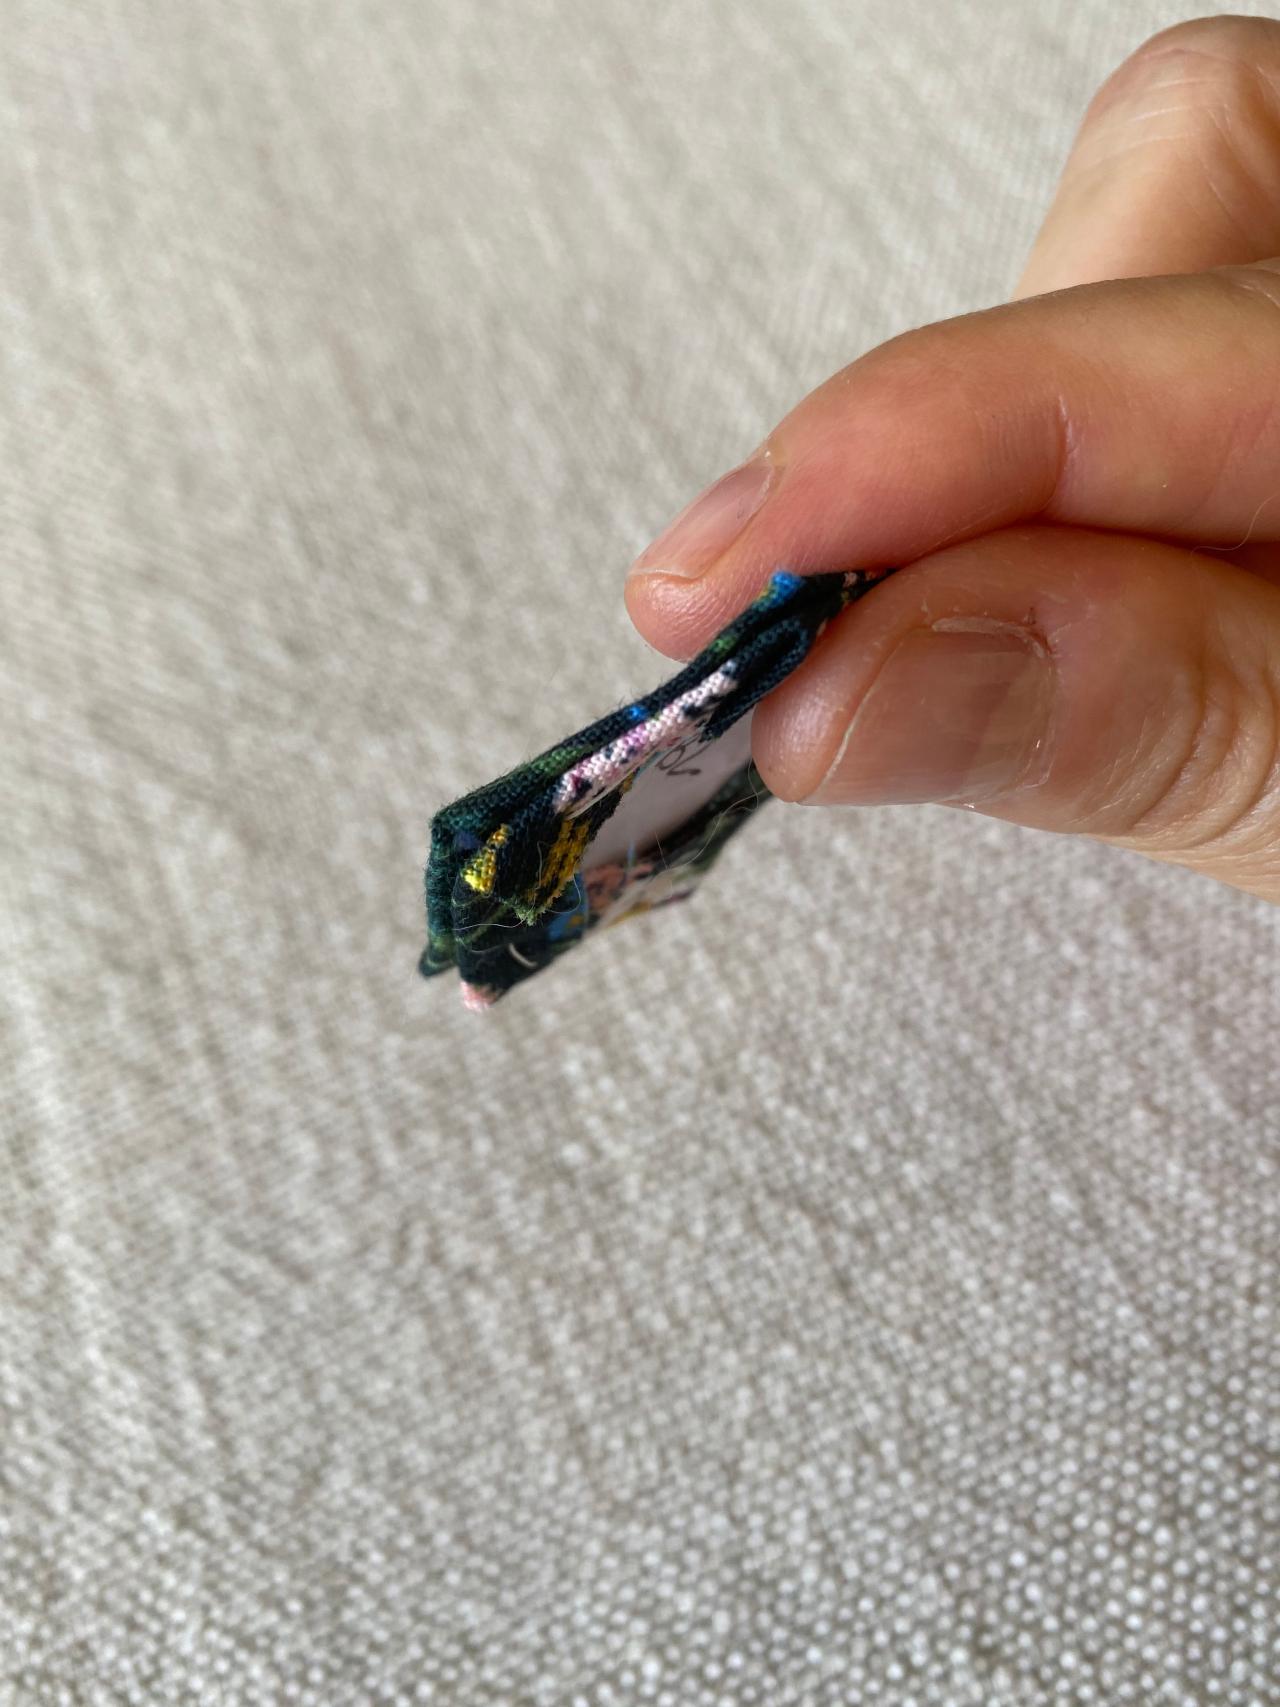
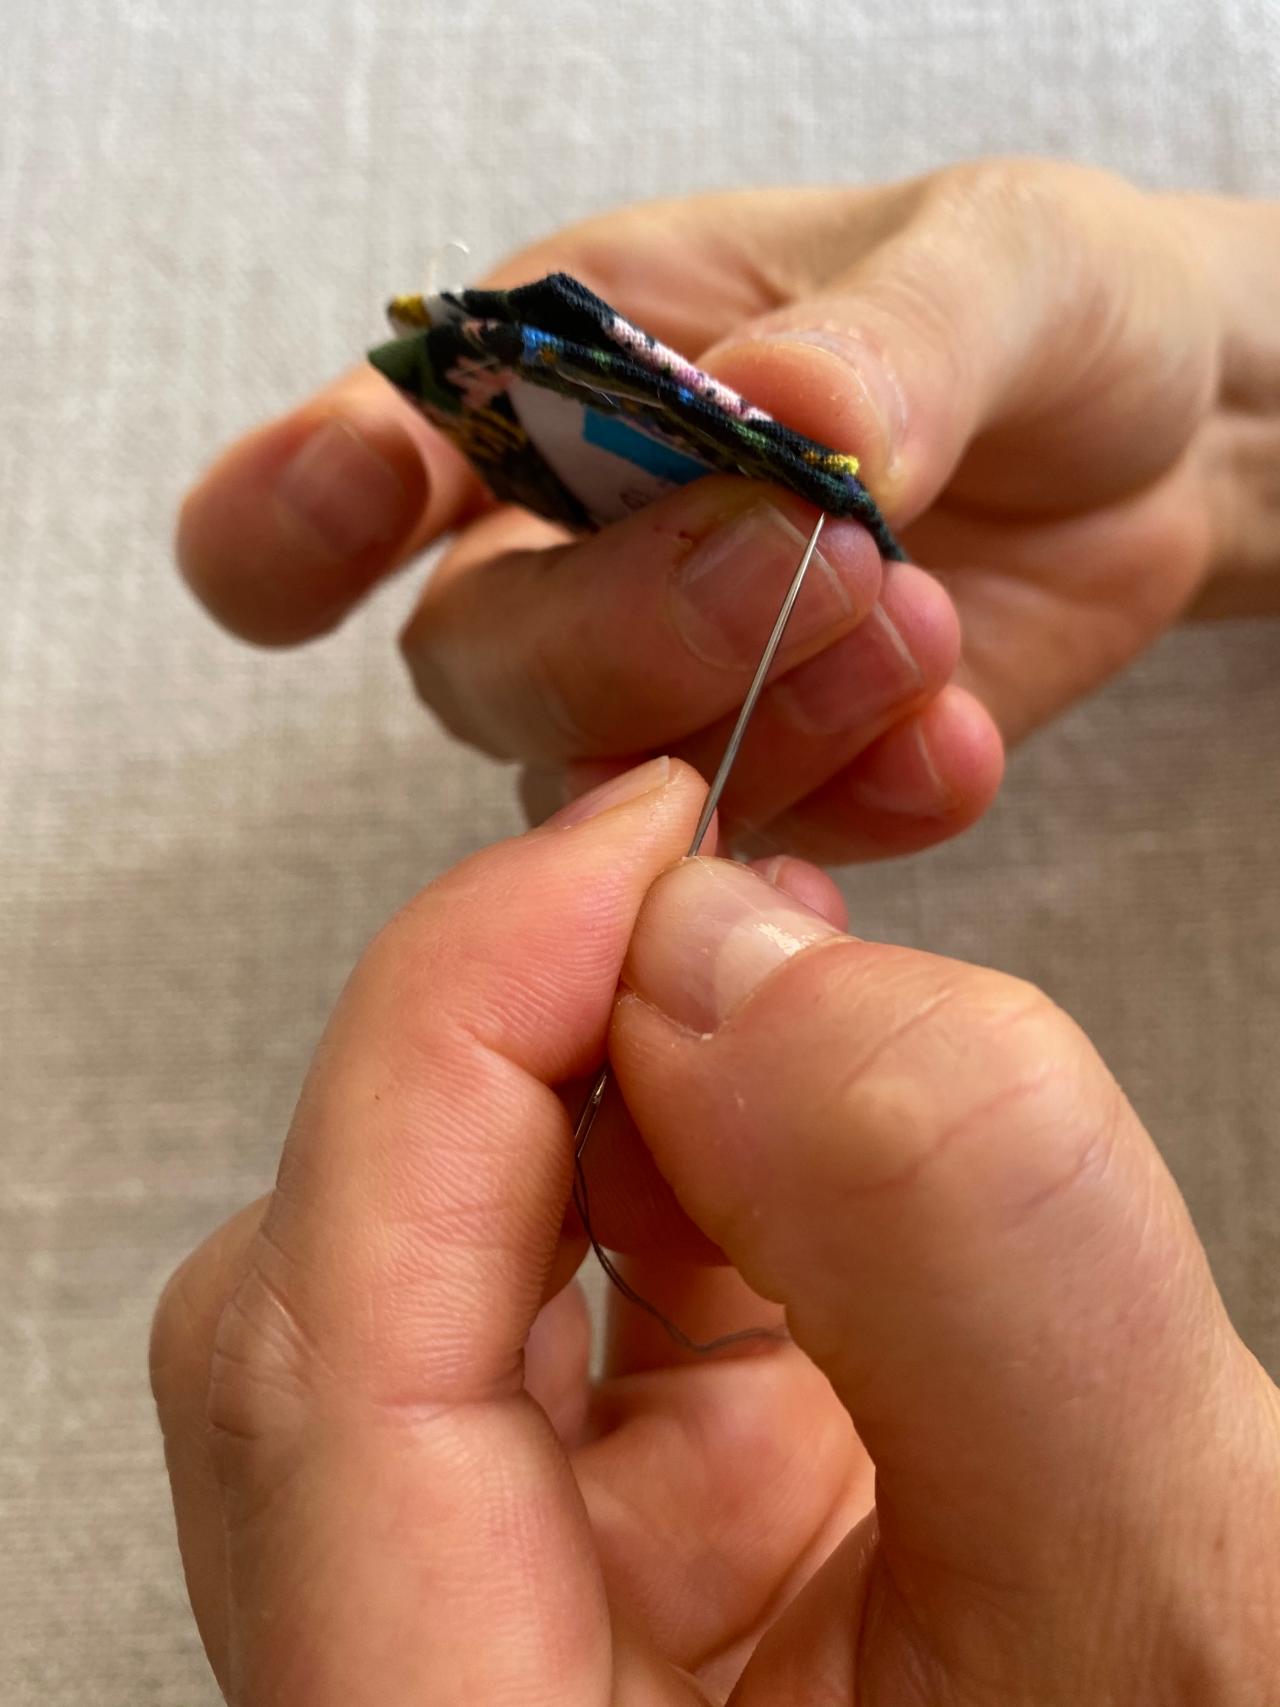
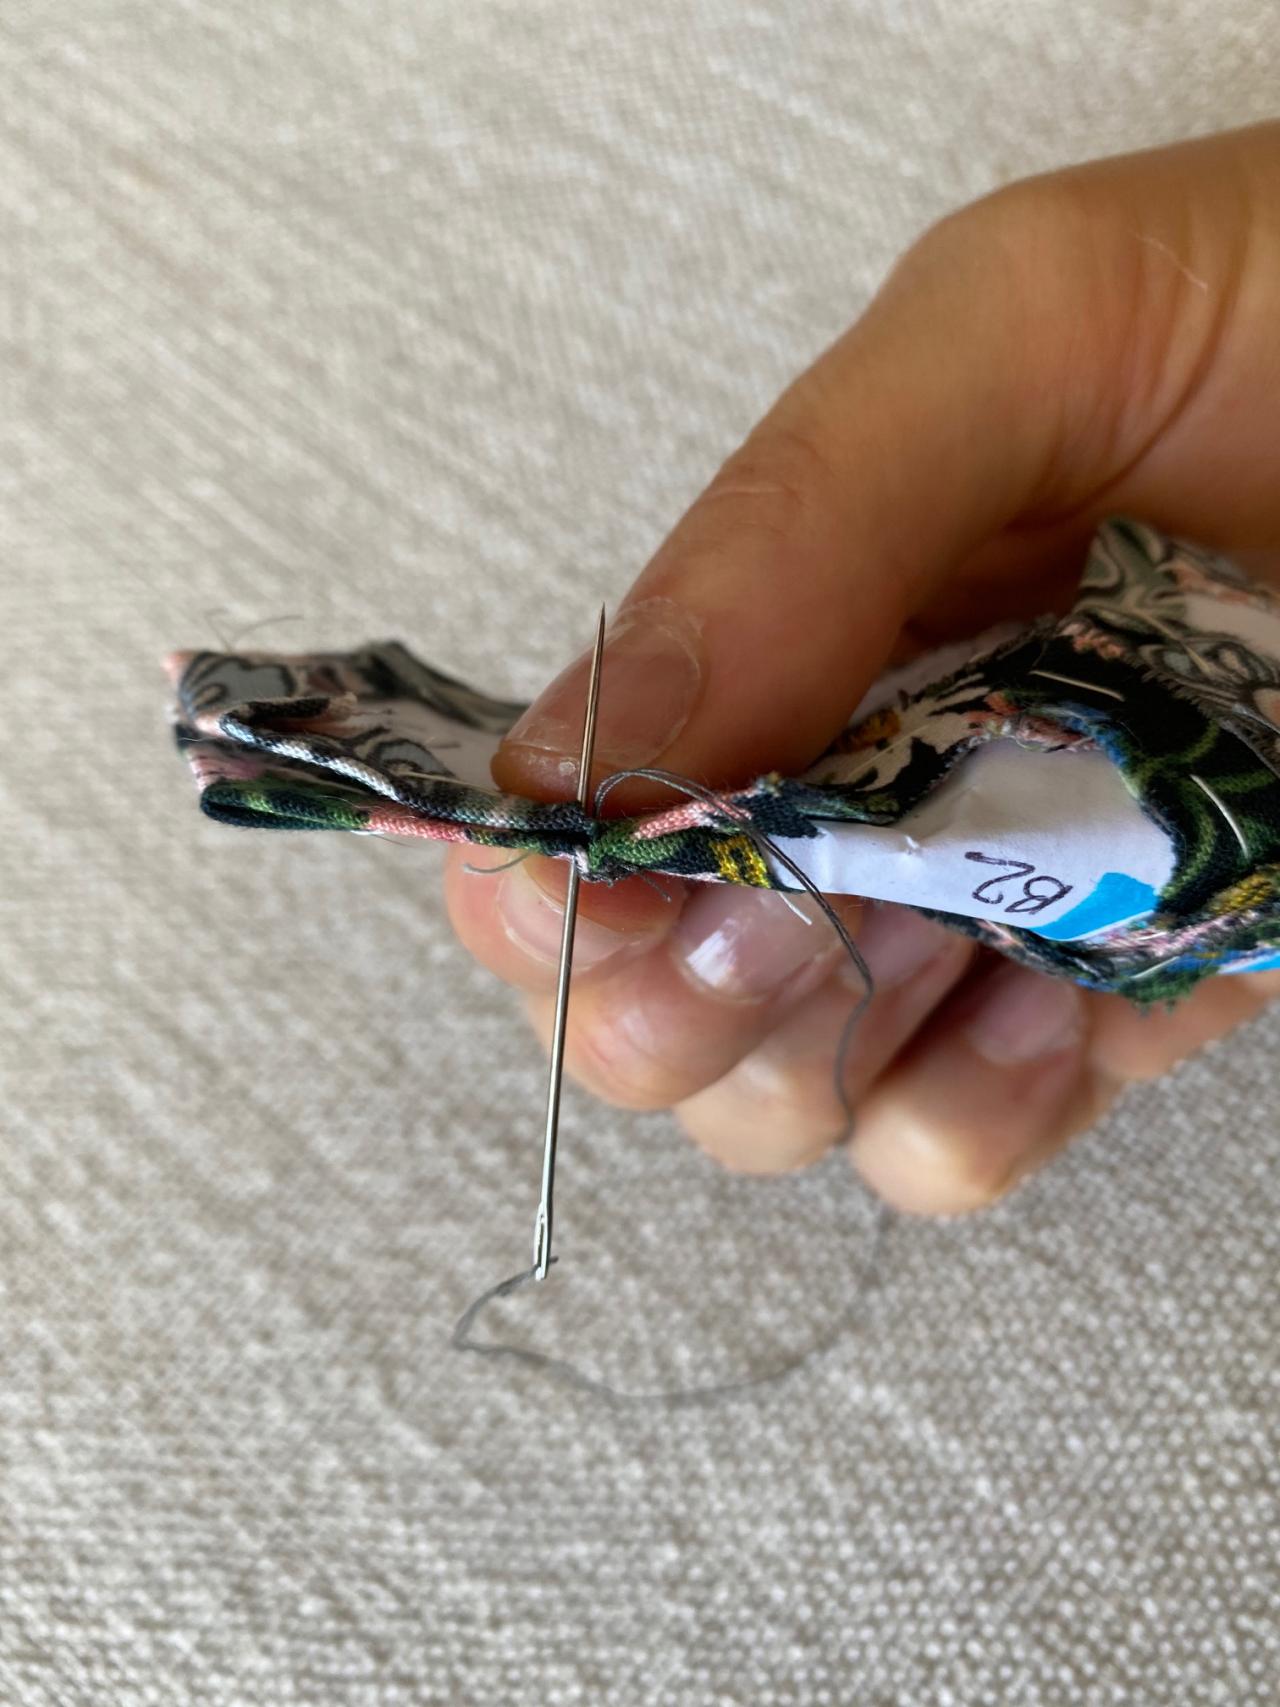
Fold the overlapping 1/4" of fabric over one side of the hexagon template (Image 1). Hold the fold in place with your thumb and forefinger, then baste the fabric to the template, beginning with a knot on the underside of the template and stitching through the layers (Image 2). Come back up through the layers a 1/4" along the side of the hexagon, and make two more small stitches in the same direction. When you reach the corner, fold down the next side of the hexagon and continue stitching and turning until you arrive back at your knot. Bring the needle back up through the top of the fabric, the template, and the folded-over back of the fabric one last time, then cut the thread, leaving a small unknotted “tail” at the end (Images 3 and 4).
Lauren Oster

Lauren Oster
Lauren Oster
Lauren Oster
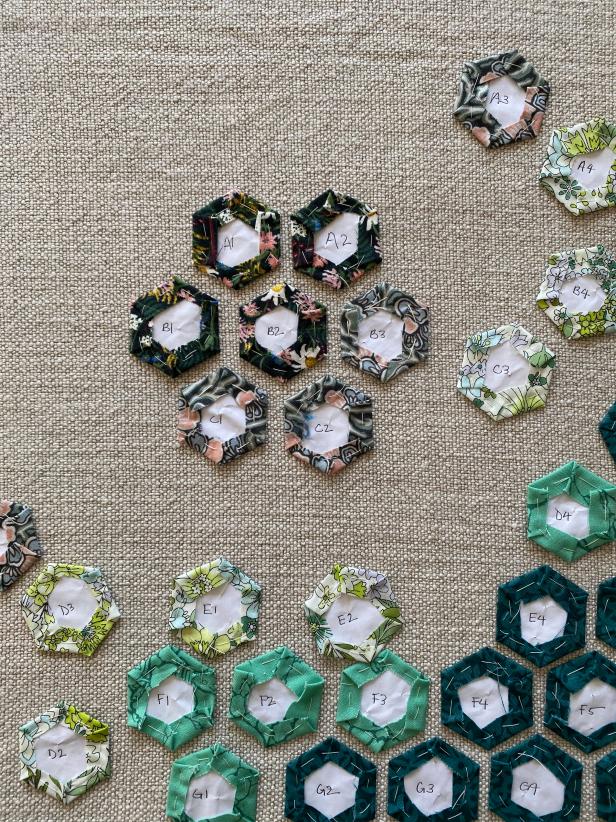
Create Pattern and Label Hexagons
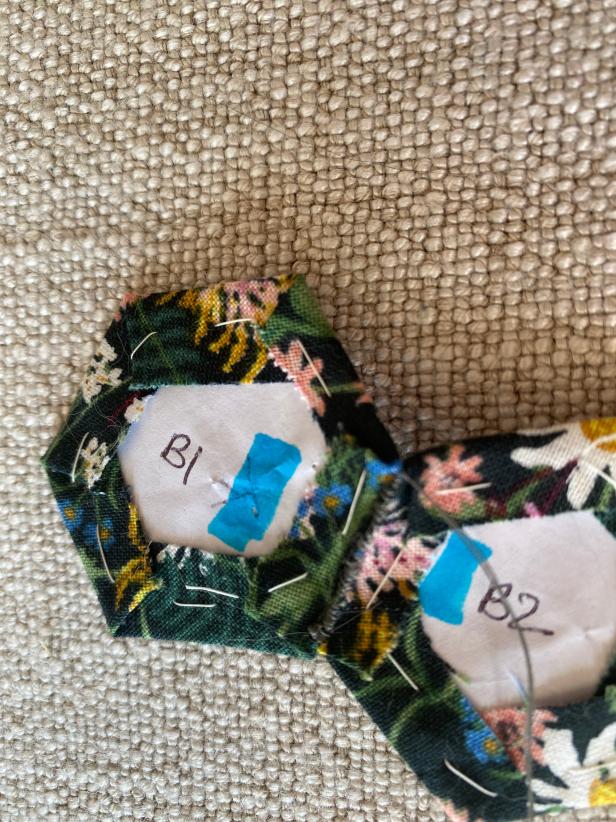
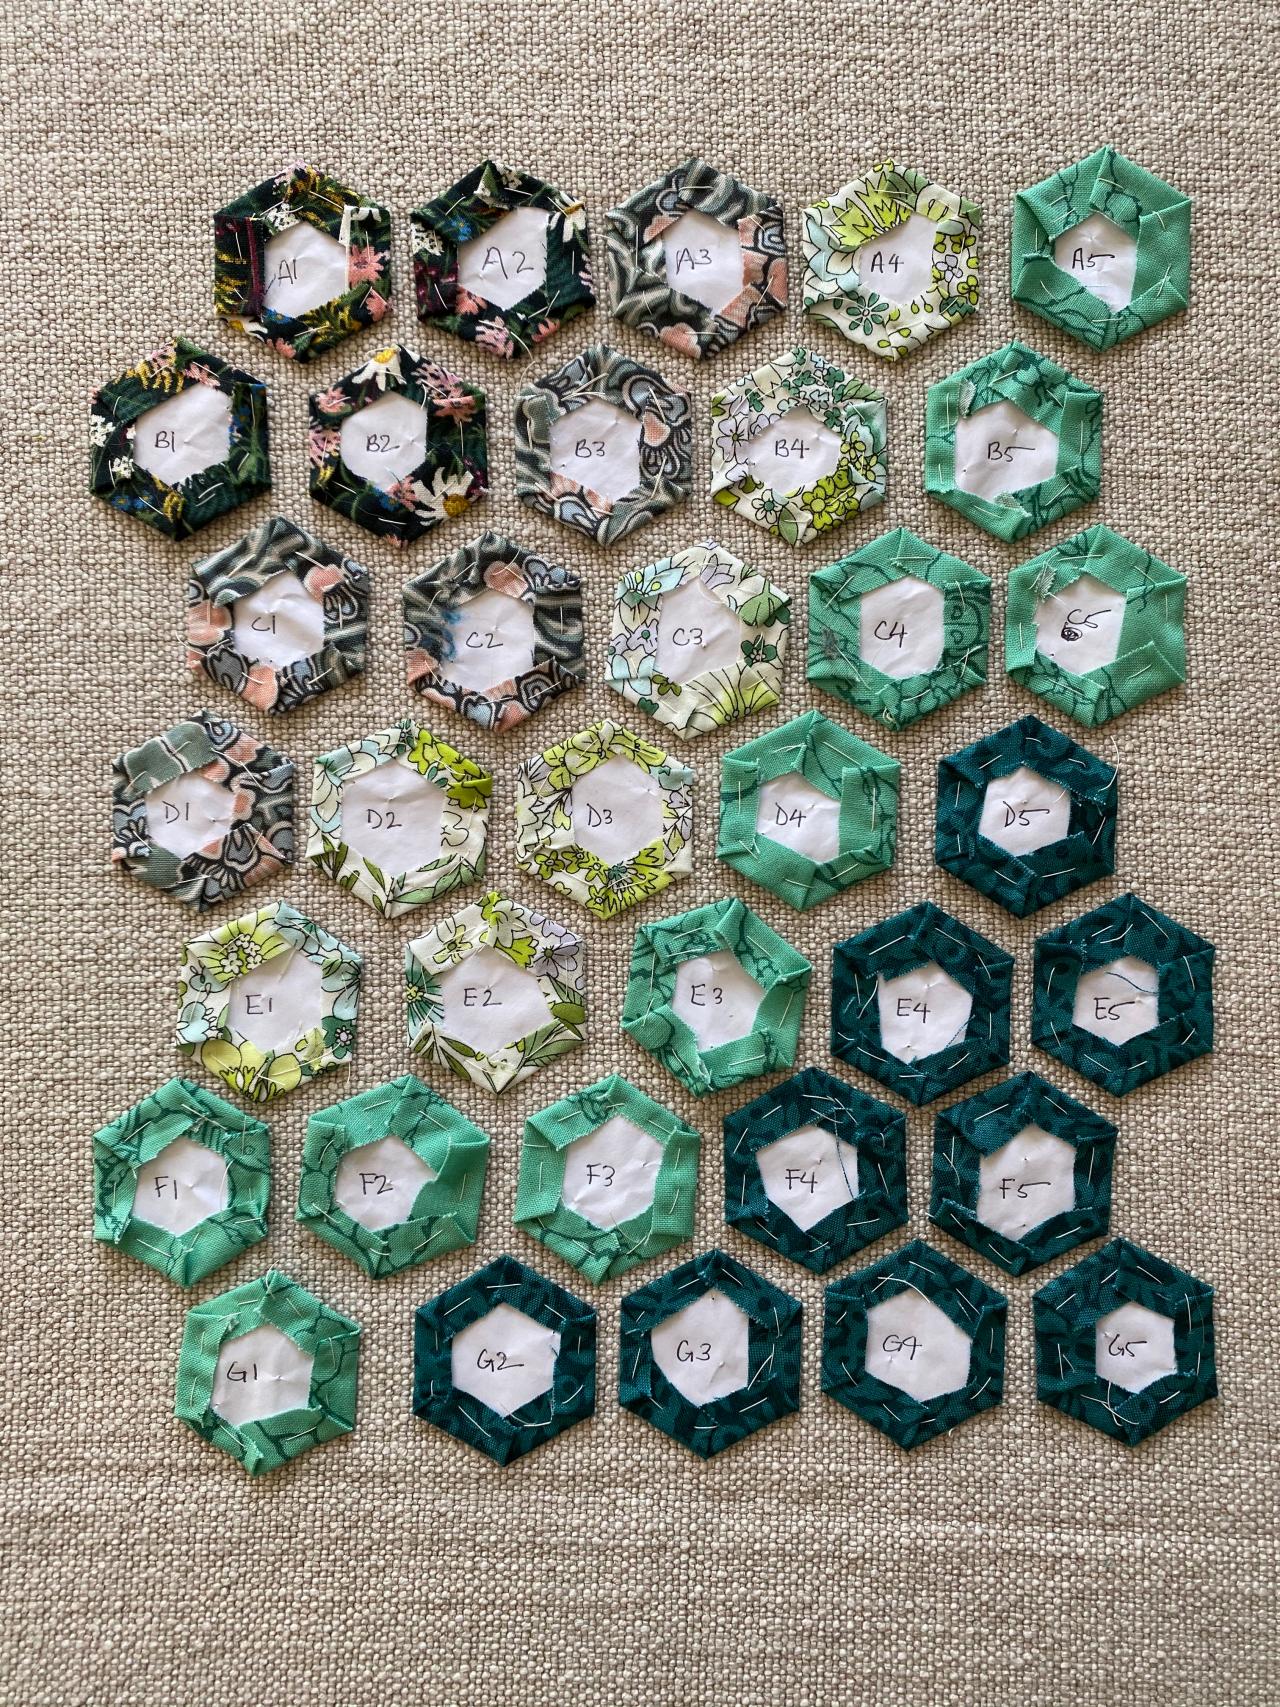
Arrange the basted hexagons in a pattern of your choice (Image 1). Tip: Create an abstract design of this size with eight rows of hexagons, beginning with a top row of six pieces, continuing with a row of five below it, then alternating rows of six and five, for a total of 44 hexagons. Flip each hexagon over in place, then label it with a row and number (A1, A2, A3, and so on) as a reminder of where it will appear in the finished pattern (Image 2). Tip: Take a smartphone photo of the flipped and numbered hexagons to use as a reference image as you sew. Once you’ve taken that photo, separate a two-hexagon, three-hexagon, two-hexagon “flower” (here, A1 and A2; B1, B2 and B3; C1 and C2) to begin sewing (Image 3).

Lauren Oster

Lauren Oster
Lauren Oster
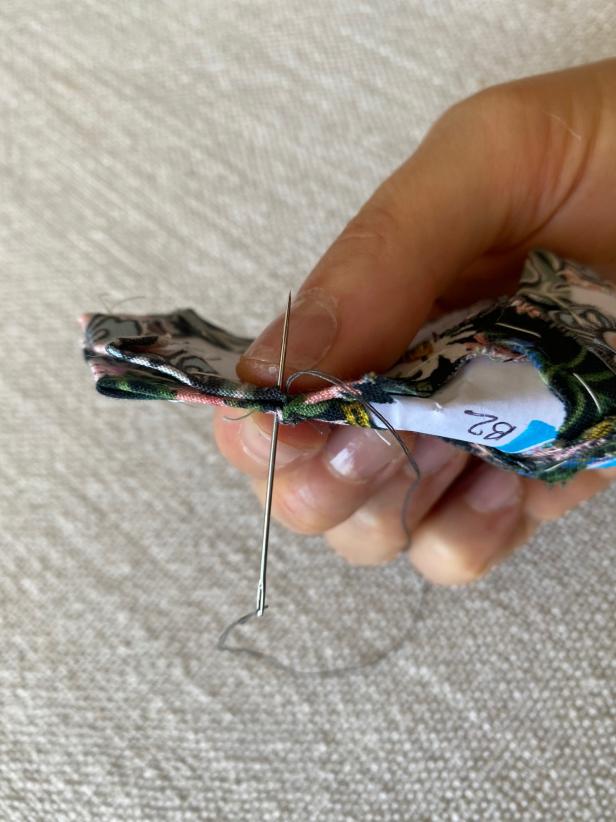
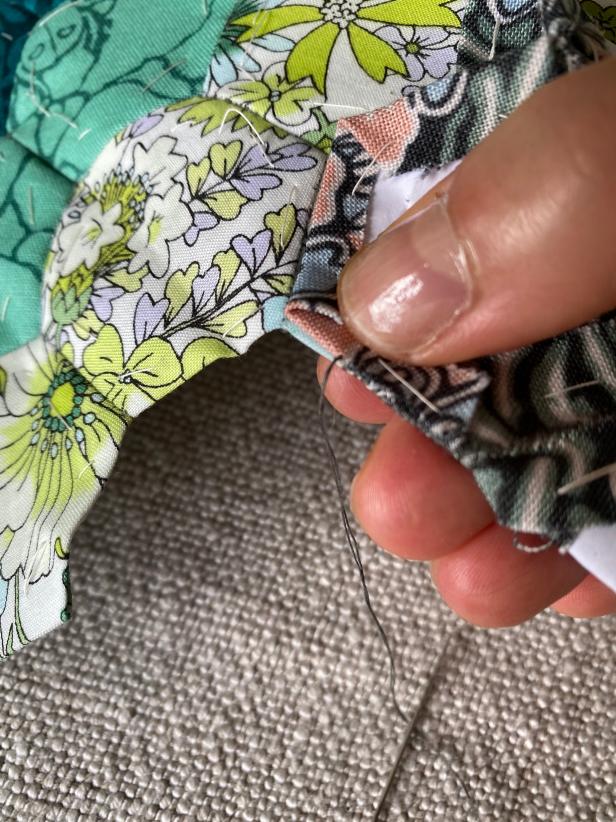
Sandwich and Whip-Stitch Hexagons
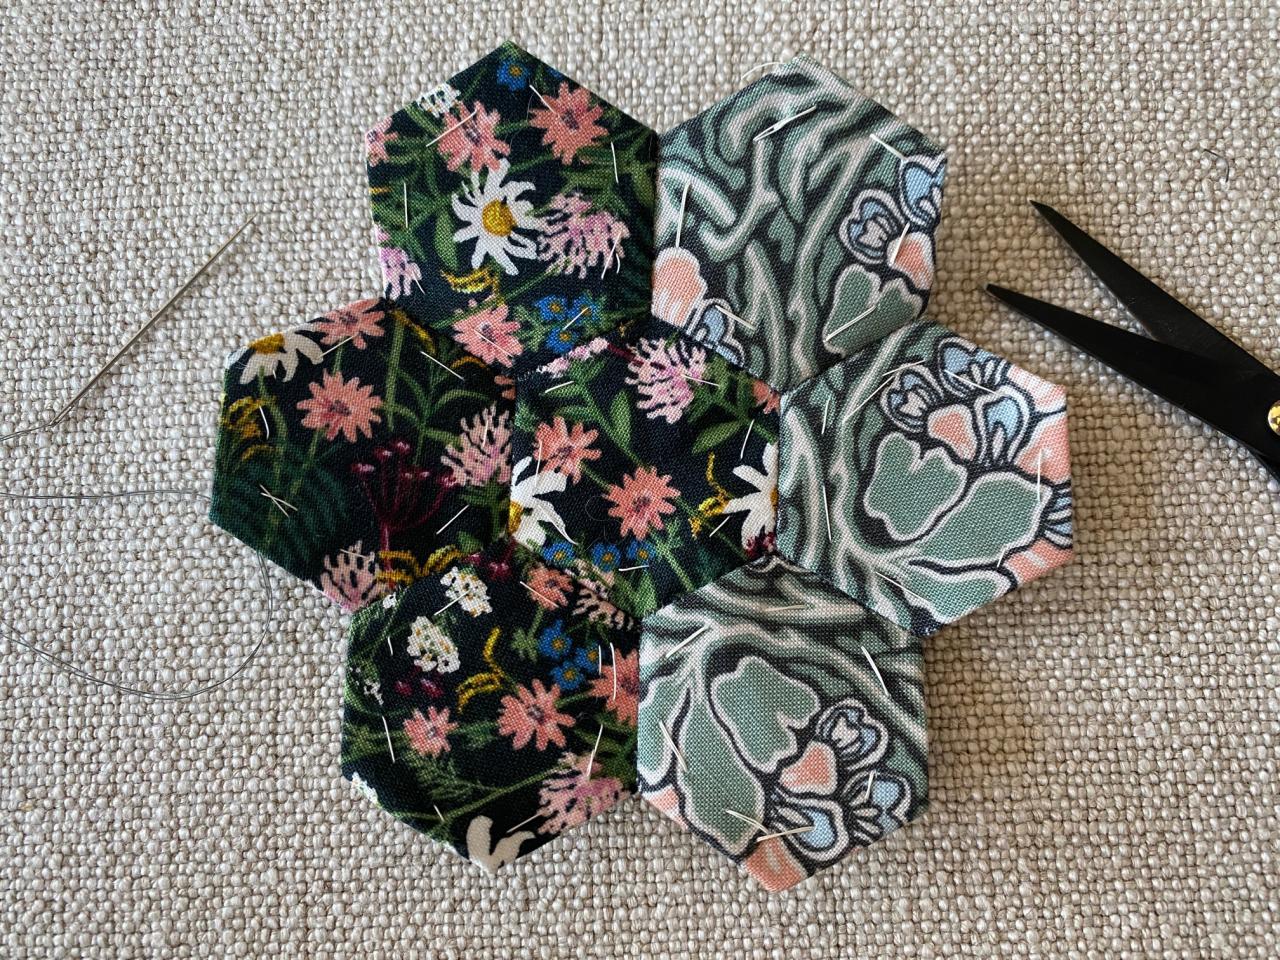
Flip the hexagons in the "flower" so their fabric sides are visible again, then choose an adjoining pair of hexagons (here, B1 and B2) and sandwich them together with their fabric sides facing inward (Image 1). Sew them together using small whip stitches — that is, starting from beneath both pieces, pulling your needle up through both of them, then bringing your needle back up from below to create a second stitch just above the first — to catch just the edges of the folds where their sides meet (Image 2). Stop whip-stitching when you reach the edge of where the hexagons are sandwiched together (Image 3), then check your reference image and create a second cloth-in sandwich with another adjoining hexagon — here, A2. Whip-stitch the adjoining sides of the second and third hexagons together (Image 4). Continue sandwiching and whip-stitching adjoining hexagons (Image 5) until the six petals of the flower are all attached to its central piece, then go back, sandwich and whip-stitch the adjoining borders between each of the petals.

Lauren Oster
Lauren Oster
Lauren Oster

Lauren Oster
Lauren Oster
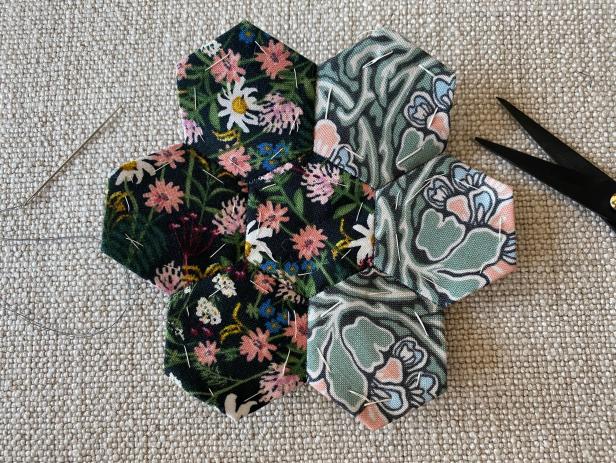
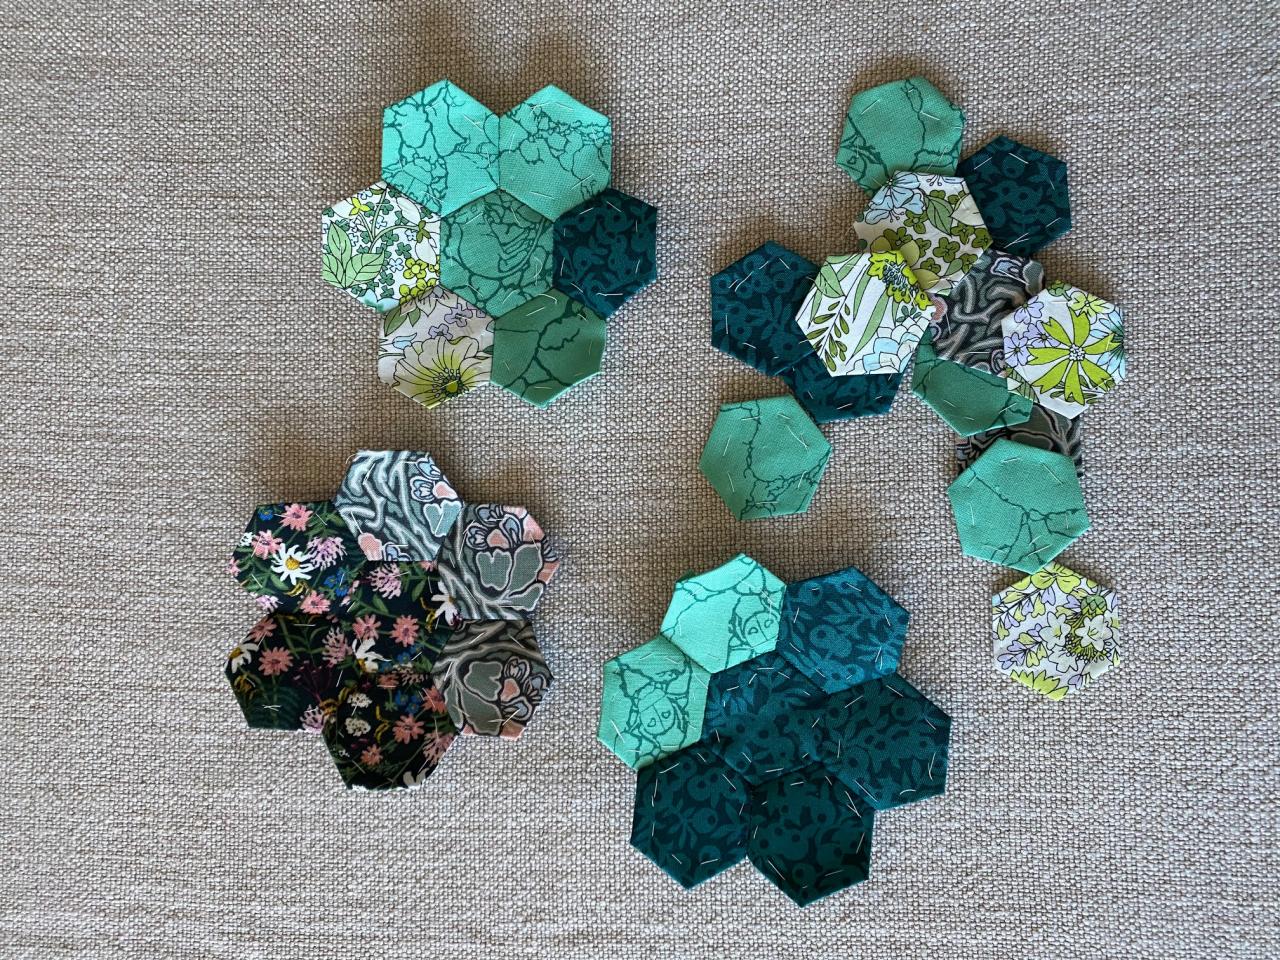
Create and Combine Flowers
Using your numbered reference photo as a guide, continue creating flowers with contiguous groups of hexagons (Images 1 and 2). When you’re down to flowers and a few stray hexagons, refer to your photo one more time and arrange them to match your original design (Image 3). Sandwich flowers and strays along contiguous edges according to your design, then whip-stitch them together (Image 4). Continue sandwiching and sewing until all adjoining hexagons are whip-stitched together (Image 5).
Lauren Oster

Lauren Oster

Lauren Oster
Lauren Oster
Lauren Oster
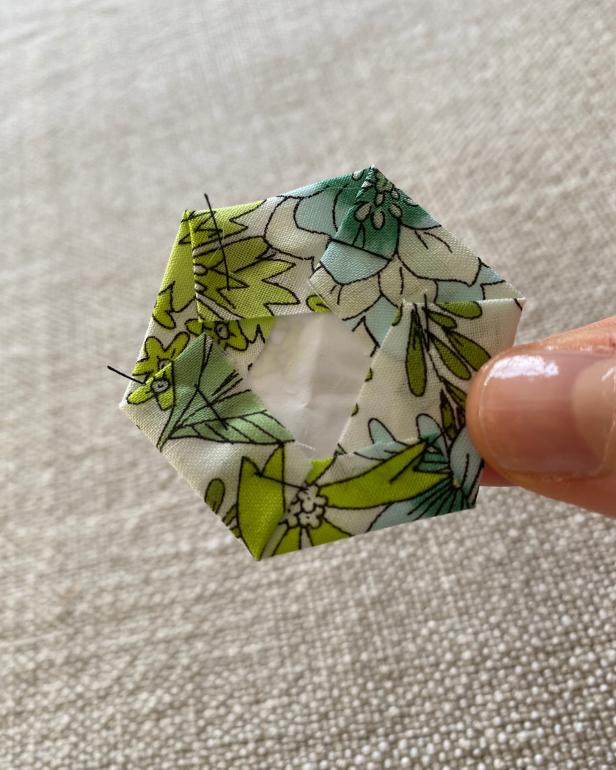
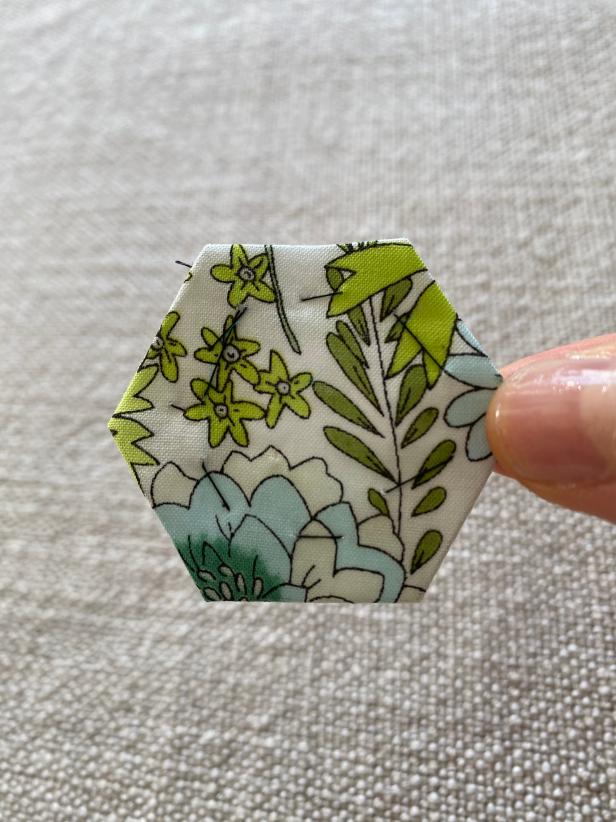
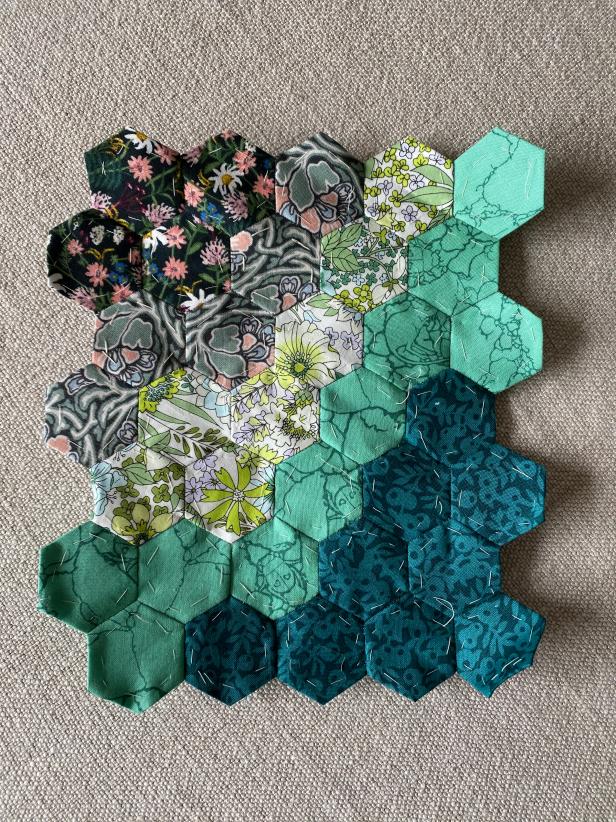
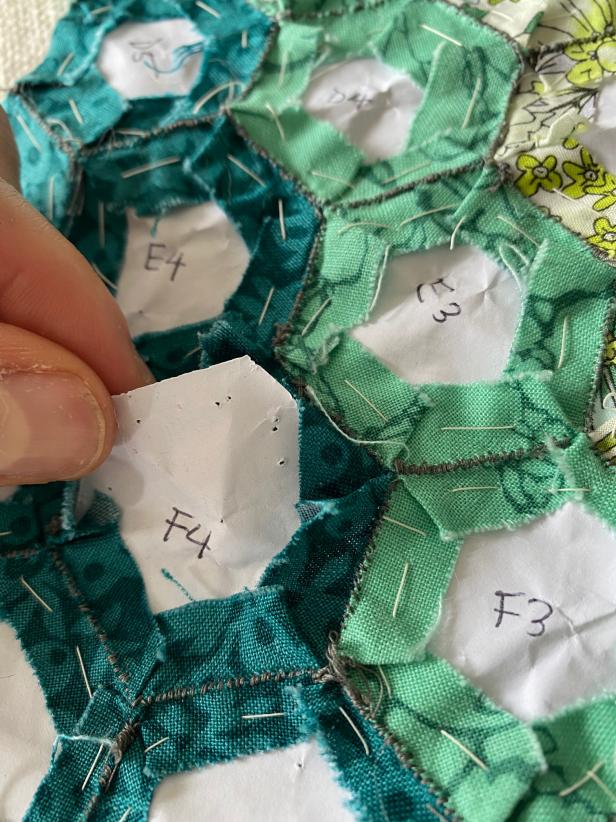
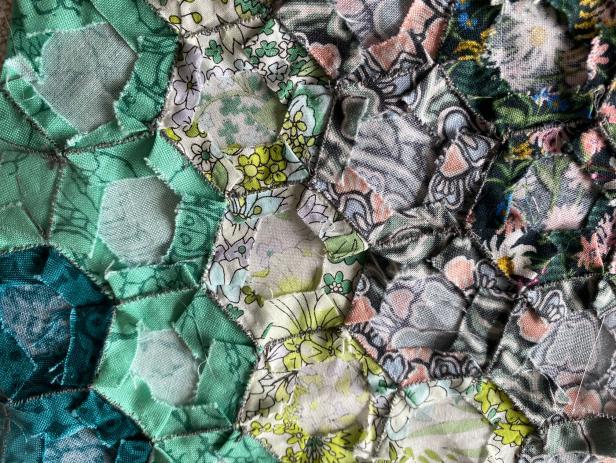
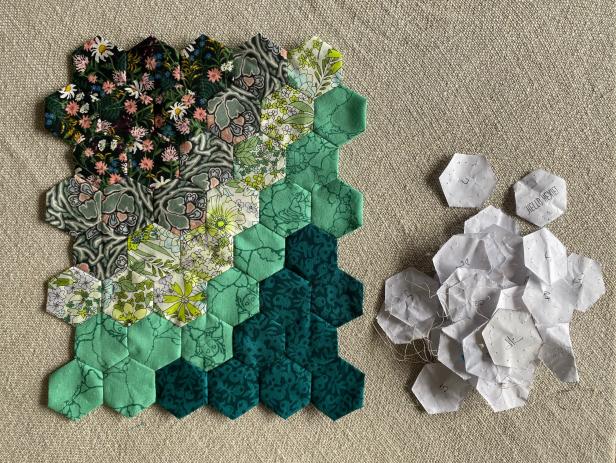
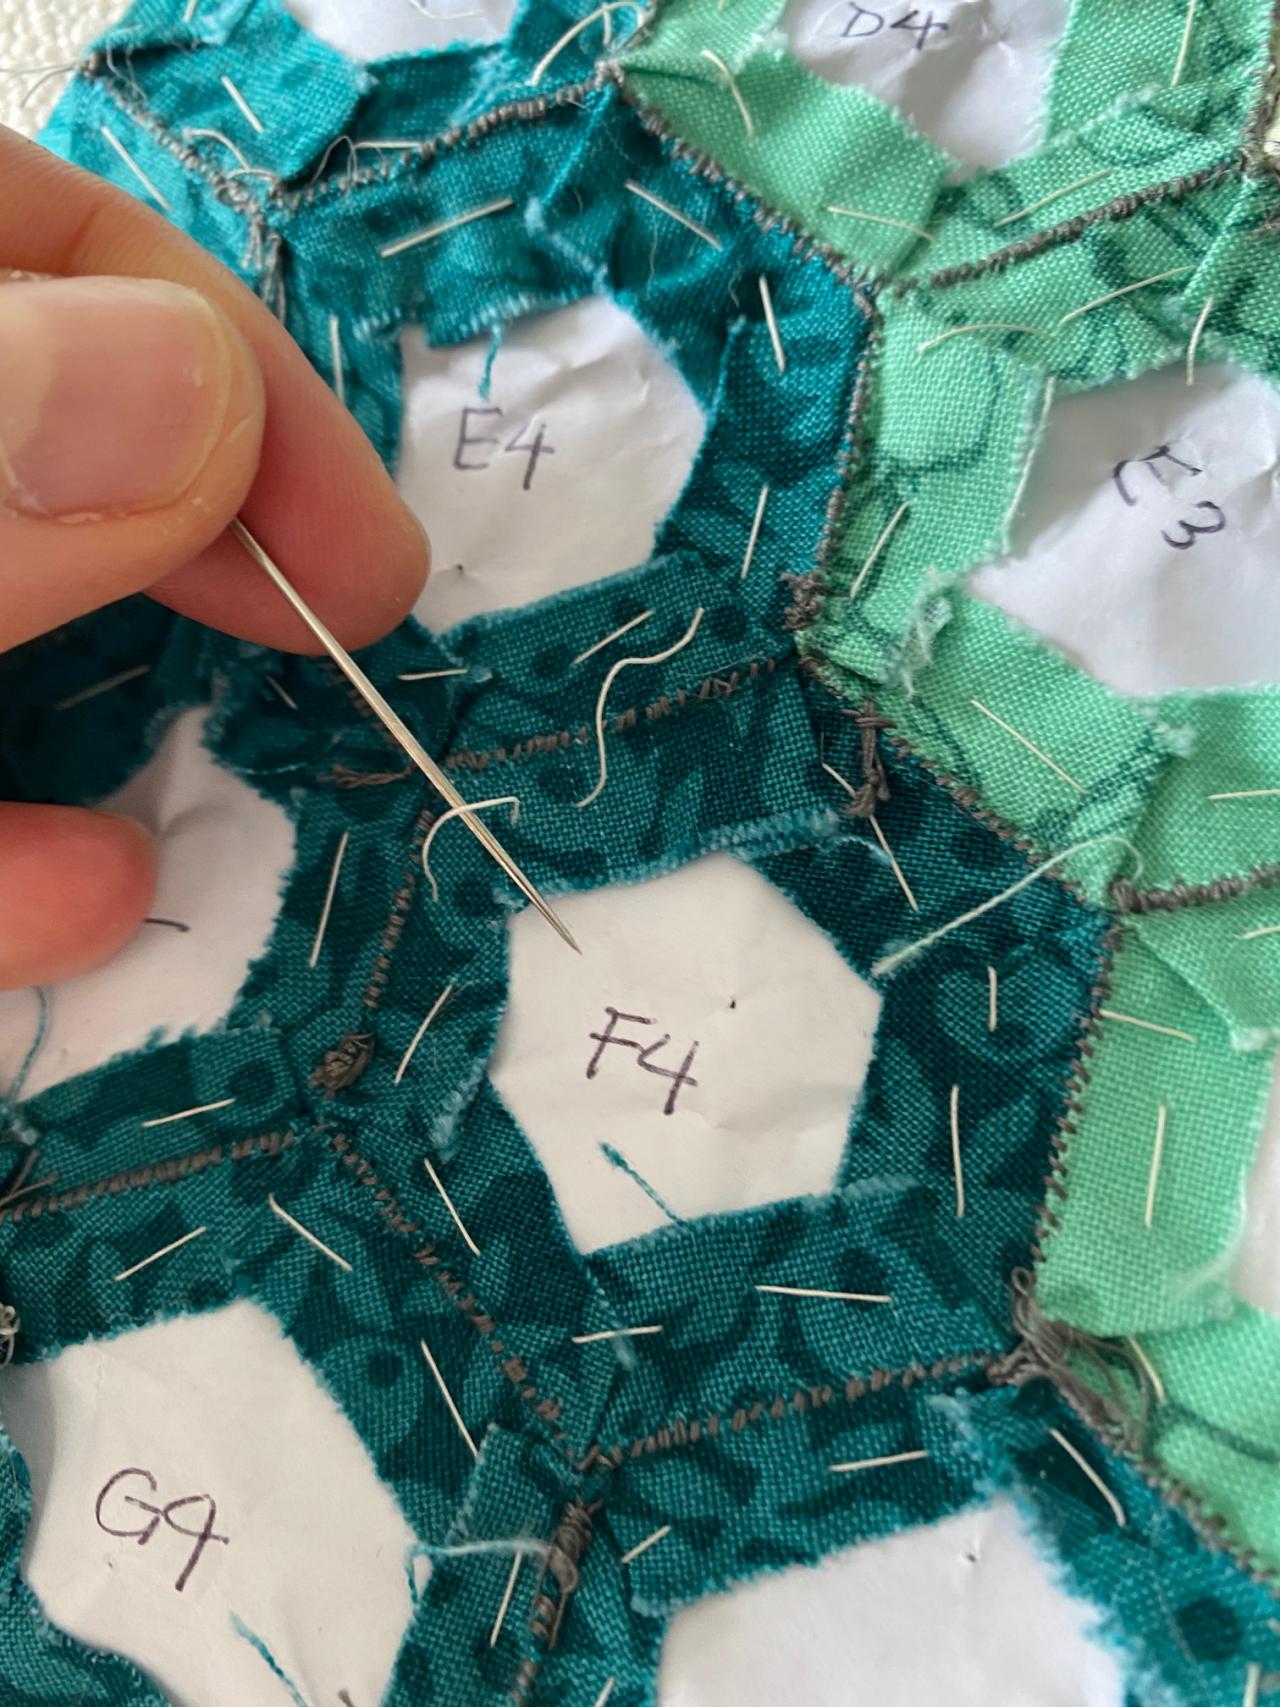
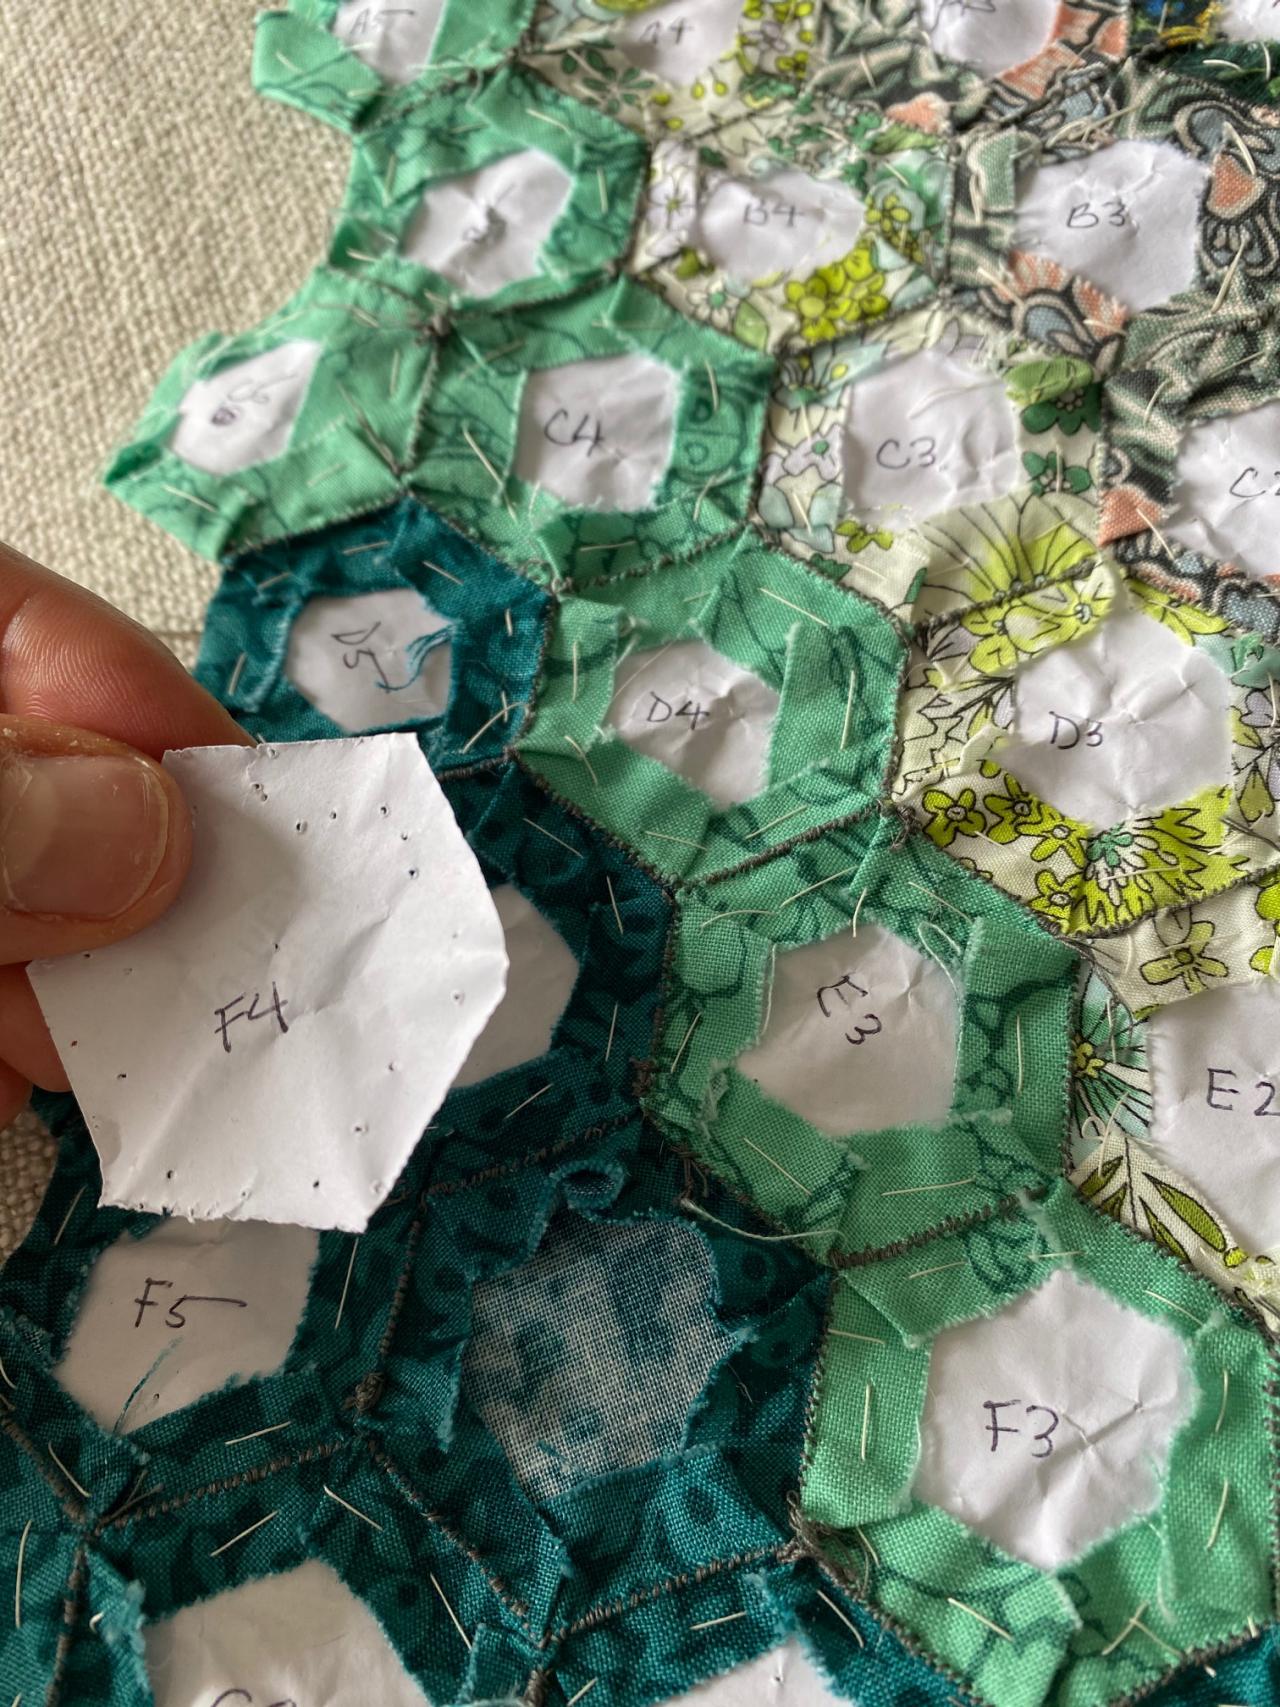
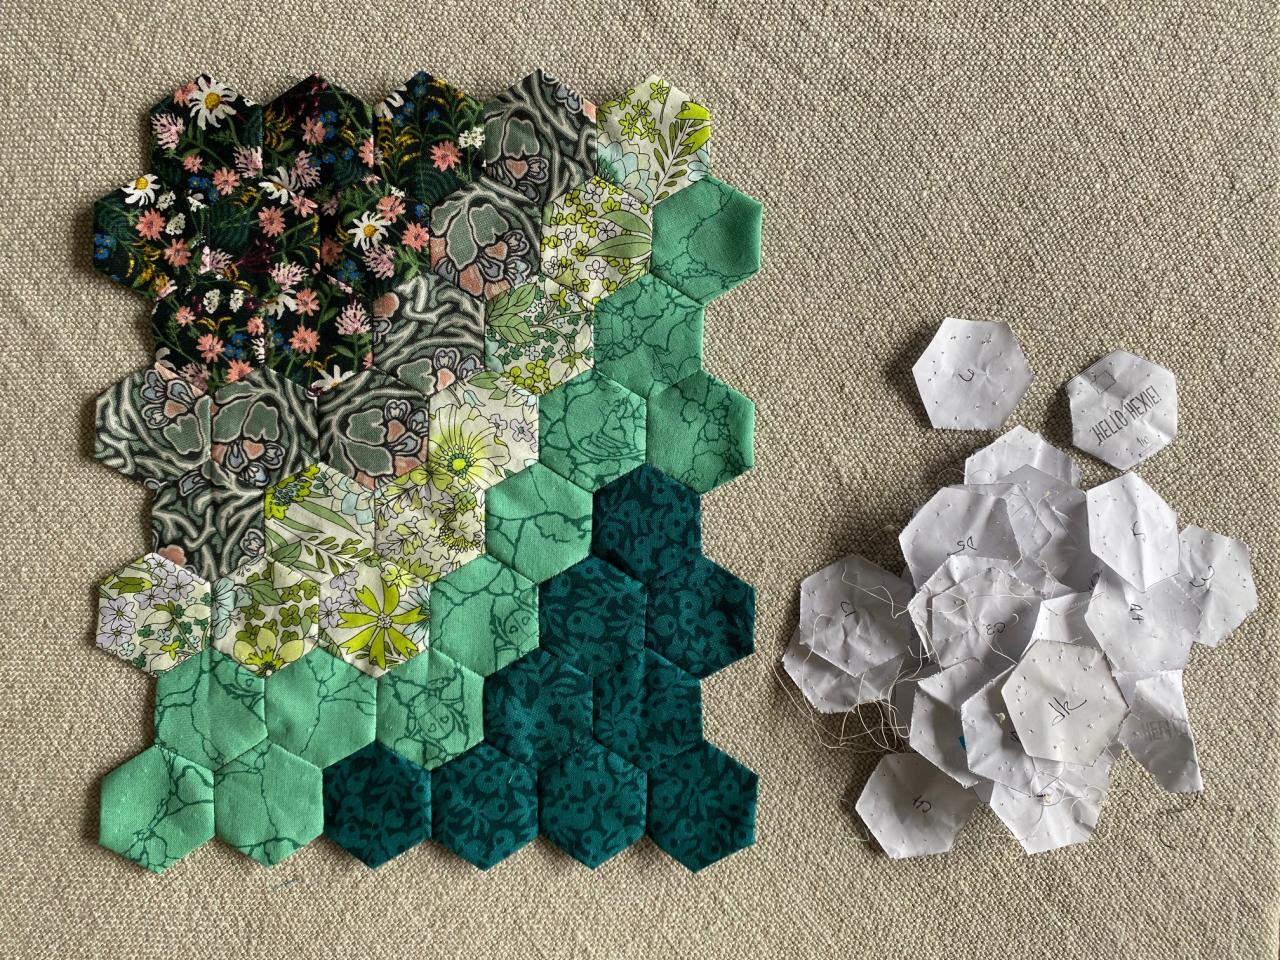
Remove Basting Stitches and Paper Templates
Flip your piece so that the basting stitches are facing up, then use your needle to pull those stitches out, starting at each loose tail and ending with your original knot (Image 1). Remove the paper template from each hexagon after pulling out its basting stitches (Images 2 and 3). Repeat until all templates are removed (Images 4 and 5).

Lauren Oster
Lauren Oster

Lauren Oster
Lauren Oster
Lauren Oster
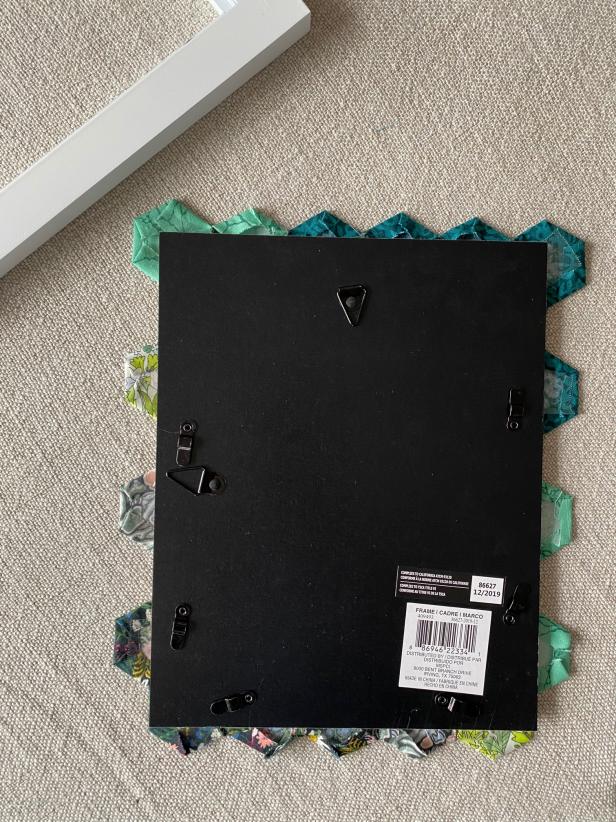
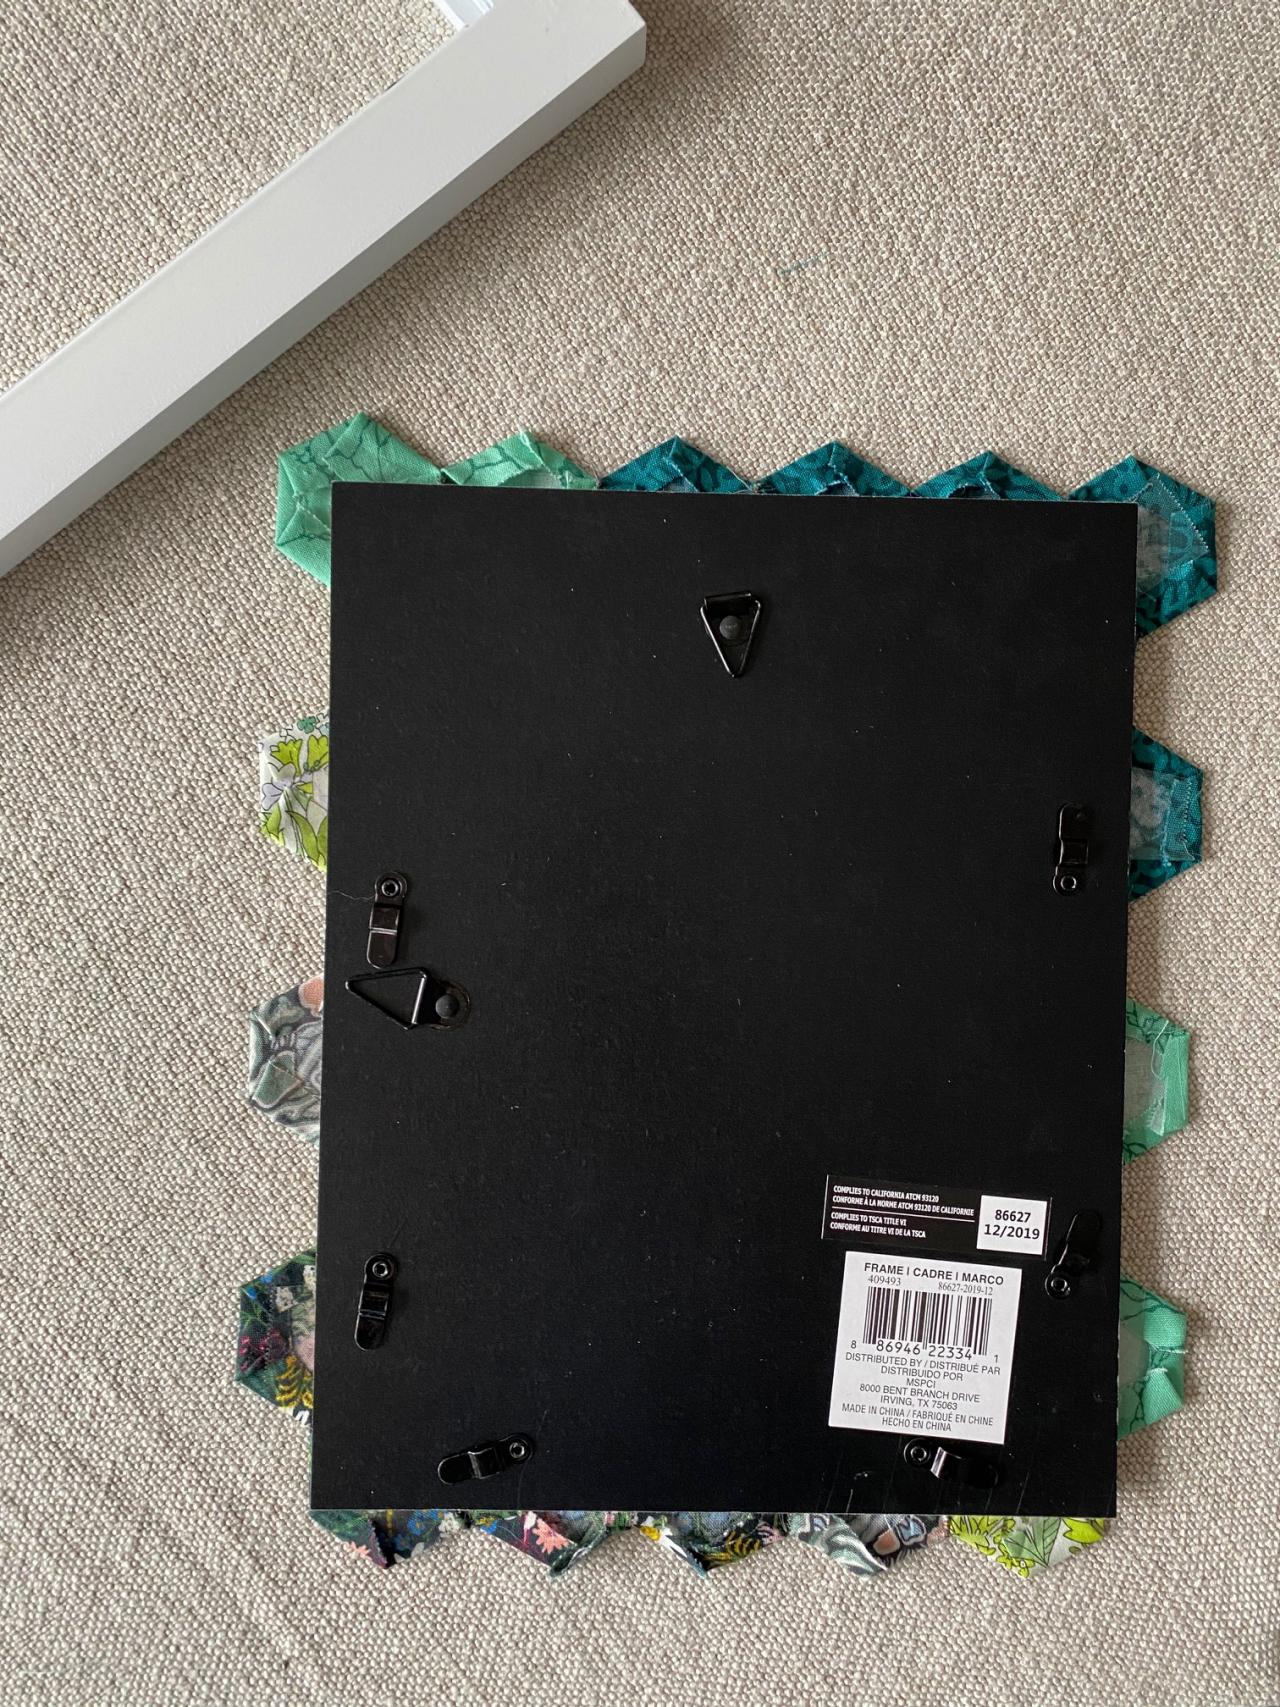
Flatten and Frame Fabric
If your cloth hexagons became creased as you whip-stitched them, steam them gently with an iron. Place your finished piece face-down on top of your frame’s glass (if used), then center the frame’s backing on top (Image 1). Tip: Use small pieces of packing tape to secure overlapping edges of the fabric to the back of the frame. Place the glass-fabric-backing sandwich in your frame and secure it (Image 2).
Lauren Oster
Lauren Oster
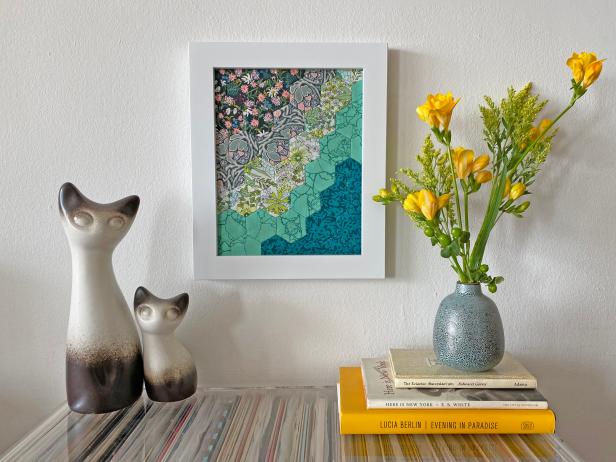
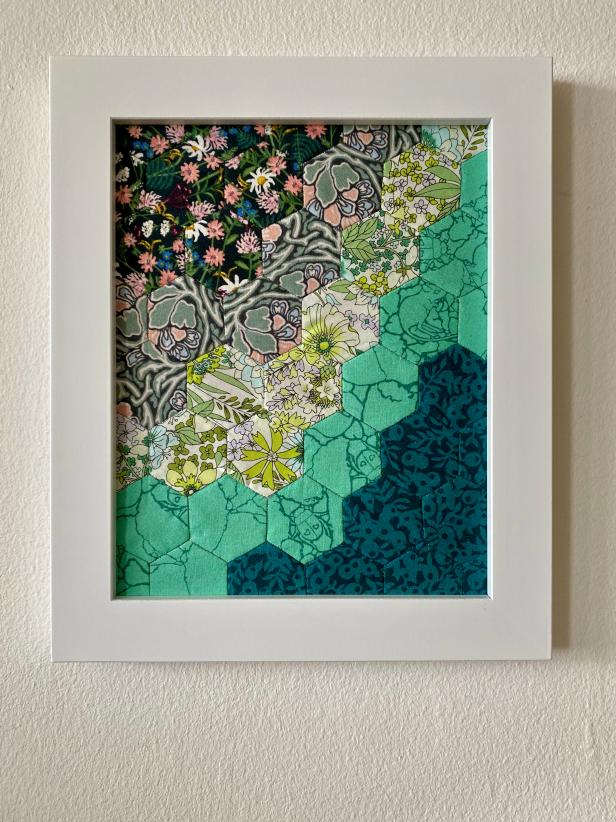
Proudly Display
Hang your completed wall art in an area where you'll be able to enjoy your colorful and crafty handiwork.

Lauren Oster


