


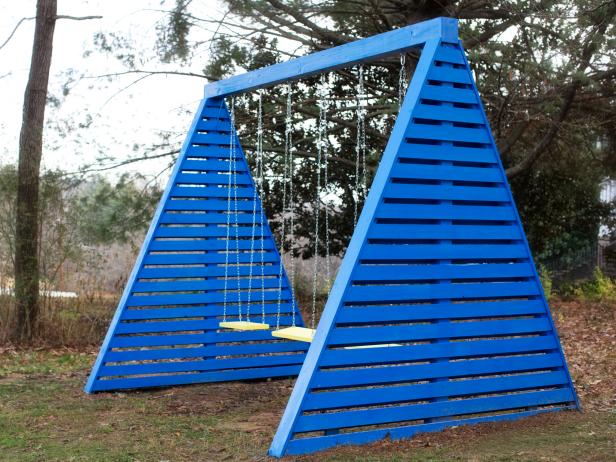
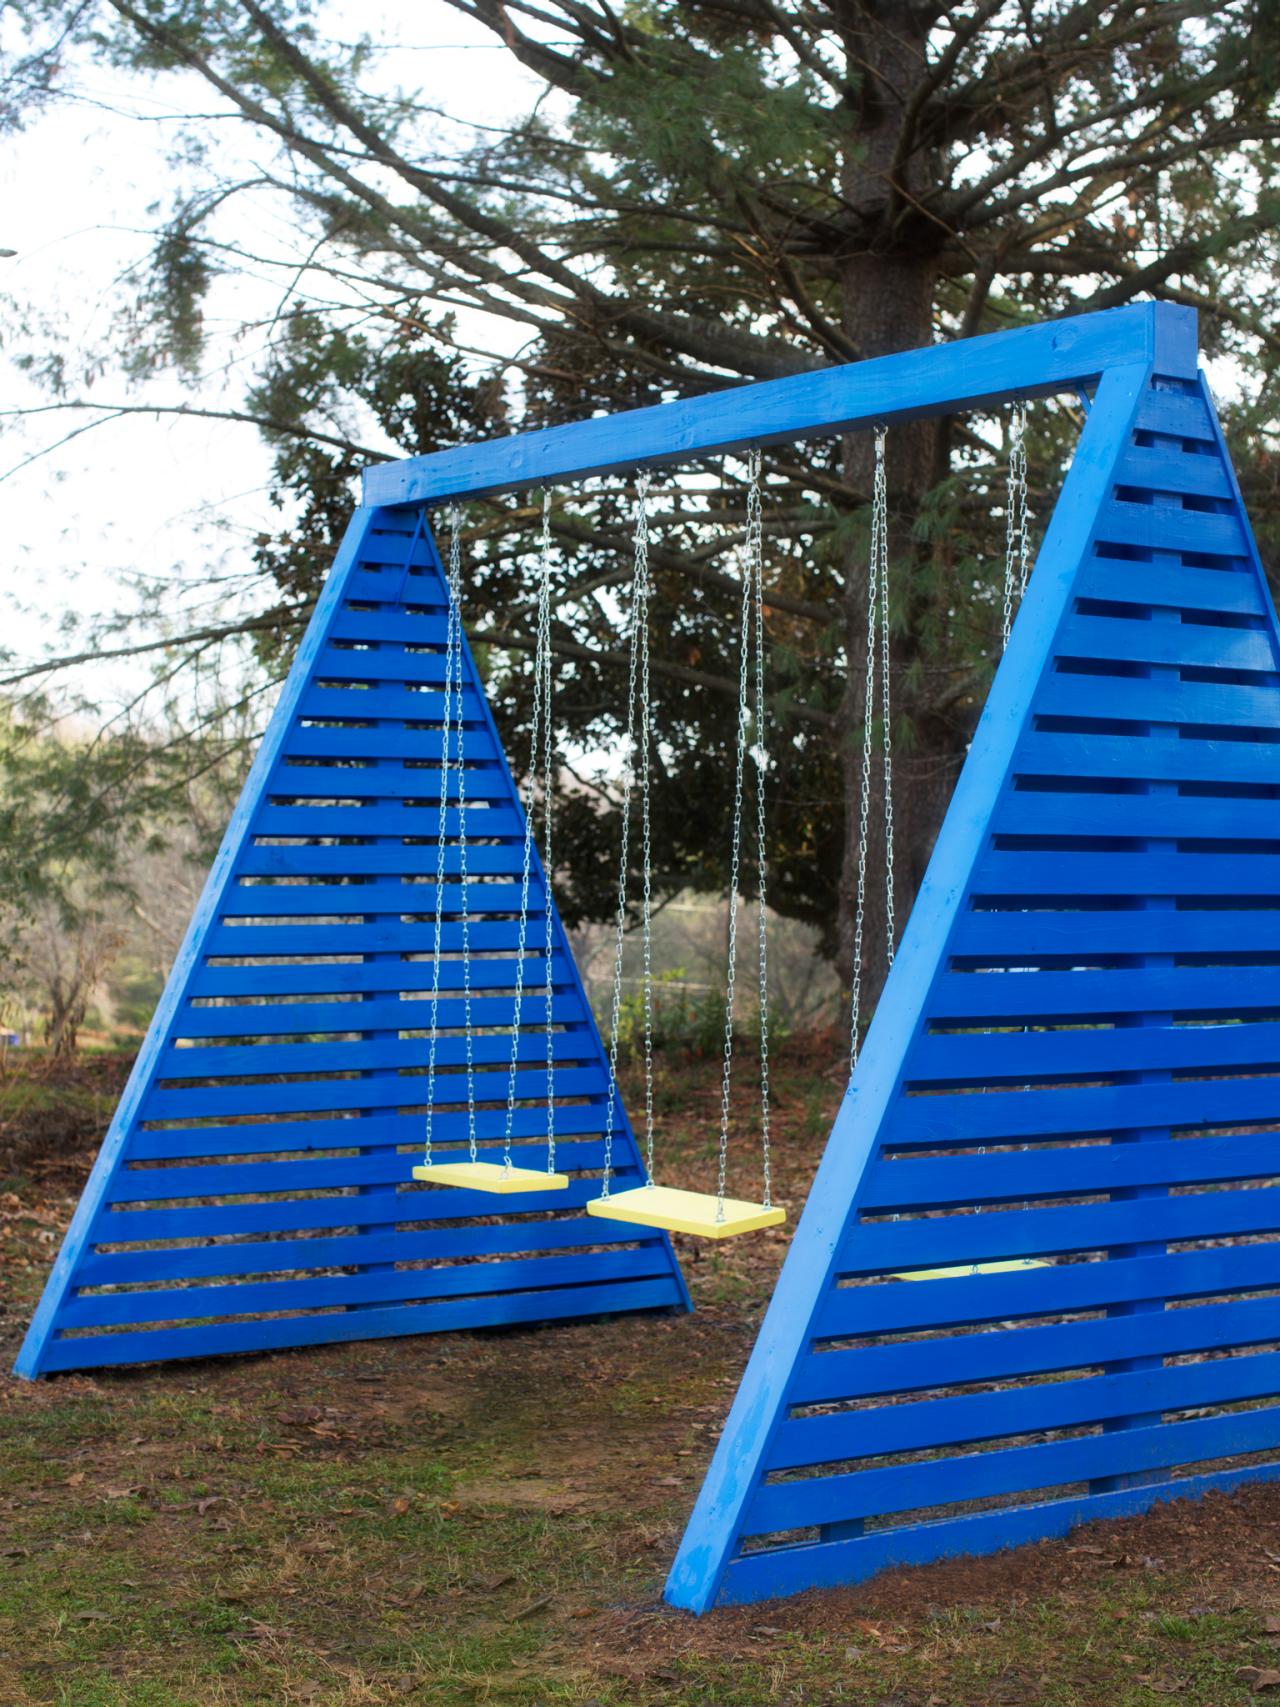
How to Build a Modern A-Frame Swing Set


Materials Needed:
- marking spray paint
- posthole digger
- exterior wood screws
- (2) 4x4x10 pressure-treated posts
- (2) 2x4s
- (60) 1x4s
- (2) post brackets
- (2) steel L-brackets
- 6x6x12 pressure-treated post
- 2x6
- (12) 2-1/2" eyehooks
- (12) carabiners
- (4) 50-lb. bags of concrete
- level
- table saw
- drill
- mixing tub or 5-gallon bucket
- 1" drill bit
- 7" eyehooks
- fender washers
- lock washers
- nuts
- HVLP paint sprayer
- exterior primer and paint
- measuring tape
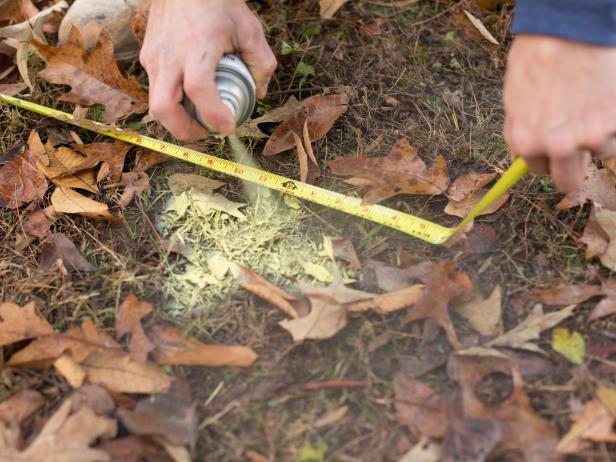
Determine Location and Dig Postholes
Choosing the proper location plays a major role in successfully building a swing set. It's best to find a flat, level area which is slightly shaded and within view from the home's main living areas. Once location has been decided, use a measuring tape and spray paint to mark a 12-foot span onto the ground (Image 1). Referring to spray-painted markings, dig two 3-foot-deep postholes, one at each end, using a posthole digger (Image 2).

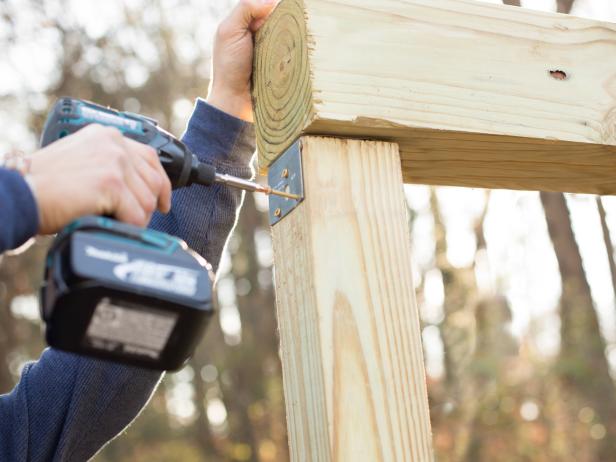
Create Frame
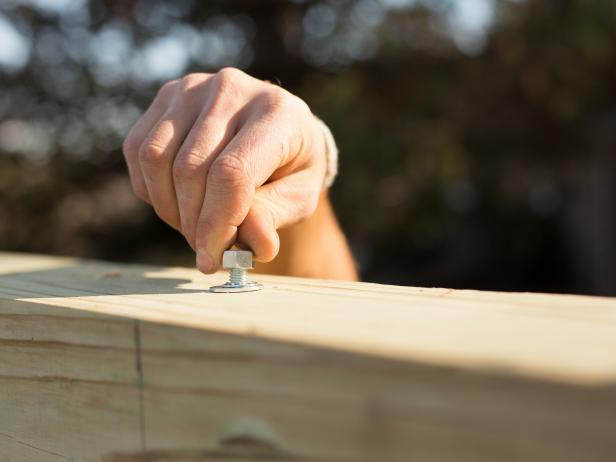
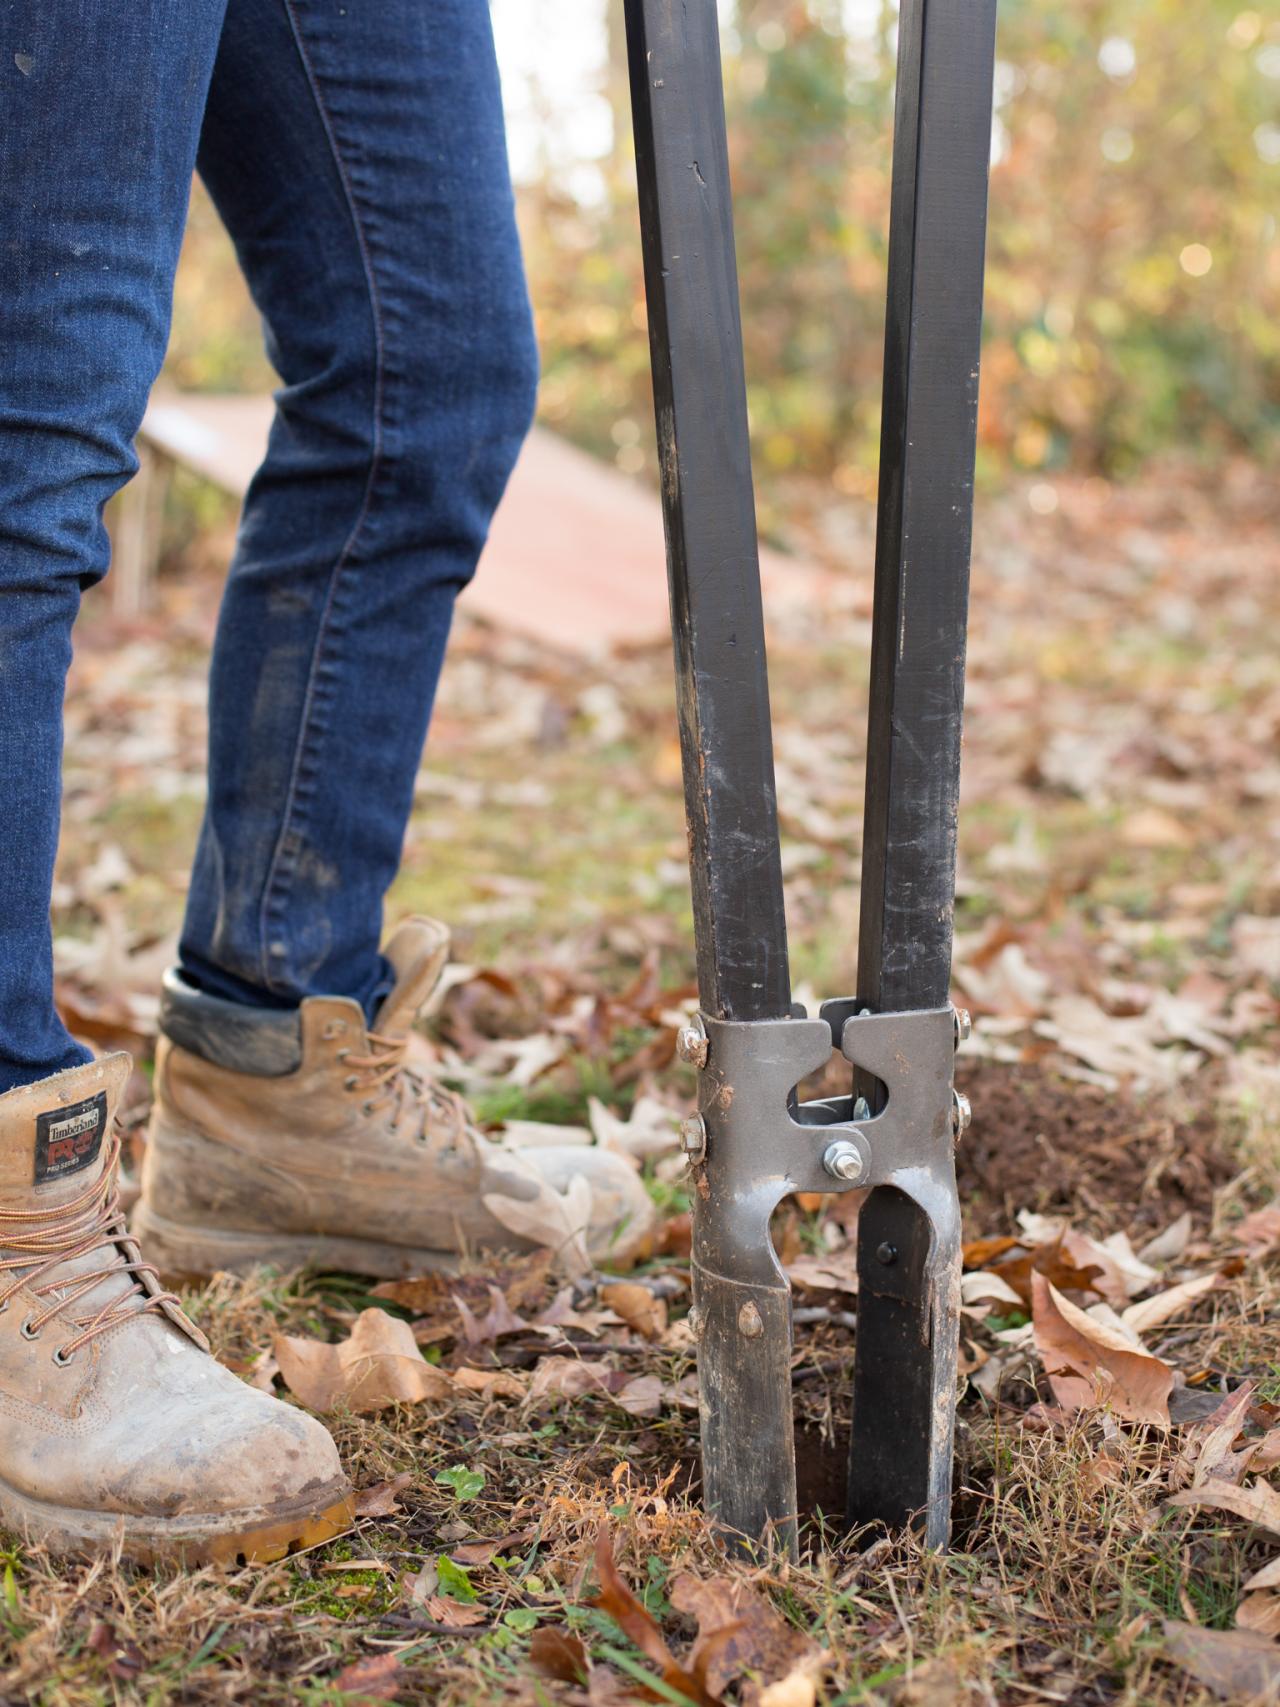
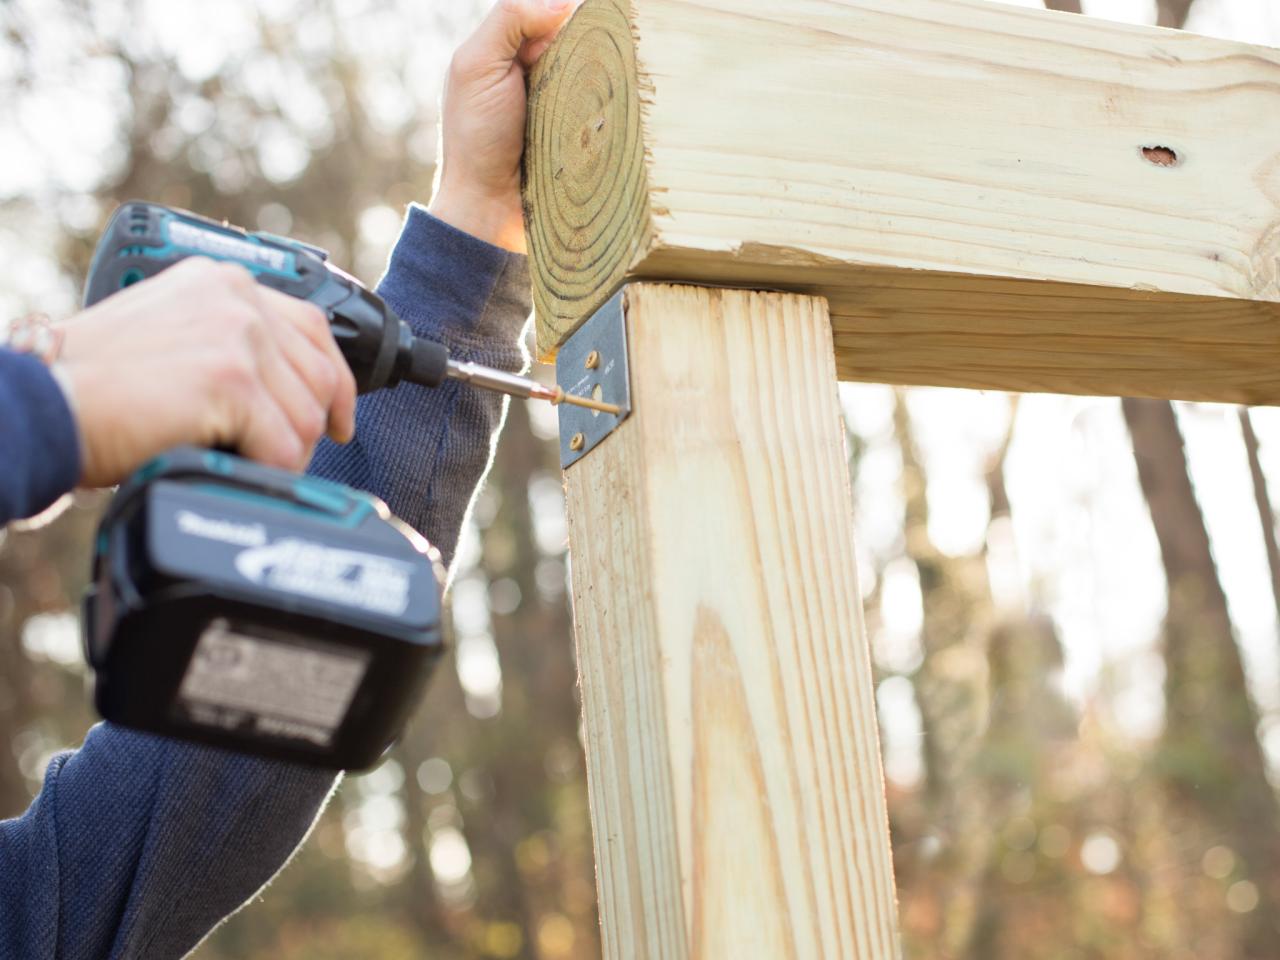
With the help of a friend, attach a 4x4x10 post to each end of a 6x6x12 post using post brackets (Image 1). This will create an upside down "U" shape. Next, screw heavy-duty steel L-brackets into each corner, securing them at a 90-degree angle (Image 2).

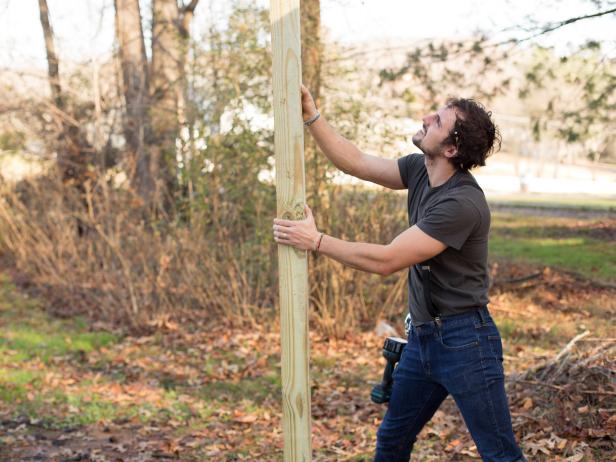
Place Frame in Holes Then Level and Secure Them
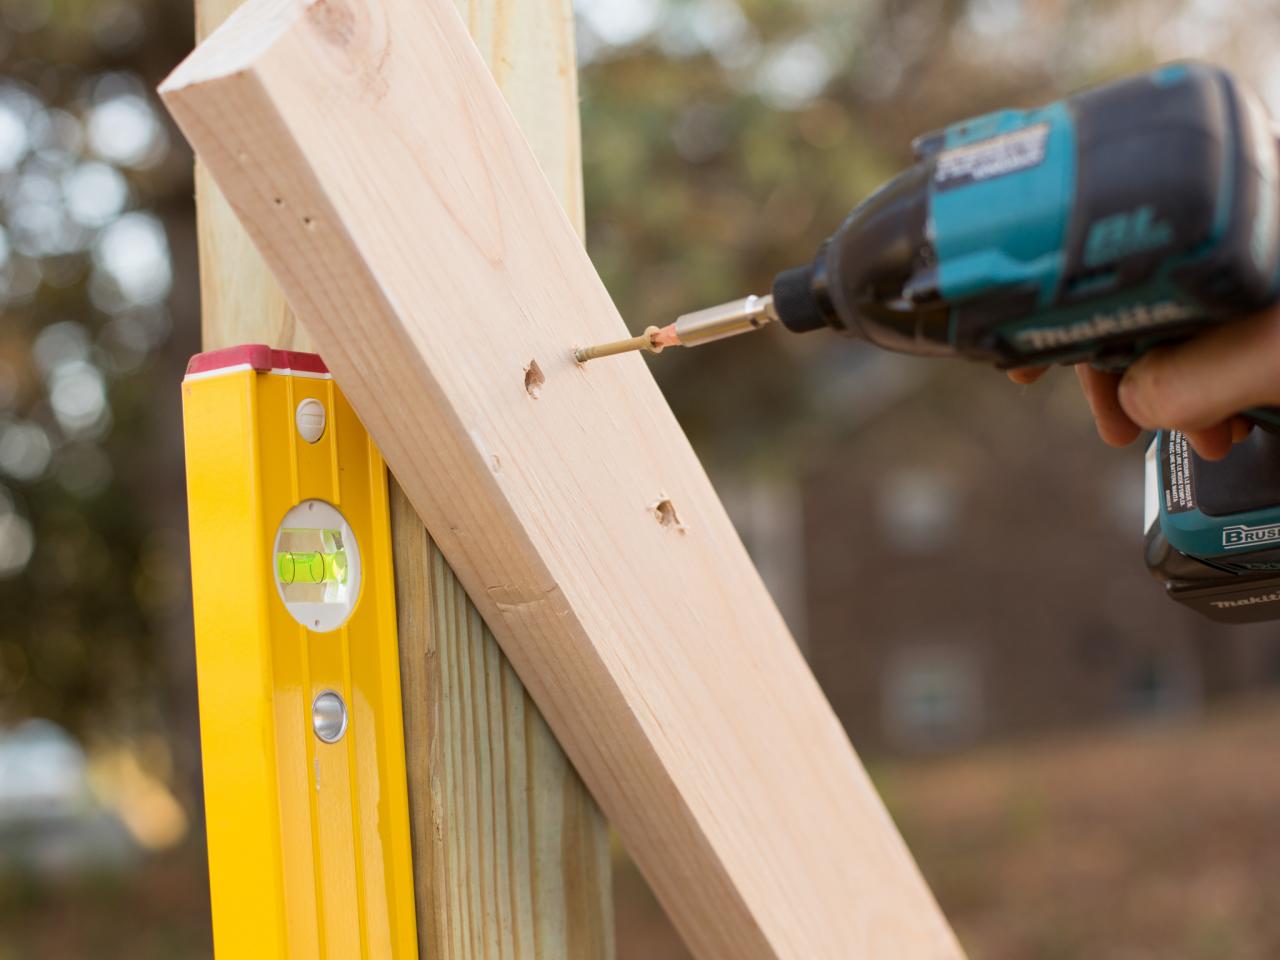
With the help of a friend, place each of the 4x4 posts into the holes (Image 1). Hold level up against each of the 4x4 posts to ensure they are perfectly level. Create temporary bracing to keep posts level by attaching a 2x4 to the 4x4 using wood screws, with the opposite end of the 2x4 resting on the ground (Image 2). When leveling the 4x4 side posts, be sure to level the top 6x6 beam as well.

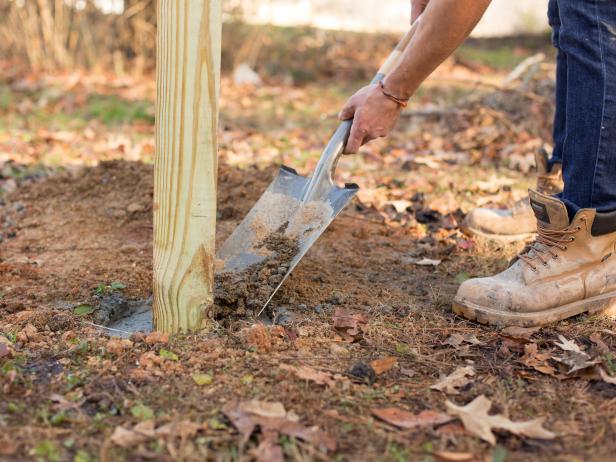
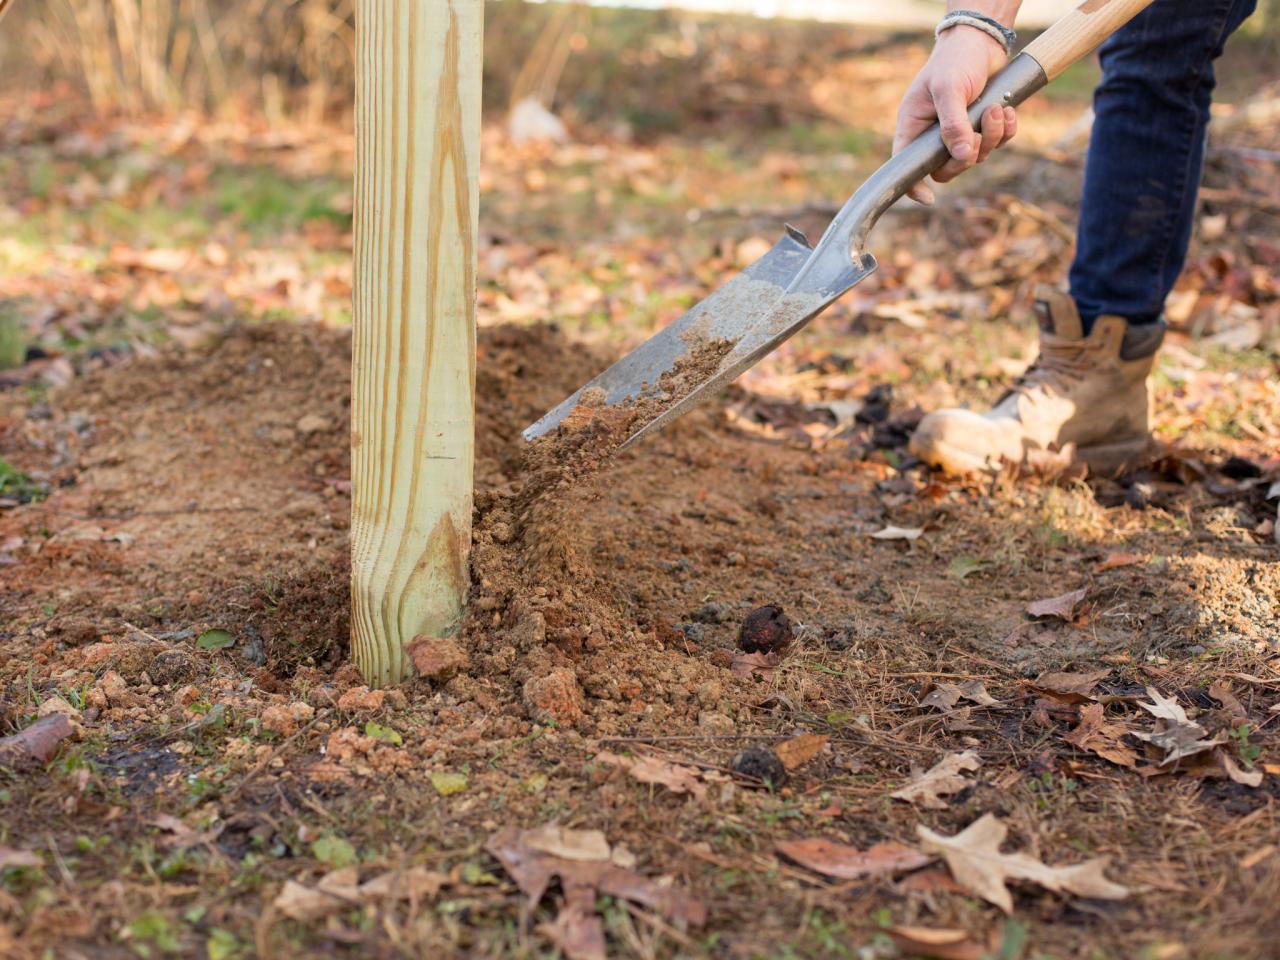
Fill Holes With Concrete Then Backfill
Mix two 50-lb. bags of concrete with water in a mixing tub or five-gallon bucket. Add concrete to the holes around each 4x4 post using shovel (Image 1). Let concrete set up for 24-48 hours depending on the climate. Backfill holes with soil to cover the concrete (Image 2). Remove the temporary bracing once concrete has set.

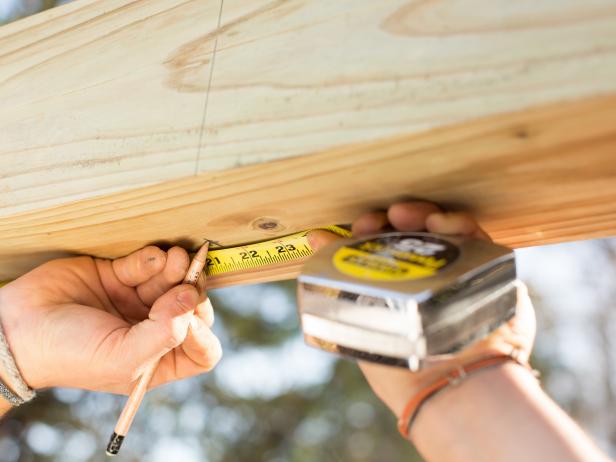
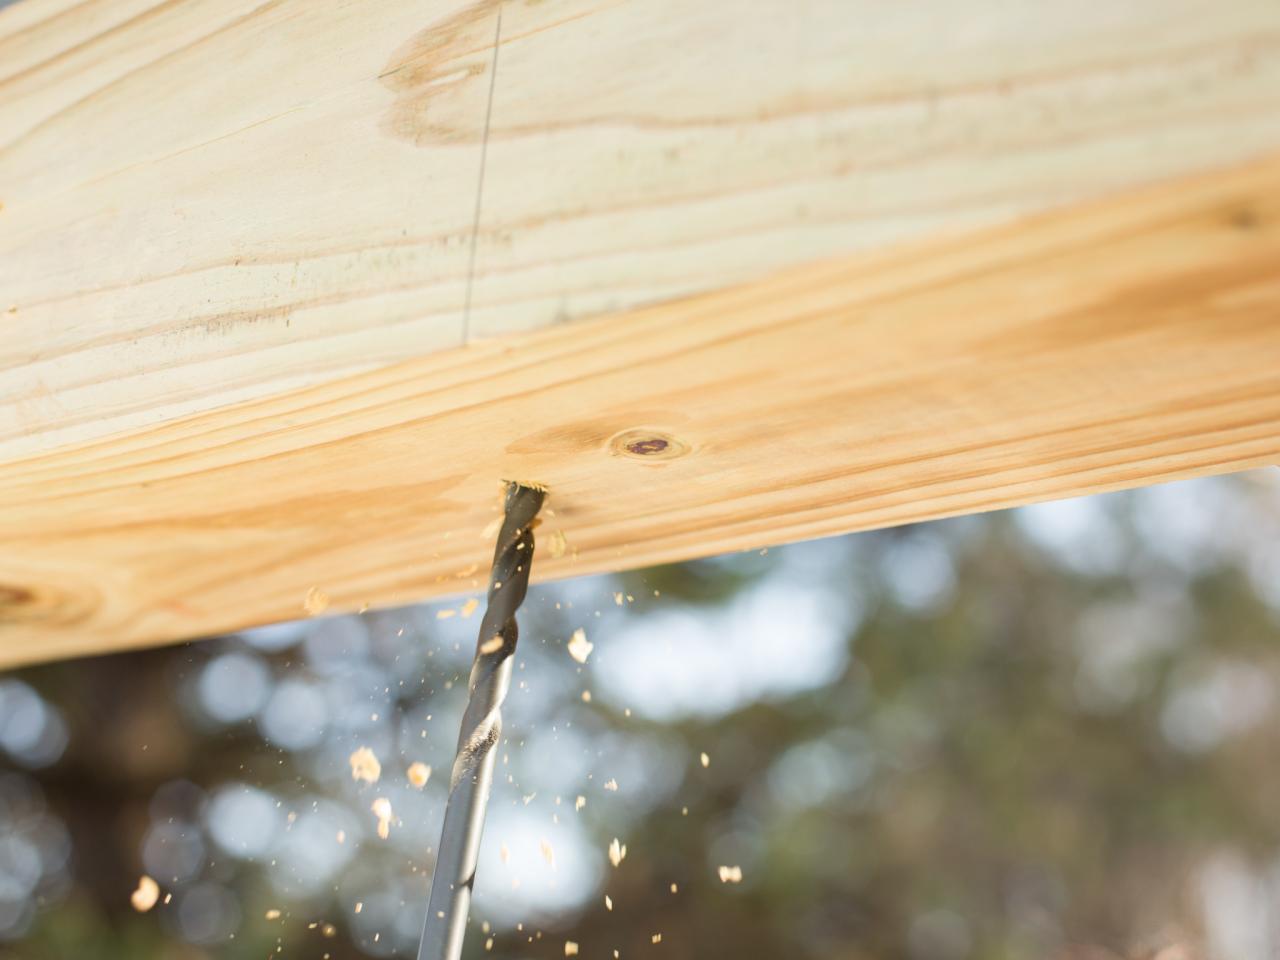
Drill Holes for Swings
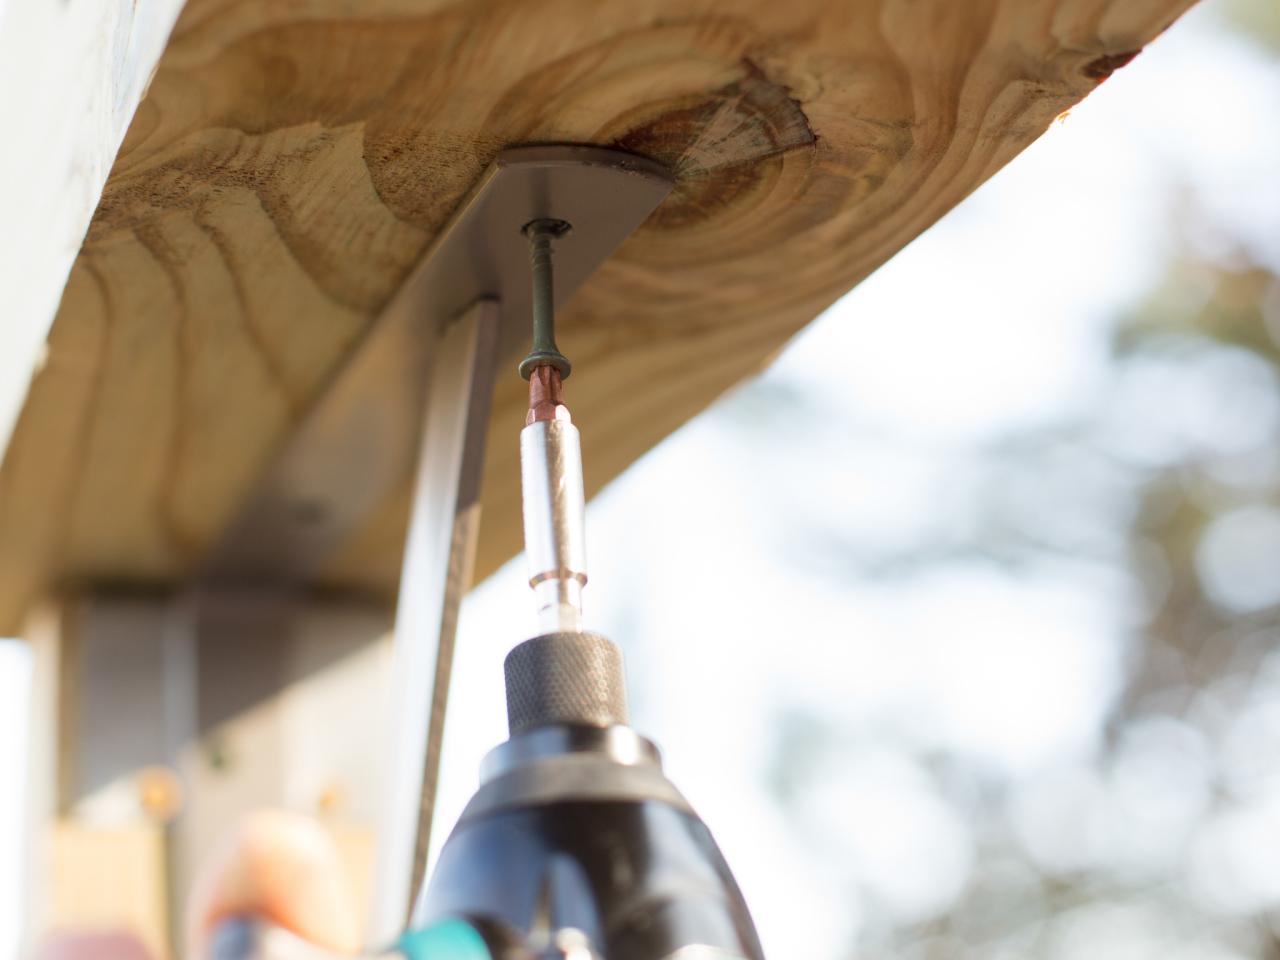
Use measuring tape to mark every 21 inches where hardware will attach to top crossbeam (Image 1). Drill holes through marks (Image 2) then insert 7-inch eyehooks, securing them on top of the beam with a fender washer, lock washer and nut (Image 3).

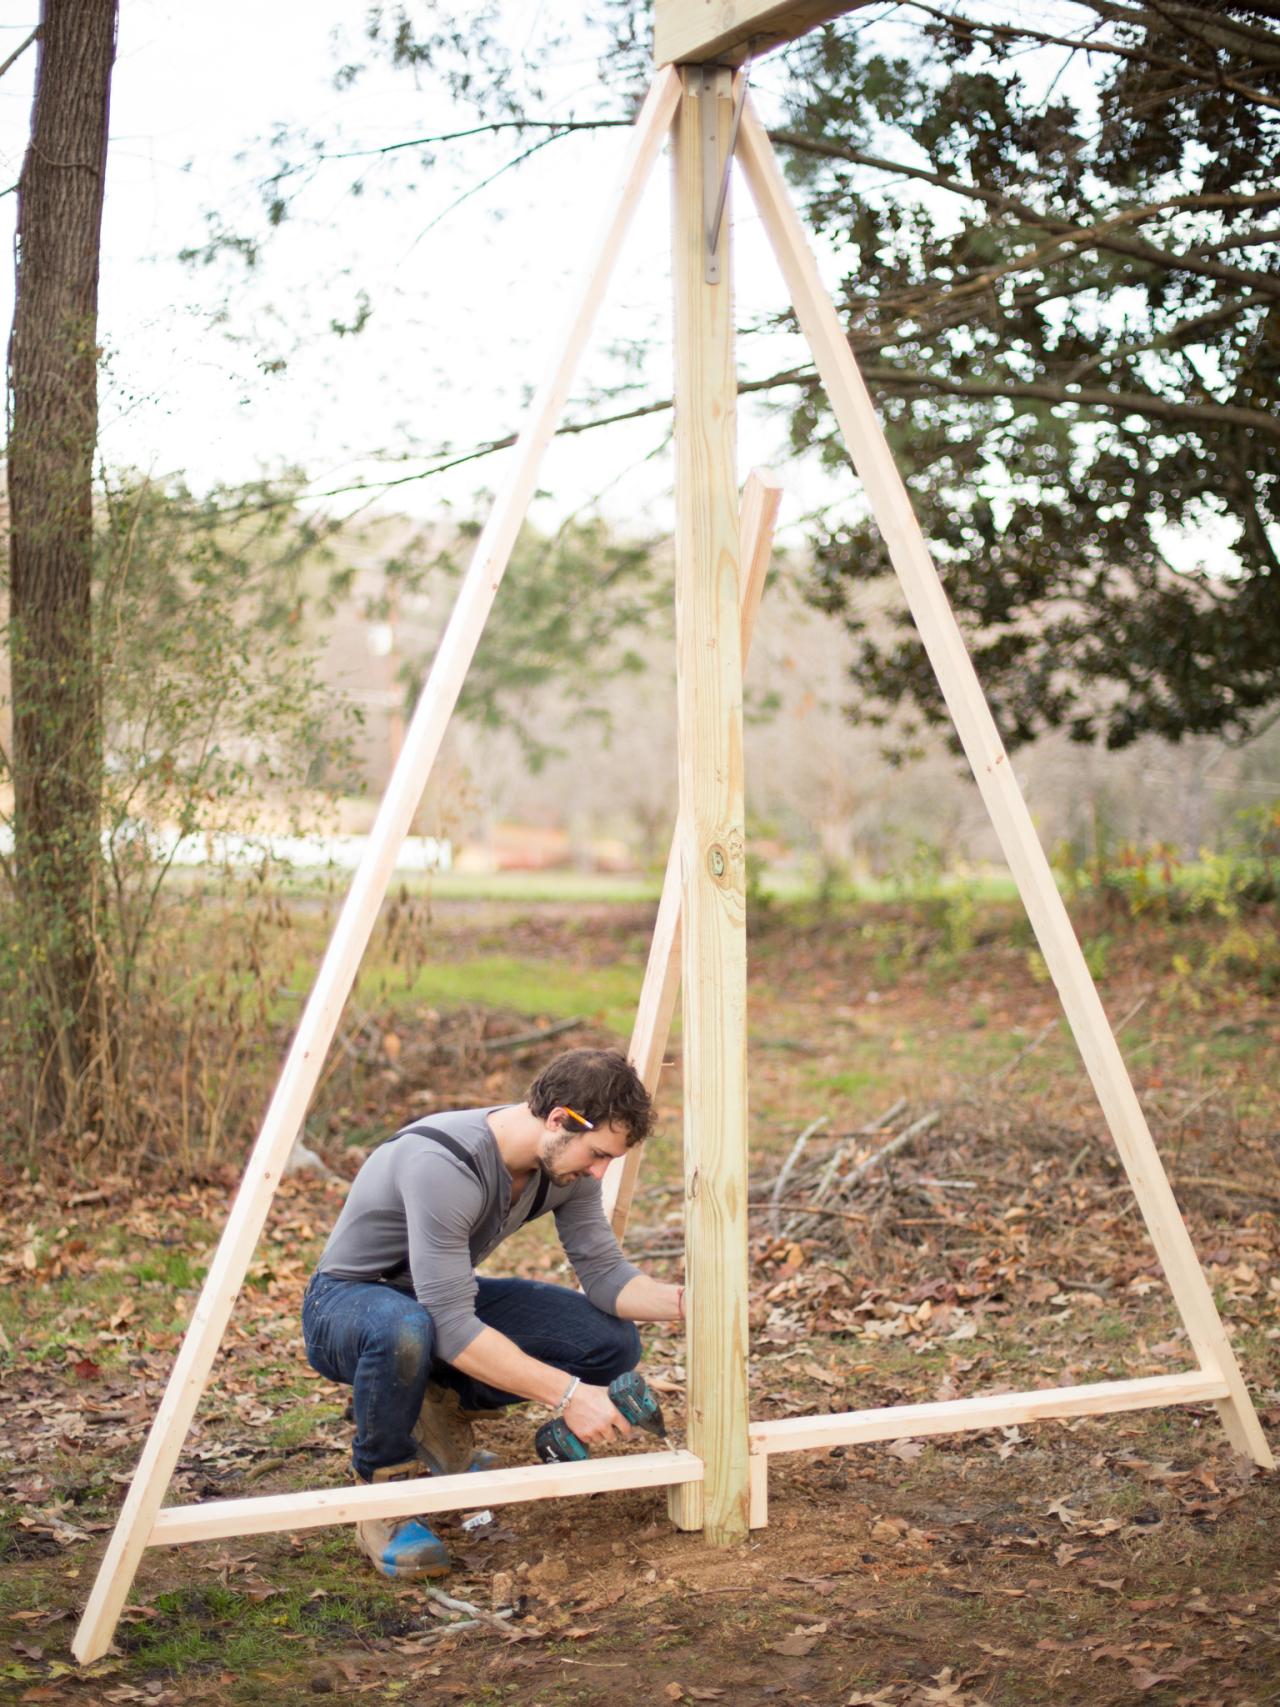
Create the A-Frame
Create a simple A-frame by screwing 2x4s to the 4x4 posts. Next, use HVLP paint sprayer to prime all the wooden surfaces. Tip: Priming the frame before slats are attached will help seal the interior structure, which will be impossible to reach with paint sprayer once slats are in place.

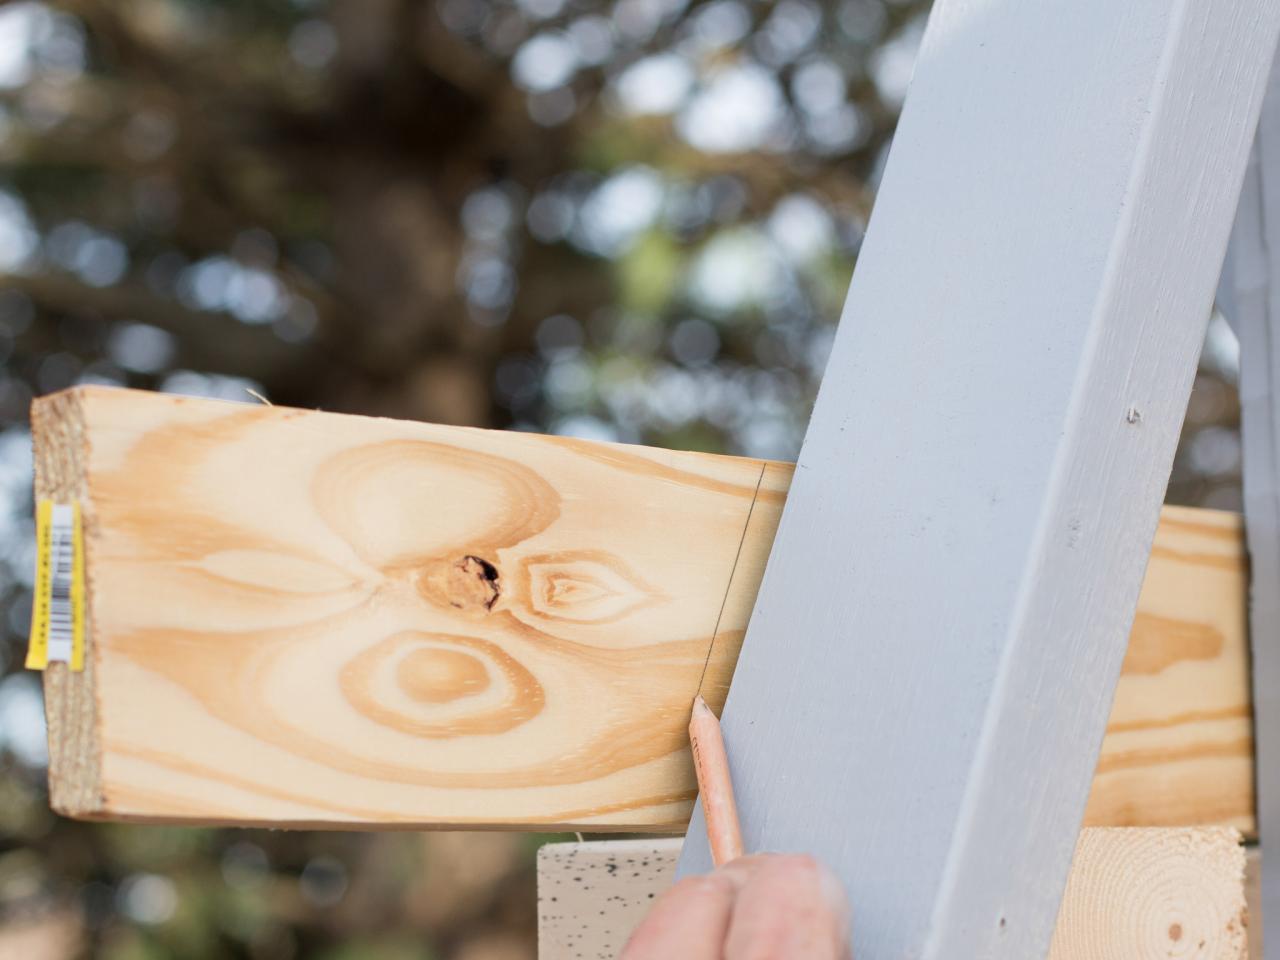
Cut Slats at an Angle
Holding the 1x4 up to the A-frame, use a pencil to mark the angle on the back of the slat and remove (Image 1). Cut angle ends on each 1x4 slat using a table saw (Image 2).


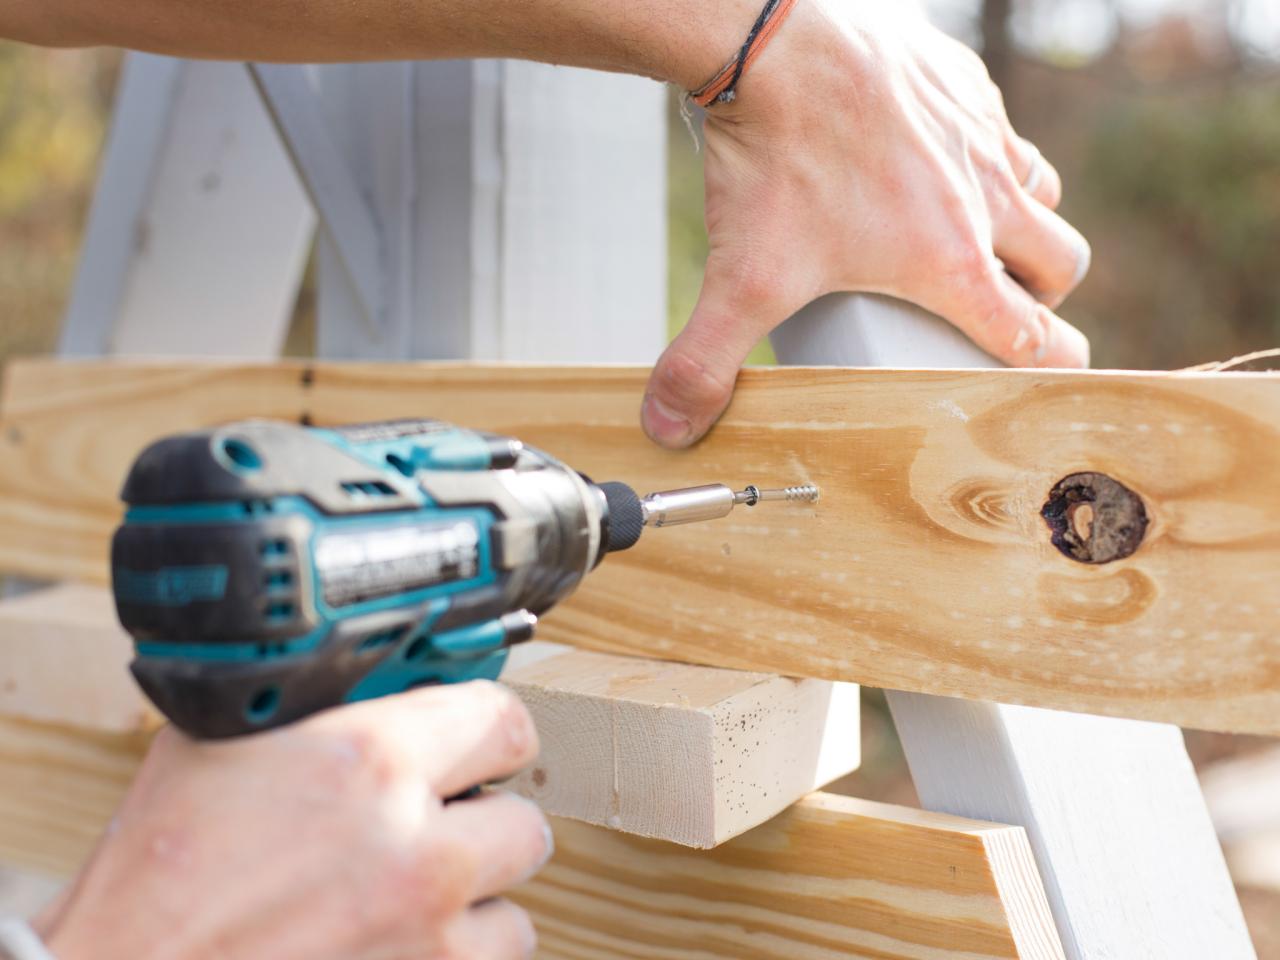
Attach Slats One Side at a Time
Using exterior wood screws, attach 1x4 slats using a scrap piece of 2x4 to create equal spacing between slats.

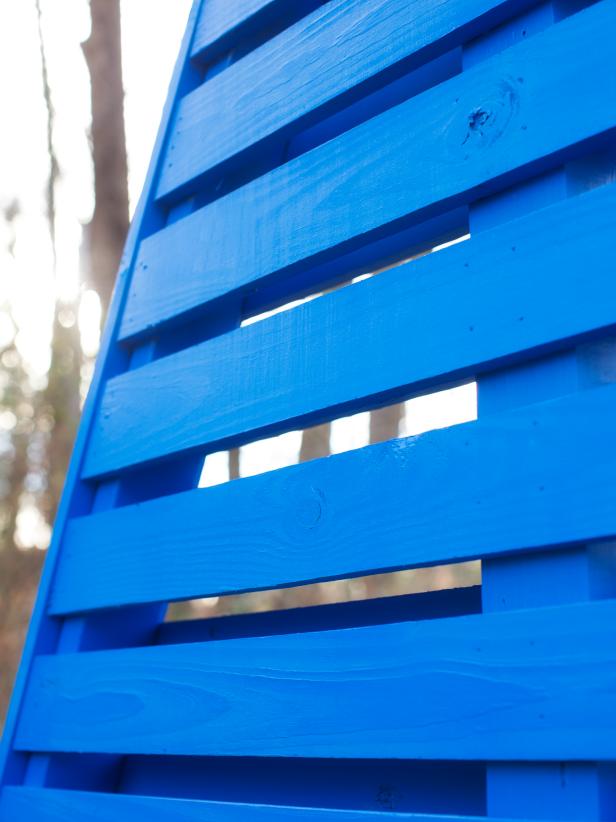
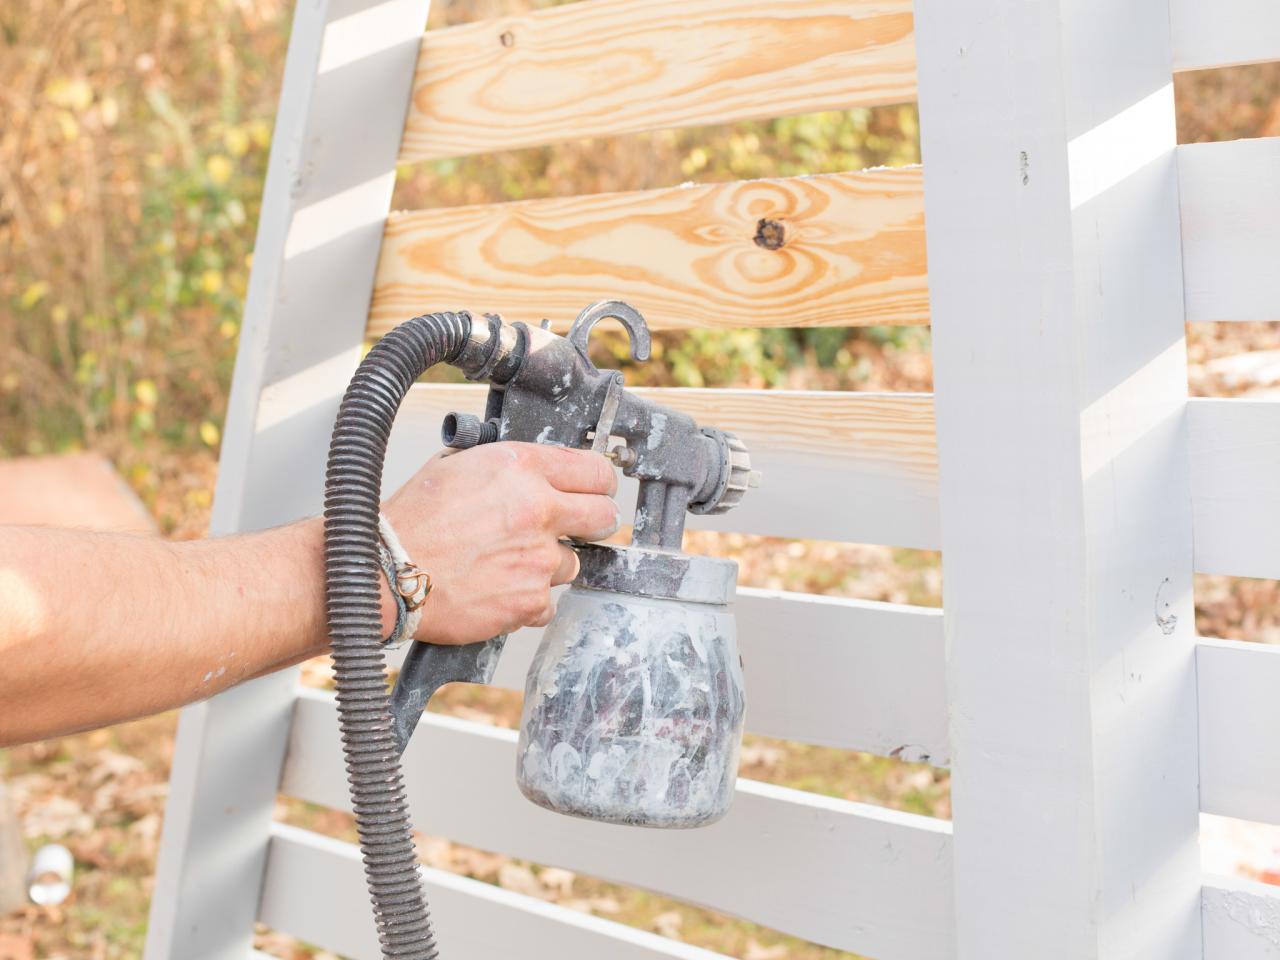
Prime and Paint Swing Set
Using HVLP paint sprayer, prime all wood surfaces including the back sides of each A-frame structure with attached slats (Image 1). Choose desired exterior paint color and once the primer has dried, paint the entire swing set frame (Image 2).

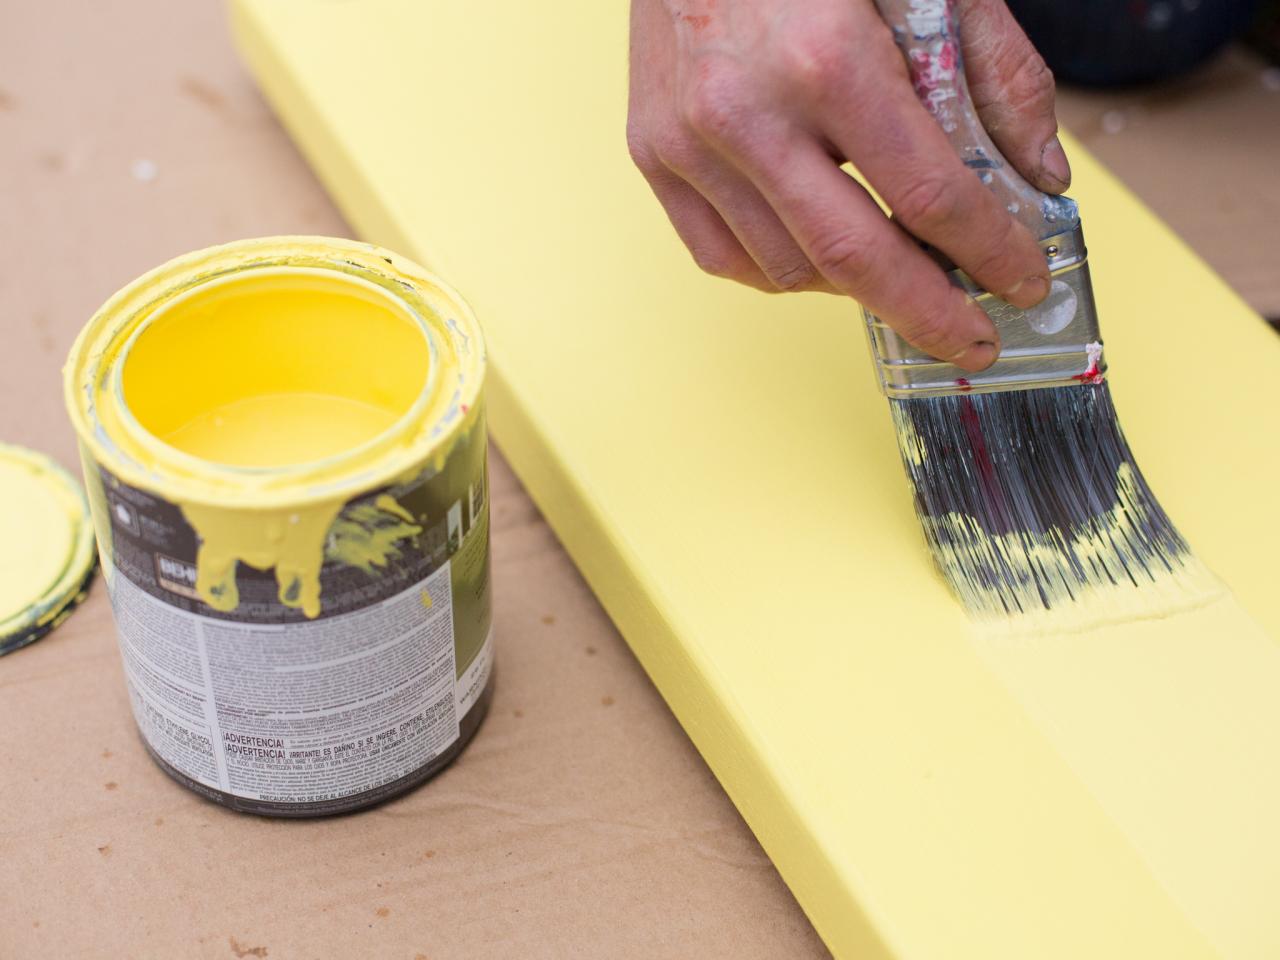
Cut and Paint Swing Seats
Create three seats by cutting a 2x6 into three 21" long sections. Once the seats are cut, drill a hole in all four corners, then use paintbrush or mini roller to coat them with exterior paint.

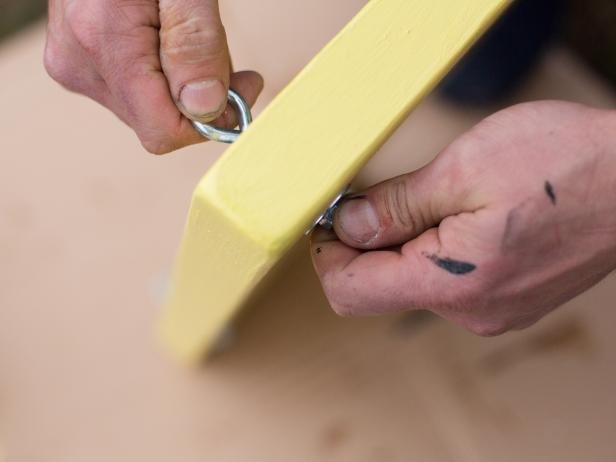
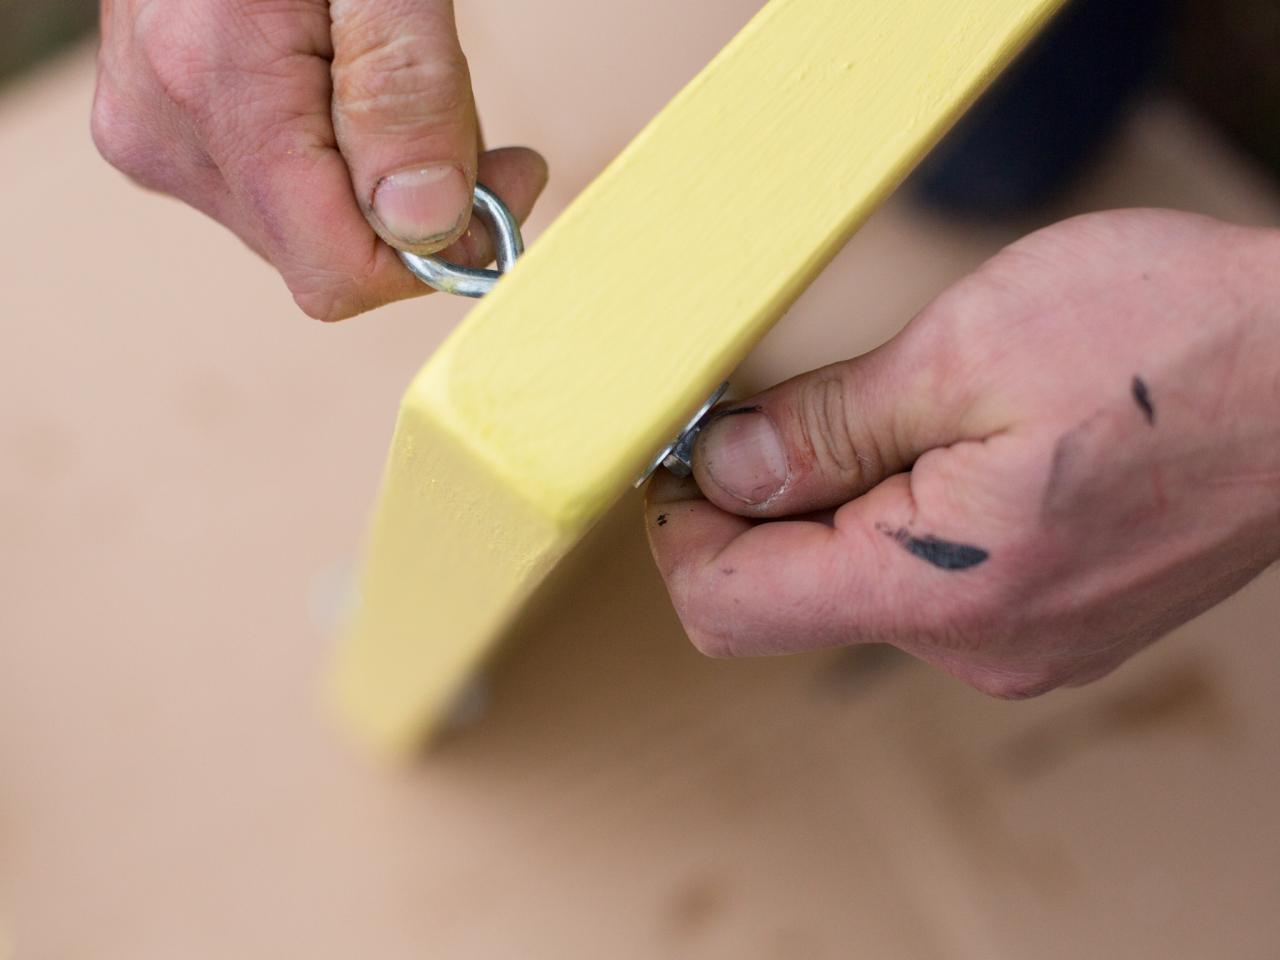
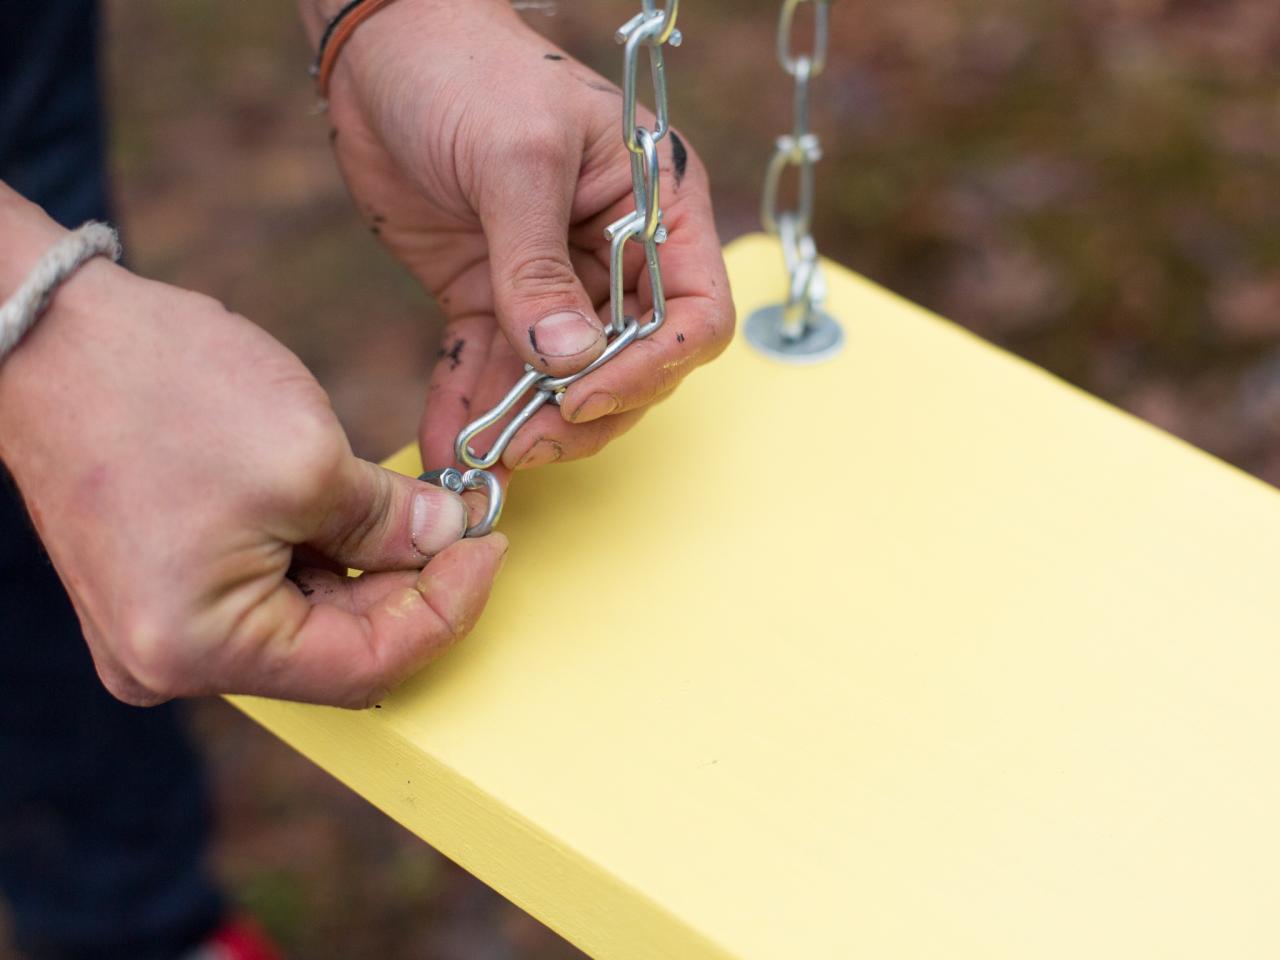
Attach Swings to Chains
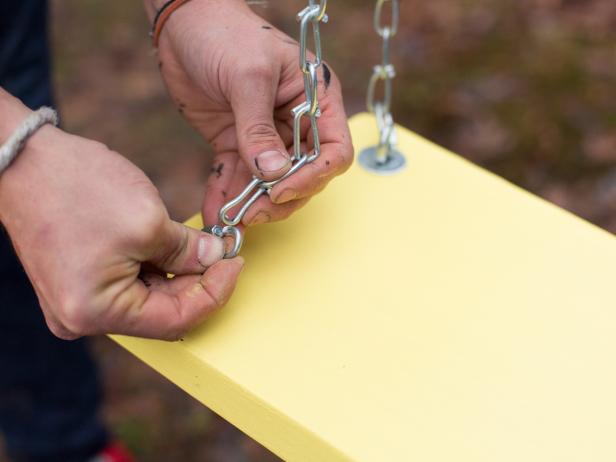
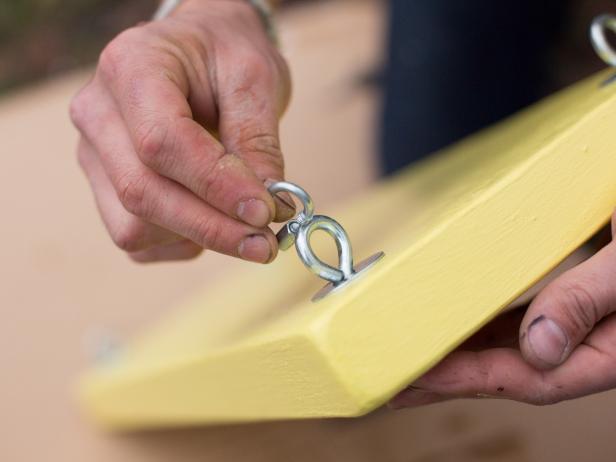
Insert 2-1/2" eyehooks secured with lock washers and nuts into each drilled hole in seats (Image 1). Slide a carabiner around each eyehook then secure the chain to the seat and screw each carabiner to lock into place (Images 2 and 3).


