


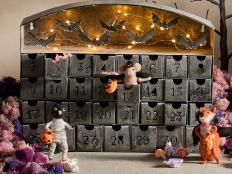
Halloween Countdown Mummy

Materials Needed:
- wooden 5x7 picture frame
- chalkboard spray paint
- scissors or utility knife
- cardboard (the thicker the better)
- approximately 1 yard of muslin
- small bag of cotton stuffing or bunting
- 30-35 inches of wire and wire cutters
- Styrofoam ball, 4-5 inch in diameter
- hot glue gun
- black and white paper for eyes
- black Sharpie pen
- tin or jar for the mummy sidekick
- glitter (optional)
Paint Cardboard
Take apart the frame. If the back of your frame is made of wood, set it aside. (If not, use the glass cover.) Paint either the wooden back or the glass cover with chalkboard paint. (It's not necessary to paint the frame itself.) Follow the instructions on the can for dry time and chalkboard prepping. Expect to use up to 3 coats.
Cut Out Legs and Arms
Cut out shapes for the mummy's arms and legs with scissors or a utility knife. For the legs, cut two pieces in the shape of Christmas stockings (they don't have to be exactly uniform). For the arms, cut two straight pieces with rounded edges. Important: Leave approximately 3 inches of extra cardboard at the end of the arms and legs to fold over and attach to the picture frame. Fold the cardboard straight across for the legs and fold the arms at roughly a 45-degree angle so they curve slightly down.

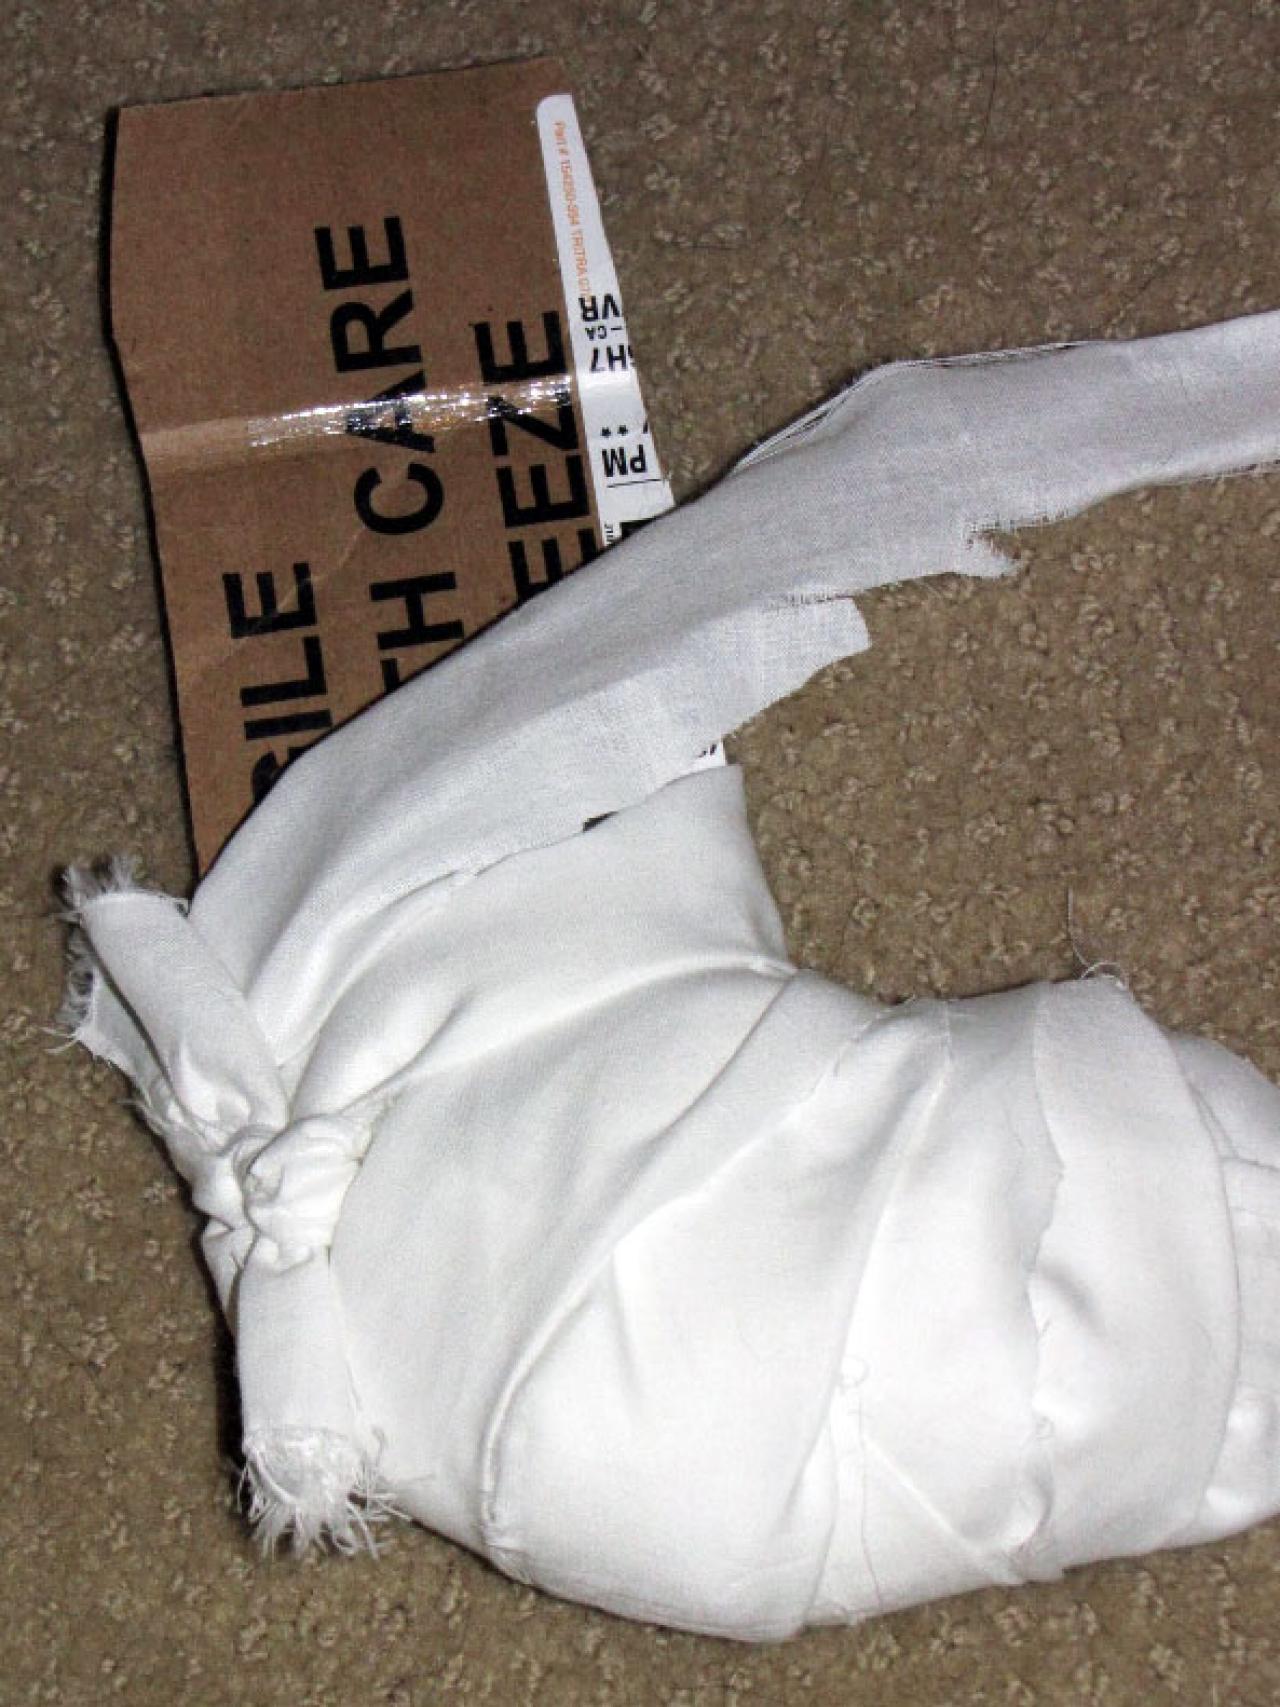
Start Wrapping Muslin around Feet
Reserving one piece big enough to cover the entire frame (for the mummy's back), rip muslin into strips 2-3 inches wide. Then starting with one foot, begin wrapping muslin around the one cardboard leg shape at a time. (If you need longer pieces, just tie strips together.) Fill with stuffing as you go. Continue until the entire leg is wrapped and stuffed, leaving the 3-inch section at the top bare. Complete the second leg the same way.

Create Arms
For the arms, cut two pieces of wire approximately 4 inches longer than the cardboard arms. Then wrap the arms with muslin and stuff as you did with the legs. After you've got the hands covered in muslin and stuffed, insert one end of the wire. This will help the arms keep their shape, plus you'll be able to pose them. Finish second arm.

Make the Head
Poke an approximately 7-inch piece of wire about halfway through one end of your Styrofoam ball (the mummy's head) in order to attach it to the picture frame. Leave about 5-6 inches of wire sticking out of the bottom. Wrap your Styrofoam ball with muslin but don't stuff. If some of the muslin is sticking up a bit, just fold it over and add a little hot glue to hold it.
Secure the Frame, Arms and Legs
With the insert of the frame removed, wrap muslin around picture frame. Make sure that you only create a thin layer on the inside of the frame so the insert will fit back in. Put the insert (now spray painted with chalkboard paint) back into the frame. It should be a really tight fit, but if necessary, you can use the frame's tabs to secure the insert in place.
Now assemble your mummy's extremities using hot glue to secure the arms and legs to the frame and insert. Finally, wire the arms together with the head in a T-shape.

Cover the Back
Cut one sheet of muslin to cover the back of your mummy. Glue into place.

Add Facial Details
You'll need two sets of eyes: one for the mummy and another for the sidekick. Cut out four black circles and four slightly smaller white circles for the eyes. Using a sharpie, draw one smaller black circle inside the white circles. Add black glitter to the small black centers (optional).

Make the Mummy's Sidekick
Simply take a large jar or tin and wrap it with the left over muslin. Add one set of eyes and fill with candy.

Begin the Countdown
Use chalk to create your display.


