


How to Make Rubber Toy Drawer Pulls


Materials Needed:
- dresser
- non-shrinking wood filler
- orbital sander
- HVLP spray gun
- rubber gloves
- respirator
- high-gloss or lacquer paint
- reciprocating saw
- pliers
- 1/8" drill bit
- drill
- 1 1/2" wood screws
- screwdriver
- 3/16" drill bit
- spackle knife
- pencil or marker
- hardened rubber or thick plastic toys
Remove Existing Hardware
Use a screwdriver to remove existing hardware from dresser. Fill existing holes with wood filler using a spackle knife. Allow to dry. Note: Filler can also be applied directly with fingertips, but a spackle knife makes the sanding process quicker and cleaner.
Sand Dresser
Use an orbital sander to smooth the filler down and to sand the drawers and dresser body.
Apply Paint
Apply 2-3 coats of lacquer paint to the dresser and drawers while wearing rubber gloves and a respirator. Make a sweeping motion, overlapping half of each previous pass as you work your way across the drawers and dresser body. Keep the spray gun moving to avoid buildup and drips. Let dry.
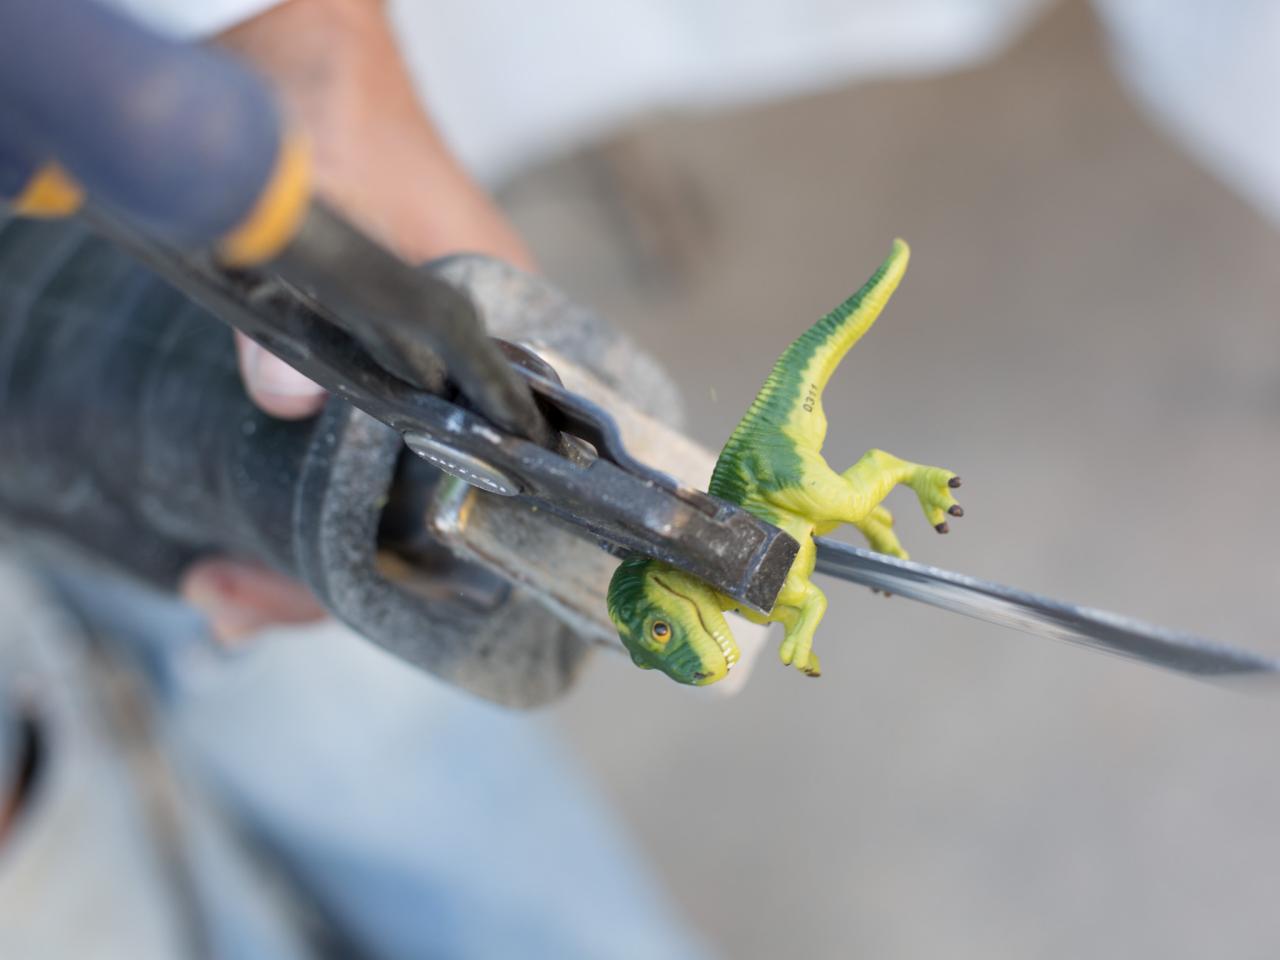
Cut Toys to Size
Hold and cut each of the rubber or thick plastic toys with a reciprocating saw and pliers (Images 1-3), being careful to keep hands away from the moving blades. Note: Always wear safety goggles when operating an electric saw.


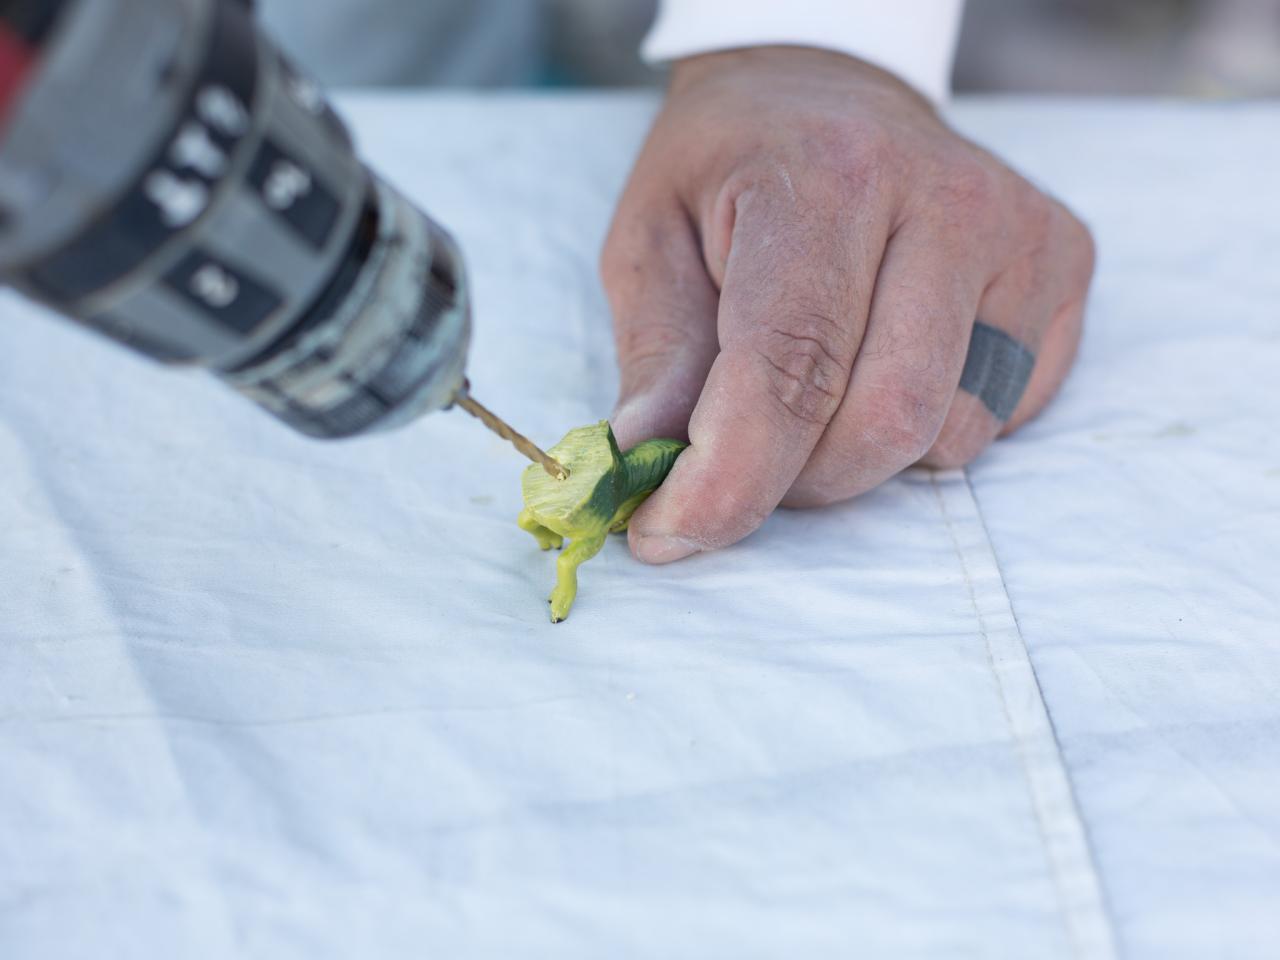
Drill Holes in Toys
Use a 1/8-inch bit to drill 1/2-inch deep pilot holes in the center of each toy.

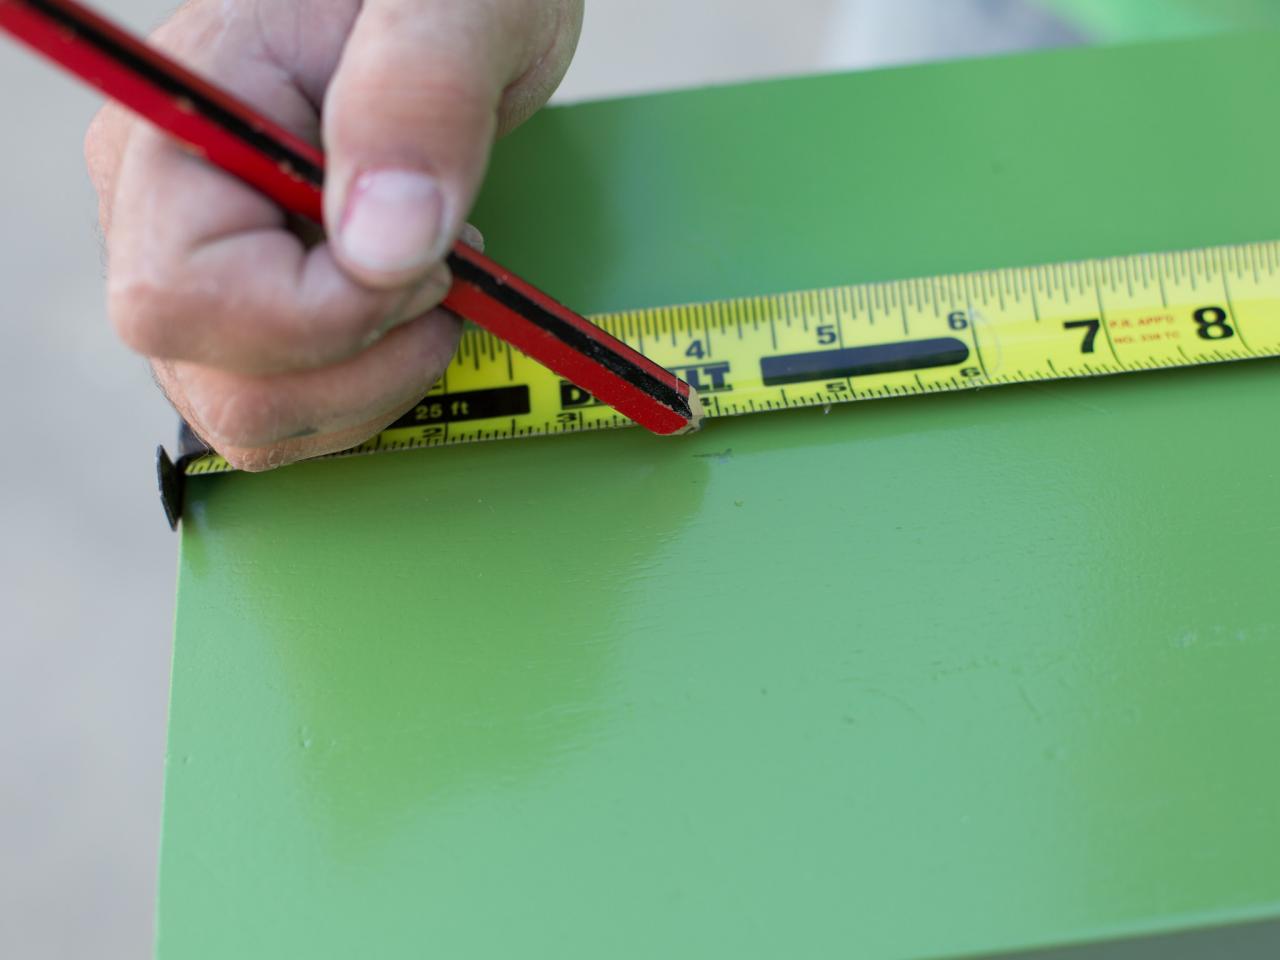
Measure for Toy Placement
Measure and mark the locations for each hardware piece with a marker or pencil, ensuring all marks are the same distance from the outside edges of the drawer and on the same center horizontal plane.

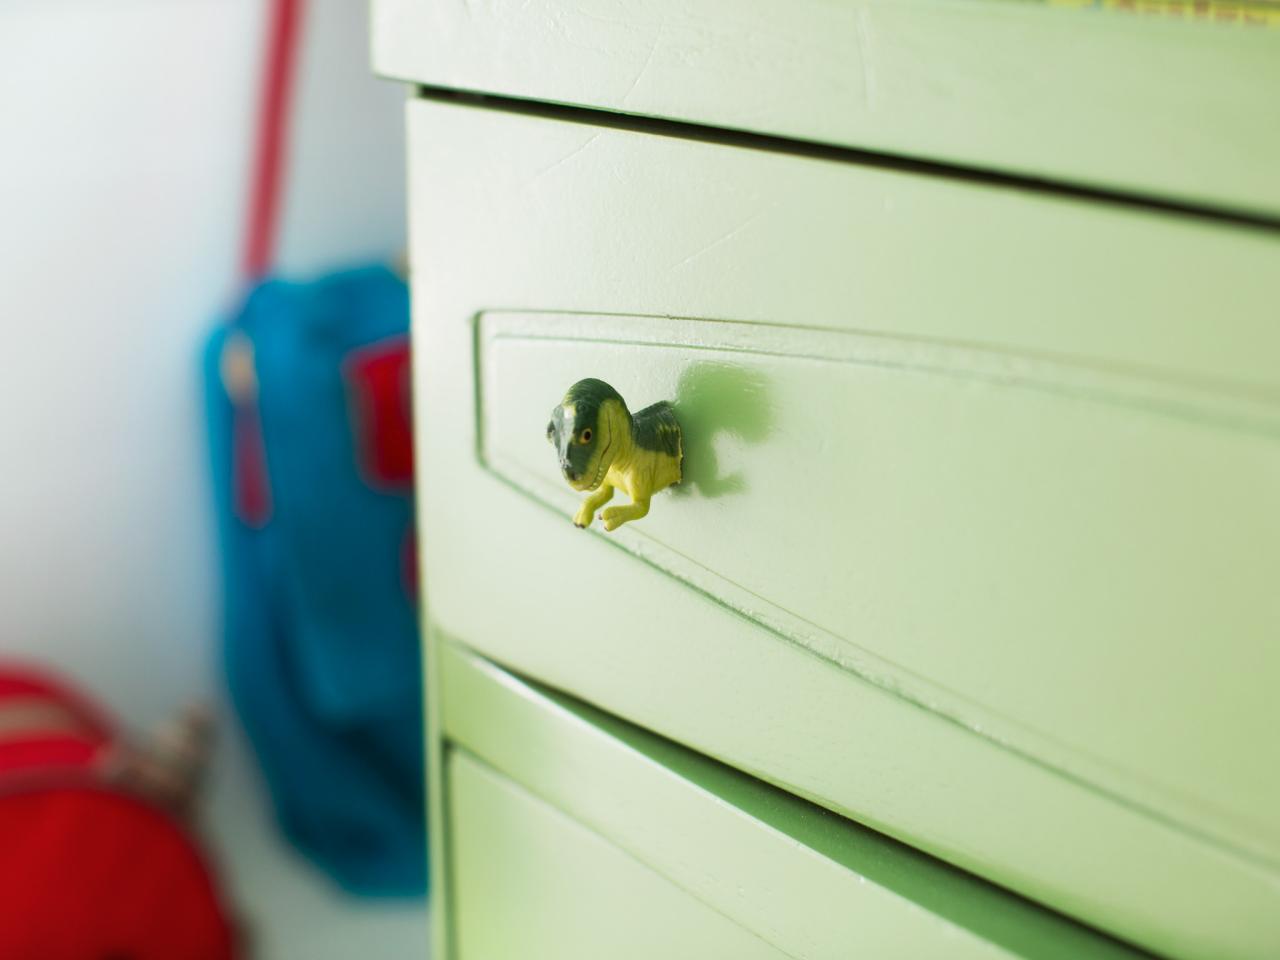
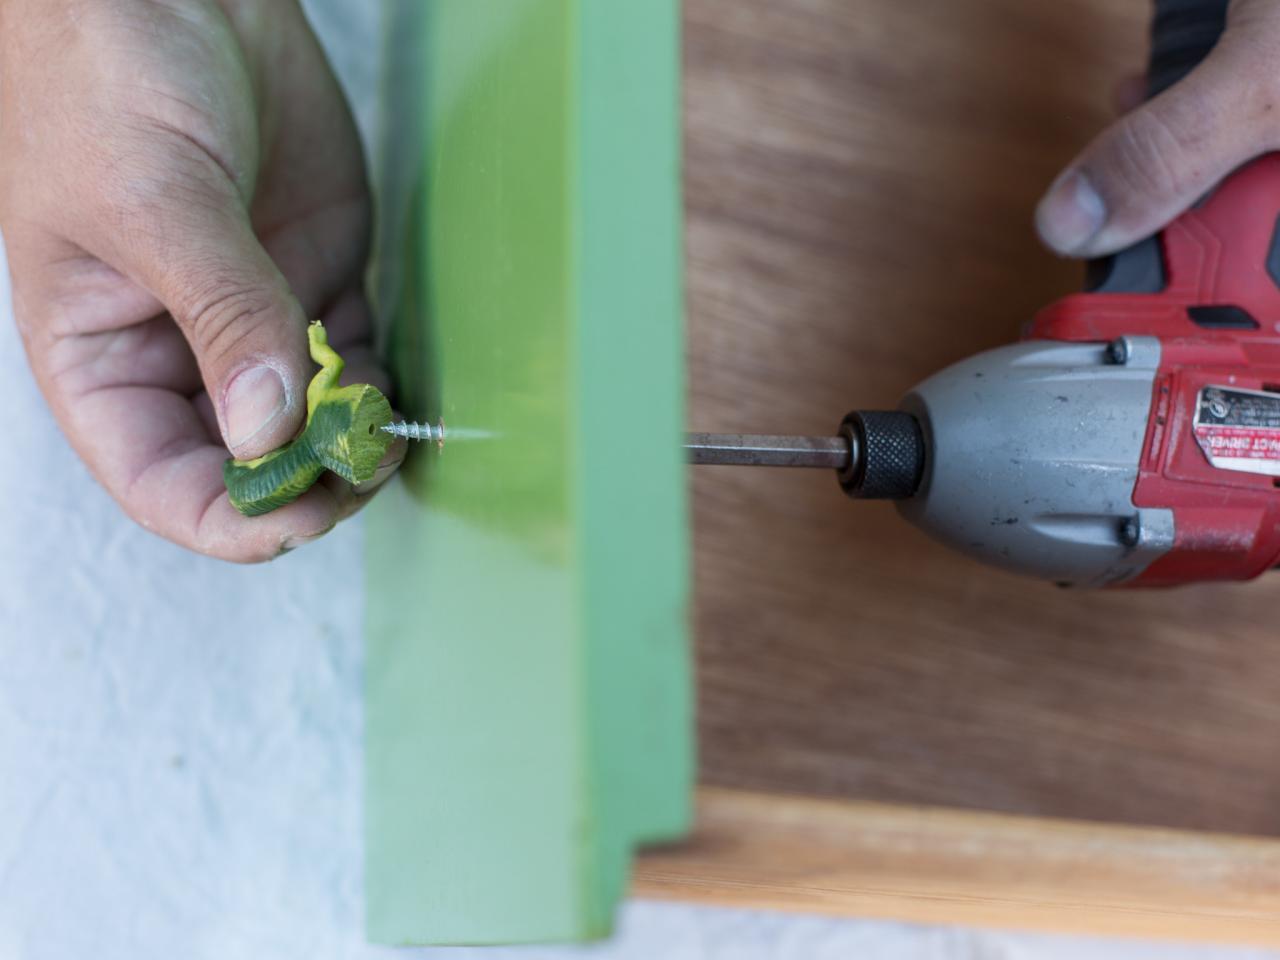
Install Knobs
Drill at the marks with a 3/16-inch drill bit (Image 1). Insert a 1 1/2-inch wood screw from the inside of the drawer though the hole, and align the hole in the toy using the tip of the screw (Image 2). Tighten the screw into the toy with a screwdriver. Repeat these steps for all knobs.


