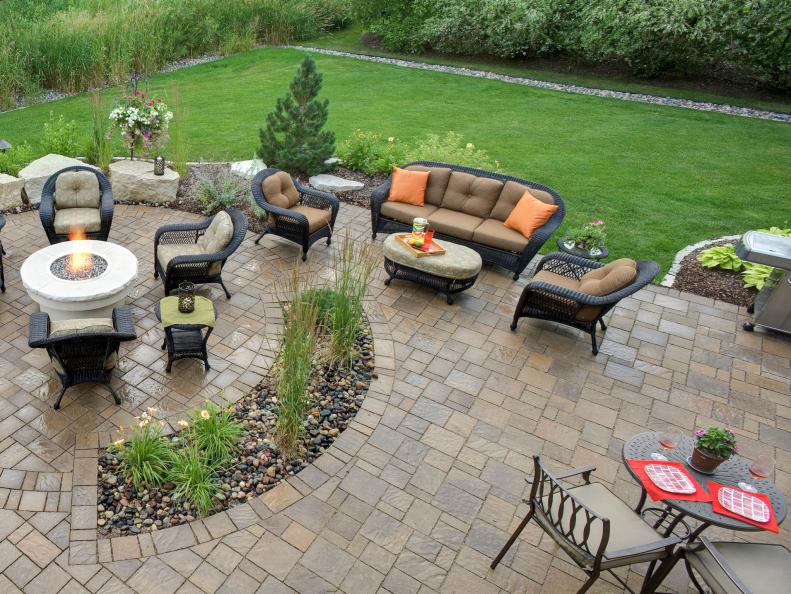
10 Things You Must Know About Paver Patios
Thinking of installing a paver patio? Keep these expert tips in mind to make the job easy and the results fabulous.
Related To:

Photo By: John Wiese Photography
Photo By: Jupiterimages ©(C) 2008 Jupiterimages
Photo By: Tomas Espinoza
Photo By: Lindgren Landscape
Photo By: Eric Perry ©DIY Network/Scripps Networks, LLC. All Rights Reserved.
Photo By: Eric Perry ©Scripps Networks, LLC. All Rights Reserved
Photo By: Michael Zak
Paver Patios: Low Cost, Easy Maintenance
A patio can be created with many materials, but it's hard to beat one made from patio pavers for ease of installation and low maintenance. The initial cost may be higher than other options, but you'll save in the long run by not having to stain or seal it continuously. Plus, repairs are easier, one paver at a time. Patio pavers come in a variety of shapes, sizes and materials to fit any outdoor space.
See the following slides for tips on installing paver patios. Then see this step-by-step how-to when you're ready to build a patio paver in your yard.
Need some design inspiration for your paver patio? See these 40 paver design ideas to jump-start your imagination.
Also See: 40 Unique Paver Designs for Outdoor Spaces
Dig Deep For Best Results
Before you prep your patio area, call your local utilities or 811 to have any plumbing, cable or electrical lines marked. Then dig down below the root level of vegetation in the area a good six inches or so. For dry soil, try watering the area the night before you plan to dig to dampen and soften the area for easier digging.
Watch: Pavers
Keep It Weed Free
Use landscaping cloth to create a barrier between the old soil and the new base of sand you'll be using. This will minimize weeds and other unwanted vegetation encroaching on your patio from underneath. To figure out how much landscaping cloth you'll need, calculate the square footage of your patio space by multiplying the length by the width and then add 10 percent.
Create the Base
Pack in the paver base and/or sand using a wacker plate compactor or tamper. You need a solid, level and smooth base upon which to lay pavers. You'll want to add and tamp 1-inch layers of gravel until there is a firm 3-inch thick compacted gravel base. Spread and level a 1-inch layer of sand over the gravel base and remember to repack each subsequent layer of material.
Plan For Drainage
While it's important to have a level patio, you need to make sure it does slope away from your home's foundation and toward an area that can either handle additional moisture or an existing drainage area. Plan for a quarter inch drop in elevation for every two feet of distance.
Keep A Tight Edge
To minimize the amount your pavers will move, be sure to plan for a good solid edge by using additional pavers, a solid cement lip, or metal or vinyl edging. In addition to stability, this will also help minimize creeping weeds.
Make Color Variations Work For You
You'll run into slight color variations in your pavers, just like you would with different lots of wood flooring or tile. Blend varying piles of stones or bricks together to create a natural look to avoid a patchwork appearance.
Make Cuts For A Perfect Fit
If you create any sort of pattern with your pavers, you'll need to cut some of the stones or bricks at some point. You can use a cold chisel to do this or you can save your hands and rent a wet saw from your local home center.
Pack In The Cracks
Set your pavers in place by applying a layer of sand — polymeric sand, sometimes called paver sand, is recommended — over and between them until the cracks are completely full. This will help keep them set in place, minimize weeds and allow for drainage.
Keep Patio Pavers On Hand
Keep a few extra stones or bricks on hand to make repairs easier (you never know when your particular paver may be discontinued). Broken pavers can be removed by prying them out with a couple of screwdrivers or a thin pry bar. If the paver needs to be cut to fit, be sure to cut it slightly smaller than the length of the opening to allow for sand to be repacked around it.