


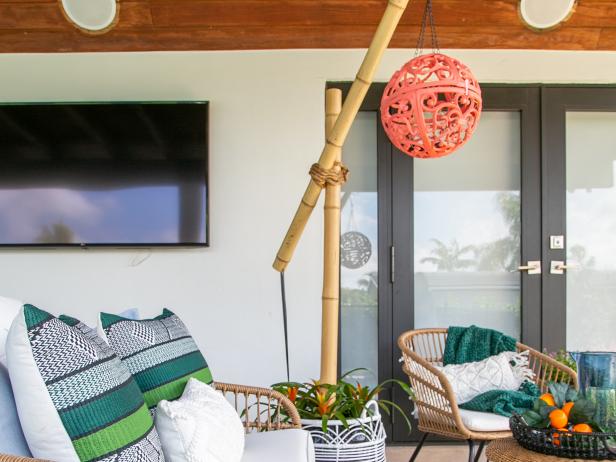
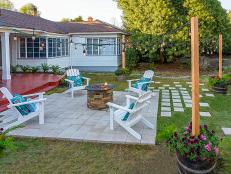
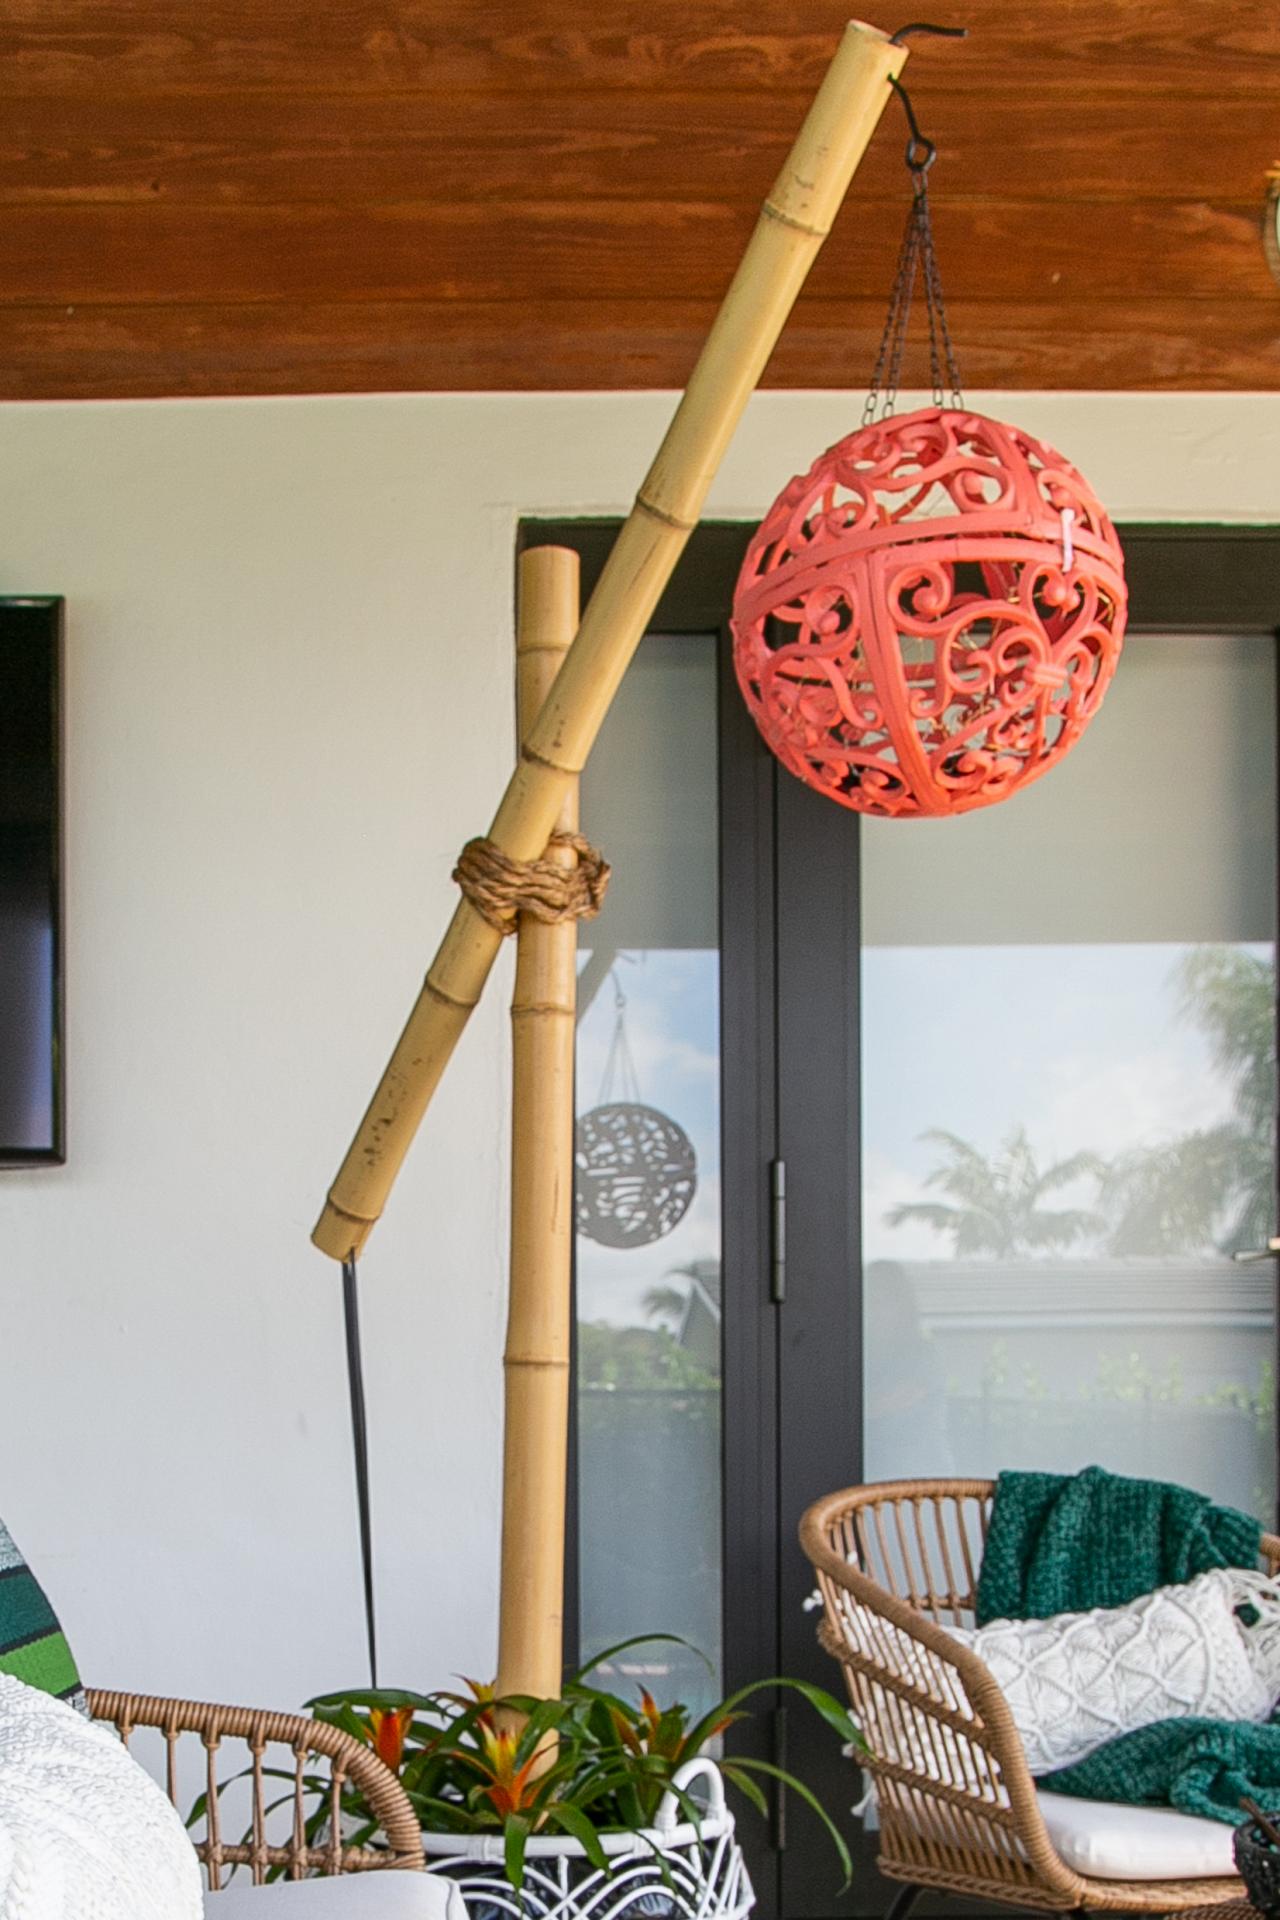
Jazz Up Your Patio With an Outdoor Floor Lamp and Planter In-One
Don’t have electricity run to your backyard but you need more light? Make this combination planter and outdoor lantern to light up the night.
Tomas Espinoza
If you want to spend more quality time on your patio or porch, good lighting and warm ambiance are essential. Give your outdoor space a little polish and panache with this DIY outdoor chandelier.
Tomas Espinoza
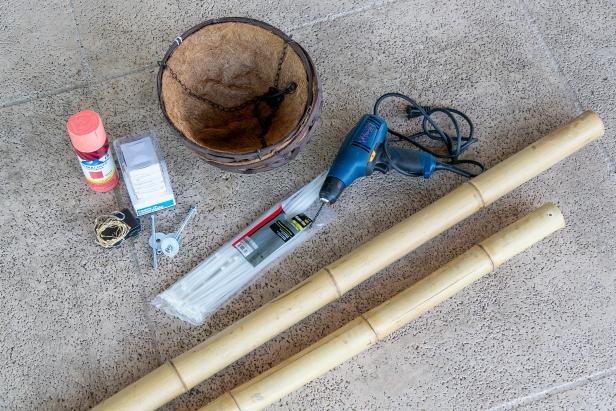
Tools and Materials
- (2) decorative hanging planter baskets (lightweight version works best)
- spray paint and primer combo
- (4) zip ties
- battery-powered LED string lights
- two bamboo poles (2” to 3” diameter)
- PVC pipe (4” diameter)
- large floor basket
- colorful plants and foliage
- drill and bit (should match bolt)
- 6” bolt with washer and nut
- manila rope
- glue gun
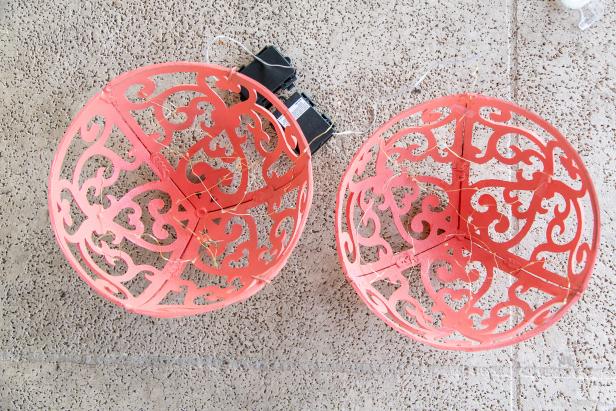
Step 1: Paint Hanging Baskets

Tomas Espinoza
Remove the chains and hooks from the decorative planter baskets put them aside for later use. Using light, even strokes spray paint the interior and exterior of each basket. While you’re at it, paint a few zip ties too. (HINT: Small clear zip ties will work as well.)
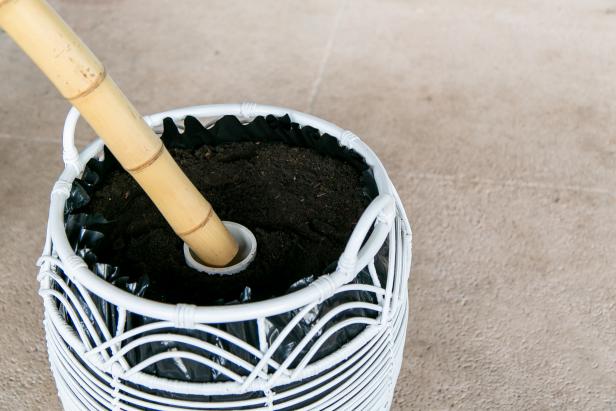
Step 2: Build Planter
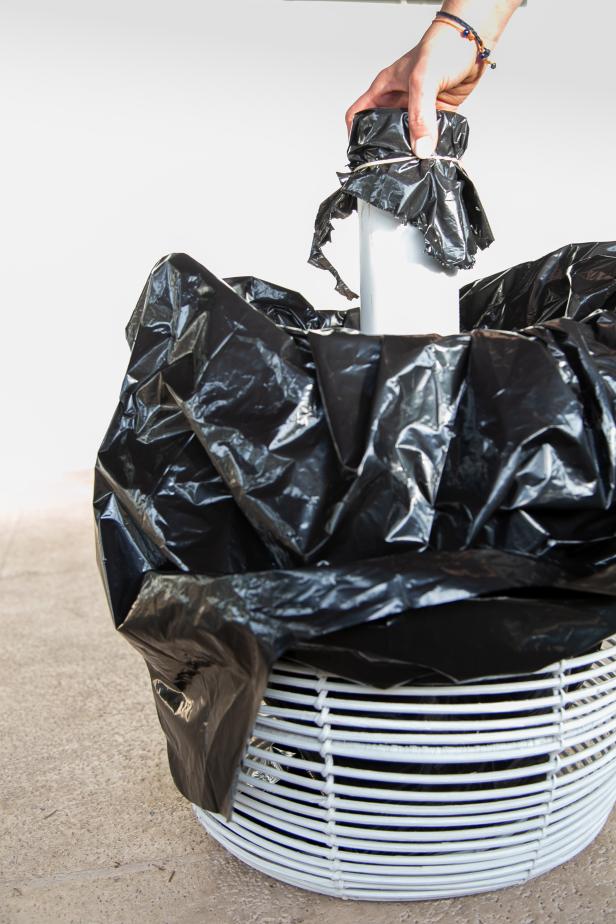
Tomas Espinoza
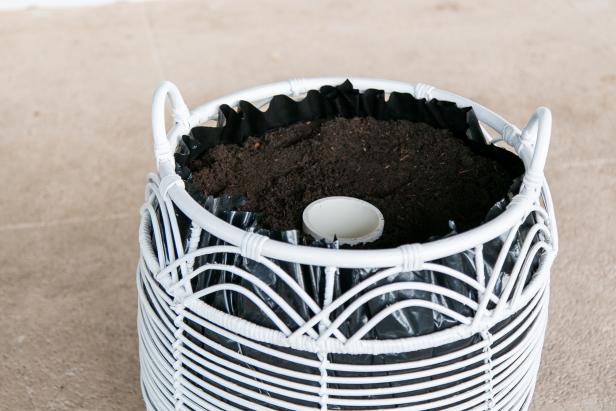
Tomas Espinoza
It’s easy to transform a stylish floor basket or hamper into a weighted base for your outdoor chandelier. First, line the basket with a heavy-duty garbage bag. Place the PVC pipe in the center. The pipe should be cut to a length about 6" shorter than the basket’s height and covered to keep the soil out. Center the PVC pipe, then pour soil around it to anchor it in place. Trim away the excess garbage bag so that it won’t be noticeable once the planter is filled with plants.
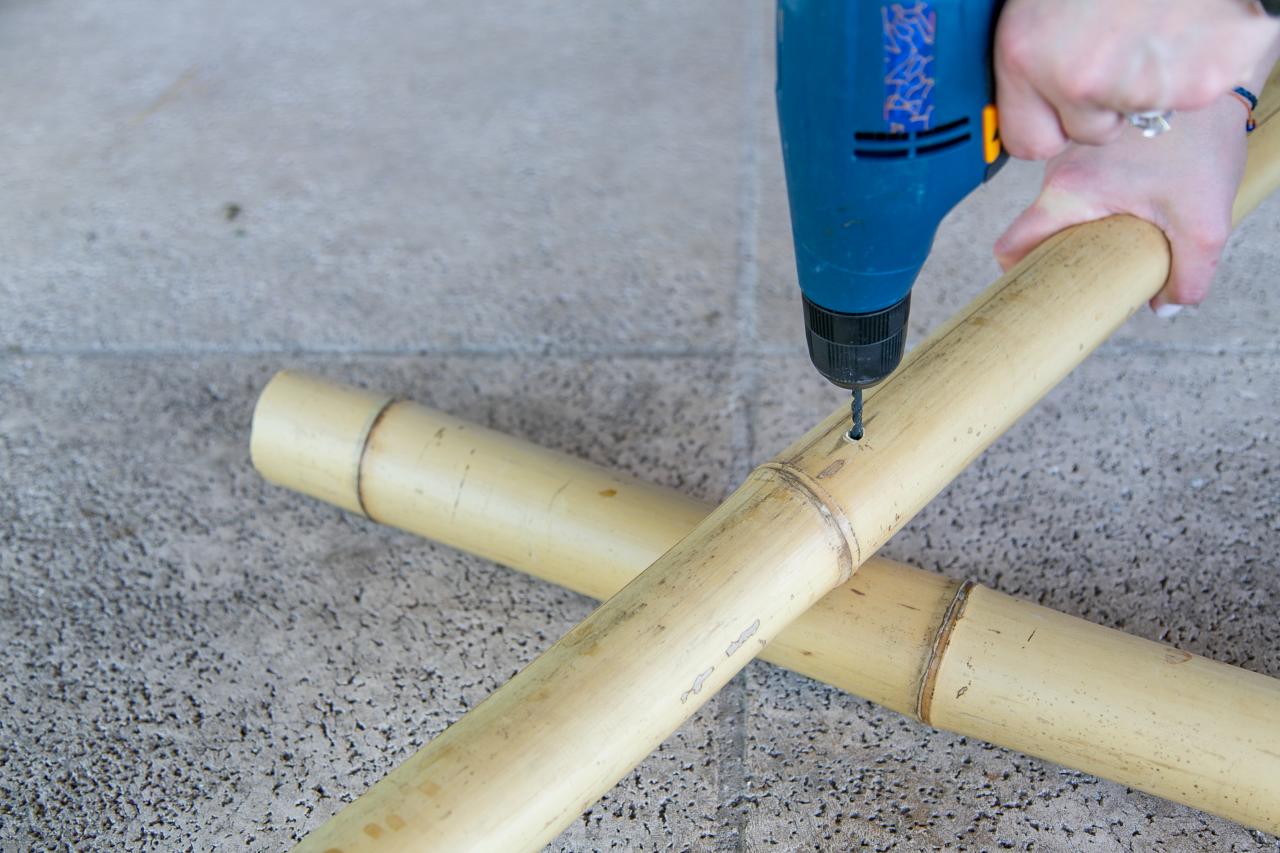
Step 3: Build Light Post

Tomas Espinoza
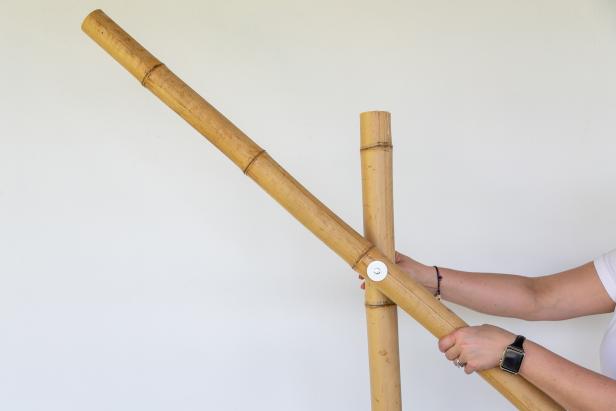
Tomas Espinoza
Bamboo poles not only look great, they come in a variety of lengths and they’re easy to work with. If you need to customize the length of the post, use a hacksaw or circular saw to cut the bamboo to size. To secure the two poles together, drill a hole through both of them where you want them to intersect, then secure with a bolt, washer and nut. Adjust the angle, then tighten the nut. For a nautical touch and to hide the bolt, tie on a bit of rope around the intersection and secure it with hot glue. SAFETY TIP: If your chandelier is slightly top heavy (or you’re worried about wind) drill a hole in the bottom end of the angled pole so you can tie the fixture down to the basket or the ground.
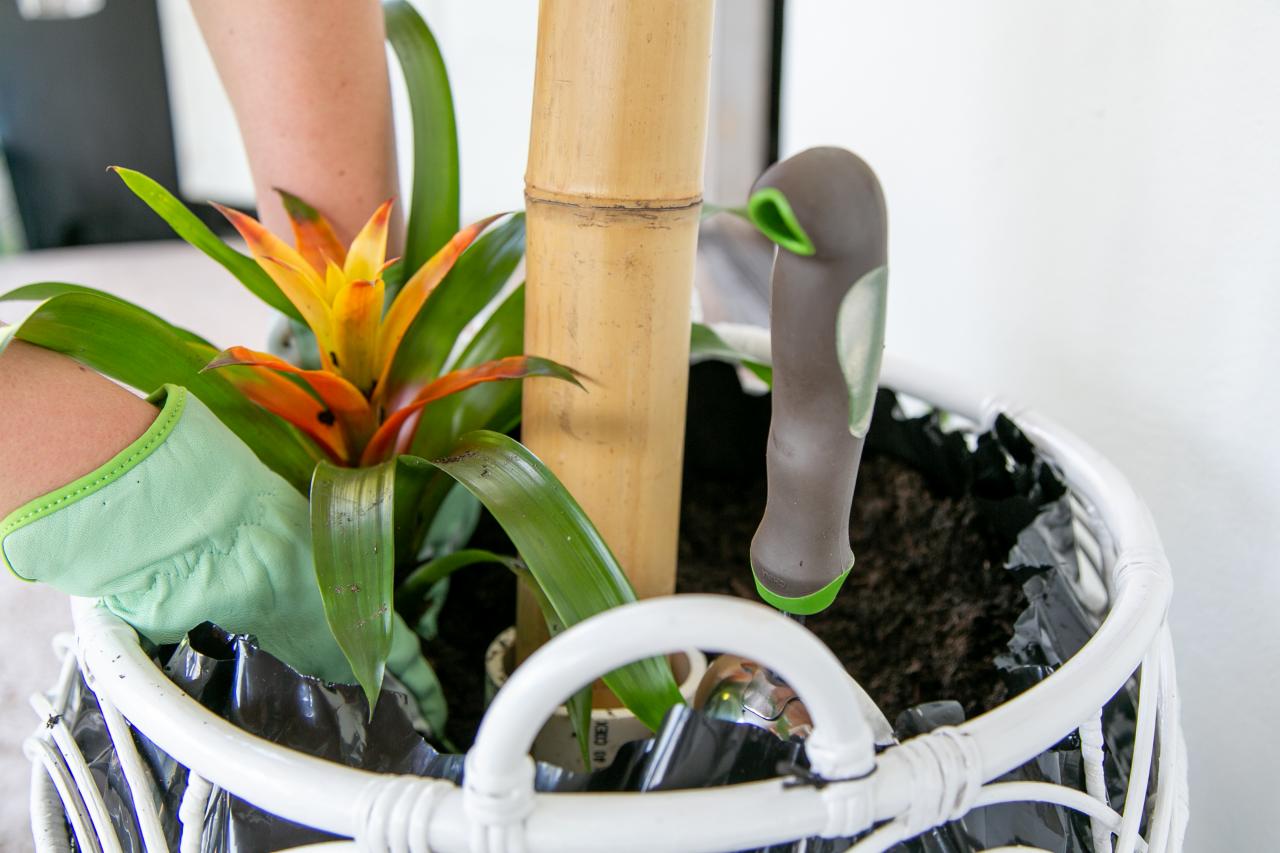
Step 4: Complete Base
Tomas Espinoza

Tomas Espinoza
With the two bamboo arms secure, place the vertical pole inside the PVC pipe inside the basket. To complete the base, add colorful greenery and flowers. Tuck in the edge of the bag so that it’s out of sight.
Step 5: Add Fairy Lights
Tomas Espinoza

Tomas Espinoza
When the paint is dry, add the battery-operated fairy lights. Weave the string lights across each basket for a uniform look. To keep the lights in place, use small dabs of hot glue or clear tape. Secure the baskets together using zip ties, trimming any excess. HINT: LEDs with a remote make turning lights on and off super-easy.
Step 6: Hang Light

Tomas Espinoza
Use the hang chains that you set aside in the first step to suspend the chandelier from the bamboo post. Drill a hole in the bottom side of the pole to accommodate the hook, then place the hanging hook into the end of the bamboo pole.


