


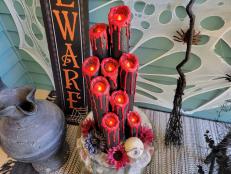
How to Make Giant Tombstones for Halloween
Go big and learn how to craft a giant (5-foot-tall) gravestone for your front yard Halloween decor.

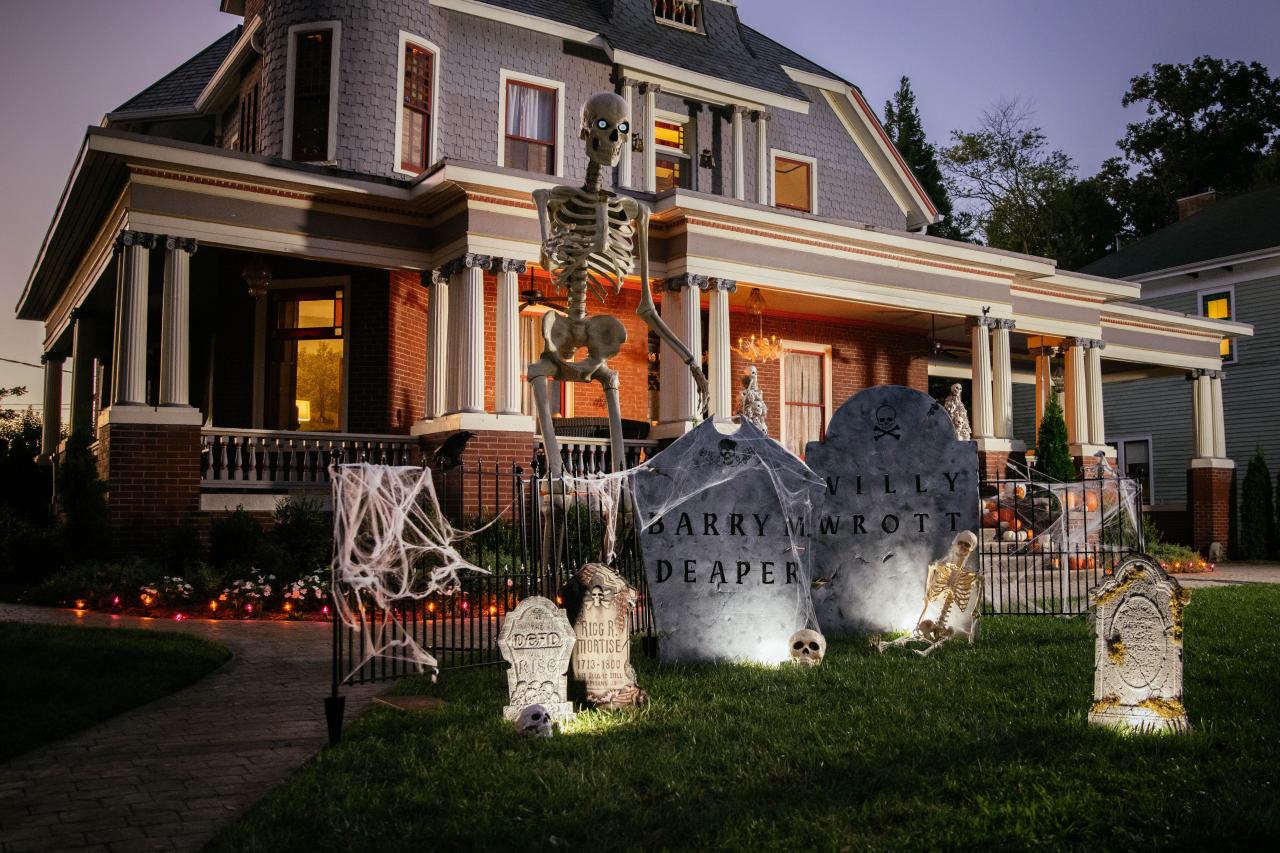
This Halloween, go big (we mean REALLY BIG) with extra-large frightful and festive gravestones. Gigantic yard skeletons are having a massive moment and these tombstones can certainly add a little extra magic to the scene. Whether you invested in a 12-foot skeleton and need some affordable decor to complement it or you just want to create your own supersized graveyard masterpiece, this is the project for you. Each stone is made of one piece of 8' x 4' foam insulation. Follow our instructions (complete with printables) to make our "Barry M. Deaper" tombstone or create your own "to die for" design.

Jennie Andrews Styling by Jill Tennant
Tools and Materials
- 1" foam insulation — comes in a 4'x8' sheet
- serrated knife or jigsaw
- rotary tool
- orbital sander or sandpaper
- white and black exterior paint
- paint roller
- paint tray
- fiberglass driveway markers
- construction adhesive for foam
- printer
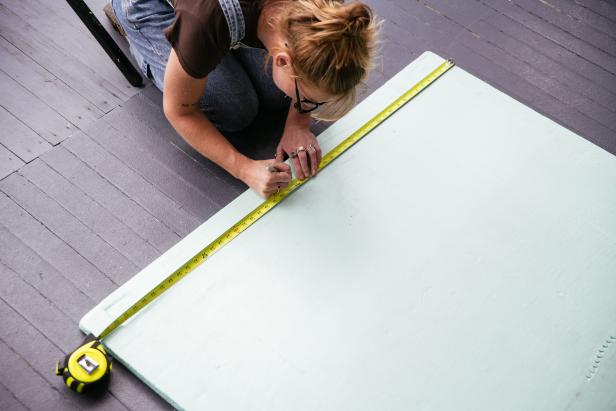
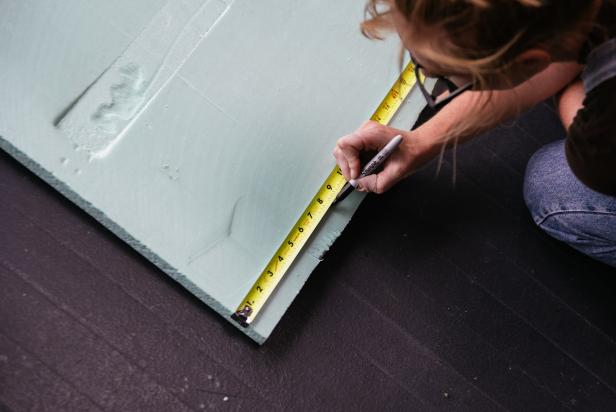
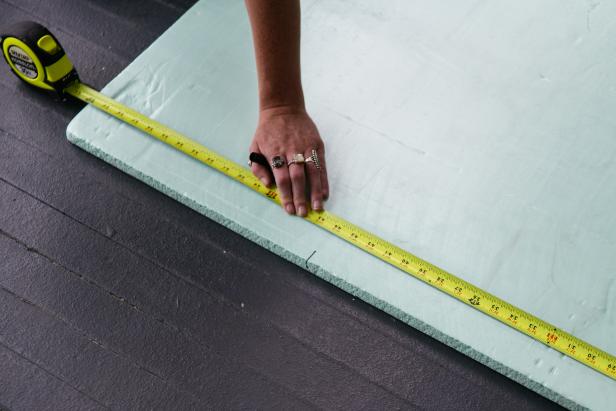
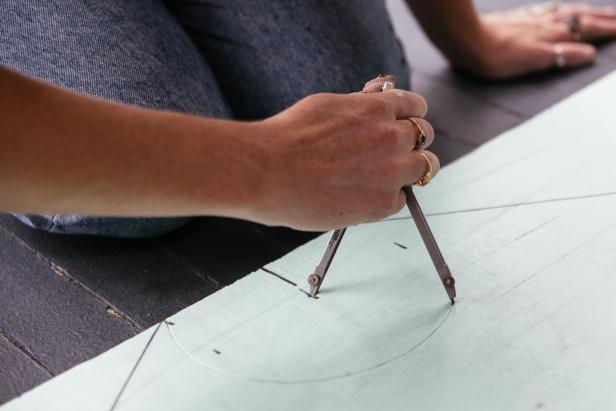
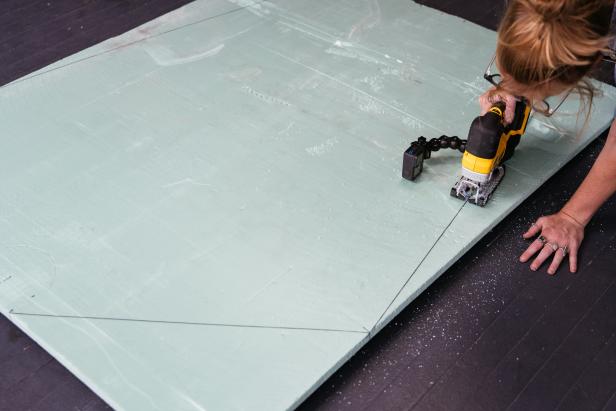
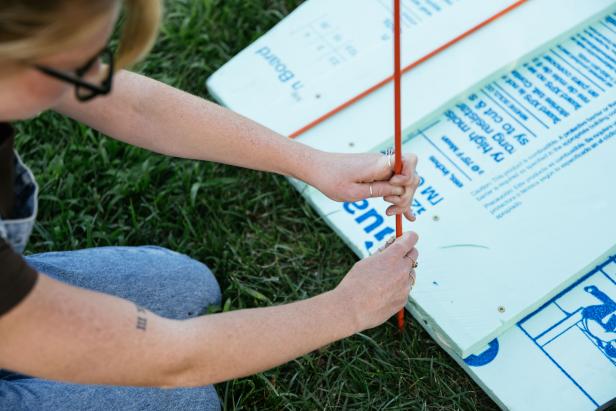
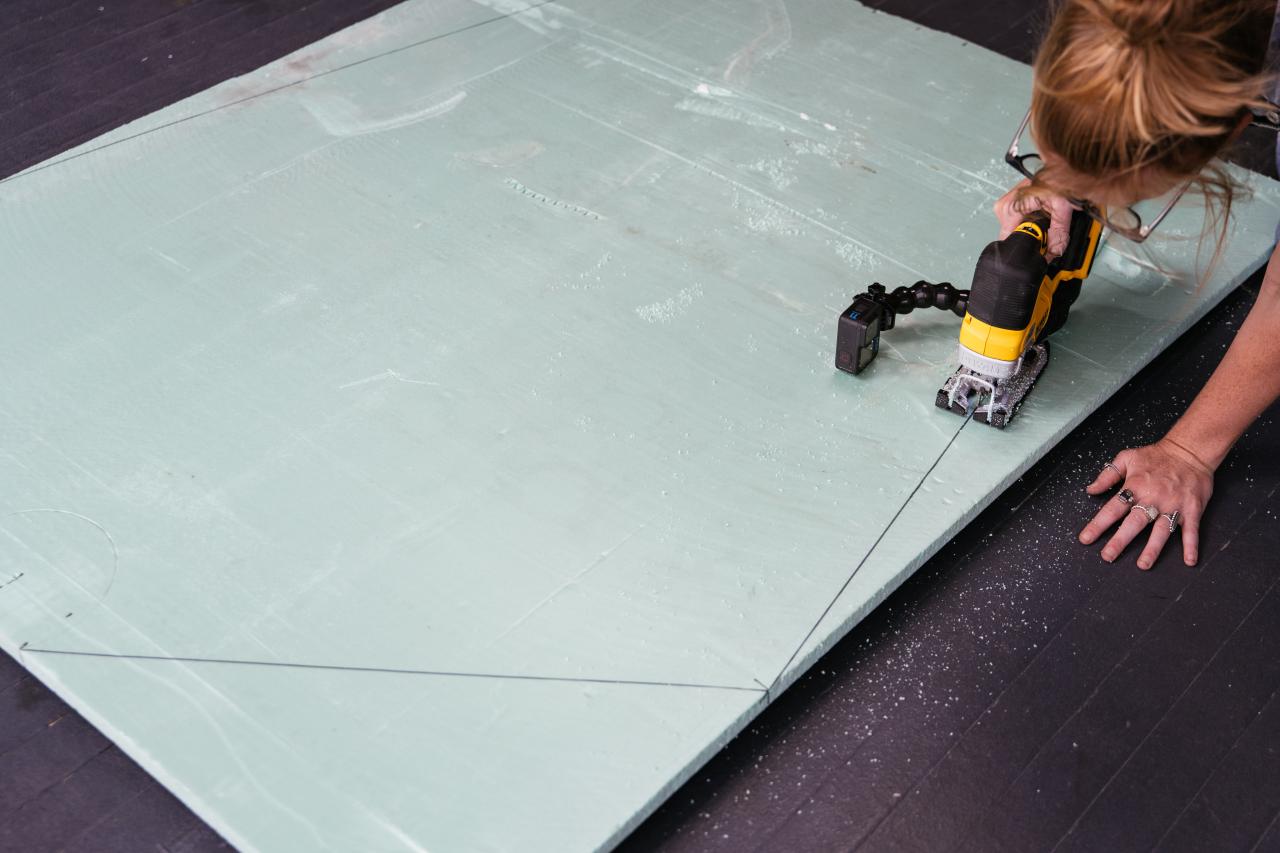
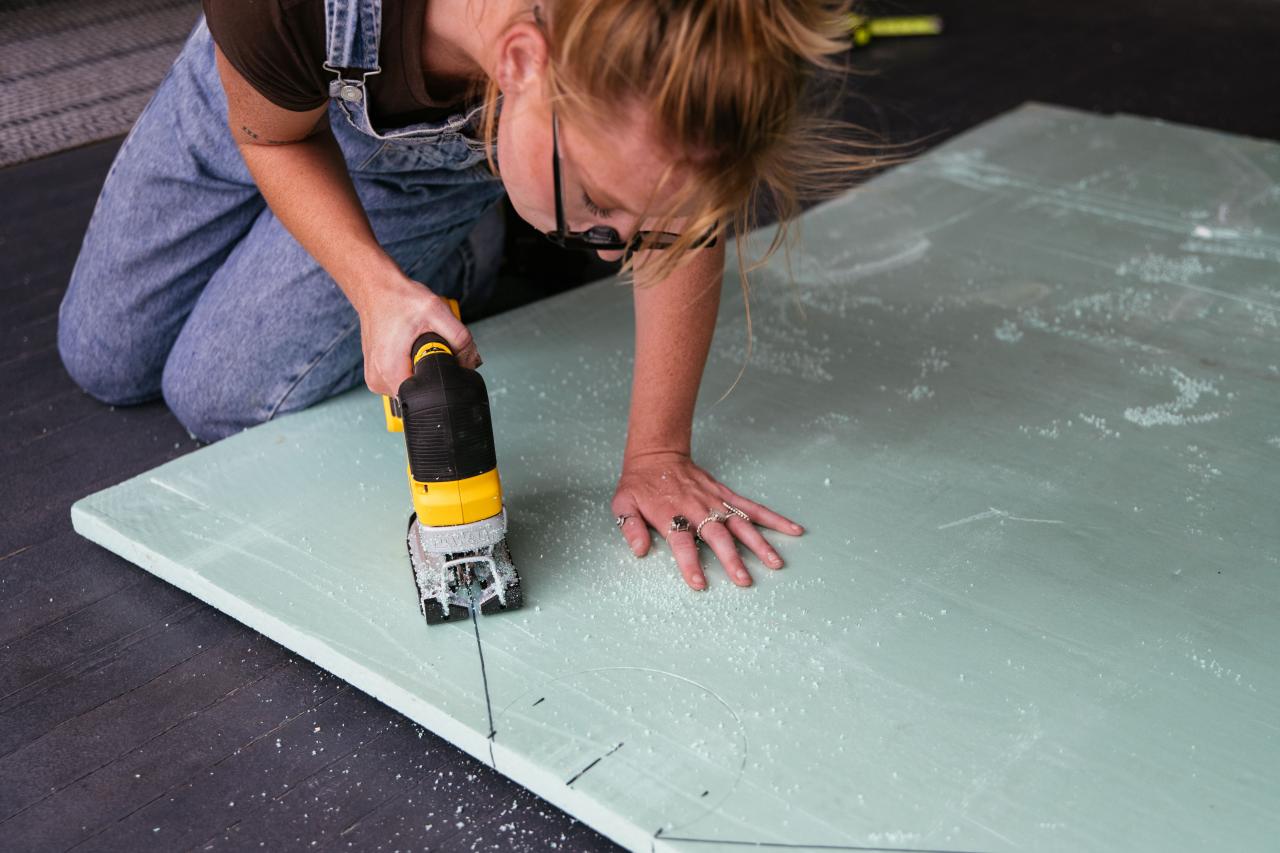
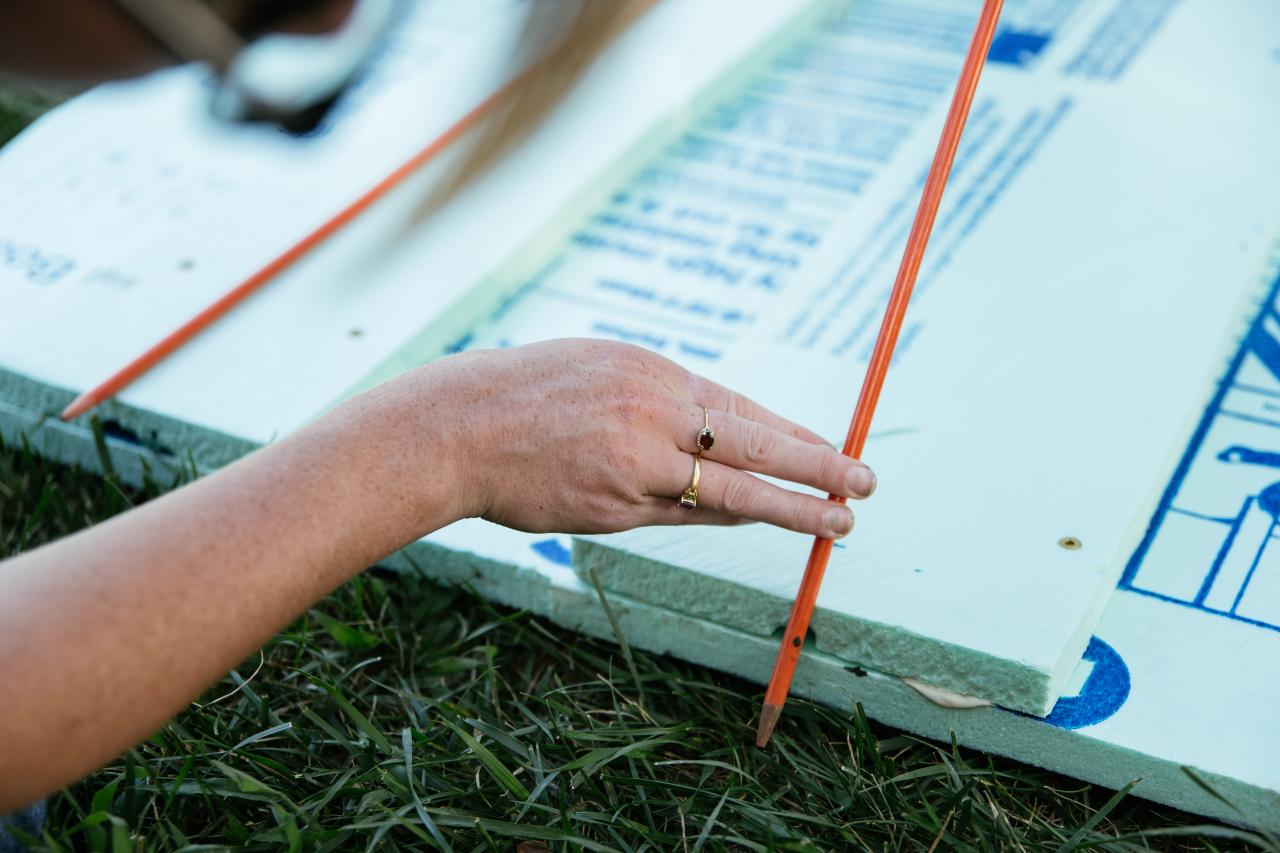
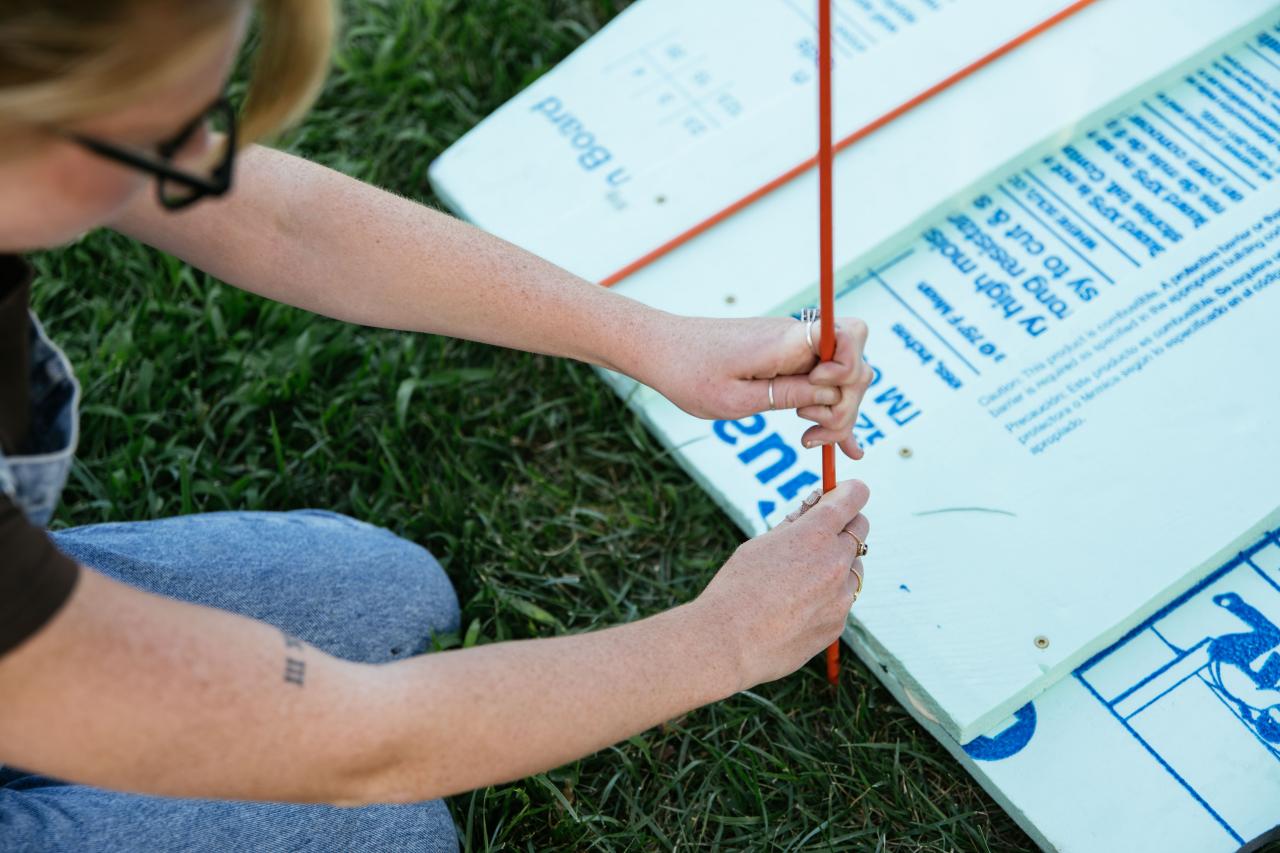
1. Measure and Mark
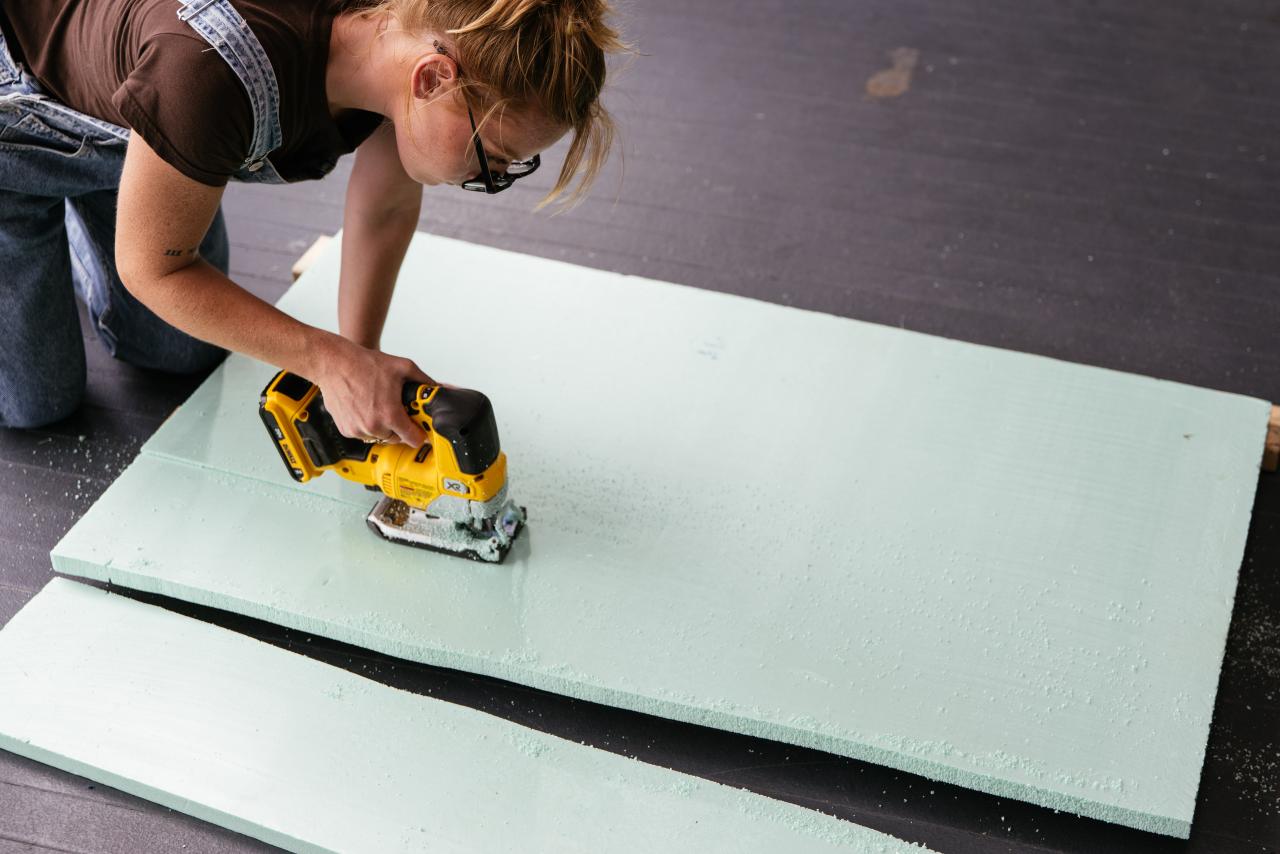
Cut an 8' x 4' piece of insulation foam into two pieces, one measuring 4’ x 5’ and another measuring 4’ x 3’. Set aside the smaller piece. On the large piece of foam, find the halfway point of one short side (24"), then mark 3" out on either side of that center mark. This will be the top of your tombstone. At the opposite end, mark 8" in from each side. This will be the bottom of the tombstone. On each of the long sides, measure and mark 44" up from the bottom edge. Draw lines to connect each of those marks. Use a compass to draw a semi-circle that runs between the top two marks.

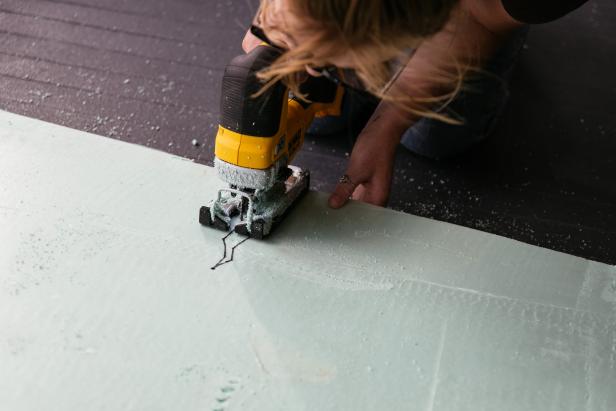
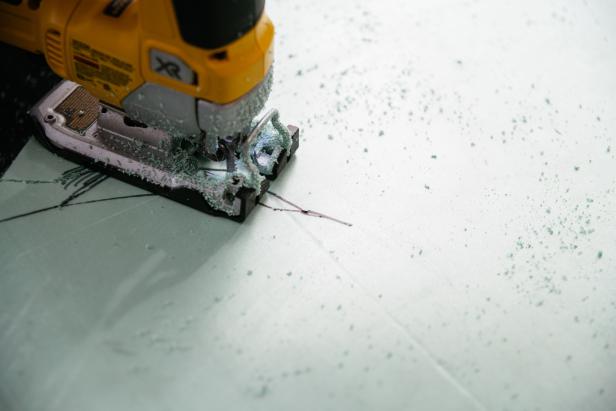
2. Cut the Foam
With a serrated knife or a jigsaw, cut along the lines. Draw and cut a few cracks along the edges.

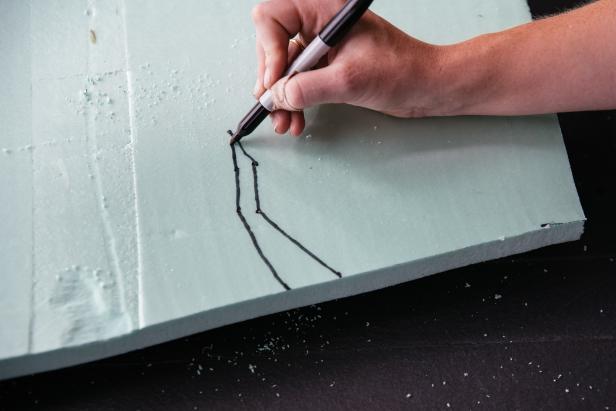
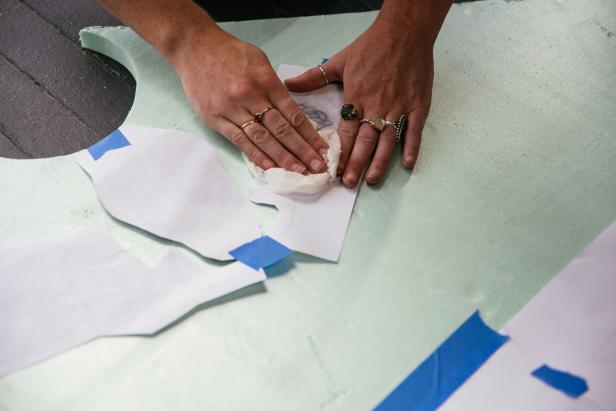
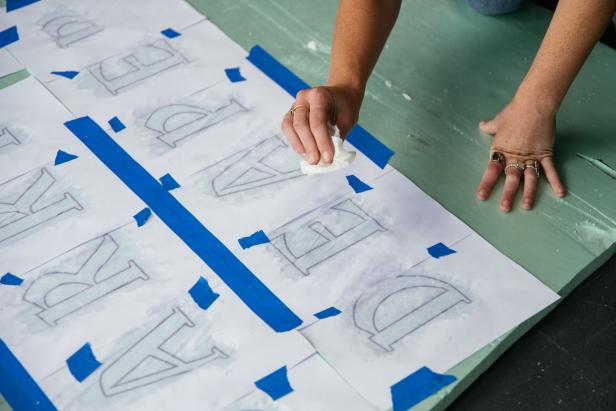
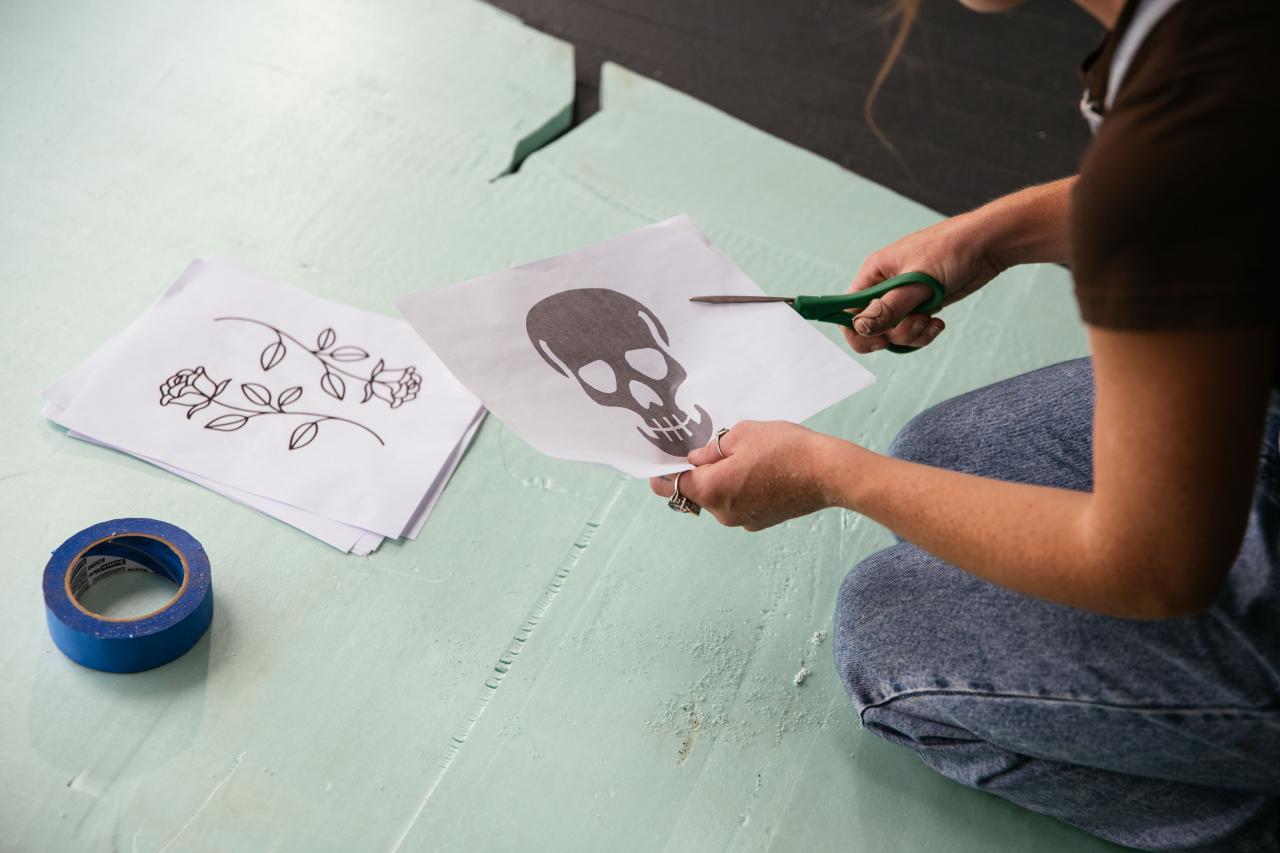
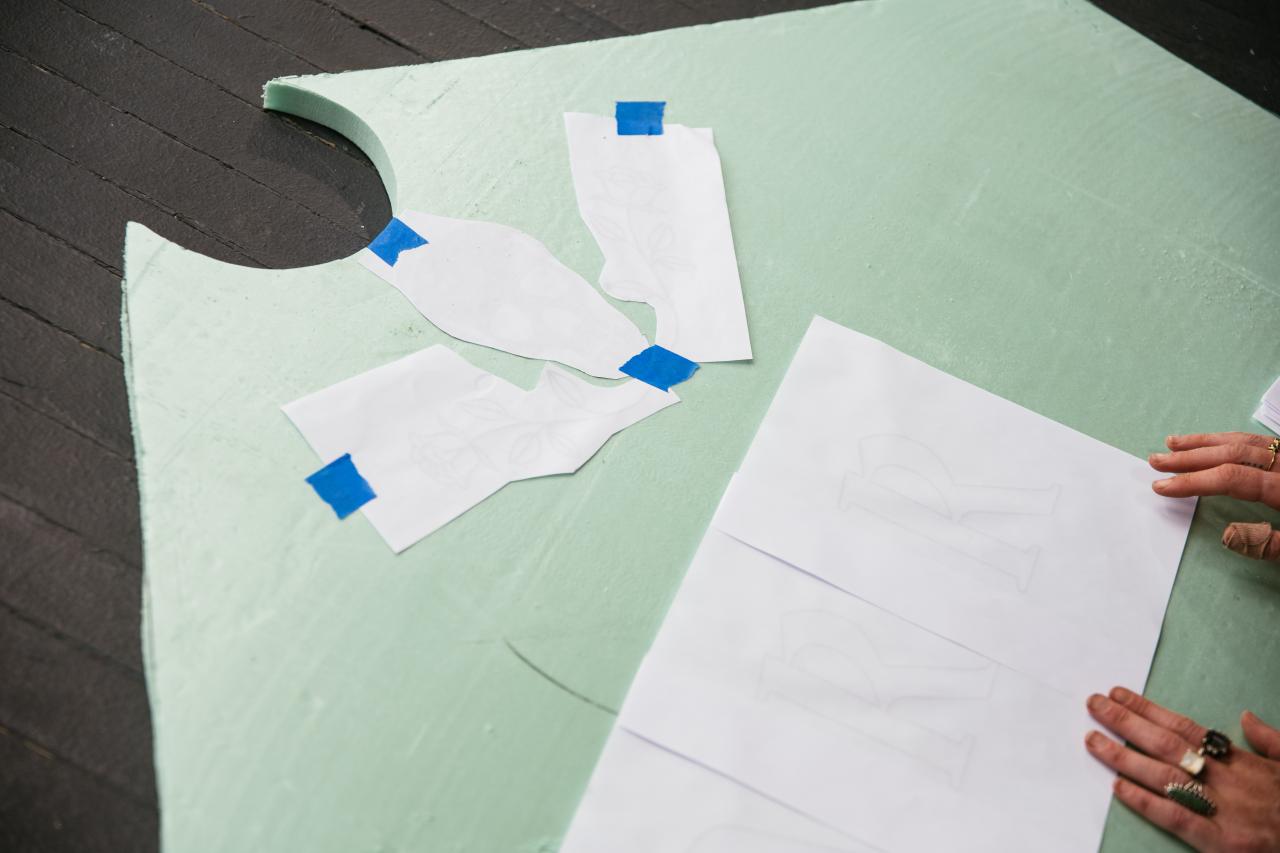
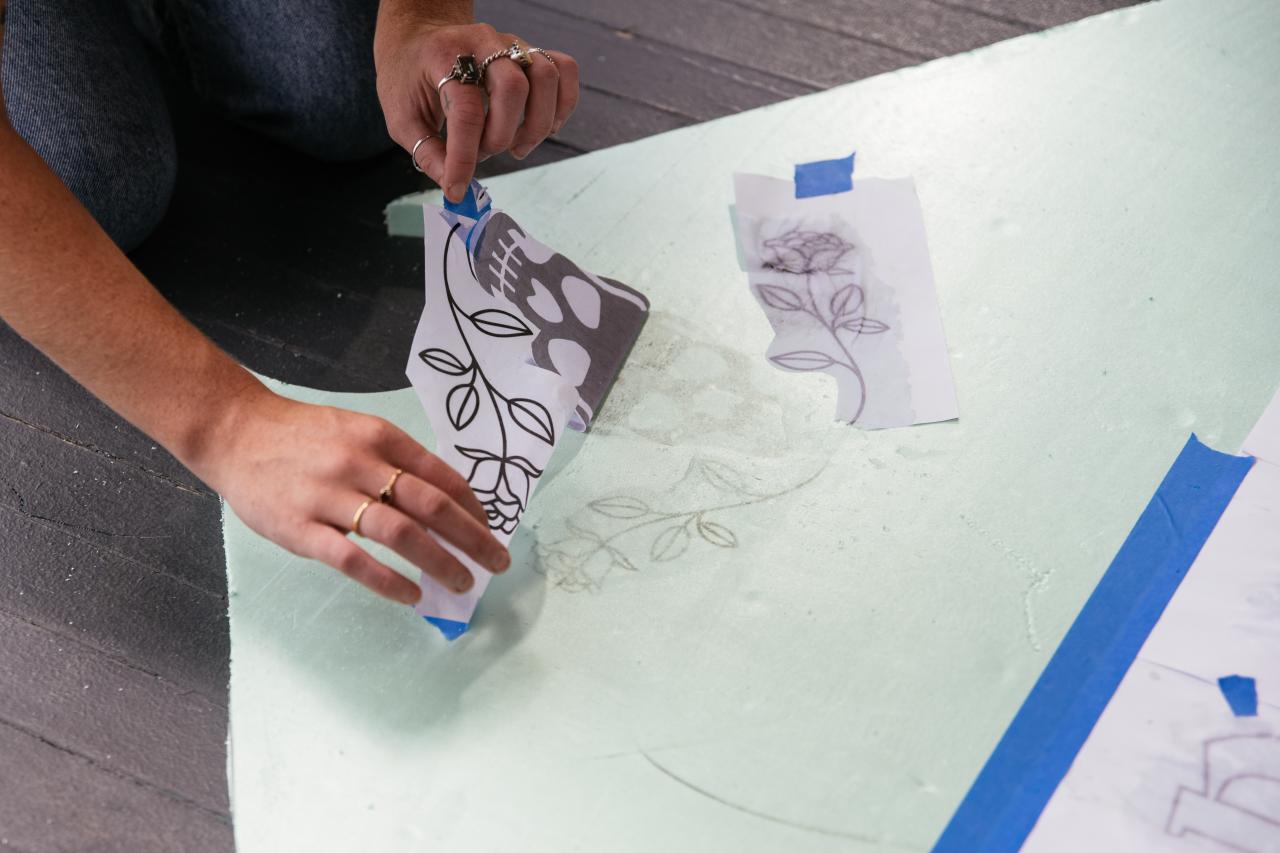
3. Lay Out the Design
Print the design using an inkjet printer. Lay out the prints face-down on the foam. Remember that any words or letters will need to be printed in reverse to be transferred. Secure the design with painter’s tape. Using firm pressure, dab the back of the prints with a slightly wet paper towel. Once the paper is well-saturated, peel it gently away from the foam. A faint pattern should remain.


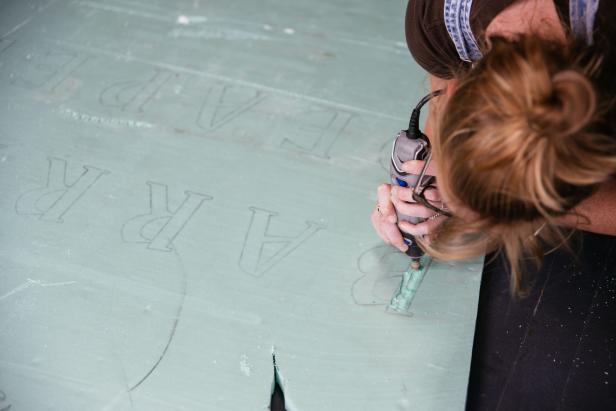
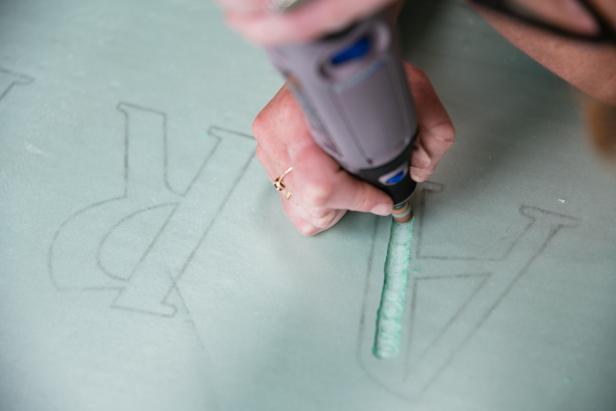
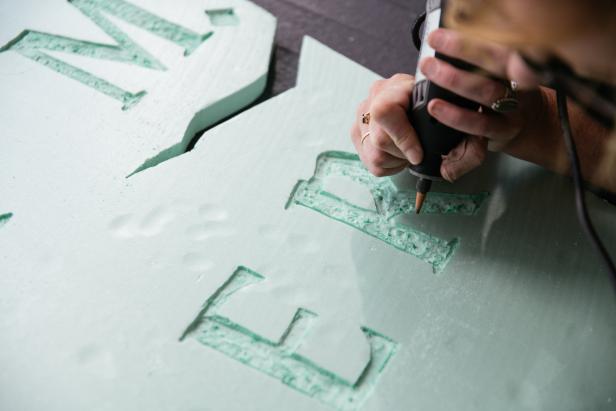
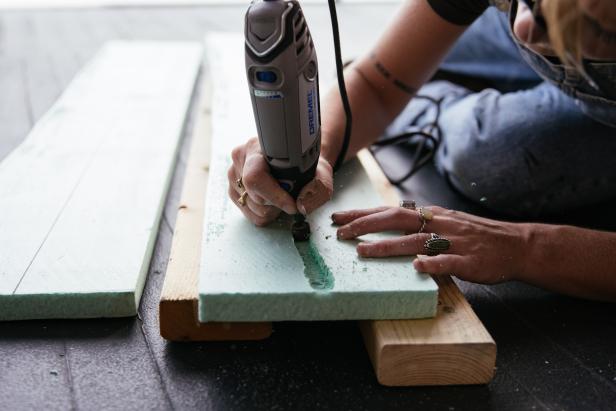
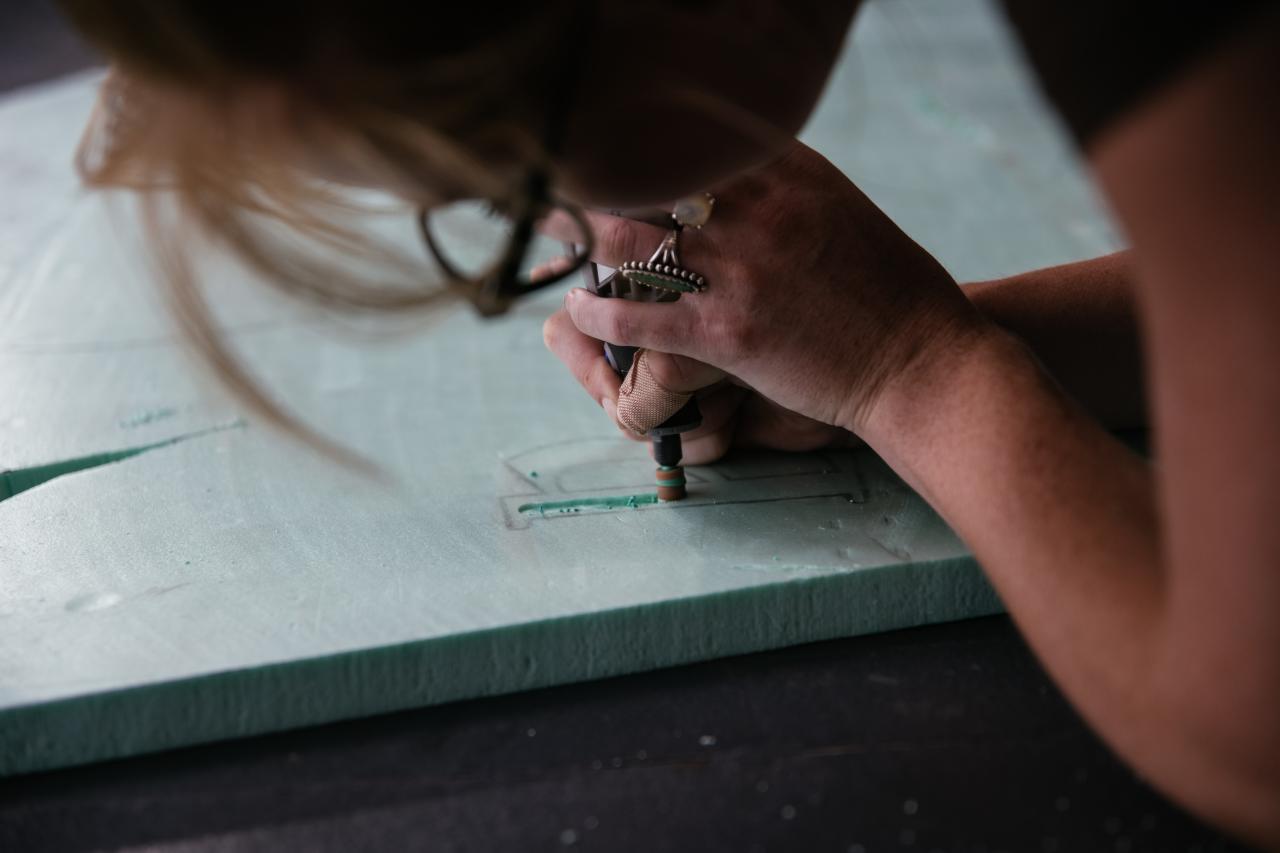
4. Carve It
Use an electric rotary tool to carve the letters and design into the foam. Start with a larger bit and then finish with a small, cone-shaped bit for detail work.

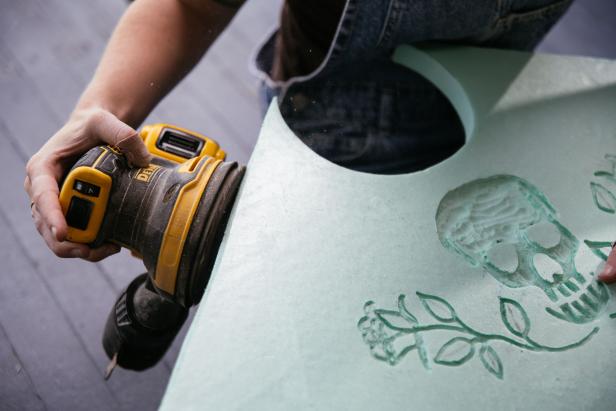
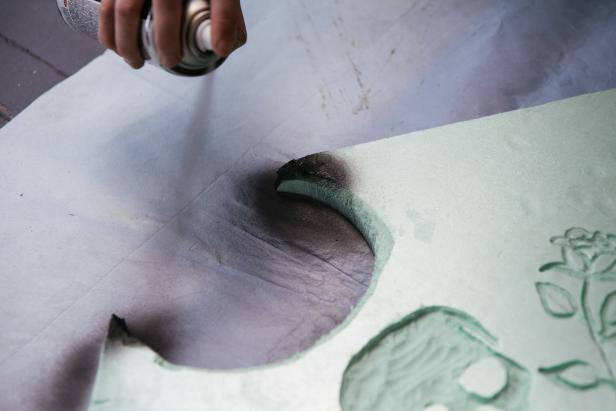
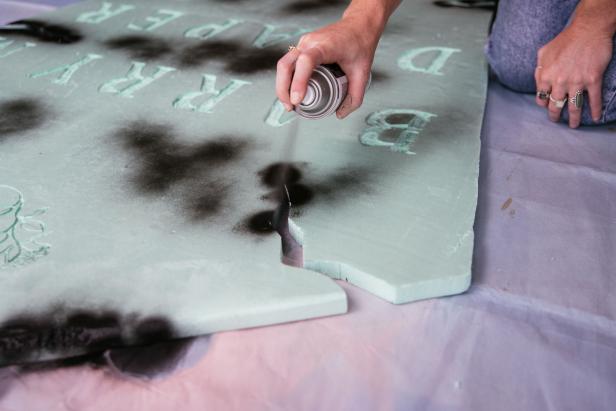
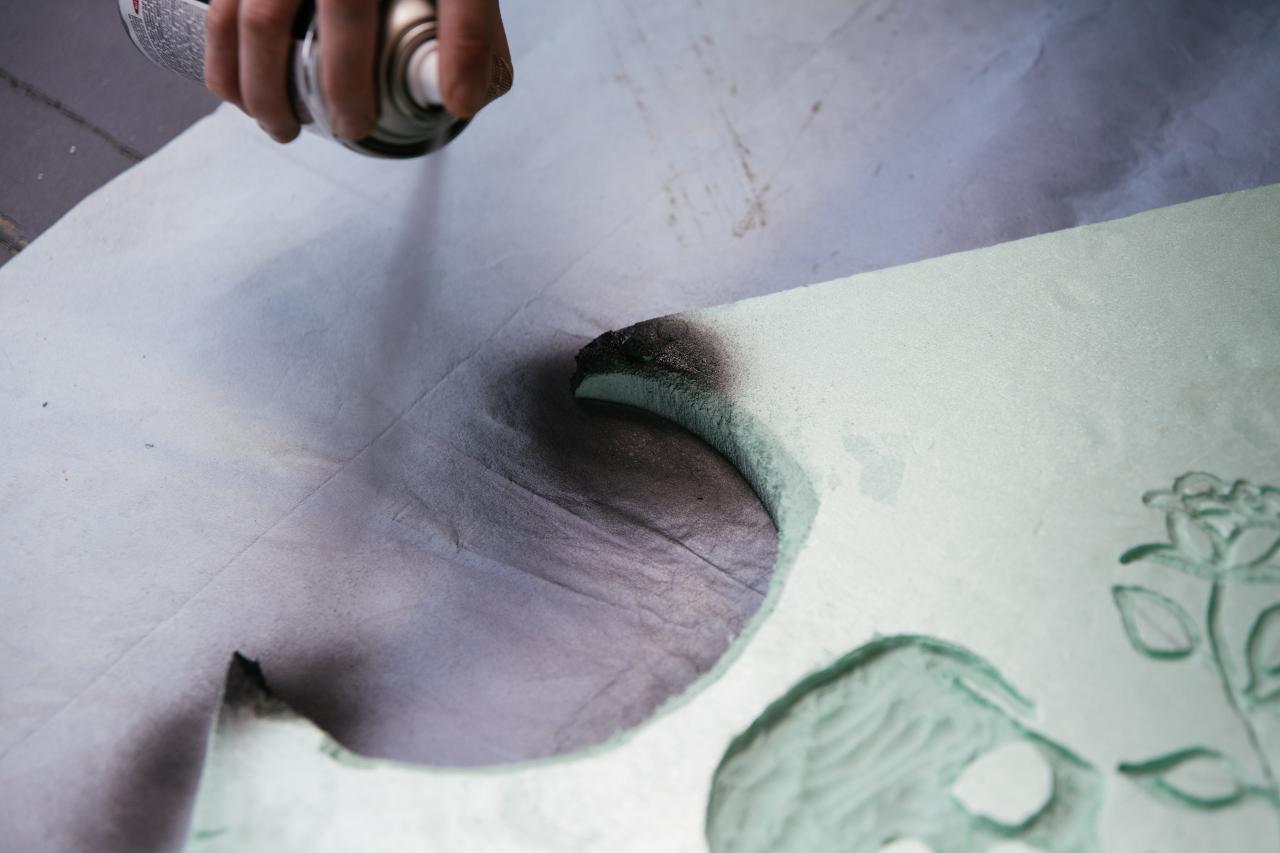
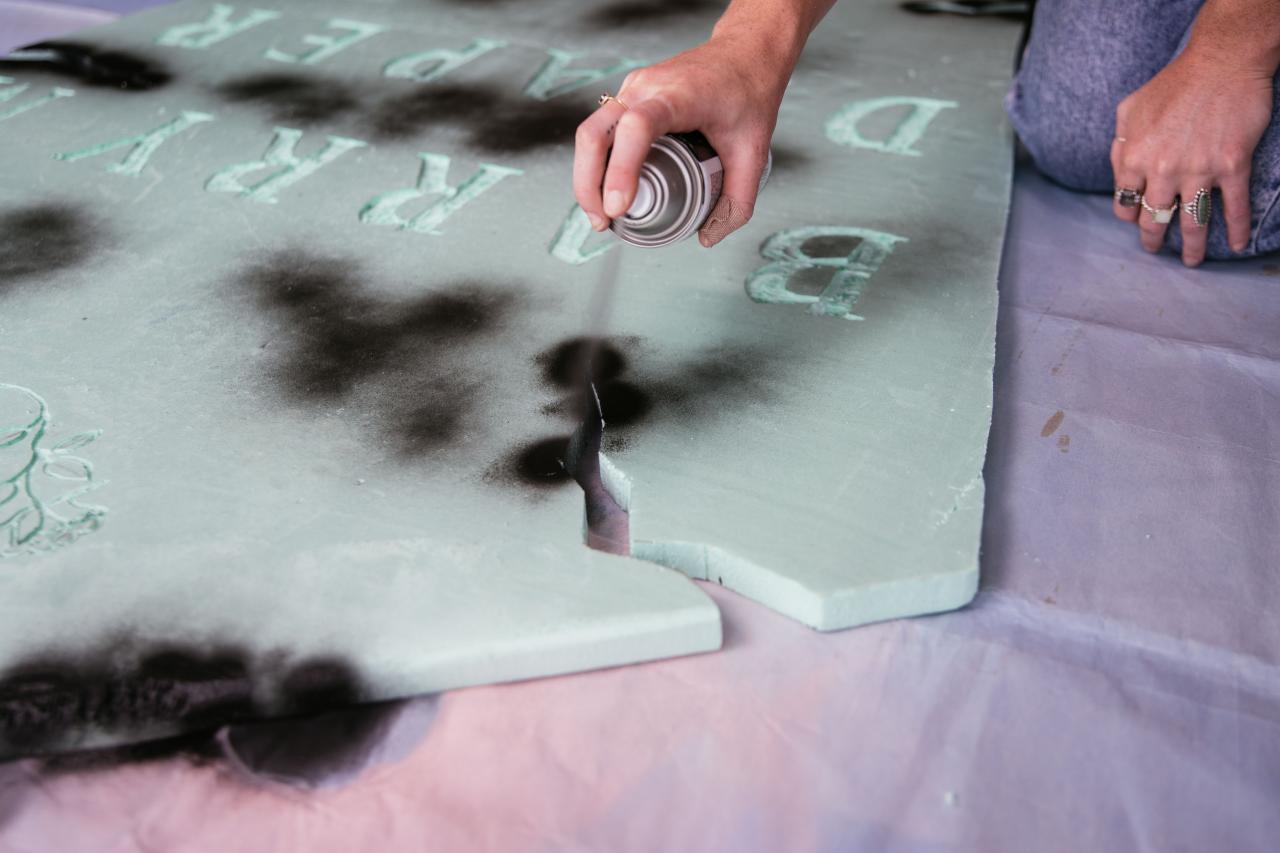
5. Distress It
Round the edges of the foam with an electric sander. Using the sander at a 30-45-degree angle, create divots and chinks in both the center of the tombstone and along the edges. Use spray paint to strategically melt the foam, making it look like eroded rock. A light spray creates a pockmarked appearance, whereas a heavier spray will melt away a good amount of foam, so use caution not to go overboard. Spray more heavily along the cracks and edges of the stone. Spray lightly in a few places in the center of the tombstone. It will take the foam a few minutes to totally melt, so be patient!

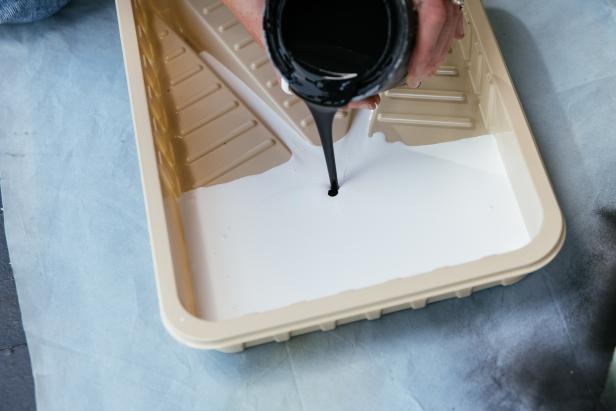
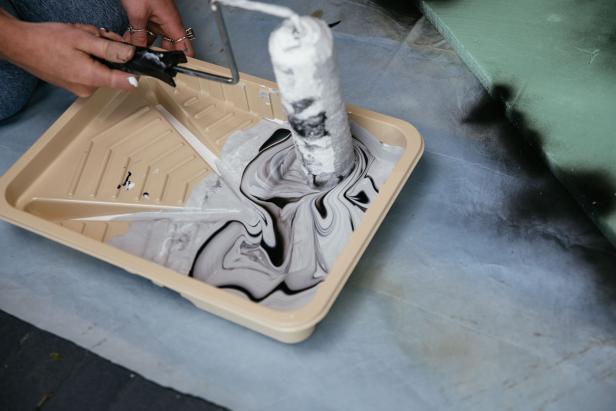
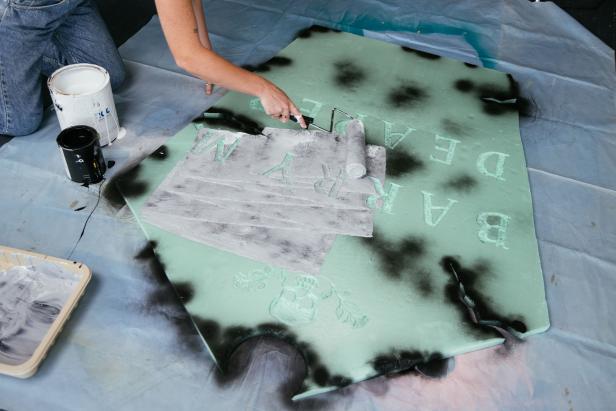
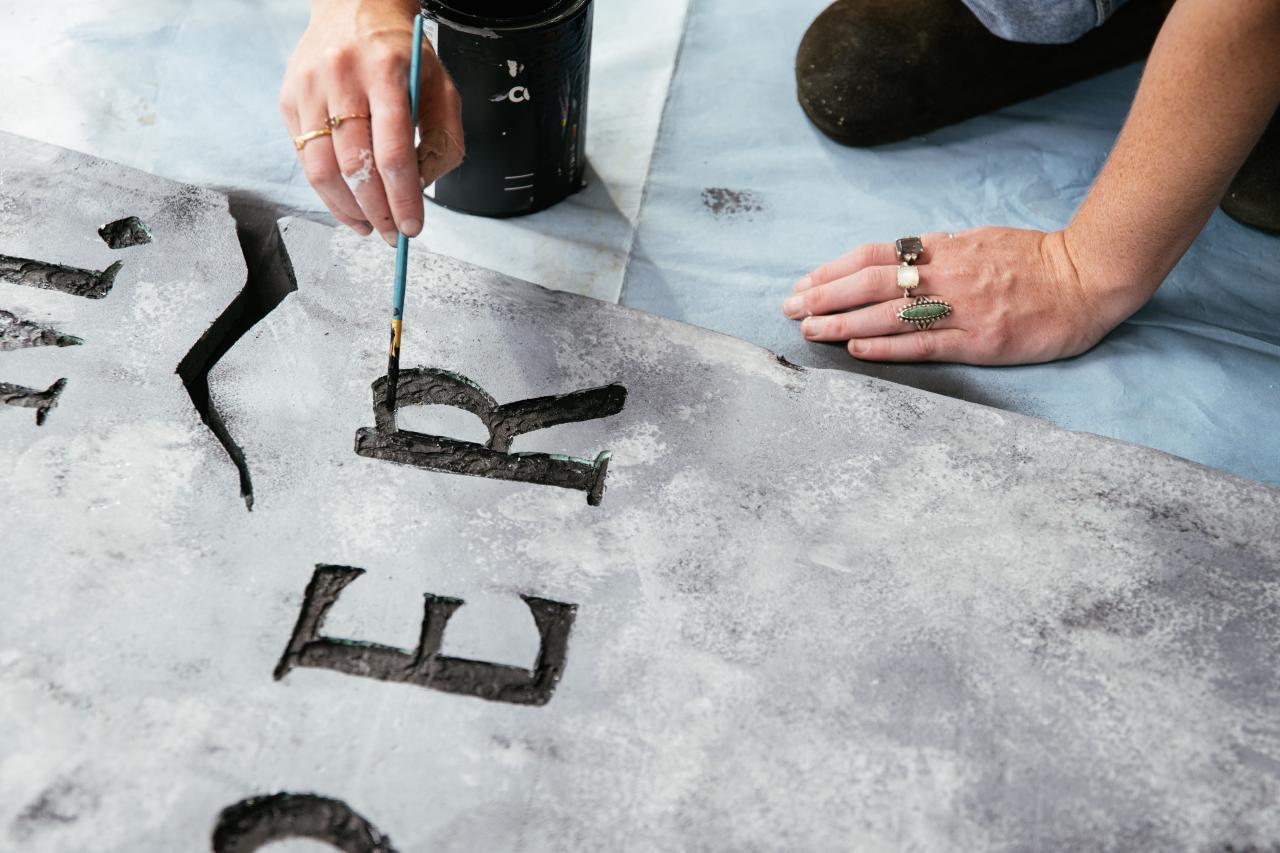
6. Paint It
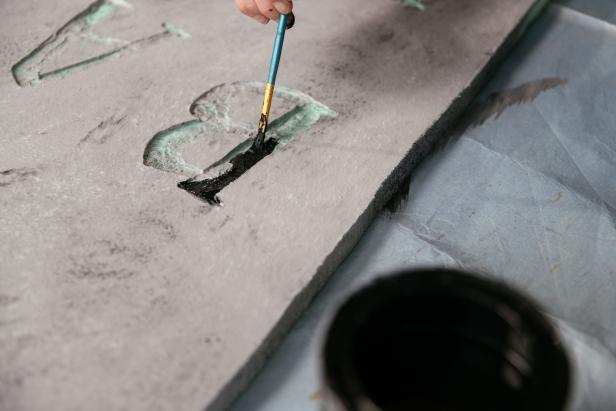
In a paint tray, pour a generous amount of white exterior paint. Directly into the same tray, pour a small amount of black paint. Swirl the paints together until the mix is medium to dark gray with a few variations. Add more black if necessary. Using a standard paint roller, paint the entire tombstone. The swirled, imperfectly mixed paint will create a mottled, aged look. With an artist’s paintbrush, paint all of the carved-out spaces black.

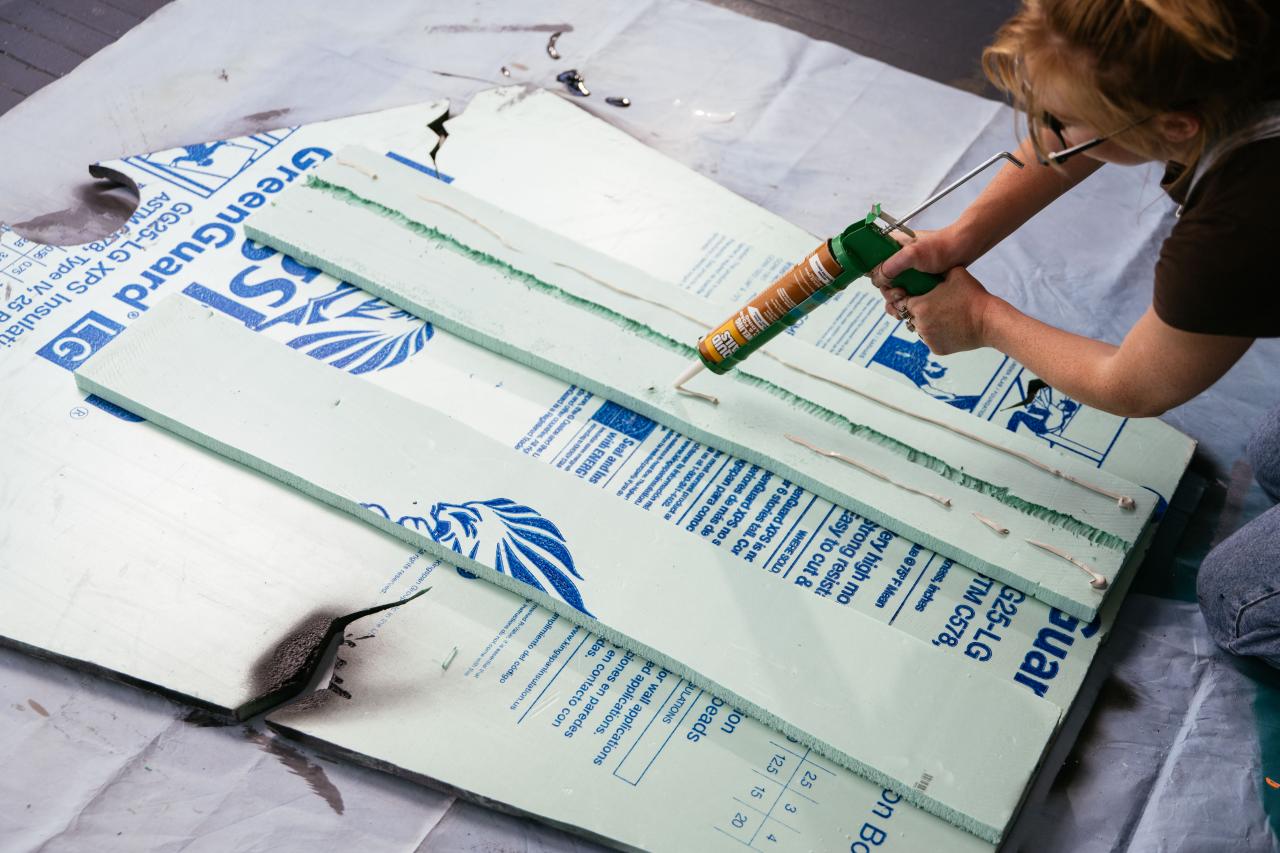
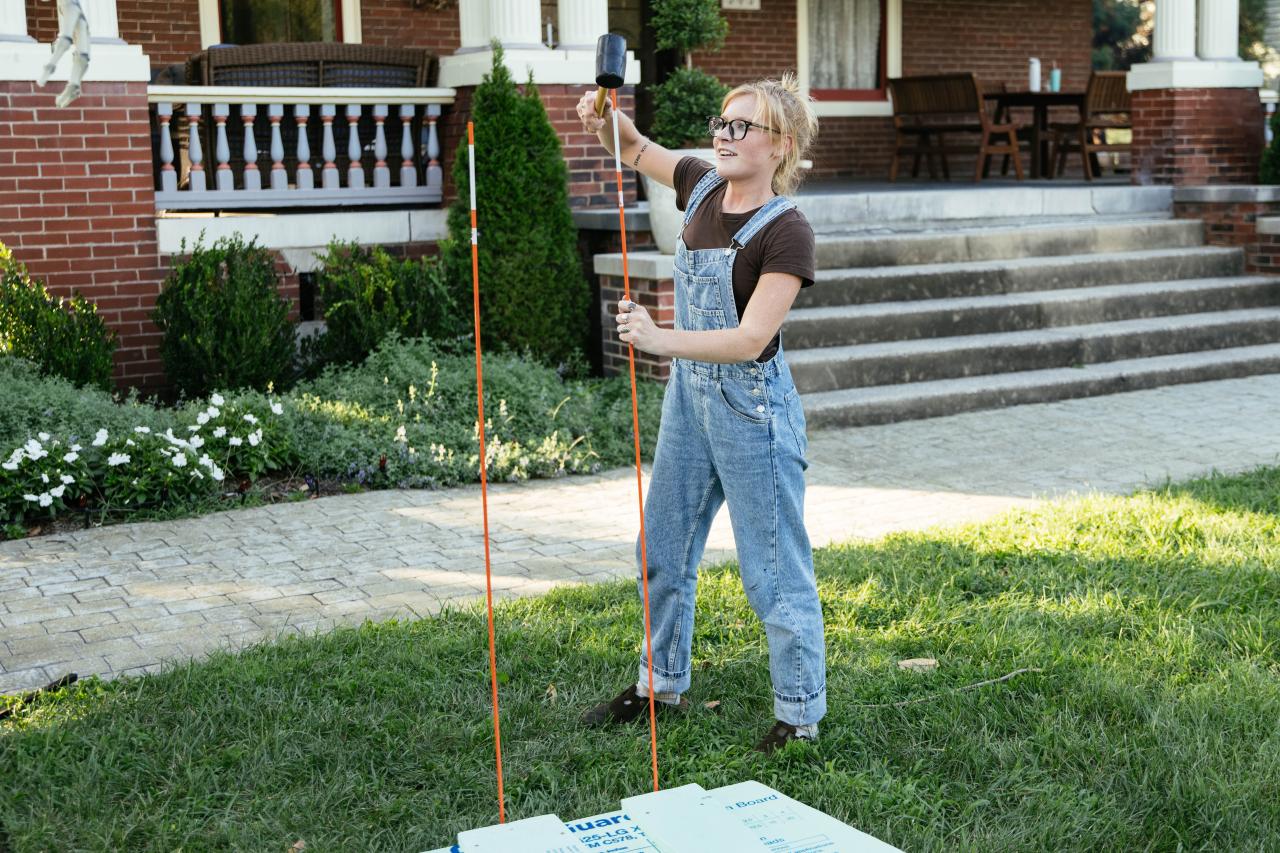
7. Make It Stand
Grab the 3’ x 4’ piece of foam leftover from the first step. Cut two strips of foam approximately 10" x 4'. Down the center of each one lengthwise, carve a channel about 1" wide and 1/2" deep with the largest rotary bit. Using construction adhesive, glue the strips vertically and channel-side-down to the back of the tombstone. Let the glue fully cure (follow package directions).


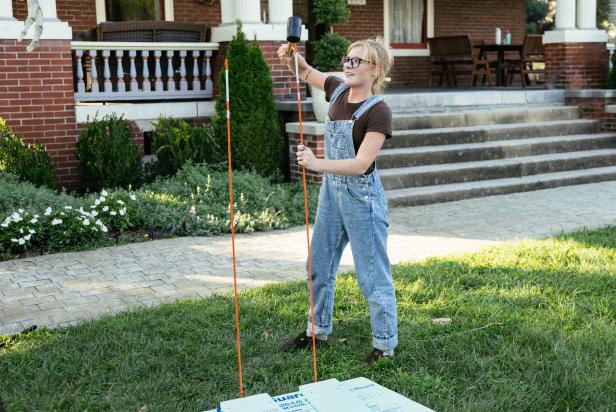
8. Install It
Lay the tombstone face-down in the yard. Mark the place where each of the channels will meet the ground. Use a rubber mallet to pound fiberglass driveway markers into the soil. Be sure that they are in the ground enough to be hidden behind the top of the tombstone. Insert one marker into each channel until the bottom of the tombstone rests on the ground.


9. Light It Up
For maximum impact after dark, add a couple of solar-powered spotlights and a skeleton or two. Your “grave” yard just became the spookiest spot on the block!

Jennie Andrews Styling by Jill Tennant

19 Ways to Pose a Skeleton for Halloween
No bones about it, these life-size skeleton poses will make your home the most hilarious haunted house on the block this Halloween. We'll show you where to buy posable skeletons, how to secure them in your yard, plus share easy-to-replicate ideas for posing them.


