DIY Farmhouse Benches
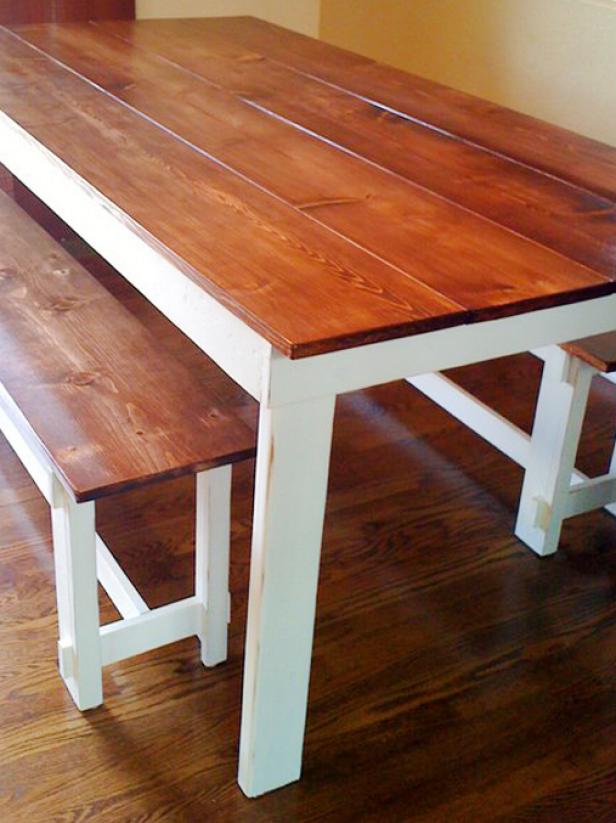
Farmhouse benches are sturdy, easy to build and stylish with rustic bracing and notched corners.
Farmhouse Bench and Table

Brown and White Wooden Farmhouse Bench and Table

Farmhouse benches are sturdy, easy to build and stylish with rustic bracing and notched corners.

Farmhouse benches are sturdy, easy to build and stylish with rustic bracing and notched corners.
By: Ana White

Materials Needed:

  • 8' 1 X 3 pine board
  • 6' 1 X 2 pine board
  • 8' 1 X 4 pine boards (2)
  • 6' 1 X 12 pine board
  • 2" finish nails (32)
  • 2" wood screws (24)
  • 1-1/4" wood screws (10)
  • pilot hole bit to match wood screws and lag screws
  • small tube wood filler
  • 1 quart stain or 2 quarts flat paint
  • spray can exterior clear coat
  • sandpaper in medium and fine grits
  • measuring tape
  • carpenter's square
  • drafting compass
  • drill
  • hammer
  • jigsaw Tip: Many hardware stores will make cuts complimentary with the purchase of lumber.
  • vacuum with soft-bristled brush

Cut List

1 X 3 boards cut at 17-1/4" (side legs, 4 boards)
1 X 3 boards cut at 11-1/2" (ends, 4 boards)
1 X 2 boards cut at 17-1/4" (end legs, 4 boards)
1 X 4 boards cut at 45" (aprons and bottom stretcher, 3 boards)
1 X 4 boards cut at 25-3/4" (cross bracing, 2 boards)
1 X 12 board cut at 54" (top)

Getting Started

Select boards that are straight. Tip: Pretend the board is an arrow on a bow and look down the length of the board to see if it is straight. Tip: For added character, select boards that are rustic in nature with imperfections, cracks and knots. To save time, have hardware store cut boards as directed in cut list. Work on a clean level surface large enough for the project and always wear safety glasses and ensure proper ventilation when painting.

Notch Legs

Mark out 1 X 3 leg boards as shown in diagram. Carefully cut notches out with jigsaw.
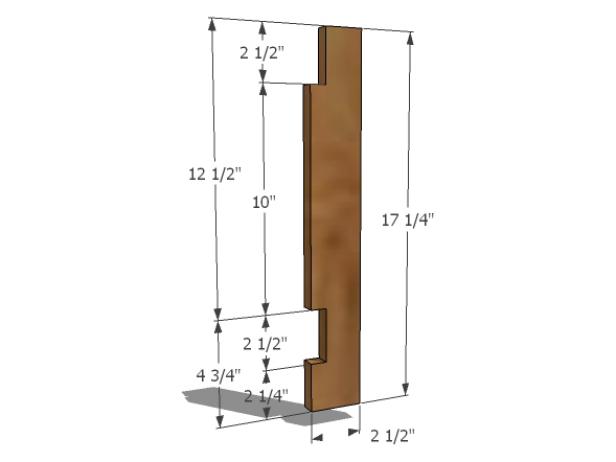
Cutting Notches in DIY Bench Legs

Illustration For Cutting Notches in DIY Bench Legs

Mark out 1 X 3 leg boards for your DIY bench as shown in diagram. Carefully cut notches out with jigsaw.

Nail Ends

Apply glue to notches in legs. Mark ends 3/4-inch from outsides and line up mark with outer edge of legs. Nail ends to legs as shown in the diagram with two inch finish nails and glue.
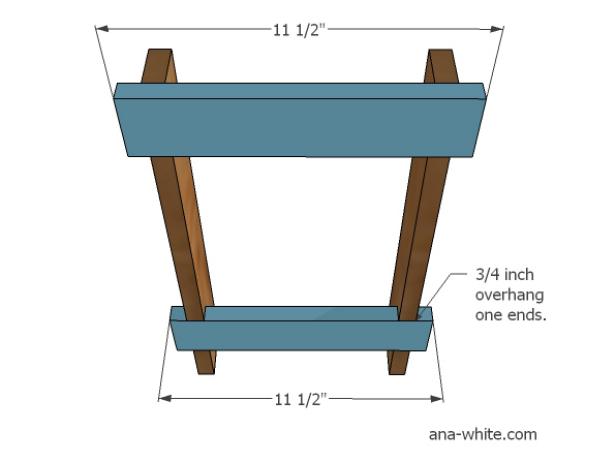
Attaching Ends to DIY Bench Legs

Attaching Ends to DIY Bench Legs

Apply glue to notches in bench legs. Mark ends 3/4-inch from outsides and line up mark with outer edge of legs. Nail ends to legs as shown in the diagram with two-inch finish nails and glue.

Attach End Legs

Apply glue to 1 X 3 legs and ends, and nail end legs. Use two inch finish nails and glue.
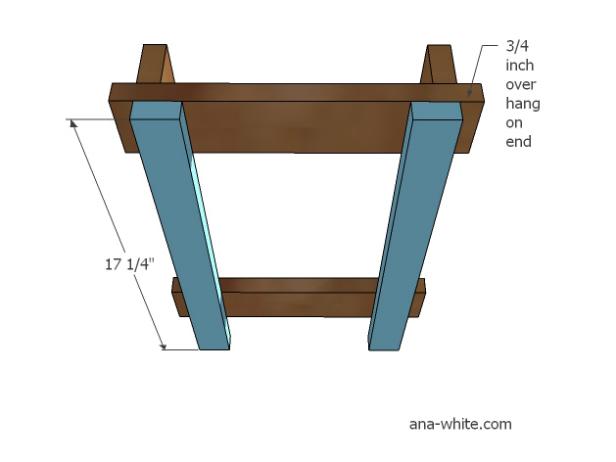
Fit End Legs into Place

Diagram For Attaching Bench Legs

Apply glue to 1 X 3 bench legs and ends, and nail end legs. Use two-inch finish nails and glue.

Screw in Bottom Stretcher

Mark bottom ends of leg frames 3-7/8-inch from inside of leg corner to find center of bottom stretcher. Apply glue and fasten stretcher to bottom ends with two inch screws.
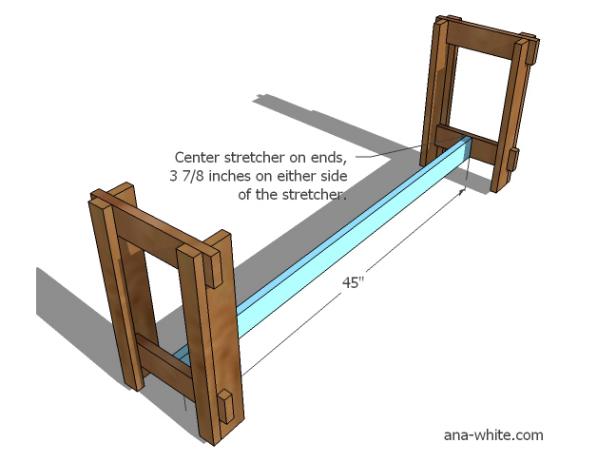
Attach Bottom Stretcher to Leg Frame

Attaching Bottom Stretcher to Bench Leg Frame

Mark bottom ends of bench leg frames 3-7/8-inch from inside of leg corner to find center of bottom stretcher. Apply glue and fasten stretcher to bottom ends with two-inch screws.

Attach Side Aprons

Apply glue to inside tops of leg frames. Screw side aprons to leg frames as shown in diagram with 1-1/4-inch screws.
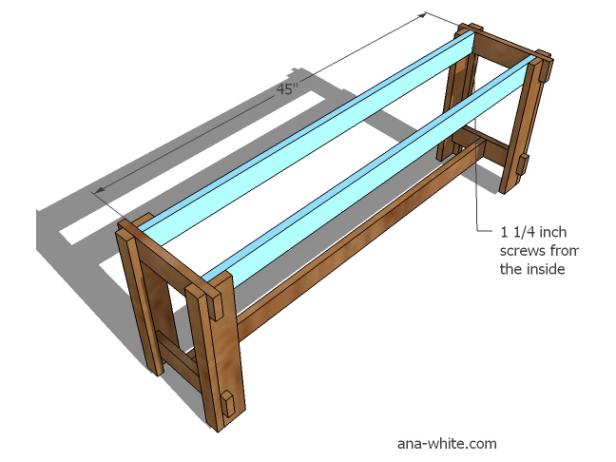
Attaching Side Aprons to Bench Leg Frames

Illustration Showing How to Attach Side Aprons to Bench Leg Frames

Apply glue to inside tops of leg frames. Screw side aprons to leg frames as shown in diagram with 1-1/4-inch screws.

Cut Cross Supports

Mark cross supports as shown in diagram. Cut with jigsaw.
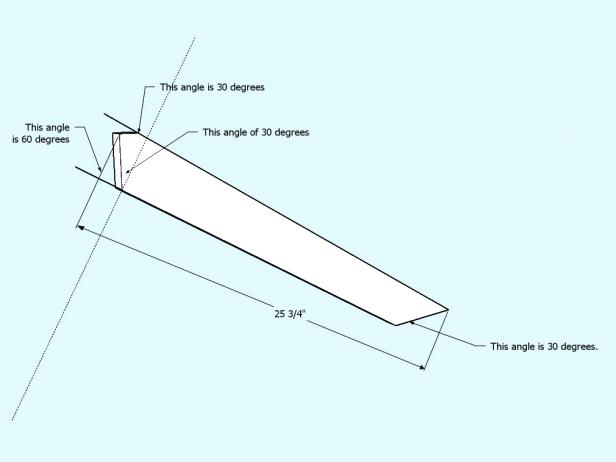
Measure and Cut Cross Supports

Measure and Cut Cross Supports

Mark cross supports for farmhouse bench as shown in diagram. Cut with jigsaw.

Attach Cross Support Assembly

Apply glue to ends of cross supports. Screw on with two inch screws.
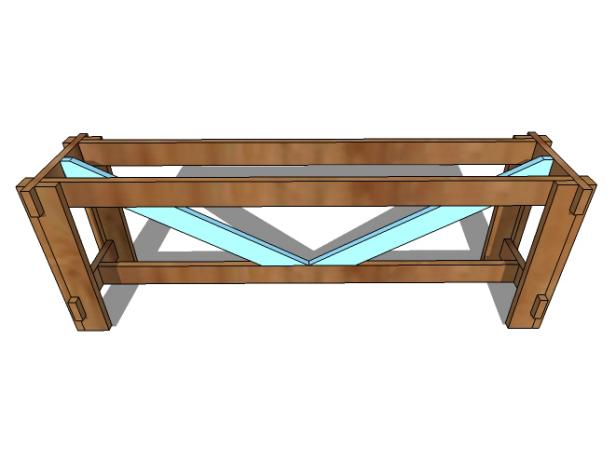
Attaching Cross Supports to DIY Bench

Illustration for Attaching Cross Supports to DIY Bench

Apply glue to ends of cross supports of bench. Screw on with two-inch screws.

Screw in Bench Top

Mark bench top ends 3-3/4-inch from ends. Line marks up with leg frame ends. Screw bench top to bench frame with two-inch screws and glue.
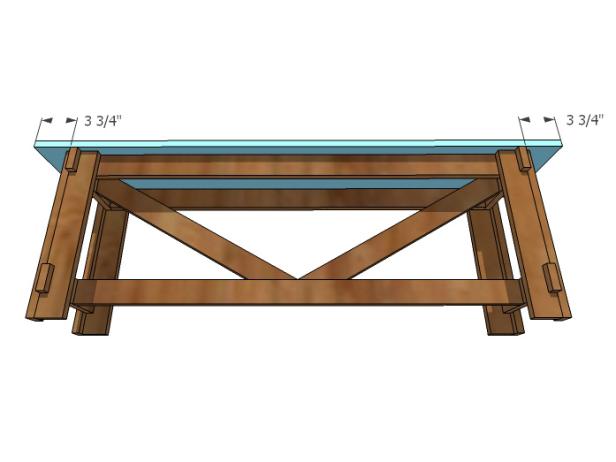
Attaching Bench Seat

Illustration of Attaching Bench Seat to DIY Bench

Mark bench top ends 3-3/4-inch from ends. Line marks up with leg frame ends. Screw bench top to bench frame with two-inch screws and glue.

Finish the Bench

Fill exposed screw holes with wood filler and let dry. Sand the entire bench with medium sandpaper. Refill holes as needed with wood filler and let dry. Sand with medium grit sandpaper, followed with fine sandpaper. Vacuum bench with soft-bristled brush to remove sanding residue. Wipe clean with damp cloth. Apply wood conditioner, stain and clear coat for a beautiful wood finish. Apply primer, three coats of flat paint followed with clear coat for a durable painted finish. Tip: Sand edges before applying clear coat to create a time-worn distressed finish.

Next Up

Easy DIY Ceiling Medallion

Use paint and a picture frame to create a one-of-a-kind ceiling medallion that highlights a chandelier.

Paint Eclectic Chairs for a Cohesive Look

Update an eclectic mix of chairs by painting them a single color and recovering the seats to create a unified look.

Paint Hardwood Floors With a Pattern

Breathe new life into old hardwood floors with a fresh coat of paint in an eye-catching pattern.

Make a Planter Box With Nail Head Trim

Create stylish planters, complete with bolt head trim, to flank and define your front door.

How to Build a Floating Shelf With Hidden Charging Station

Don't let unsightly cables and cords clutter your living space. This DIY floating shelf has a built-in power strip tucked away in a drawer — the perfect spot to charge your phones, tablets and other gadgets out of sight.

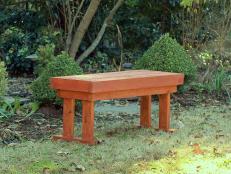
Easy Woodworking Project: Build a Simple Garden Bench

Get step-by-step instructions on how to make a simple yet sturdy garden bench.

How to Build a Modern Outdoor Bench

Looking for more outdoor seating or a decorative bench for your porch? Try your hand at this easy woodworking project that can be built in less than a day.

How to Whitewash Wood: Whitewashing and Pickling Techniques

Easily brighten and add rustic charm to furniture and a variety of wood surfaces with these budget-friendly whitewashing and pickling techniques.

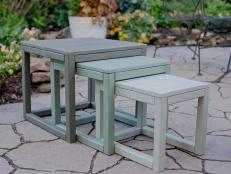
DIY Outdoor Nesting Tables

In need of more outdoor furniture? These sturdy nesting tables can also serve as extra seating for any outdoor space. Check out the step-by-step instructions for this simple woodworking project.

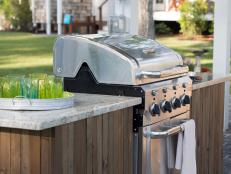
How to Build a Grilling Island

Create an outdoor kitchen by nestling a gas grill into a custom-built, granite-topped island.

Go Shopping

Get product recommendations from HGTV editors, plus can’t-miss sales and deals.

Follow Us Everywhere

Join the party! Don't miss HGTV in your favorite social media feeds.