Custom Upholstered Room Divider
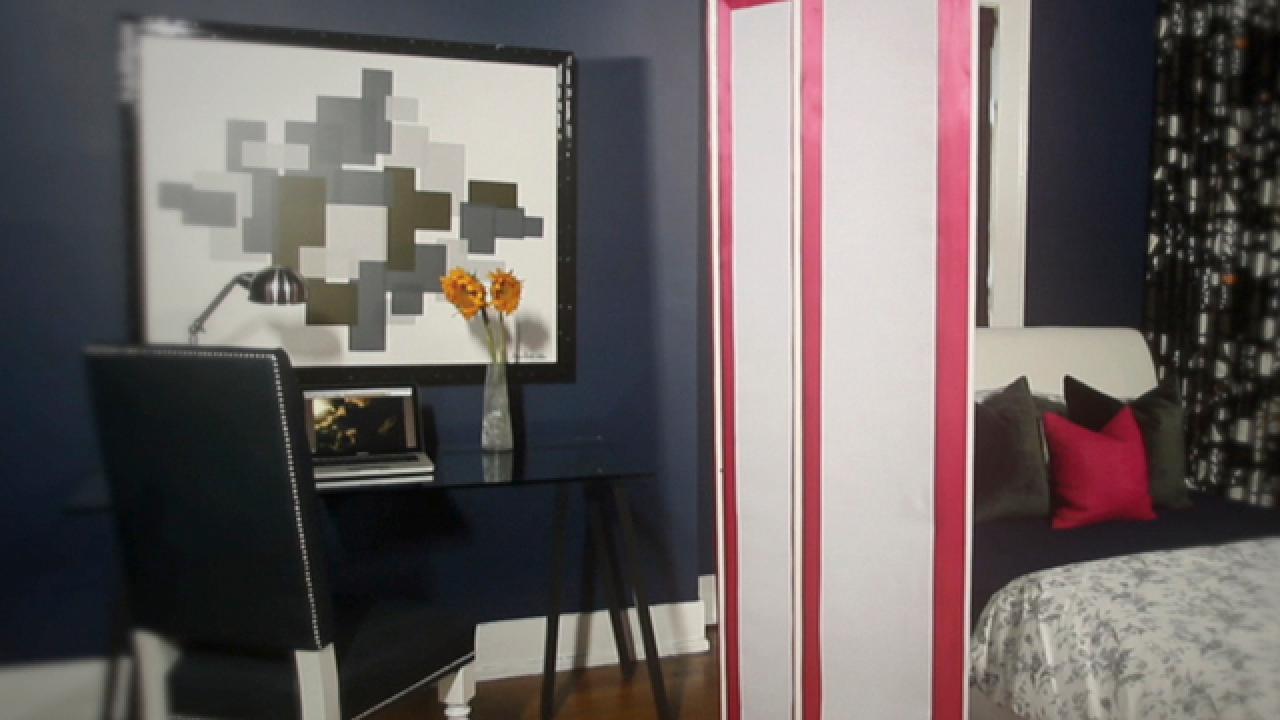
Delineate a bedroom work area from sleep space by customizing inexpensive, bi-fold doors to create a one-of-a-kind room divider.
How To Make a Room Divider
Loading Video...

Materials Needed:

  • 2 sets of wood bi-fold doors
  • fabric batting
  • staple gun and staples
  • tape measure
  • pencil and notepad
  • drill
  • screws
  • fabric
  • wide ribbon
  • iron-on adhesive tape
  • iron
  • fabric scissors
  • decorative hinges
  • paint and brush

Prep Doors

Remove existing hardware so each door is separate. Paint door edges in desired color, if needed.

Add Batting

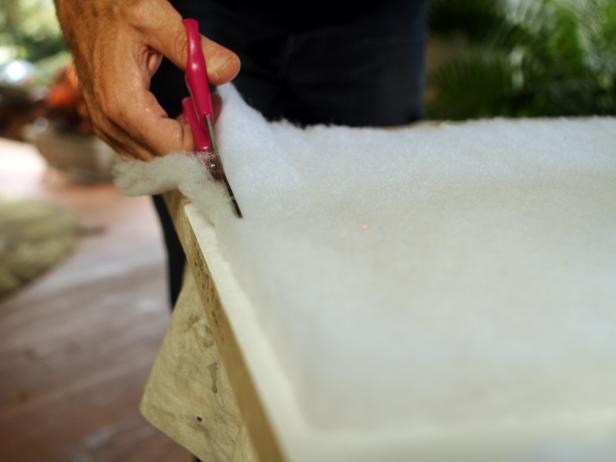
Lay bi-fold doors out on a long, flat work surface. Use a tape measure to determine the width and height of doors. Mark dimensions down in notepad with pencil. Use fabric scissors to cut batting 1/4-inch shorter than door on all sides. Attach batting to front and back of each door with staple gun.
Attach Fabric

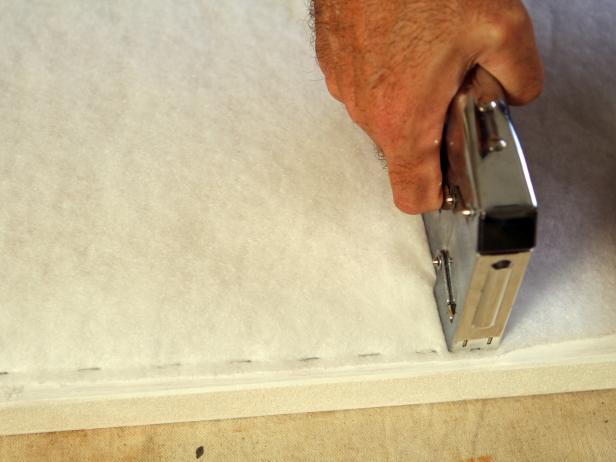
Mark then cut fabric to same dimensions as batting. Attach fabric to doors, over batting, pulling fabric taught as you staple.
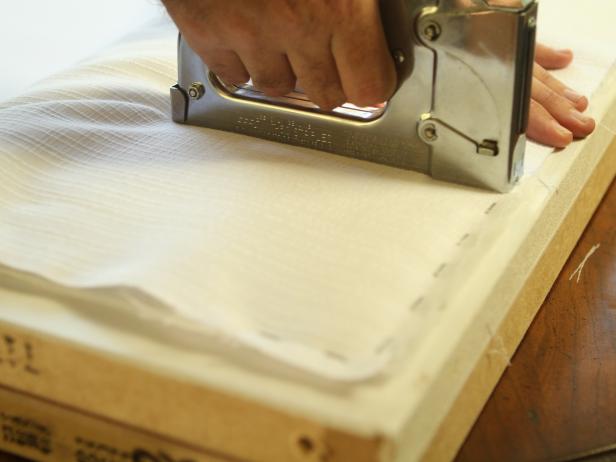
Staple Gun Staples White Fabric Over Batting

Attach Fabric With Staple Gun

Mark then cut fabric to same dimensions as batting. Attach fabric to doors, over batting, pulling fabric taut as you staple.

Finish Edges With Ribbon

Cut strips of ribbon long enough to cover edges of fabric and batting. Place iron-on adhesive tape over staples. Cover adhesive tape with ribbon, lining up the ribbon's edges with outside edges of door. Miter ribbon at corners by cutting with scissors at a 45-degree angle then use iron to bond both ribbon and adhesive tape to fabric.
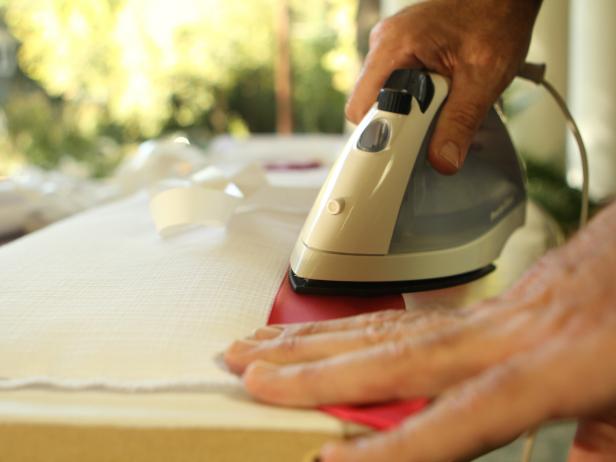
Ironing Red Ribbon on White Fabric

Finish Edges With Ribbon

Cut strips of ribbon long enough to cover edges of fabric and batting. Place iron-on adhesive tape over staples. Cover adhesive tape with ribbon, lining up the ribbon's edges with outside edges of door. Miter ribbon at corners by cutting with scissors at a 45-degree angle then use iron to bond both ribbon and adhesive tape to fabric.

Add Decorative Hinges

Join doors together using decorative hinges, attached with drill and screws.

Next Up

Upholstered Headboard With Nail Head Trim

Create a dramatic focal point in your bedroom with a custom, upholstered headboard that extends to the ceiling.

Creative and Chic DIY Nightstands

Turn an unused table into a pair of stylish and useful nightstands with our easy-to-follow instructions.

Cottage-Style Nightstands

Give any nightstand a quick, cottage-style facelift with a fresh coat of paint and distressed finish.

Custom Fabric-Covered Lampshade

Give a tired lamp a fresh, high-end look by covering the shade with trendy fabric and ribbon.

Rustic Yet Chic Wood Headboard

Add style, color and texture to your bedroom with this do-it-yourself headboard that looks anything but DIY. A great project for newbie woodworkers, this headboard can be completed in just a few hours and for less than $100.

Quick-and-Easy Bed Skirt

A great project for beginning sewers, a custom bed skirt will boost your bedroom's style.

Turn an Architectural Item Into Art

Add a one-of-a-kind decoration to your bedroom: Hang an interesting, salvaged object on the wall as art in just a few simple steps.

Modern Bedroom Update: Add a Drapery Focal Wall

Floor-to-ceiling draperies add height, drama and a stylish, modern look to any bedroom.

Turn a Coverlet Into a Duvet Cover

Give a favorite thin quilt or coverlet new life by turning it into a custom duvet cover.

Coastal Cottage-Style Shutter Headboard

Easily create this inexpensive yet impressive headboard using unfinished shutters, paint and sandpaper.

More from:

Fast Fix: Bedrooms

Go Shopping

Get product recommendations from HGTV editors, plus can’t-miss sales and deals.

On TV

Follow Us Everywhere

Join the party! Don't miss HGTV in your favorite social media feeds.