


Build Your Own Multifunctional Storage Cubby
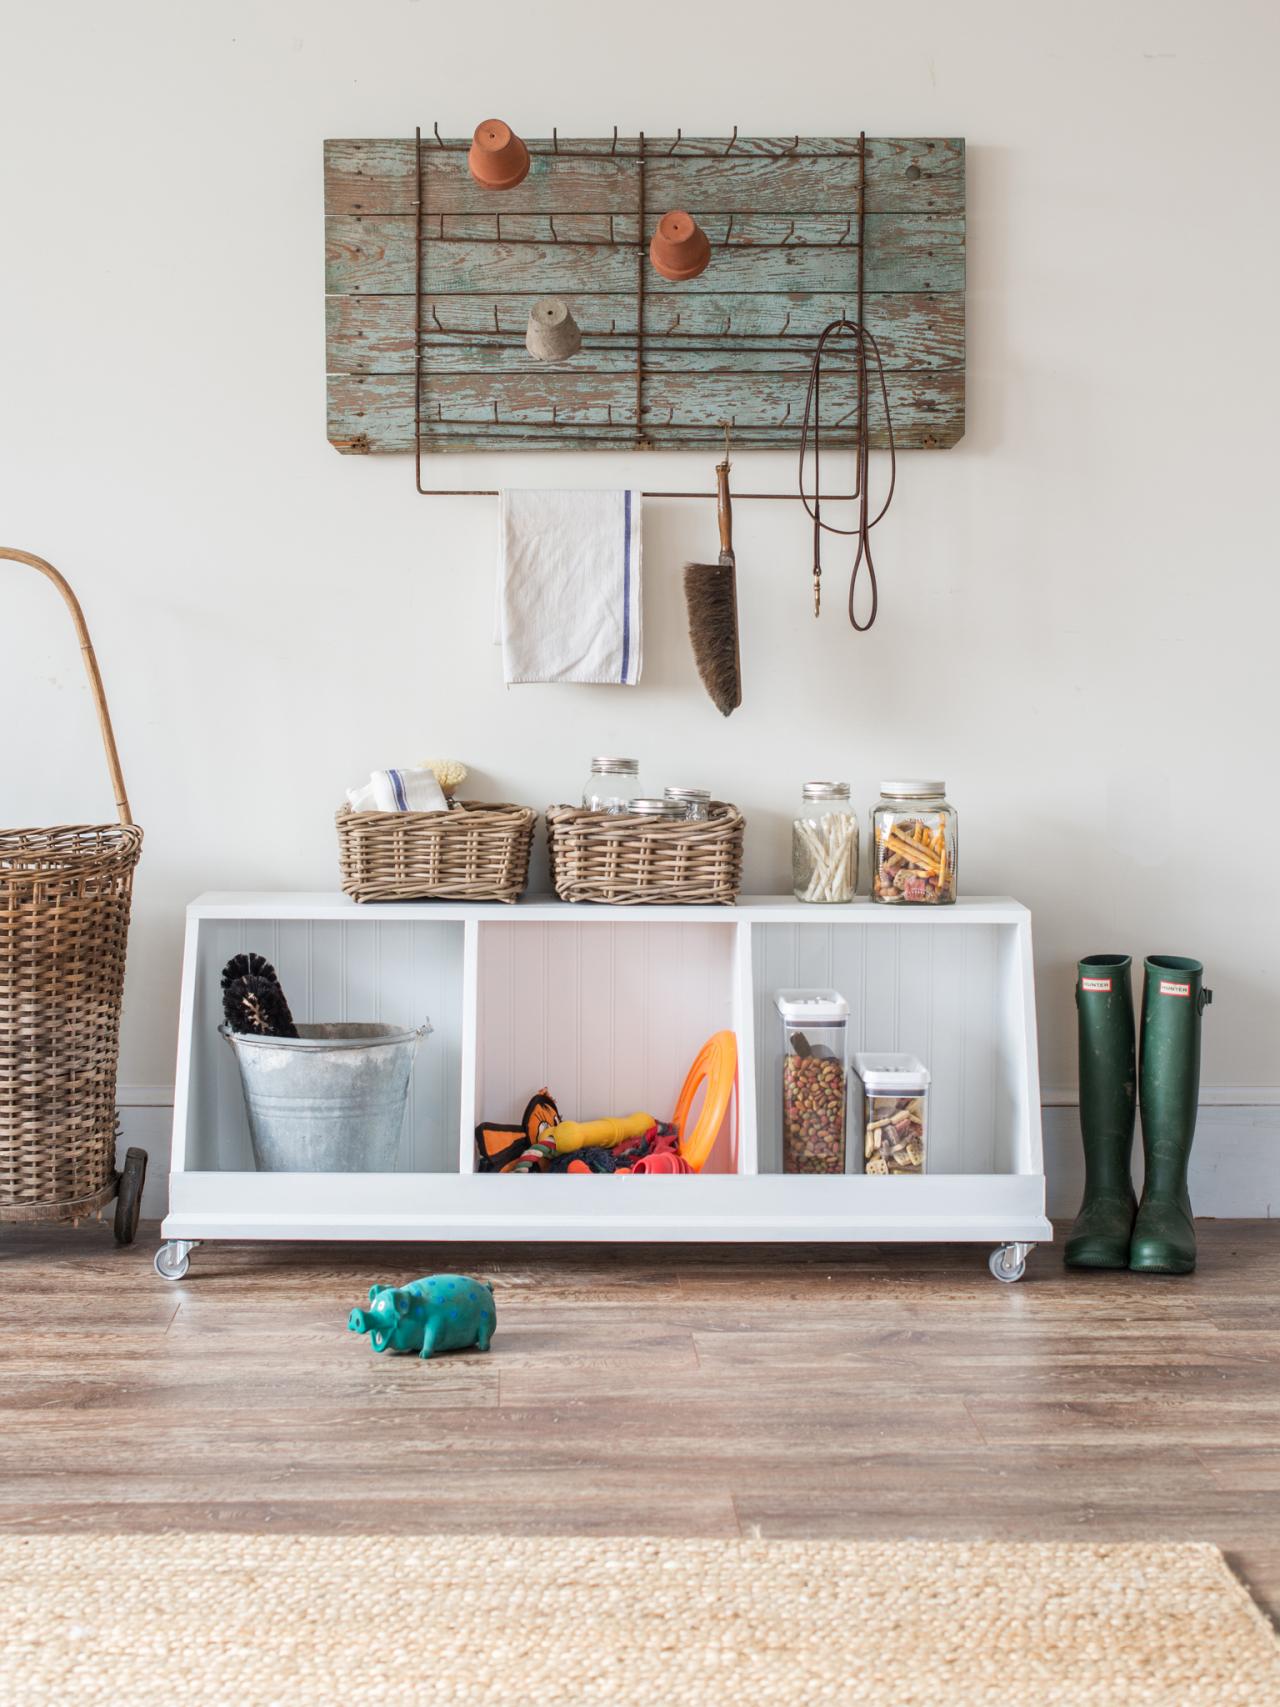
Ample storage is a must for every home. This rolling cubby was designed to be a multifunctional storage piece for parents, pet owners, crafters or homeowners at every stage of life. The open cubbies make it easy to stash away or grab backpacks, shoes, pet supplies, kids' toys or any other necessities you need to keep at hand in the mudroom, living room, playroom, closet or garage.

Build-It-Yourself Pet/Toy/Shoe Storage
Good storage pieces are a must when trying to create a beautiful, functional home. This rolling “cubby” unit was designed to be a multi-functional family storage piece for several stages of life. It’s great for pet toys and gear, kid/baby storage for toys and books, and even in a mudroom or closet for shoes.

Photo by: Marian Parsons, Mustard Seed Interiors
Marian Parsons, Mustard Seed Interiors
Materials Needed
16” wide pine wood panels cut to following dimensions:
4) 16” x 16” (sides and dividers)
1) 9” x 48” (top)
1) 16” x 48” (bottom)
1) 1” x 4” x 48” pine board (front edge)
1) 16” x 48” piece of bead board (back)
1) 8’ piece trim for base
4) 2” casters
1-1/4” self-boring wood screws
3/4” self-boring wood screws
compressor and brad nailer
1-1/4” finishing brad nails (a hammer and finishing nails can be used)
measuring tape
pencil
carpenter’s square
miter/chop saw
circular saw
c-clamps
drill equipped with bits matching screws
eye and ear protection
120-grit sand paper
all-purpose wood primer
trim paint in desired color and finish (semi-gloss or satin is suggested)
6” foam roller
paint tray and liners
2” angled sash paint brush
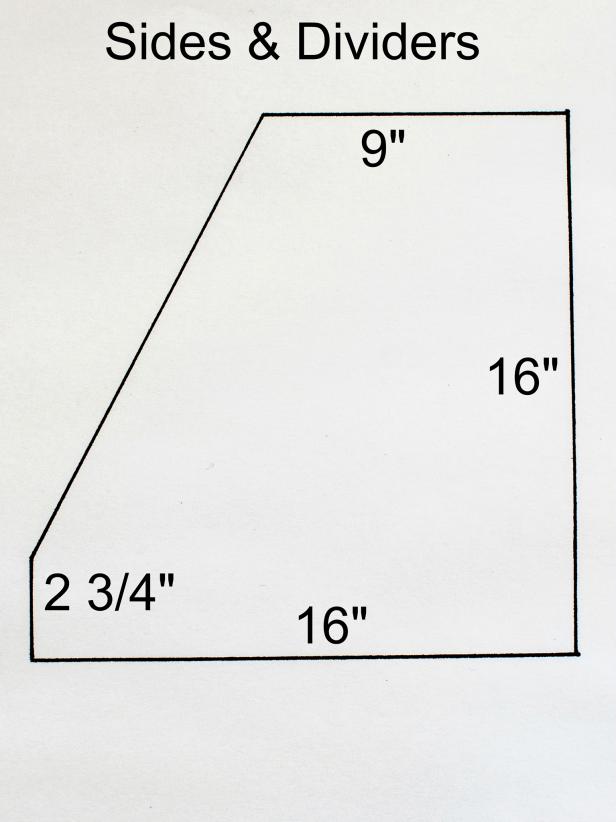
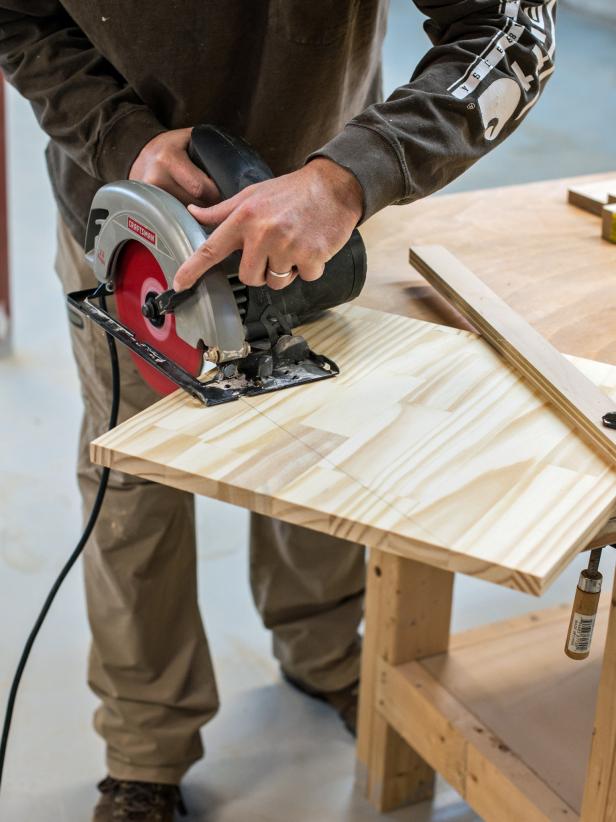
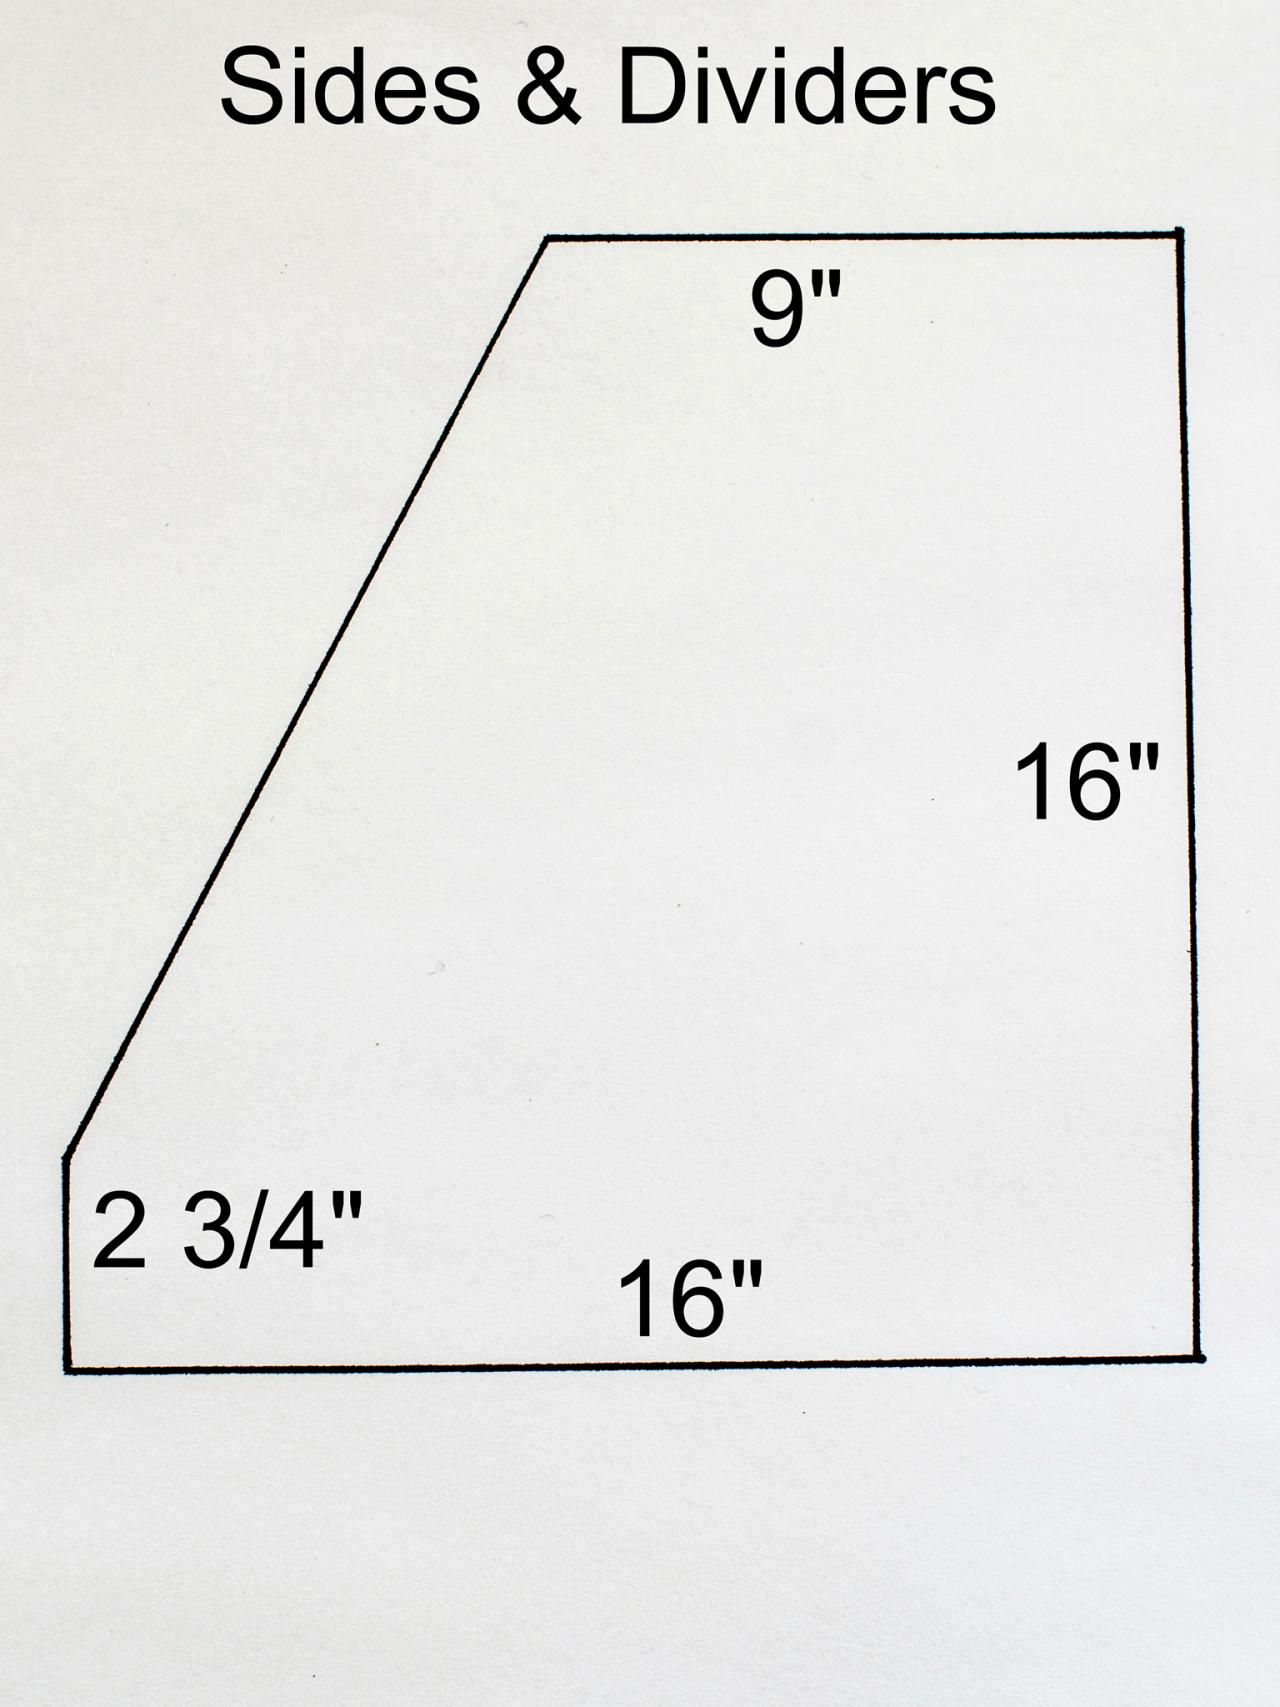
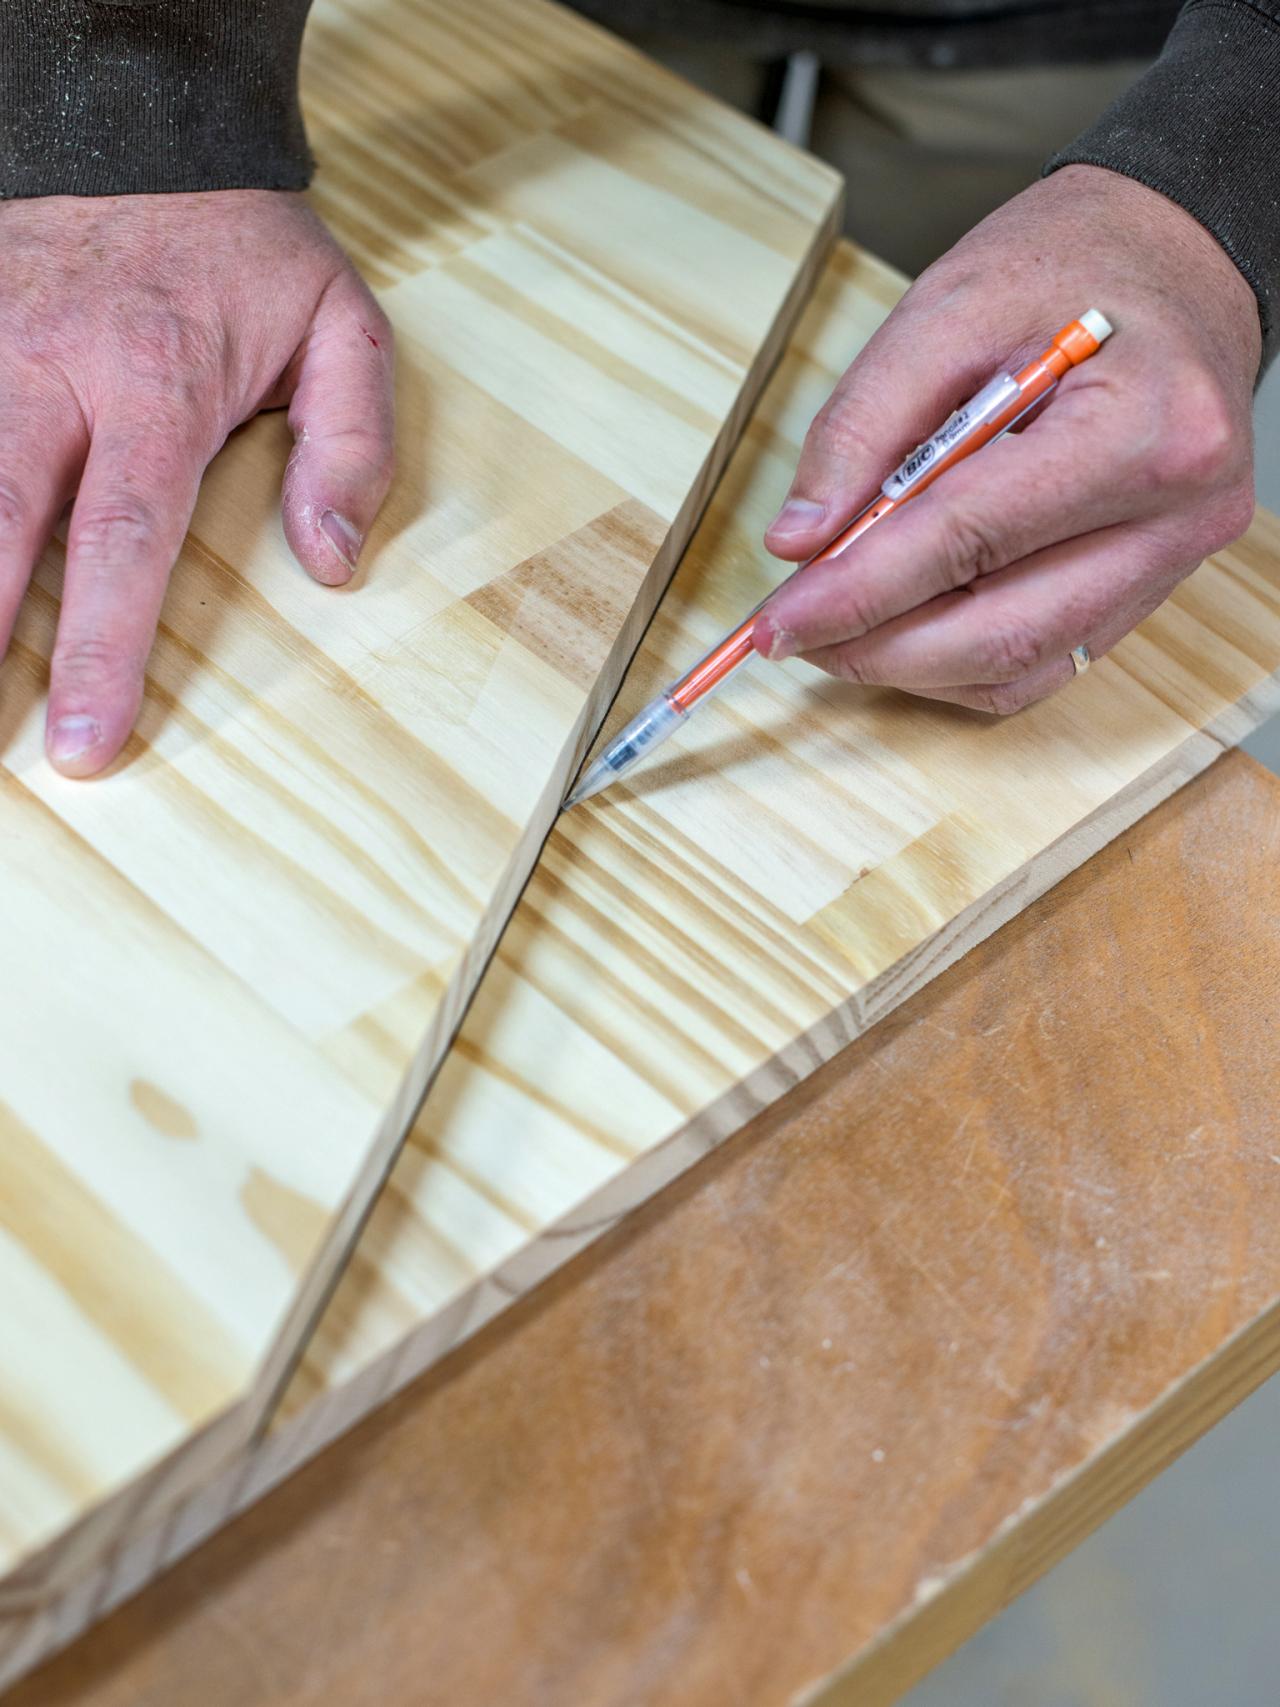
Measure and Cut Dividers
Cut wood to sizes in supplies list either at home or at hardware store. Take one 16” square piece and measure and mark angle to match diagram (Image 1). Cut marked line with a circular saw (Image 2). Use first cut piece as a template for the other three (Image 3). Mark and cut remaining three pieces. Tip: Clamp wood piece to stable work surface while cutting with the circular saw to prevent it from shifting.
Marian Parsons, Mustard Seed Interiors
Marian Parsons, Mustard Seed Interiors

Marian Parsons, Mustard Seed Interiors
Build-It-Yourself Pet/Toy/Shoe Storage: Step 1: Measure and Cut Dividers
Cut wood to sizes in supplies list either at home or at hardware store. Take one 16” square piece and measure and mark angle to match diagram. Cut marked line with a circular saw. Use first cut piece as a template for the other three. Mark and cut remaining three pieces. Tip: Clamp wood piece to stable work surface while cutting with the circular saw to prevent it from shifting.
Photo By: Marian Parsons, Mustard Seed Interiors
Dry Fit and Cut Trim
Arrange cut pieces on a flat work surface and ‘dry fit’ unit together to ensure everything is properly cut. While pieces are dry fit together, cut trim to proper length. Miter the corners to 45 degrees using a miter saw.

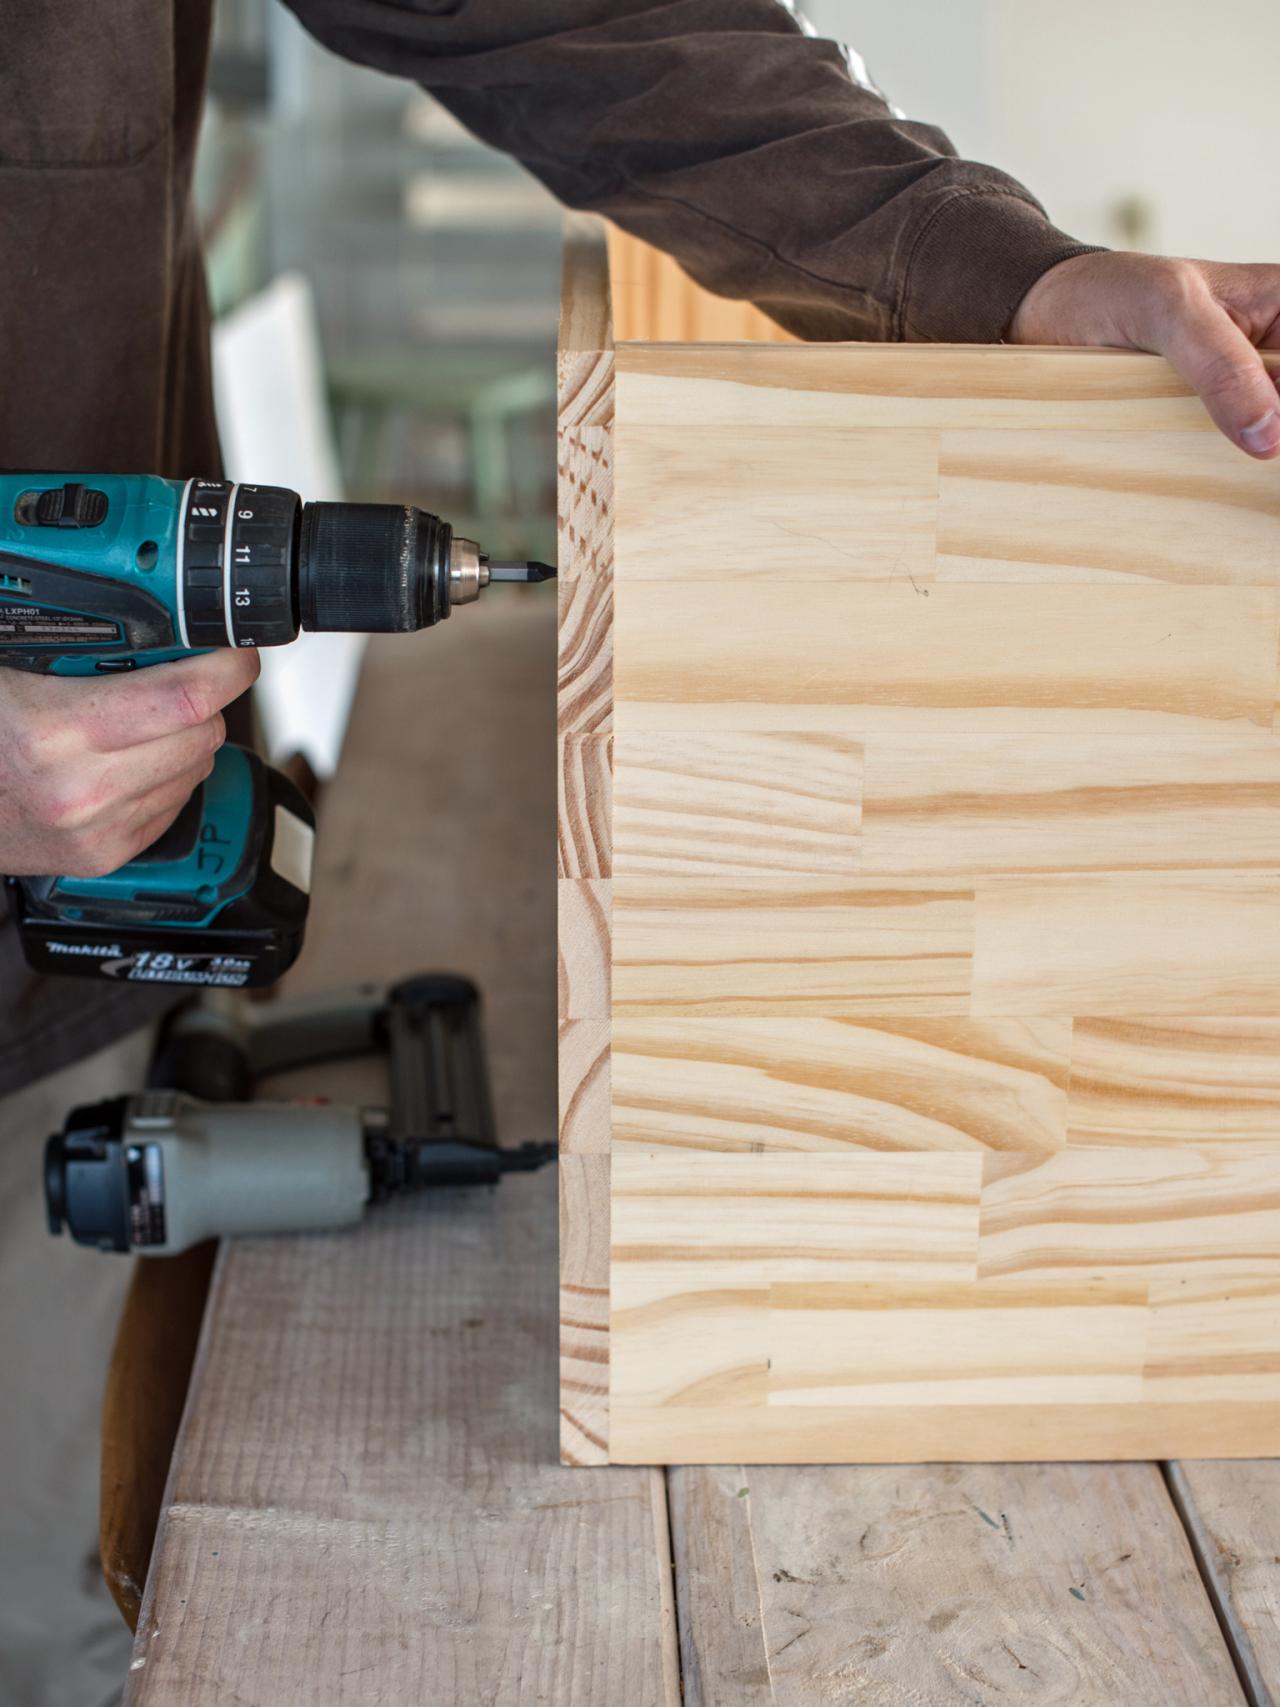
Attach Sides and Dividers to Bottom
Use brad nailer and 1-1/4” finishing brad nails to attach bottom of unit to sides. Insert 1-1/4” wood screws through underside of bottom into sides to add further stability. Repeat with two cubbies, spacing them evenly (15-1/2” apart). Tip: Tacking the sides and dividers into place prior to inserting the screws prevents them from shifting.

Build-It-Yourself Pet/Toy/Shoe Storage: Step 3: Attach Sides & Dividers to Bottom
Use brad nailer and 1 ¼” finishing brad nails to attach bottom of unit to sides. Insert 1 ¼” wood screws through underside of bottom into sides to add further stability. Repeat with two cubbies, spacing them evenly (15 ½” apart). Tip: Tacking the sides and dividers into place prior to inserting the screws prevents them from shifting.
Photo by: Marian Parsons, Mustard Seed Interiors
Marian Parsons, Mustard Seed Interiors
Attach Front Edge and Top
Attach 1” x 4” x 48” pine board to front of unit, flush with the bottom and sides. Tack into place securely with finishing brad nails. In this same manner, attach the 9” x 48” piece cut for top.

Build-It-Yourself Pet/Toy/Shoe Storage: Step 4: Attach Front Edge & Top
Attached 1” x 4” x 48” pine board to front of unit, flush with the bottom and sides. Tack into place securely with finishing brad nails. In this same manner, attach the 9” x 48” piece cut for top.
Photo by: Marian Parsons, Mustard Seed Interiors
Marian Parsons, Mustard Seed Interiors
Attach Trim and Beadboard Backing
Position front edge of trim so it is flush with bottom edge. Nail in place with brads. Repeat with trim pieces for both sides. Flip unit over and secure beadboard back with 1-1/4” brad nails.

Build-It-Yourself Pet/Toy/Shoe Storage: Step 5: Attached Trim & Bead Board Backing
Position front edge of trim so it is flush with bottom edge. Nail in place with brads. Repeat with trim pieces for both sides. Flip unit over and secure bead board back with 1 ¼” brad nails.
Photo by: Marian Parsons, Mustard Seed Interiors
Marian Parsons, Mustard Seed Interiors
Install Casters
Use 3/4” wood screws and screw driver to install 2” casters at each bottom corner of unit. Tip: As an alternative, the unit could be put on pre-made legs or bun feet.
Fill Holes and Sand
Fill in holes with wood filler. Work it in by swirling a fingertip over nail hole, pushing filler in and smoothing it out. Allow wood filler to dry per manufacturer’s directions. Lightly sand entire unit with 120-grit sand paper to smooth rough edges. Wipe or vacuum away dust.

Build-It-Yourself Pet/Toy/Shoe Storage: Step 7: Fill Holes & Sand
Fill in holes with wood filler. Work it in by swirling a fingertip over nail hole, pushing filler in and smooth out. Allow wood filler to dry per manufacturer’s directions. Lightly sand entire unit with 120 grit sand paper to smooth rough edges. Wipe or vacuum away dust.
Photo by: Marian Parsons, Mustard Seed Interiors
Marian Parsons, Mustard Seed Interiors
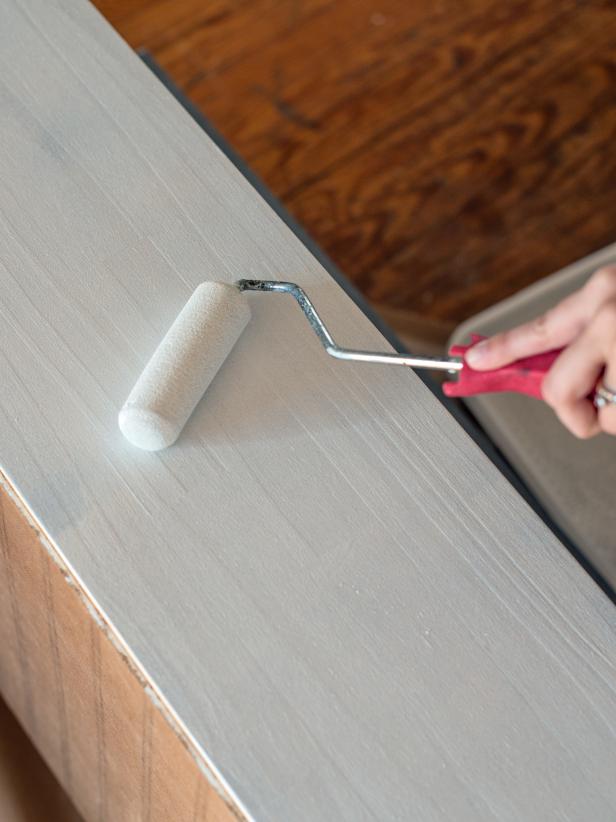
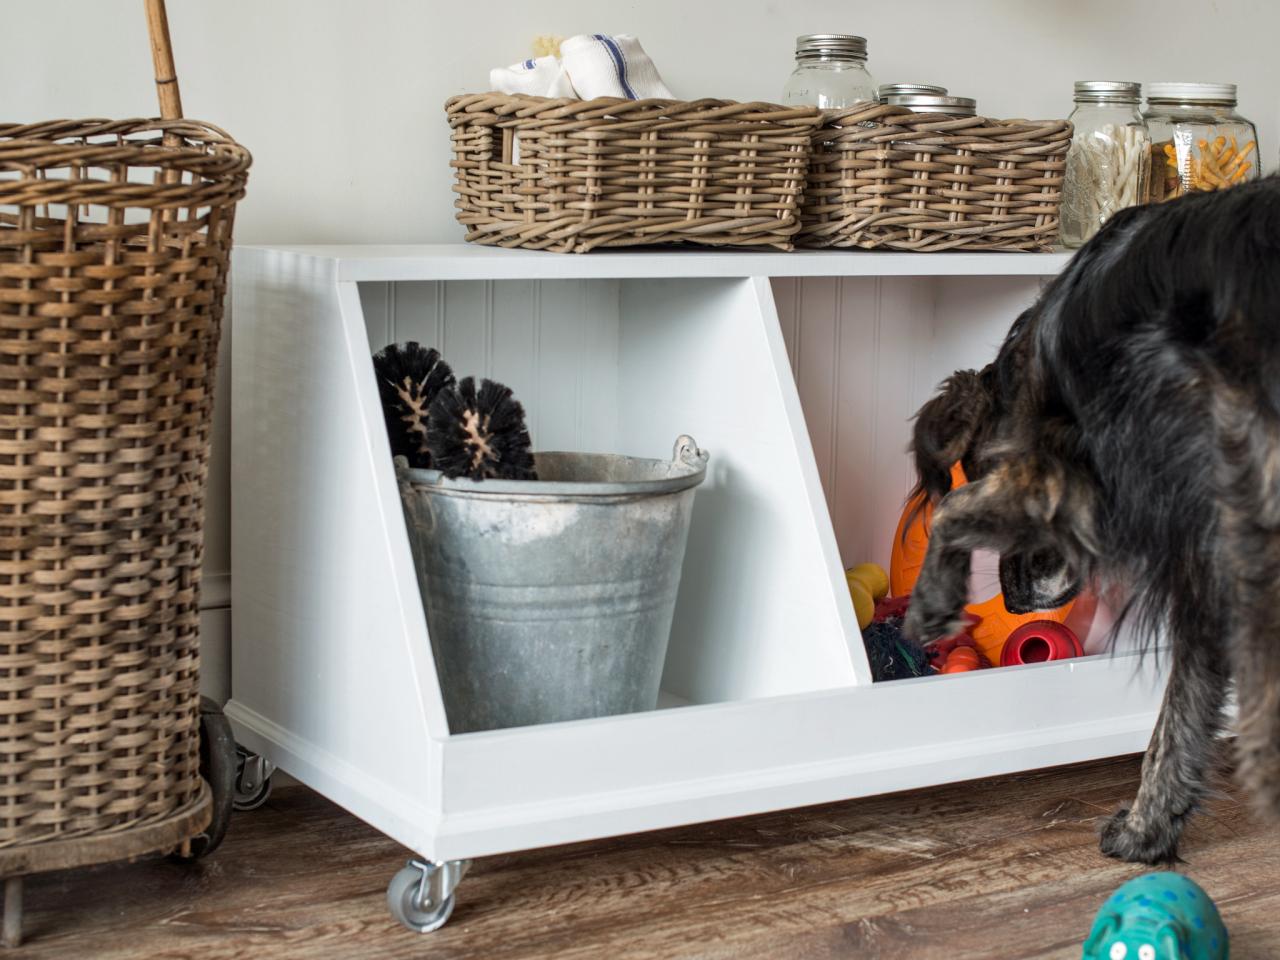
Prime and Paint
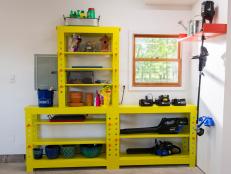
Apply primer with a 4” foam roller (Image 1), cutting in with a 2” angled sash brush. Allow primer to dry. In same manner, apply one to two coats of latex trim paint in desired color and finish. Allow paint to dry prior to use. Tip: It takes most paints and finishes 30 days to completely cure. The piece may be used during this cure time, but be gentle with it to keep the new finish intact. Place your completed cubby in the family room and fill with kids' or pet's toys (Image 2). This open cubby is also an excellent place to store shoes or outdoor gear in a mudroom or closet.
Marian Parsons, Mustard Seed Interiors

Marian Parsons, Mustard Seed Interiors
Marian Parsons, Mustard Seed Interiors
Build-It-Yourself Pet/Toy/Shoe Storage: Step 8: Prime & Paint
Apply primer with a 4” foam roller, cutting in with a 2” angled sash brush. Allow primer to dry. In same manner, apply one to two coats of latex trim paint in desired color and finish. Allow paint to dry prior to use. Tip: It takes most paints and finishes 30 days to completely cure. The piece may be used during this cure time, but be gentle with it to keep the new finish intact.
Photo By: Marian Parsons, Mustard Seed Interiors
Build-It-Yourself Pet/Toy/Shoe Storage
Good storage pieces are a must when trying to create a beautiful, functional home. This rolling “cubby” unit was designed to be a multi-functional family storage piece for several stages of life. It’s great for pet toys and gear, kid/baby storage for toys and books, and even in a mudroom or closet for shoes.
Photo By: Marian Parsons, Mustard Seed Interiors


