How to Make a Vintage Book Planter

Turn an old book into a one-of-a-kind planter with our easy how-to instructions.
How to Make a Vintage Book Planter

Vintage Book Planter

Book crafts aren't for your rare or treasured tomes, but there are plenty of ways to repurpose damaged or unwanted volumes. Turn a book into an unexpected planter by cutting open the inside of an old book and adding a small succulent.

Materials Needed:

  • 1 leather bound book
  • white glue
  • 1 small succulent
  • ruler
  • pen
  • X-Acto knife
  • 1 quart-size zip-top bag
  • scissors

Glue Book Pages Together

Glue the pages of your book together by squiggling glue along the sides and gently pressing it into the pages with your fingers. Make sure not to glue the pages to the cover. Let dry completely, about 20 minutes.

Gluing pages of a book together to make a vintage planter.

Gluing Book Pages Together to Make a Vintage Book Planter

Step 1 in creating a vintage book planter is to glue the pages of your chosen book together by squiggling glue along the book's page side and gently pressing the glue into the pages with your fingers. Make sure not to glue the pages to the cover. Let dry completely for about 20 minutes.

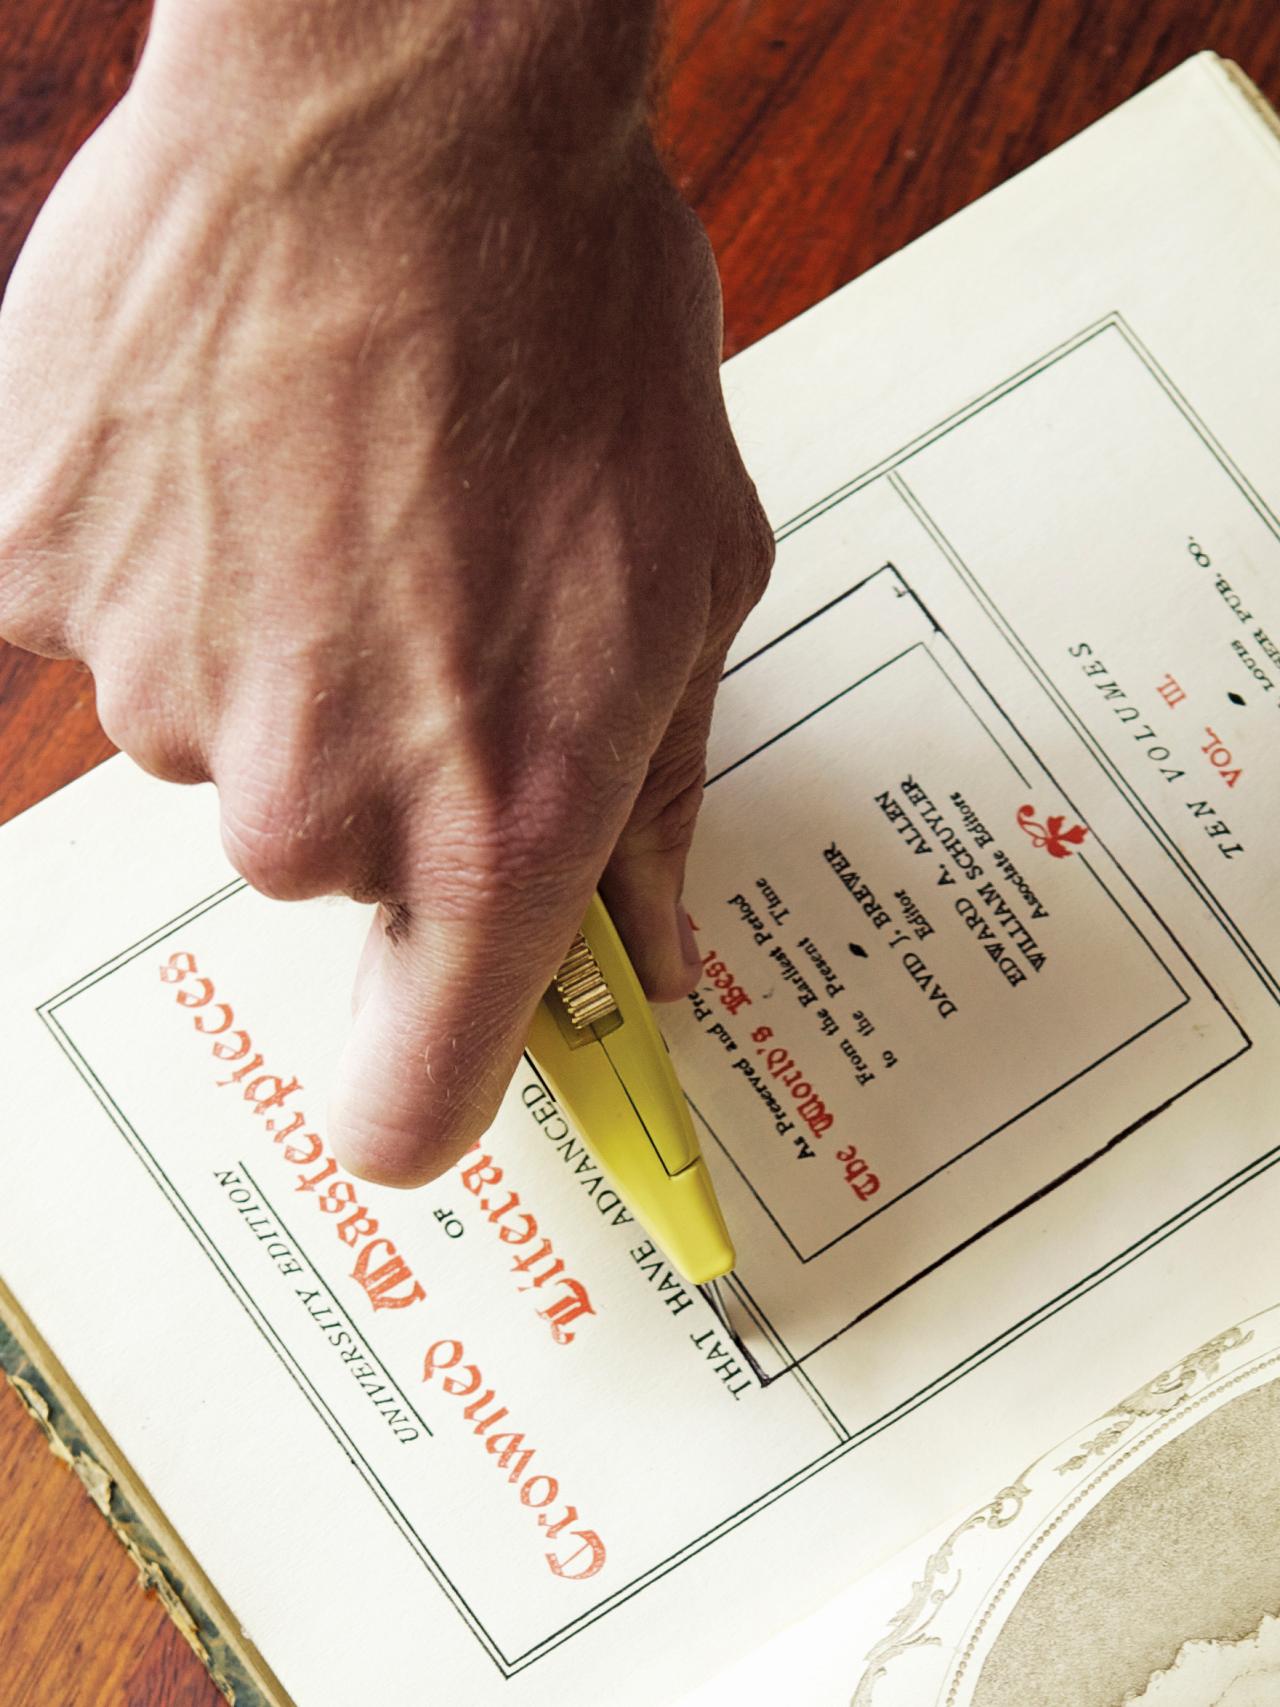
Measure and Mark Square for Succulent

Determine how wide of a space to cut for your succulent; you want at least 2 inches around the circumference of the roots to promote growth. Measure and trace the area you need to cut on the top page of your book.

Measuring for a cut in the pages to make a vintage book planter.

Measuring and Marking Square for a Vintage Book Planter

Step 2 in making a vintage book planter is to determine how wide of a space to cut for your succulent. At least two inches around the circumference of the roots are needed to promote growth. Measure and trace an area on a page of the book where you can begin to make your first cut.

Cut Book With Craft Knife

Using your X-Acto knife, carefully cut into the box you just drew. You will only be able to cut about 30 pages at a time, so you'll need to repeat this step until you've created a hole deep enough for your succulent.

Cutting a box into pages of a book to make a vintage planter.

Cutting a Book to Make a Box for a Vintage Planter

Step 3 in creating a vintage book planter is to cut a box into the book, using a craft knife. Using an X-Acto knife, carefully cut into the box you just drew on the page of the book. You will only be able to cut about 30 pages at a time, so you will repeat this step until you have created a hole deep enough for your succulent plant.

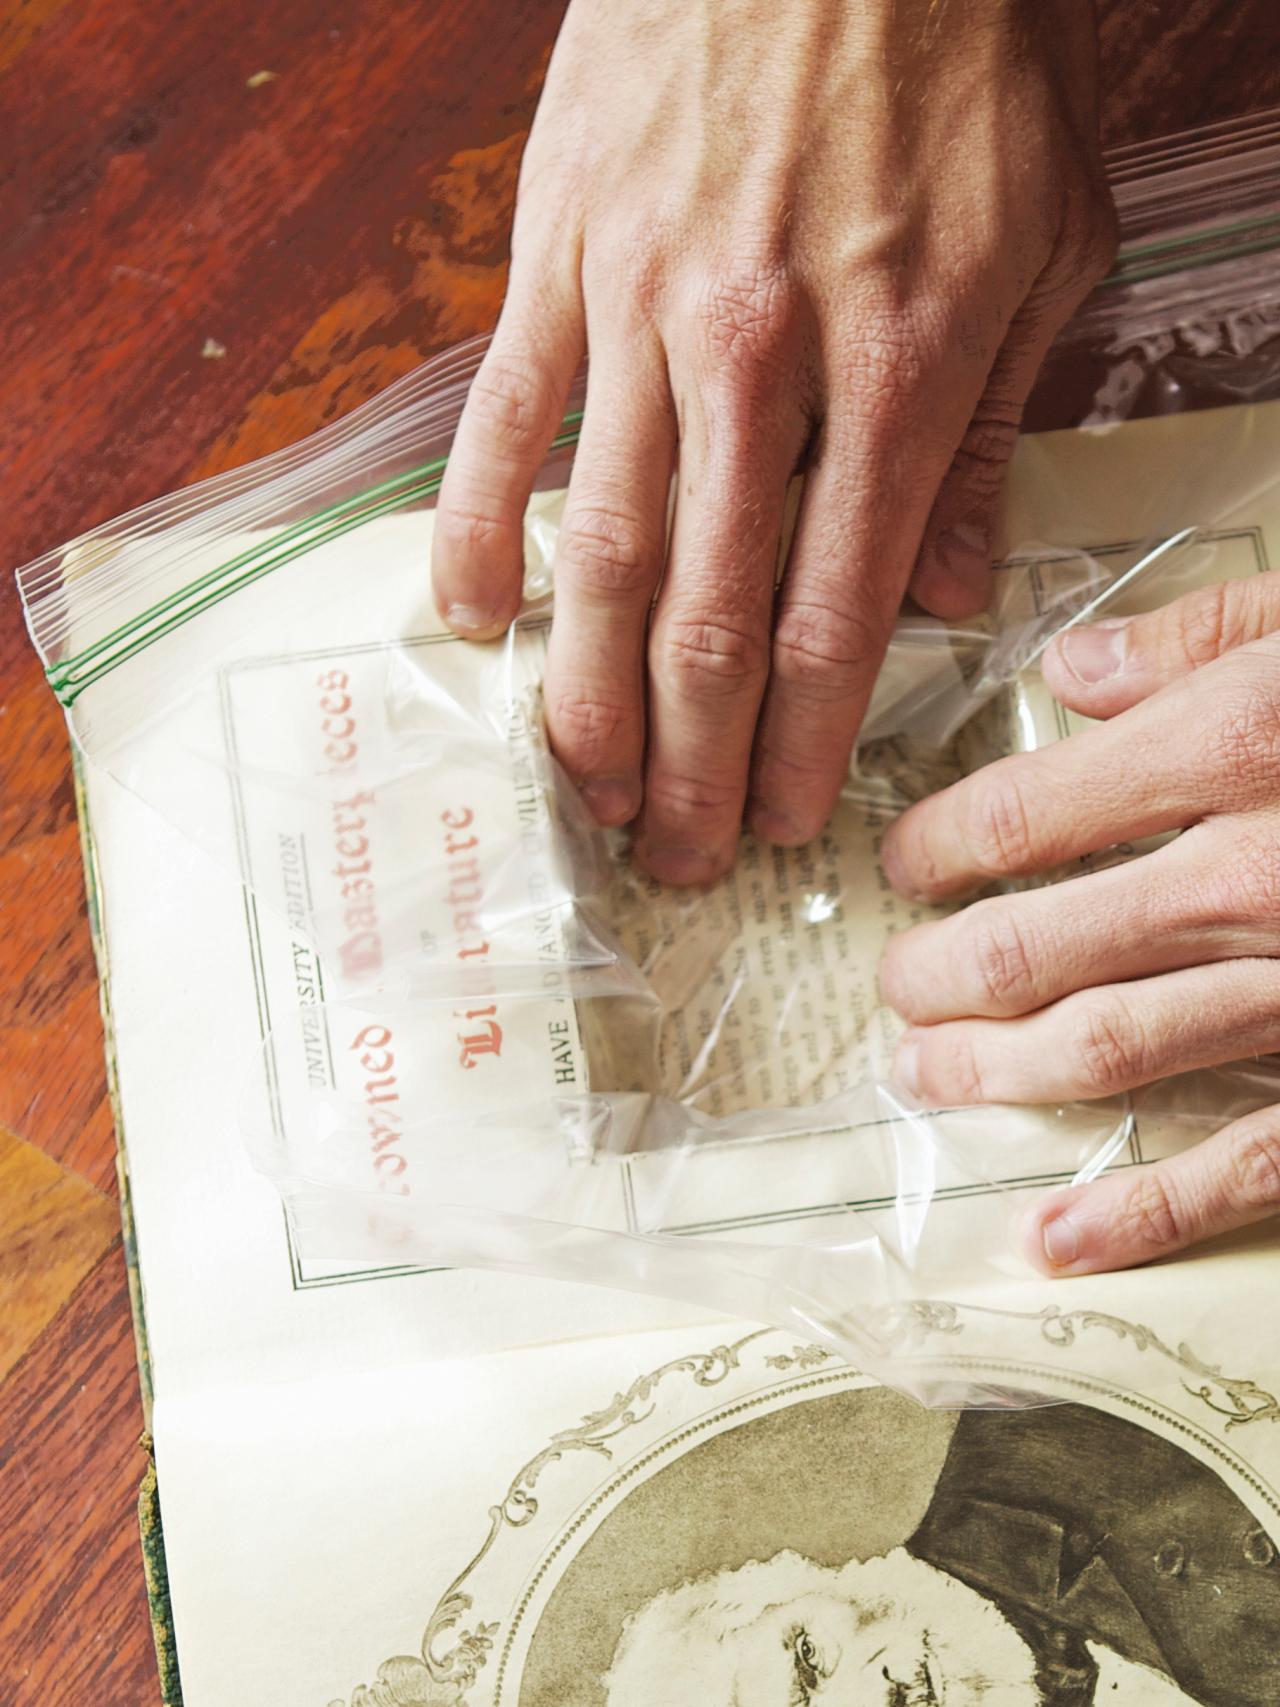
Line the Box With Plastic

Line the box you just cut with your plastic zip-top bag, making sure the bottom and sides are covered.
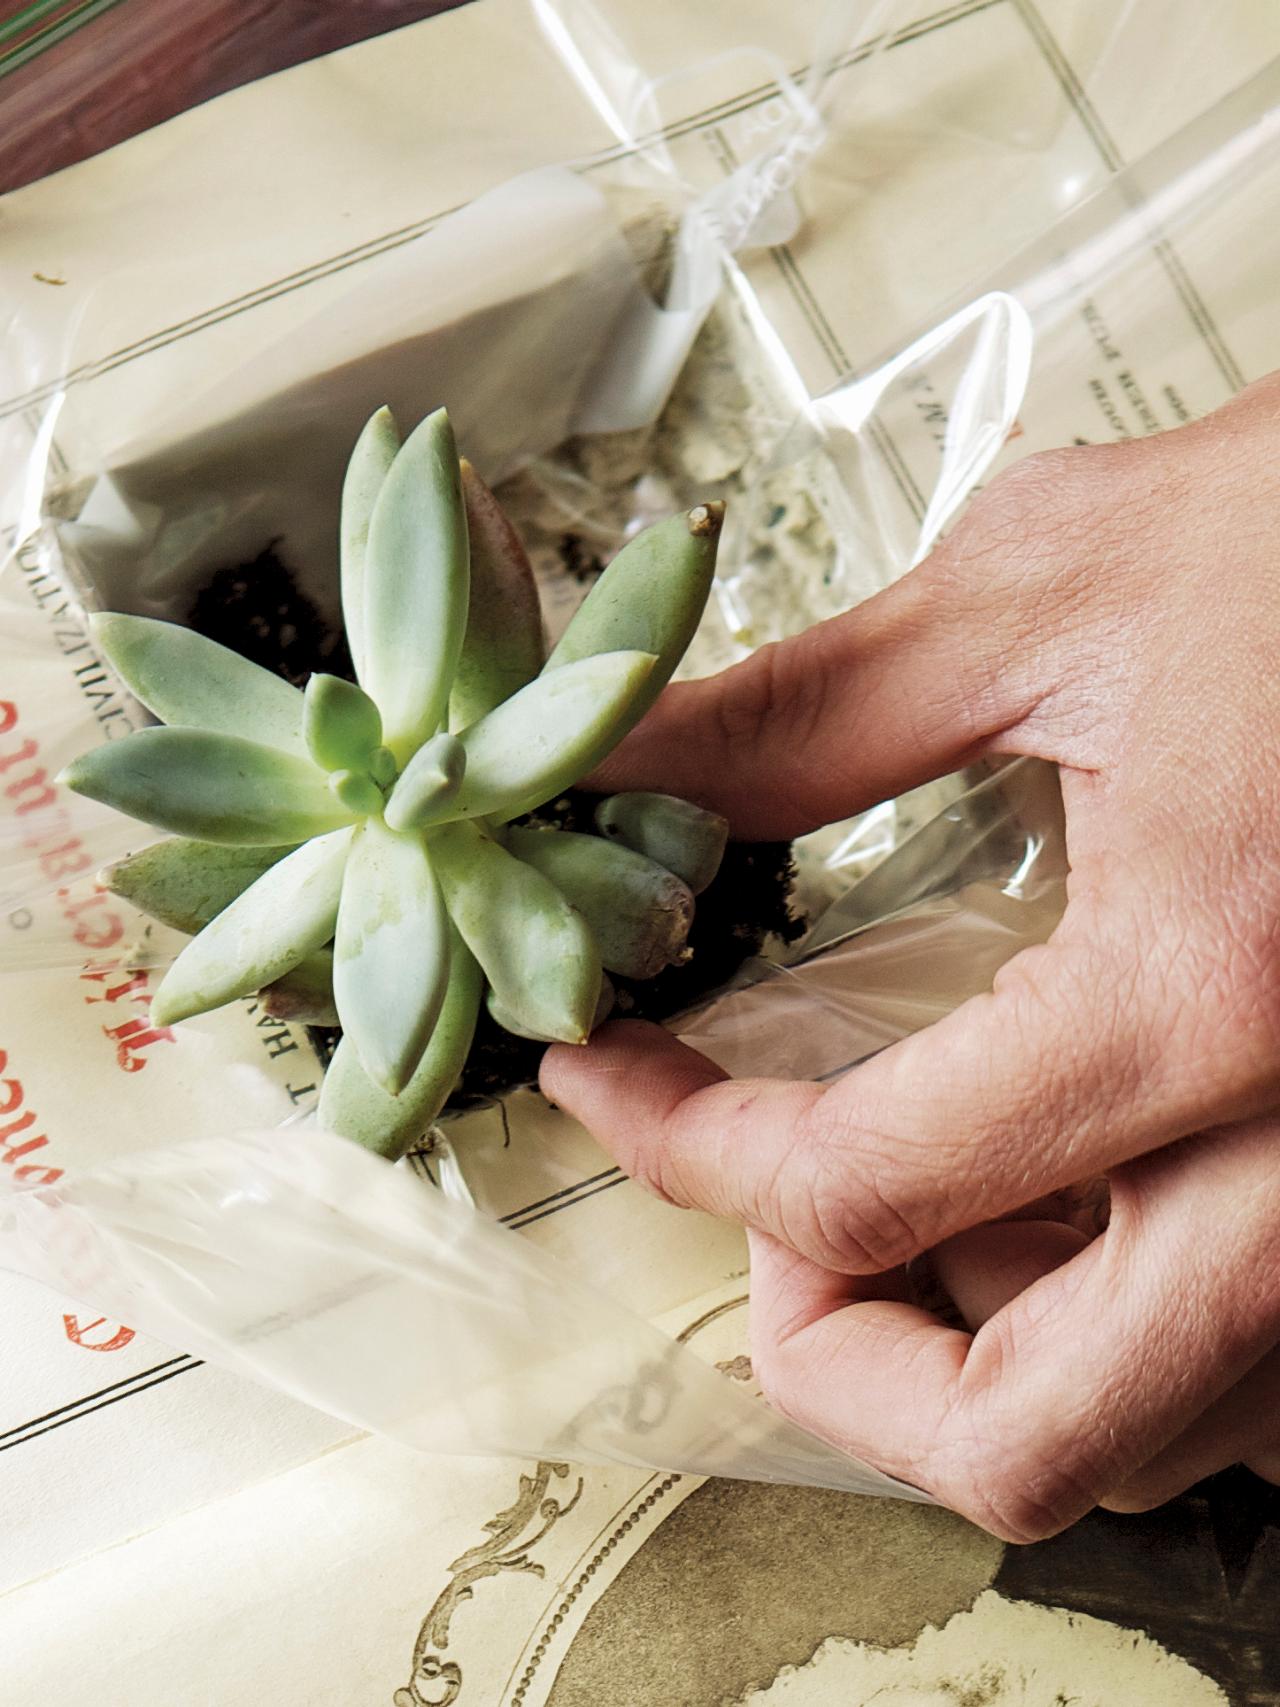
Lining a book's cut-out box with plastic to make a planter.

Lining a Cut-Out Box With Plastic to Make a Vintage Book Planter

Step 4 in creating a vintage book planter is to line the box with a plastic zip-top plastic bag, once you have cut out in the box with your craft knife. Make sure you the plastic bag covers the sides and bottom of the cut-out box.

Add Succulent

Arrange your succulent on top of the zip-top bag. Be sure to transfer enough soil from the original planter, along with the plant itself.

Inserting the succulent plant into a vintage book planter.

Adding a Succulent to a DIY Vintage Book Planter

Arrange your succulent on top of the zip-top bag that lines the book. Be sure to transfer enough soil from the original planter, along with the plant itself into its new container.

Trim Plastic Lining

Using your scissors, trim the excess plastic bag around the edge of your succulent, leaving just enough of a plastic liner to keep water from running into the pages of the book when you water it.

Trimming a plastic bag with scissors to make a DIY book planter.

Trimming Plastic Liner to Fit a Vintage Book Planter

Step 6 in making a vintage book planter is to trim the plastic liner that will hold the succulent plant. Using a scissors, trim the excess plastic bag material around the edge of the succulent, leaving just enough of a plastic liner to keep water from running into the pages of the book when you water it.

Next Up

How to Design a Container Garden

Follow this simple design concept and boost the impact of your container gardens with plants of various sizes, textures and color combinations.

Make a Mini Blooming Garden Table to Showcase Your Favorite Succulents

Indoor garden tables are trending big time right now, but if you don’t have the space for one, you can make a tabletop version in just a few easy steps. Waterproof a display case for the base and fill it with your favorite plants. You’ll be surprised just how charming a mini blooming table can be.

How to Hang Plants from the Ceiling

Learn the correct steps to securely and safely hang plants from the ceiling.

How to Grow Hydrangeas in Pots

Learn how to grow these ever-popular flowering shrubs in containers for mobile garden color.

How to Grow Cucumbers in a Pot

Growing cool, crunchy cucumbers in a container is easy if you know the steps. These basics will make them a success.

Make Clay Pinch Pot Hanging Planters to Display Your Fave Succulents

Learn how to make clay pinch pot hanging planters, perfect for mini succulents, with just a few materials and this easy, step-by-step tutorial.

Make a Planter Box With Nail Head Trim

Create stylish planters, complete with bolt head trim, to flank and define your front door.

How to Plant and Grow Marigold Flowers

Easy-to-grow marigolds add bright yellow, gold, orange and creamy-white color to gardens and containers from spring into fall.

How to Grow and Care for Orchids

Find out how to care for orchids with these tips, including how to water orchids and how to rebloom a sleeping orchid, from HGTV gardening experts.

How to Plant and Grow Chinese Evergreen

Caring for Chinese evergreens is easy, and these pretty houseplants brighten rooms with low light, or even no natural light, with their leaves of pink, green, creamy white and red.

Go Shopping

Get product recommendations from HGTV editors, plus can’t-miss sales and deals.

On TV

Follow Us Everywhere

Join the party! Don't miss HGTV in your favorite social media feeds.