


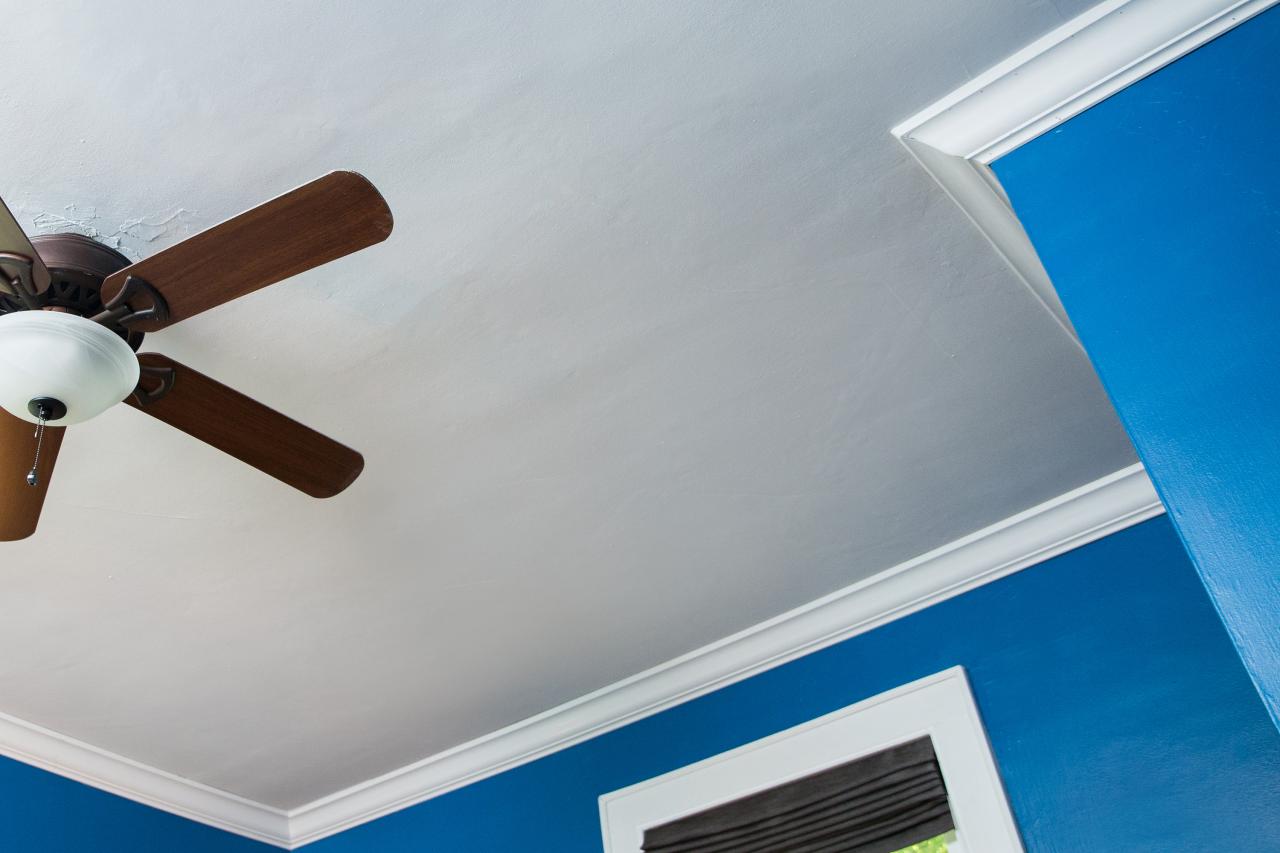
How to Install Crown Molding
Crown molding is an inexpensive and easy way to add visual interest and value to your home. With just a few tools and basic carpentry knowledge, you can achieve a stylish upgrade within any space.

Jalynn Baker
Supplies Needed
- crown molding
- nail gun
- nails
- paintable caulk
- caulk gun
- ladder
- miter saw
- tape measure
- safety glasses
- pencil
To begin, let's go over the basics of crown molding cuts. There are three types — the inside corner, outside corner and the scarf, or overlapping, joint.
For an inside corner cut, the bottom edge will be long and the top edge will be short. On the left side of an inside corner, the cut will angle up to the left. On the right side of an inside corner, the cut will angle up to the right.
Jalynn Baker
Jalynn Baker
For an outside corner cut, the bottom edge is short and the top edge will be long. On the right side of an outside corner, the cut will angle up to the left. On the left side, the cut will angle up and to the right.
Jalynn Baker

Jalynn Baker
A scarf joint is used to hide where two pieces of molding meet on a long wall. On both the right and left side of a straight joint, the cut will angle in the same direction.

Jalynn Baker
Jalynn Baker
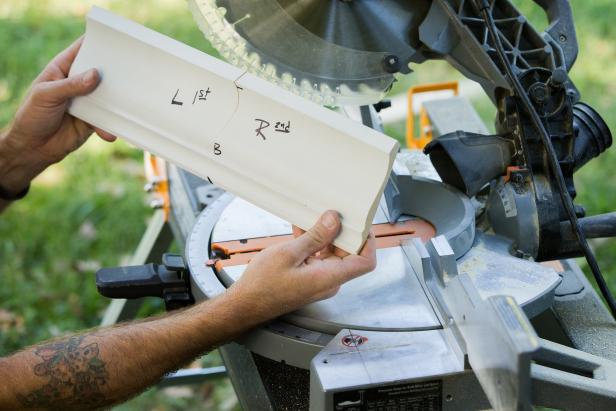
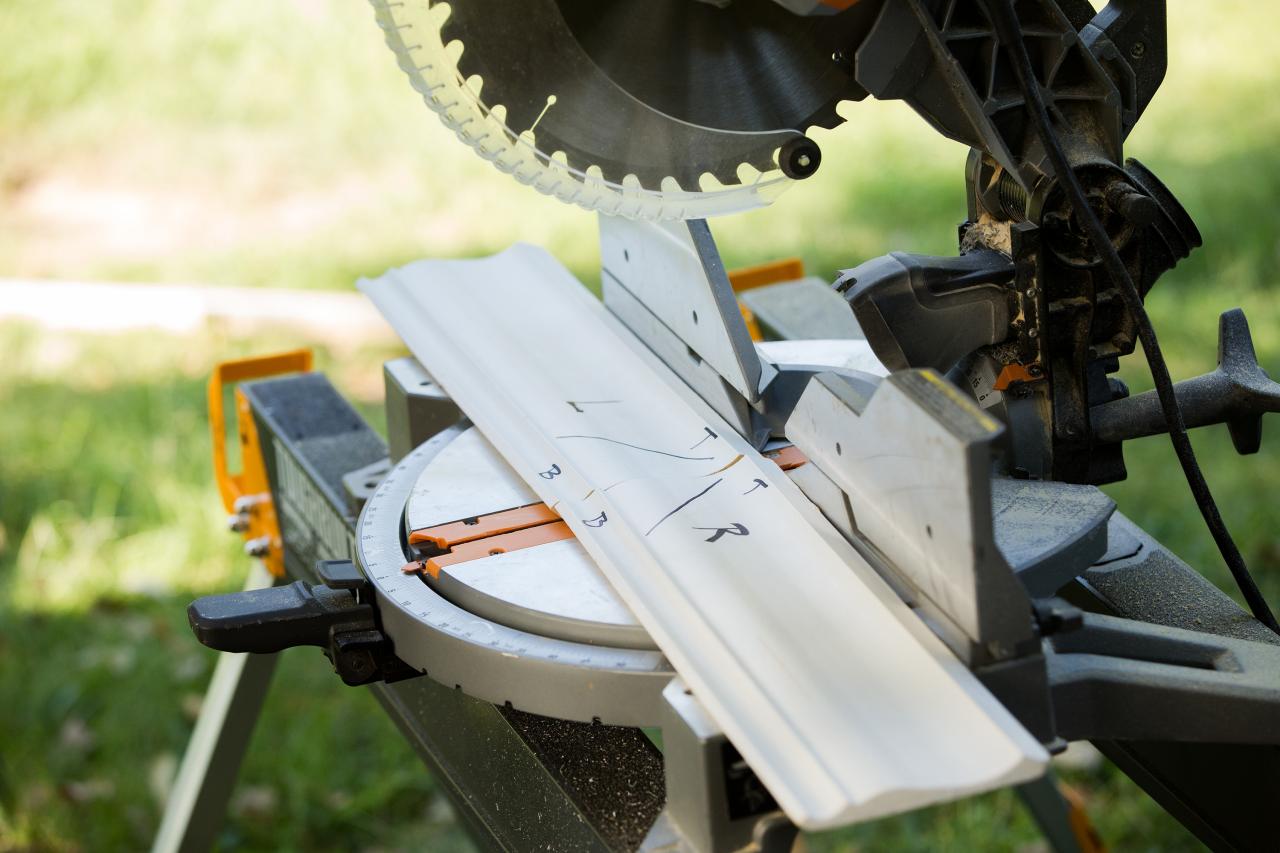
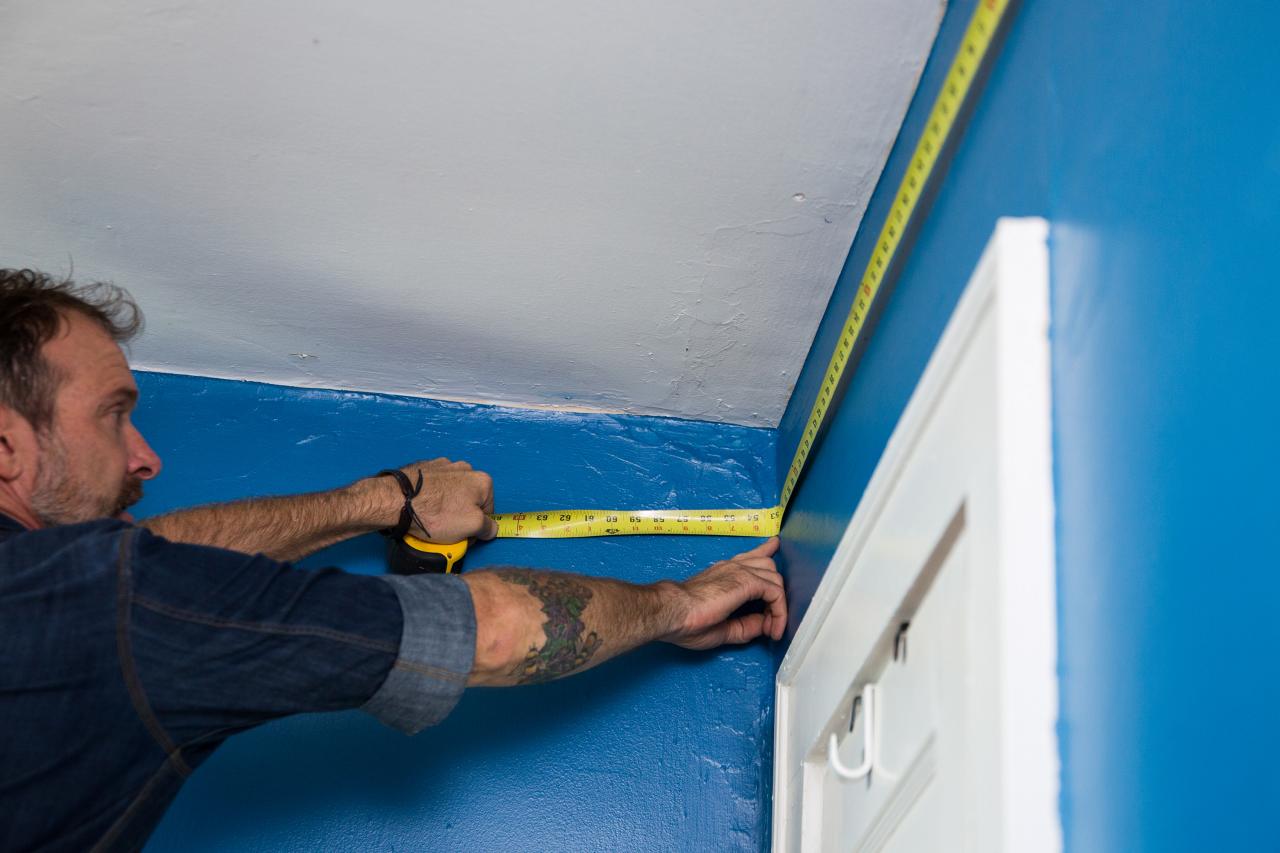
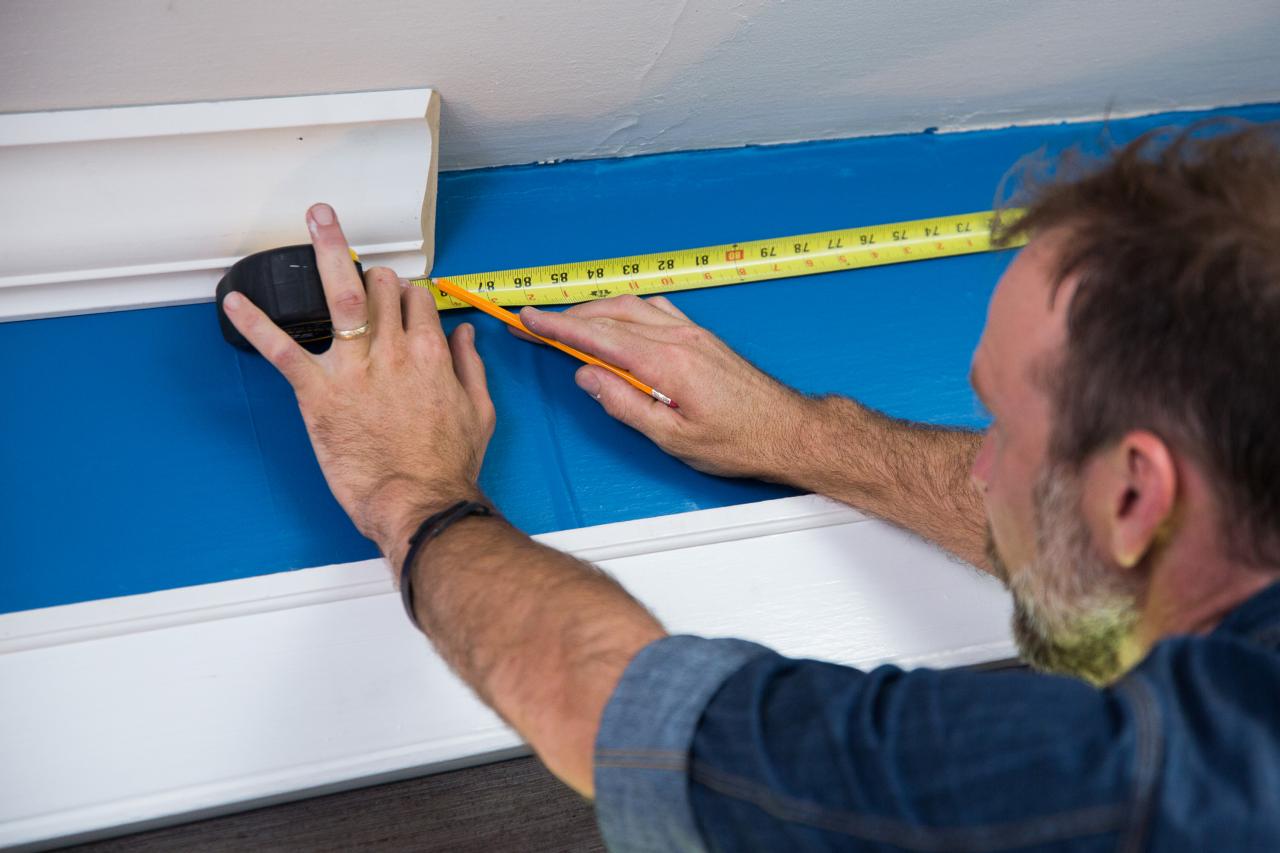
Measure & Mark
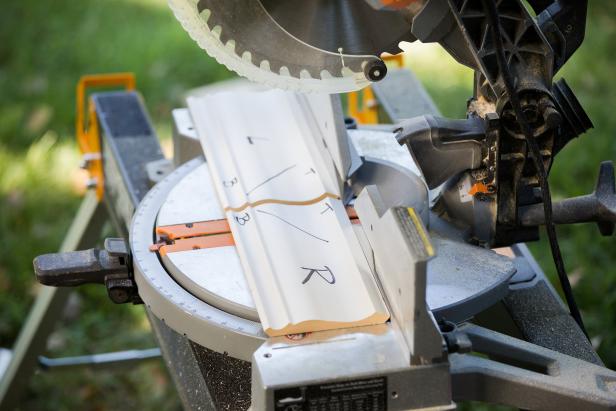
For every cut, measure the wall where the bottom of the crown molding will sit (Image 1). Measure corner to corner. Mark the wall measurement on the bottom of the crown molding (Image 2). Draw a small line just past your measurement indicating the direction and angle of the cut.

Jalynn Baker

Jalynn Baker
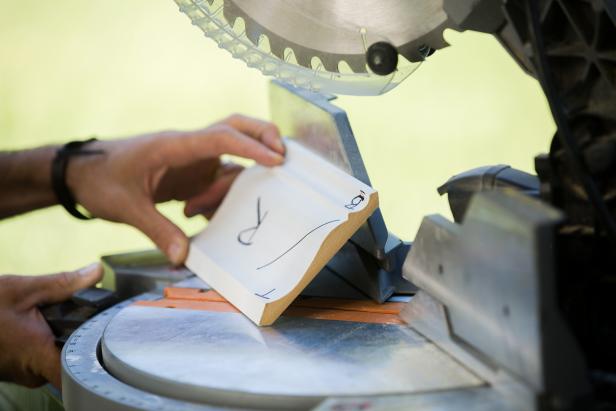
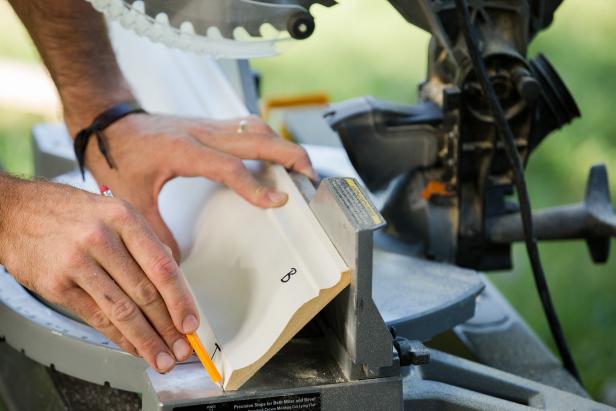
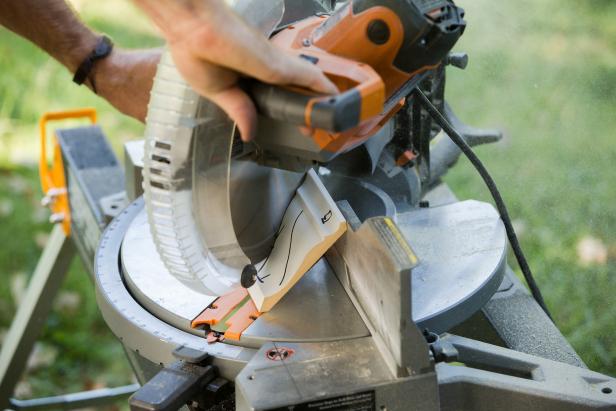
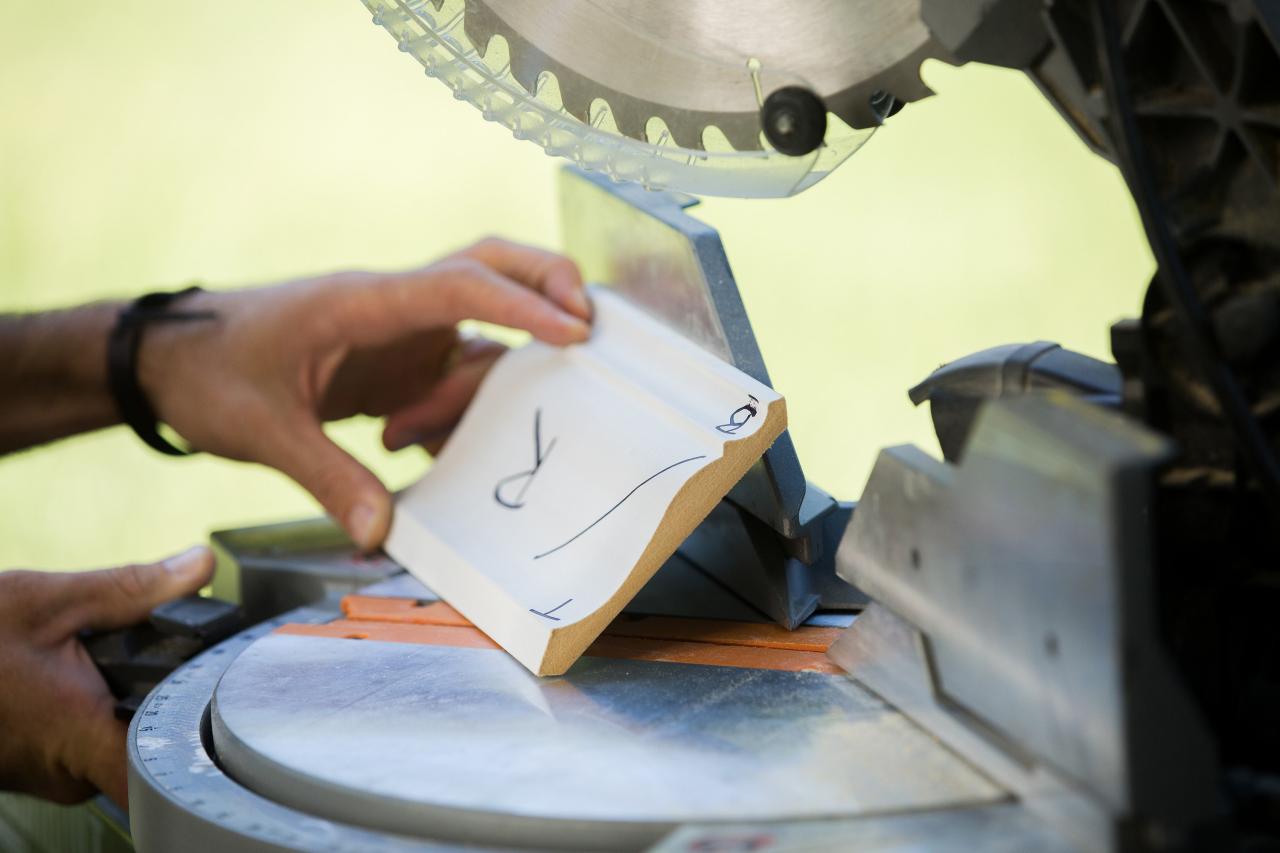
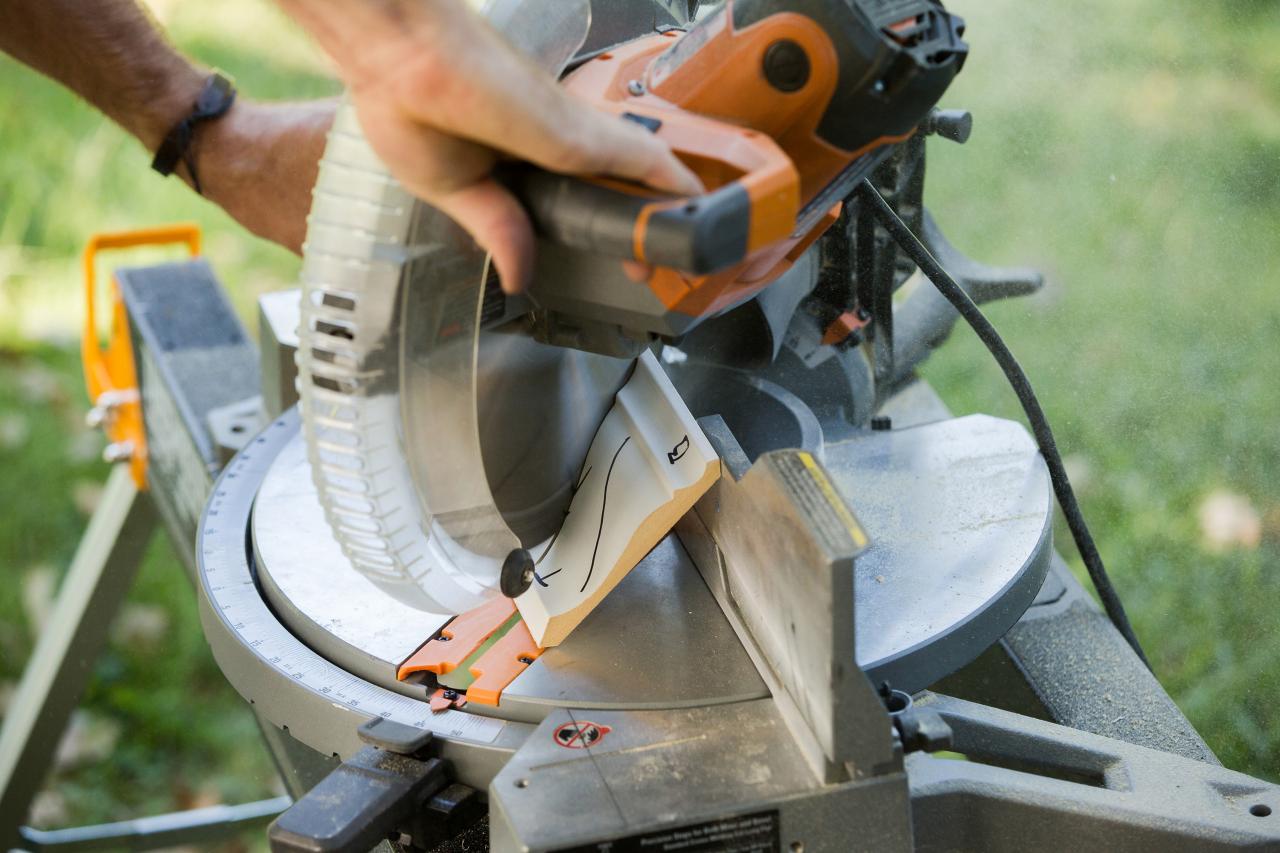
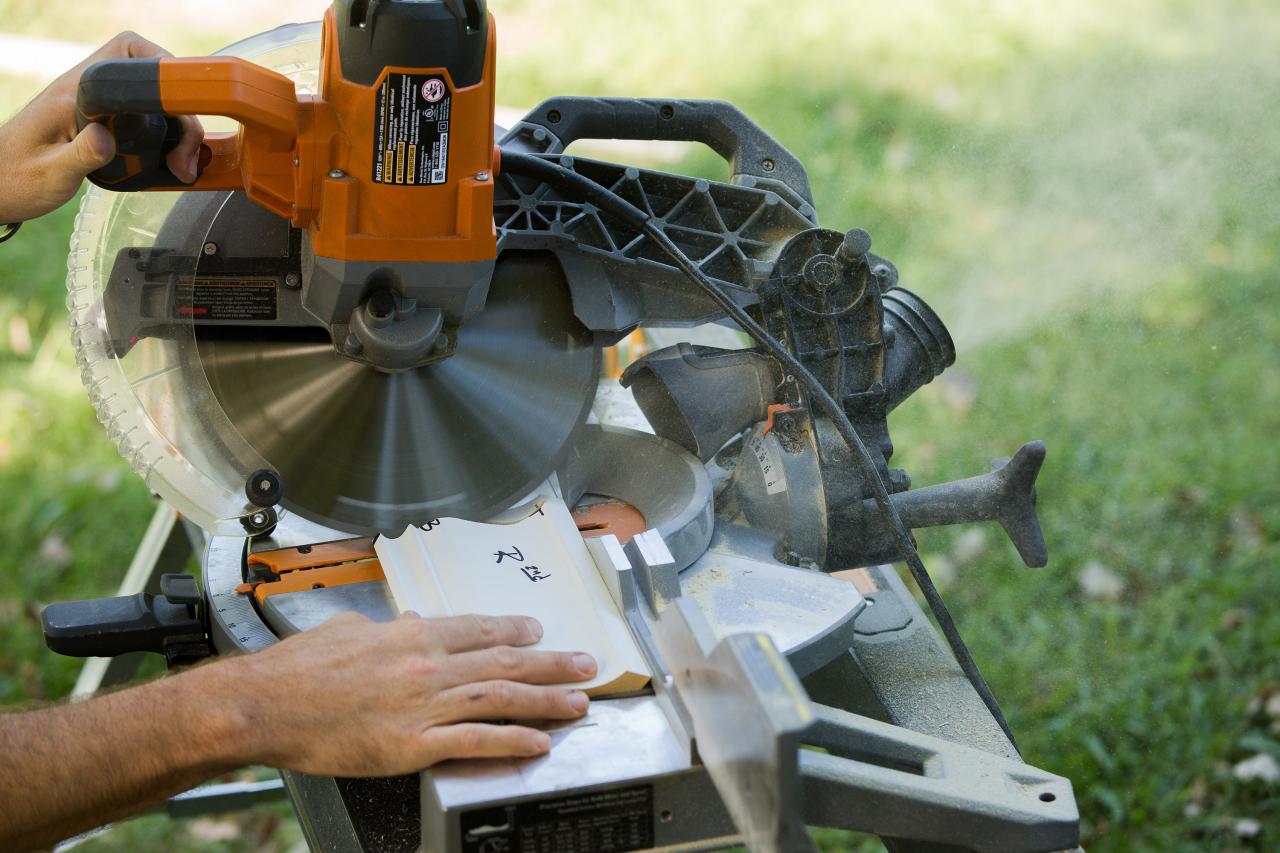
Cut the Molding
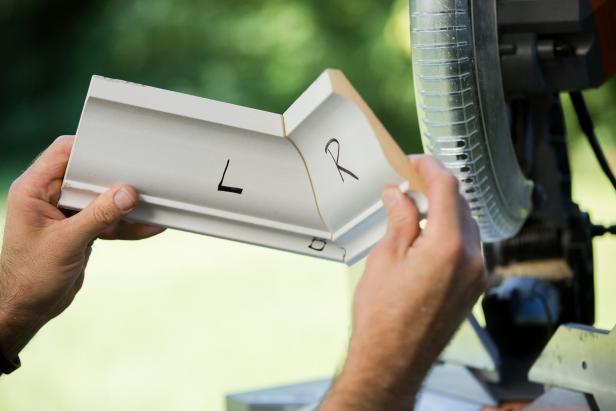
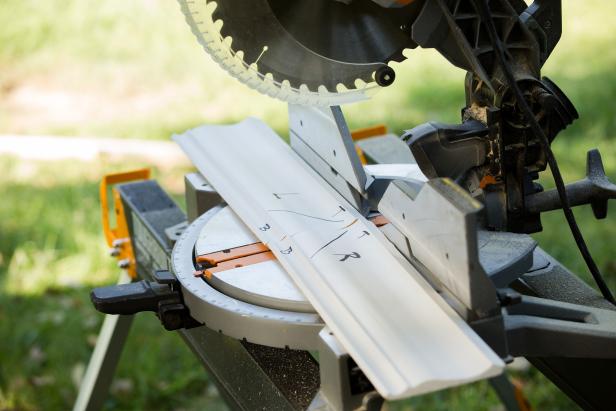
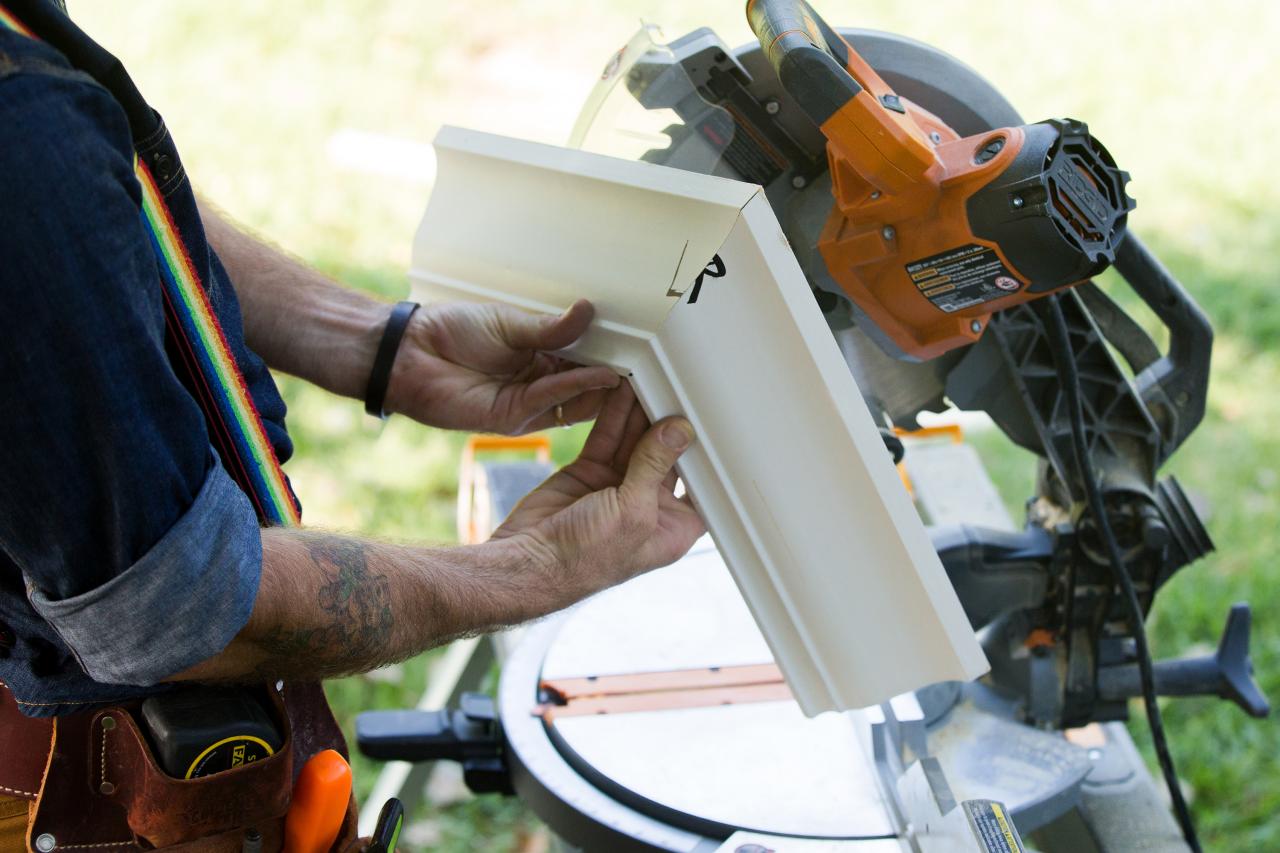
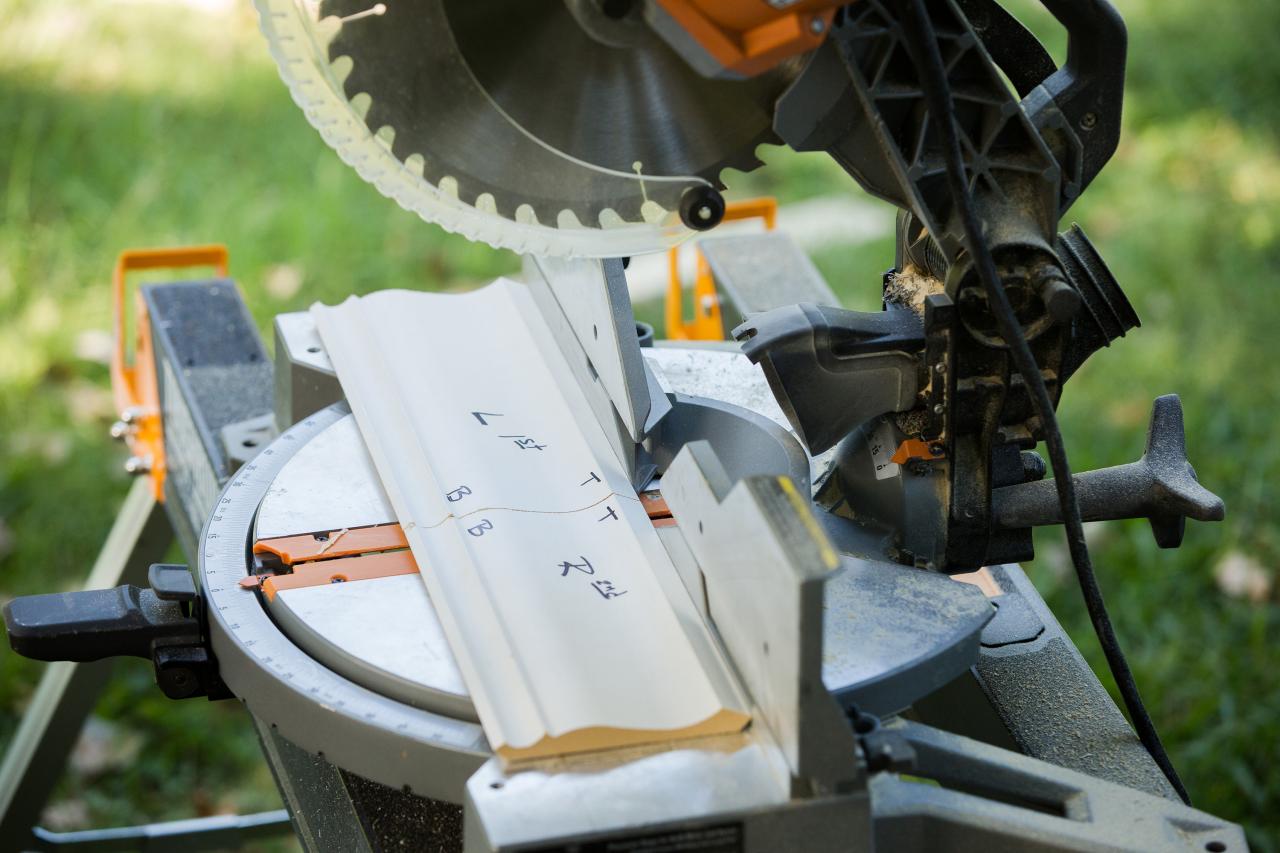
The number one trick to cutting inside and outside corner crown molding is to cut each piece upside down with the ceiling side on the bottom and the wall side on the top (Image 1). The second trick is to set the molding against the saw and mark a line on the table with a pencil (Image 2). This visual reference will make sure the cuts are consistent from board to board. Swivel the saw to a 45-degree angle to match the direction of the molding, set the board against the saw at the mark and make the cut (Image 3).
Jalynn Baker
Jalynn Baker
Jalynn Baker
For scarf joints, do not turn the boards upside down. They will lay flat on the saw. The swiveling part of the saw table stays centered during this cut. Instead, tilt the saw blade to a 45-degree angle and make the cut. The boards should then fit perfectly together.

Jalynn Baker
Nail in Place
To install the pieces of molding, simply nail them in place on the wall with a nail gun. For scarf joints, fit them as tightly together as possible before nailing in place.

Jalynn Baker
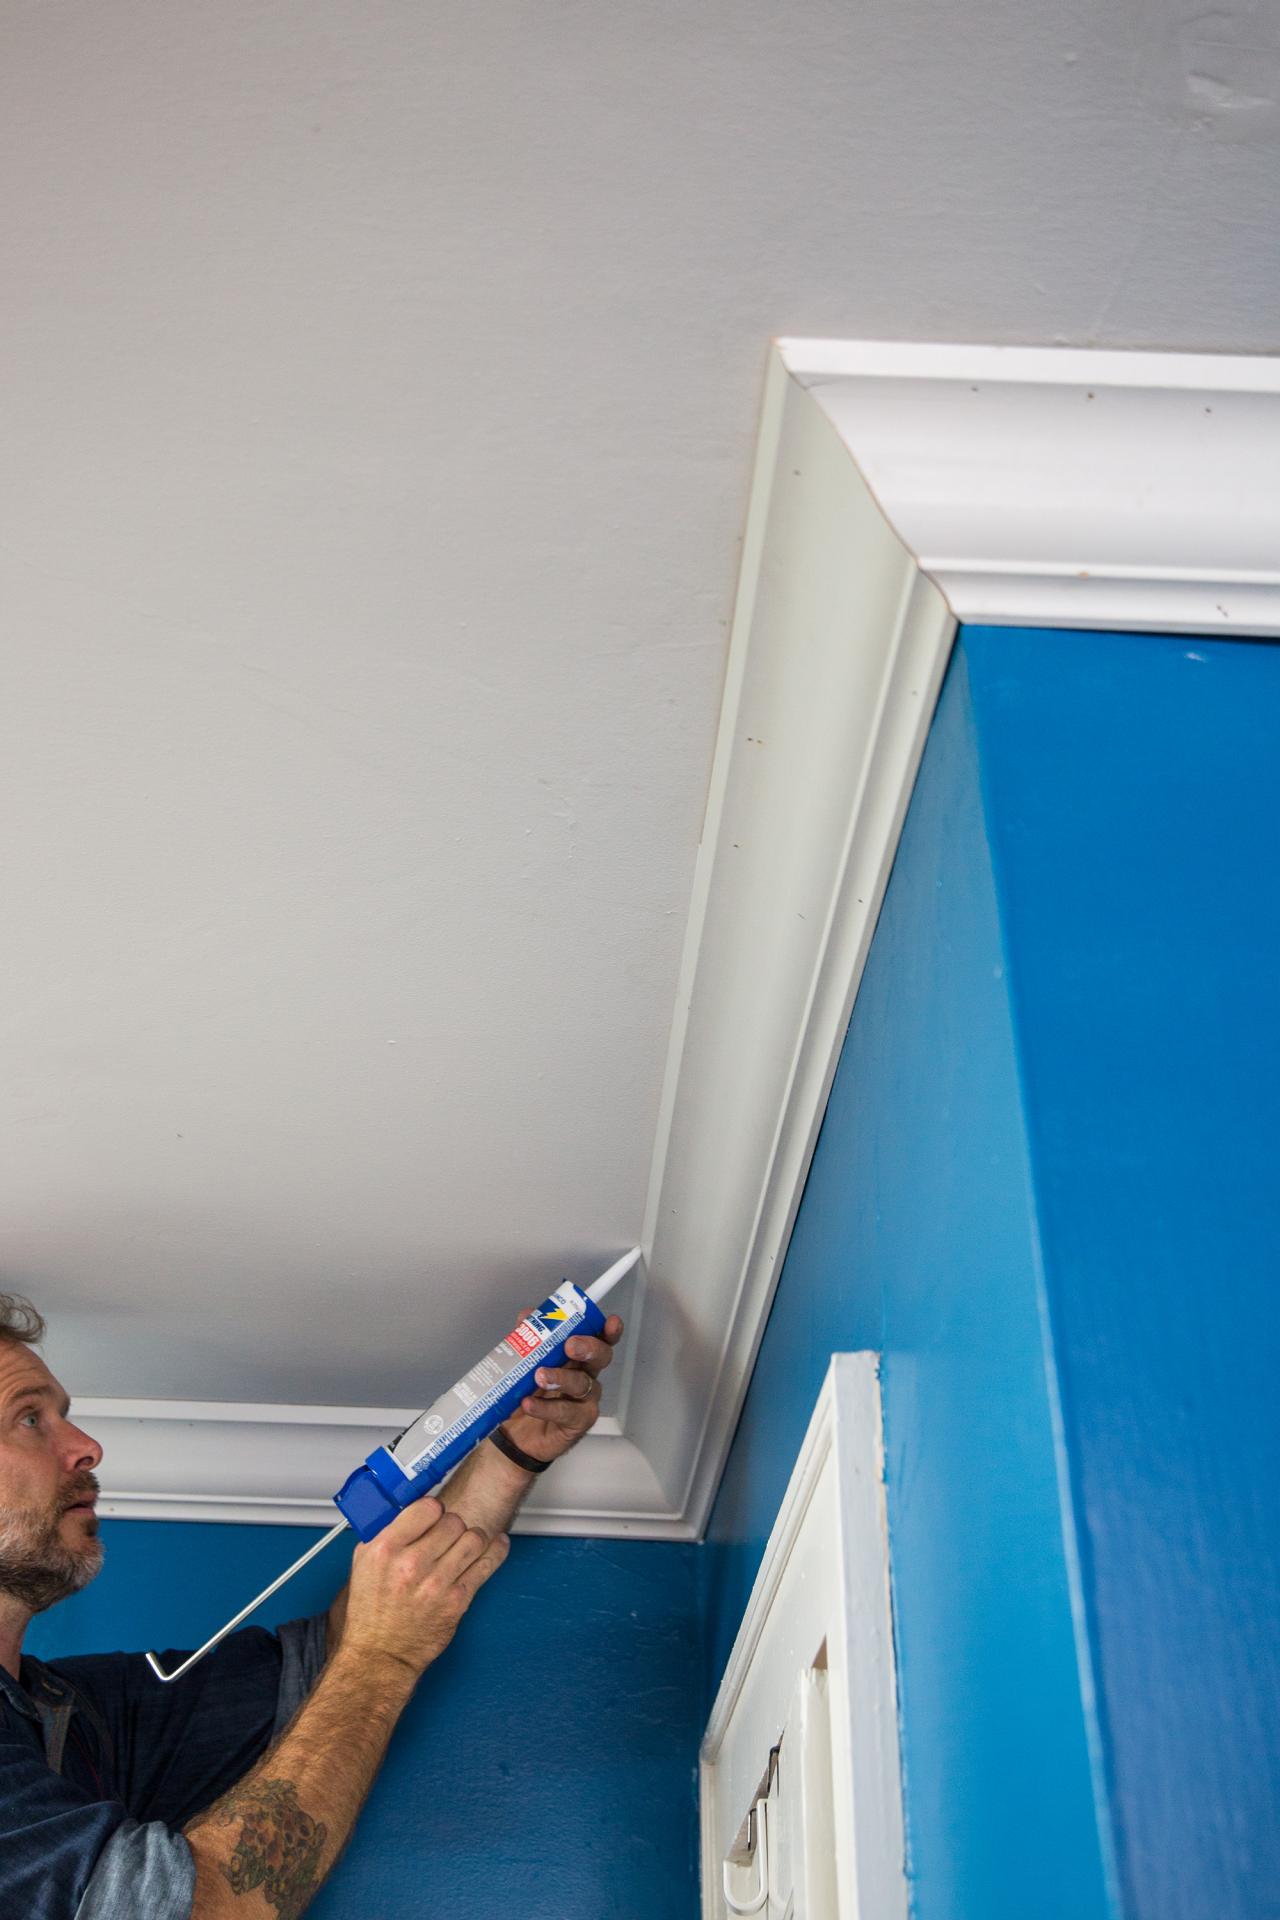
Caulk
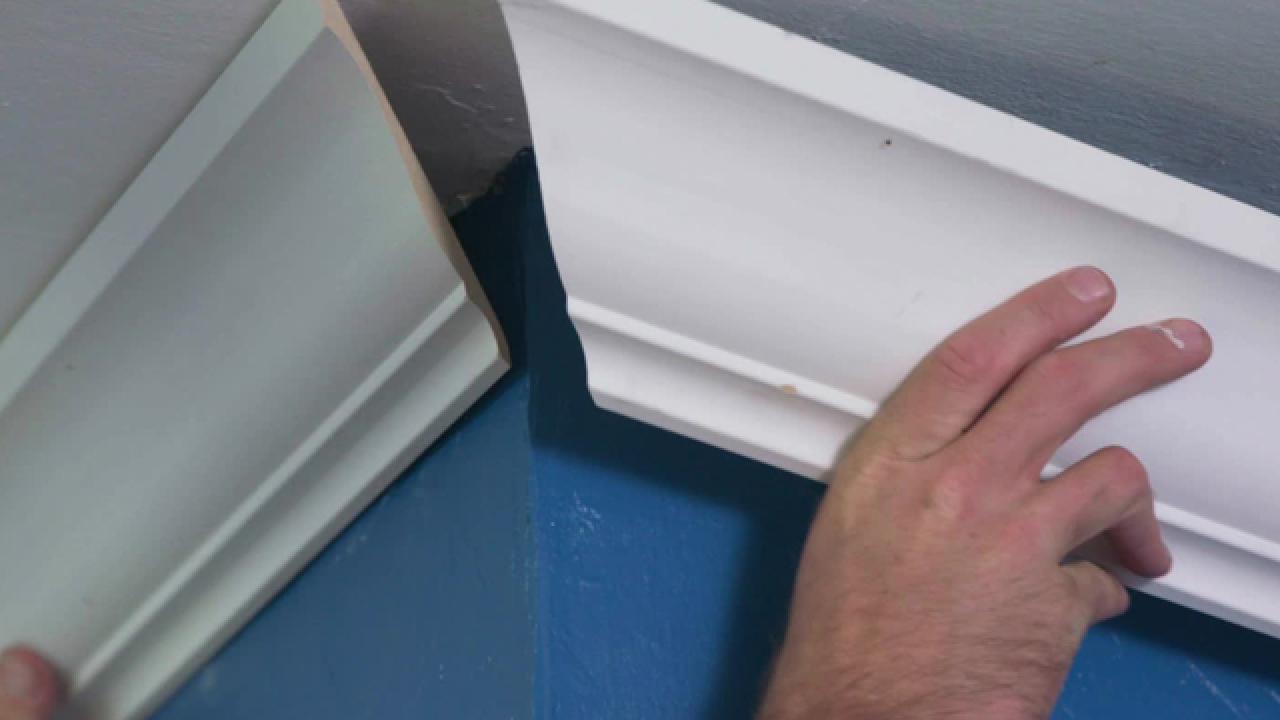
If the corners don’t meet perfectly together, use paintable caulk to fill any gaps or space between the molding boards or where the molding meets the ceiling. Fill the gap with a small bead of caulk and wipe smooth with a damp rag. Repeat the same process with visible nail holes as well. On the outside corners, it is extremely important to get a snug fit because caulk won’t help you much here.

Jalynn Baker


