


Make Your Own Floorcloth
Learn how to "decorate" your floor by adding a floorcloth.

So how do you go about "decorating" the kitchen floor? The addition of a floor cloth is a perfect way to transform ordinary flooring into art.
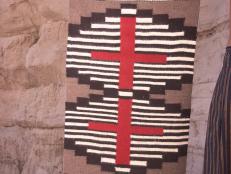
Floor cloths originated in France in the 1400s and were introduced to the American colonies in the early 1700s. Originally made from recycled ships' sails, they were used to cover dirt or wooden floors in early American homes. Patterns including diamonds, squares and cubes were hand painted or stenciled, frequently by the lady of the house.
These cloths became known as "crumb cloths" when used under tables, but their use was not limited to dining areas. Because of their bright colors and interesting patterns, floor cloths were used as art in parlors, bedrooms and hallways.
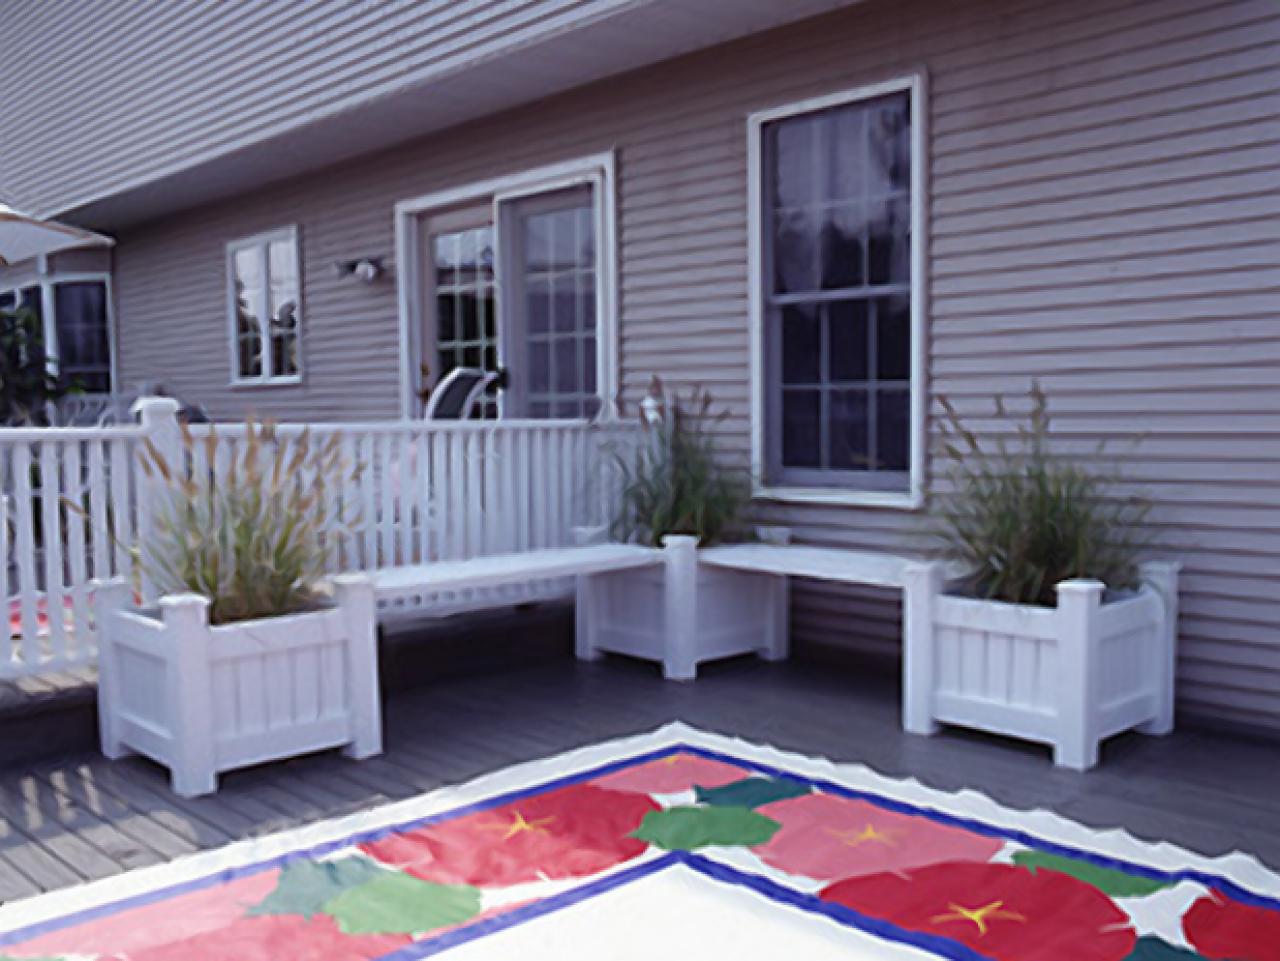
Floor cloths are a great addition to the modern kitchen. When used under tables, they are flat enough to allow kitchen chairs to slide over them. They are very durable, clean up easily and can be painted to complement any kitchen decor. They are inexpensive to make and relatively easy to design. No wonder they are popular!
If you'd like to try your hand at a floor cloth, here's what you'll need:
Materials and Tools:
pre-primed canvas floor cloth (available in various sizes at most craft stores)
flat exterior paint
synthetic bristle paint brush
lead pencil
yardstick
scissors
sewing machine with heavy-duty needle
white polyester thread
white glue
graphite paper
latex or acrylic paints
artist brushes (various sizes)
stencils or rubber stamps
nonyellowing latex polyurethane
Steps:
1. To begin this project, you must first prepare the canvas. Working from the center, brush a coat of flat exterior paint over the entire primed canvas. After the canvas is completely dry, you need to straighten the edges.
2. Use a yardstick and a pencil to mark the canvas 1/2 inch from the edge on all four sides. Cut along this line. Measure 1/2 inch from the edge on all four sides again.
3. Trim the corners. Fold the canvas on the line and stitch in place. To prevent the hem from fraying, run a bead of white glue along the cut edge of the fabric.
4. Paint a second coat of the background color.
5. Now the real fun starts. You need to pick your design. Look around your kitchen for inspiration. The motif we used came right from the kitchen border, but you might find design ideas in note cards, calendars or even dish towels.
6. Once you've decided on your design, pencil it onto your floor cloth. If the design is too difficult to draw, blow it up on a copy machine. Using graphite paper, transfer the design to your canvas.
Another method you might also consider involves taping your floor cloth to a wall and using an overhead projector to transfer the image. You can also use a stencil or rubber stamps to produce your design.
If you decide to stick with a traditional design of diamonds, squares or cubes, use blue painter's tape to define the edges. Press the edges of the tape so that no paint can leak under the tape and blur the line.
7. To avoid smearing the designs, begin painting in the center. It's best to paint one area at a time and let it dry before moving on to the next area. A handheld hair dryer can be use to speed up the drying process.
8. After you've finished your design and it is completely dry, use a damp sponge to remove any dust from the surface. To preserve the design, apply the polyurethane with a clean brush using long smooth strokes going from one side of the cloth to the other.
9. Apply two or three coats of the sealer for the best protection.
10. Let the sealer dry completely between coats. If desired, you may apply a final coat of paste wax using a soft cloth. When the wax dries, hand-buff the surface. To make your floor cloth slip-proof, you can apply a liquid rubber backing available at most craft stores. Floor clothes are a wonderful project for "artists" of all levels.
They can be designed to complement any kitchen style. They provide color and pattern to an area that is frequently overlooked in terms of decorating. They are so beautiful that it seems wrong to put them on the floor and walk on them, but we know you can do it.


