Air Sealing and Insulation for Maximum Efficiency
Techniques to tighten Jeff Wilson's home more than doubled the walls' energy efficiency rating.
Homeowner and carpenter Jeff Wilson hopes to save 50 percent to 90 percent on energy costs through his Deep Energy Retrofit (DER) project. To achieve this goal, Jeff must air seal his 70-year-old home and ensure the new garage/addition envelope is tight. He used two air sealing methods: one in retrofitting the original home and another involving new construction techniques for the garage/addition.
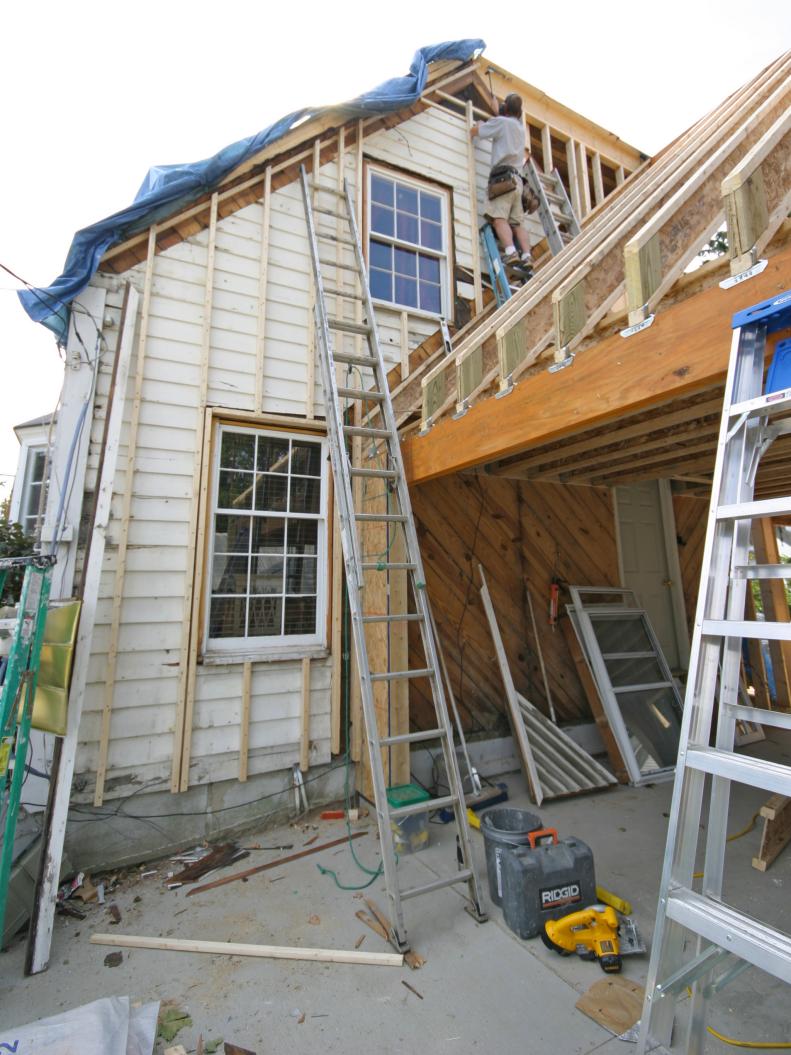
Using the original painted redwood siding as a foundation for new insulation, Jeff began creating a curtain wall by nailing 2x3 framing to the exterior.
Jeff and the crew worked on the original siding while building the new garage/addition. Here you can see 2x3 framing installed on the original siding and the frame of the addition, which will be insulated from the interior.
The original house was insulated from the exterior. About 2 1/2 inches of Foam-It Green spray foam insulation was applied between the 2x3s.
The spray foam will reinforce cellulose insulation that was blown into the walls of the original home five years ago. On top of the foam, sheathing was applied. This surface was covered with house wrap before SmartSide ready-to-paint engineered wood siding was installed.
Jeff and the crew demolished the old garage that was attached to the original home and built a new garage/addition, applying today's energy efficient best practices.
This photo shows the crew insulating the floor of the yet-to-be-built addition. It's a floating slab surface cradled with foam insulation four inches thick on the bottom and two inches thick on the sides. The slab doesn't touch concrete block or dirt; therefore it doesn't transfer heat or cold air into the space.
After the foundation and first floor are finished, rafters are put in for the addition's second level.
Framing goes in for the area above the new garage, which will serve as an office or apartment.
The new structure was seven feet wider than the old garage and had higher ceilings (13 feet) to accommodate a second level. Jeff had to raise the roof angle of the entire back of the house (both old and new). This also created a flatter surface to support solar panels.
This is the view of the back of the home as sheathing is applied to the new addition's exterior.
Jeff installs radiant sheathing on the rafters of his home and the addition. This prevents heat generated by sunlight hitting the roof from entering the structures.
The interior walls of the new garage/addition get Foam-It Green treatment. Because the wall cavities are deeper, Jeff has room to install three more inches of fiberglass batting to further insulate the wall.
Jeff's goal was to boost the R-value of the new garage/addition. Jeff double-insulated, using spray foam and batting, achieving R-27 — twice the efficiency of his original home's walls when they were only filled with cellulose.