These 12 Crafts Are Your Next DIY Decorating Projects
Whatever you're into, pick one of these cool crafts from HGTV Magazine, and start creating.

Related To:

Photo By: Alison Gootee
Glam: Gold Foil Pillow
Supplies: Washed 20" x 20" linen pillow cover in beige (H&M, $13); R-Foil gold foil heat transfer (Screen Printing, $28); Wilflex Epic HD clear and foil transfer adhesive (Screen Printing, $33)
Here's How:
- 1. Iron a pillow cover to remove any wrinkles. Place a piece of cardboard inside to create a hard surface.
- 2. Working on a quarter of the pillow at a time, brush foil transfer adhesive onto the fabric in a random pattern. We used a 3/4-inch-wide flat paintbrush.
- 3. Cut a piece of gold foil large enough to cover the section, and place it over the adhesive, shiny side up.
- 4. Put a sheet of parchment paper on top, and iron the section on medium heat for about 20 seconds. Let cool.
- 5. Pull back foil to reveal the design. Repeat for the remaining sections.
Glam: Leather-Wrapped Containers
Supplies: Glittrig metal containers (Ikea, $10); Leather 3" x 14" pieces in turquoise 345, yellow 346 and purple 347 (Etsy: Moxi Leather, $8 each); Suede cord 1/4"-wide in fuchsia, dark purple and turquoise (Leather Impact, $3 per yard)
Here's How:
- 1. Set the lids of the containers aside. Cut a piece of leather to fit around each container so the ends are flush.
- 2. Wrap the leather around the container and adhere with double-sided tape on the top, bottom, and ends.
- 3. Make monkey fist knots for the lids (we used suede cord). For a step-by-step guide, go to hgtv.com/monkey-fist-knot.
- 4. Glue the monkey fist knots to the lids with strong glue, such as Krazy Glue. Replace the lids.
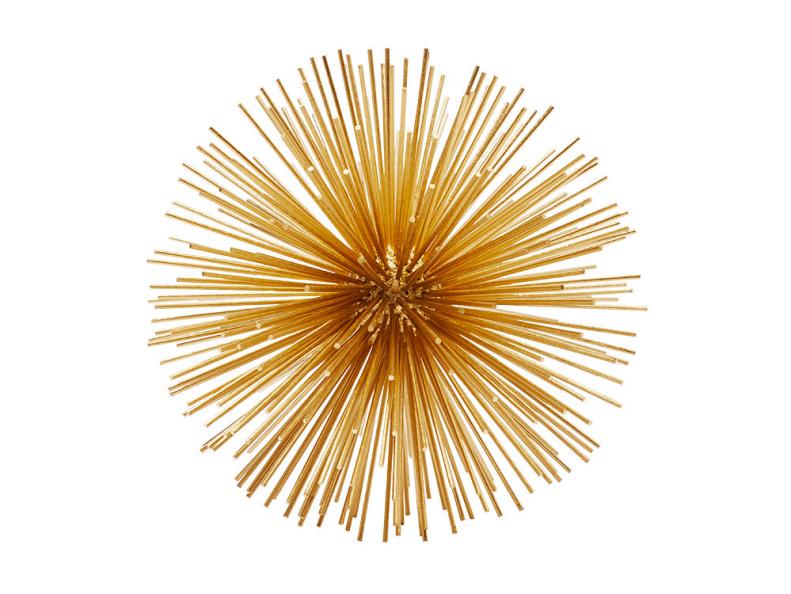
Glam: Metallic Spheres
Supplies: Smoothfoam styrofoam balls 1-1/2" and 2"-diameter (Michaels, both $6 for 12); Gold by Rust-Oleum Specialty Metallic spraypaint (Walmart, $4)
Here's How:
- 1. Stick bamboo skewers into a smooth Styrofoam ball, starting near the middle. We used 3-inch skewers for the small sphere and 4-inch for the large. Continue adding skewers until the entire ball is filled, as shown. If a skewer falls out, secure it with hot glue.
- 2. Spray-paint the sphere gold. Do a few coats, rotating it to cover the skewers and the ball completely.
Vintage: Dairy Cap Coasters
Supplies: Wooden 1/4-"H x 3-3/4"-diameter unfinished circles (Action Craftworks, $6.50 each); Milk Bottle Caps (Etsy for a similar look); Decoupage adhesive Mod Podge in matte (Joann, $7)
Here's How:
- 1. Make copies of vintage milk bottle caps on a laser printer or
at a copy store, enlarging them to create images that are
3 -3/4 inches in diameter. (Our caps were 1-3/4 inches wide, and
we enlarged them by 230%.) - 2. Cut out each circle, leaving a 1/2-inch border all around.
3. Center the printed image on top of a wood circle and adhere with decoupage medium. Let dry. Flip it over and trim the excess border with a crafts knife. - 4. Brush a coat of decoupage medium on the top of each coaster
to waterproof the paper.
Vintage: Splattered Stand
Supplies: Form Pedestal 4"H x 11-1/2"-diameter porcelain stand (Crate & Barrel, $20); Pebeo Porcelaine 150 ceramic paint in turquoise (Blick, $6.50)
Here's How:
- 1. Dip a 1/4"-wide flat paintbrush into ceramic paint, and hold it over the stand. Flick the brush with your finger to splatter paint all over the stand’s top. Let dry.
- 2. Turn the stand on its side and repeat to cover half of the base. Let dry. Repeat for the other half.
- 3. Place in the oven to set the paint, following the paint’s package instructions. Don’t place food directly on top—use cupcake liners, for example or use as decoration.
Vintage: Painted Vases
Supplies: Montana Gold spray paint in Malachite, Dolphins and Malachite Light (Montana Cans for info)
Here's How:
- 1. Wash vases (we used new and thrifted ones) inside and out with soap and water. Dry them with a clean cloth.
- 2. Spray-paint each vase, including the inside of the rim, a different color. We used paint with a flat finish for a matte look.
Poppy: Woven Chair
Supplies: Project 62 Sodra wire dining chairs in white (Target, $100 for a set of 2); 550 Paracord parachute cord in neon pink, neon yellow and neon orange (Paracord Planet, $10 for 100')
Here's How:
- 1. Wrap several yards of parachute cord around a wood crafts stick, leaving a piece of cord about 6 inches long at one end. Tie that end to the top side edge of a slatted wire chair with a loose knot on the back.
- 2. Weave the crafts stick under and over the wire bars of the chair’s back, releasing the cord from the stick as you go. Continue going back and forth across the chair, nudging up the cord after each row to create even lines. When you’ve filled the desired amount of rows, cut the cord and tie the end to the side of the chair with a knot.
- 3. For large blocks of color, you’ll need to reload the
crafts stick with cord and repeat the above steps a few times. Continue until the back and seat are covered. - 4. Hide the tails of the cord on the back by tucking them in vertically along the sides of the chair.
Poppy: Color-Blocked Planters
Supplies: 5 -1/2" square cement vase and 4 -1/4" square cement vase (Jamali Garden, $5.50 and up); Bertech 1/4"-wide copper tape (Staples, $14); Martha Stewart Peacock Feather and Caterpillar craft paint (Michaels, $3 each)
Here's How:
- 1. Tape off sections of the planter with delicate-surface painter’s tape, as shown. Fill in with crafts paint. Remove the tape while the paint is still wet. Let dry.
- 2. Add foil tape along the edges of the painted areas.
Poppy: Geometric Art
Supplies: Colored Paper in assorted colors (Color-aid, $5.50 per sheet); Gallery Profile Cradled Premier 8" x 8" and 10" x 10" wood panels (Blick, $9.50 and up)
Here's How:
- 1. Cut a piece of Color-aid paper large enough to cover the front of the square wood panel. Then cut squares of different colors, decreasing in size. We made ours 2 inches smaller each time.
- 2. Use rubber cement to adhere the largest piece of paper to the wood panel, then repeat to adhere the additional squares, placing them as shown.
Boho: No-Loom Wall Hanging
Supplies: Bucilla RyaTie mesh fabric (Plaid, $10); Clover super jumbo tapestry needles (Joann, $4 for 2)
Here's How:
- 1. Cut a piece of RyaTie mesh
fabric for weaving into a rectangle (ours was 9 inches by 12 inches). Gather yarns of various colors and thicknesses. - 2. For the woven sections, thread yarn through the mesh holes using a bent-tip yarn needle, moving horizontally across the row. Knot the ends on the back.
- 3. For the rows of fringe, loop pieces of yarn through each mesh hole. (Tie a few sample pieces to determine the desired length before cutting all the yarn.) Do two to three rows of fringe in each section to get the full effect. Trim the ends of the fringe to make them even.
- 4. Attach the weaving to a dowel: Tie one end of a long piece of yarn to the dowel, then thread the yarn through the top row of the weaving, wrapping the dowel as you go. Secure with a knot at the end. To hang, tie another piece of yarn to each end of the dowel
Boho: Rattan Mirrors
Supplies: Vintage place mats; Water Hyacinth 16"-diameter place mat (Pier 1, $8); Darice mirrors (Joann, $2 and up)
Here's How:
- 1. Center round mirrors on round rattan place mats (we used new and vintage ones) and adhere with construction adhesive, such as Liquid Nails for mirrors.
- 2. Attach picture hanging strips, such as ones made by Command, to the back, then hang on the wall.
Boho: Patterned Placemats
Supplies: Creekside 4"H x 6"-diameter basket (Coastal Craftwork, $30); Fig 7"H x 8-1/4"-diameter basket (Coastal Craftwork, $45); Martha Stewart Crafts craft paint for small basket in Camellia Pink, Caterpillar and Peacock Feather (Michaels, $3 each); Martha Stewart Crafts craft paint for large basket in Wine and Peacock Feather (Michaels, $3 each); Americana paint for largebasket in Coral Shell Americana (Artist's Club, $3)
Here's How:
- 1. Paint designs on rope baskets freehand using a 1/4-inch-wide flat paintbrush and crafts paint. Use the lines of the rope as a guide for spacing. For the larger basket, paint one magenta diamond and one blue plus sign near the top edge of the basket as shown, then repeat all around the basket. Do the same for the second and third rows, offsetting the design as shown. Let dry. Paint the peach plus signs over the purple diamonds.
- 2. For the smaller basket, start with the blue diamonds, let dry, then add a lime green border around each one. Let dry. Paint the pink diamonds over them, and half diamonds along the top and bottom of the basket. Let dry.