


3 Ways to Turn Buffalo Plaid Scarves Into DIY Holiday Decor
Give new life to your old buffalo plaid scarves by upcycling them into budget-friendly holiday decorations.

Flynnside

If you're like us, you love all things buffalo plaid. So, why not take this prized pattern to new heights by incorporating it into your home's holiday aesthetic? No need to spend money on pricey decorations because we've got three ways to upcycle your old buffalo scarves into fashionable decorations that are exactly what your home needs for the holidays.
Festive Fabric Ornament

Flynnside
Materials Needed
- buffalo plaid scarf
- faux berry garnish
- hot glue gun + glue sticks
- scissors
- yarn
- large plastic ornament
Cut Fabric Into Strips
Choose your buffalo plaid scarf of choice, cut the fringe off the bottom and discard (Images 1 & 2). Using the ornament to measure the length you’ll need, cut the scarf into strips that are roughly two inches wide and long enough to wrap around the circumference of the ornament (Image 3). Cut enough strips to cover the ornament completely.

Flynnside

Flynnside

Flynnside
Pro tip: For perfectly straight, clean cuts, use the lines of the buffalo check as your guide.
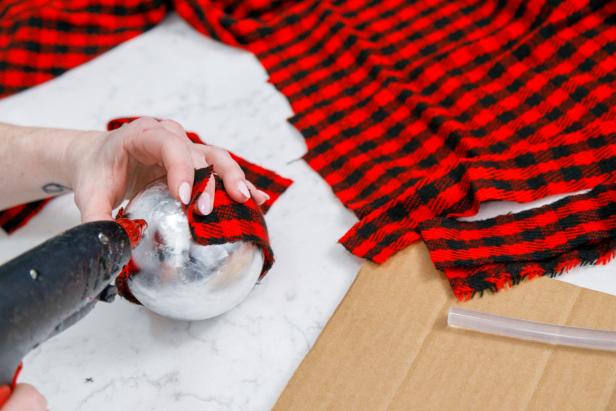
Glue Fabric to Ornament
Hot glue one end of the first strip to the top of the ornament (Image 1). Add more glue at the bottom of the ornament (middle of the strip) and back at the top where the end of the strip wraps back around (Images 2 & 3). Cover the ornament with the fabric strips by gluing them in an overlapping pattern. Repeat until the ornament is completely covered, gluing down any loose edges at the end (Image 4).

Flynnside
Flynnside

Flynnside

Flynnside
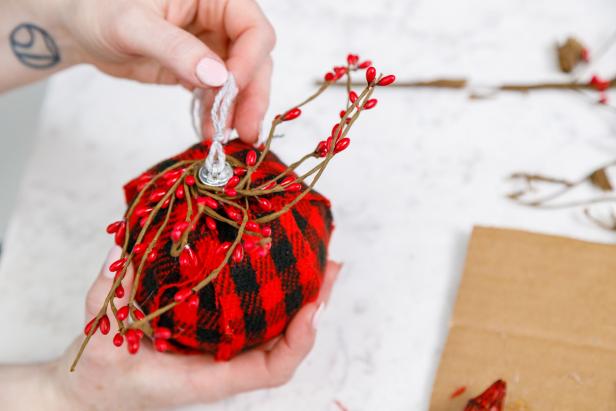
Add Berry Sprigs
Twist a small piece of berry garland around the ornament hanger, then use hot glue to secure it in place. Add as much or as little berry garland as you'd like.

Flynnside
Make Hanger
Attach a piece of yarn as a hanger.
Flynnside
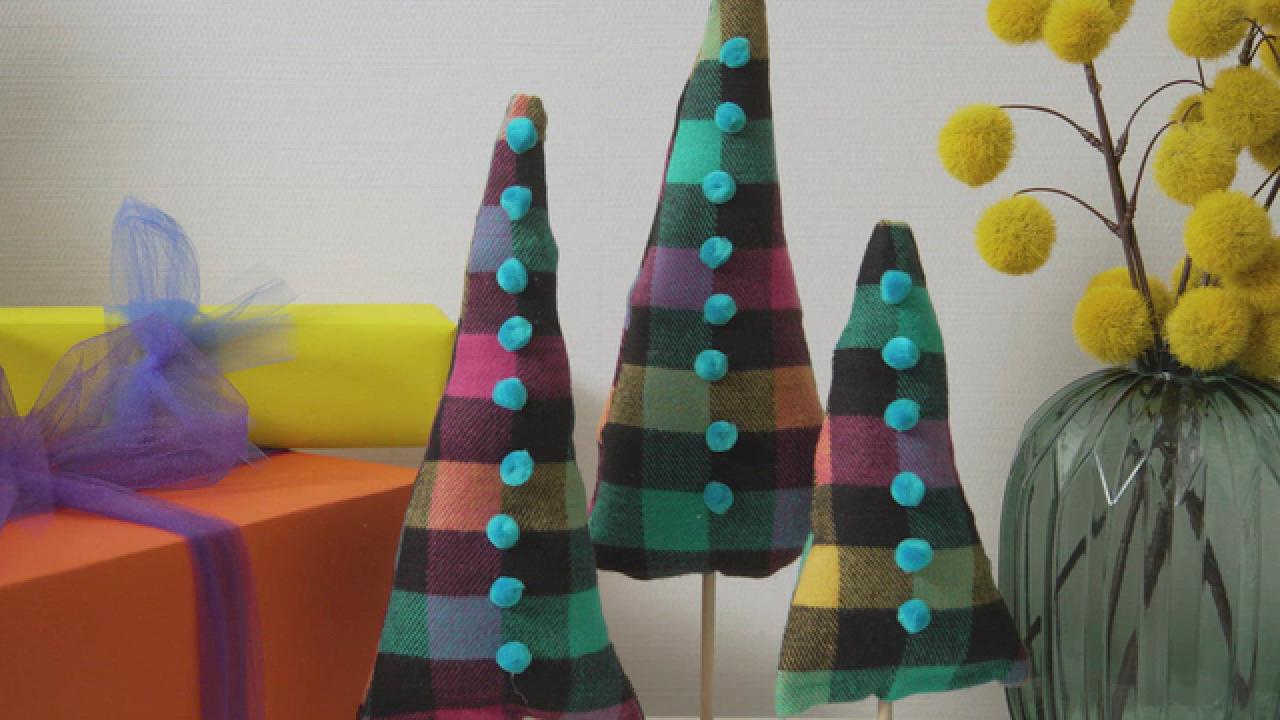
Checked Christmas Tree

Flynnside
Materials Needed
- buffalo plaid scarf
- marker
- scissors
- hot glue gun + glue sticks
- triangle-shaped cardboard template
- 1/4" wooden dowel
- decorative miniature pom-poms
- 2" mini wooden craft wheel
- fabric stuffing
Cut Out Fabric
Using a cardboard template you create and marker, trace two triangles onto the scarf with a marker (Images 1 & 2). These will serve as the two sides of your tree. Cut out the triangles along the marked lines (Image 3).

Flynnside

Flynnside

Flynnside
Note: The triangles will get smaller once the edges are glued together so keep this in mind when creating your templates.
Glue Fabric Together
Use hot glue along the longest side of one triangle and carefully attach the second triangle. Repeat this step for the second side, leaving the bottom unglued. Let the glue sit for a few minutes to harden.

Flynnside
Hem Bottom Edge
Once dry, glue along the bottom edge of the triangle and fold the fabric back over itself, creating a hem (Images 1 & 2). Repeat on the other side.

Flynnside

Flynnside
Form Tree
Carefully turn the tree inside out so that the glued edges are now hidden, using the dowel to push the very top of the tree out (Images 1 & 2).

Flynnside

Flynnside
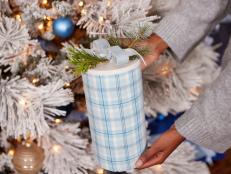
Stuff Tree and Add Dowel Trunk
Fill the tree halfway with stuffing, working to ensure the tree is evenly stuffed and won’t sag in any areas (Image 1). When the tree is about half full of stuffing, insert the dowel into the tree (Image 2). Flip the tree over and add stuffing on both sides of the dowel to keep it centered inside the tree.

Flynnside

Flynnside
Glue Tree Closed
Add hot glue to one side of the bottom edge, then carefully squeeze both sides together (Images 1 & 2). Hold the seam together until the glue hardens.

Flynnside

Flynnside
Add Decorations
Using hot glue, add decorative pom-poms along the center of the tree.

Flynnside
Attach Base
Insert the dowel into the wooden wheel and glue securely in place on both sides of the wheel.

Flynnside
Wrapped-Up Wreath

Flynnside
Materials Needed
- buffalo plaid scarf
- 16" foam wreath form
- silver thumbtacks
- straight embroidery pins
- faux or real greenery sprigs
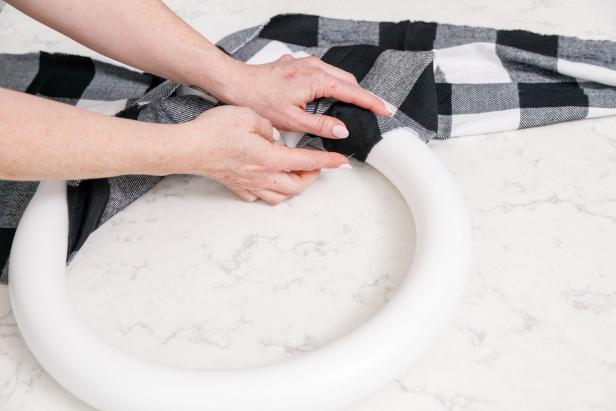
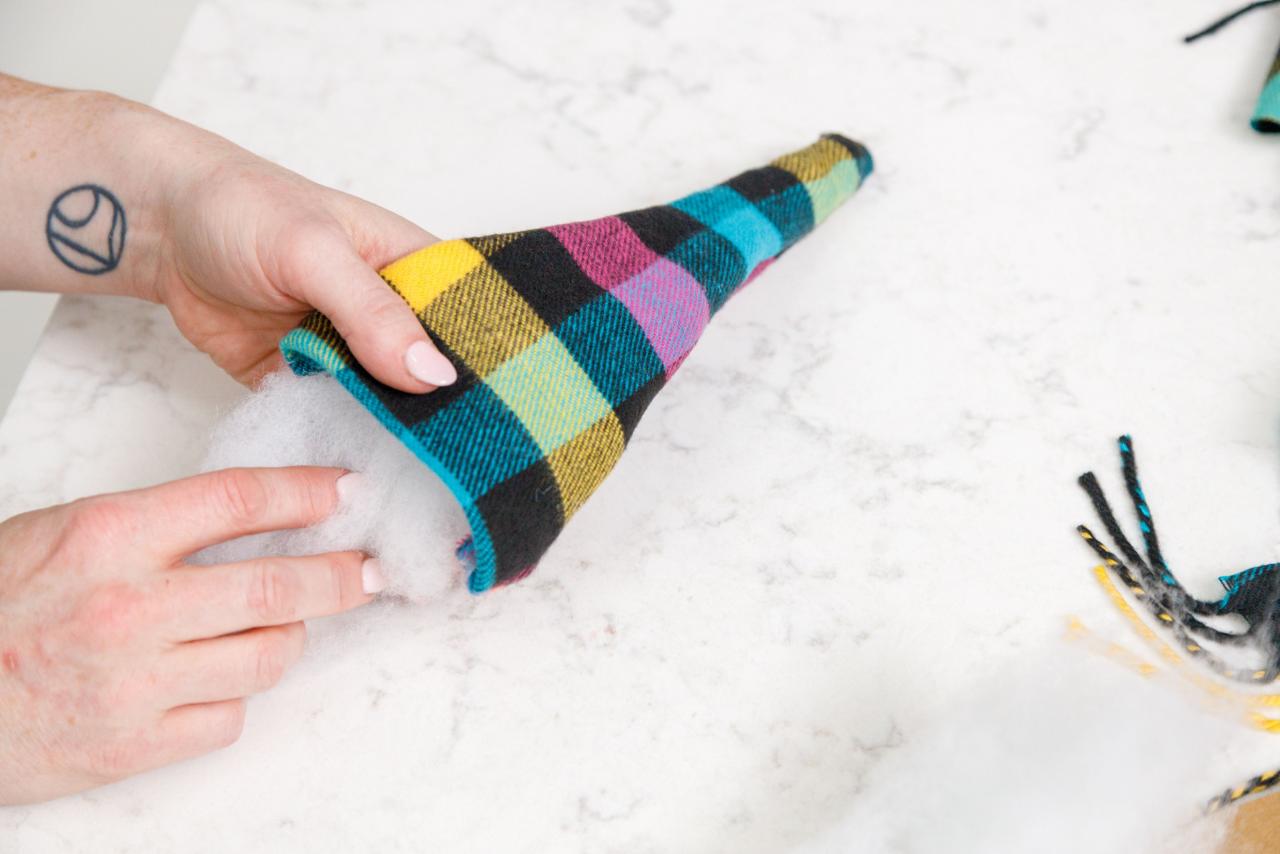
Create Layout
Lay the scarf out on a flat work surface and place the wreath on top, right in the middle of the scarf (Image 1). Pull the scarf through the middle of the wreath and fold it over the foam (Image 2).

Flynnside
Flynnside
Wrap Wreath
Starting at the top of the foam wreath, use straight pins to wrap the scarf around and secure it in place as you go. Tightly wrap the scarf down the right side, followed by the left side, until you meet in the middle at the wreath's bottom.

Flynnside
Pin Bottom
Holding the scarf in place with one hand, pull the fabric securely and pin it into place at the bottom of the wreath. There will be some fabric overhang for decoration.

Flynnside
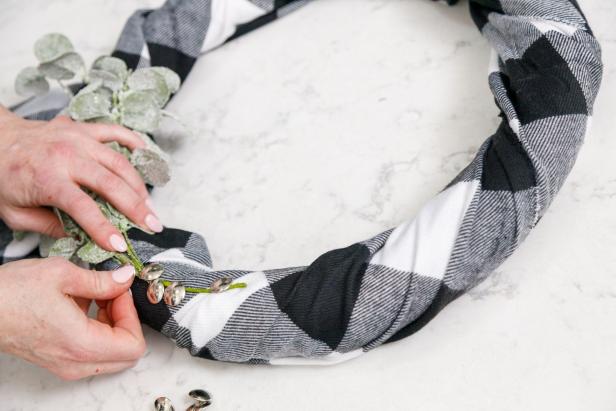
Add Greenery
Use either faux or real greenery to add some texture to the wreath. Pin the greenery into place to secure.

Flynnside
Decorate With Tacks
Insert thumbtacks in a random fashion for added embellishment.
Flynnside
Pro tip: If you used faux greenery, use the tacks to cover the wired end of the garland.


