


How to Refinish a Wood Deck in a Weekend
See how we cleaned, pressure washed and painted a multi-level deck to give it a fresh look and to maintain it so it will last for years to come.

Mick Telkamp
Learn how to refinish a deck in just a few days — like over the weekend — with our step-by-step-instructions.

A deck is a great way to add extra living space and increase your home’s value. But decks — especially all-wood decks — require maintenance to keep them secure, safe and looking good. If it has been a few years or even decades since your deck has been given the attention it deserves, it may be time to make some necessary repairs, give it a thorough cleaning and apply a fresh coat of paint or stain.
This is a DIY project you can complete in a weekend. Just follow our step-by-step instructions on how to refinish a deck below.
1. Determine Your Needs
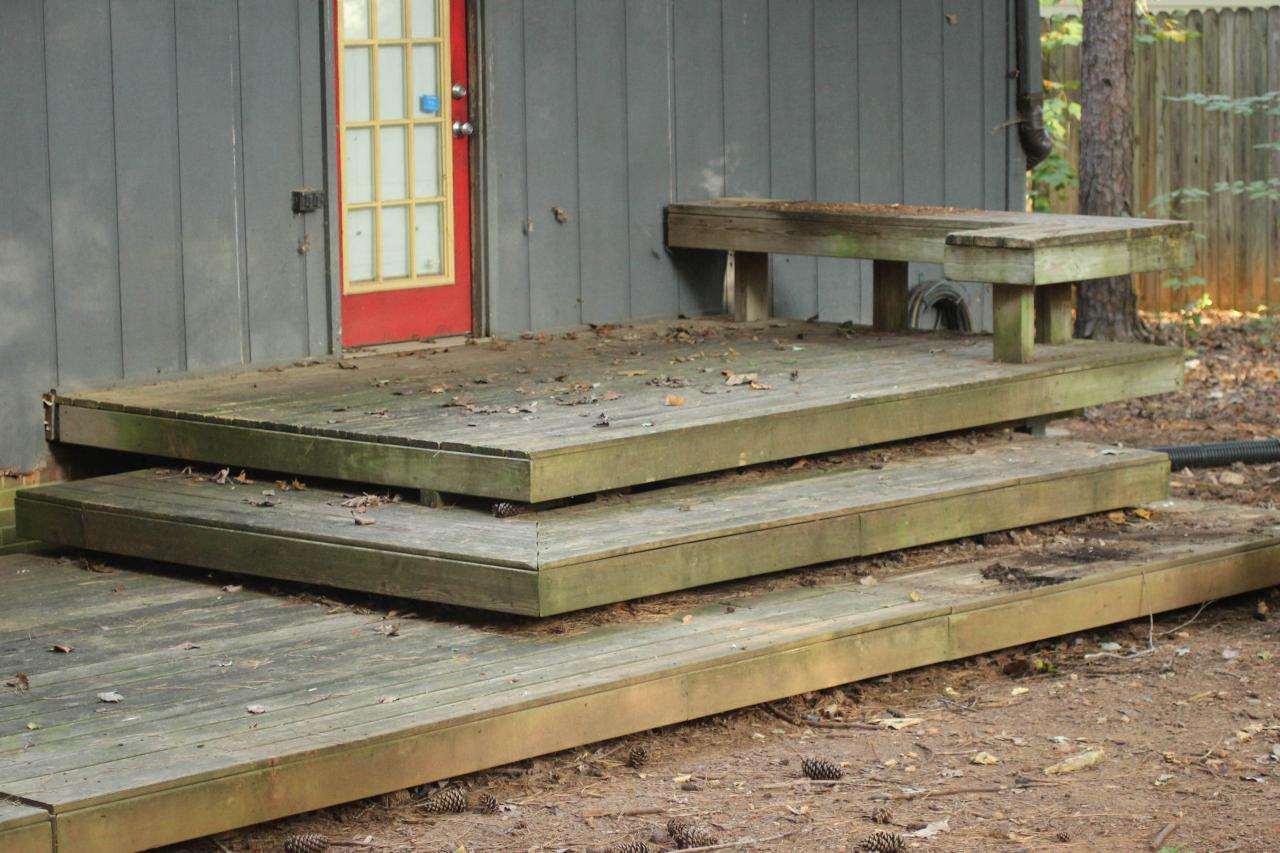
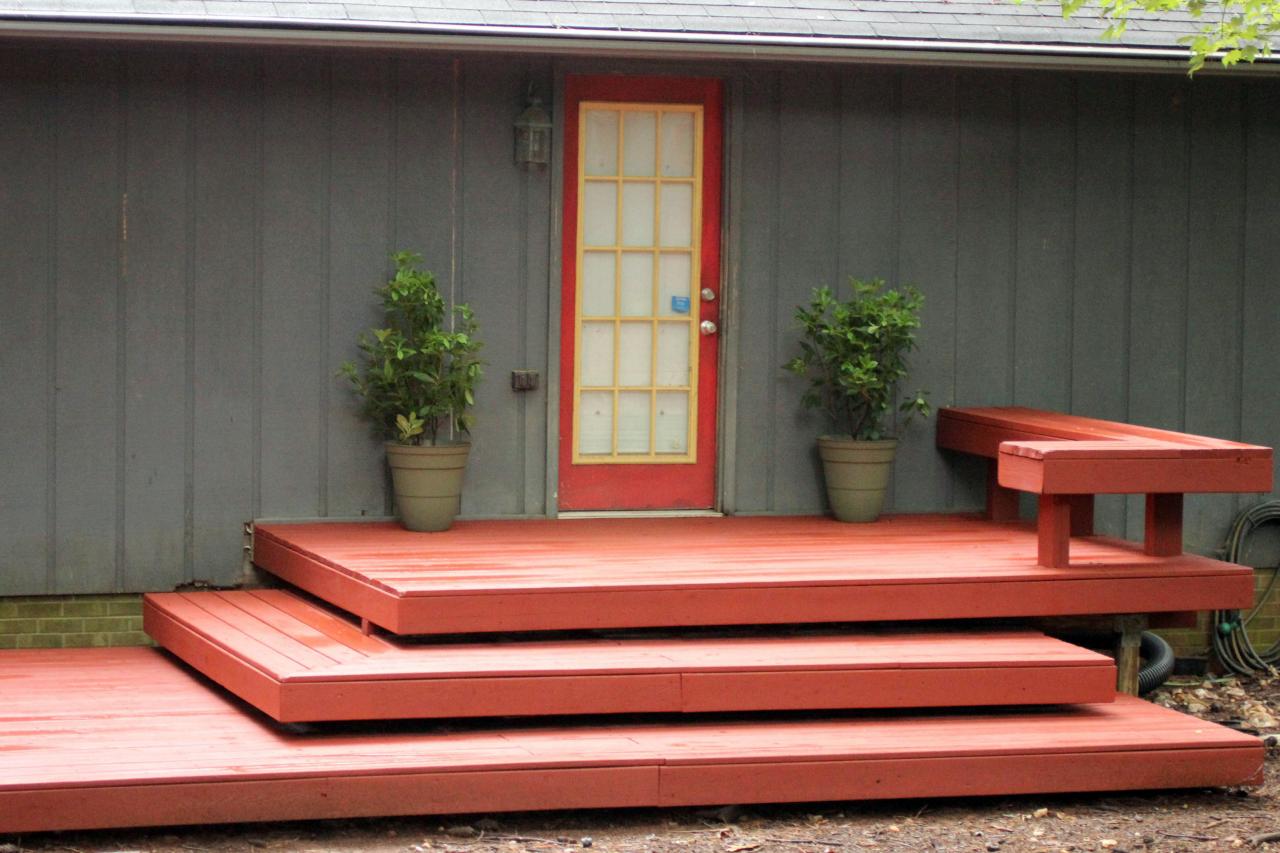
A deck that is just a couple of years old or has received regular maintenance is still likely to benefit from a good cleaning. An older deck may need repairs to railings or steps, replacement of split or splintering planks, and decisions will need to be made regarding the type of stain used to protect and beautify the structure.

Mick Telkamp
Before
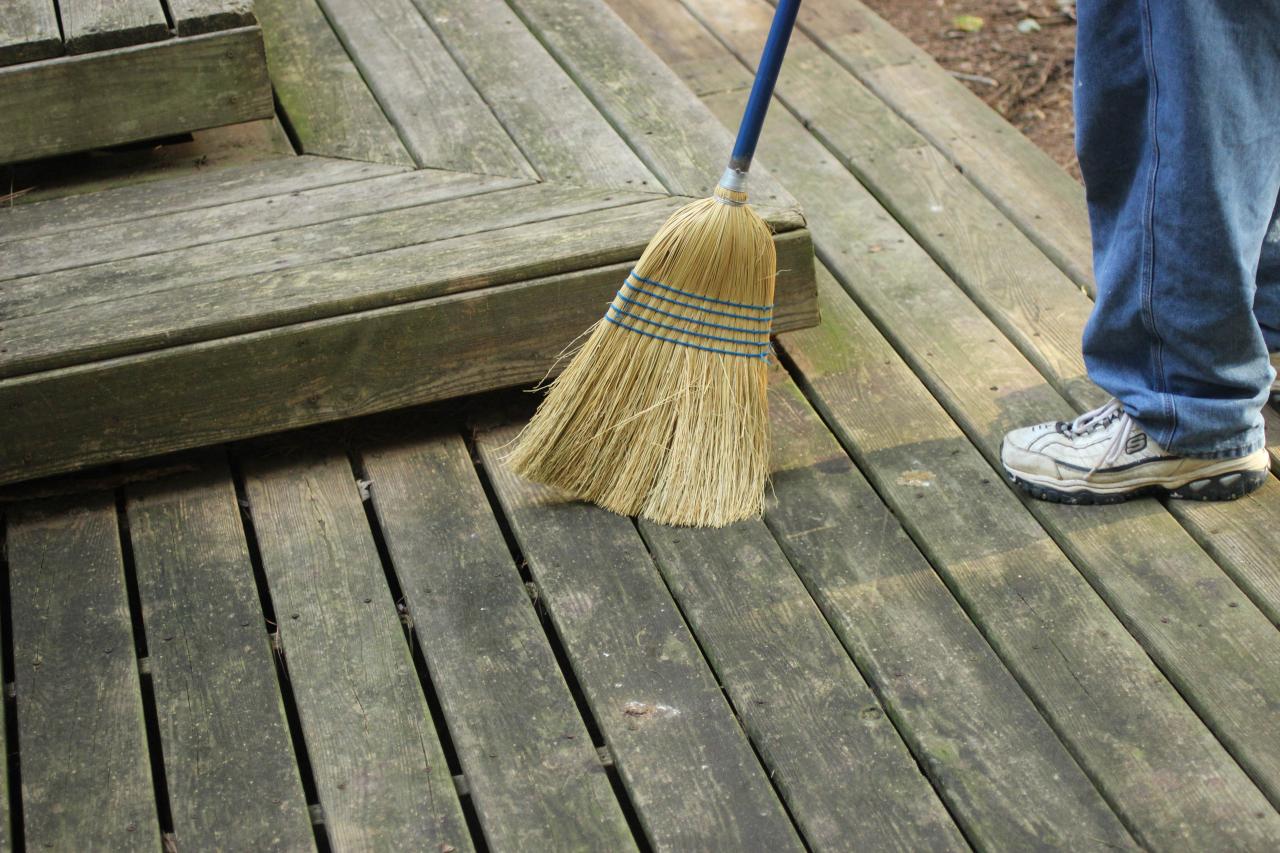
2. Sweep and Assess
Clear any furniture or plants from the deck, grab a broom and clear off surface debris. As you traverse the deck, make note of any split, splintered or rotting lumber, raised screws or nails, rusted hardware and any other problems that will need to be addressed.

Photo by Mick Telkamp
3. Select a Cleaning Solution
Diluted bleach is a popular choice for deck cleaning, but isn’t necessarily the best choice. Over time, stain is more likely to fade or discolor and bleach can hasten the degradation of the wood. Instead, select a cleaner formulated specifically for deck cleaning and follow manufacturer instructions regarding dilution and application.

Photo by Mick Telkamp
4. Apply Cleaner
Deck cleaner can be spread by using a brush or broom to sweep it across the surface or applied using an inexpensive tank sprayer, as shown here. Make sure all edges, corners and gaps are treated as well as the deck surface. Follow manufacturer instructions regarding the use, but in most cases, the solution should be left to soak on the wood for a period of time before continuing.

Photo by Mick Telkamp
5. Pressure Washing
A pressure washer is a powerful tool for cleaning a deck. Take care to select a nozzle appropriate for the job. Spray nozzles are categorized by the angle of the spray. A zero-degree “red tip” provides the most powerful stream but can damage softwood. Consider a nozzle with a spray angle of 25 or even 40 degrees to clean your deck without scarring the surface.

Photo by Mick Telkamp
6. Controlling the Spray
Hold the spray wand at an angle to push dirt and grime away from the contact point. Use consistent motion and distance for uniform cleaning without the risk of pitting or scarring.

Photo by Mick Telkamp
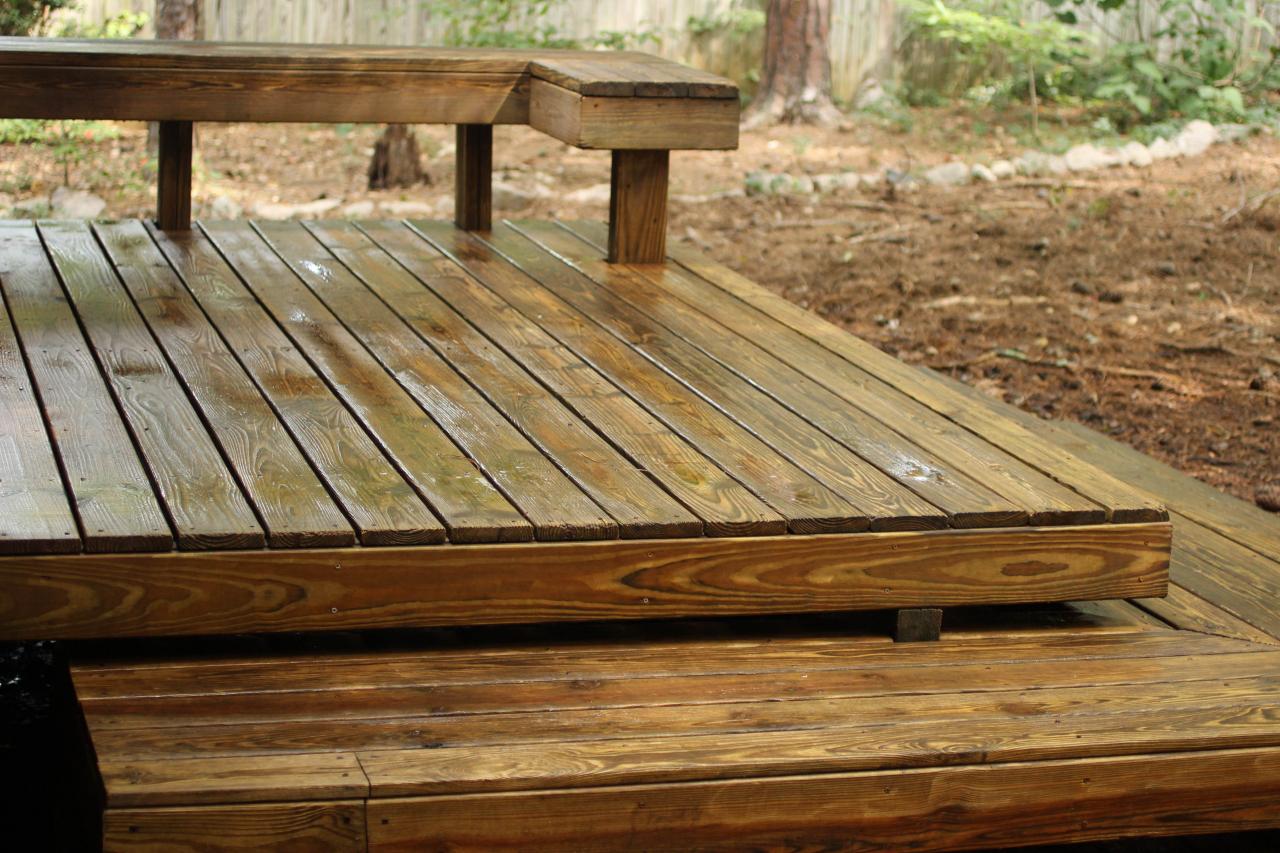
7. If Necessary, Repeat
If it has been a long time since the deck has been pressure washed or has been subject to unusual mildew or staining, a second application of deck cleaner and another round of pressure washing may be needed. If you were on the fence about applying a new stain to the deck, it may be easier to decide once you’ve seen it at its cleanest.

Photo by Mick Telkamp
8. Tap Down Exposed Nails
Wood shrinks over time and nails that were driven flush with the surface of the deck may need to be hammered back down level with the wood.

Photo by Mick Telkamp
9. Replacing Planks
Planks that have cracked, split or rotted may need to be removed. Individual planks may be pried up and replaced with new lumber of the same type. Although a structurally sound choice, newer wood will not match older when using a clear sealer or a semi-transparent stain.

Photo by Mick Telkamp
10. Selecting a Stain or Paint
If the lumber used to build your deck looks just perfect in condition and color, you may elect to apply a clear sealer. For most of us, the deck will benefit from a little color, but the choice of stain or paint used will vary with preference and deck condition. A deck that is in good condition with minimal splintering and uniform color throughout is a good candidate for a semi-transparent stain, which soaks into the wood and leaves the grain of the wood visible. Solid stains, as we use on this project, coat the surface of the wood like paint and will hide replaced lumber and minor weathering. If the condition of the wood is especially weathered, a resurfacing stain containing grit is a forgiving choice and can hide cracks as deep as 1/4".

Photo by Mick Telkamp
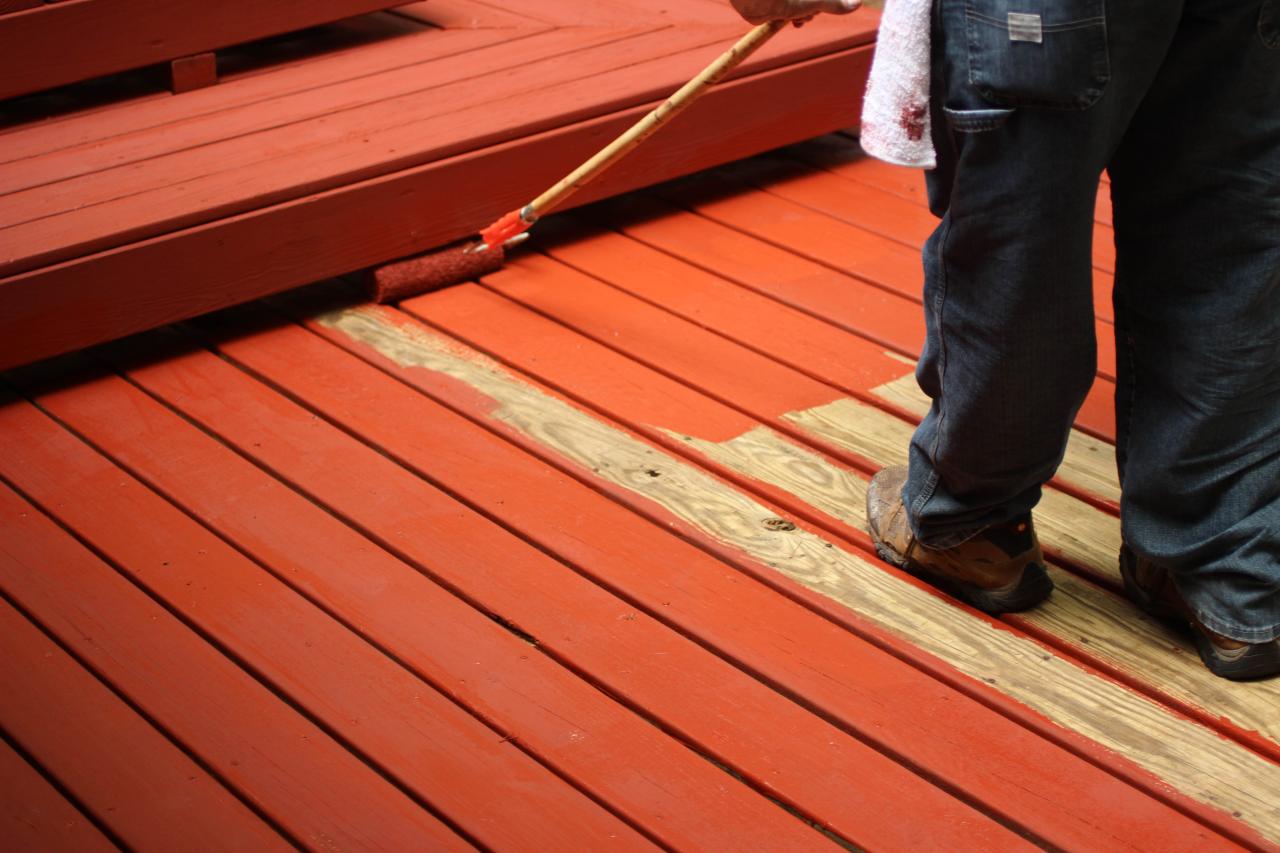
11. Apply Stain
Plan to stain once the deck is completely dry and no rain is in the immediate forecast. Tape off edges as needed and make sure no debris is present. A paint pad or roller can be used to apply stain to the deck, but care should be taken to apply evenly. Solid stains are more forgiving, but an uneven application or “touch up” spots will stand out when using semi-transparent stains.

Photo by Mick Telkamp
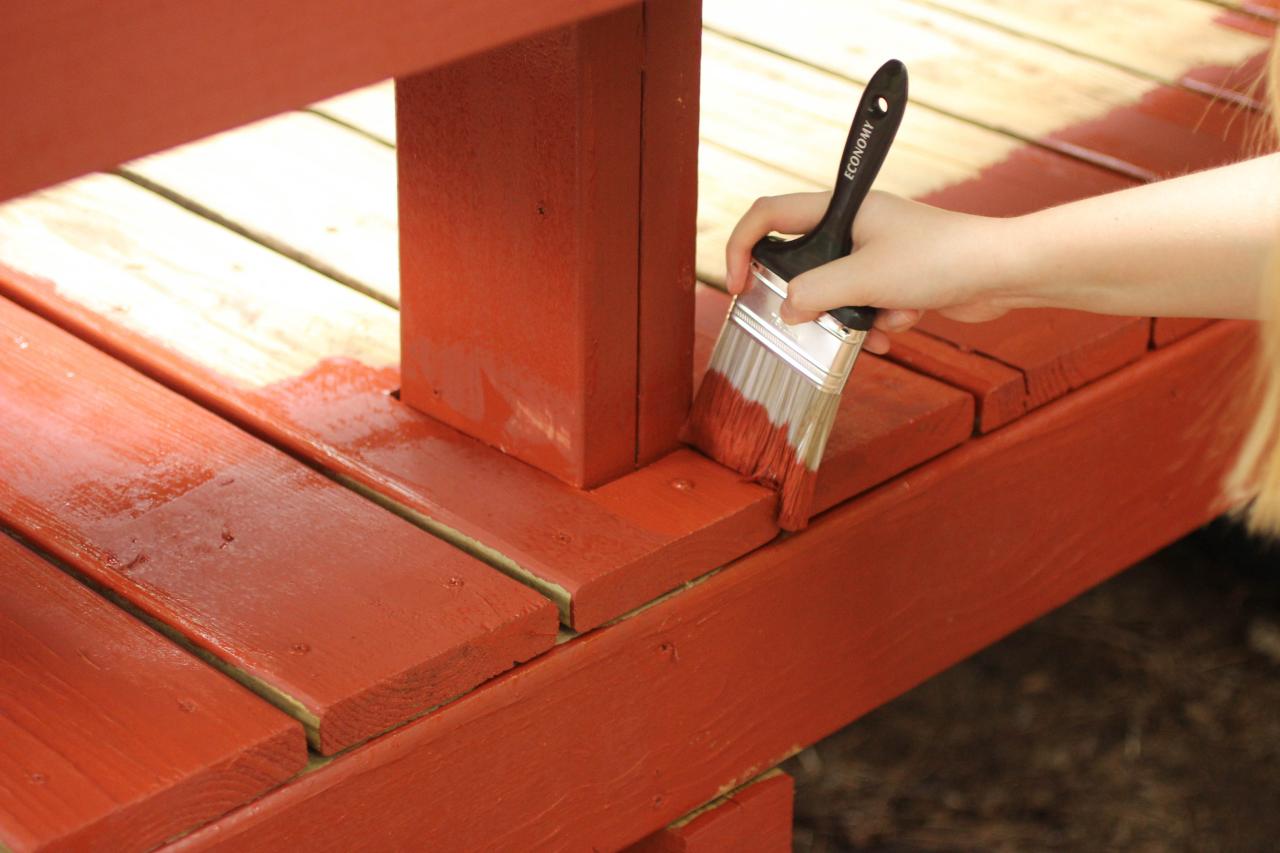
12. Corner, Gaps and Railings
A paintbrush should be used in corners, railings and in gaps between planks. Railings and gaps between deck boards require special attention and can impact the amount of stain and time needed for the project.

Photo by Mick Telkamp
13. Solid Stain
While the look of solid stains obscures wood grains, any pitting, scarring and other indicators of age can be hidden.

Photo by Mick Telkamp
14. Leave an Escape Route
Apply stain from corner or wall to deck edge to allow an egress when finishing up.

Photo by Mick Telkamp
15. Continued Maintenance
A yearly cleaning and inspection will keep the deck looking good, but expect to re-stain in anywhere from three to 10 years, depending on the type of stain used. Proper care and maintenance of your deck can drastically increase its lifespan with minimal expense.

Photo by Mick Telkamp

35 Deck Design Ideas 50 Photos
Get inspired by these ideas for decks and turn your outdoor living space into a family room and area for entertaining.


