


How to Reupholster an Arm Chair
Upholstery can be an intimidating project, but it seems more complicated than it actually is. A thrift store arm chair with simple lines, a sturdy frame and good padding makes a perfect subject for a novice upholsterer.

If you’ve got an old chair with “good bones” but a sad fabric covering, give it new life by reupholstering it. Use upholstery-grade fabric, and do not wash it beforehand, it could shrink, pucker or lose its stain-resistant coating. Look for a chair with multiple panels, it is easier to re-cover than a single-paneled chair. Then attach decorative trim with hot glue to hide the seams and staples.

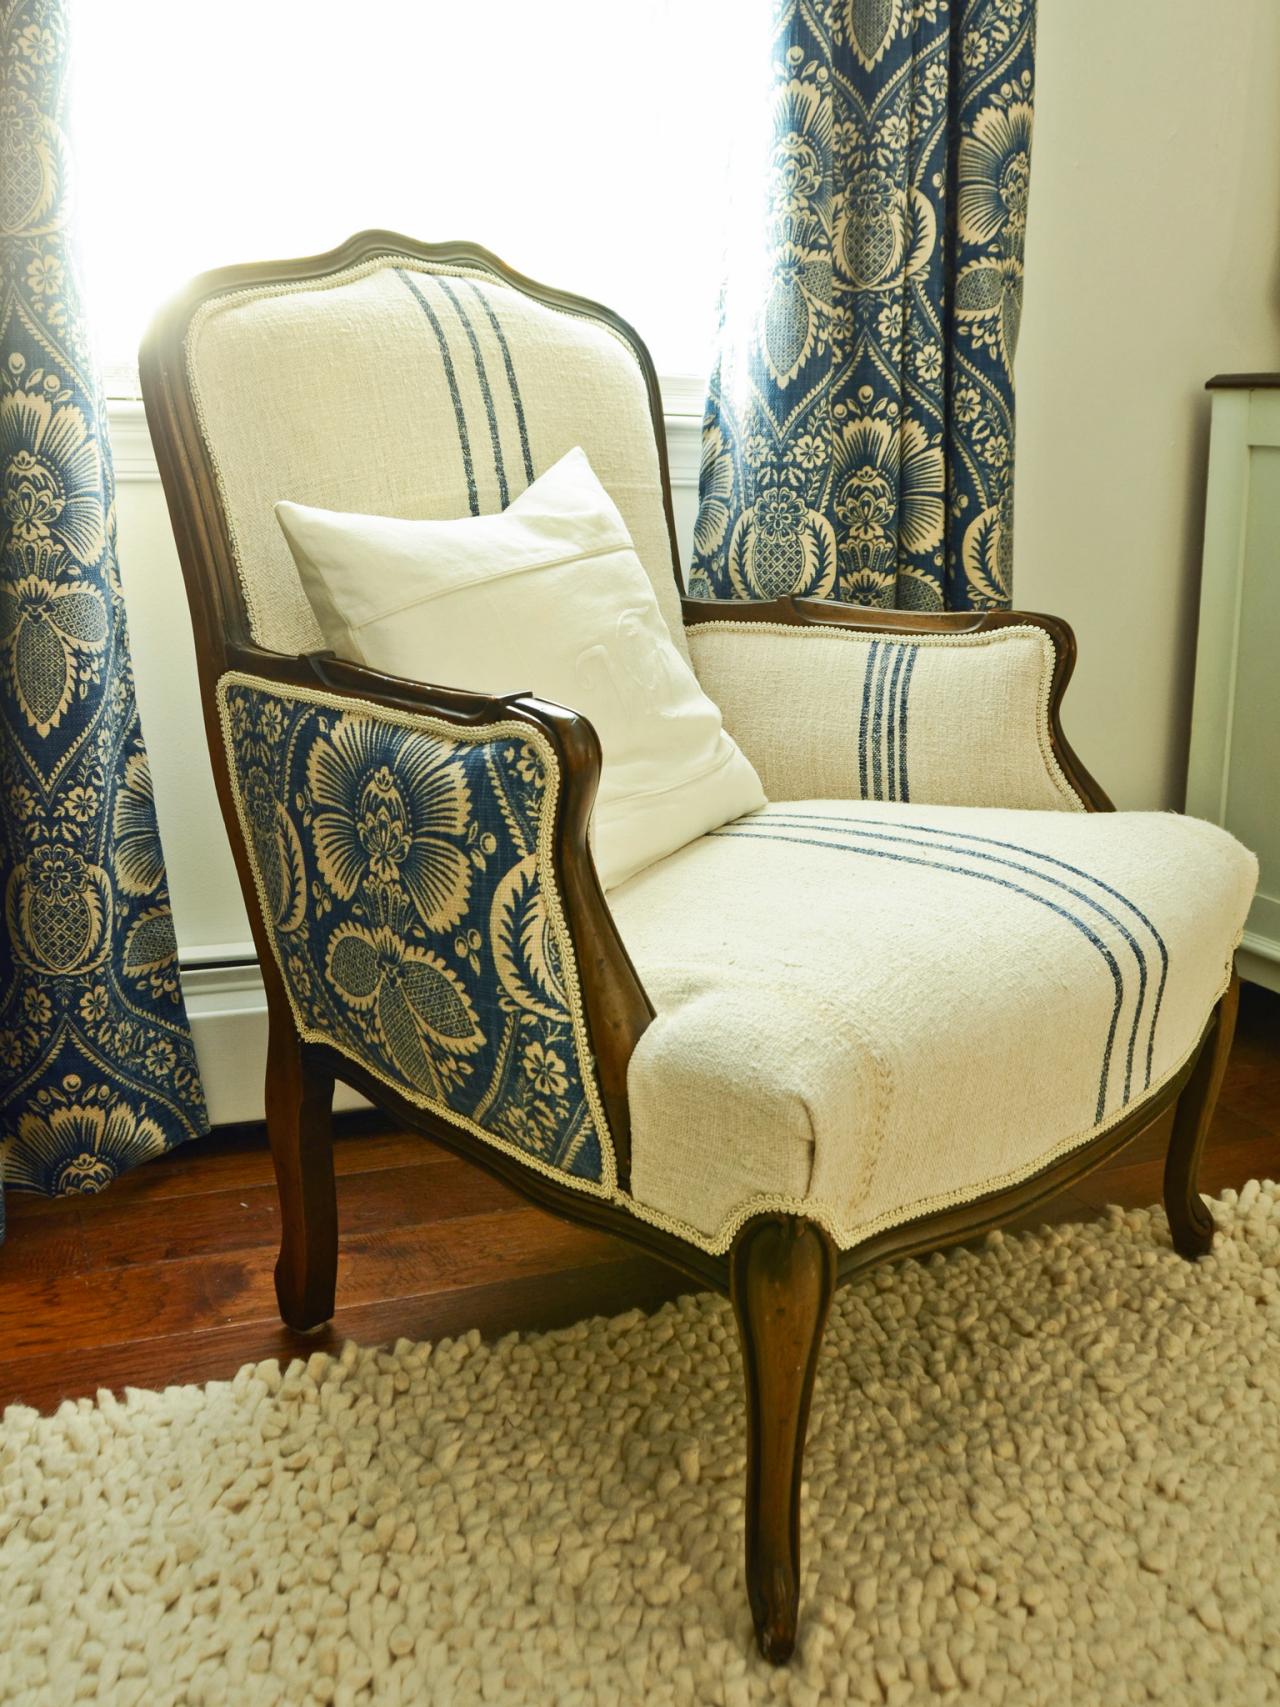
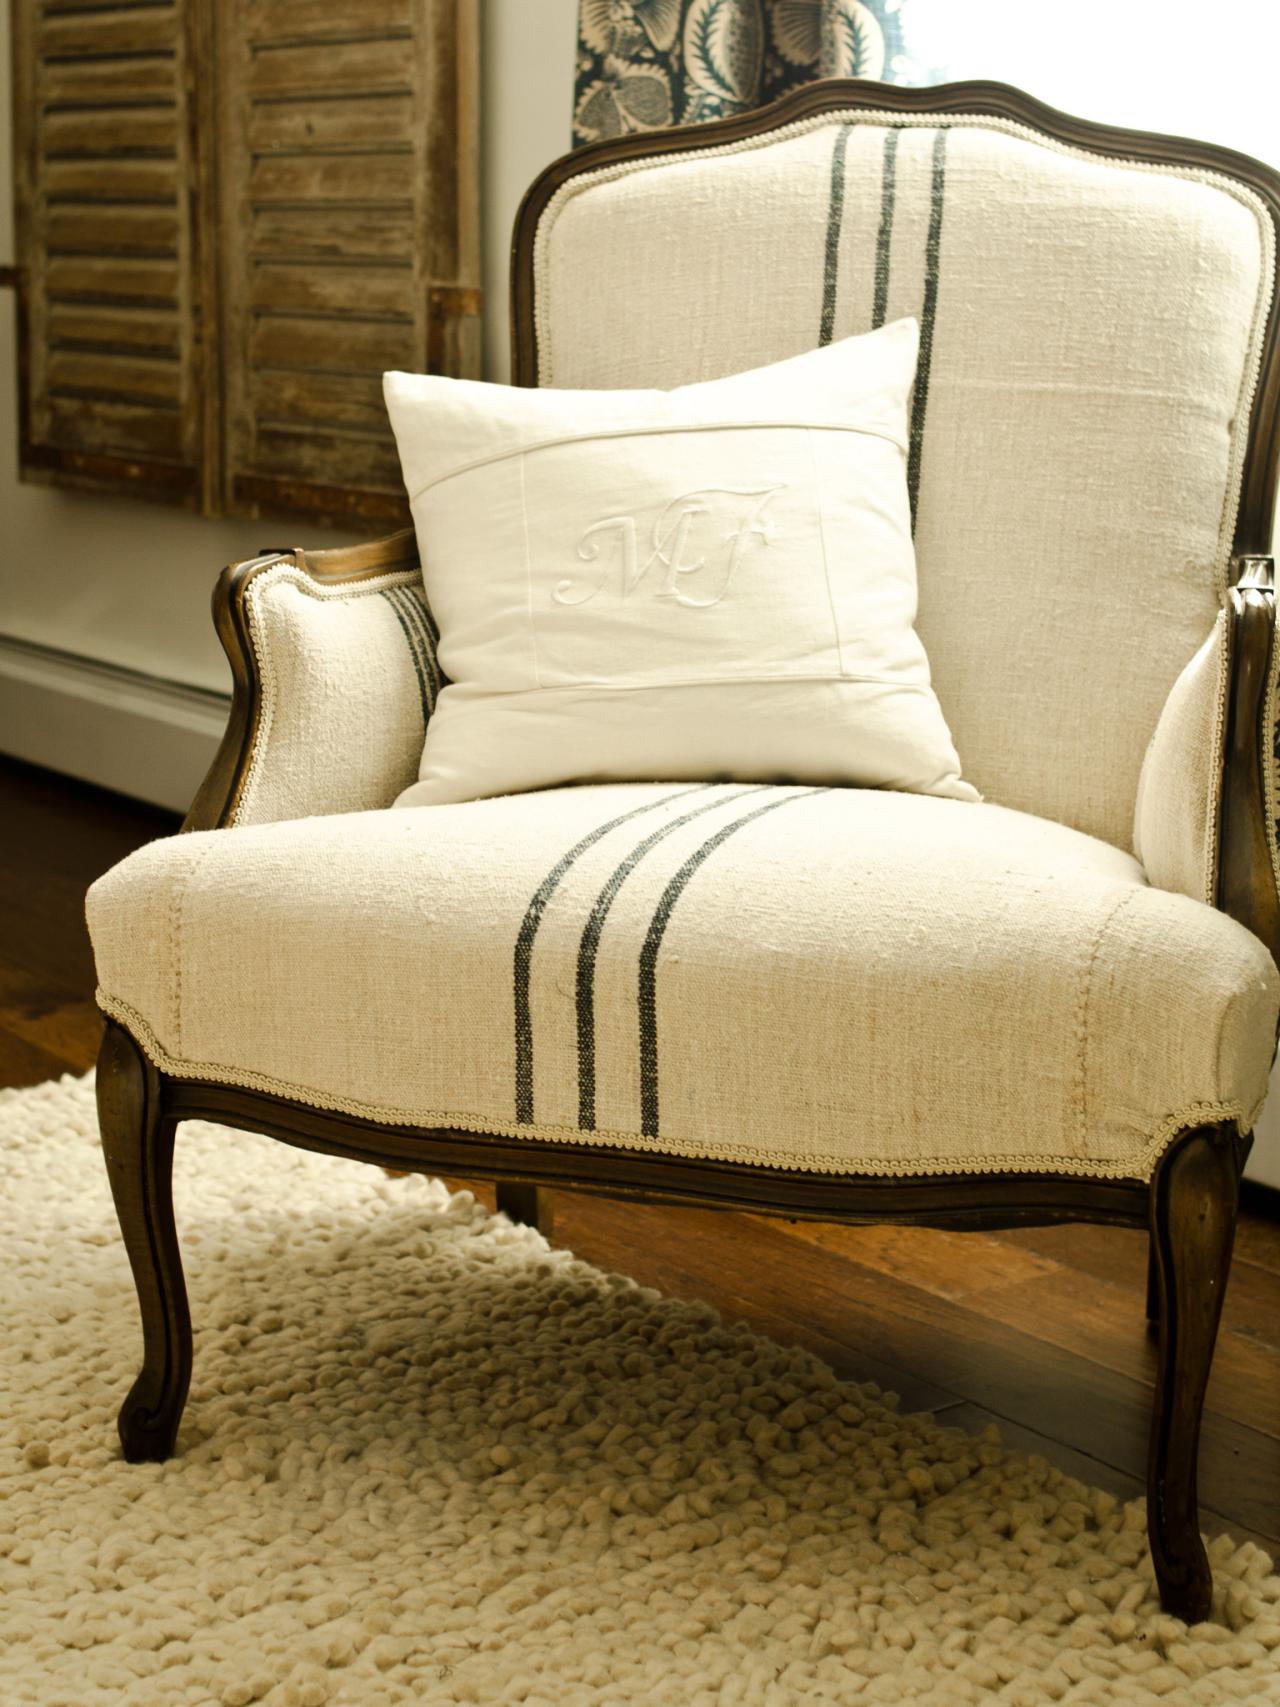
Upholstered Chair After
Tip: Chairs that have panels of fabric surrounded by exposed wood frames are a simpler project for beginning upholsterers. More complicated chairs may involve tack strips and other materials to hide raw edges. Examine the chair closely before purchasing to make sure it's a good candidate for your abilities.
Tools and Materials
- arm chair with exposed frame
- approximately 2-4 yards upholstery weight fabric, depending on size and complexity of chair
- sewing machine (may be required for certain chairs)
- staple remover/puller
- wire cutters
- gloves
- protective eyewear
- sharp scissors
- seam ripper
- pins
- permanent marker
- iron and ironing board
- pneumatic upholstery staple gun
- 1/4" - 1/2" staples
- air compressor
- approximately 4-6 yards gimp trim
- high temperature hot glue gun and glue sticks
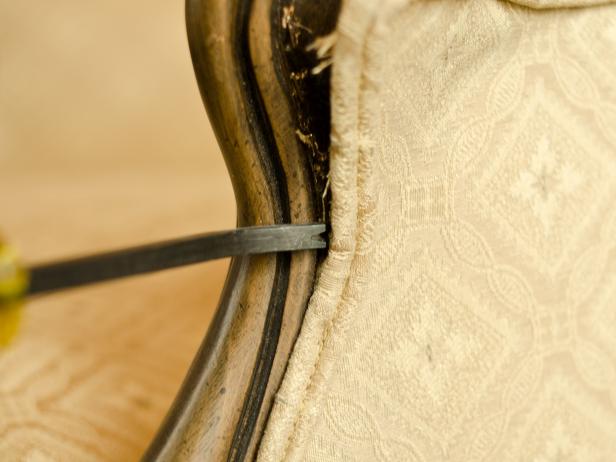
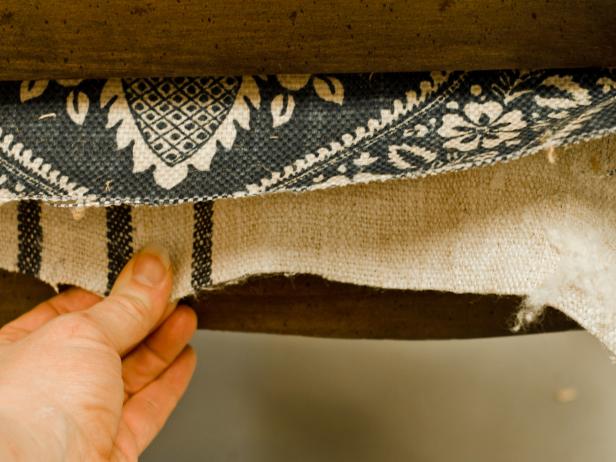
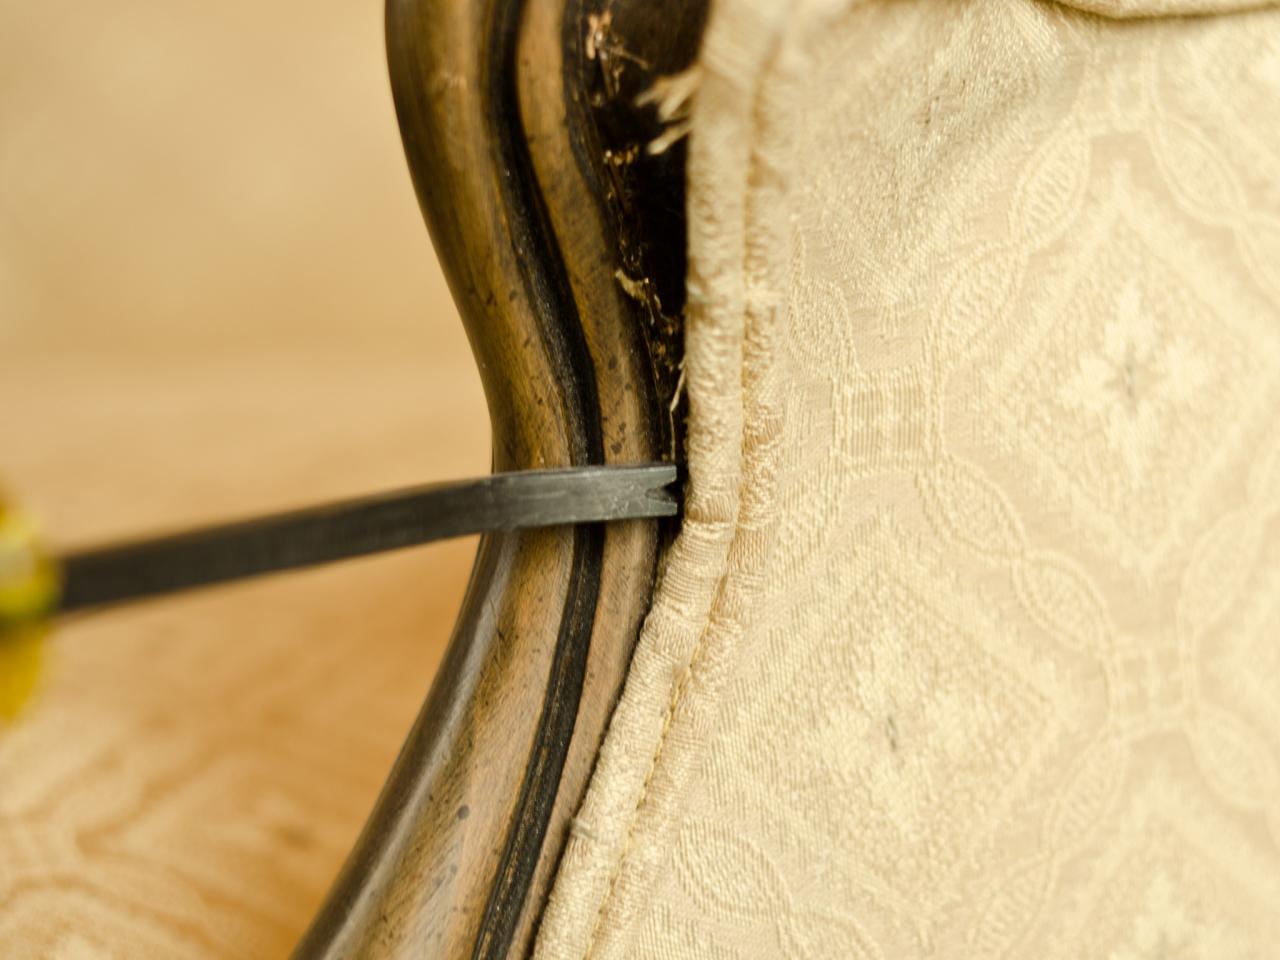
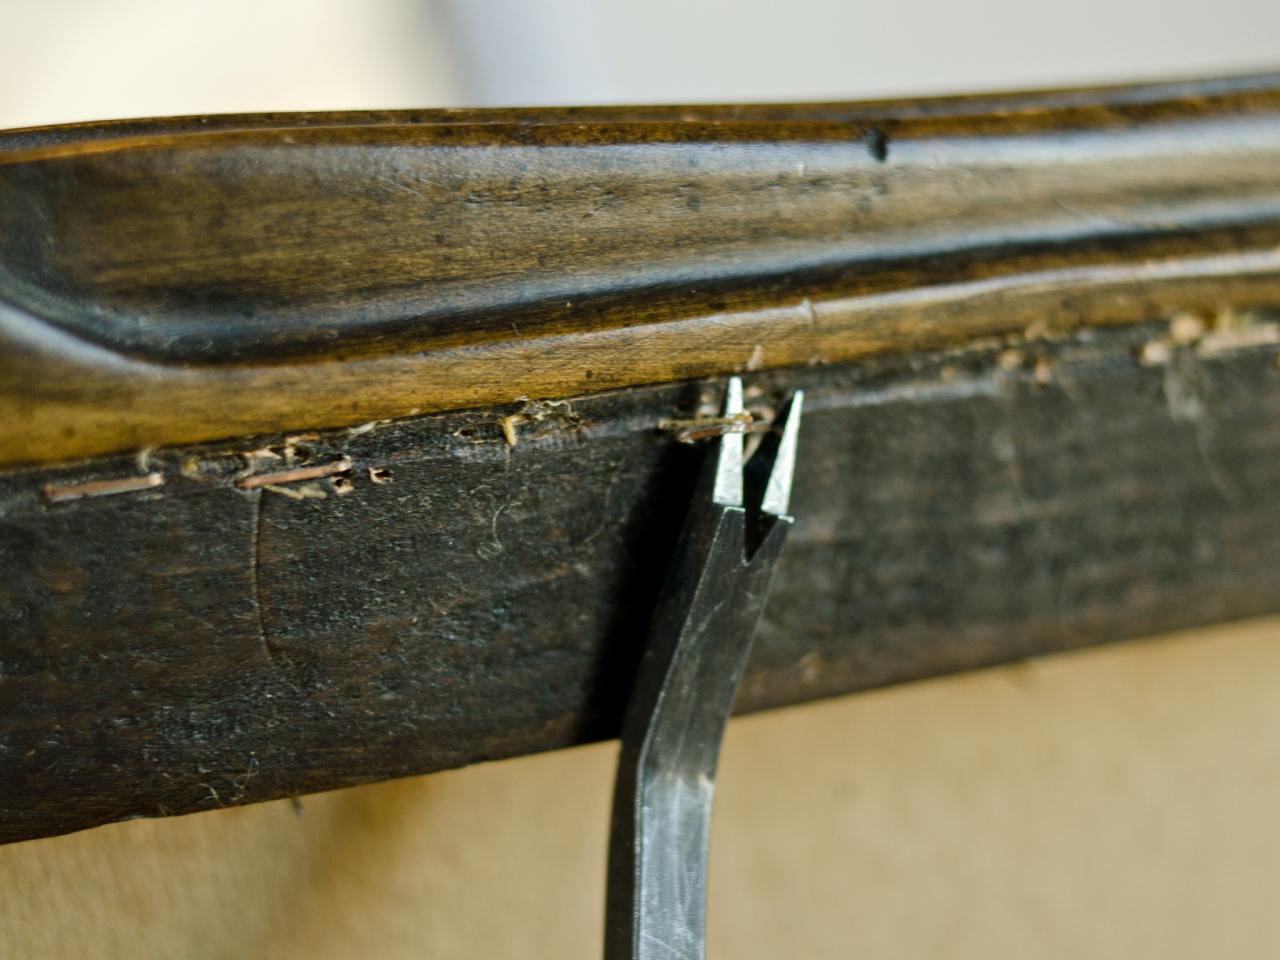
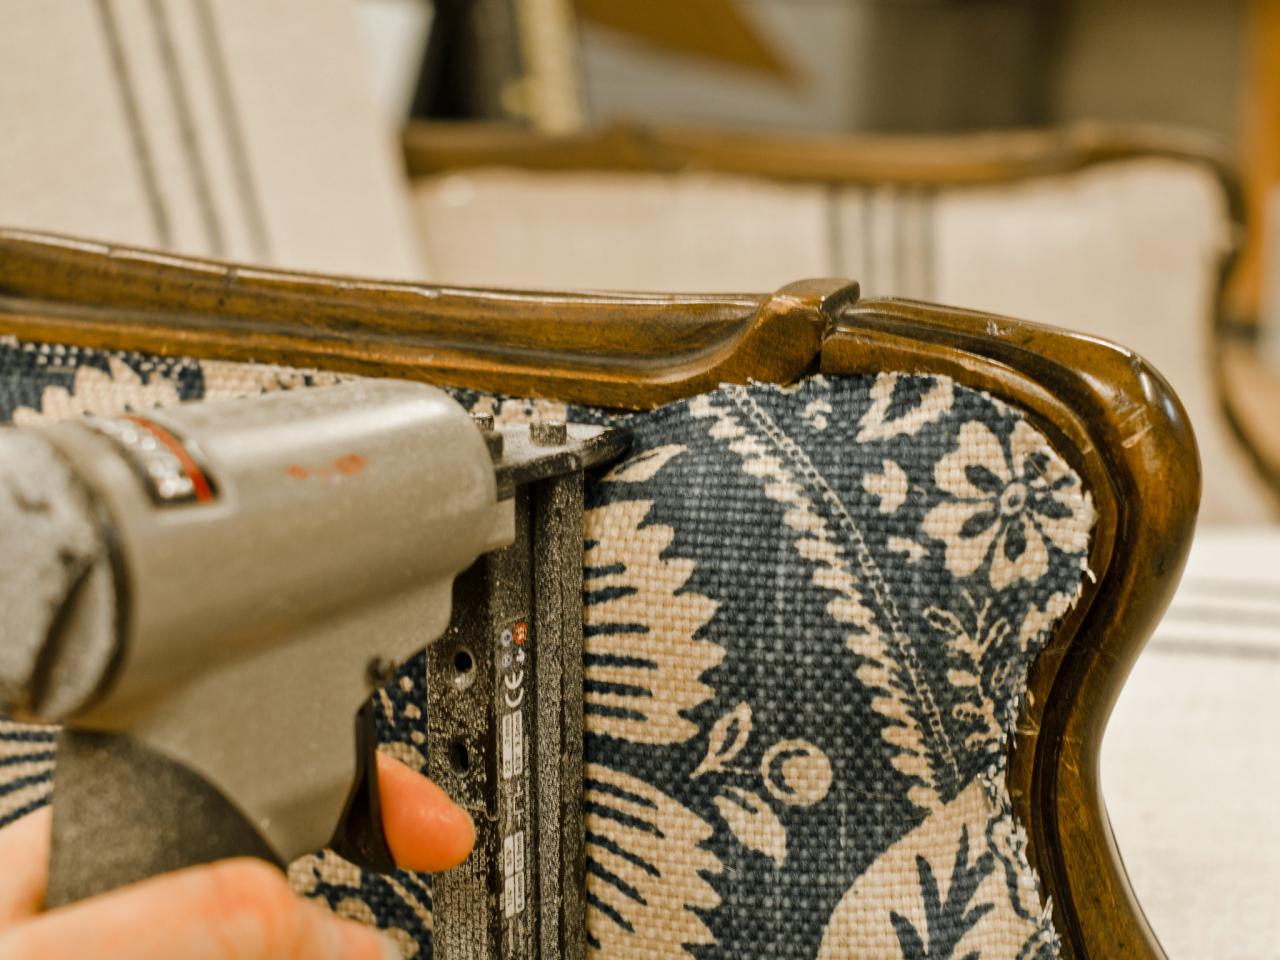
1. Strip Chair
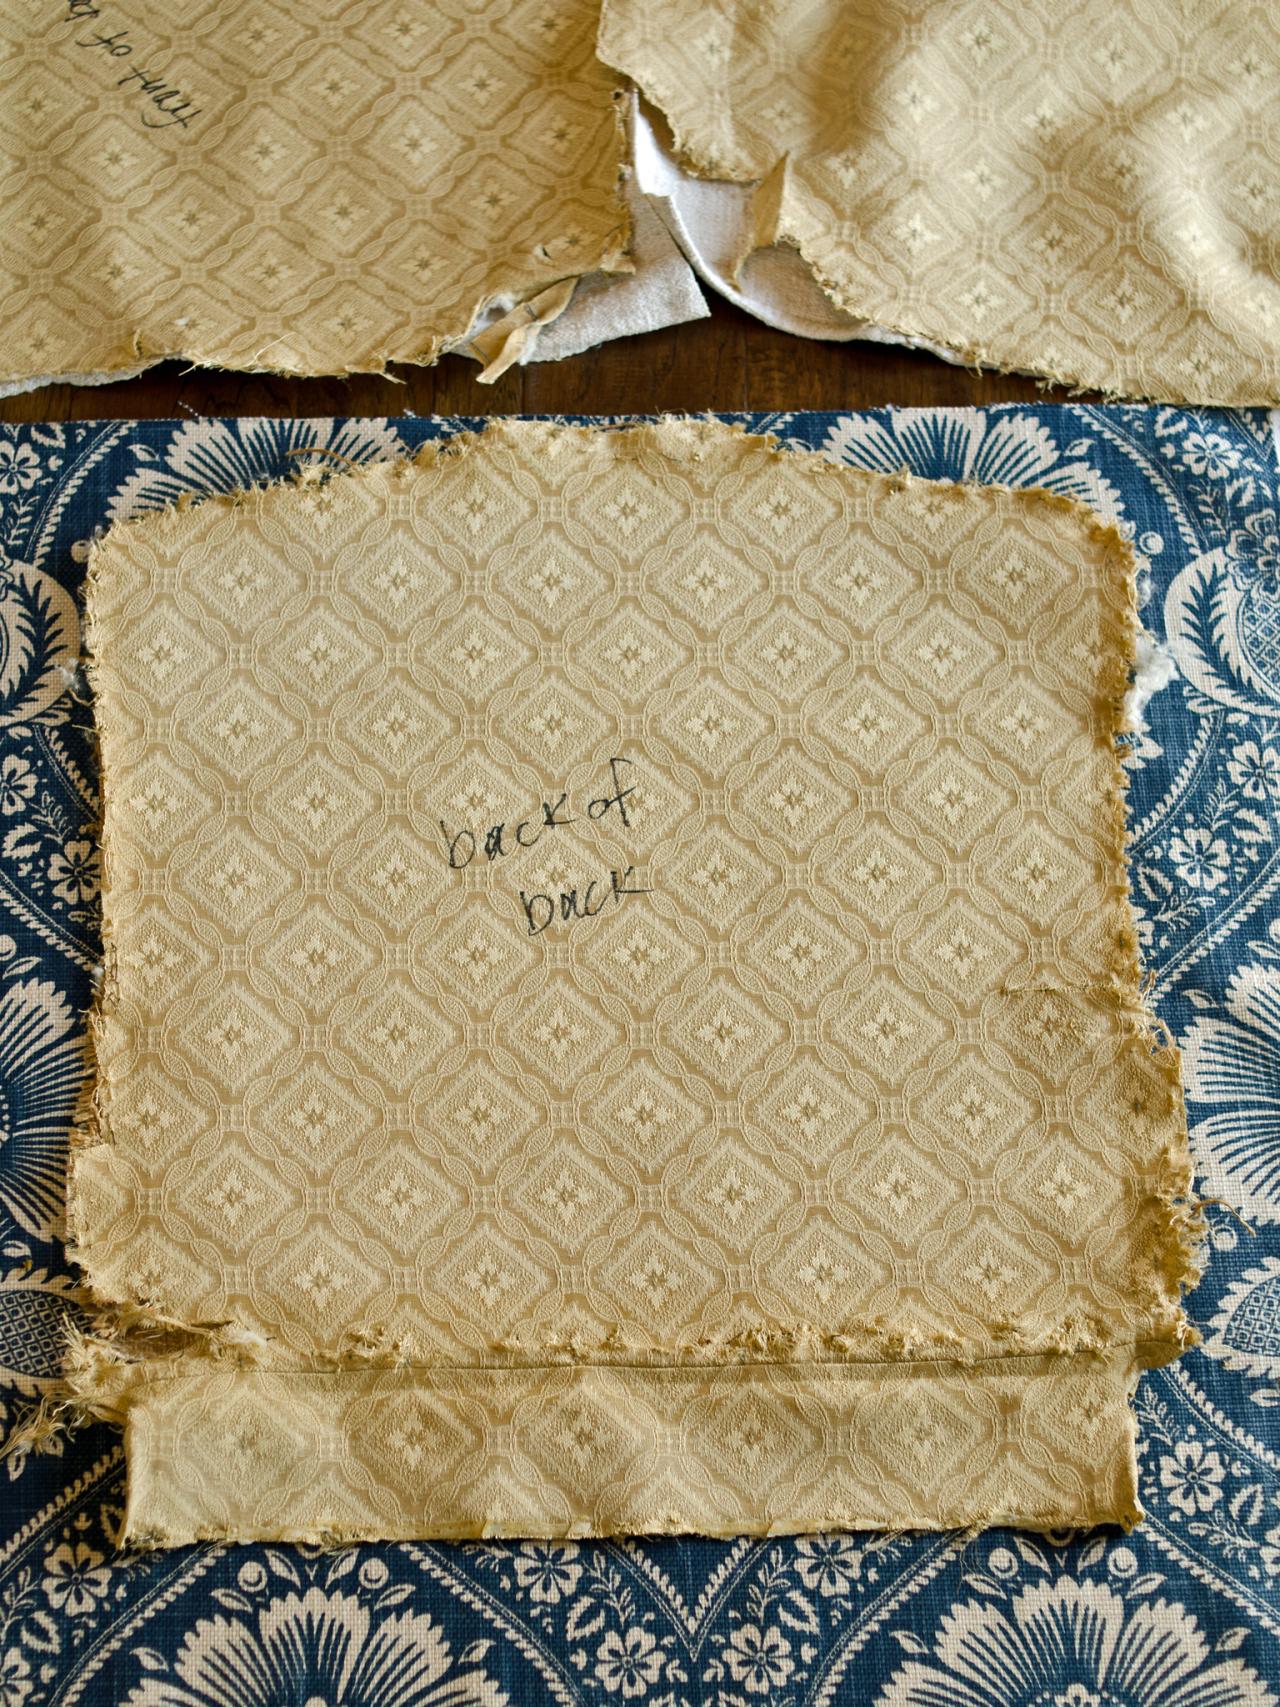
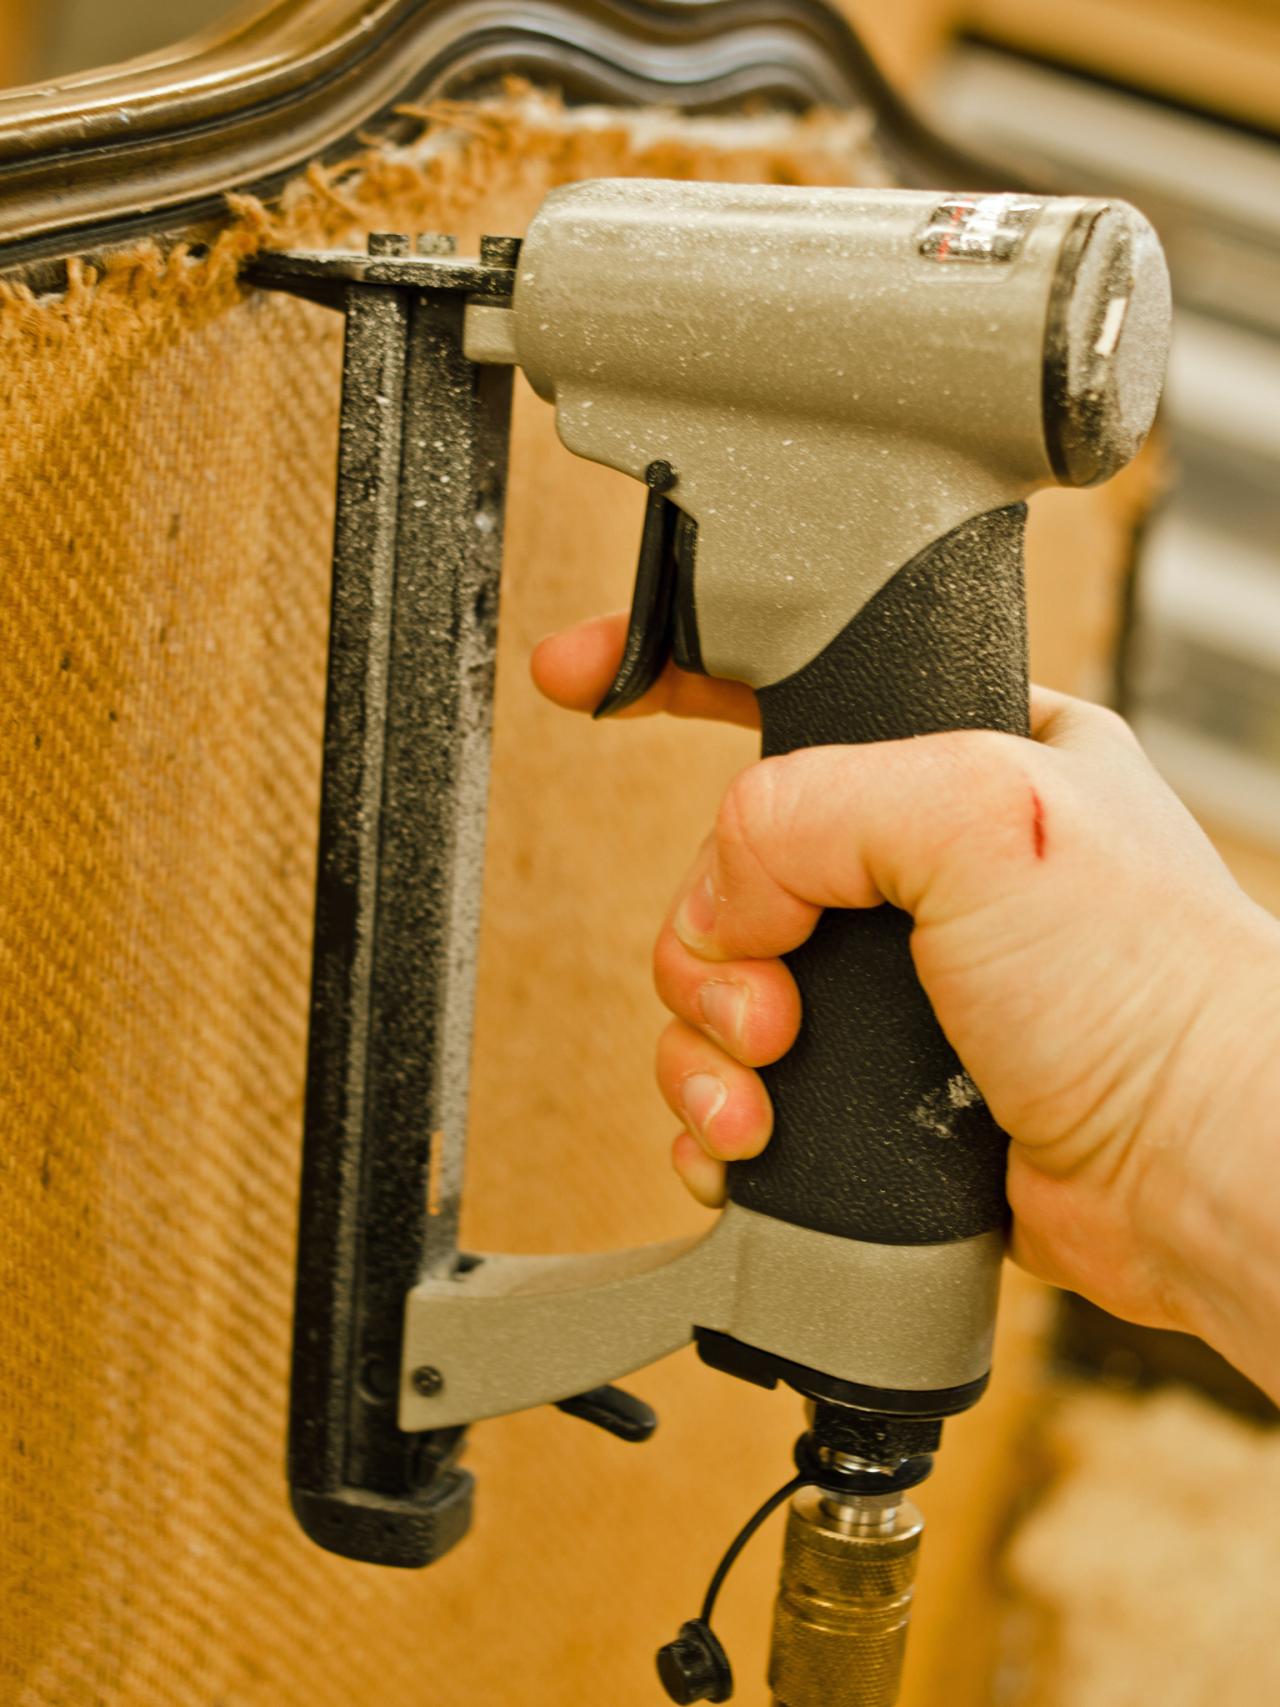
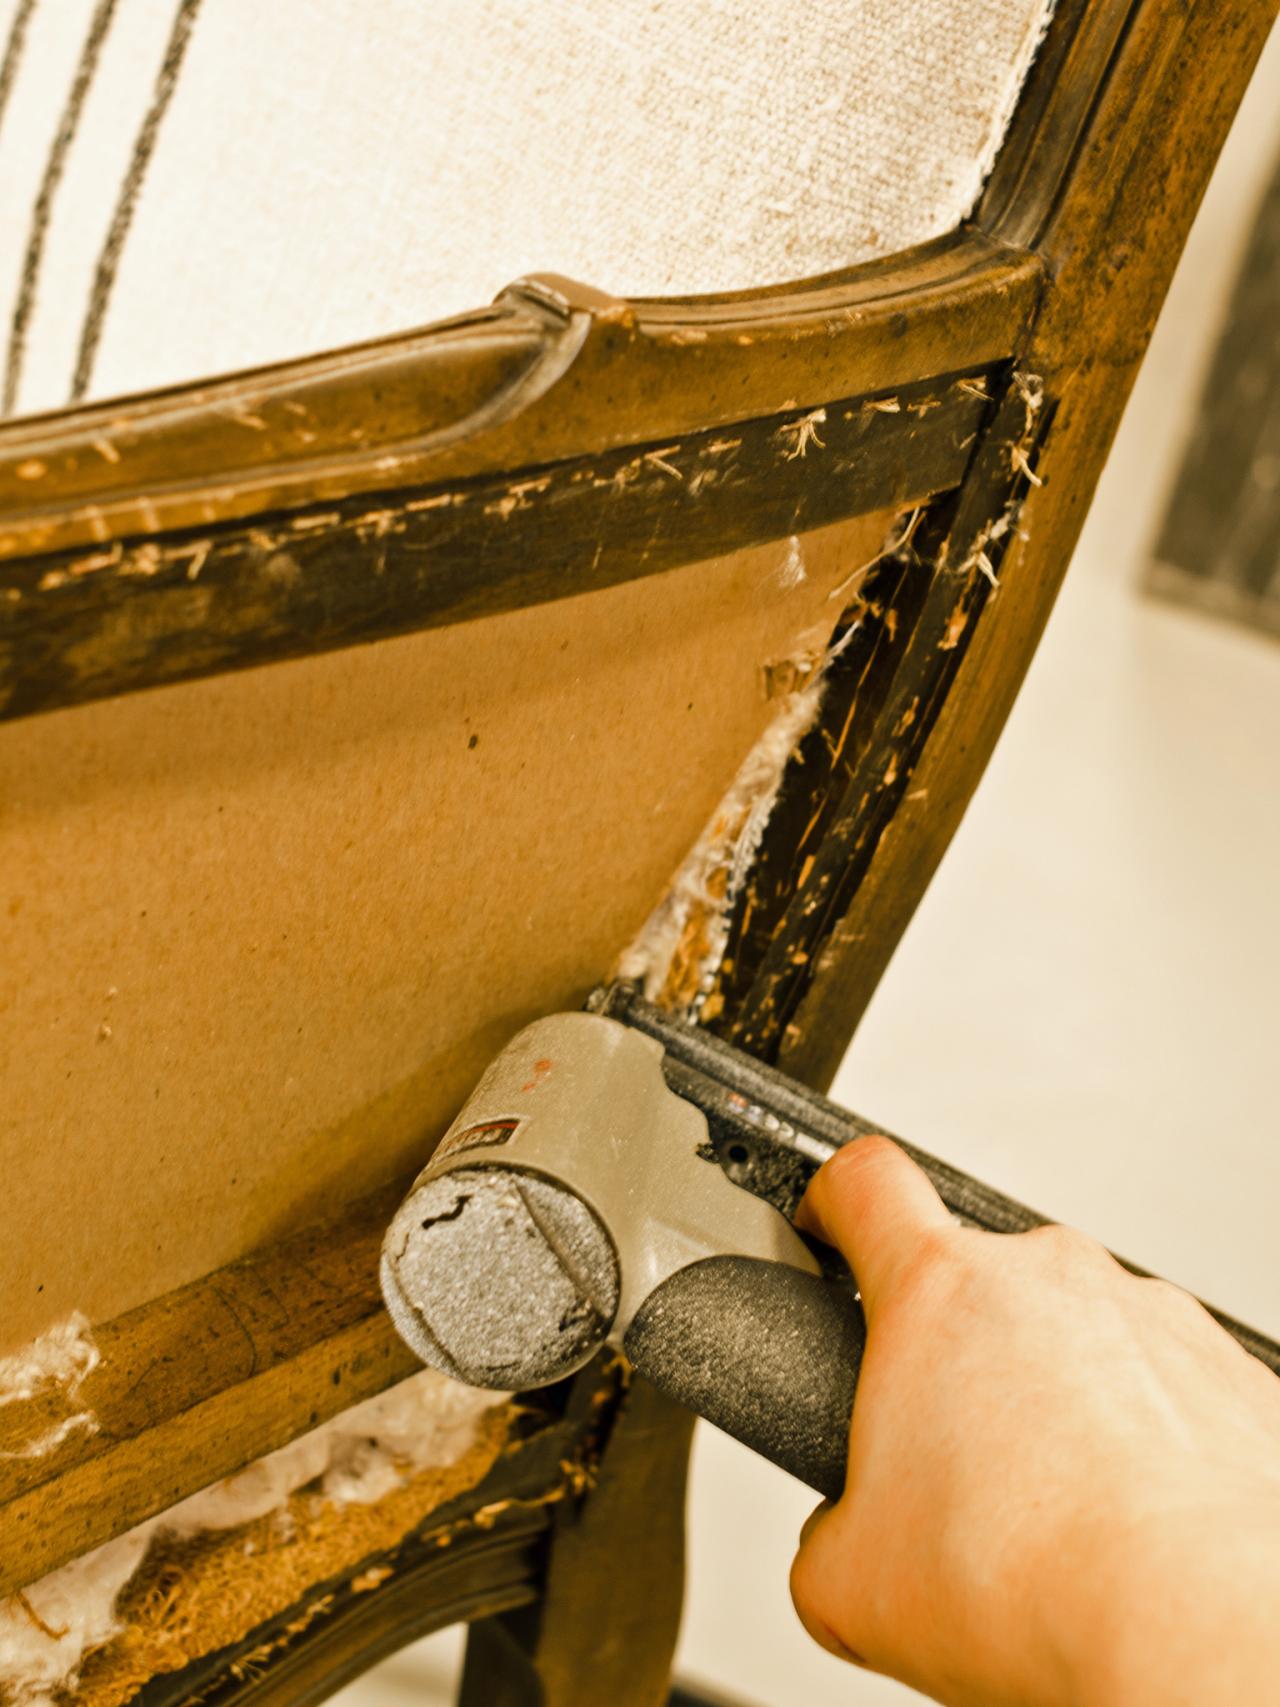
Using a staple puller/remover, gently remove fabric, staples and trim from chair (Image 1). Wear gloves and protective eyewear during this step. Label each piece of fabric removed with a permanent marker and take notes on how the chair was assembled and where each fabric piece was secured (Image 2). If panels were stitched together, use a seam ripper to separate panels and make notes or take photos on how they were attached. Remove padding that would restrict access to the frame where fabric needs to be secured. All other padding, webbing and springs can remain in place. Set aside pieces of cardboard, burlap, webbing, padding, etc. that can be reused. Once stripped, go back over the frame with a staple puller and remove any staples that would interfere with new staples when the chair is reassembled (Image 3).


Prying Old Fabric Off Chair Frame
Labeling Old Fabric as Patterns
Removing Staples
2. Cut Fabric Panels
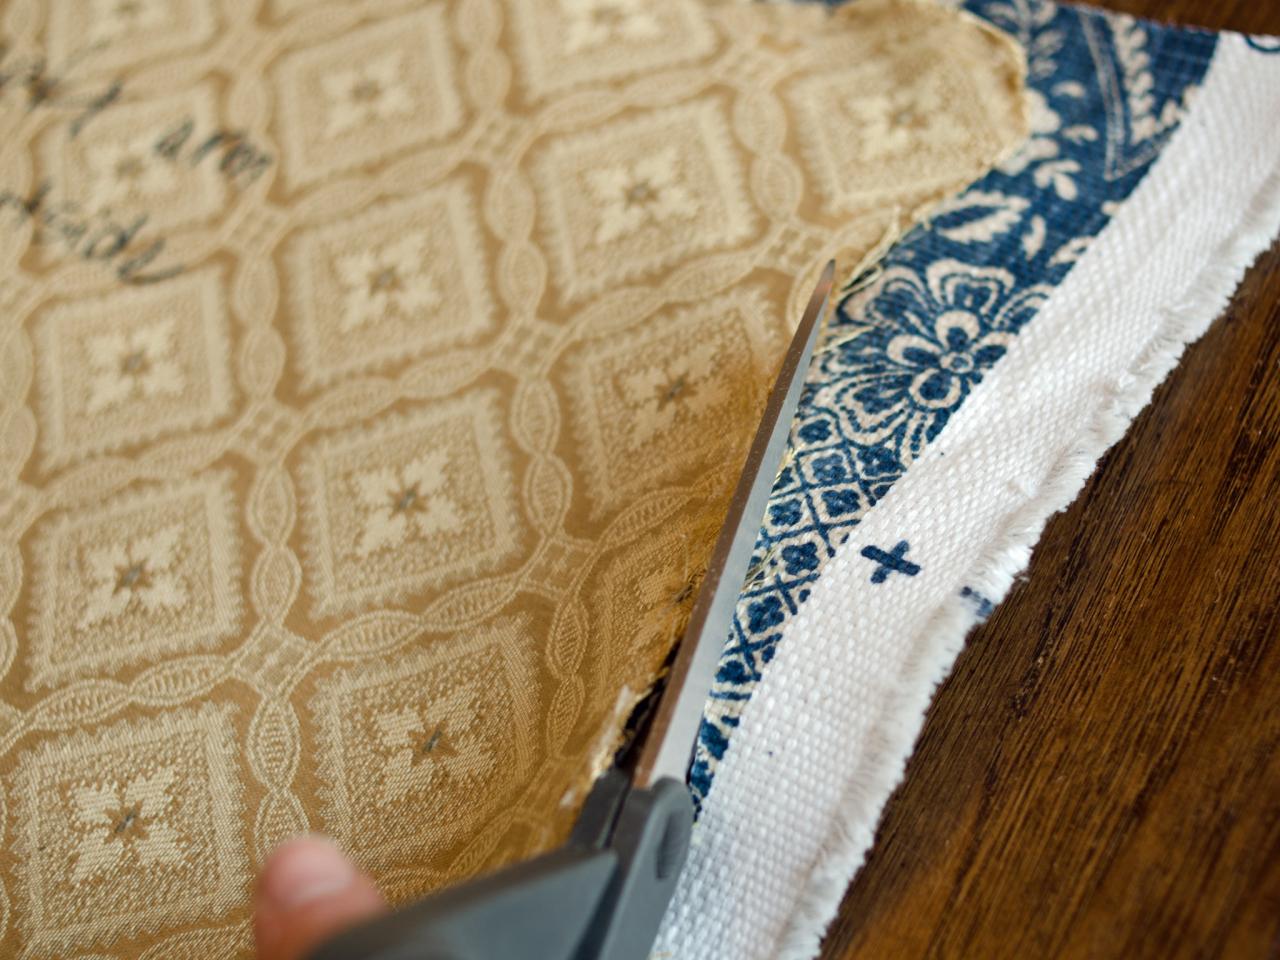
Pin the old panels of fabric to the new upholstery fabric (Image 1). Make sure both pieces of fabric are facing the same direction, so they are an exact copy, not a mirror image (Image 2). Cut new upholstery fabric to size using the old fabric as a template (Image 3). Repeat this process with all panels. If a panel needs to be pieced together on a sewing machine, sew those pieces at this step.
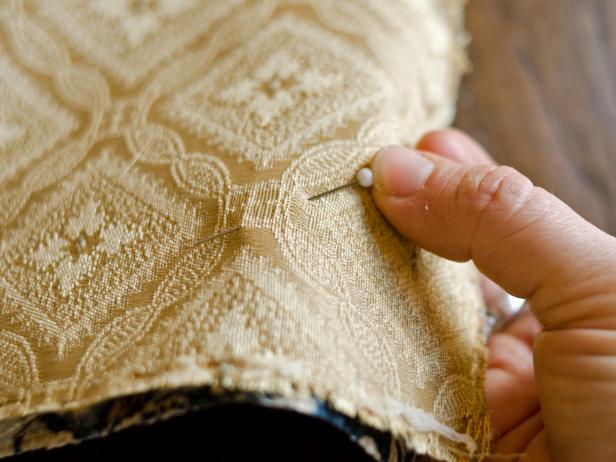


Pinning Fabric
Using Old Discarded Fabric as Patterns
Cutting Fabric
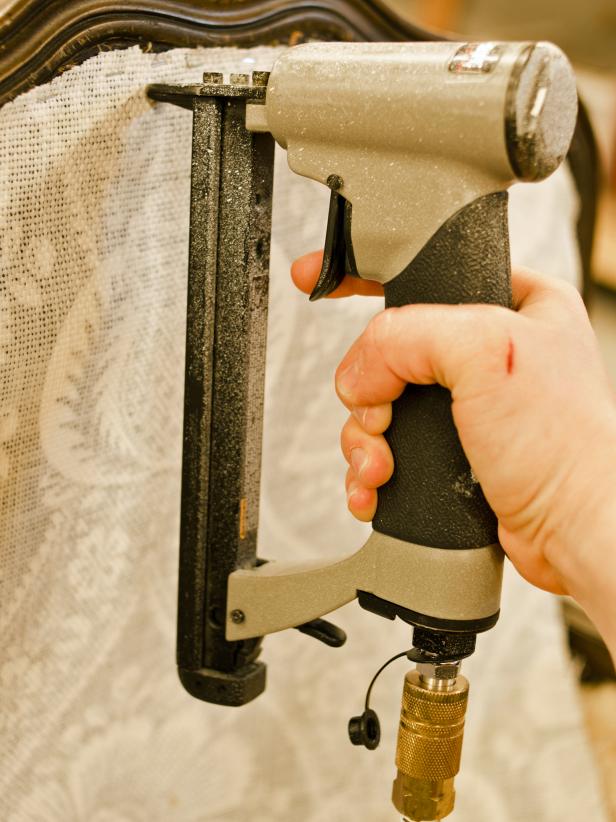
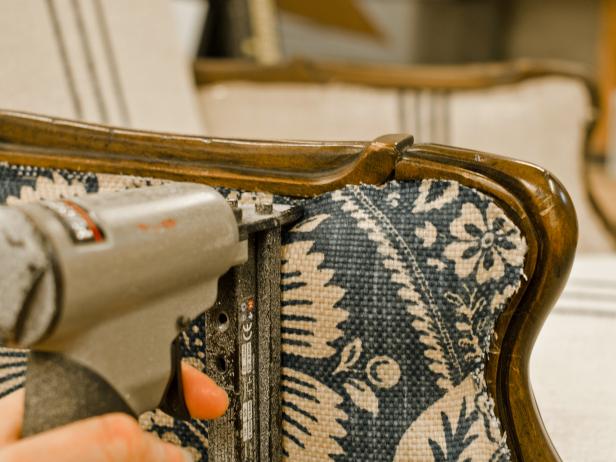
3. Upholster Chair
Wait to remove the pins and old upholstery from your new fabric panels until right before using it, this way there is no confusion about what piece goes where. Most chairs should be assembled starting with the inside back, arms and seat. Our chair required the back side of the chair to be assembled first, followed by the inside back, seat and arms, and then outside arms. Secure each panel with one staple to secure it in place and then a staple on each side to make sure the panel fits properly and isn't pulled in one direction or another. Make sure staples are in a straight line that can be covered by a piece of gimp trim (Image 1). Staples should be approximately 1/2" apart. Seat backs should always be supported with burlap, cardboard or webbing and padding (Image 2). Tip: Don't try to upholster a chair with an electric or manual staple gun. They are too bulky and not powerful enough for a project like this.

Stapling Fabric on Chair During Reupholstering
Pneumatic Staple Gun
4. Upholster Chair Back
When upholstering the inside of a chair back, spread the fabric panel over the chair back, making sure the fabric pattern is lined up, if necessary. Place one staple at the top to hold the panel in place. Tuck fabric through the back of the chair frame and gently pull tight (Image 1). Pull the fabric through the sides and staple it to the frame to secure it in place (Image 2). Be sure to not pull the fabric too tight on one side, this might make the pattern crooked. Once fitted and secured in a few places. Go around the panel and insert staples every 1/4" (Image 3). Leave the bottom of the seat back unstapled until the fabric panel for the seat is in place.

Tucking Fabric When Reupholstering
Pulling Fabric When Reupholstering Chair
Stapling Fabric When Reupholstering
5. Upholster Seat and Inside Arms
Place the seat fabric panel on the seat and spread it out. If a pattern needs to be lined up with the inside of the back, make sure it is lined up. Pull the seat fabric through the sides and back of the chair. Once the seat is in place, staple it to the frame. Follow your notes to see where to staple, tuck or fold the fabric. Secure all pieces in the back of the chair to frame. On our chair, the very back panel was stapled over the inside back and seat once those were secured to the frame. Repeat that process with inside arms.

Reupholstering Chair
6. Upholster Outside Arms
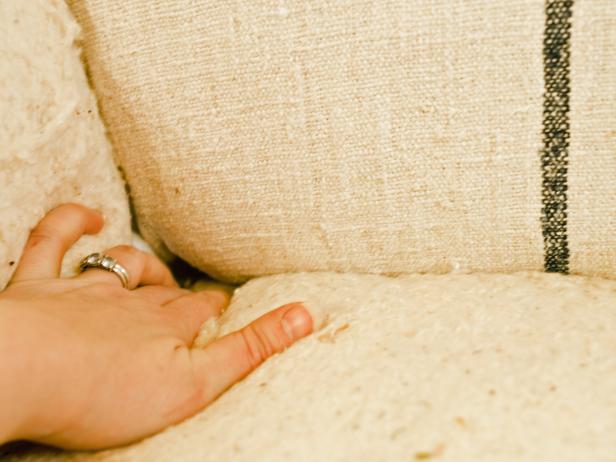
Replace any padding that was removed to access the frame (Image 1). Staple outside arm panels in place. Tip: Small armchairs are a great way to use fabric remnants. Use one fabric for the inside panels and another for the outside (Image 2).
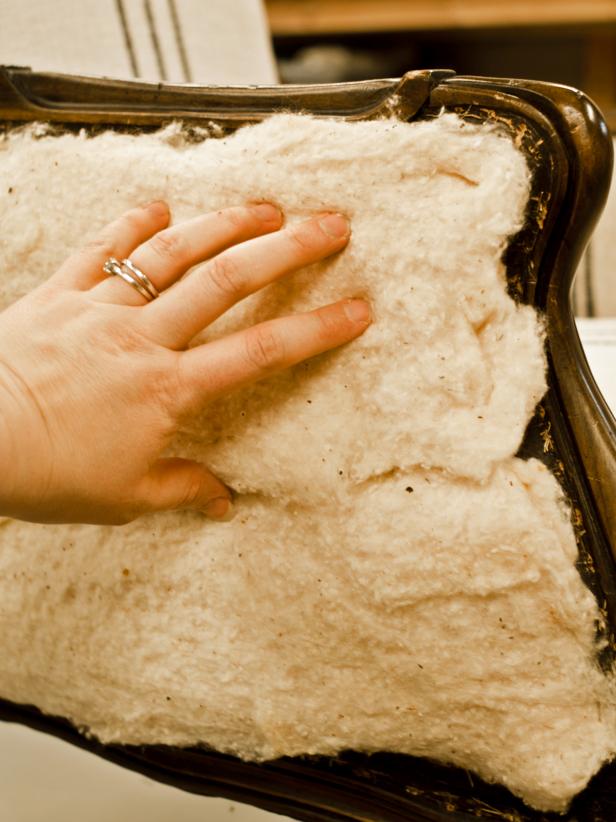
Adding Batting to Chair
Stapling Upholstery to Chair
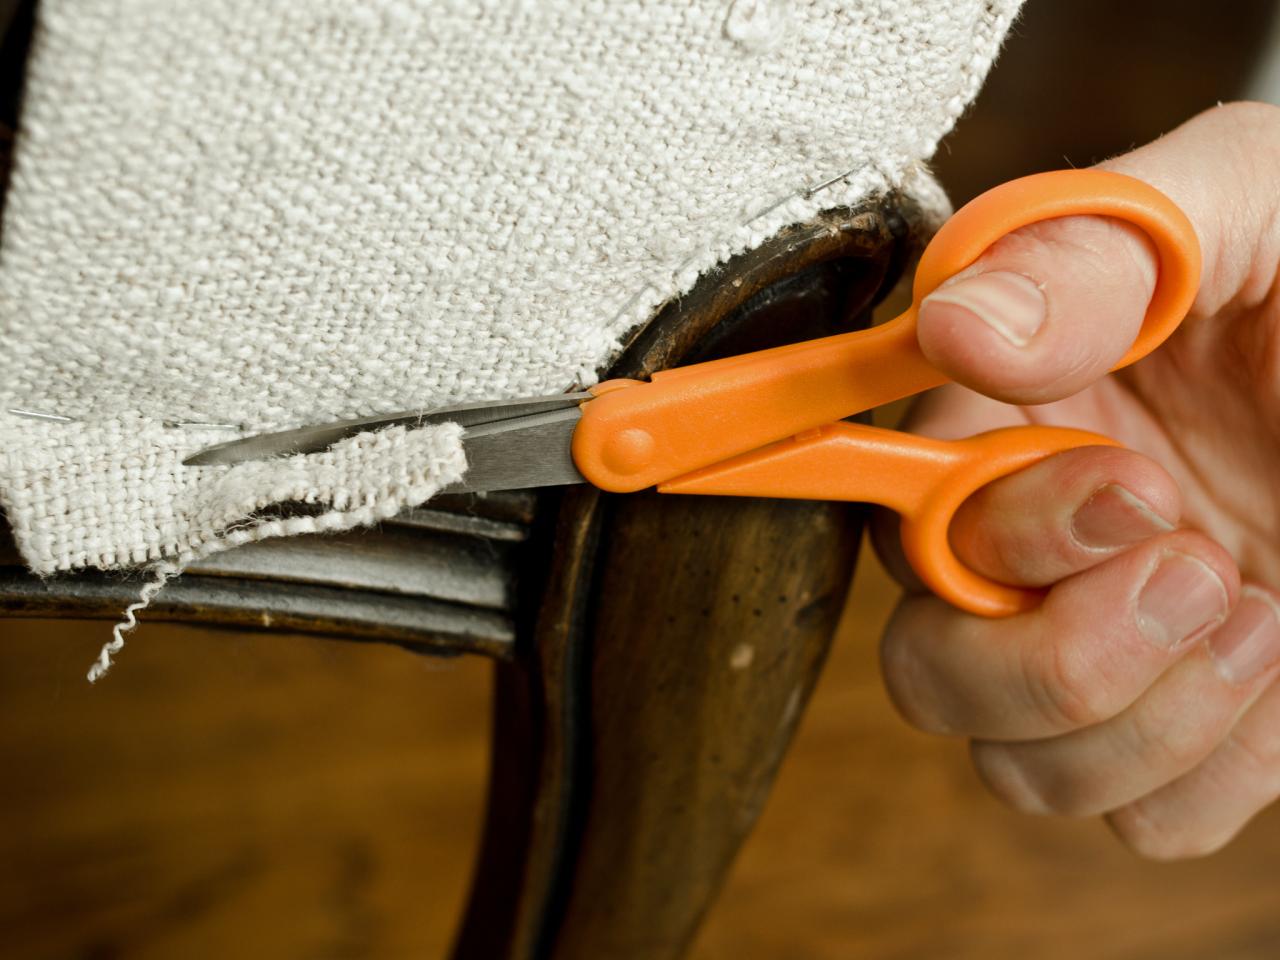
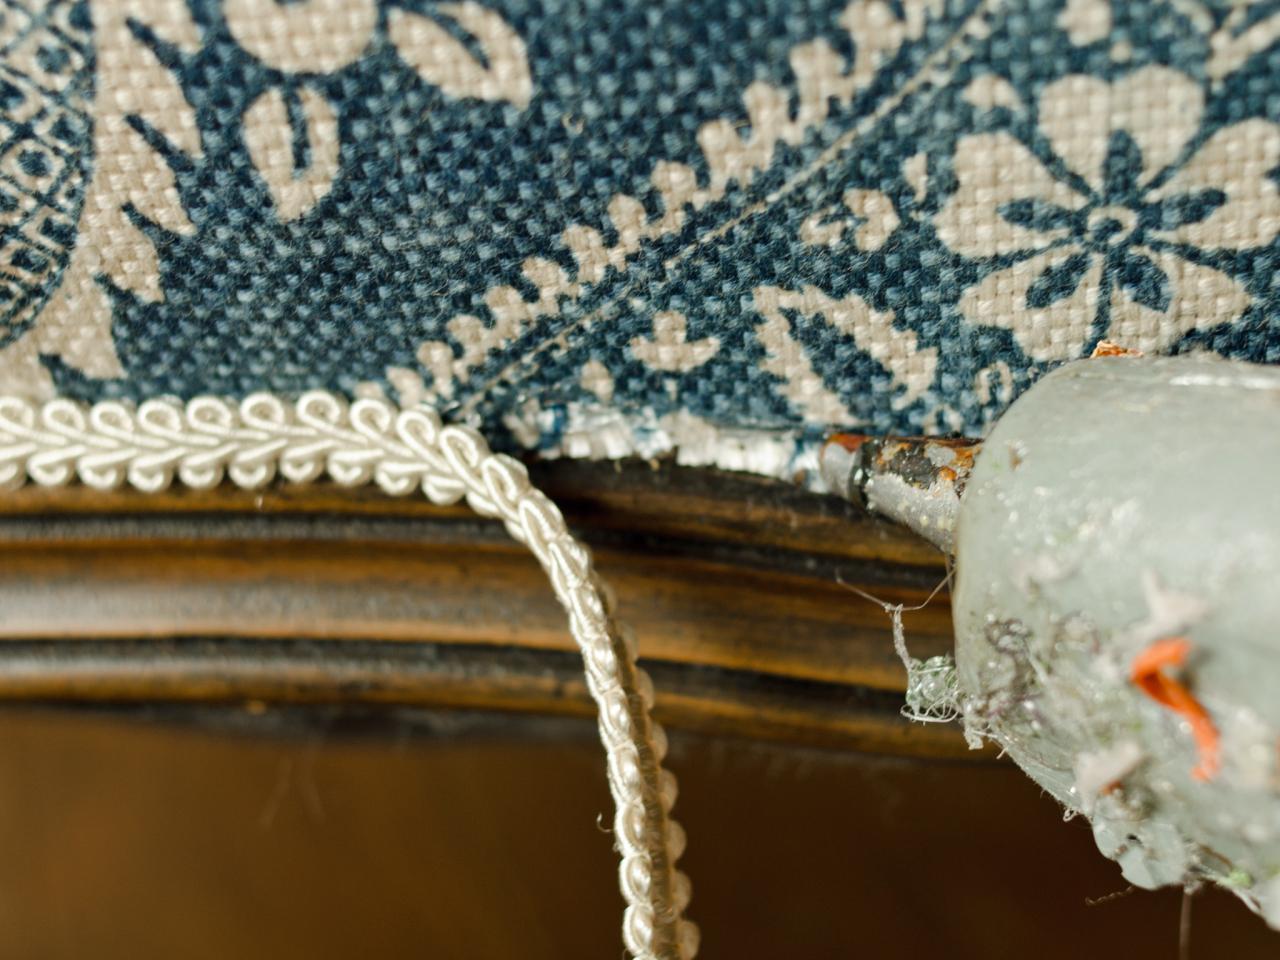
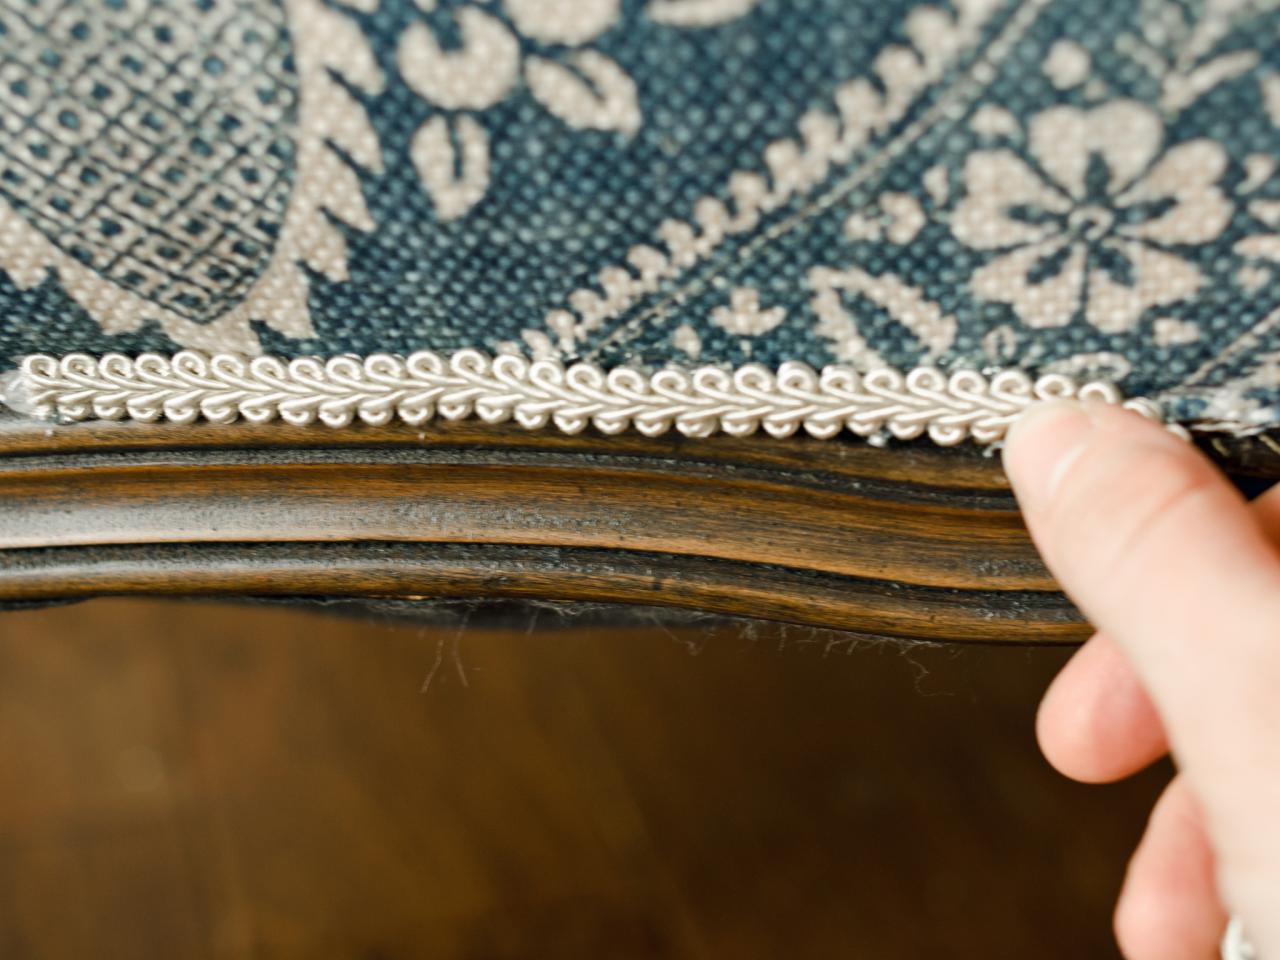
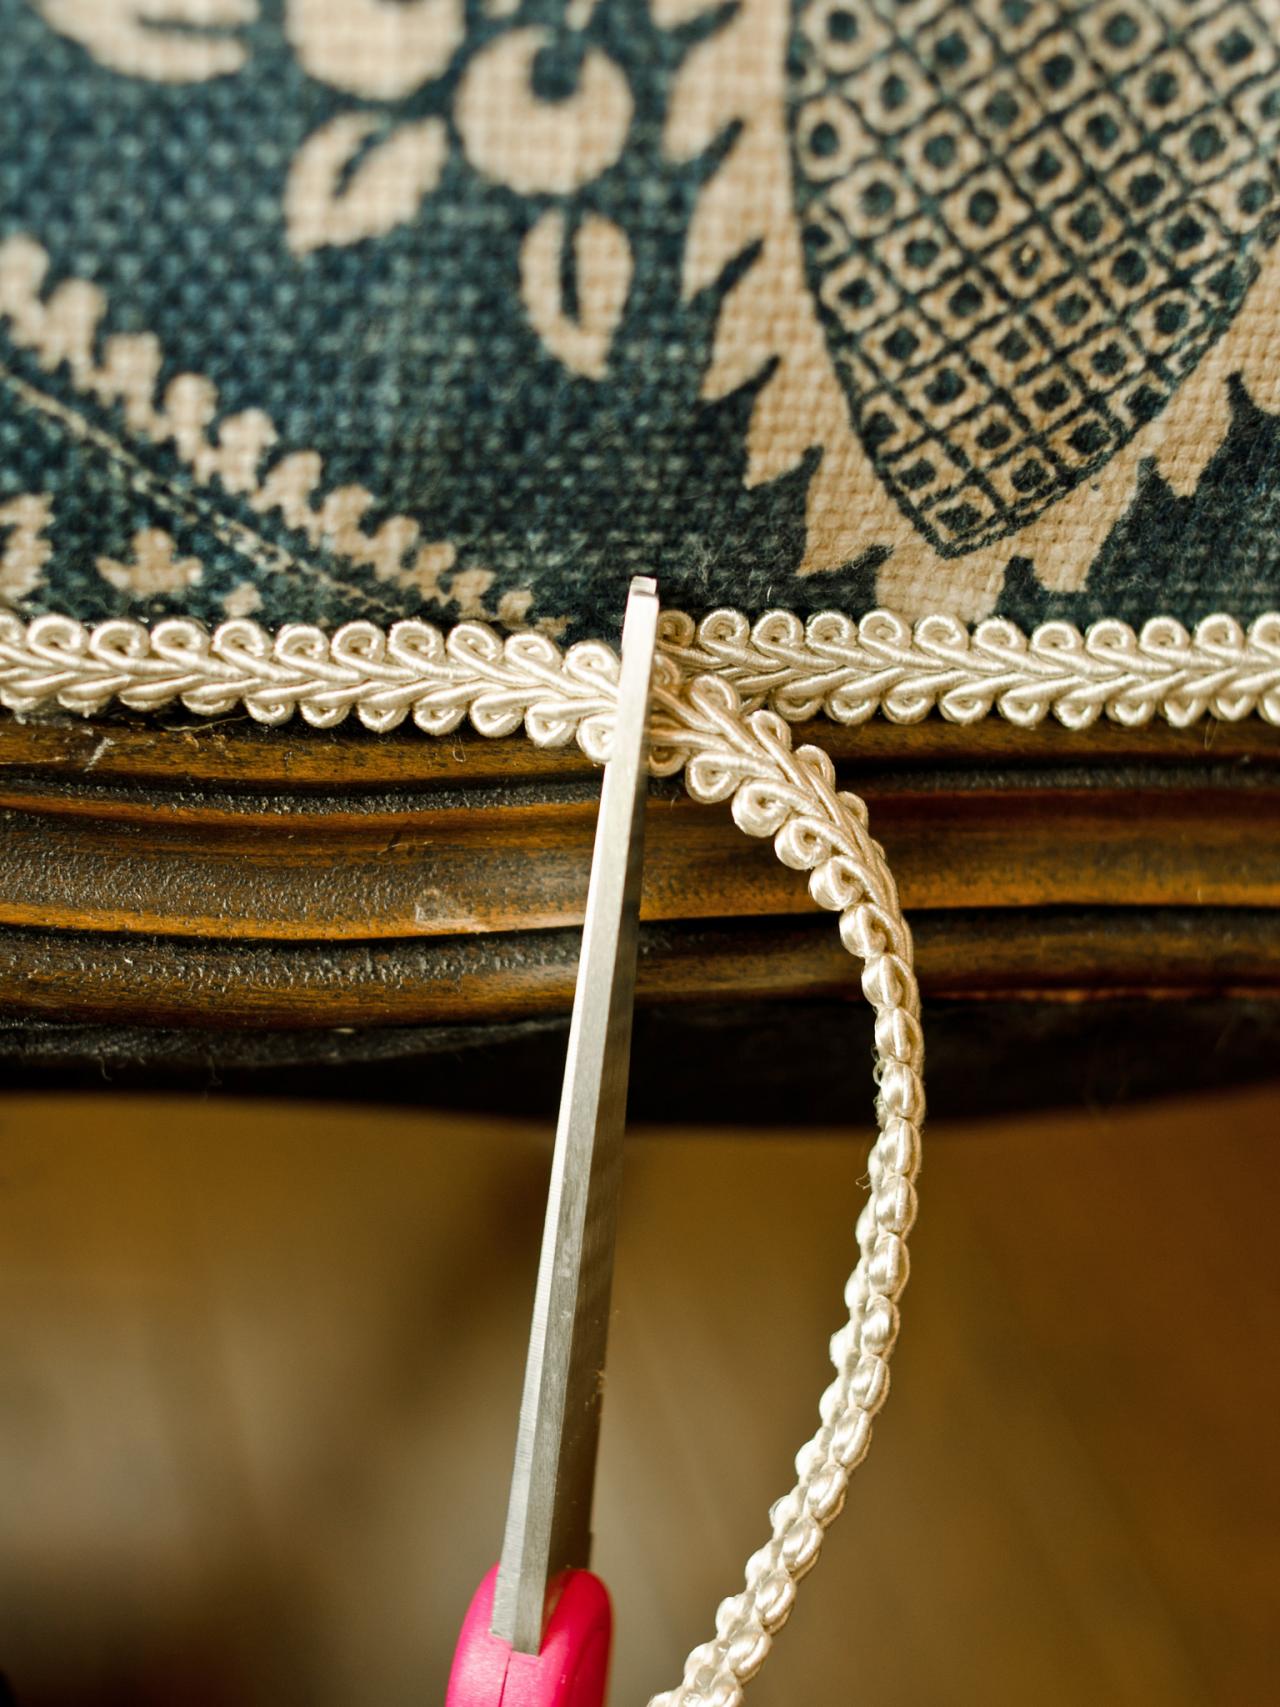
7. Trim Fabric, Apply Trim


Cutting Fabric
Gluing Gimp to Chair
Attaching Trim to Chair
Trimming Fabric Gimp
Upholstered Chair After
Cut off excess fabric with a sharp pair of scissors. The fabric should be cut as close to the staple line as possible (Image 1). Apply a line of hot glue along the staples and press the gimp trim into it (Images 2 and 3). Hold in place until the glue is cool. Work in small 6"-8" sections to prevent the glue from cooling too quickly. Where trim ends meet, cut trim to size and secure ends together with hot glue (Image 4). Apply trim where needed to cover staples. Trim threads and remove glue gun strings before enjoying your "new" old chair (Image 5). Tip: Don't wash the fabric before use. Most decorative upholstery weight fabric is treated to resist staining. If the fabric is washed prior to using it for upholstery, that protective treatment will be washed away.

37 Easy DIY Budget Decorating Projects You Can Do This Weekend 37 Photos
Tired of staring at the same four walls? Check out these solutions for refreshing furniture, creating gallery walls and artwork that will add pizzazz without depleting your wallet. (Minimal DIY skills required.)


