


How to Make a Weatherproof Cardboard Box Fort
Use a weatherproofing spray to make your kids' cardboard box fort stand up to the elements.


Who doesn't love a good cardboard box fort? Me, me, I do! Hours of entertainment that comes at a zero dollar price tag? Yes, please. Because we live in New England and endure some looooong, cold winters, we've gotten pretty creative with our cardboard box fun on days when it's too cold to go outside. But even now that the frigid temperatures, snow and ice are long forgotten, my daughter still loves to play in box forts. Box forts are a fun way to change things up in the backyard without dropping a hefty chunk of cash on a playhouse. Unfortunately, a few of our box creations have suffered a sad, soggy fate when left out overnight to sag and collapse after a heavy dew or a surprise rain shower.
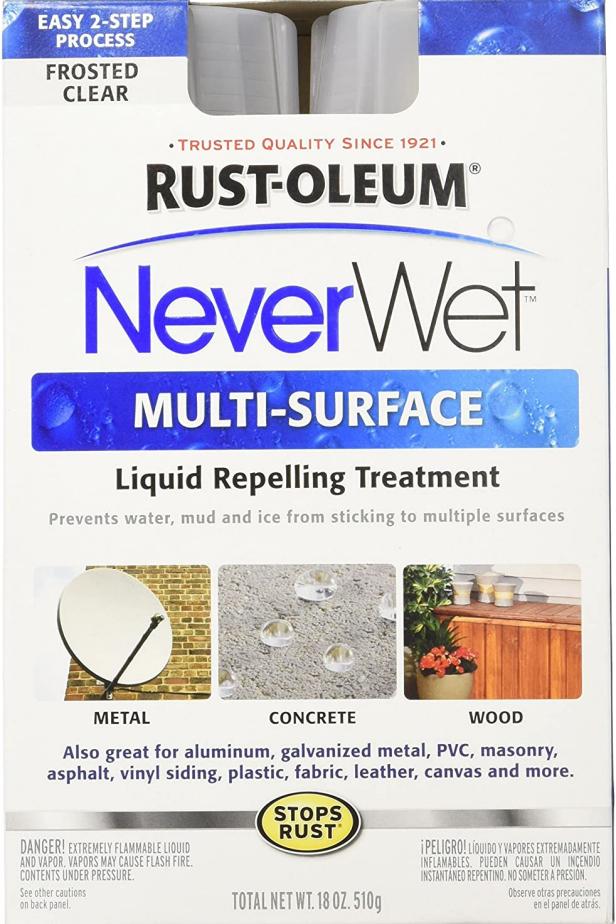
It finally hit me that Rust-Oleum NeverWet — a liquid-repelling treatment often used to make patio pavers, decks and outdoor umbrellas water-resistant — might just be the product to save our summer cardboard box forts from a soggy fate.
Let me tell you, this stuff was crazy amazing. I did a test on a scrap piece of cardboard and could not believe how cool it was to see the water bead up and slide right off. This stuff is BANANAS.

Once I finished up the box fort and was ready to test it out, of course the forecast called for only blisteringly hot, sunny and cloud-free days. We decided to create a man-made test by using the box fort as a sprinkler shelter. Our daughter has a love/hate relationship with the sprinkler — she loves the idea of it, but the cold water is a little shocking and usually her first pass through is her only one. We thought giving her a nice, dry place to hang out and get a little wet might be the perfect compromise. HUGE success. The cardboard box fort is still going strong a week and a half later, and it's become the favorite backyard hot spot. The swing set looks on longingly. At this rate, the box fort might only go into retirement when our daughter outgrows it. Read on for my step-by-step guide on how to build your own cardboard box fort.
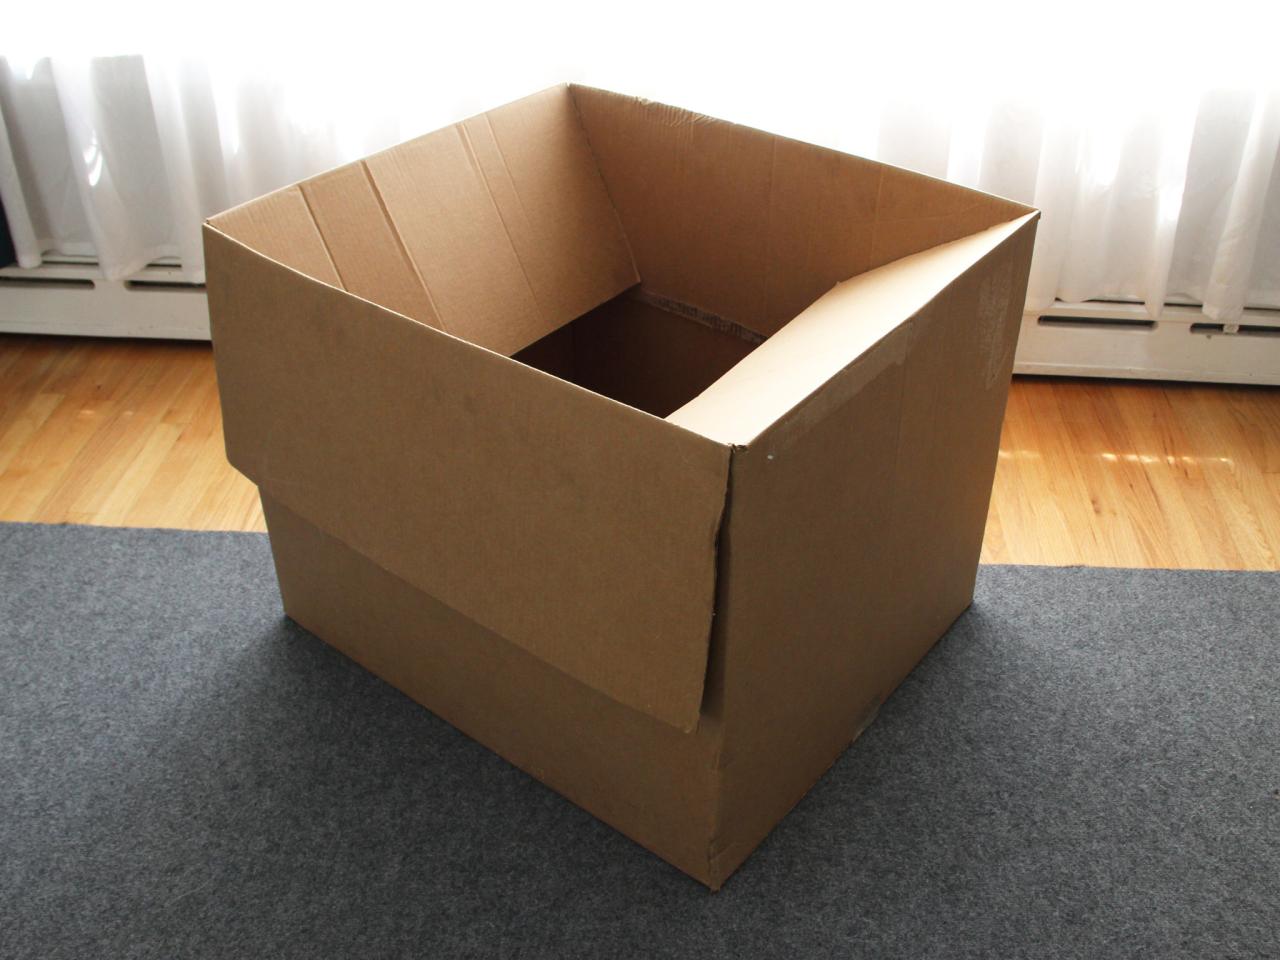
We have a stockpile of cardboard boxes in the basement. This particular box held a chair from IKEA and was the perfect size to use for a toddler-sized fort.
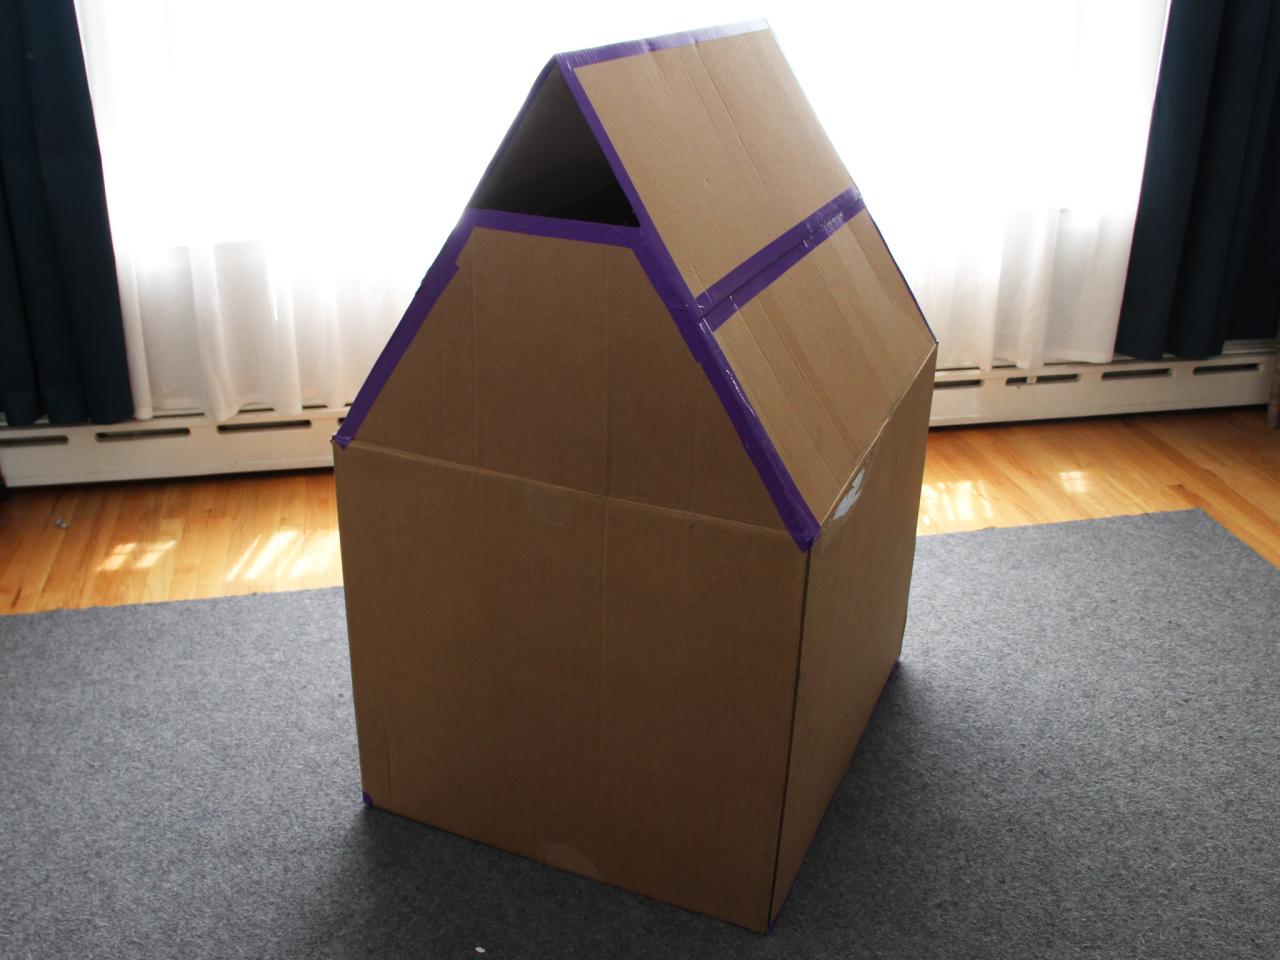
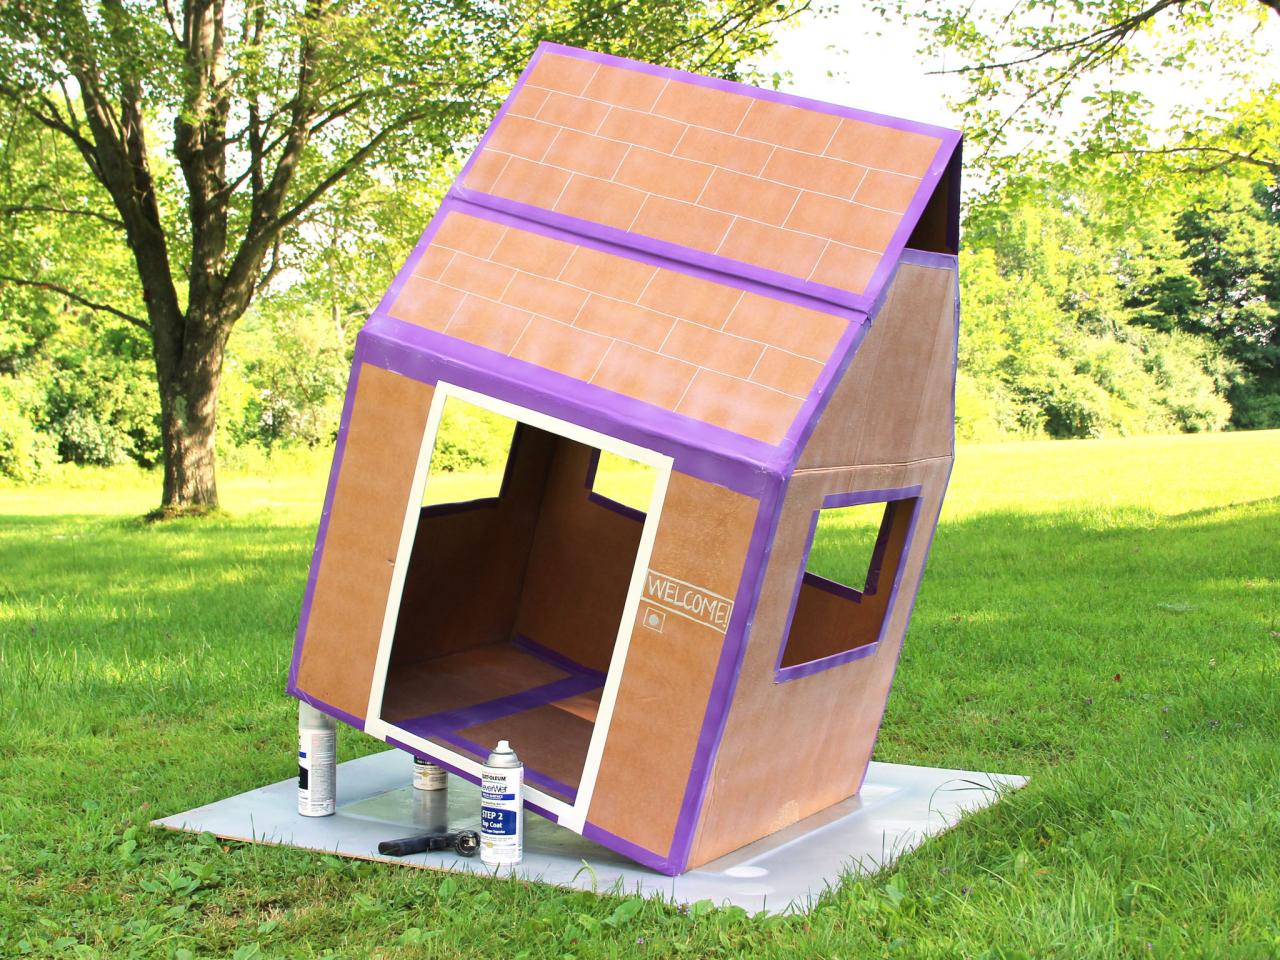
I wanted to create a pitched roof that was high enough to allow my 36-inch-tall daughter to stand up inside the fort, so I first cut two of the longer flaps off the bottom of the box to use to extend the roof. Then I marked the shorter of the flaps on the top of the box to cut — they become the support for the roof flaps.
Here are the cut flaps.

I used a few pins I had on hand to secure the flaps attached to the box to the support flaps I'd just cut so that I could tape them up with my old standby, Duck Tape. (I did glam it up a little with one of the new bright colors for this project!)

This is where I used those two flaps I'd cut from the bottom of the box in step 2. I taped them together to form the inverted V of the roof, then taped each side to the lower flaps I'd already secured to the support flaps.

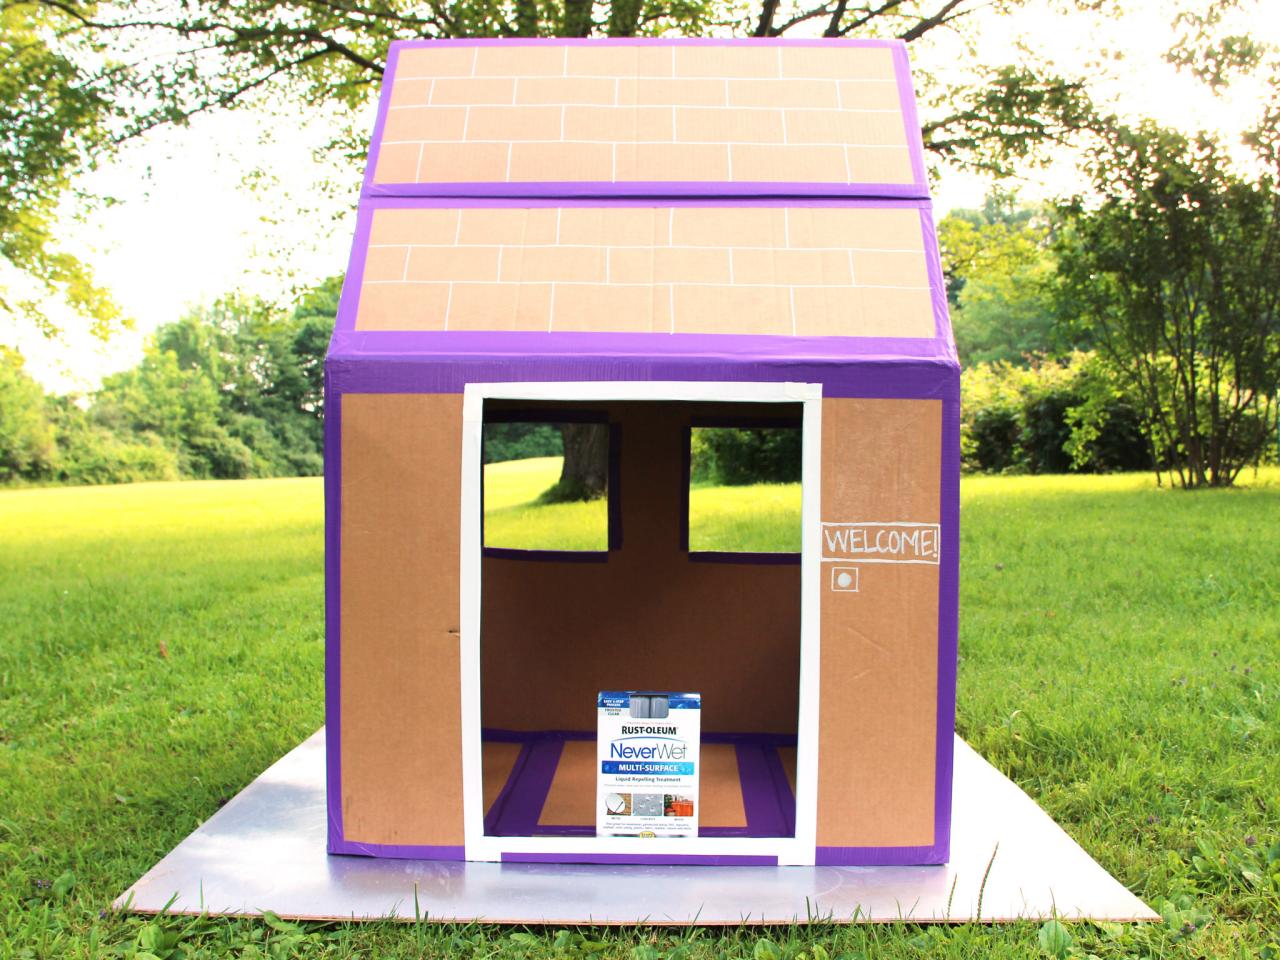
A good fort has to have windows for peeking. I taped off all of the cut edges to protect them from water and was ready to move on to the spraying.

I brought my box fort outside to spray. I set it up on a board to protect the grass and got down to business.

Rust-Oleum NeverWet is a two-step treatment and was super easy to apply. Step 1 is the base coat. You spray it on side to side, in a light and even coat, and then go over it top to bottom in another light and even coat.

After I applied Step 1, I gave my box fort 30 minutes to dry before moving on to Step 2.

Step 2 is the same process — side to side, then top to bottom. Light, even coats.

And then, if you're like me, you realize you completely forgot to treat the bottom first like you'd planned, because you were so giddy to give this stuff a test drive. No harm, no foul. Just treat the bottom with Step 1, allow to dry 30 minutes, and treat with Step 2. No one will ever be the wiser. Unless you write about it on HGTV. In which case, a whole lot of people will know what a silly girl you are. Oh well. Like that was some big secret anyway.


