


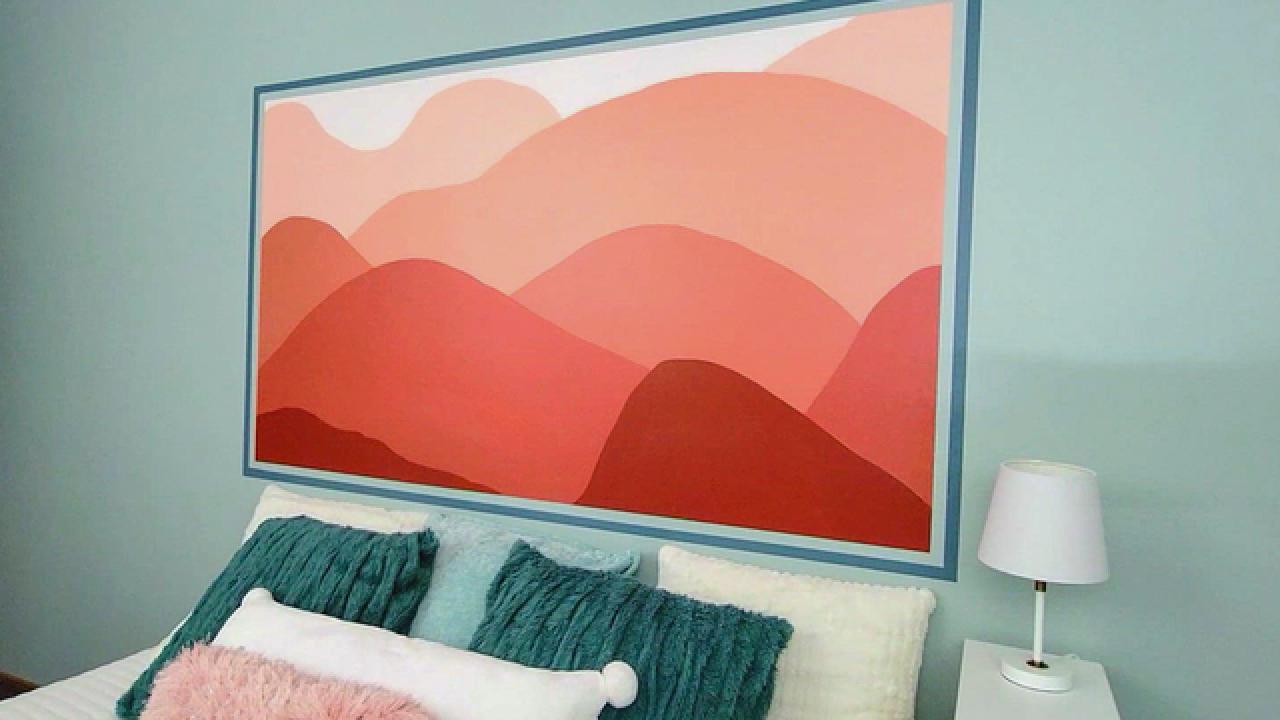
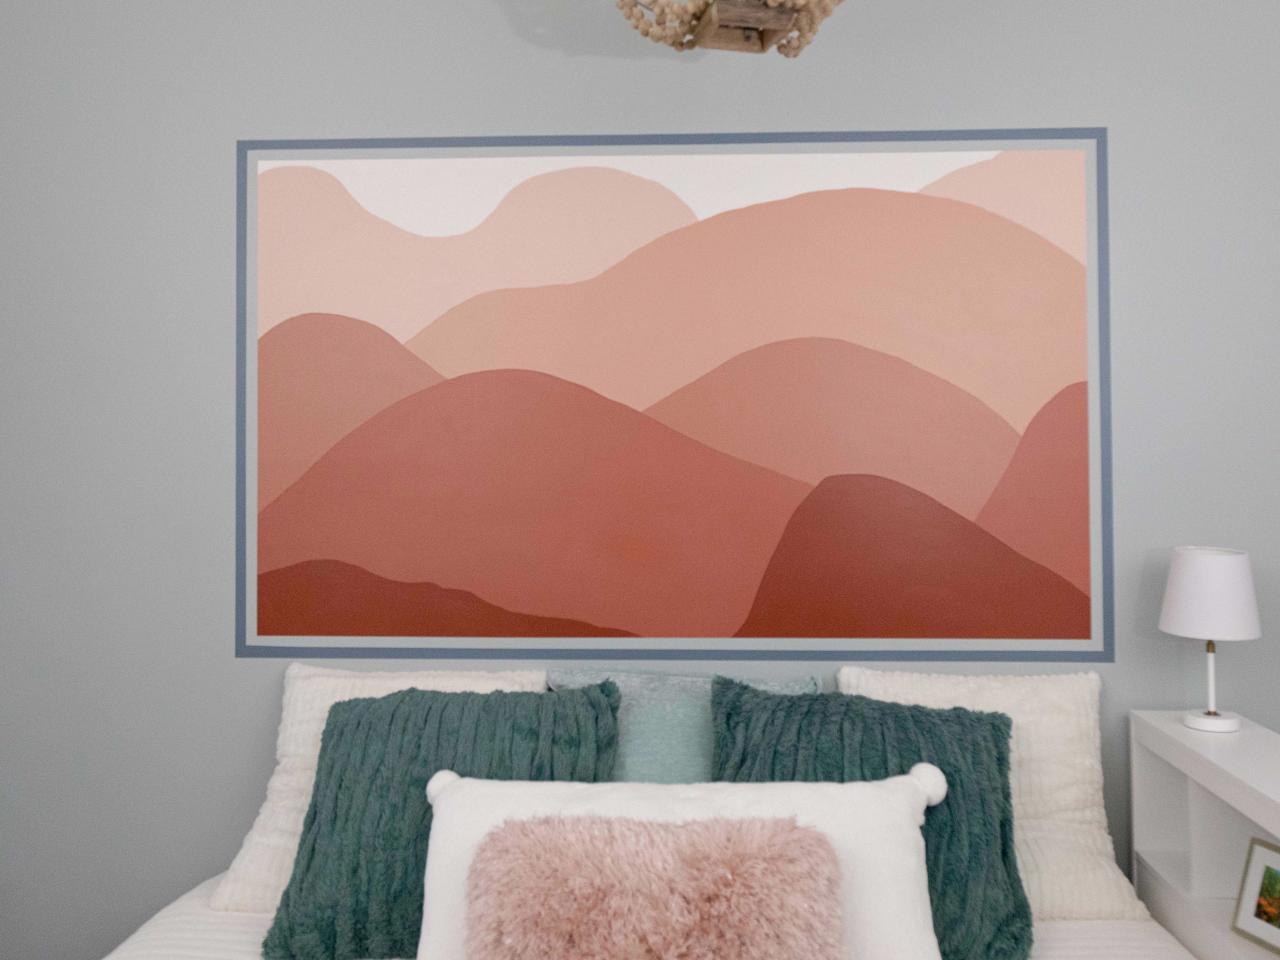
How to Paint a DIY Mountain Wall Mural
HGTV shows you how to create a custom mountainscape painting. It is easy; no advanced artistic skills are required. It’s also inexpensive, and you can make it any size and color palette you want.
Custom wall murals can be expensive and difficult to install. Instead, paint your own mural. You should be able to get it done for around $50 to $75, depending on how big and how many colors you use. This mountainscape design is easy to create. As long as you can draw a curve or a peak, you’ve got the required skills.

SHAIN RIEVLEY
Tools and Materials:
- large level or laser level
- pencil and paper
- step ladder
- paint for the mountains (We used sample-sized jars of the following: SW 6331 Smoky Salmon; SW 6332 Coral Island; SW 9006 Rojo Dust; SW 6333 Foxy; SW 6334 Flower Pot)
- paint for the frame – SW 7619 Labradorite
- original wall color – SW 7621 Silvermist
- white paint – SW 7005 Pure White
- 2” painter's tape
- 1” angled paintbrush
- 2” angled paintbrush
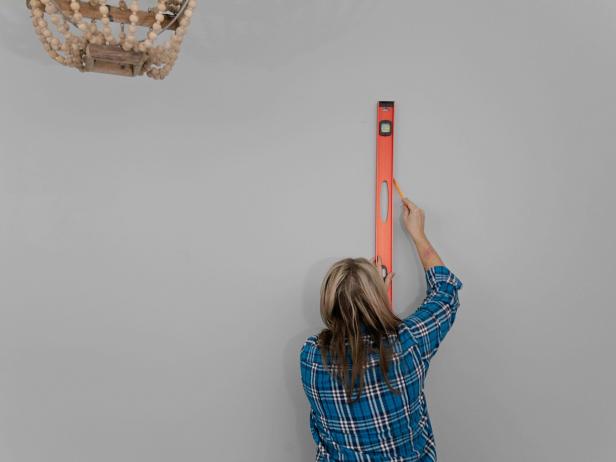
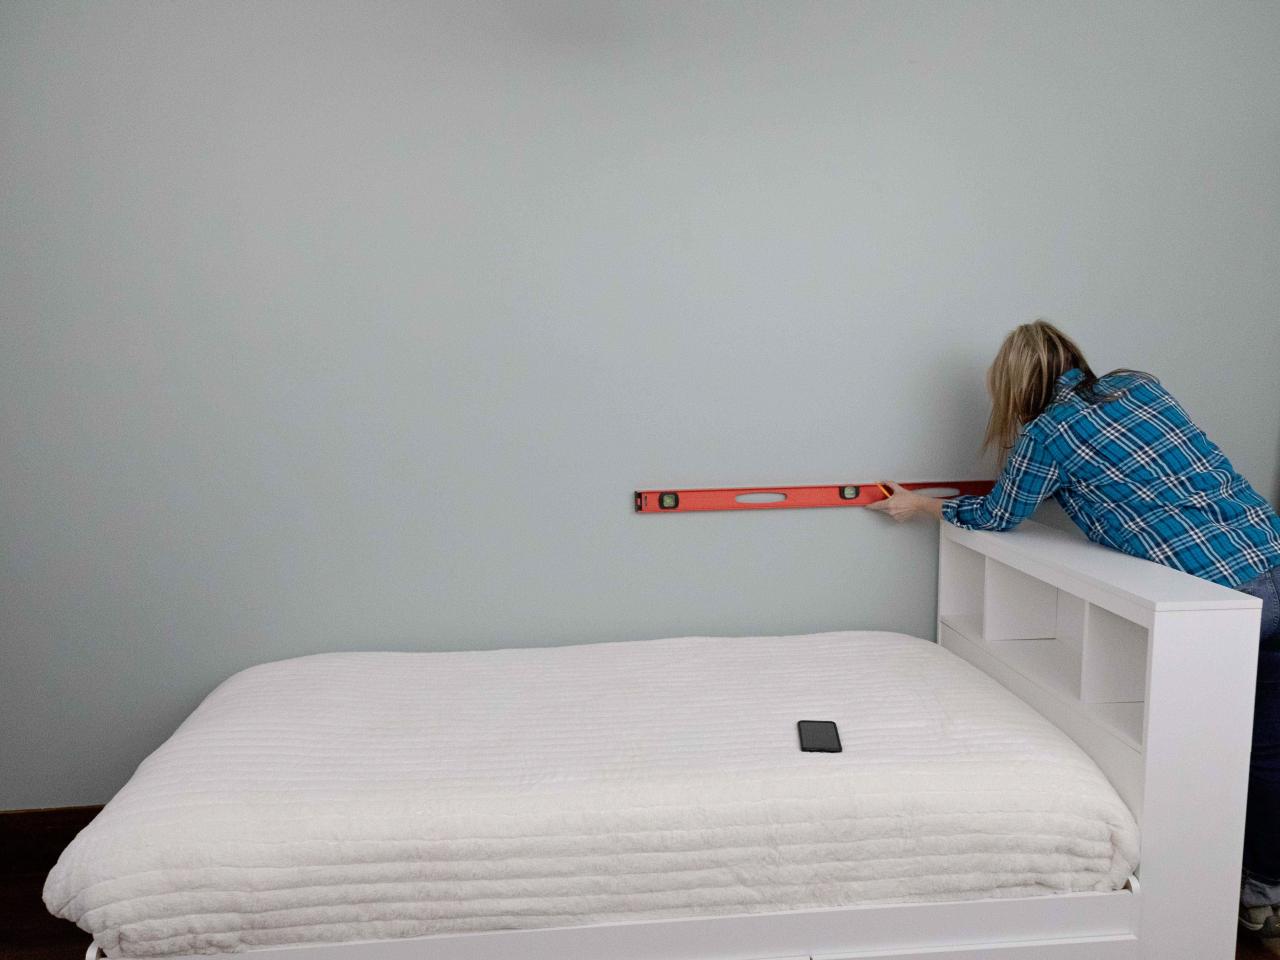
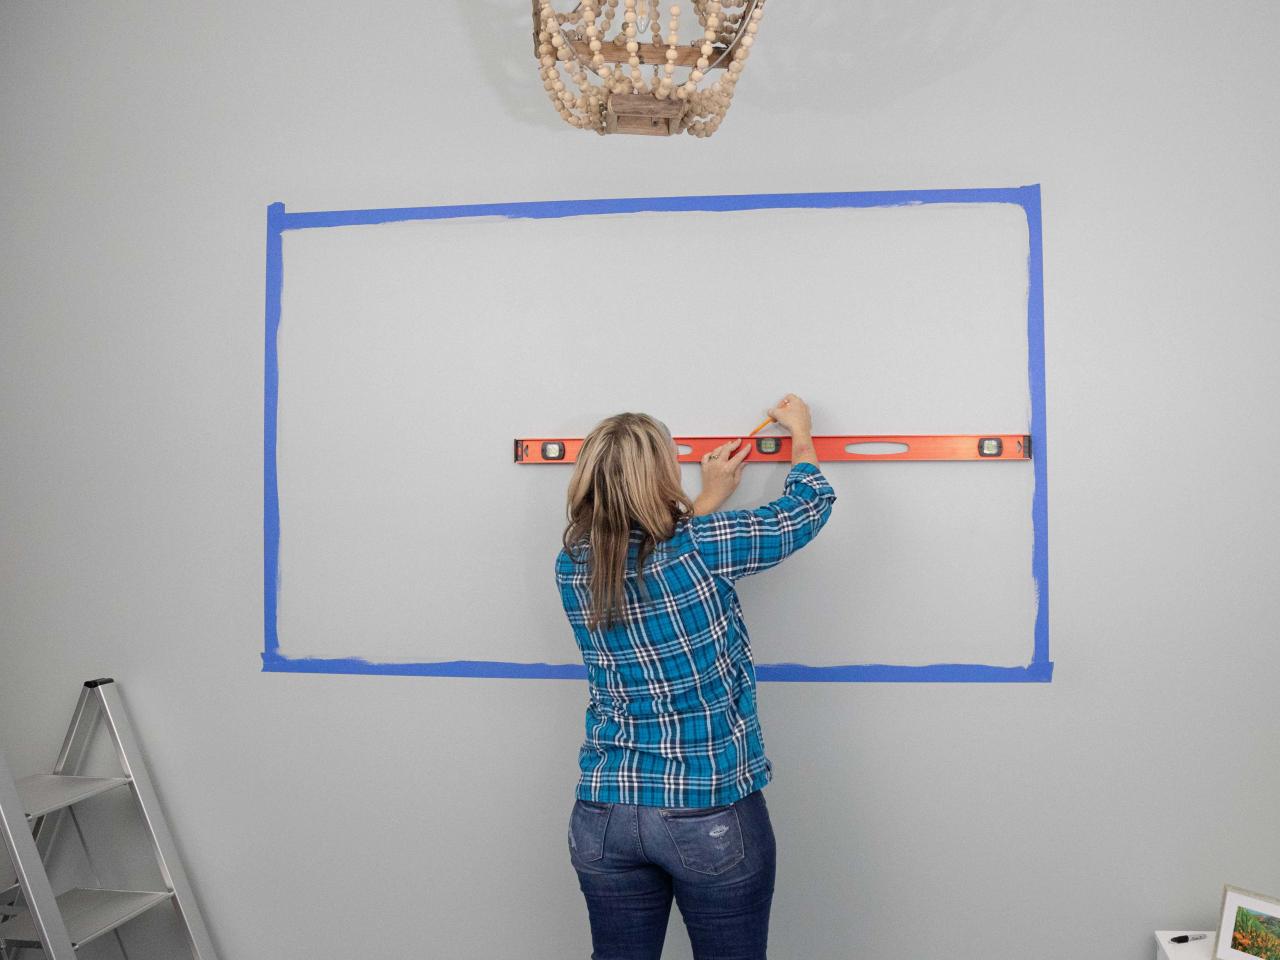
1. Measure and Draw the Outline
Measure and mark the dimensions of the mural. Use a large level to make straight pencil lines. If you have a laser level, or can borrow one, it can make this task a bit easier. Our mural measures 72” x 48”.

SHAIN RIEVLEY
SHAIN RIEVLEY
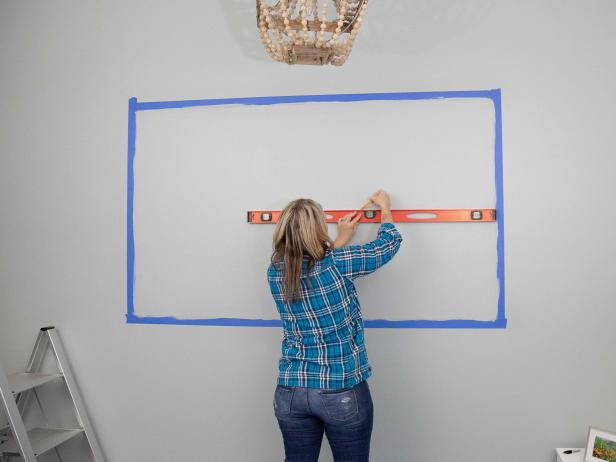
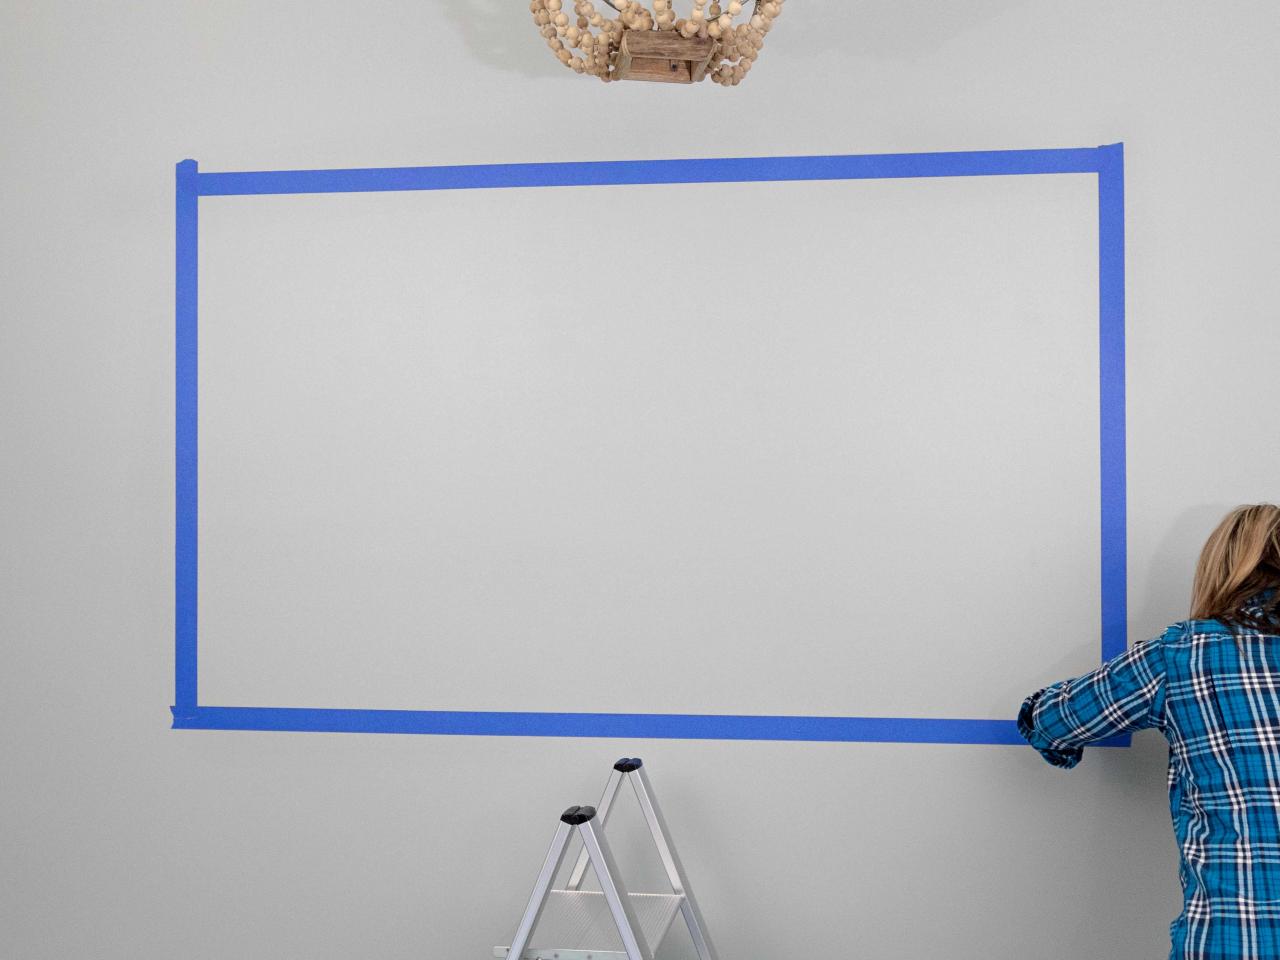
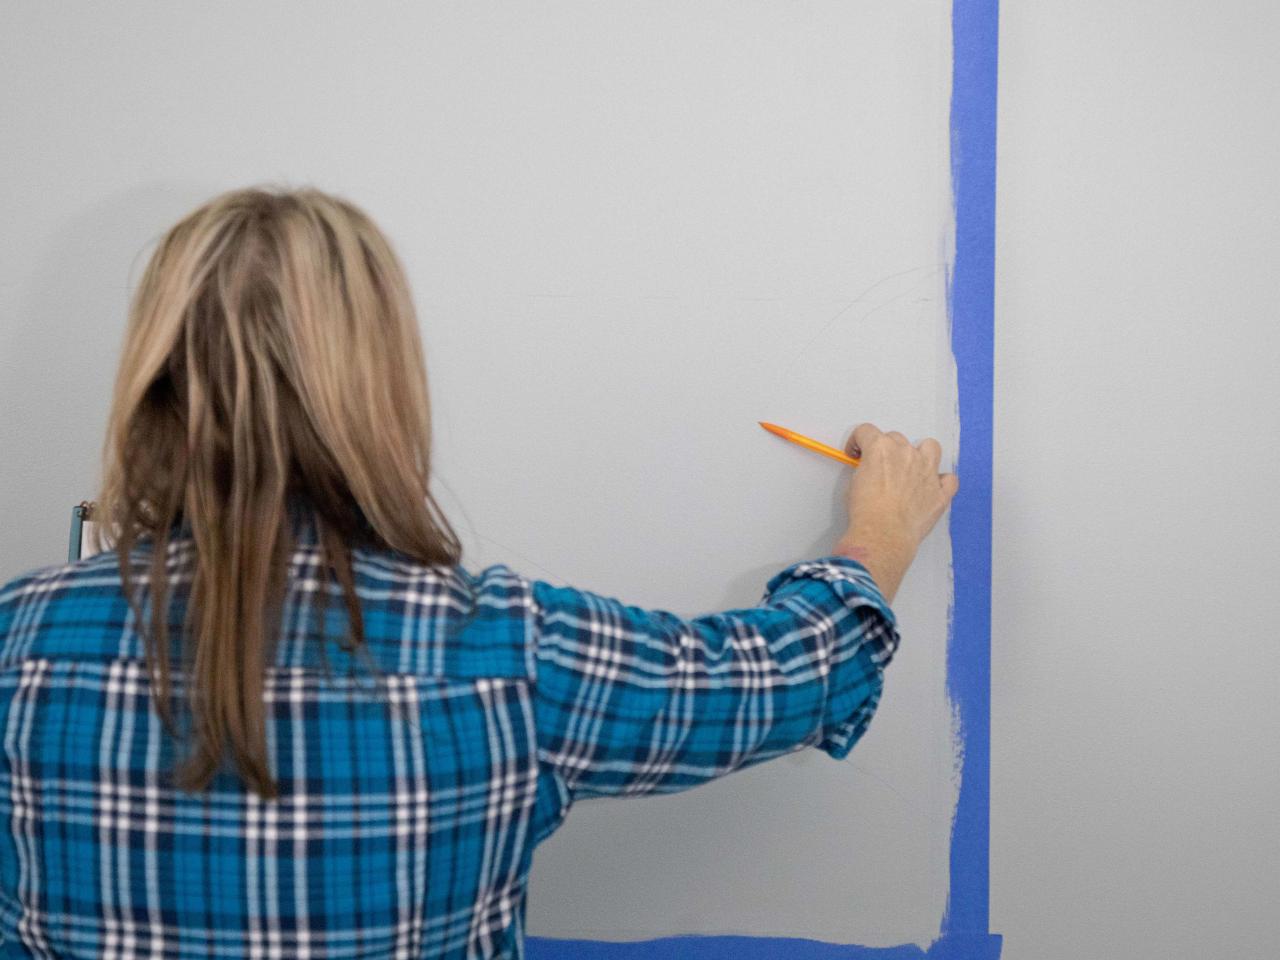
2. Tape the Border
Place painter’s tape on the edge of the outline you just created. Use the level to double-check that your lines are straight.

SHAIN RIEVLEY
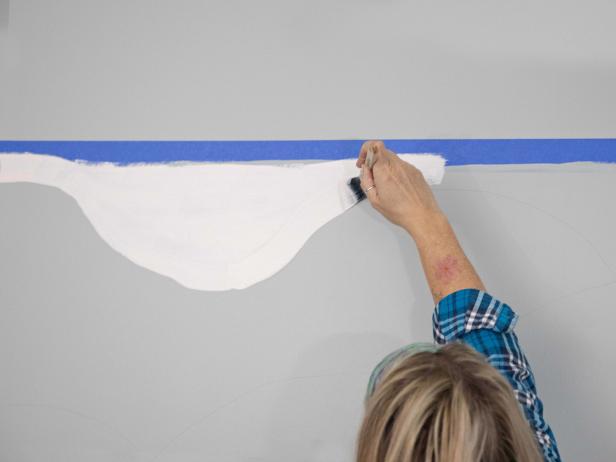
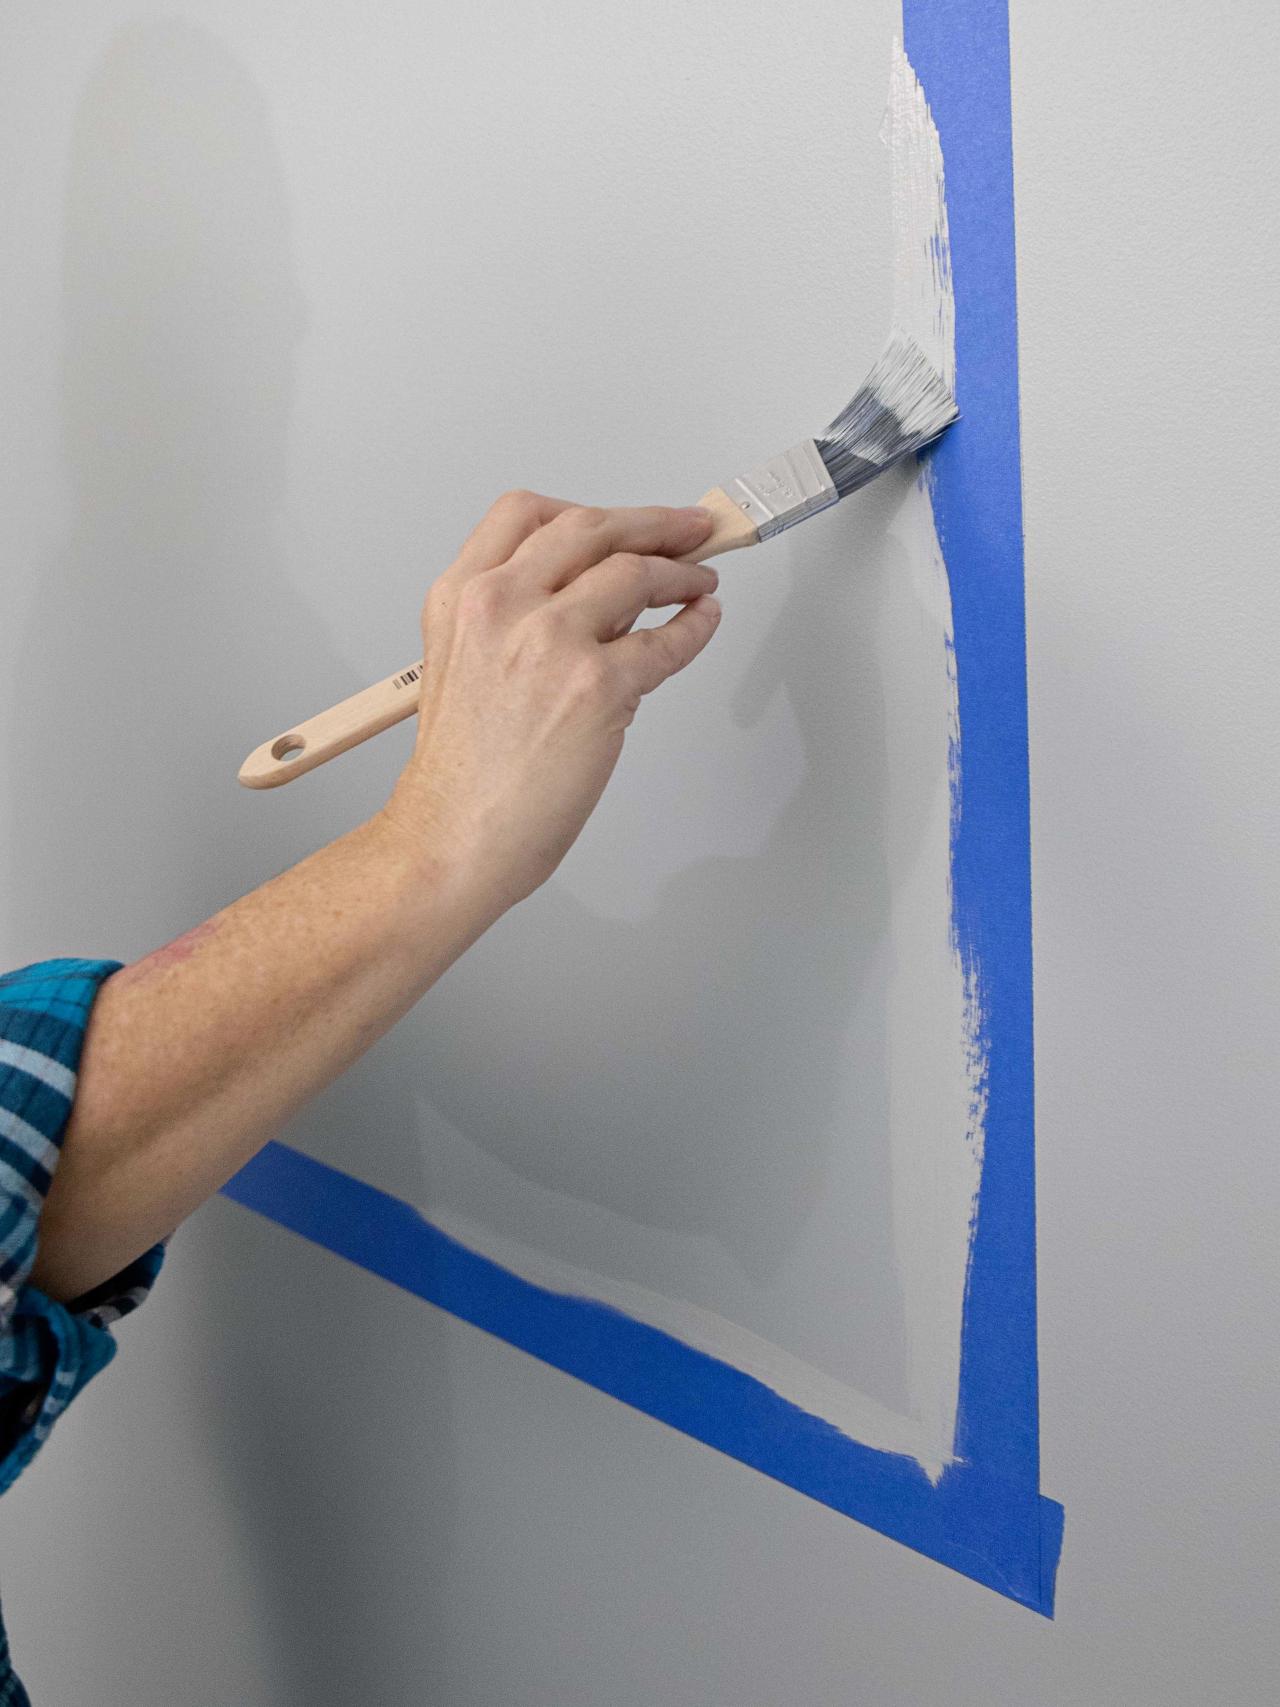
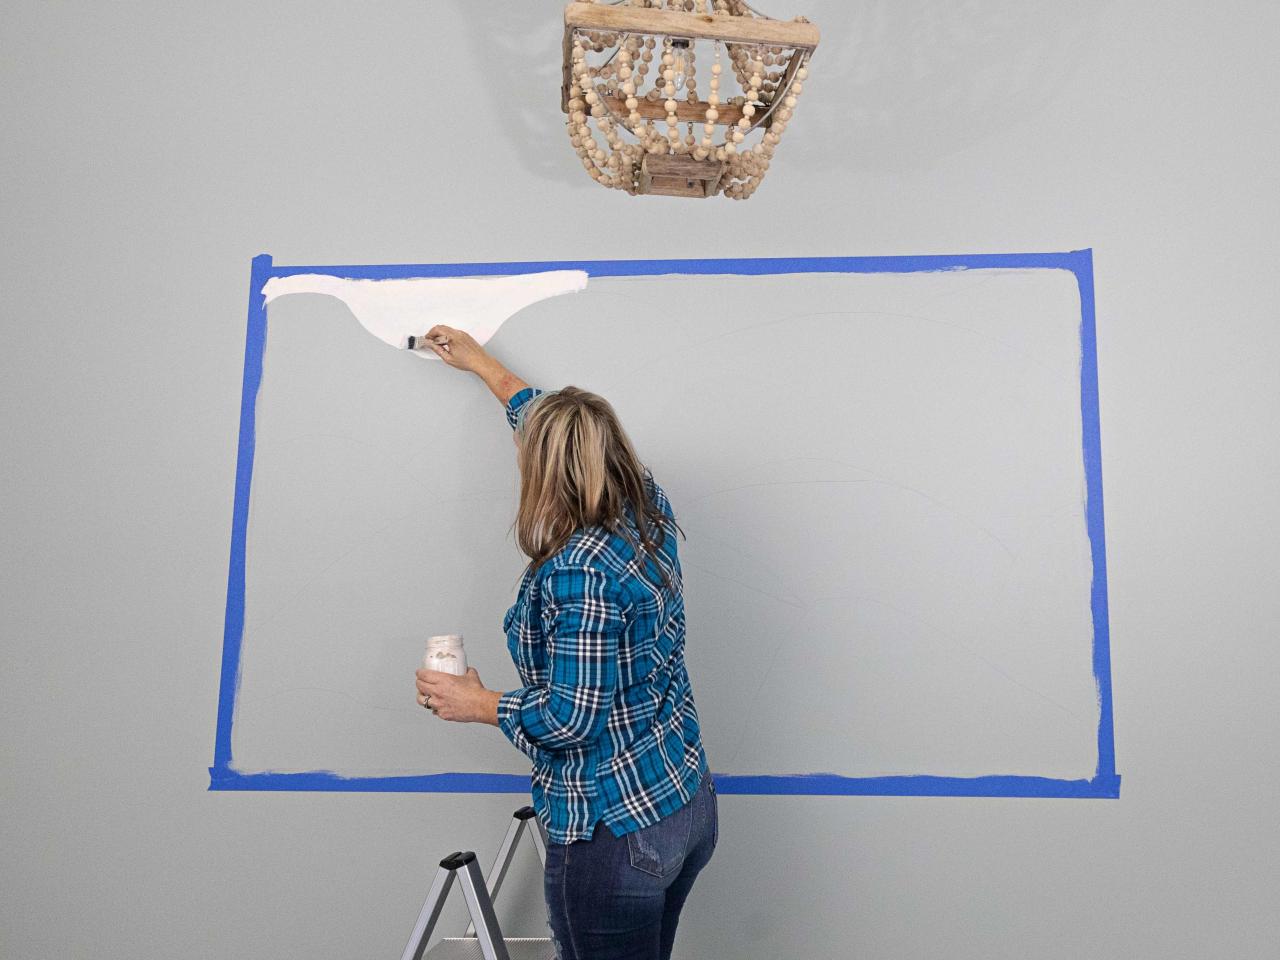
3. Paint a Base Coat Around the Borders
To make sure you get a crisp line around your border and prevent the paint colors from bleeding under the tape, paint around the inside of the taped border with the existing wall color. Painting slightly over the tape will create a seal so the paint will not seep underneath the tape.

SHAIN RIEVLEY
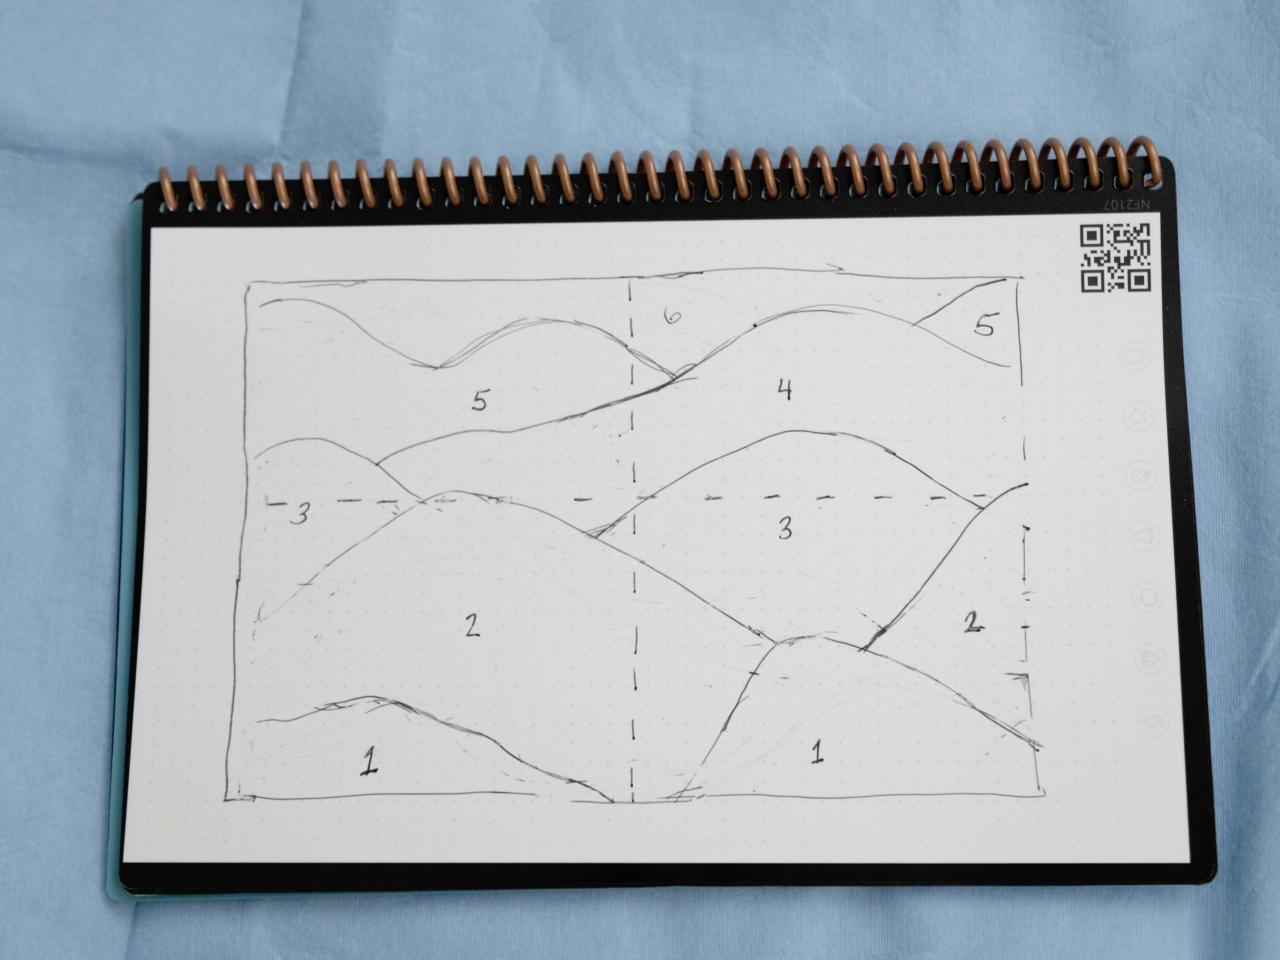
4. Draw Design on Paper
Sketch out your mountainscape design on paper with various colors in mind. Use a grid to help with the placement on the wall.

SHAIN RIEVLEY
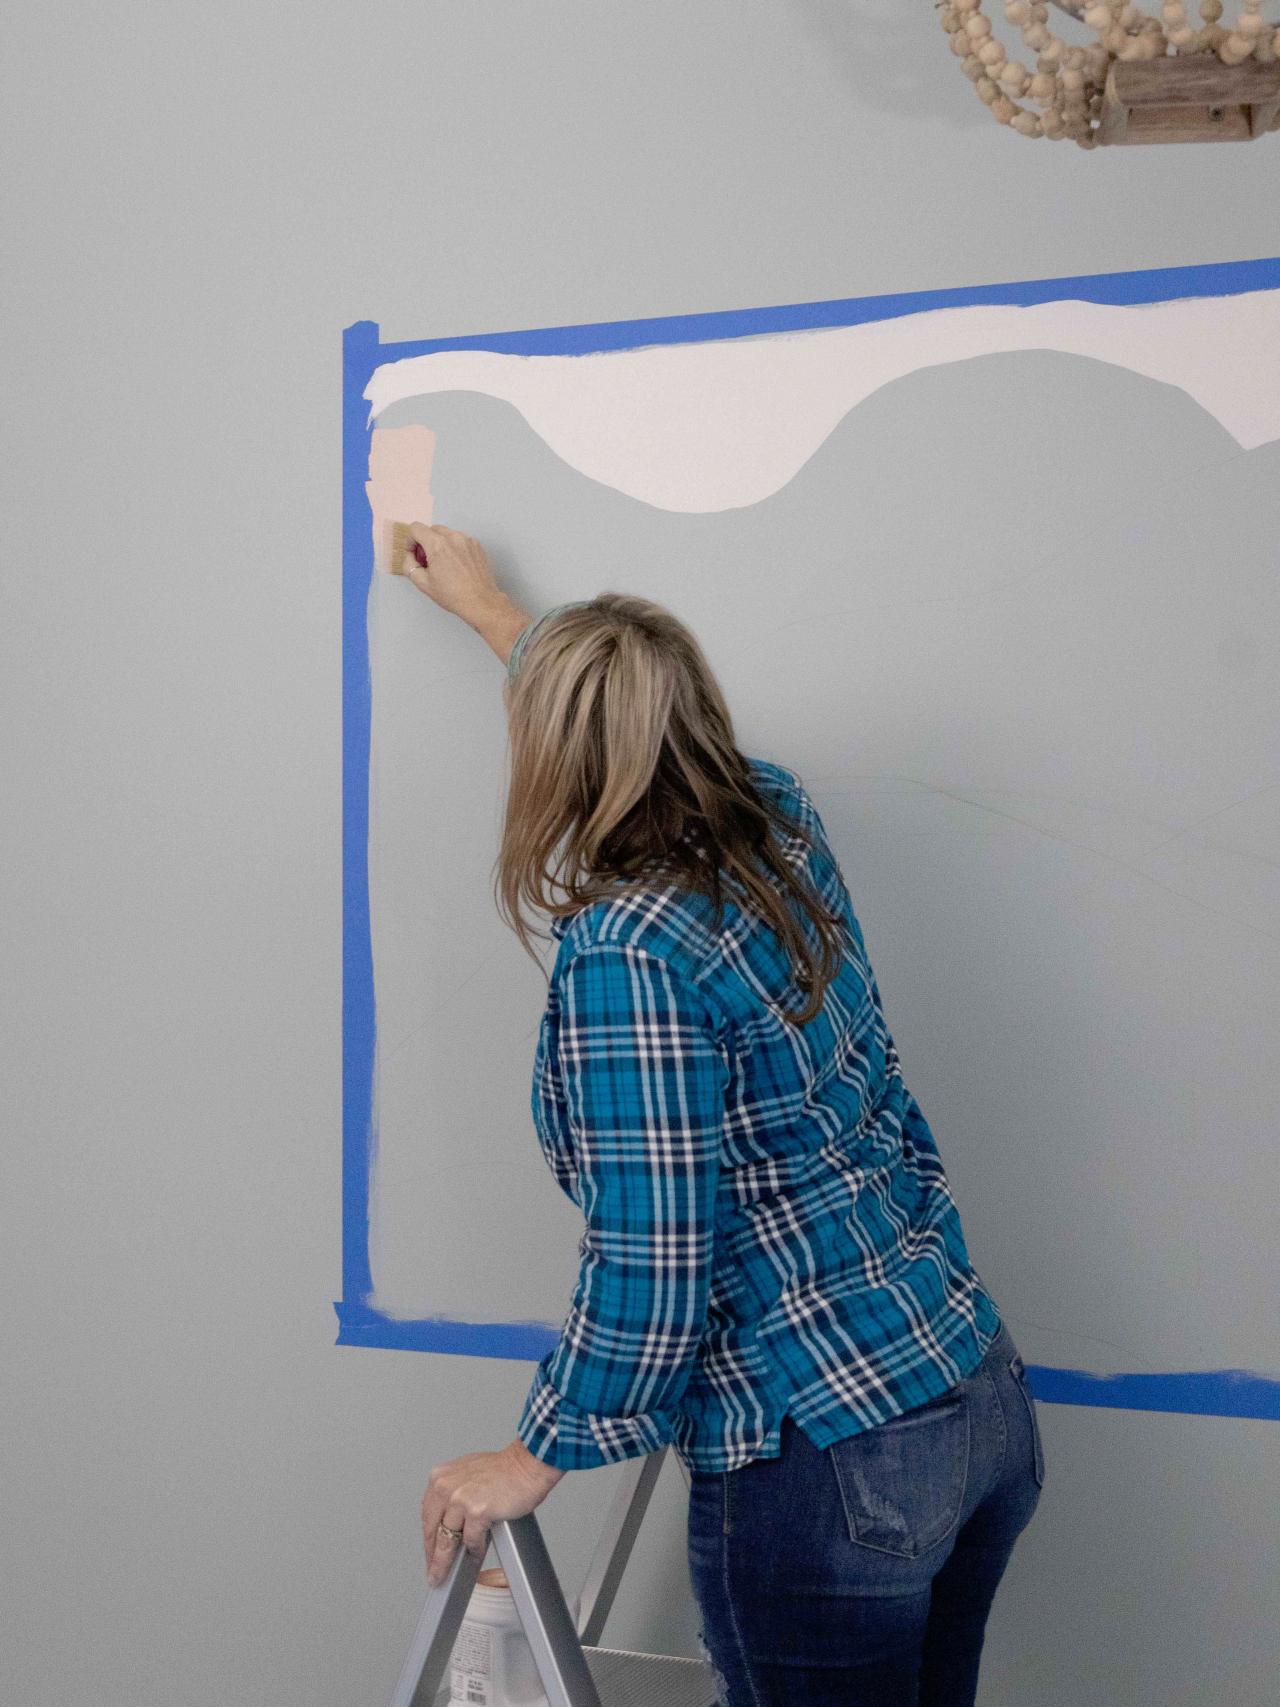
5. Transfer Pattern to Wall
Mark the grid on the wall using dotted lines that match the scale of the drawing. We divided our mural into four sections with dotted lines to help us transfer the pattern onto the wall. Sketch the design onto the wall very lightly using a pencil. Transfer your pattern section-by-section within the grid to make it easy.
SHAIN RIEVLEY

SHAIN RIEVLEY
6. Determine the Color Scheme
Choose five colors that go from light to dark. Add a few drops of one of these shades to white to create the sixth lightest color. Mix it up in a separate jar using a wooden dowl or paint stir stick. Label each paint container with a number then label the corresponding section on the wall.

SHAIN RIEVLEY

SHAIN RIEVLEY
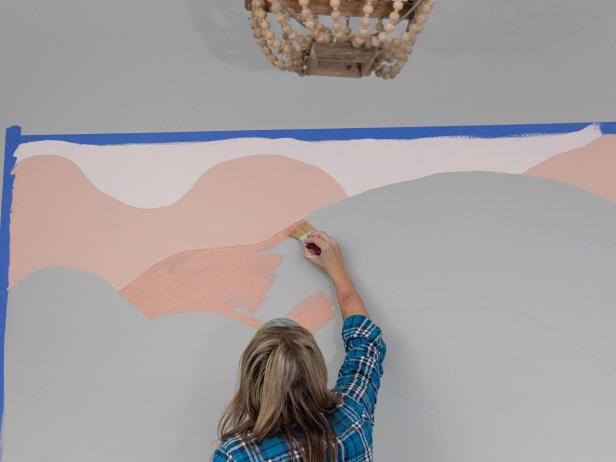
7. Start With the Top Color
Start painting at the top of the mural — the lightest color. Use a 1” angled paintbrush to apply the color. Apply two coats of paint. Remember, being perfect isn’t required.
SHAIN RIEVLEY

SHAIN RIEVLEY
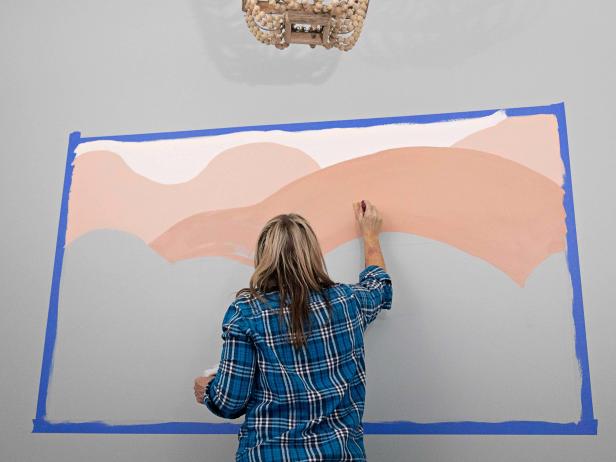
8. Paint the Darker Colors
Move on to the next lightest color. The darker color will cover the lighter shade above it; this makes it easy and failproof. Add two coats of paint on each successive layer.

SHAIN RIEVLEY

SHAIN RIEVLEY
SHAIN RIEVLEY
SHAIN RIEVLEY
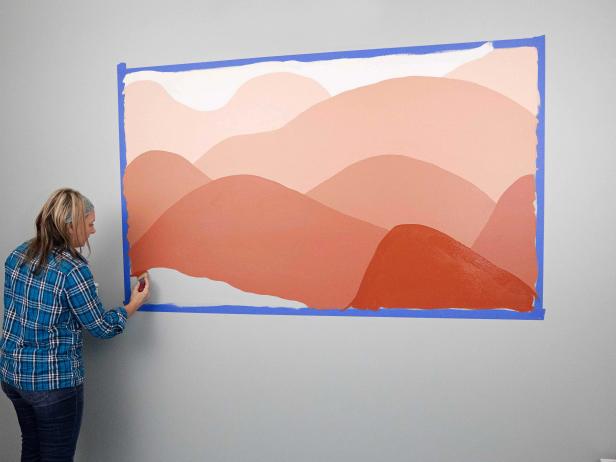
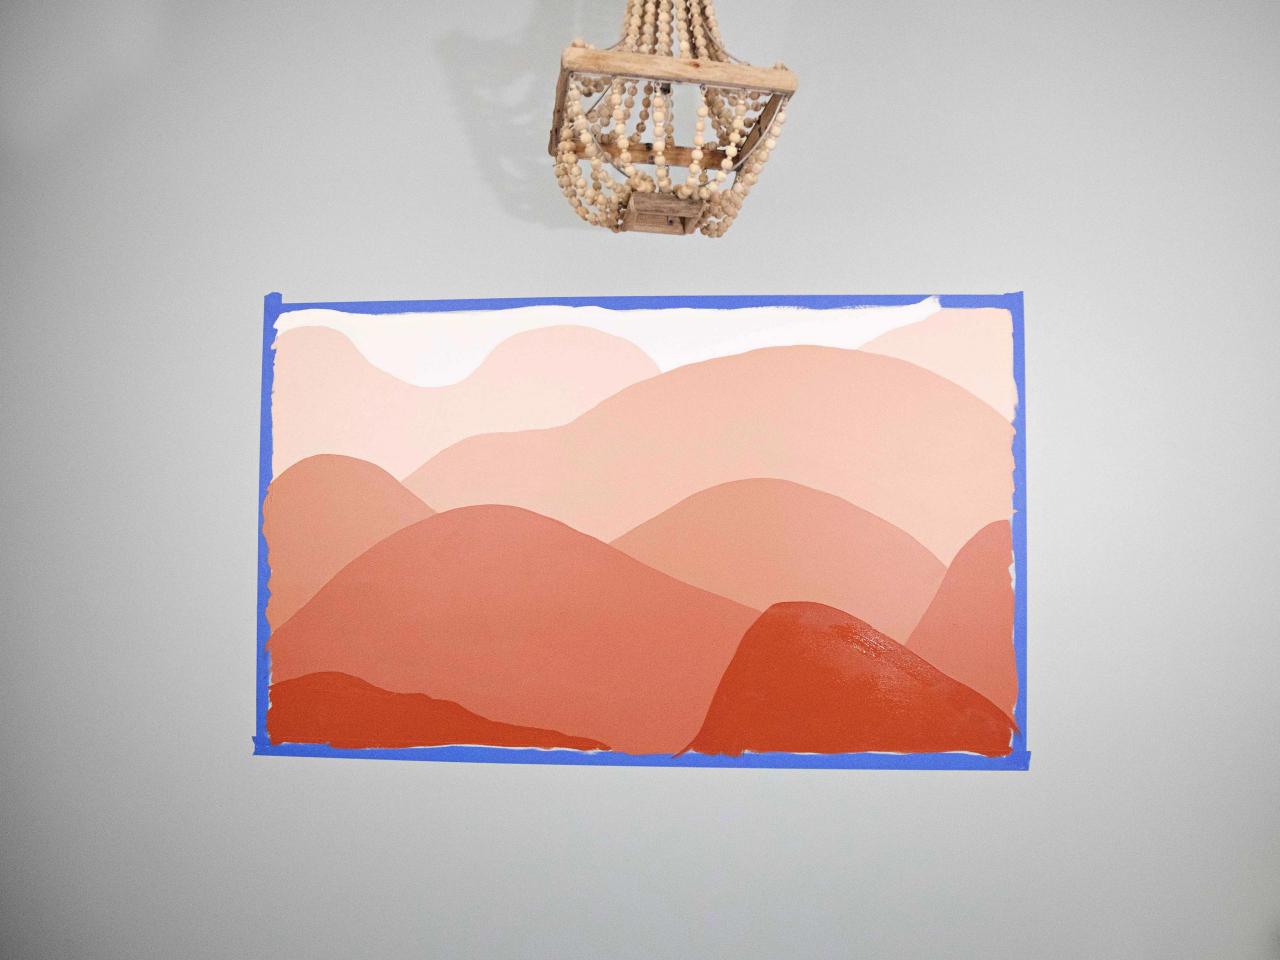
9. Work Your Way Down
Continue to fill in all the colors, ending with the darkest on the bottom. Again, apply two coats of each color. Allow the paint to dry before moving on to the next step.
SHAIN RIEVLEY

SHAIN RIEVLEY
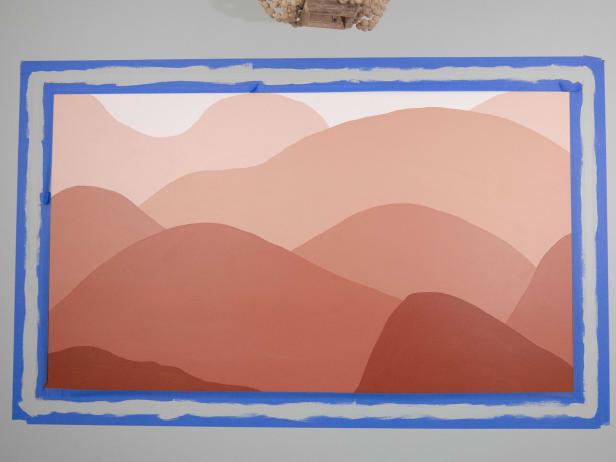
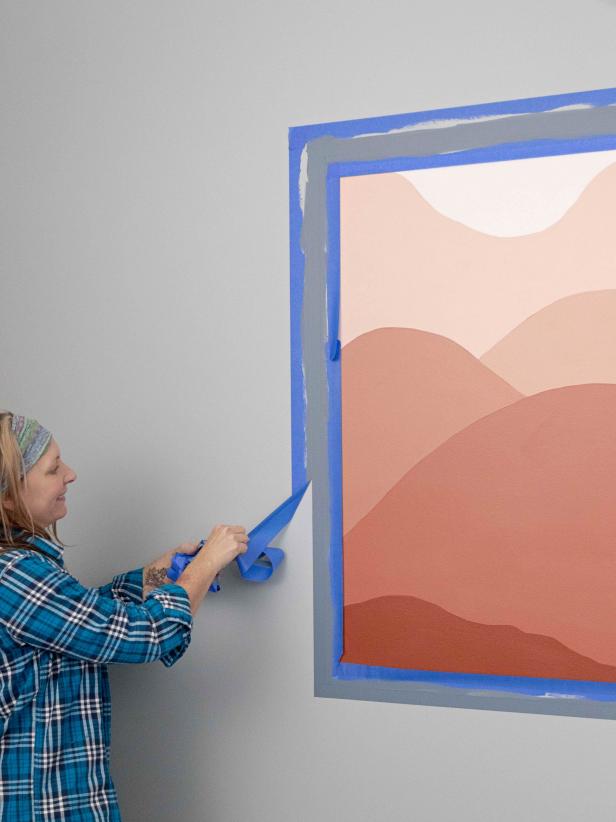
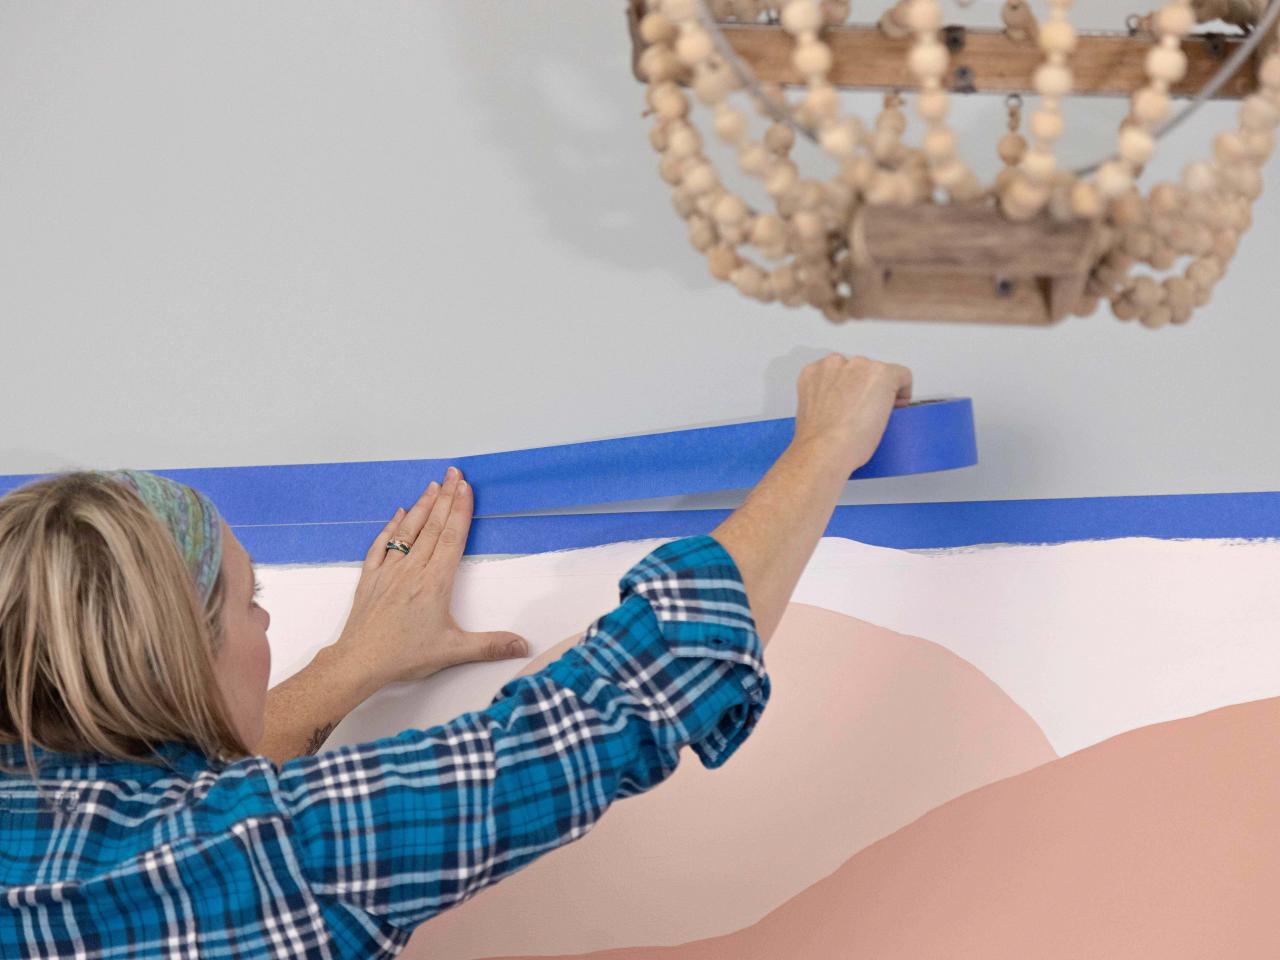
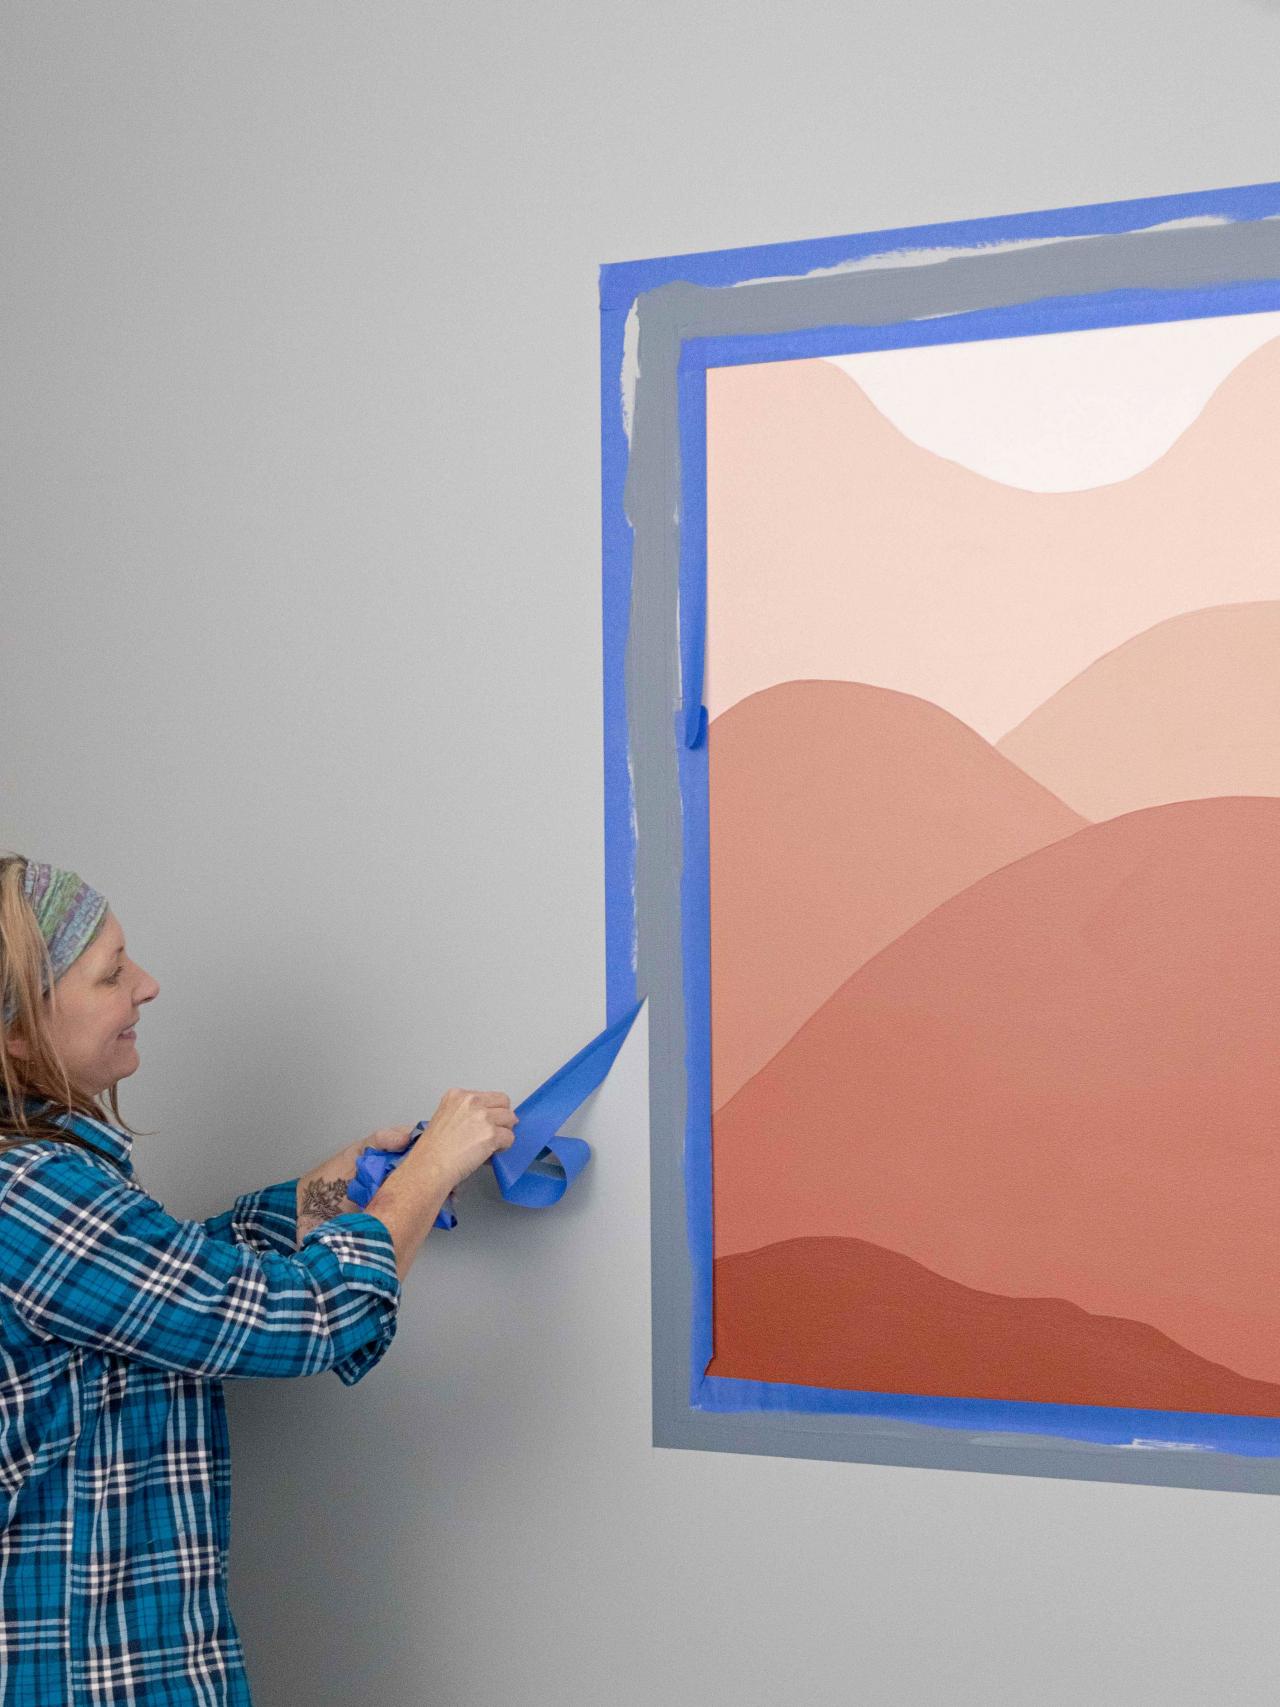
10. Mark Off a Frame
Add another layer of tape right beside the existing border. Peel away the first layer of tape to reveal the mural. Add the third layer of tape to cover half the edge of the mural. This will leave a small open space to paint the frame color on the wall.

SHAIN RIEVLEY

SHAIN RIEVLEY
SHAIN RIEVLEY
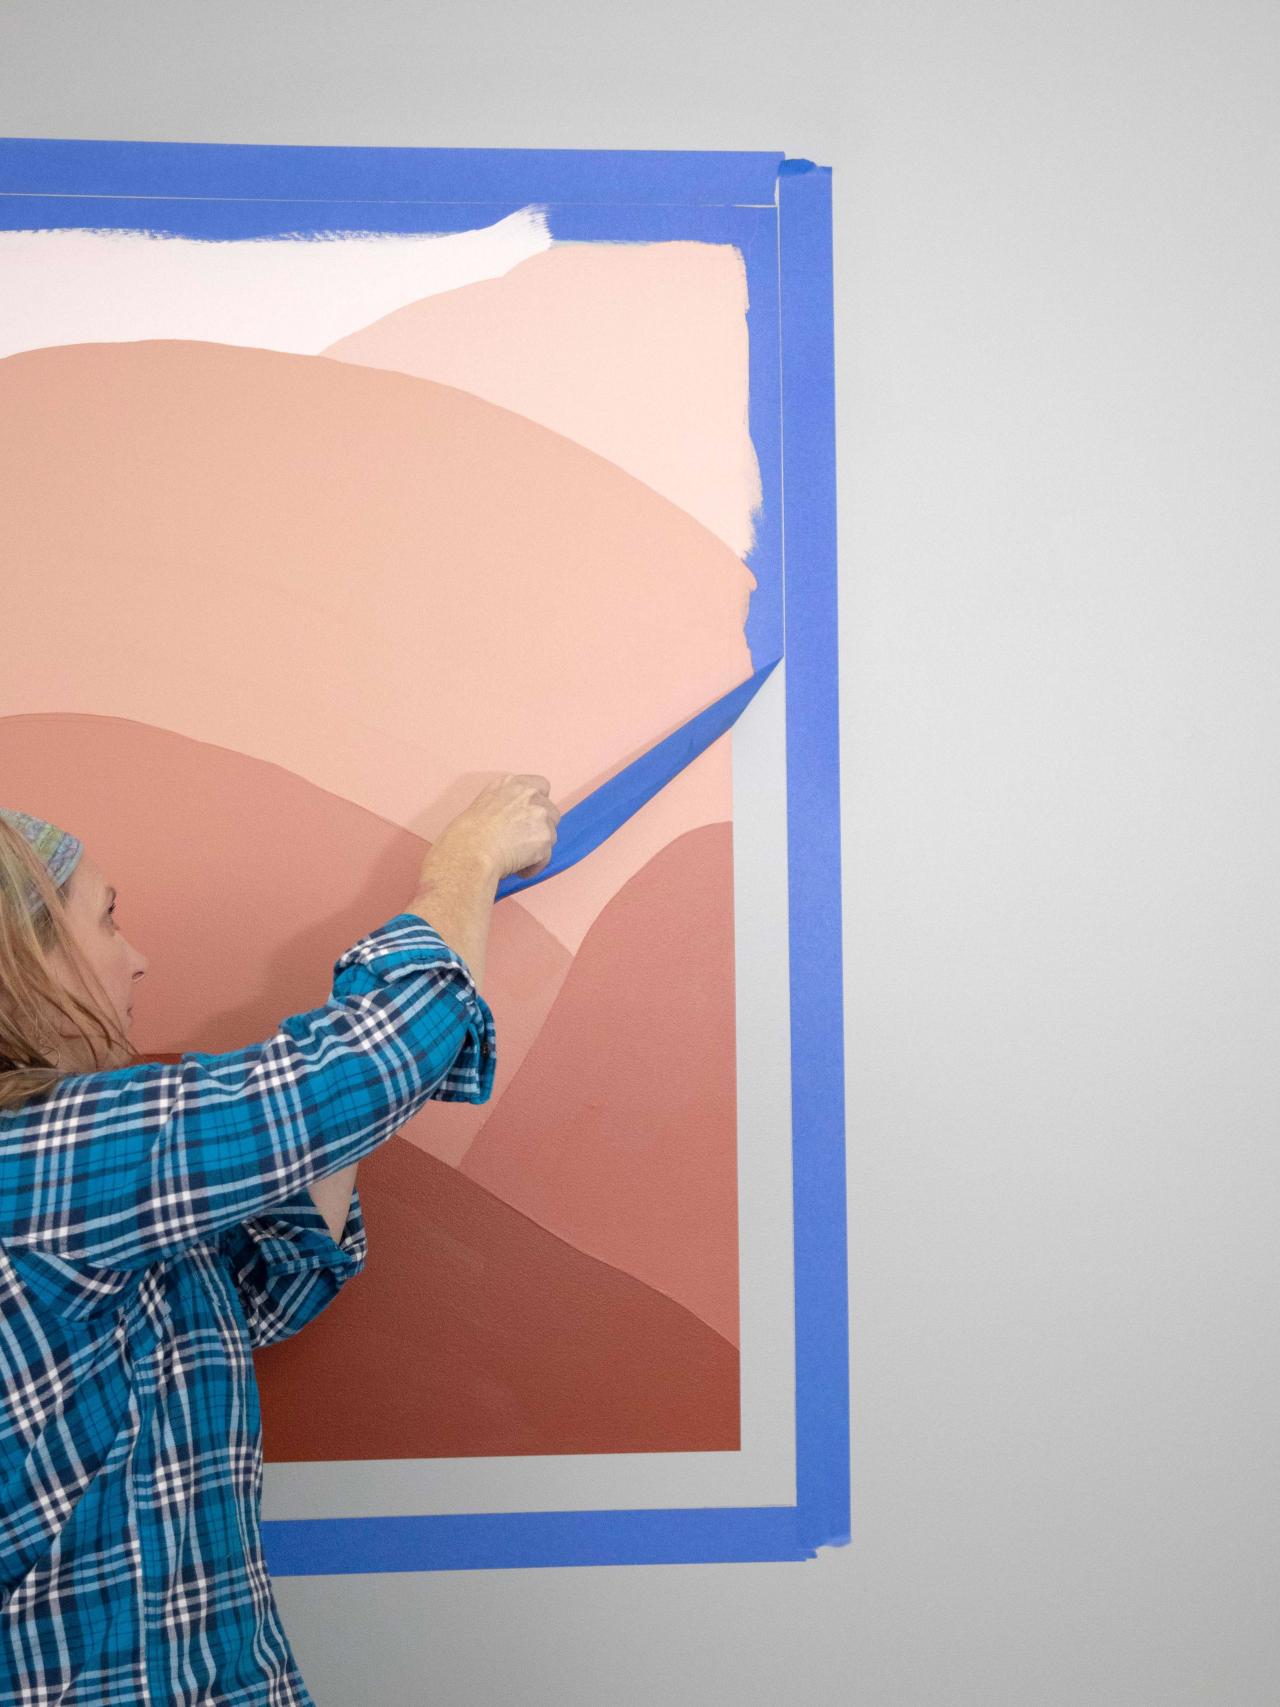
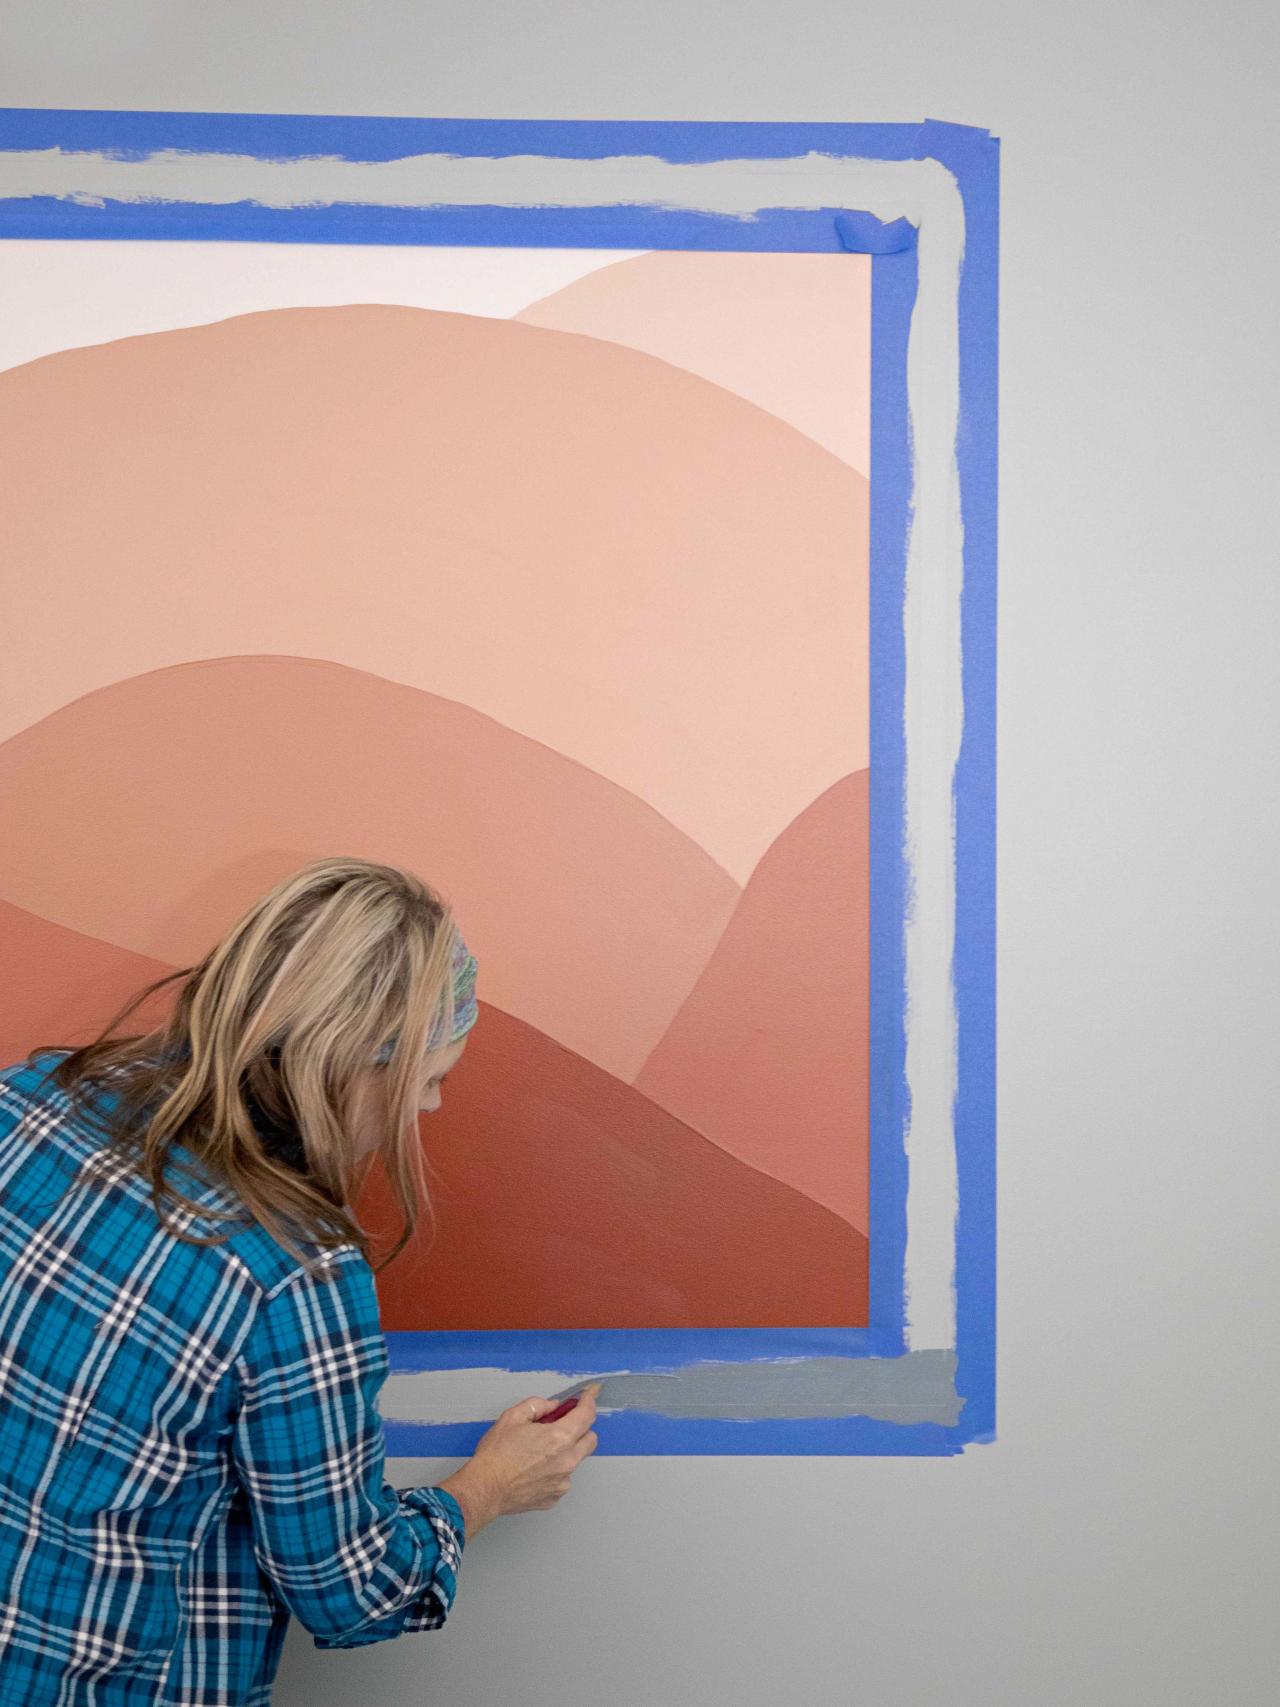
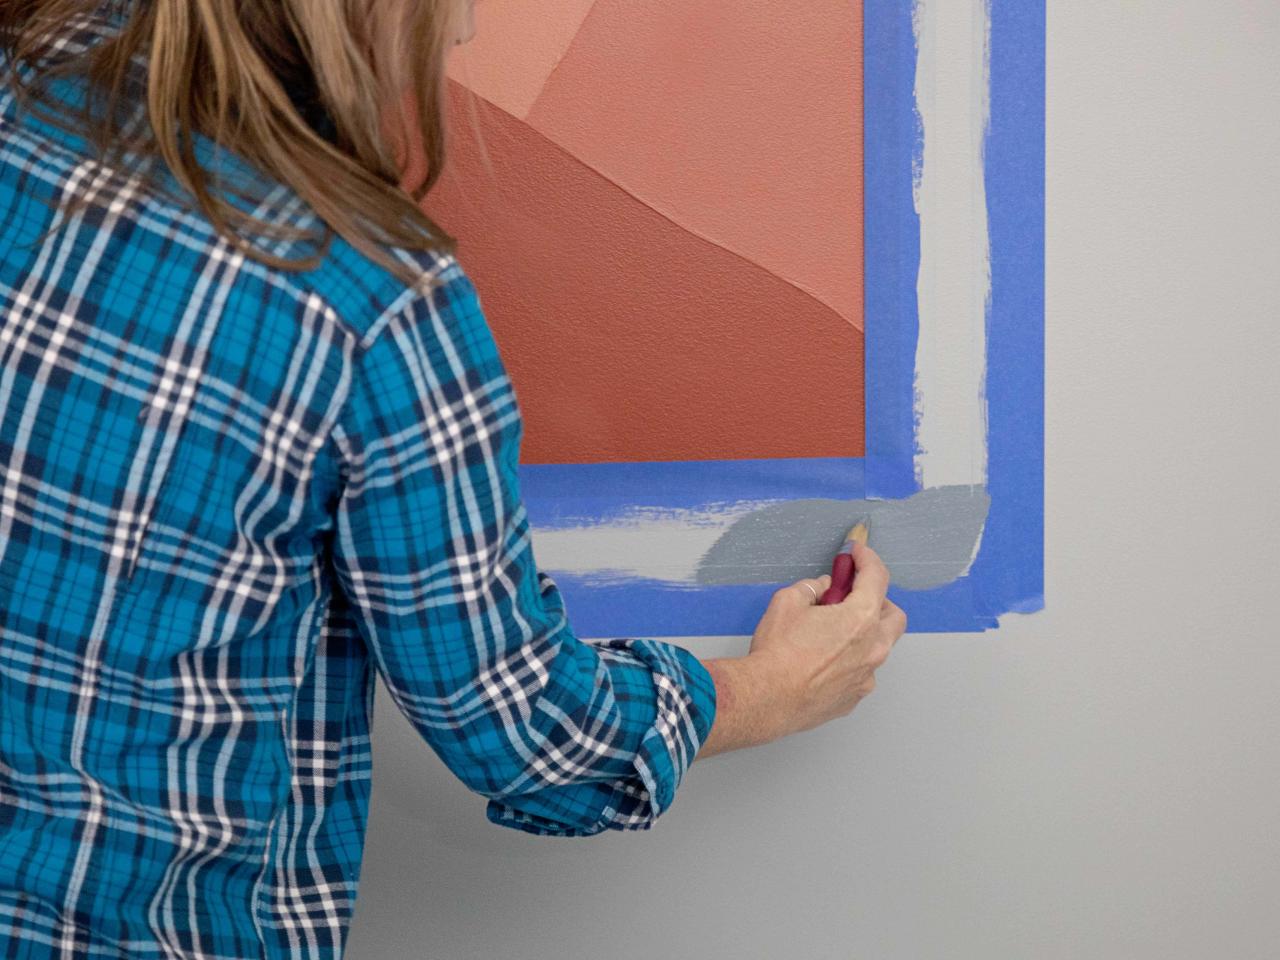
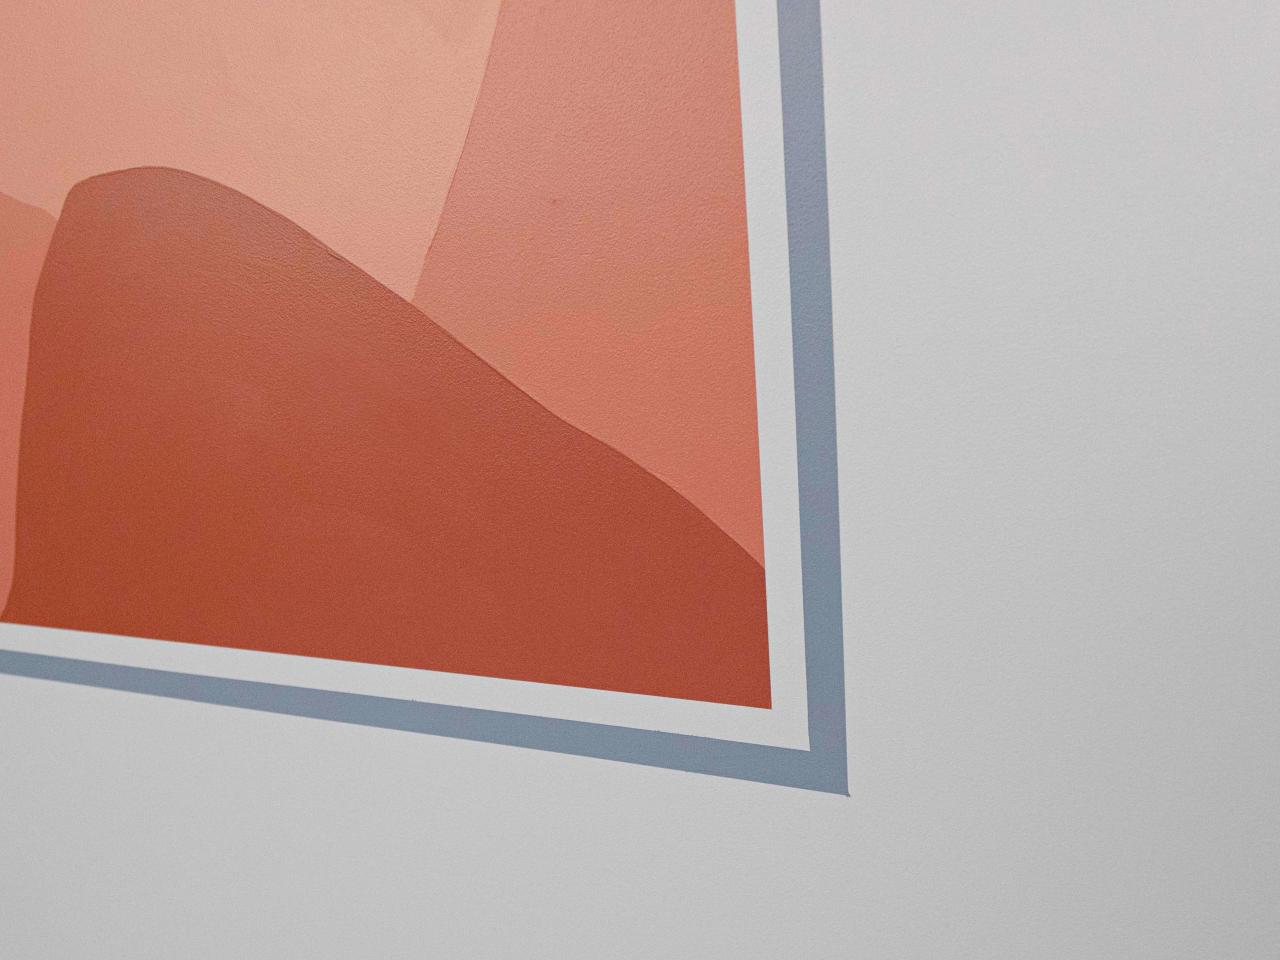
11. Paint the Frame
Remember to paint the wall color on the tape line first to prevent the paint from bleeding under the tape. Apply two coats of the frame color. Peel away the tape when you’re done painting.

SHAIN RIEVLEY

SHAIN RIEVLEY
SHAIN RIEVLEY

SHAIN RIEVLEY


