Deep Energy Retrofit: The Problem Areas
Looking at key areas like windows and walls will help focus problem solving.
Jeff Wilson says his house is nearly perfect in every way for his family -- it's situated in the Appalachian hills, in a vibrant college town, in a pedestrian-friendly neighborhood. But it needed a lot of TLC. So the Wilsons completely gutted and remodeled the home's interior and backyard living area, creating an open floor-plan, which allowed the family to better entertain guests. This photo shows the outside of the home before the Deep Energy Retrofit. The existing attached garage you see is rotting away and has no insulation, so the Wilsons plan to demolish it and replace it with a slightly larger, super-insulated structure to make space for a workshop and office. Other problems with the home: the siding is damaged, the roof is on its last legs and the windows are single-pane, cracked and rotting. The old rounded dormers show daylight through the cracks between the windows, creating substantial air leaks.
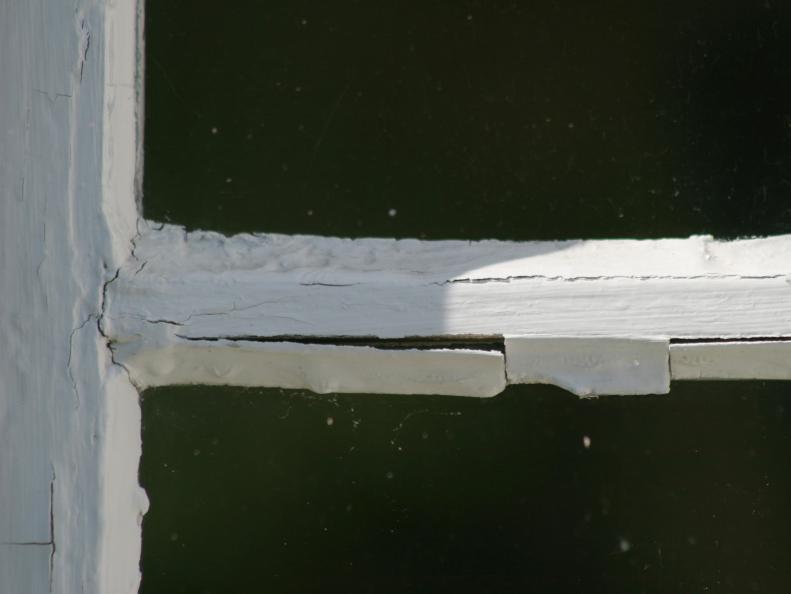
This is an example of what most of the home's windows looked like before the DER. Wooden, single-pane windows, glazed with putty, were standard back in 1940 when this home was built. Seventy years of weather, the house settling and general use had made them barely functional. The windows and doors were a major weak spot in the building envelope -- the shell that separates the interior and exterior environments of a building.
This image shows an actual crack in one of the windows, most likely due to settling or an accident of some sort years ago. Even if the Wilsons replaced the pane, fixing the aesthetics of the broken window, they'd still have old technology wasting vast amounts of energy over time. The Wilsons had a few difficult windows to replace -- two unique bay windows and two unique arched dormer windows -- but according to Jeff, it was important that they "bite the bullet" and fix the problem once and for all.
This is a close-up of one of Wilson's old bay windows. A previous homeowner had once installed storm windows, which were rusting in some areas. The wood frames were rotting away, despite being carefully and frequently repainted. The Wilsons wavered a bit about replacing the bay windows because it is a major job, but they ultimately decided that the windows were one of the weakest links in their building envelope and couldn't be ignored.
Despite having a reliable sump pump, the basement had moisture problems and consequently developed a mold problem, comprising indoor air quality. During the summer, hot, humid air leaked in from the outside and came in contact with the cool masonry walls, creating condensation and an environment where mold and mildew could thrive. This image shows the paneling on the basement walls -- which Sherri Wilson later discovered had this ironic warning label: "Not for use in moisture-prone areas." The Wilsons also had a minor radon problem, just below the level where remediation is suggested by the Environmental Protection Agency. They are fixing it by creating a curtain wall using plastic studs on the walls and floor, and then using spray-foam insulation to fill the spaces between the studs, up against the concrete and block. The spray-foam comes in easy, do-it-yourself kits and will seal out moisture, air and radon, while giving them insulation and creating a thermal block to stop the condensation from forming. Spray-foam is ideal for an interior basement retrofit application.
This image shows the back wall of the existing garage where the studs have literally rotted away. Wilson says a previous homeowner had added on to the back of the garage, removing a wall that helped support the roof. Without that support, the rafters were being held up by the interior sheathing and sheer luck. That same homeowner also neglected to properly apply and flash the roofing materials, so water leaked in from day one. The building was never insulated, and the concrete slab had no proper foundation, so it had cracked and buckled. The Wilsons were aware of all these issues when they moved in and had planned to do a major renovation to correct them.
This is a closeup of the previous image, except now you can see where even the sheathing has rotted away. You can see the back of some old tar paper and the back of the exterior siding. This image also illustrates how sheathing (the outer layer of a building's framework) was applied in the 1940s and why buildings from that era are so drafty. As you can see, these 1x6 boards were applied on a diagonal, leaving a decent-sized gap between each board. This allows air to infiltrate the building envelope, letting conditioned air out and unconditioned air in. This is part of the reason a house can feel drafty and dry in the wintertime (cold, dry outdoor air seeping in and your humidity and heat seeping out) and uncomfortably sticky and warm in the summertime (dry, cool, air-conditioned air seeping out and hot, humid outdoor air seeping in). With proper air sealing and insulation, your HVAC unit will not only be more effective at dealing with the temperature of your home, but also its humidity. This means energy savings, since you'll keep your furnace set slightly lower during the wintertime if some humidity remains in your air, and you'll keep your AC set slightly higher during the summertime if your air stays drier. Regulation of humidity also means that mold and mildew won't get a foothold, making your indoor air healthier. Energy Answers main page