
.-Battle-on-the-Beach-courtesy-of-HGTV.-.jpg.rend.hgtvcom.196.196.suffix/1714761529029.jpeg)


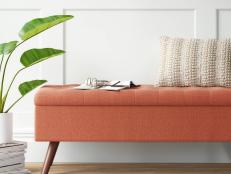
Workout in Style: DIY Storage Bench
Getting your workout in has never been so stylish.


RTR Media

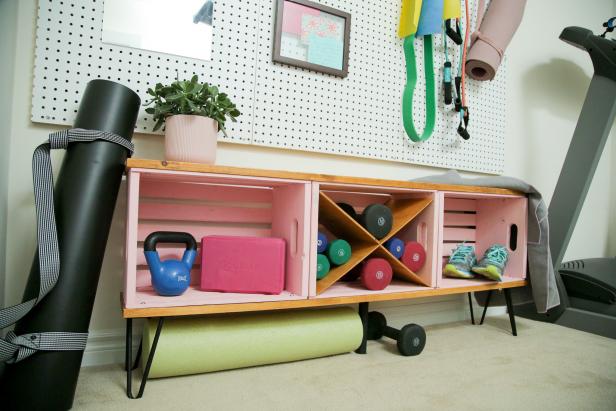
Creating an in-home gym can be difficult and frankly, ugly. Never fear, we’ve created an ultra-chic, practical solution you’ll be happy to display anywhere in your home.
Materials Needed
- (2) 1x10 x 6’ pine boards
- (4) 1x2 x 8’ pine boards
- (3) wood crates
- 2'-x-2' 1/4” plywood sheet
- (3) 2'-x-4' pegboards
- (4) 8” hairpin legs (3/4” diameter)
- 8” support leg
- pink chalk paint
- chalk paint brush
- cotton rags
- pre-stain wood conditioner
- wood stain
- water-based wood finish
- 5/8” dome-head wood screws
- 1/2” washers
- 2” wood screws
- drill
- 1/8” drill bit
- wood glue
- orbital sander
- 220-grit sandpaper
- table saw or circular saw
- pegboard accessory kit
- adhesive mirror tiles
Cut and Stain Boards
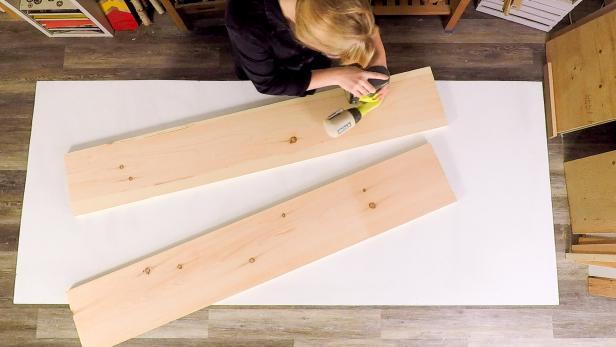
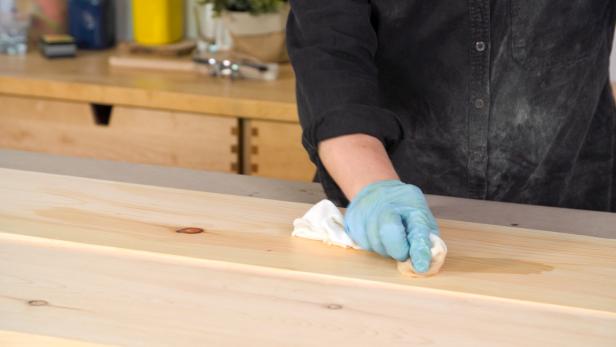
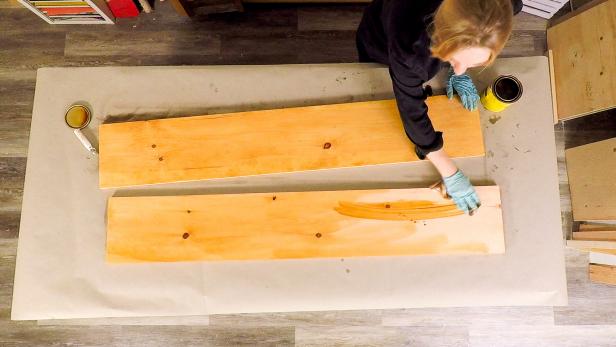
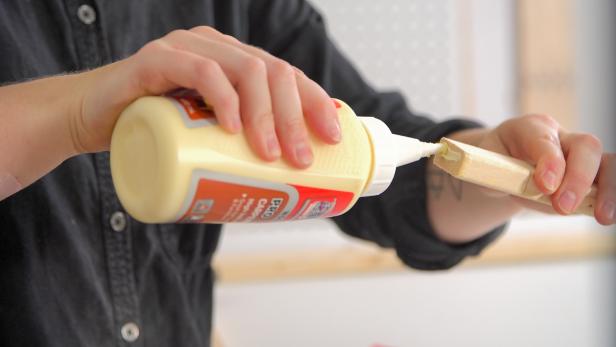
Cut two 1x10 boards to 4-1/2-feet lengths (adjust the length to fit your three wood crates lined up). Sand the boards with 220-grit sandpaper until smooth (Image 1). Because pine is a soft wood and is prone to uneven, blotchy staining, prep the boards with pre-stain wood conditioner (Image 2). This allows it to accept the stain more evenly. Stain your boards with the color of your choice being sure to follow the manufacturer’s instructions. For a more durable finish, coat the wood with a water-based clear coat (Image 3).
RTR Media
RTR Media
RTR Media
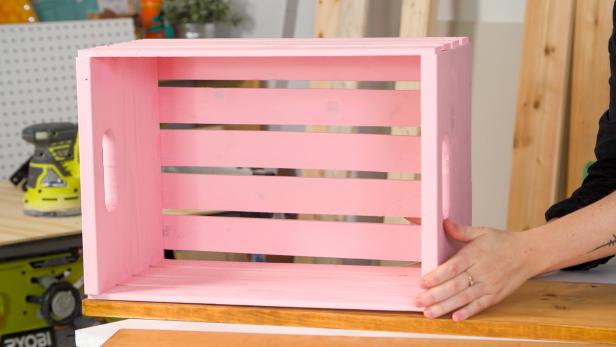
Paint Wood Crates
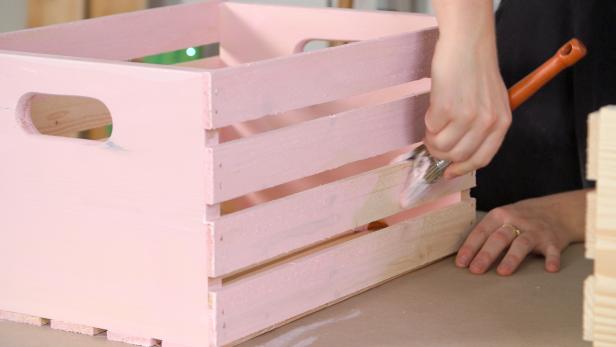
Paint the three wood crates whatever color your heart desires. We went with a beautiful blush pink chalk paint. To give it a nice, smooth top coat, cover each crate with a chalk paint wax finish and let dry.
RTR Media
Assemble Bench
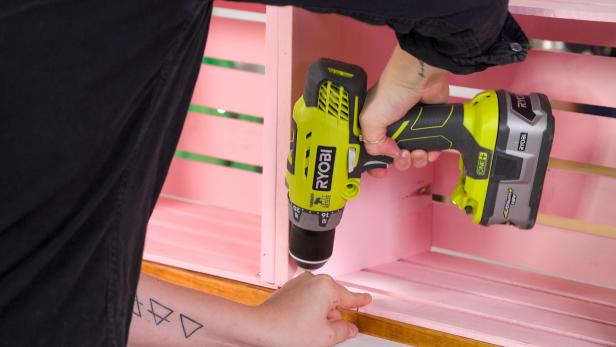
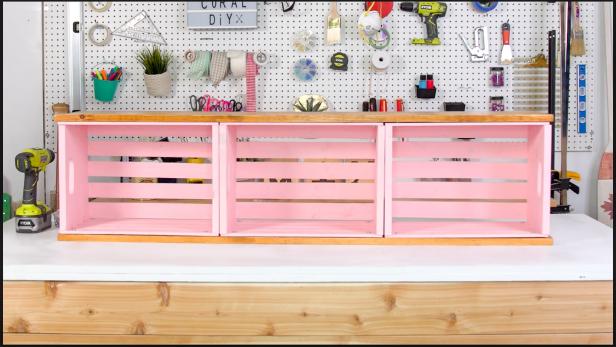
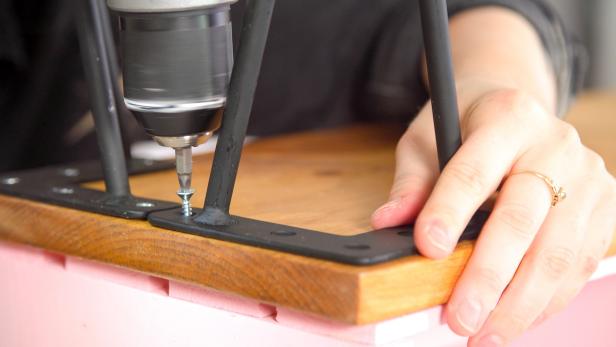
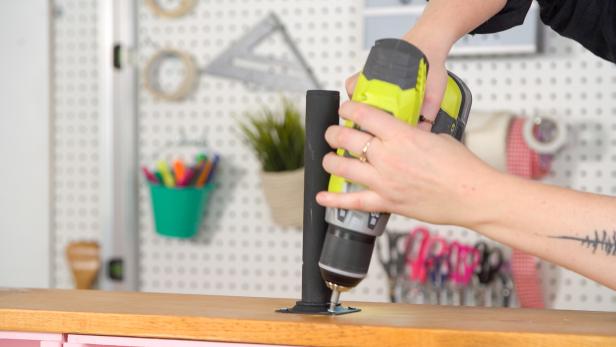
Let’s make a bench. Begin by lining the three wood crates side by side on one of the 1x10 boards (Image 1). Secure the crates to the 1x10 by placing a 1/2-inch washer down and fastening with a 5/8-inch dome-head wood screw (Image 2). The washer will ensure the screw does not rip through the crate, which is made from a thin plywood. Use one screw in each corner of the three crates. Once finished, flip your fastened crates upside down and secure the second wood board with the same process. By the end, you should have something that looks like a crate sandwich (Image 3). To give this bench some height, secure 8-inch hairpin legs to all four corners of the bottom board (Image 4). A small 8-inch support leg was added in the center of the board for added stability (Image 5).
RTR Media
RTR Media
RTR Media
RTR Media
RTR Media
Create Weight Compartment
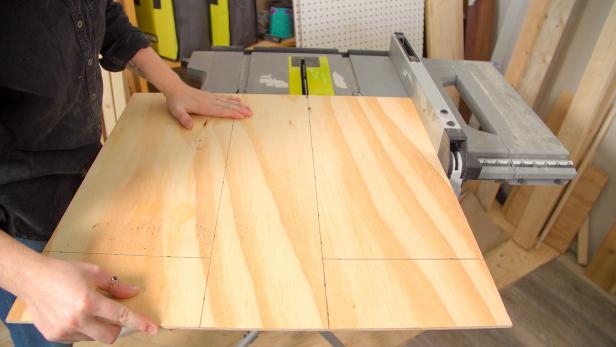
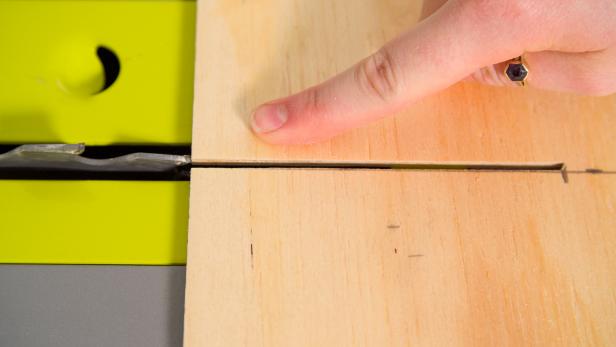
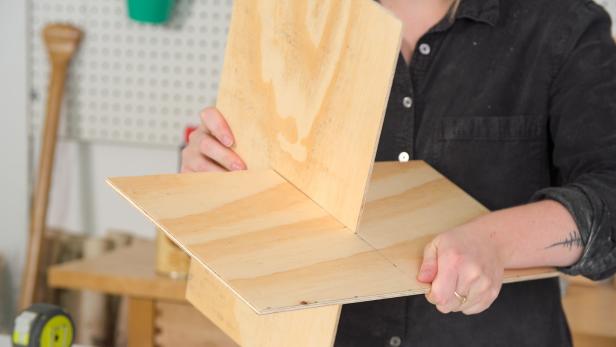
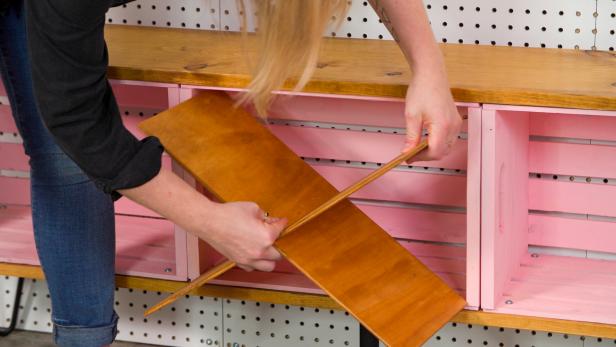
To create a weight organizer in the middle crate, use a table saw or circular saw to cut the 1/4-inch plywood into two 9-inch by 9-3/8-inch pieces (Image 1). Adjust to fit different crate sizes. Take the cuts and mark halfway down each board. Mark a line across the short length of your board, then mark the halfway point on that line (Image 2). Do this for both boards, making sure your lines are the same on each board. Adjust your saw to 20 degrees and line up your saw blade so the blade cuts through the middle of the line to your marked center point (Image 3). Repeat with the second board. Slide the boards together and "X" marks the spot (Image 4). Stain the “X” boards following the same procedure as before (Image 5).
RTR Media

RTR Media
RTR Media
RTR Media
RTR Media
Create Pegboard Frame
For best results, the pegboard needs to sit slightly off the wall so that the pegboard hardware can properly punch through the holes. The easiest way to do this is to use 1x2s to build a frame that is the same total dimension as the three pegboard pieces.
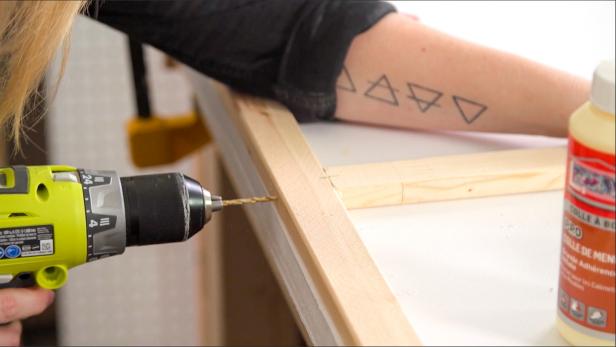
When assembled, the pegboard will be 72 inches long and 48 inches tall. Because a 1x2's actual width is 1-1/2 inches, you will cut your four vertical pieces to 45 inches and your two horizontal pieces to 72 inches. To assemble the frame, lay the two 72-inch pieces out parallel to one another and connect with four 45-inch vertical pieces. Place two of the vertical pieces on the ends to form a 72-inch by 48-inch rectangle and center the remaining two 45-inch pieces at the 24-inch mark and the 48-inch mark. This allows the three pegboard pieces to have support on each side. Secure the frame with wood glue and 2-inch wood screws (Image 1). Pre-drill your holes with a 1/8-inch drill bit to prevent splitting (Images 2 and 3).
RTR Media
RTR Media

RTR Media
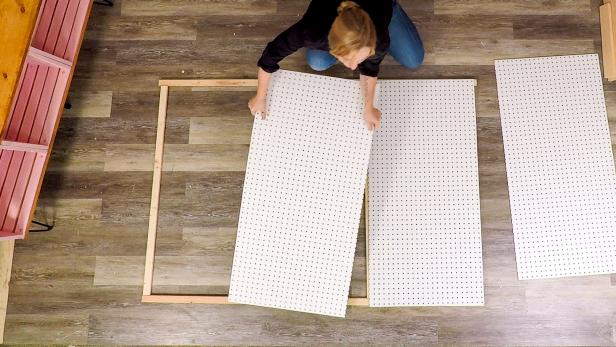
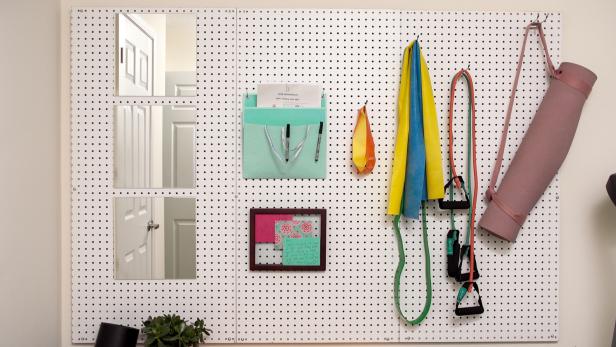
Attach Pegboard and Mirrors
Place your pegboards on top and secure to the frame with a 5/8-inch wood screw and a 1/2-inch washer (Image 1). As a last step, we secured three adhesive mirror squares to the left pegboard to make this space workout ready (Image 2).
RTR Media
RTR Media
RTR Media


