


5 Festive Dollar Store Easter Basket Fillers
With these five DIY Easter basket fillers, you can give your kiddos the ultimate personalized Easter baskets without blowing your budget.

If you like to buy preassembled Easter baskets, do your thing; it does make things very easy. But, if you’re like us, you believe that half the fun of Easter baskets is putting them together! A well-assembled Easter basket is a personalized work of art, and we’ve got exactly what you need to set your baskets apart. So, here are five budget-friendly DIYs to fill your Easter baskets.
Carrot Colored Pencil Pouch

Cassidy Garcia
Materials Needed
- orange tissue paper
- paper towel tube
- hot glue gun + glue sticks
- green construction paper
- permanent marker
- scissors
- pack of colored pencils
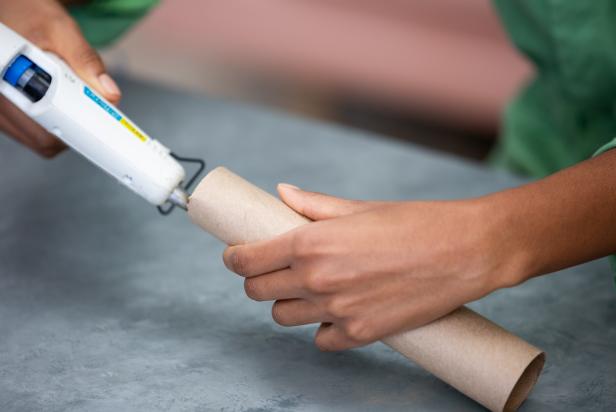
What’s an Easter Bunny without its carrot? To craft a cute carrot-colored pencil pouch, first grab a recycled paper towel tube. Squeeze one end together to close and seal it off using hot glue (Images 1 & 2). Hold in place until the glue cools slightly and sets. Lay out a piece of orange tissue paper and draw a line of hot glue along the full length of the paper towel tube (Image 3). Line the closed end of the tube up with the paper, press the paper into the glue and roll it up (Image 4). Once you get to the end, secure in place using hot glue (Image 5). Use scissors to cut the excess, leaving approximately 2 inches of extra paper to stuff into the open end.
Cassidy Garcia

Cassidy Garcia

Cassidy Garcia

Cassidy Garcia

Cassidy Garcia
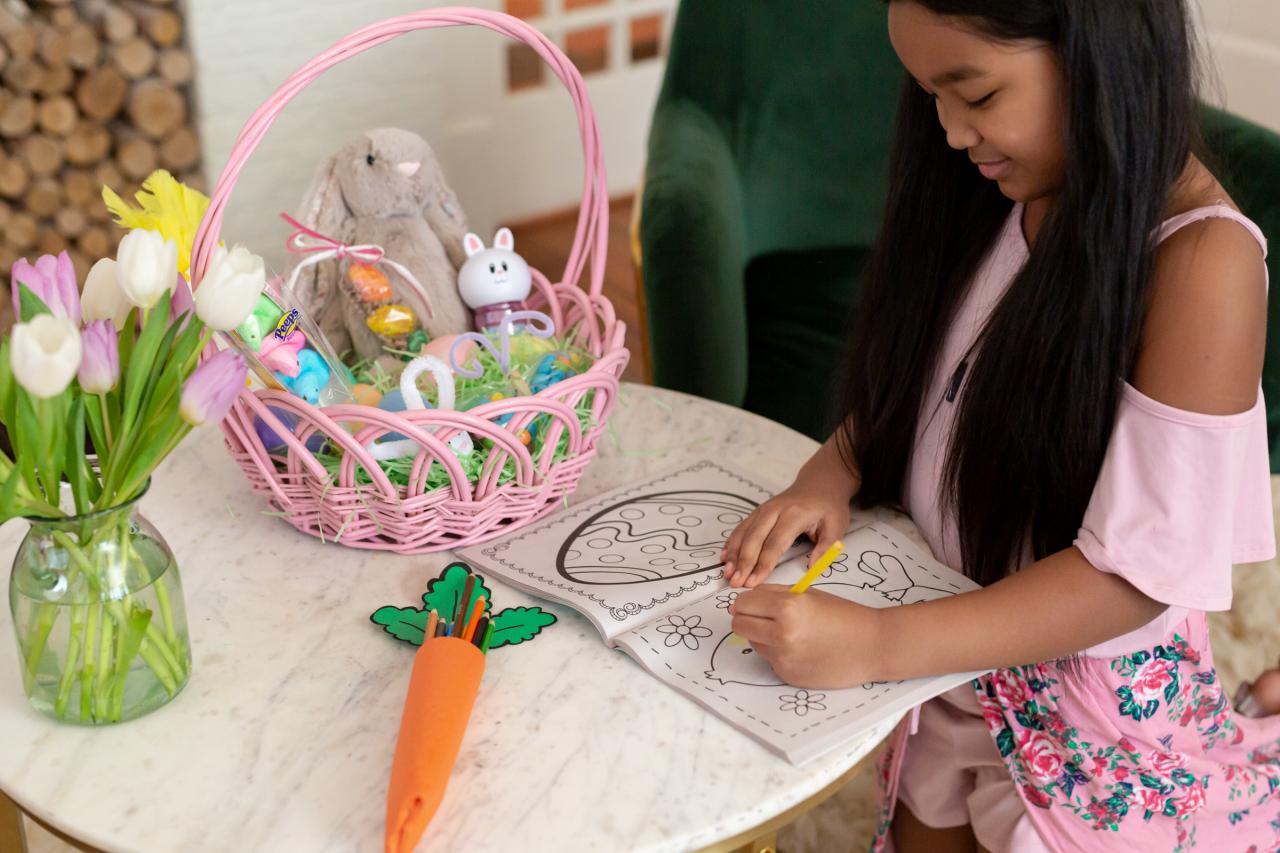
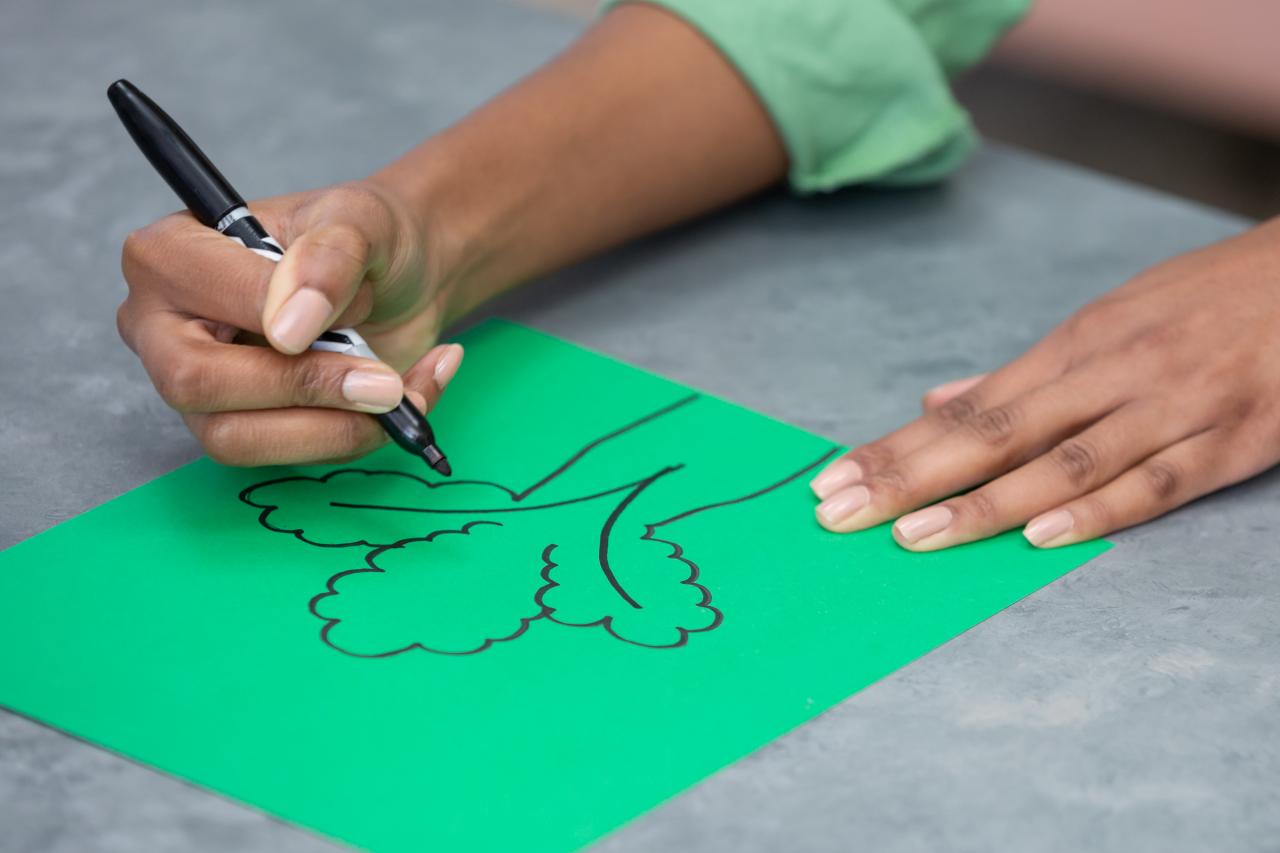
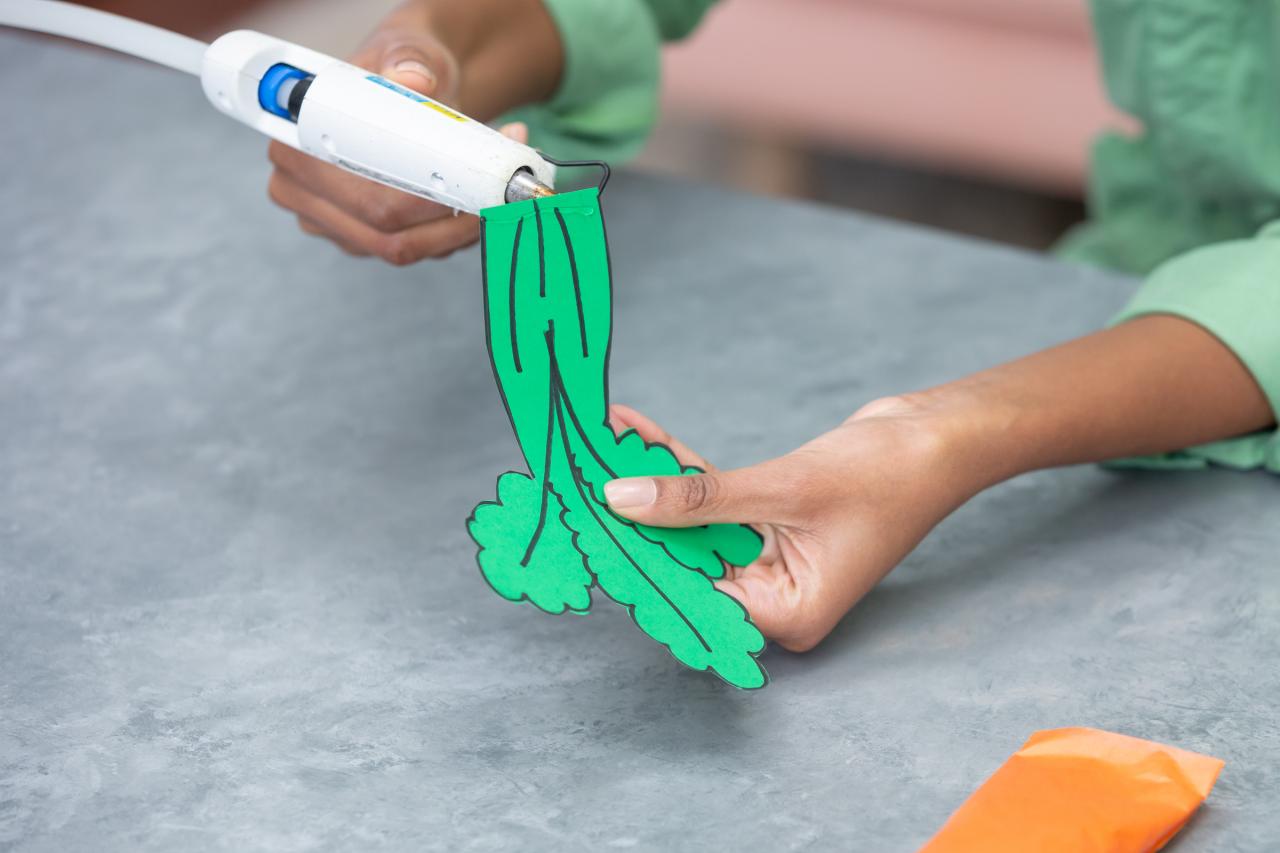
To add some fronds to this carrot, use green construction paper. Simply freehand a drawing of the fronds, making sure the base is approximately the same width as the opening of the paper towel tube (Image 1). Once you’re satisfied with your drawing, cut it out using scissors and hot glue it in place in the opening of the tube (Images 2-4). Now, just slide your colored pencils into the pouch (Image 5). If you want to add extra height to the pencils, roll up the excess tissue paper and place it inside the pouch as filler. Place in your basket alongside an Easter-themed coloring book for some Easter afternoon fun.

Cassidy Garcia

Cassidy Garcia

Cassidy Garcia

Cassidy Garcia

Cassidy Garcia
Colorful Easter Egg Crayons

Cassidy Garcia
Materials Needed
- pack of crayons
- hot water
- bowl
- silicone Easter egg mold
- baking sheet
- oven
- dish towel
- plastic treat bags
- pastel ribbon
- crinkle paper
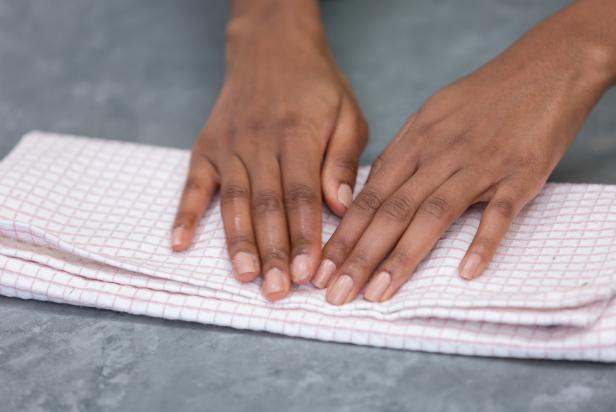
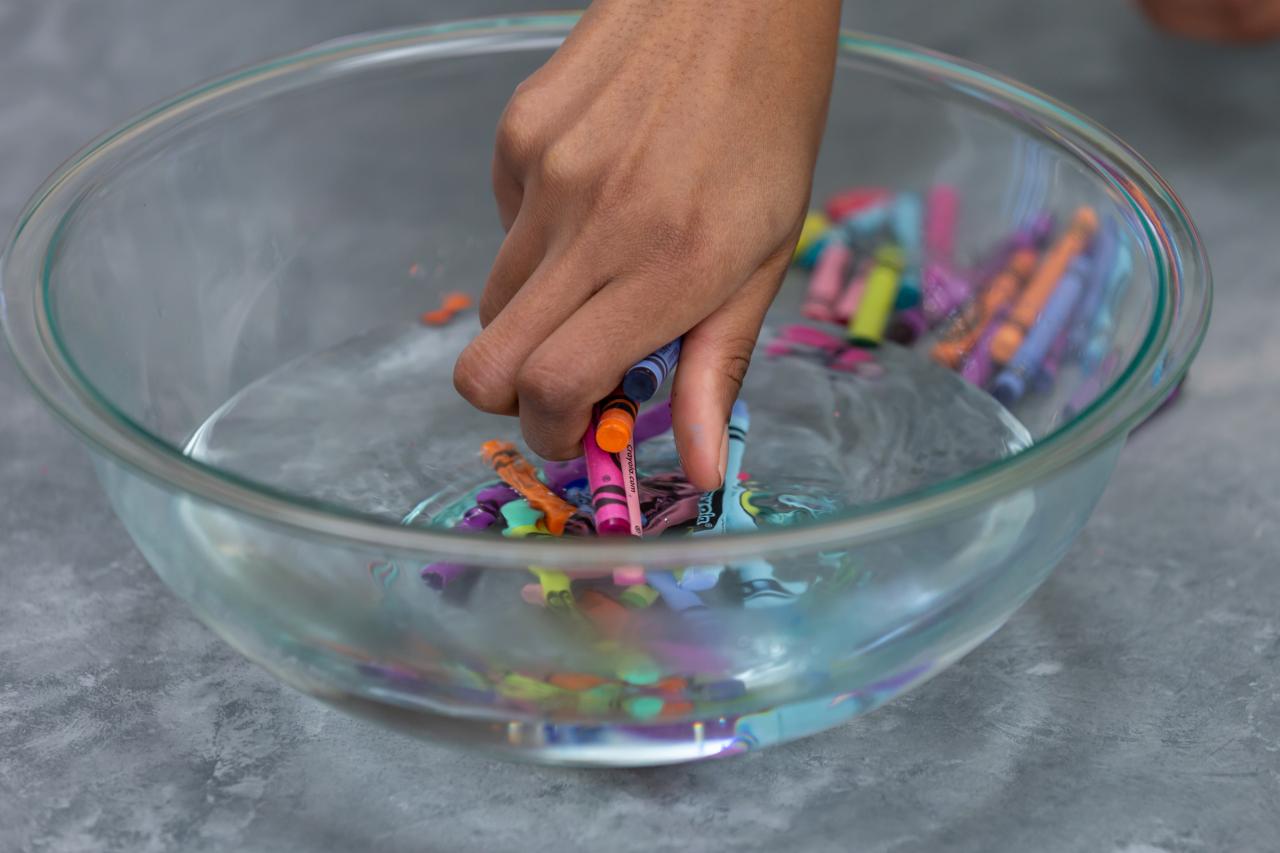
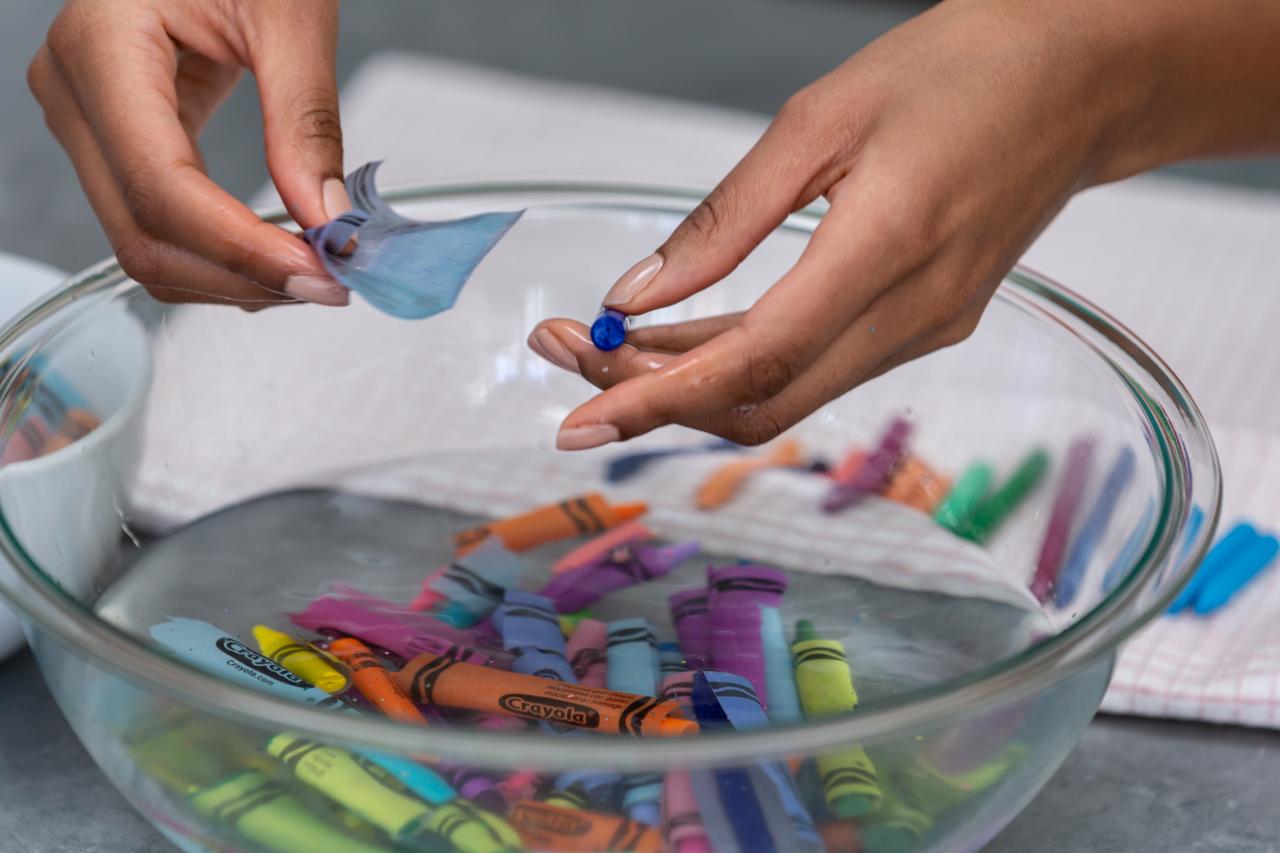
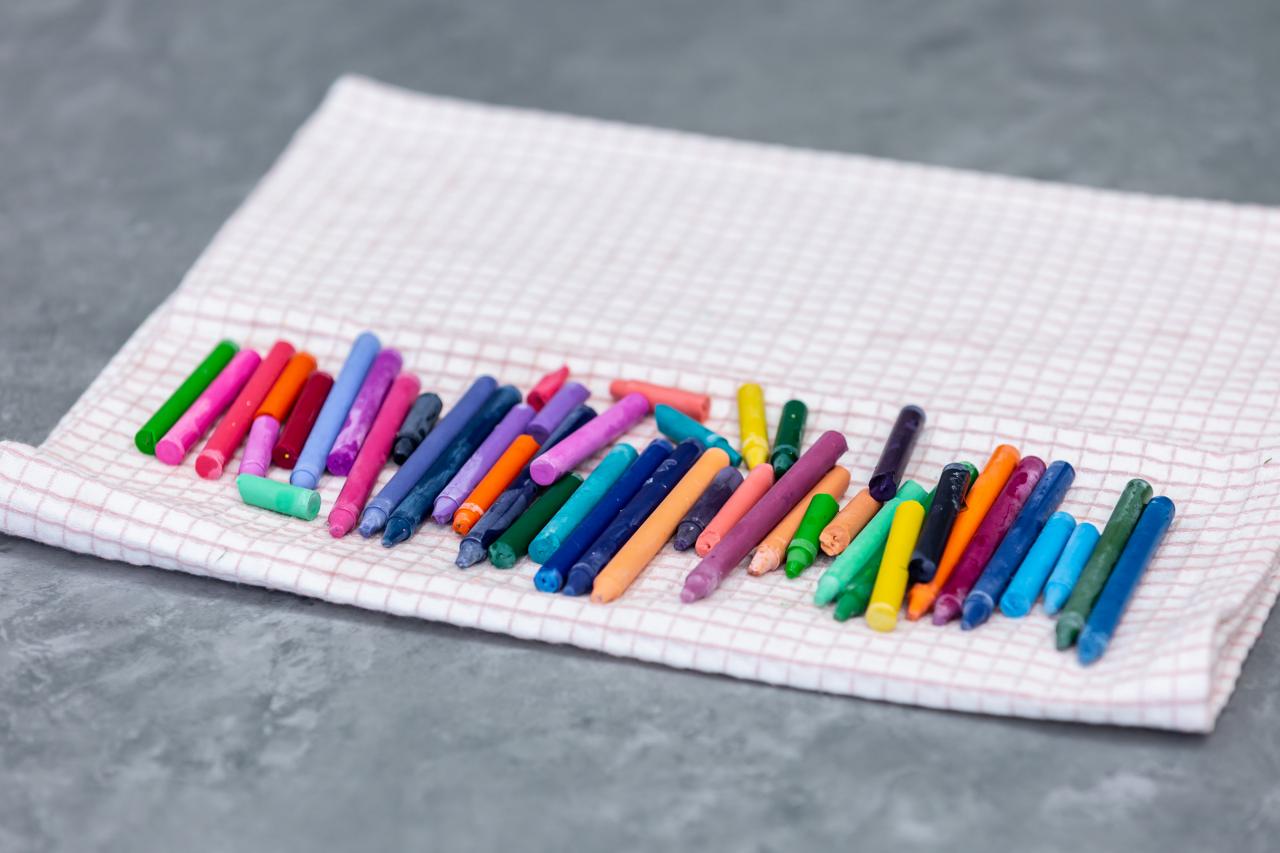
To make a custom set of Easter egg crayons, start by emptying a pack of crayons into a bowl of hot water and letting them soak for 15 minutes (Image 1). Once ready, lay a dish towel out and begin taking the crayons out one by one, removing the wrappers as you go (Images 2 & 3). Use the towel to gently blot dry the crayons, then begin breaking them into small pieces and arranging them by color family (Images 4 & 5).

Cassidy Garcia

Cassidy Garcia

Cassidy Garcia
Cassidy Garcia

Cassidy Garcia
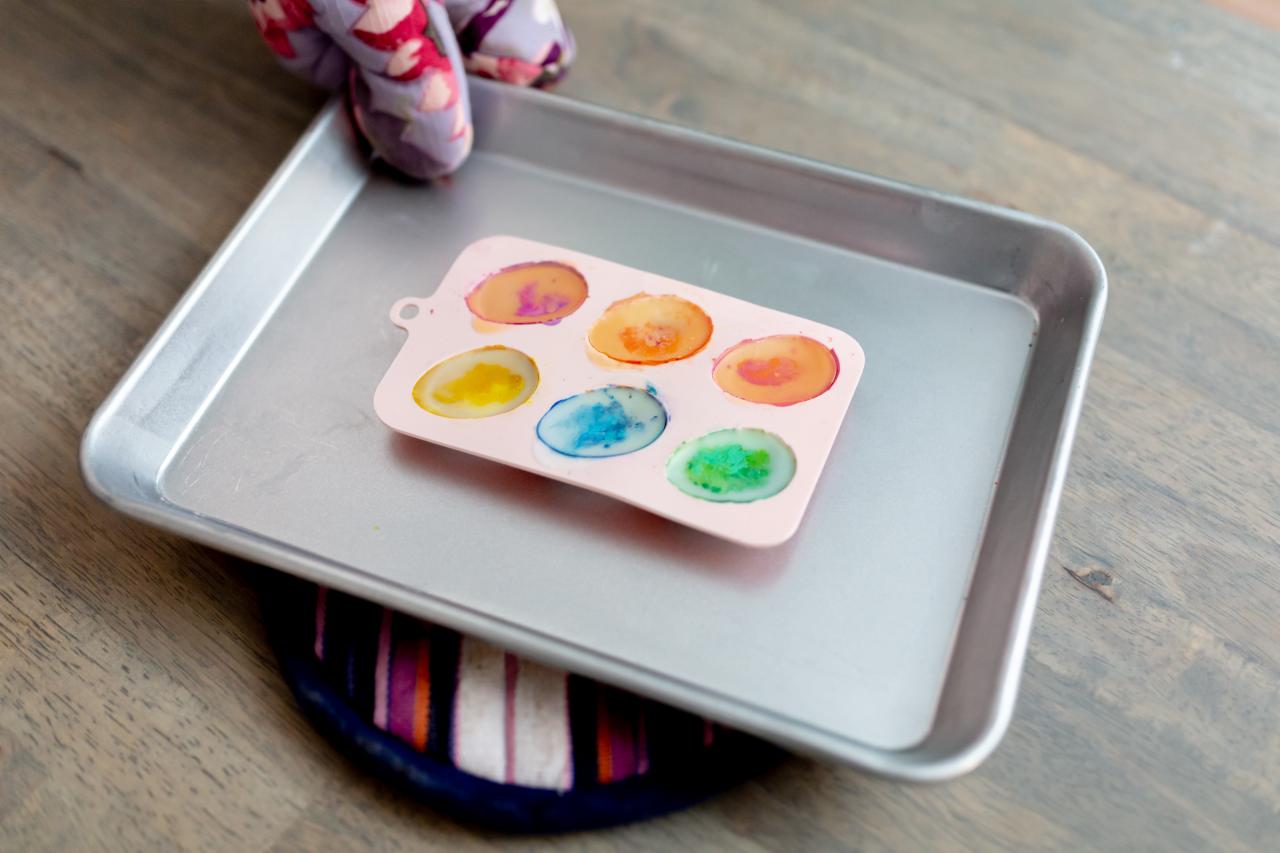
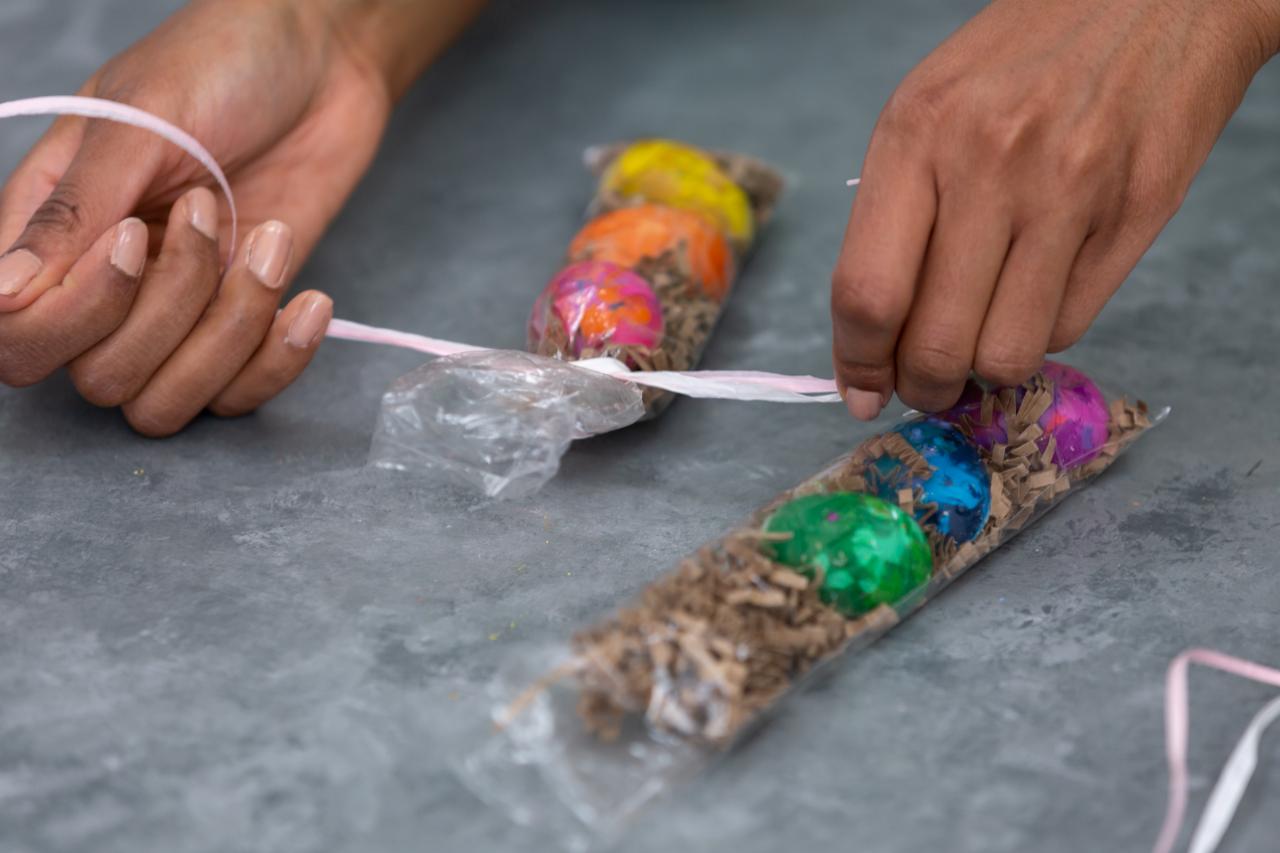
Once broken, place each color family into a separate section of a silicone Easter egg mold and place it on a baking sheet (Image 1). Bake the crayons at 250 degrees Fahrenheit for 20 minutes, then remove and allow to fully cool (Images 2 & 3). Once cool, gently remove the crayons from the mold and slide them into a small plastic gift bag with some crinkle paper, then tie off with a pastel piece of ribbon (Images 4 & 5). These adorable crayons are Easter basket ready — just be sure they aren’t mistaken for candy!

Cassidy Garcia

Cassidy Garcia

Cassidy Garcia

Cassidy Garcia

Cassidy Garcia
Butterfly Treat Bag

Cassidy Garcia
Materials Needed
- snack-sized zip-top bags
- pastel chenille stems
- clothespins
- pastel acrylic paints
- paintbrush
- bulk Easter candy
You can easily save money by buying bulk candy and packaging yourself, especially when there are multiple kiddos involved. To give your DIY candy wrapping a cute touch, we’ve got the perfect solution. First, for every bag of candy you plan to make, paint a clothespin with colorful pastel paint and set it to the side to dry (Image 1). Next, fill a snack-sized zip-top bag with colorful Easter candy until it's 75% full (Image 2). Wrap a pastel chenille stem tightly around the center of the bag, twist to secure, and bend the remainder into a curly antenna shape (Images 3 & 4). Once your clothespin is totally dry, use it to complete the butterfly body by attaching it to the bottom of the center of the bag (Image 5).

Cassidy Garcia

Cassidy Garcia

Cassidy Garcia

Cassidy Garcia

Cassidy Garcia
Bunny Pop

Cassidy Garcia
Materials Needed
- lollipop
- coffee filter
- pinking shears
- colorful baker's twine
- pink construction paper
- scissors
- permanent marker
- white chenille stem
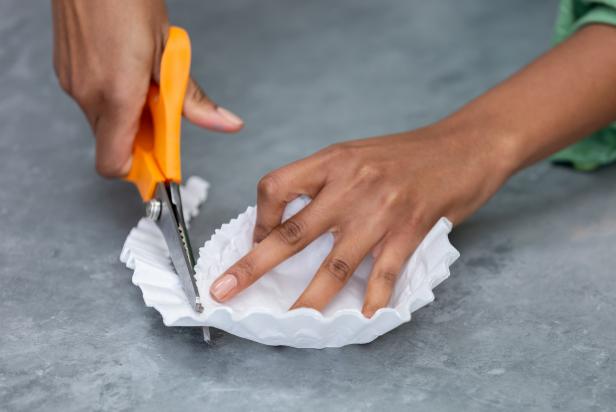
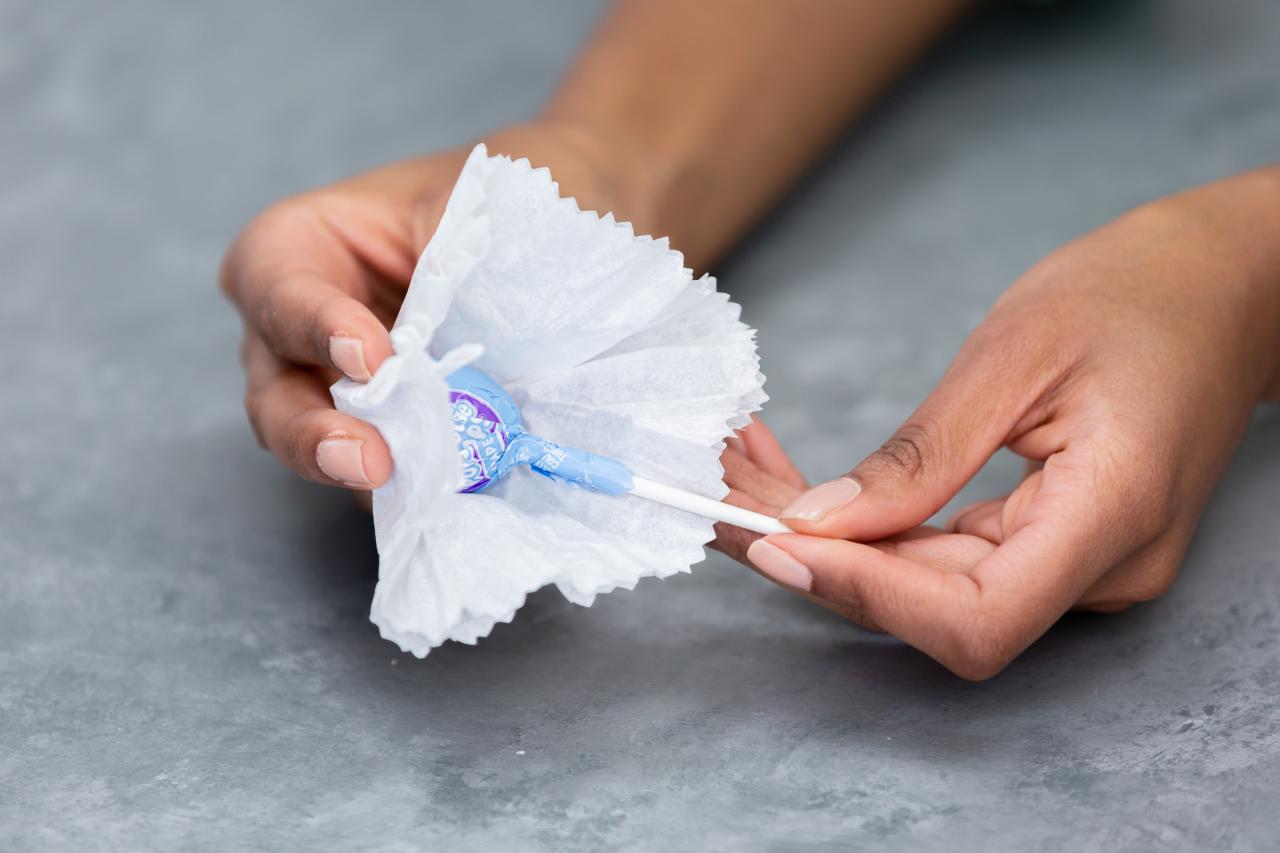
Why settle for ordinary candy wrappers in Easter baskets when you can easily pretty them up a bit? To give lollipops an Easter makeover, cut off the outer part of a coffee filter using pinking shears so it’s not so big and has a cute decorative edge (Image 1). Next, wrap a lollipop with the filter and tie it off in a bow using colorful baker’s twine (Images 2 & 3).
Cassidy Garcia

Cassidy Garcia

Cassidy Garcia
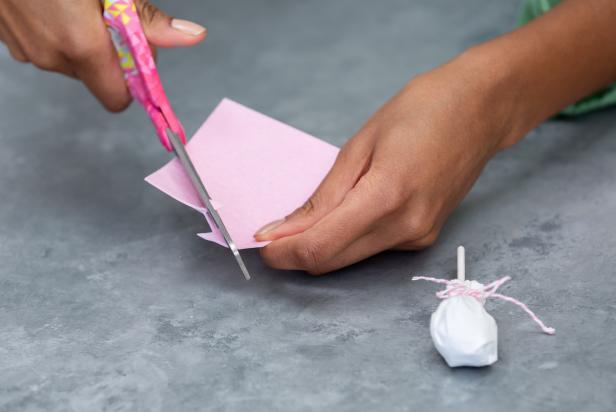
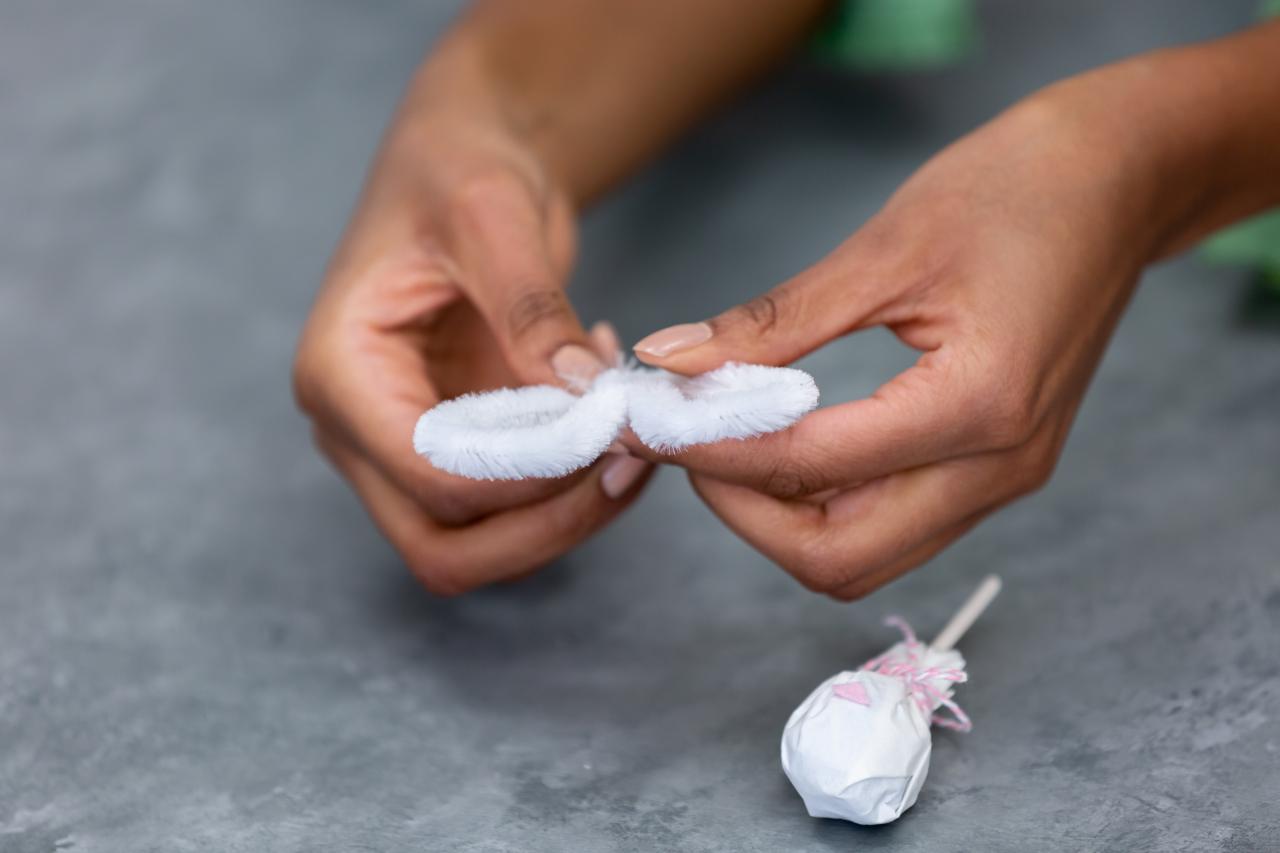
Cut a small rabbit nose out of pink construction paper and stick it to the center of the lollipop with tape or glue (Images 1 & 2). For some big bunny ears, bend a white chenille stem into a heart and glue it to the back of the lollipop (Image 3). Finish off this adorable bunny pop by drawing some cute little eyes with a black marker (Image 4).
Cassidy Garcia

Cassidy Garcia

Cassidy Garcia

Cassidy Garcia
Chick Gift Bag

Cassidy Garcia
Materials Needed
- small gift bag
- orange construction paper
- scissors
- hot glue gun + glue sticks
- sticker eyes
- faux yellow feathers
- tape
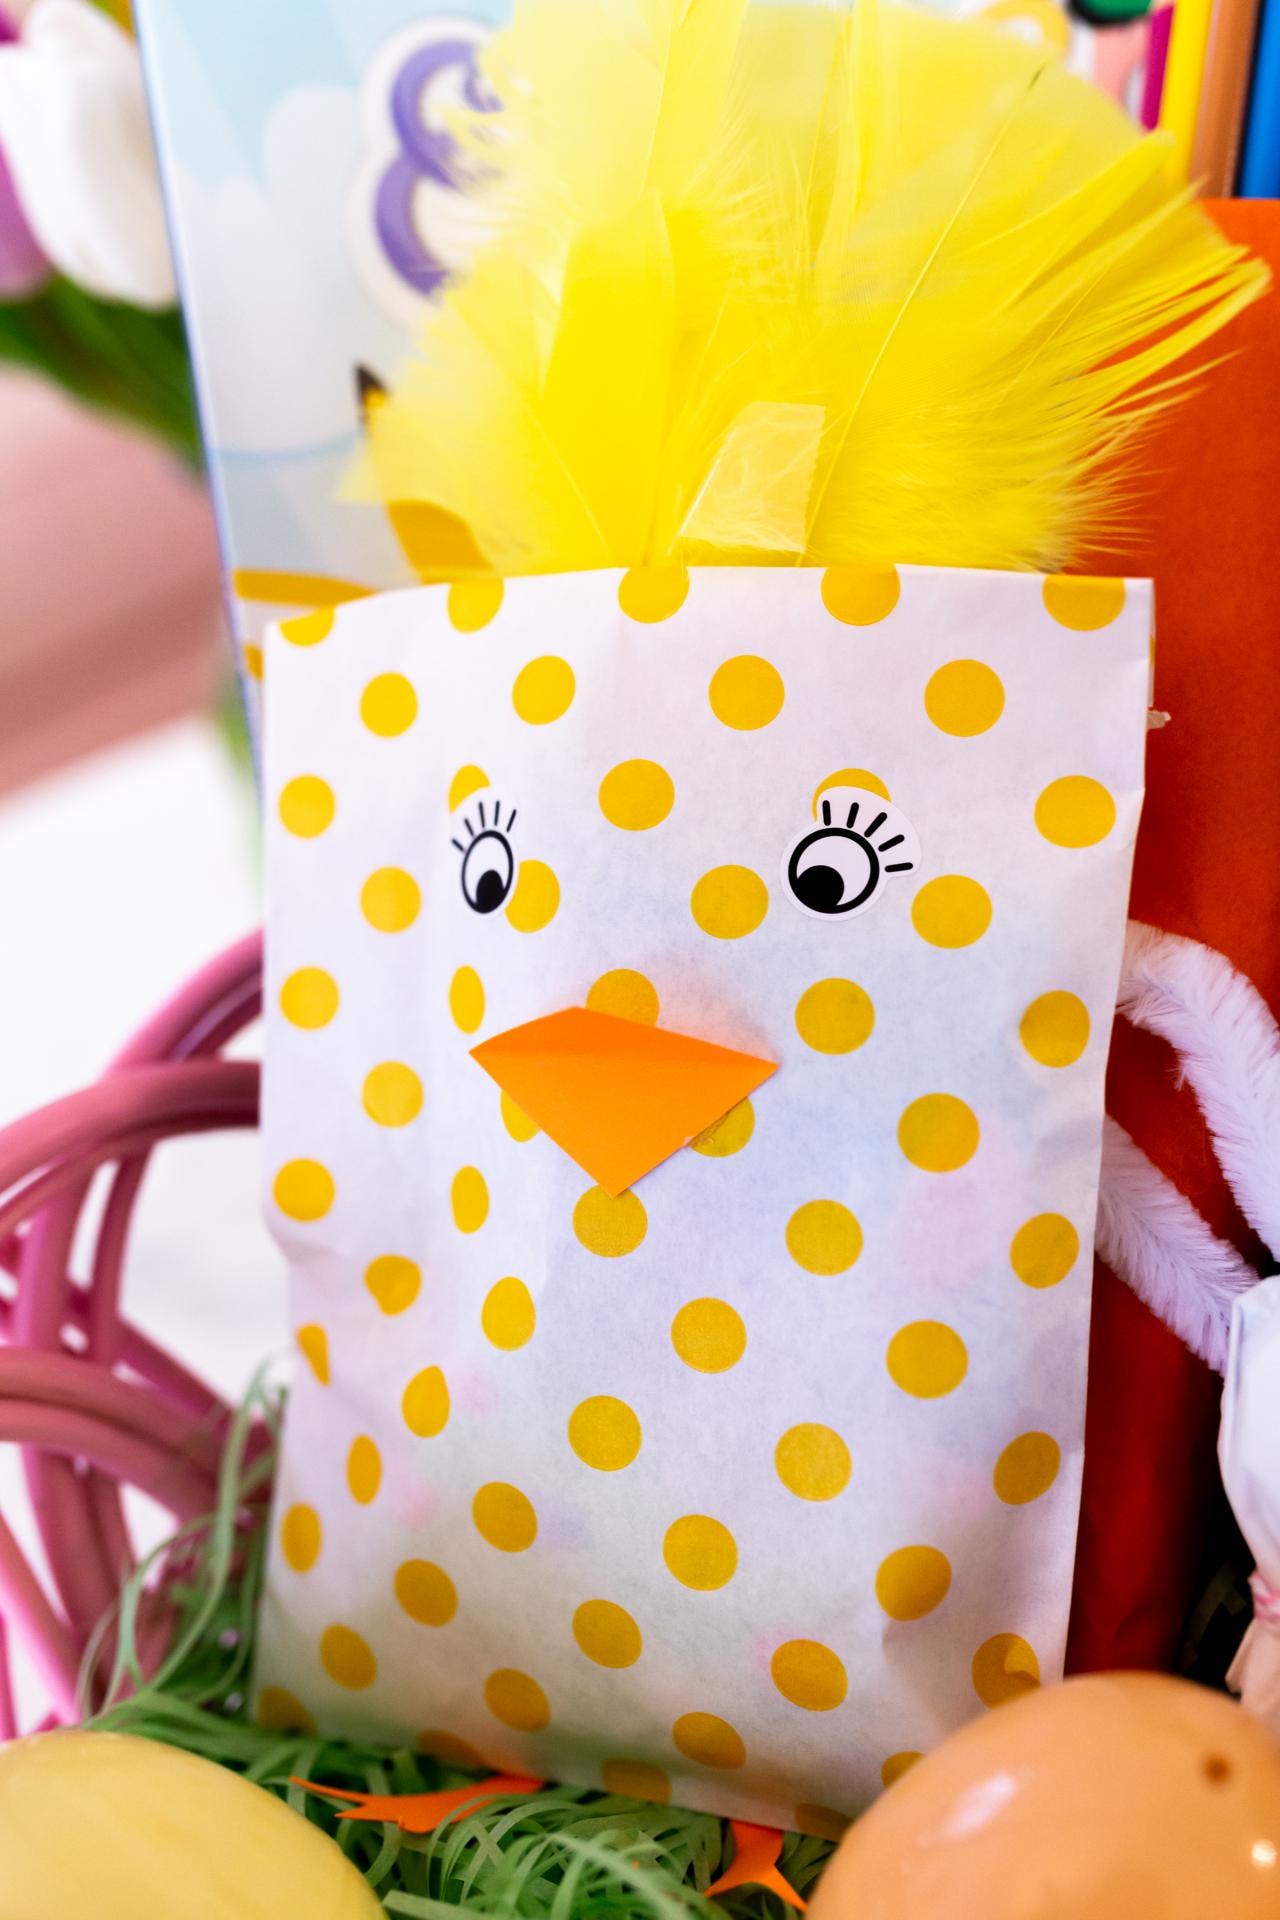
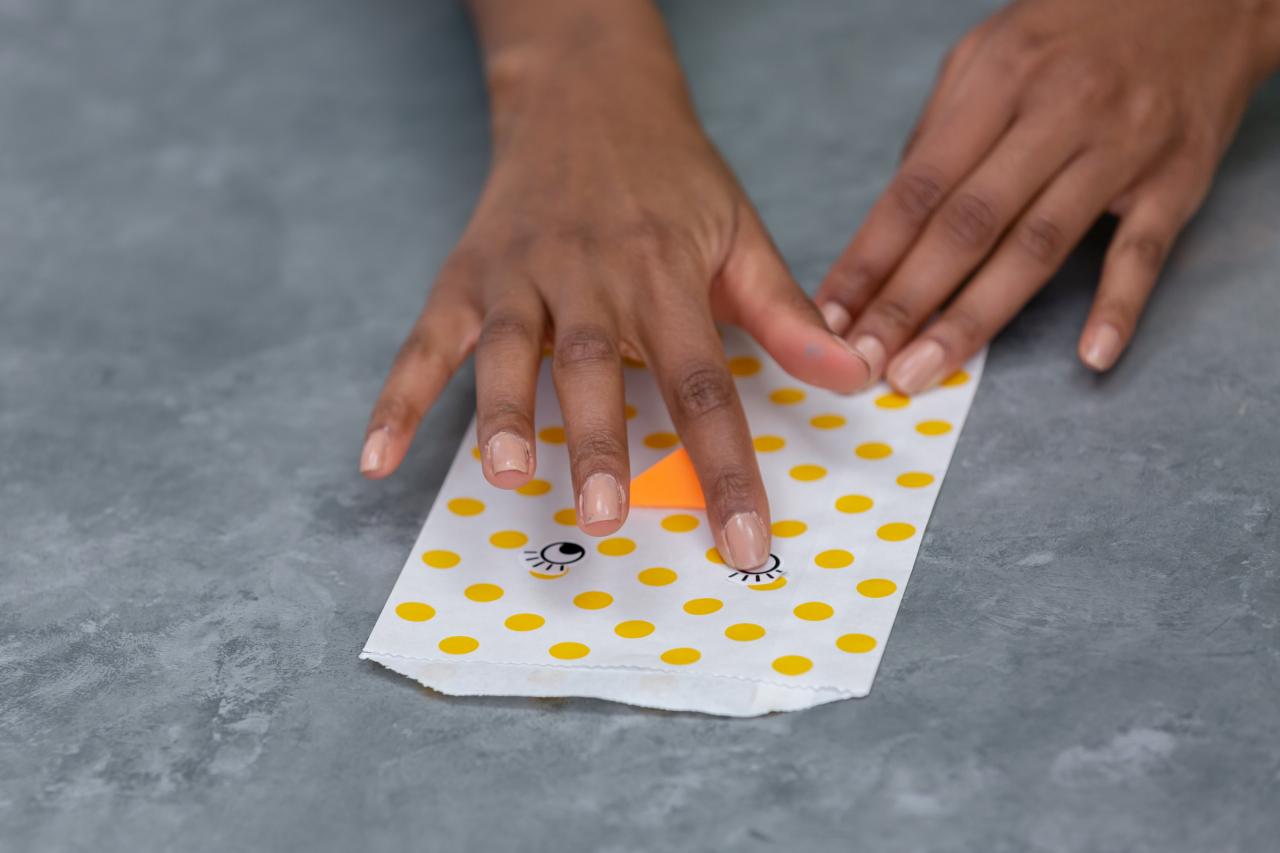
For gifts larger than candy, we’ve got another festive packaging solution that is sure to ruffle your feathers (in a good way). Start by picking out a small-sized yellow treat bag. Using orange construction paper, cut out a few cute little chicken legs and glue them to the backside of the bag so that the feet are visible from the front (Images 1 & 2). With the same paper, cut a small square, bend it into a triangle and glue the bottom side to the center of the bag so that one side of the triangle sticks out like a beak (Image 3). Complete the chick’s body by sticking on a few sticker eyes above the beak (Image 4).

Cassidy Garcia

Cassidy Garcia

Cassidy Garcia

Cassidy Garcia
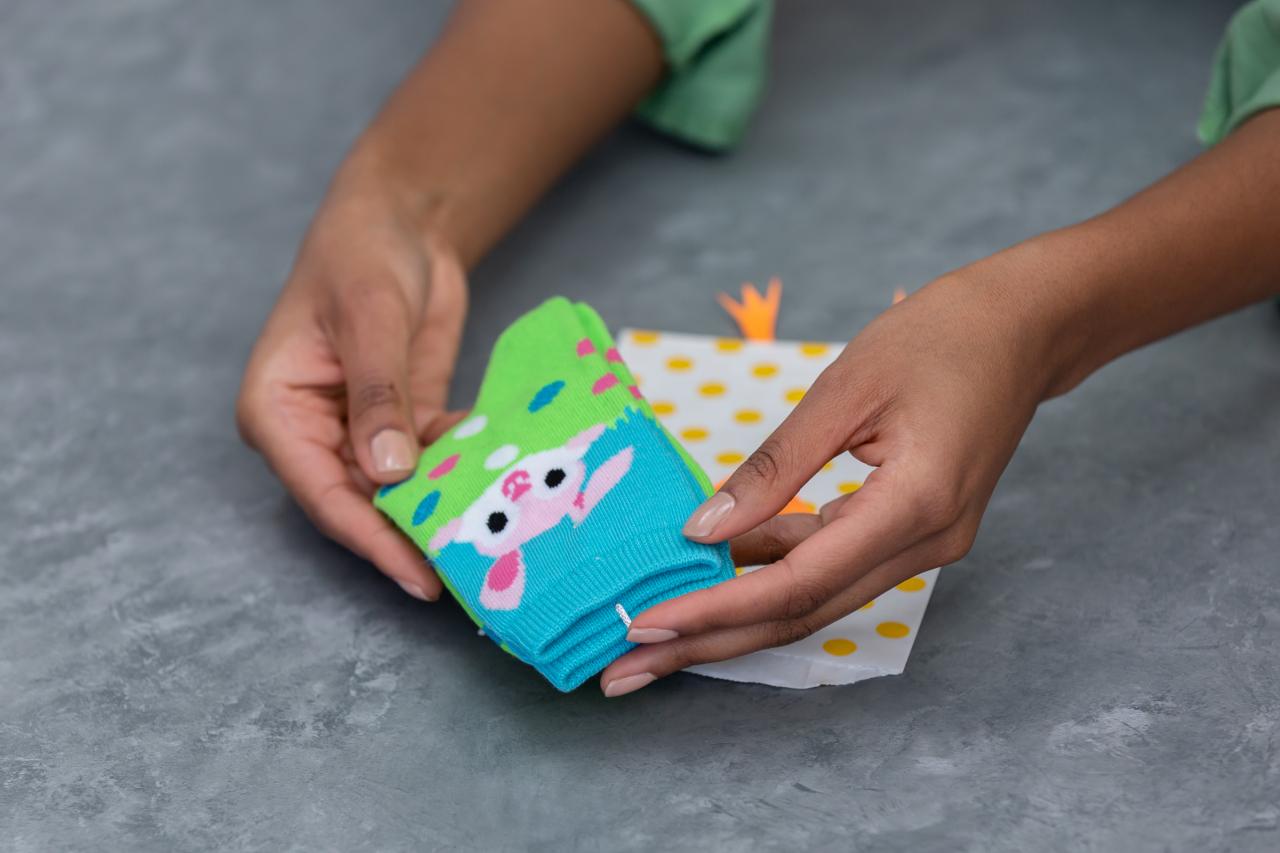
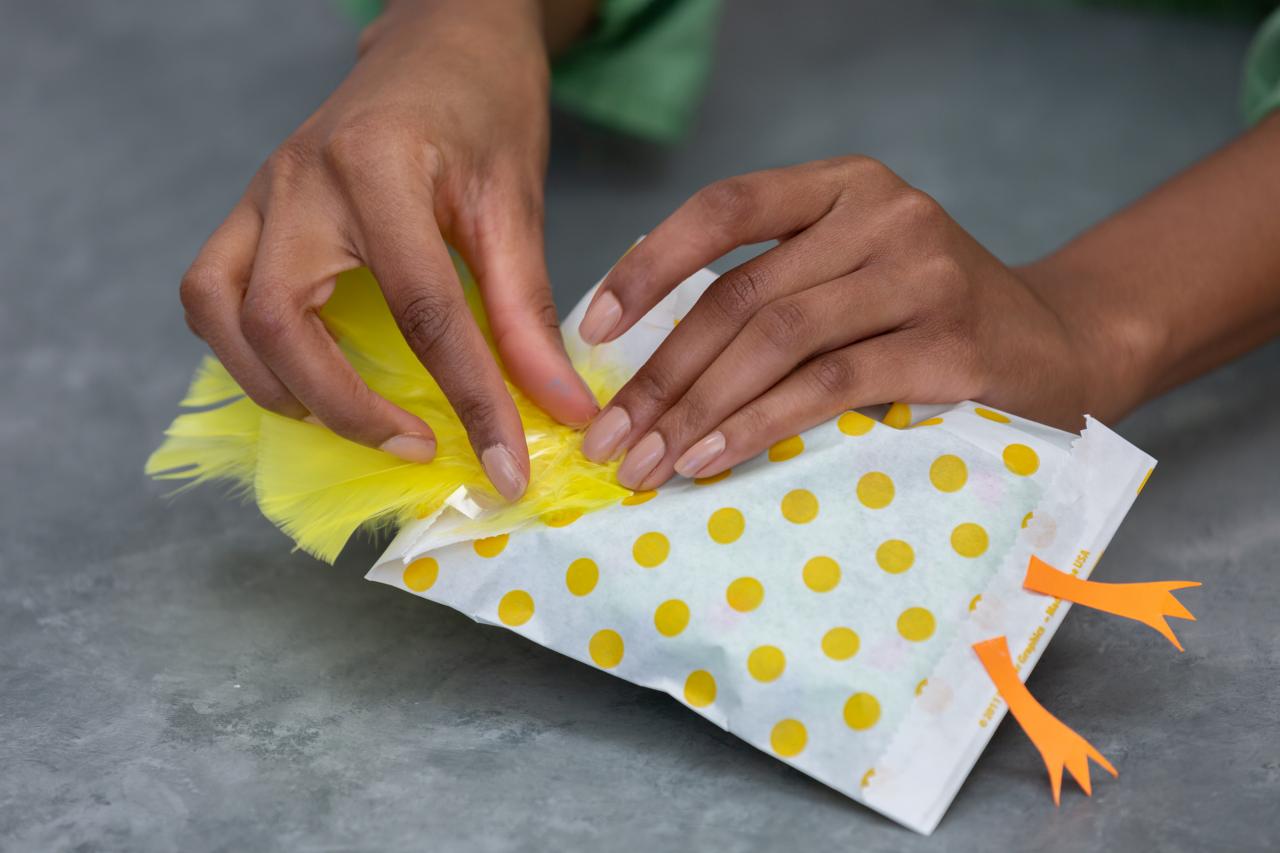
Before you complete the bag, go ahead and slide your gift inside and tape off the opening (Images 1-3). Now all that’s left on this adorable chick is a few faux yellow feathers bunched together and taped to the bag side so that they are sticking out of the top (Image 4).

Cassidy Garcia

Cassidy Garcia

Cassidy Garcia

Cassidy Garcia


