


DIY No-Sew Dog Christmas Stocking
Show your furry friends how much they mean to you this Christmas with a personalized stocking crafted just for them.
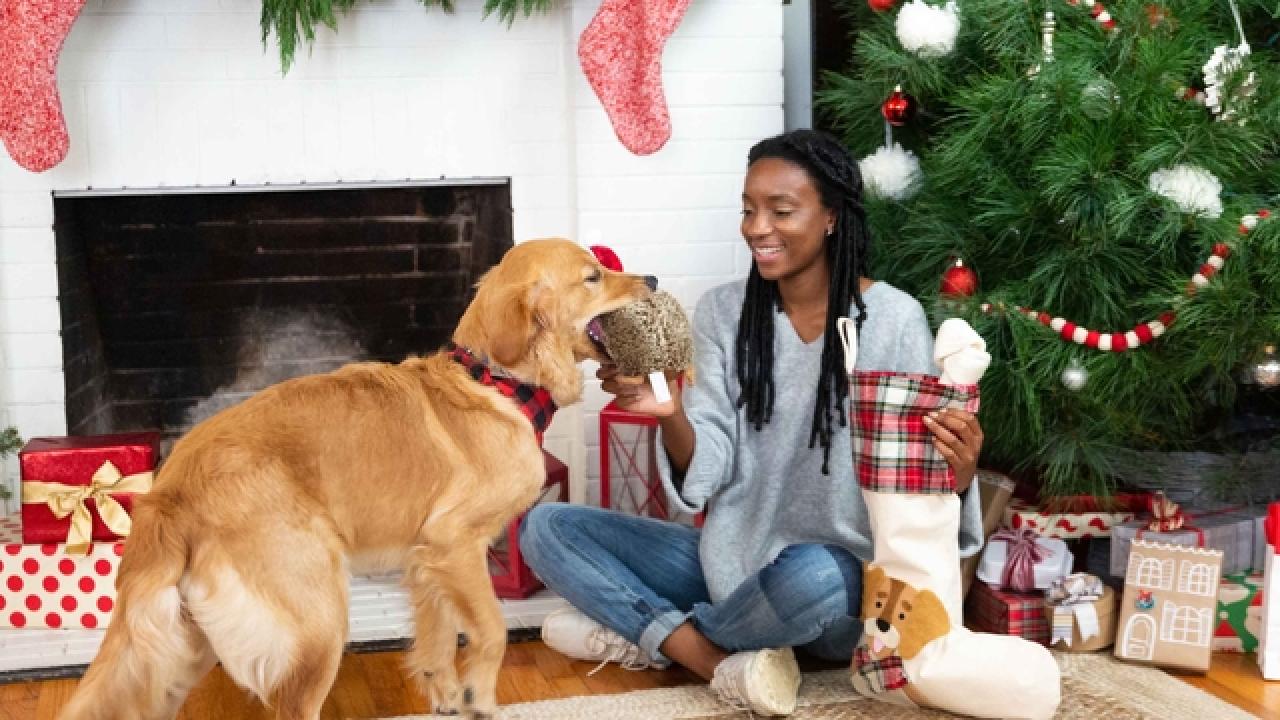

Dogs bring an abundance of joy to our lives. It’s time we gave back with a little more than treats and belly scratches! This Christmas, your four-legged furball has earned their own stocking on the mantel, complete with an artistic portrayal of their likeness. Not much of an artist? Don’t worry, this DIY will show you exactly how to do it step by step. Oh, and did we mention it’s no-sew?
Materials Needed
- plain canvas stocking
- felt and faux fur fabric in your dog’s colors
- plaid fabric
- hot glue gun + sticks
- scissors
- printer paper
- marker
Choose Fabric
For your base, all you’ll need is an inexpensive, plain canvas stocking. For the dog body, we chose a mixture of faux fur and felt to add textural contrast, but the choice is yours. Have a long-haired dog? Go faux fur the whole way. Short hair? Opt for felt. Whatever you choose, be sure to get the colors needed to best resemble your pup. We chose two shades of brown and white for our dog’s body, black for the nose and eyes, and pink for the tongue.
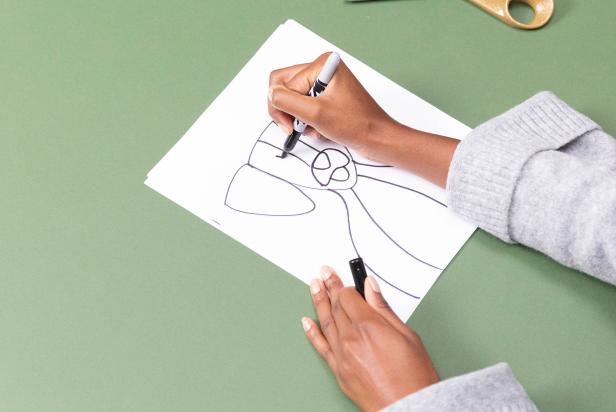
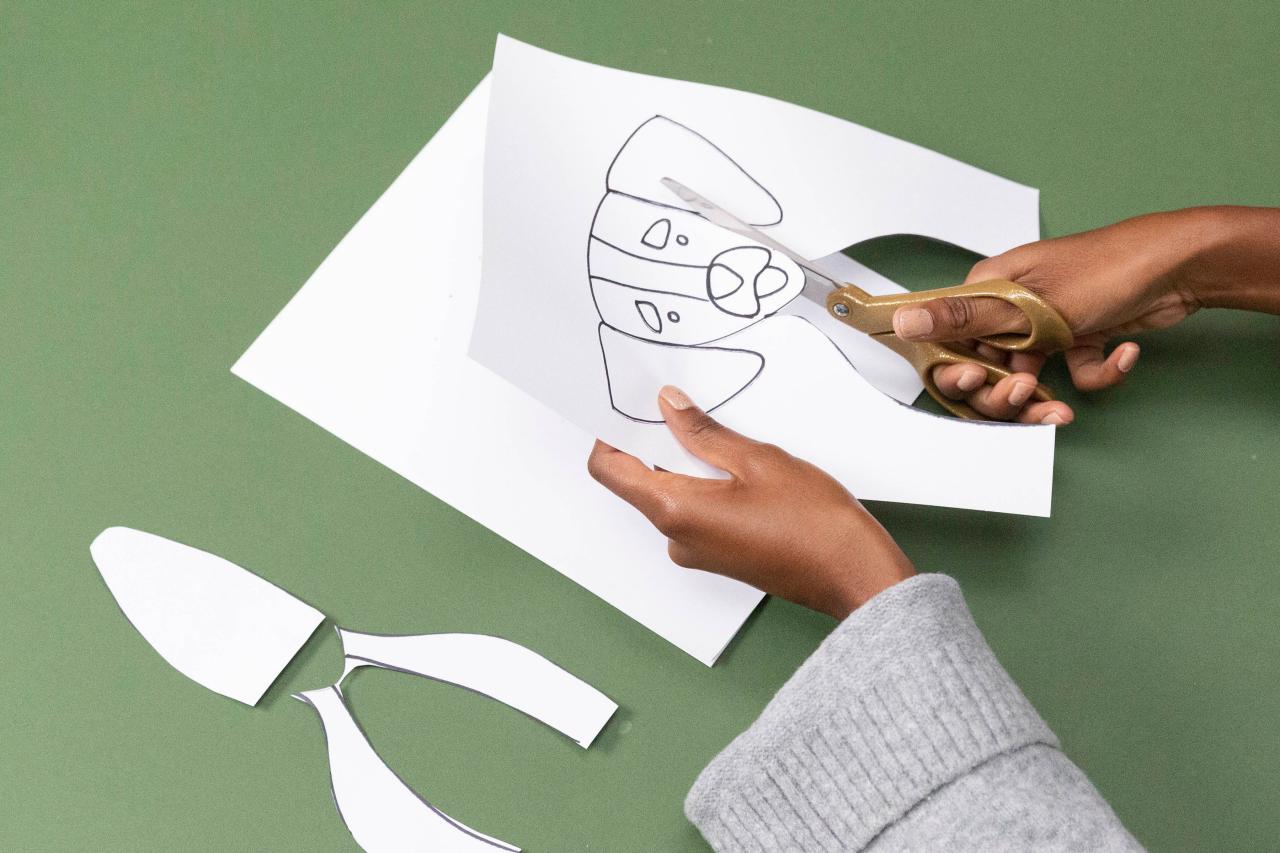
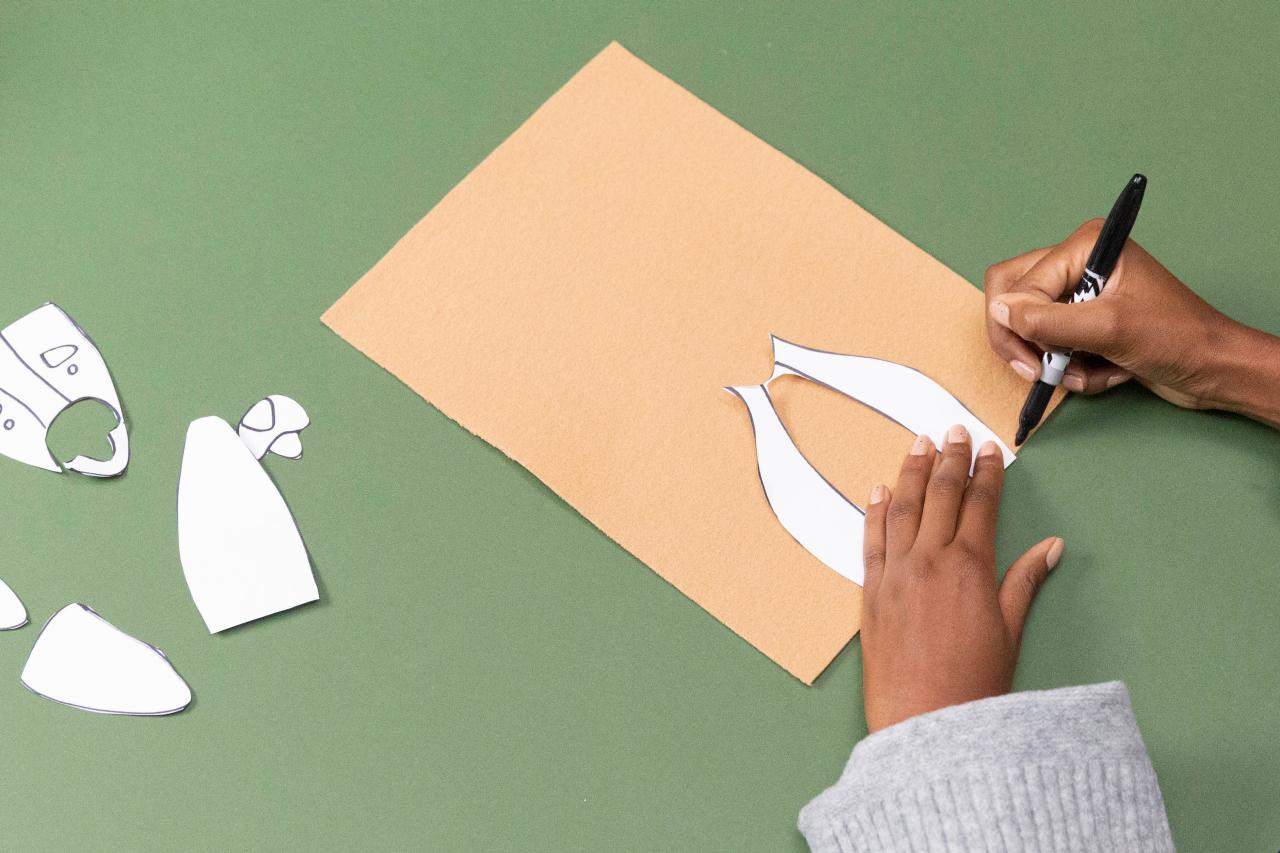
Draw Dog
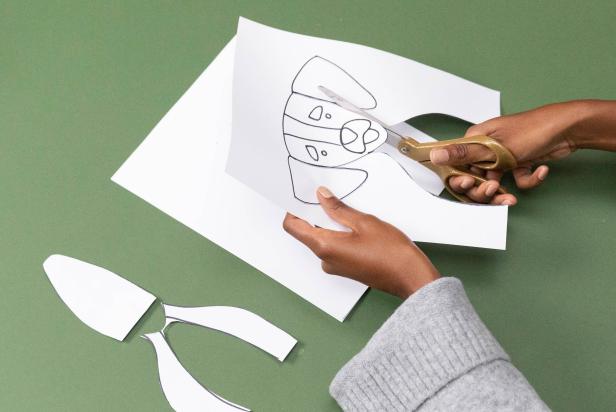
Don’t worry if you’re not a great artist; drawing a dog is easier than it sounds. On standard printer paper, start by drawing the face (Image 1). The shape should look like an upside-down triangle with rounded edges. Adjust the dimensions of the face to better suit your dog’s appearance. For the ears, simply mimic the face shape on each side of the head. Again, manipulate the scale and look of the ears to suit your specific dog. For the face, keep it simple. A couple of round eyes, a muzzle with a nose at the top and a tongue hanging out the bottom will do. We added a stripe down the center of the face to better resemble our dog. For the body, simply bring the neck down, swoop out for the shoulders, and carry the line to the bottom of the page. Remember to add any of your dog’s characteristic markings to aid in the stocking’s resemblance. Once you’re finished drawing, use scissors to cut out each section (Image 2).
Yasmin Murphy
Yasmin Murphy
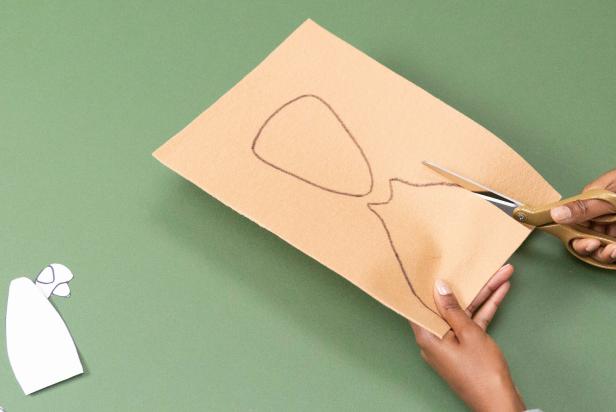
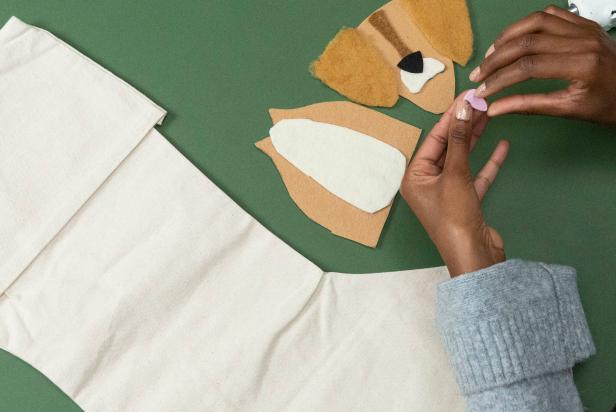
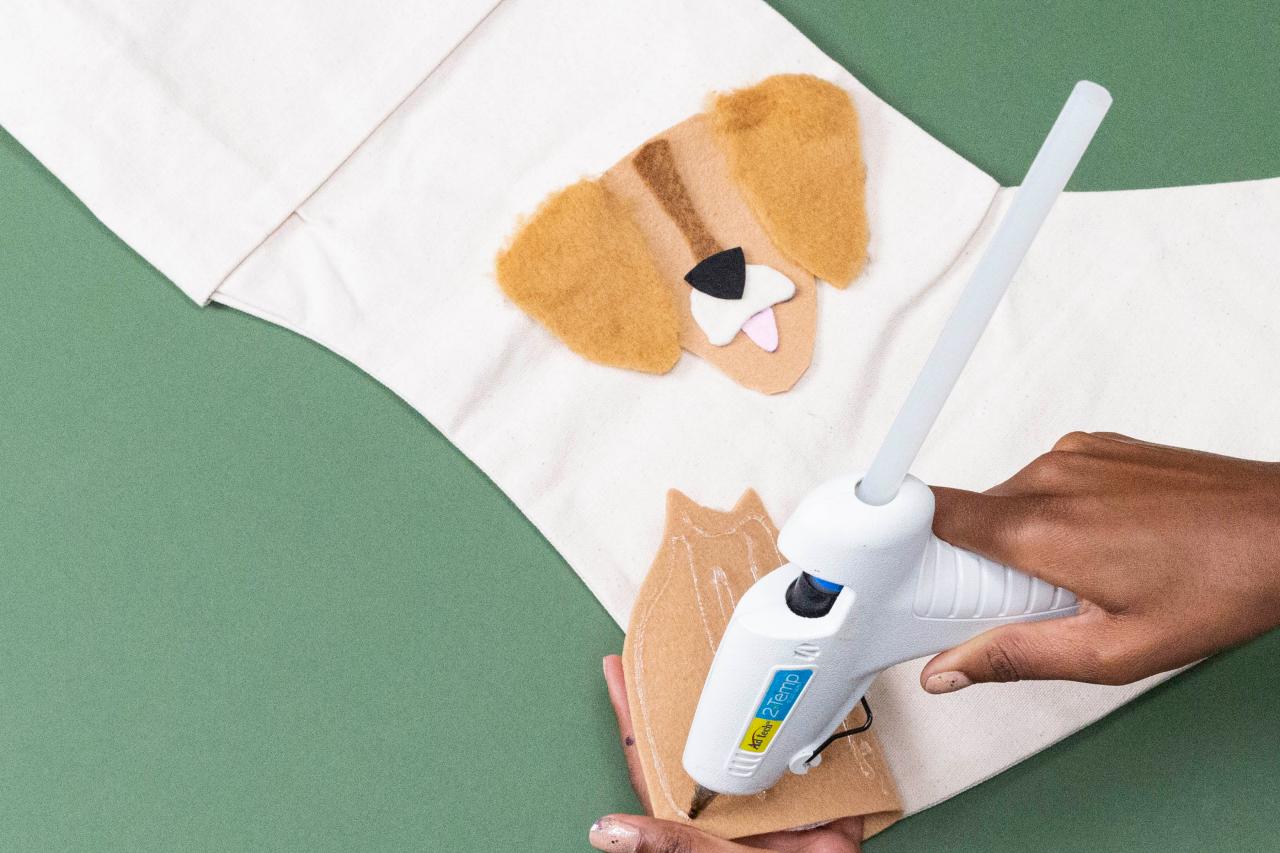
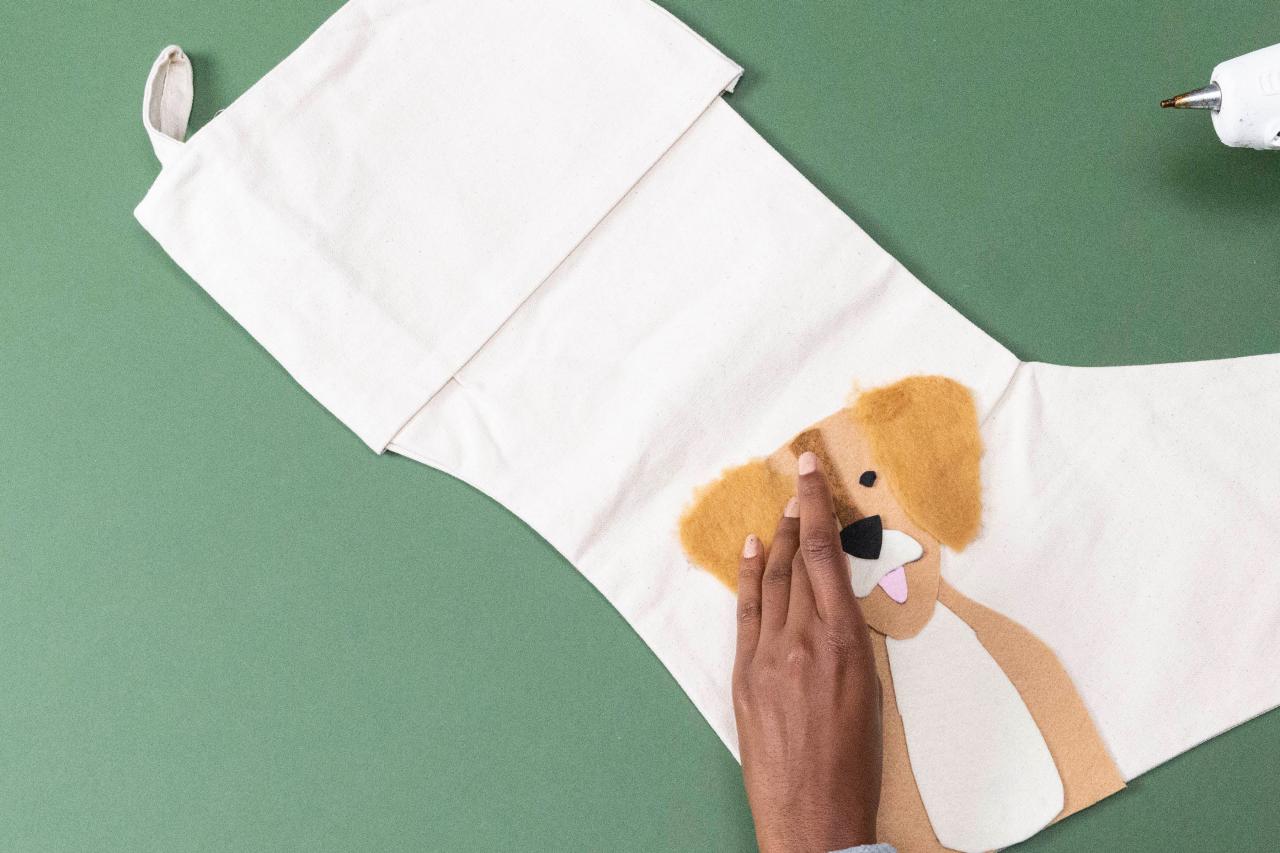
Cut and Attach Fabric
Use a marker and scissors to trace and cut the fabric according to the templates you’ve created (Images 1-3). Once all pieces are cut out, affix them to themselves and to the stocking using hot glue (Images 4 & 5).

Yasmin Murphy
Yasmin Murphy
Yasmin Murphy

Yasmin Murphy

Yasmin Murphy
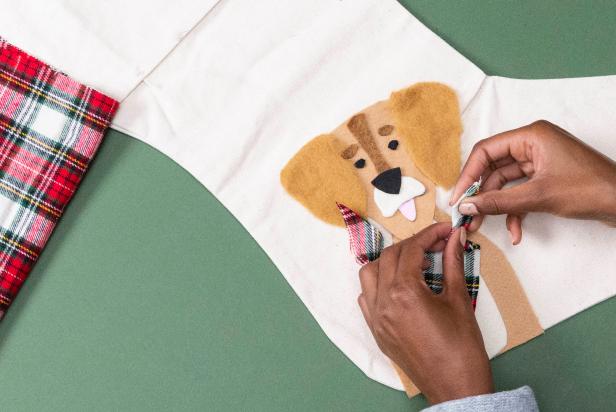
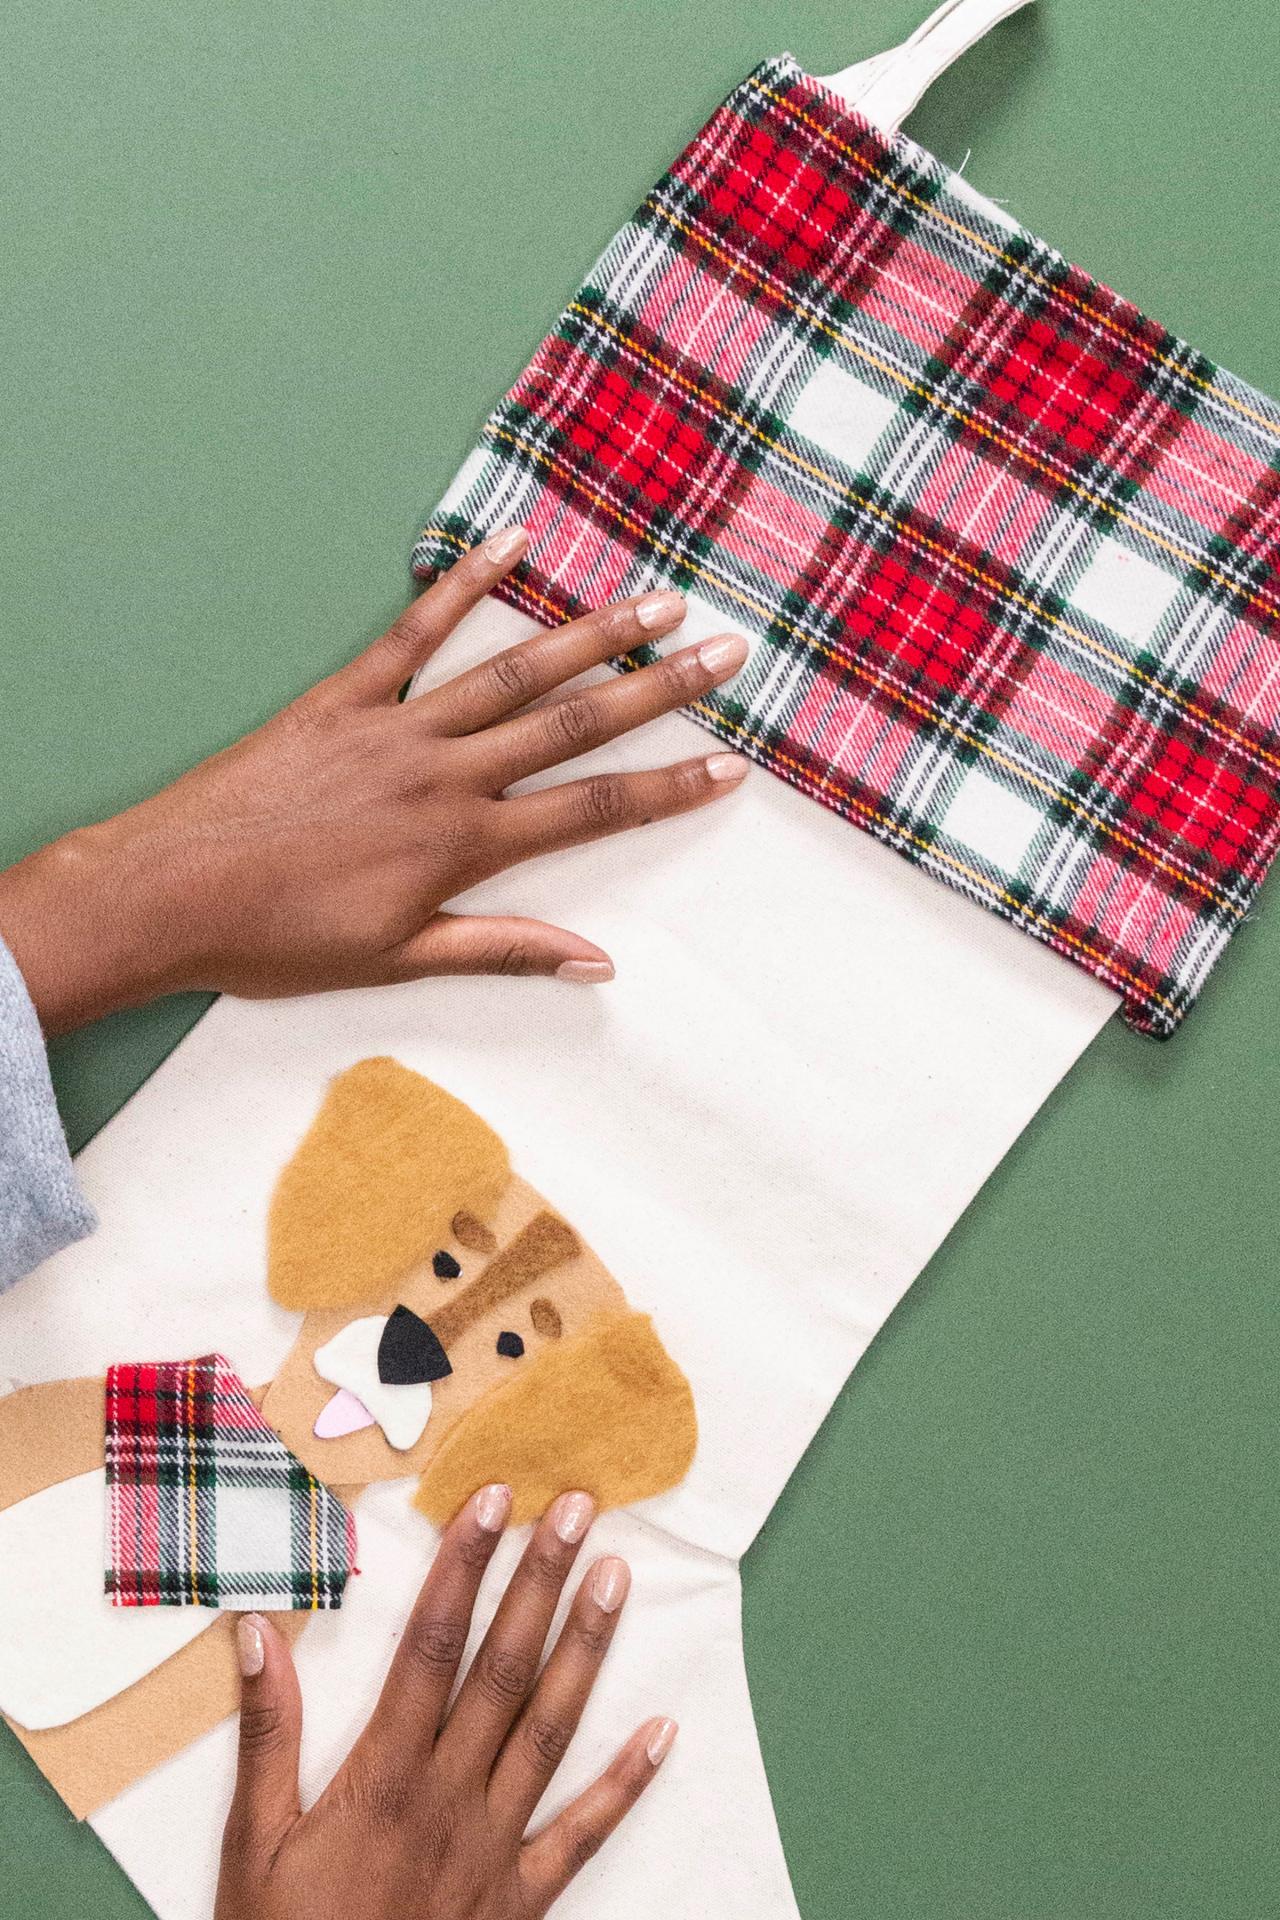
Add Scarf
No adorable Christmas pup is complete without a seasonal scarf! Fold the plaid fabric in a triangle slightly wider than your felt dog’s neck. Cut out and fold the edges over to appear as if it is wrapping around the dog’s neck, then glue in place using hot glue.
Yasmin Murphy
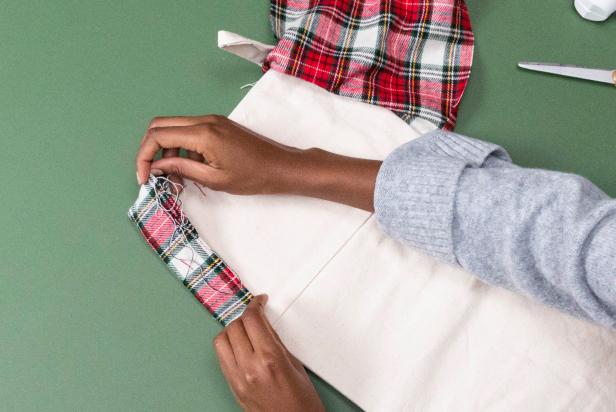
Final Touches
For a final festive touch, use the same plaid fabric to line the top of the stocking. To do this, simply cut to size and glue in place, folding the fabric over and underneath any existing seams on the stocking for a finished, professional look (Images 1 & 2). Voila! Your prized pup won’t believe her eyes!
Yasmin Murphy

Yasmin Murphy


