


How to Install Vinyl Plank Flooring
Many homeowners have turned to vinyl plank flooring as an alternative to hardwood or tile because it’s easy to install, very durable and comes in a huge variety of styles. Learn how to transform your home with high-quality vinyl floors.

Modern manufacturing methods for vinyl plank floors have transformed the flooring market. Vinyl tiles can look luxurious — just as good as natural hardwoods — but offer more durability and longevity in a busy home. Unlike hardwoods, vinyl floors are more resistant to warping, staining or scratching. All vinyl flooring offers water resistance, but enhanced engineering has made it possible to have 100-percent waterproof options for areas prone to moisture or spills, such as kitchens, bathrooms, basements or utility rooms.

NelleG
Vinyl floor installed in a modern kitchen.
Installing vinyl is so easy that with a little know-how, you can transform a room in as little as a day. And, it’s available and installed for a much lower cost than other flooring options.
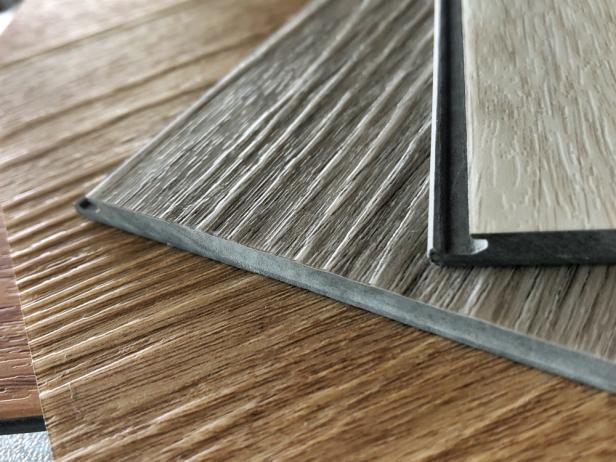
Types of Vinyl Tile
There are many similarities between the types of vinyl tile, so let's break it down. Keep in mind that all types of vinyl planks can be manufactured with interlocking edges and ends, adhesive backing or as a glue-down product. There are pros and cons to each method of installation, but all vinyl plank flooring is intended to be easy to install and offers durability for homeowners. Identifying the differences in categories makes it easier to narrow down options for your own home.
Luxury Vinyl Plank Flooring (LVP)
Luxury vinyl plank flooring (also known as LVP flooring) is engineered to the highest quality. Its scratch-resistant surface finishes are most likely to trick guests into thinking that your floors are hardwood or tile. Its PVC vinyl core guarantees longevity and offers more comfort underfoot. LVP flooring is a great investment for homes that would benefit from a stain-resistant top layer — consider it if you have a household with busy kids and pets.
Shutterstock
Rigid Core Vinyl Plank Flooring
Rigid core vinyl plank flooring is commonly offered with stone plastic composite (SPC), wood plastic composite (WPC) or a combination of materials. While these products offer similar benefits as luxury planks, the dense composite core adds durability in high-traffic areas, such as busy hallways and entryways. Rigid core planks are also waterproof, making them popular options for open floor plans where continuity in flooring is important and needs to be widely durable.
Waterproof Vinyl Plank Flooring (WPC)
Waterproof vinyl plank flooring offers all the benefits of the rigid core and luxury planks but also incorporates an advanced waterproof core. If you’re updating any rooms prone to spills or moisture, make sure you choose a product with a 100-percent waterproof core.

The Best Vinyl Plank Flooring Picks for Your Home
Vinyl plank flooring is a modern miracle that gives homeowners the luxurious look and longevity of hardwood floors without the warping, water damage, staining or scratching. The look of classic hardwood floors for less money and upkeep? Yes, please!
Install Vinyl Plank Flooring
The installation process can vary depending on your type of vinyl tile, the subfloor and underlayment. If you have any issues installing your floor, contact the manufacturer for assistance.

NelleG
Tools and Materials:
- pry bar
- tape measure
- utility knife
- fine-tooth saw
- carpenter's square
- permanent marker or chalk line
- rubber mallet
- hammer
- vinyl plank flooring
- underlayment (if necessary)
- denatured alcohol (if necessary)
- pneumatic nailer
1. Acclimate Planks + Prep Subfloor
Acclimate the vinyl flooring in your home for one to two days prior to installation. While the flooring adapts to your environment, start doing basic prep work.
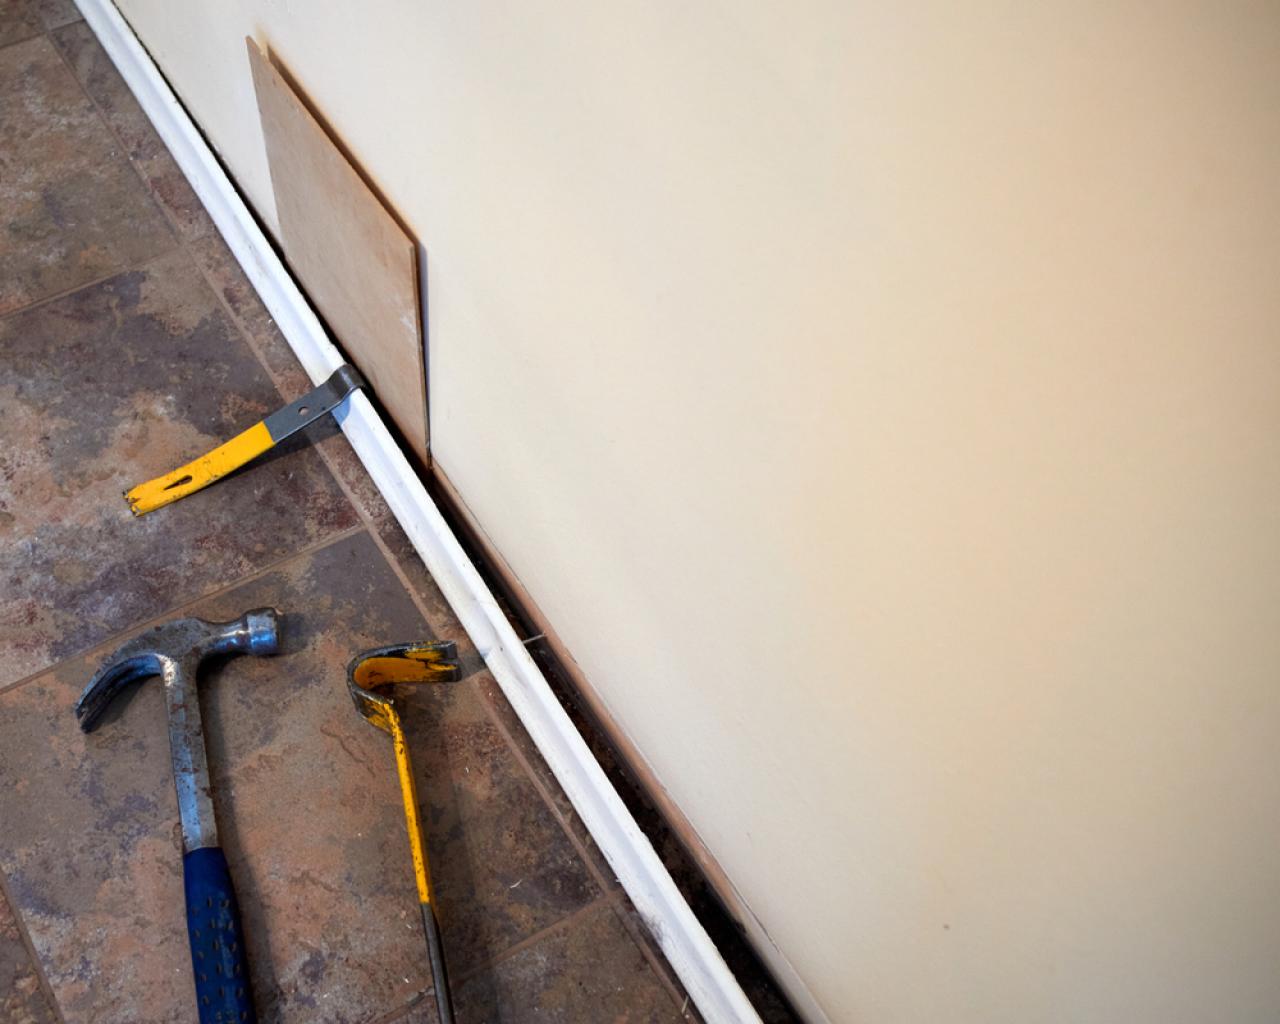
Remove the baseboards and/or corner-round molding where you'll be installing the new floor. You may also need to remove or undercut the casing around the door to make space to slide vinyl planks underneath it.
Clean the floor surface very well. If you removed carpeting, be sure to pull out any exposed staples that will interfere with the new floor. Floating vinyl floor planks can be installed over any existing solid floor surface, but it must be clean and level. If your space has old hardwoods, ceramic tiles or old sheet vinyl, you may choose to save yourself the time on demo and plan to cover the existing floor.

Shutterstock
2. Add Underlayment
Add an underlayment to the floor in your room if necessary. Different underlayments offer different benefits, but most serve as a moisture barrier and soundproofing layer. With a floating vinyl plank floor, the underlayment layer may also reduce bouncing.
Adhesive vinyl planks do not require an underlayment layer, but it’s very important to remove any dirt or debris from the floor. Denatured alcohol is ideal for cleaning the underlying floor throughout the project.
3. Determine Layout
Determine which direction your planks are going to run, then measure and mark the center of your room. Starting in the center of the room is not entirely necessary, but it absolutely helps make the installation more symmetrical. If you choose to start your first row to be on-center with a focal wall or doorway, mark that as the center. And, if you choose to start at the edge of a wall, that's okay too!
Use a permanent marker or a chalk line to mark the placement of your first row of planks will run. This helps to square the placement of the panel and gives you a moment to step back and make sure the positioning is perfect for your space.
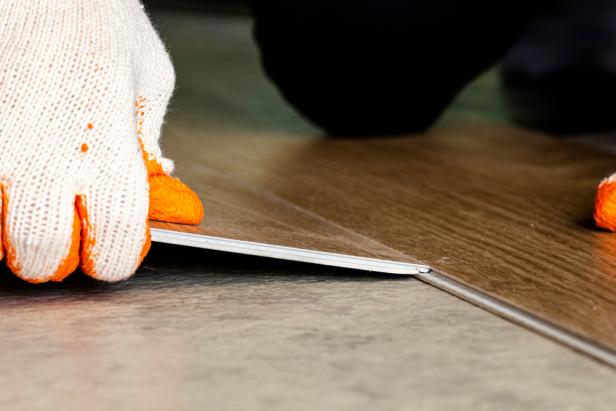
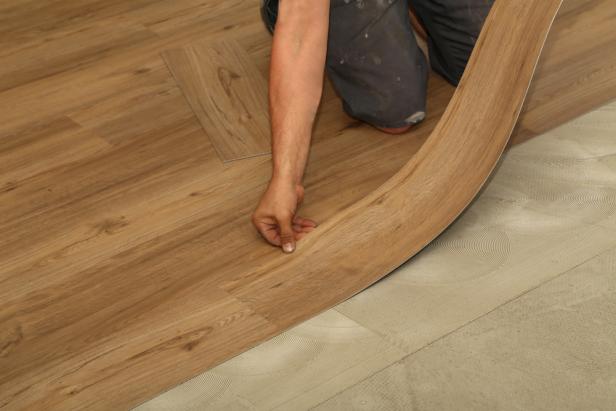
4. Start Installing
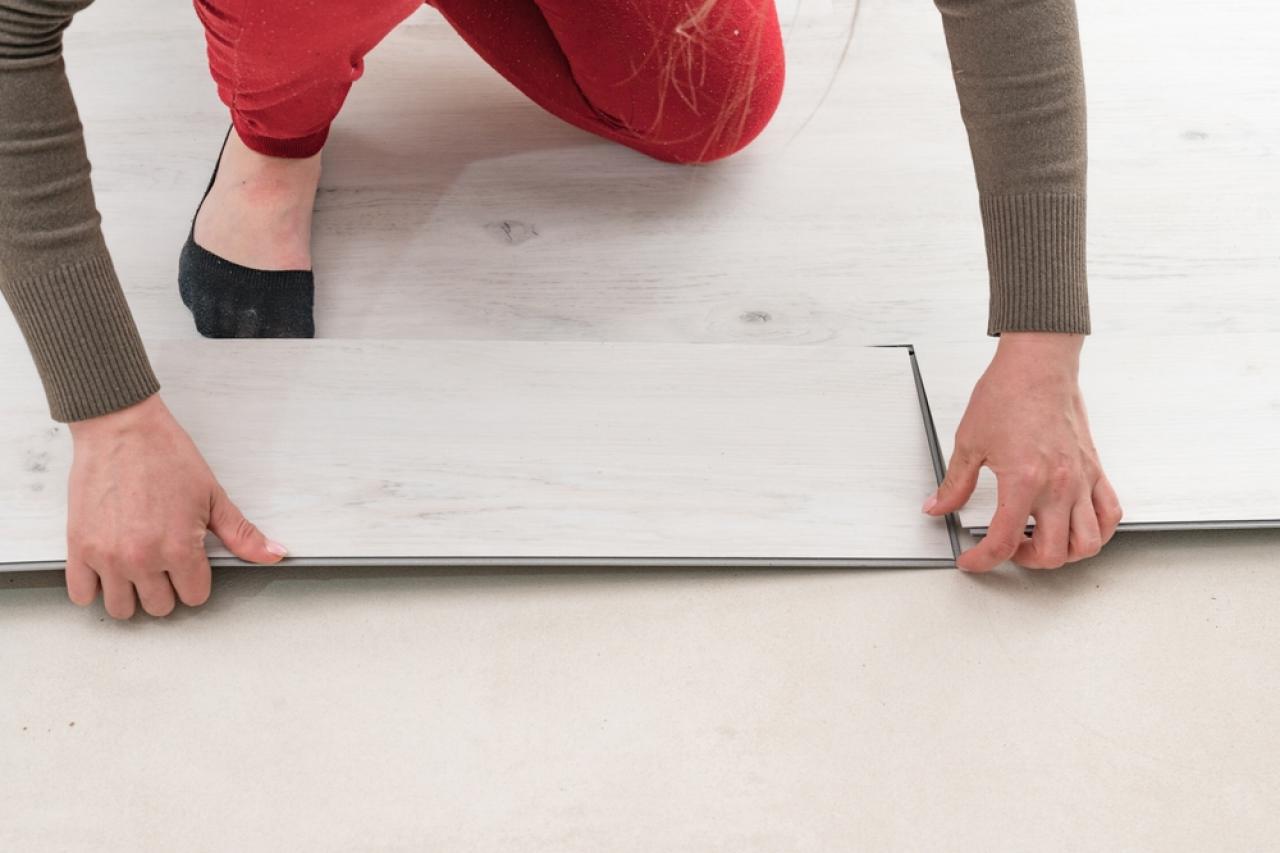
Install the first row of vinyl planks by lining up one piece on your center line and connecting adjoining pieces end-to-end. Work to create one long piece until you reach the side walls. Interlocking planks will attach very quickly. If you are working with peel-and-stick or adhesive, plan each plank individually to ensure that the floor is clean and that the planks remain straight on the line.
Shutterstock
The end pieces will likely need to be cut to length. When you plan where to cut the end of the board, remember to leave an expansion gap. The board needs to be long enough to fit underneath the baseboard when it’s reinstalled but ideally leaves about 1/4" space for expansion between the end of the board and the wall.
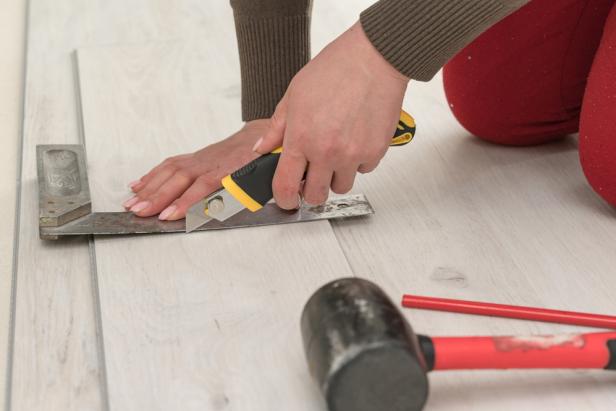
Scoring and cutting the planks is easy. Measure where your cut is going to be and line your carpenter square along the edge to ensure that the line is scored straight. Use the utility knife to make shallow cuts repeatedly on the line until the mark is well-defined. When you bend the board to complete the cut, it should snap easily on the line. If you need to make precise cuts to accommodate floor features, such as corners in a room or exposed pipes, use a fine-toothed saw.
Shutterstock
Use a square to mark and cut pieces of vinyl plank to the correct length.
5. Make Sure to Stagger Rows
Plan the placement for your next few rows of planks keeping in mind that you want to stagger the joints. The more randomly you’re able to stagger each row from the last, the more natural the installation will look when it’s complete.

Shutterstock
Continue to install each row of planks. Interlocking planks offer a tongue-and-groove system that will click into place when properly aligned. If you insert the tongue into the groove of the first installed row, you will be able to apply pressure to the plank and hear and feel it click into place.
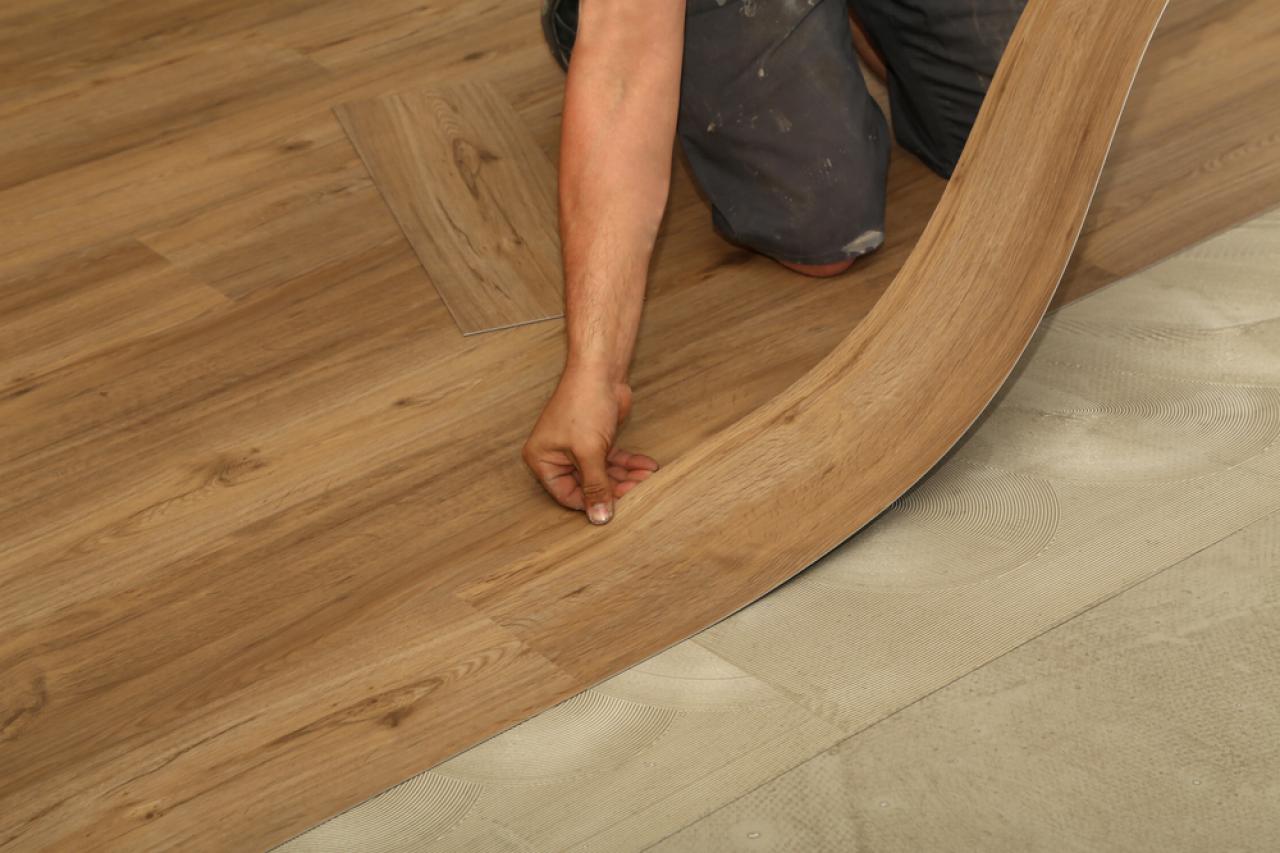
If you’re using adhesive, planning out 3 to 4 rows in advance makes it easier and faster to install.
Shutterstock
Using adhesive to install vinyl floor planks in a home.
6. Make Necessary Cuts for Last Row
Continue installing planks until you reach the edges of the room. For the last few rows of planks, you will want to assess how close you will be to the wall of the room. Remember that you will want to leave a 1/4" expansion space between the wall and the edge of the vinyl plank while also getting the edge close enough that it’s guaranteed to be covered by the baseboard.
If you find in your measurements that the last board will have to be cut lengthwise, never fear. One great tip that will make installing that last, narrow row easier is to cut it and attach it to the second-to-last row, and then drop both the second-to-last row with the pre-attached last row into position so they can easily be attached to the third-to-last row of planks.
7. Reinstall Baseboards
The last step is to reinstall the baseboards. If you’re attaching the existing baseboards, you can use a pneumatic nail gun to attach the boards in place exactly like they were before removal. Fill the holes with caulk and repaint the trim.

Westend61

Flooring Buyer's Guide
Given the wide array of flooring options available, you're bound to find one that fits your lifestyle and budget. Learn about 10 popular flooring types to find your match.


