


The Easiest Way to Hang a Heavy Mirror
Here's everything you need to know about safely and securely hanging heavy, oversized mirrors quickly and easily without a call to the handyman — or potentially damaging your wall with drywall anchors.

Kamron Sanders

Large mirrors, artwork and other heavy wall hangings simply cannot be supported by nails, D-rings or picture hanging wire. Without proper fastening, you risk the object falling and breaking as well as damaging anything in its path. On top of that, improperly secured wall hangings are a danger to anyone around them, especially children and pets. Thankfully, there is a simple way to guarantee your heavy mirror stays put and it’s called a French cleat. A French cleat utilizes interlocking 45-degree-angle slopes to hold an object in place on a vertical surface. The rigid, practically failproof design has been a go-to method for mounting cabinets, hanging heavy mirrors and securing large-format artwork for hundreds of years.
Materials Needed
- 1/2" x 6" board
- wood screws
- drill + bits
- table saw
- level
- pencil
- stud finder
- measuring tape
- chop saw
Prep the Mirror
Before you begin cutting the wood board that will be your French cleat, first make sure your mirror frame has ample room for screws that will support its weight. Mirrors with thick wooden frames or substantial wooden backings are perfect for this method. Next, measure and mark a uniform distance on both sides to mount the cleat. The spot needs to be somewhere between the middle and the top of the mirror to ensure a secure mount that will not tip forward. Choose strong wood screws that are long enough to pass through the cleat and into the frame without protruding through the front of the frame.

Kamron Sanders
Cut the Cleat
When choosing a board from which to cut your French cleat, consider the size and placement of the mirror. Extremely heavy mirrors may need 3/4-inch thick boards, while the majority of mirrors can be secured using 1/2-inch boards. The board needs to be wide enough to allow for multiple rows of screws even once cut in half. For our mirror, we chose a board with a width of 6 inches. To cut the cleat, set a table saw blade to a 45-degree angle, position the fence to cut down the center and rip the board. Use a chop saw to cut the pieces to your mirror’s width.

Kamron Sanders
Pro Tip: A French cleat can be cut using a circular saw set at a 45-degree angle, but this method is much more difficult. A table saw offers an extremely accurate cut that ensures level and stable mounting. If using a circular saw, clamp a straight edge along the length of your board to create a fence to aid in accuracy and safety while cutting.
Mount the Wall Piece
To determine where to place the wall-mounted half of the French cleat, start by locating studs wherever you want to hang the mirror (Image 1). A minimum of two studs is necessary to mount the cleat, however, three studs are preferred when mounting wide mirrors. Once located, place a level across the studs to mark a level line, butt the bottom of the board against the line, and pre-drill through the board and wall at the center of each stud. Remember, the cut angle should be facing the wall and creating a pocket at the top. Once drilled, sink strong 3-inch wood screws through the board and into the studs (Image 2). If possible, place a second row of screws above or below the first for added strength.

Kamron Sanders

Kamron Sanders
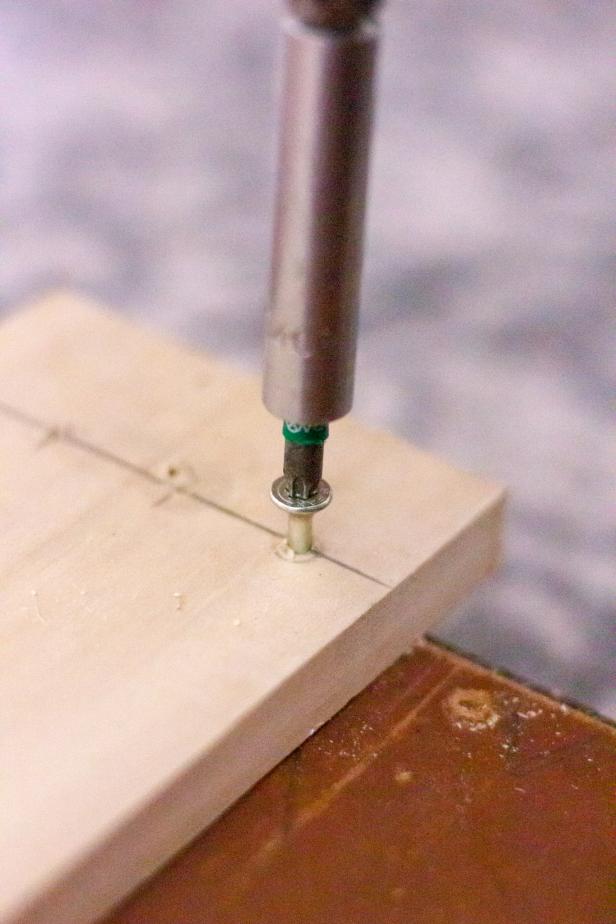
Mount the Mirror
Butt the edge of the mirror piece to the lines you marked previously. The cut angle should be open to the mirror, creating a pocket, and facing the bottom of the mirror. Repeat the pre-drilling process, being careful to not drill through the mirror frame (Image 1). Screw the board into place with a minimum of two rows of screws (Images 2 and 3). If possible, add a third row for extra strength. Once screwed into place, if everything feels secure, mount the mirror on the wall by seating the cleats together. Take a step back and admire your handiwork!

Kamron Sanders
Kamron Sanders

Kamron Sanders


