


Magnetic Kitchen Boards and Shelves

Materials Needed:
- 1 roll steel roof flashing, 14" wide by 10' long
- 3/4" thick particle board shelf, 12" wide by 8' long
- 2" metal screws
- picture-hanging kit
- measuring tape
- tin snips
- drill or screw gun with Phillips bit
- hammer
- magnetic hooks, clips and tape
- black fine tipped permanent marker
Cut Particle Board and Flashing
Cut particle board shelving to desired length of magnetic board. Tip: Keep overall length less than 36 inches for ease of building. Add two inches to overall length of particle board shelving and mark flashing to this length. Cut flashing with tin snips.

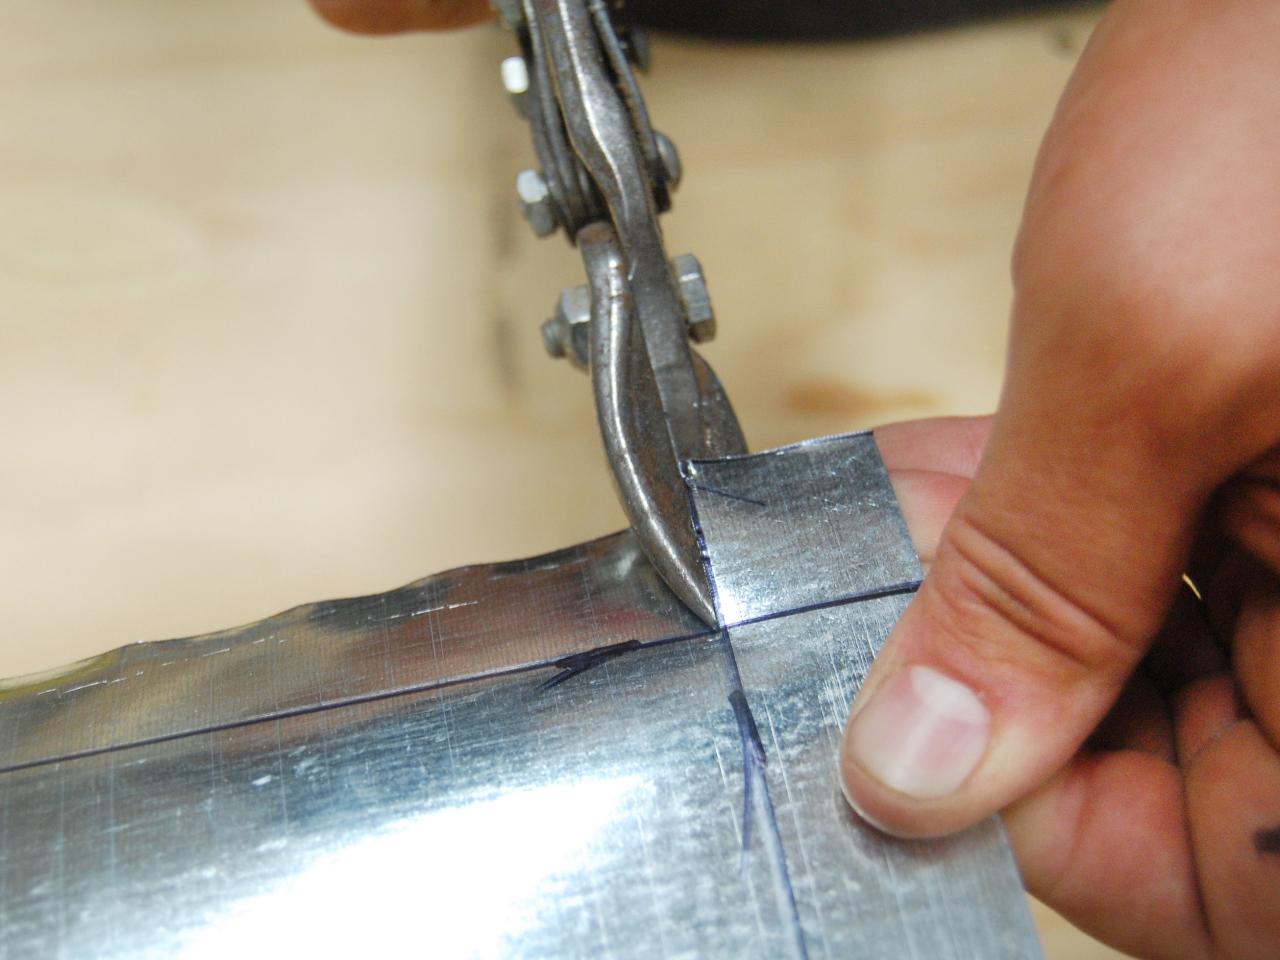
Cut Flashing Corners
Lay shelf on top of flashing piece. Center shelf with approximately one inch of flashing surrounding shelf. Trace shelf with a permanent marker and cut corners of flashing.

Bend Flashing
Bend flashing around shelving. Tip: Use a scrap board and hammer to crease flashing on edges. Attach flashing to shelving with 2-inch screws and drill every 12 inches.

Hammer Edges Under
On the back side of the magnet board, hammer flashing down, bending flush with the shelving.
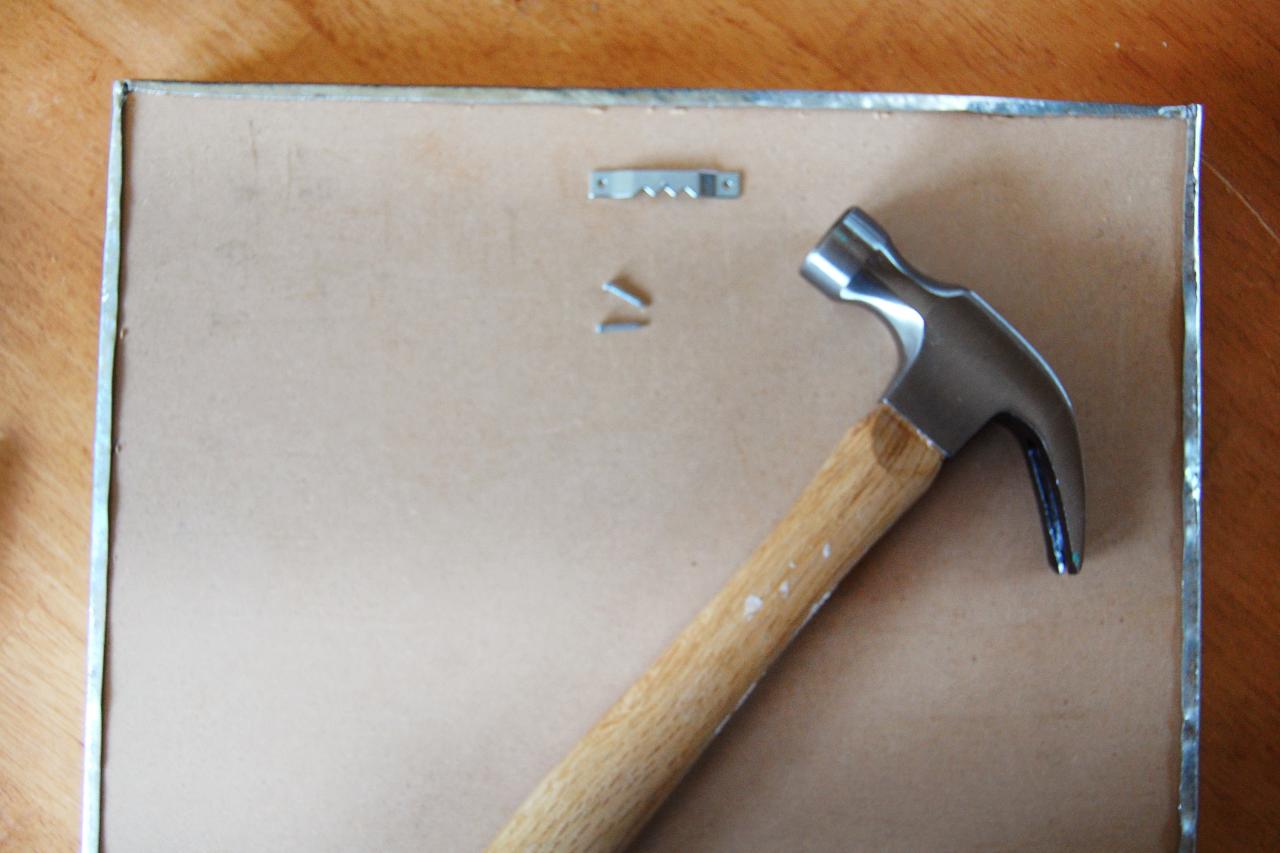
Attach Picture-Hanging Kit
Tape picture hanging kit to back of magnet board on center, approximately one inch from top. Nail picture hanger to magnet board with included nails. Remove tape and hang magnet board on wall.

Make Ledges, Shelves and Backsplashes
Now that you have the basic process mastered, you can create a multitude of magnetic kitchen items. Using tin snips, cut metal flashing to desired length. Drill two holes in back of flashing and screw directly to wall. For longer shelves, drill holes and attach every 24 inches to wall. Tip: Magnetic accessories including hooks, canisters, clips and holders are readily available. To make a non-magnetic accessory magnetic, simply glue magnetic tape to the back.


