
.-Battle-on-the-Beach-courtesy-of-HGTV.-.jpg.rend.hgtvcom.196.196.suffix/1714761529029.jpeg)


How to Build Your Own Rolling Beach Basket
A day at the beach just got a whole lot easier.


Going to the beach sounds simple enough but there’s a lot to bring when you think about it. You need chairs, towels, toys, food, drinks, lotion and countless other items. Carrying all of those items is no easy task either. A rolling cart is the best way to transport beach essentials but why purchase one when you can upcycle items you have around the house and build your own? Let’s get started:

Jalynn Baker
Materials
- laundry basket
- 1/2" aluminum rod
- (2) 1/2" washer
- (2) 10" tires
- 3/16" drill bit
- power drill
- hacksaw
- 2 cotter pins
- 6 zip ties
- 3' PVC pieces
- (2) 90-degree 3/4" PVC elbows
- epoxy glue
- 12" PVC piece
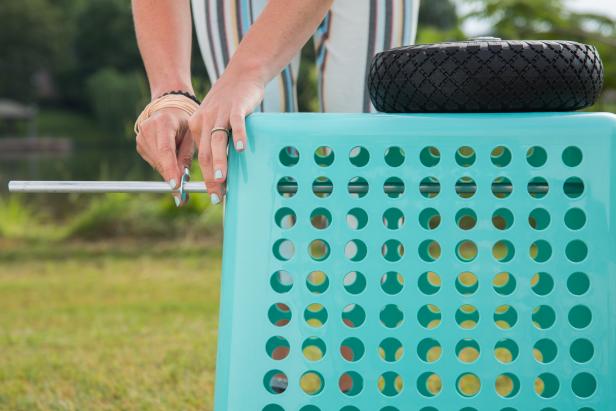
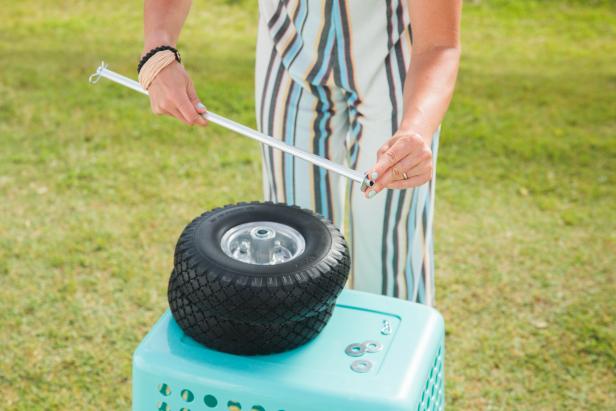
Assemble the Axel
Jalynn Baker
Take an average laundry basket and flip it upside down. Take a 1/2-inch aluminum rod and feed it through the holes of the basket more towards one side. Slide a 1/2-inch washer onto the rod and then add the 10-inch tire. Repeat the washer and tire step on the opposite side of the aluminum rod as well.
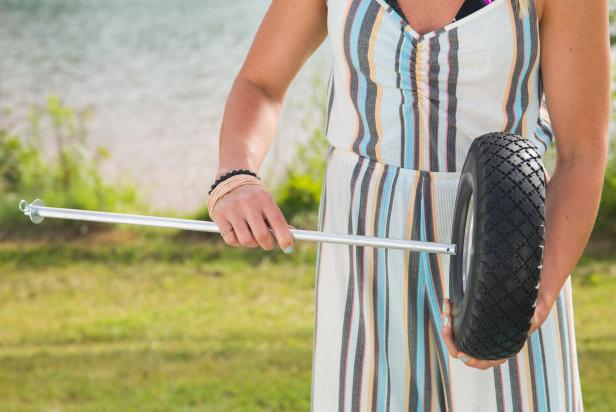
Mark Your Spot

Jalynn Baker
With the wheels in place, use a marker to indicate where you should drill and cut. A dot near the wheel means to drill and a line right next to that means to cut. Do this for both wheels.
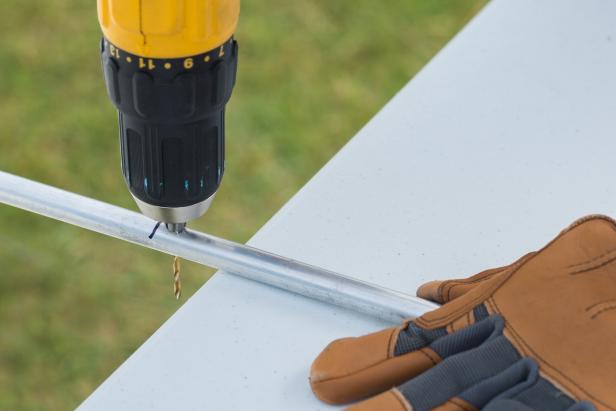
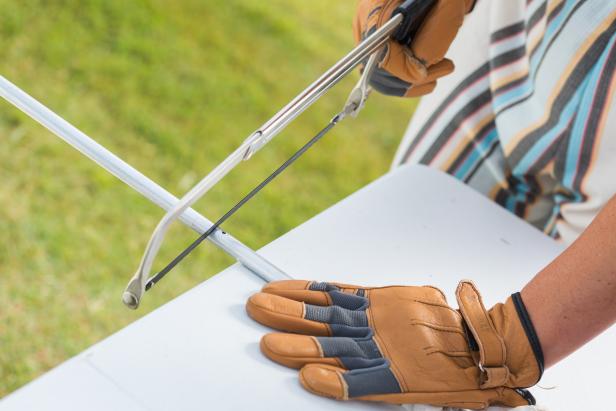
Drill + Cut
Jalynn Baker
Jalynn Baker
Slide the aluminum rod out of the laundry basket and move to a safe place to drill a couple of holes and use a hacksaw. With a 3/16-inch drill bit, drill through the dot you drew in the previous step. Use the saw to cut along the marked line as well. Make sure to do this on both sides of the aluminum rod.
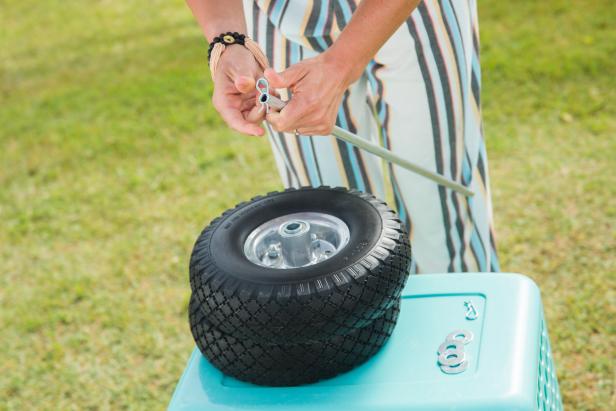
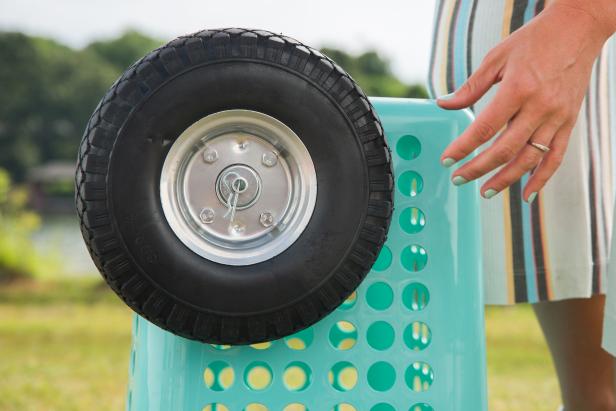
Put a Pin in It
Jalynn Baker
Jalynn Baker
Jalynn Baker
Jalynn Baker
Poke a cotter pin through one of the holes you just drilled and slide a washer down from the opposite side of the pole so that it's up against the cotter pin. Next, take one of the tires and slide it down to the cotter pin and washer and add another washer on the other side of the tire. The order should be cotter pin, washer, tire, washer.
Take the entire aluminum rod and slide it back through the hole in the laundry basket. Add another washer to the end with no wheel and then slide on the wheel. Finish with a washer and a cotter pin to keep the wheel from coming off.
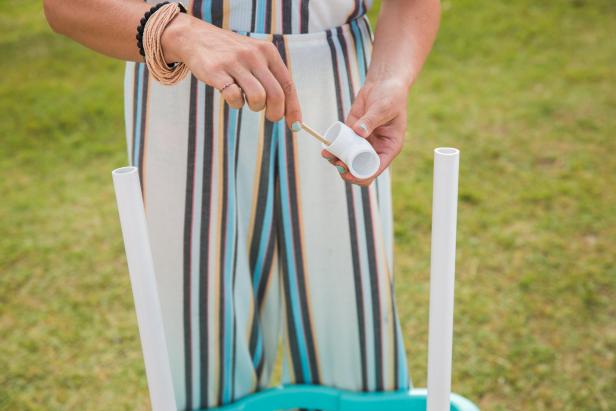
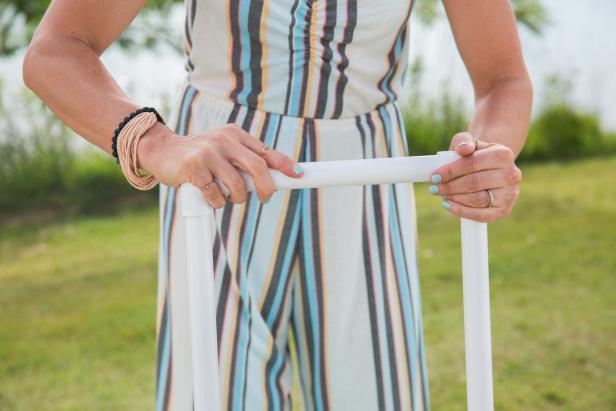
Assemble the Handle

Jalynn Baker
Take the 3-foot PVC pieces and attach them to the inside of the laundry basket with zip ties. The PVC pieces should be on the opposite side of the wheels. Once you have two vertical pipes coming out of the basket, use scissors to remove the excess plastic from the zip ties.

Jalynn Baker
To complete the handle, add epoxy glue to the inside of two 90-degree 3/4-inch PVC elbows and connect them to each of the 3-foot pieces you just secured to the basket. A 12-inch PVC piece will connect the two elbows.
Jalynn Baker
Jalynn Baker
Hit the Beach
What are you waiting for? Fill up your rolling basket and spend the day at the beach!

Jalynn Baker


