


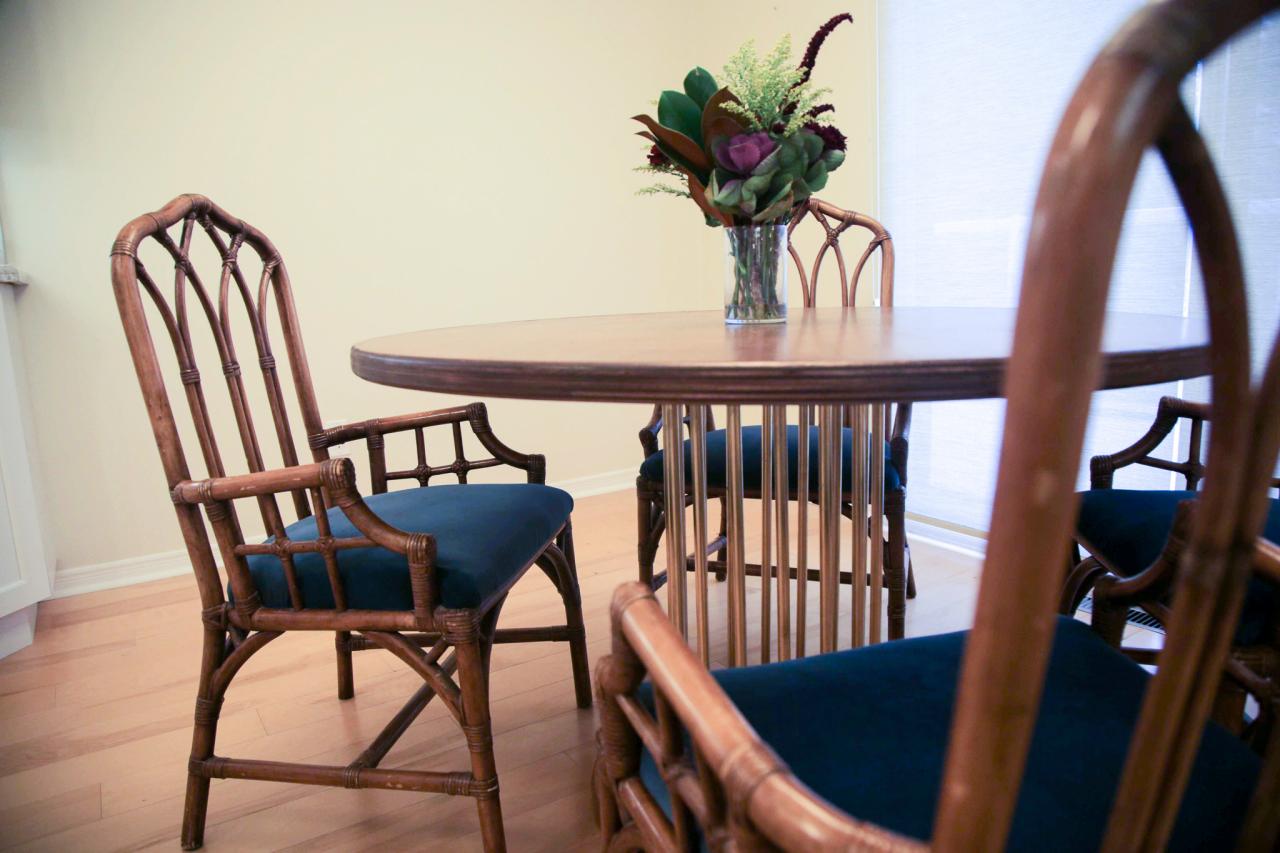
Dine in Style: DIY Dining Set
Making your own furniture has never been so simple.


Dining tables, let alone a dining set, can be super expensive and hard to find in the exact style you want. What’s the solution? Well DIY your own, of course! Trust us: It's easier than it sounds. Simply follow these steps, and you will not only save money, but you'll also create something you love.
Materials Needed
- 4’-x-8’-3/4" maple plywood sheet
- (2) 18” wood rounds
- 24” wood round
- pre-stain wood conditioner
- wood stain
- water-based wood finish
- corner-rounding router bit
- gold spray paint
- metal cutting blade
- 11/17” forstner bit
- (4) 1/2"-x-10’ metal conduit pipe
- orbital sander
- 120- and 220-grit sandpaper
- tack cloth
- strong adhesive glue
- jig saw
- router
- reciprocating saw or pipe cutter
- cotton rags
- tapered synthetic brush
- drill
- 2” wood screws
- clamps
- (4) thrifted chairs
- velvet fabric
- tailor chalk
- staple gun + staples
- fabric scissors
- black upholstery mesh
Assemble Tabletop
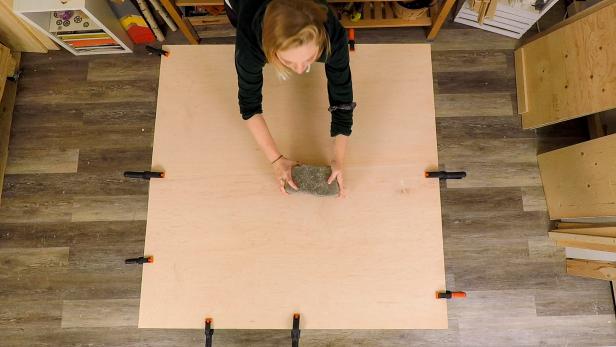
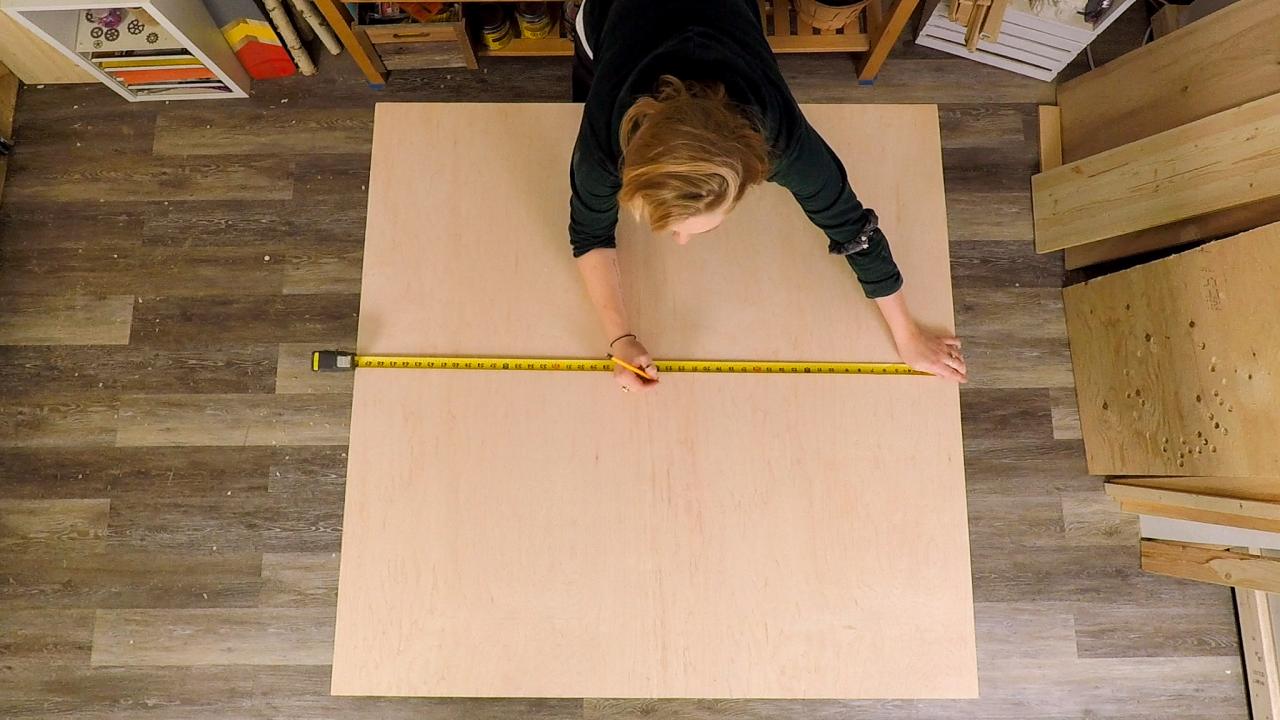
Begin by cutting the 4x8 piece of plywood in half to create two 4x4 pieces. If possible, we recommend having the hardware store cut this for you to make the trip home much easier. To create a thick, sturdy tabletop, we stacked and glued the two pieces of plywood together. To do this, spread plenty of glue between the two pieces, press together and clamp around all of the sides (Image 1). To make sure the middle of the boards glue properly, add weight by placing bricks, weights or anything heavy you have on hand on top until the glue has dried (Image 2). Making sure the boards are on an even, flat surface will also aid in even gluing.

RTR Media
RTR Media
Pro Tip: You can never have too many clamps when gluing wood. The tighter and cleaner the joints are, the stronger they are. In this case, one on each side is the minimum recommended, but the more the better.
Cut Conduit
If you don’t have a pipe cutter on hand, you can use a reciprocating saw with a metal blade to cut your conduit. To do so, place a scrap board down and use clamps to hold the pipe steady on your work surface. Cut the pipes into 27-inch segments, and the piece will yield 16 total pieces.
Paint Conduit
To prep the conduit for painting, scuff the surface with 120-grit sandpaper. This helps the paint to better adhere. Spray paint your conduit pipe gold and let dry. To ensure our pipe was sprayed evenly, we fastened a string to a screw, fed the screw through the pipe, and hung it up. This allowed us to spray paint all the way around the pipe without worrying about pooling and drip lines.

RTR Media
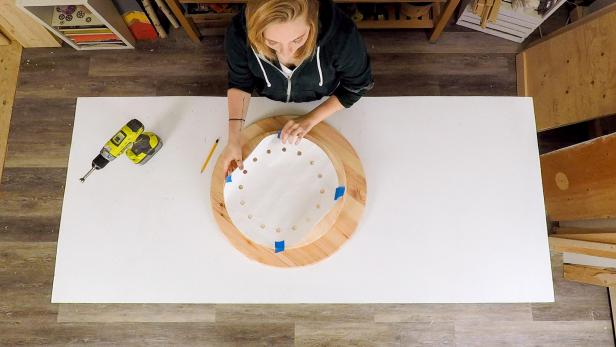
Draw Holes for Conduit
To align the holes properly on the wood rounds, we first created a template on paper. It is much easier to pull out a new piece of paper if you mess up! Once you’ve aligned your holes evenly on the paper, tape the paper to the 18-inch wood round and mark the holes on the wood with a pencil. Wait to mark your second round until your holes are drilled in the first.
RTR Media
Drill Holes in Wood Rounds
You may be inclined to think that your bit size should match the size of your pipe, but pipe sizes are based on internal diameter only. Always double-check your outer diameter before drilling holes. The outer diameter of our conduit was 11/17 inch, so we chose the same size forstner bit. Place a scrap piece of wood underneath your wood round. It is imperative that you drill straight, clean holes all the way through the piece.

RTR Media
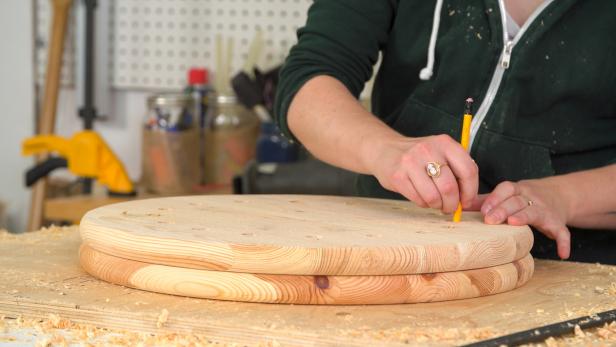
Once you have all of the holes drilled out of the wood round, place it on top of your second 18-inch piece and clamp together. Mark the holes with a pencil and remove the top piece to drill your second round. We waited to mark the second piece with the first to ensure the holes would match up perfectly.
RTR Media
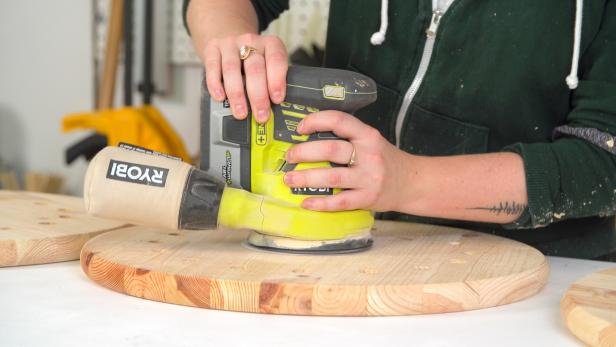
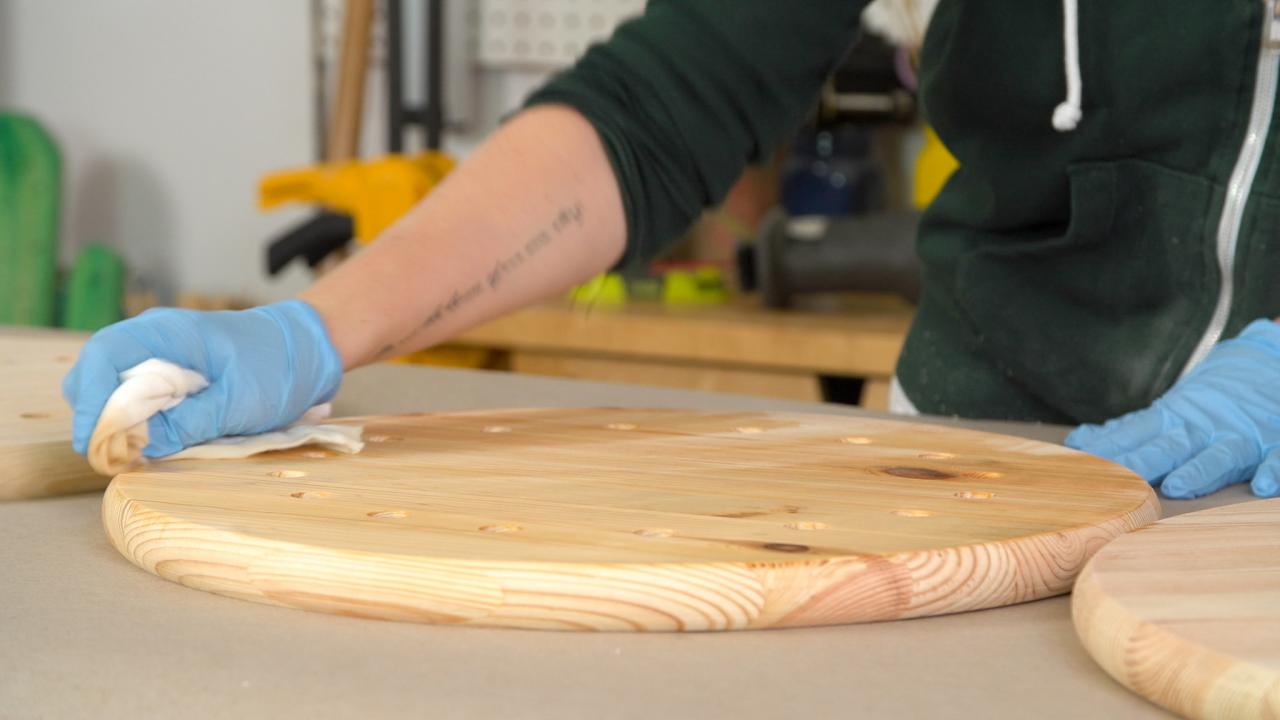
Sand and Stain Wood Rounds
Sand all three wood rounds with 220-grit paper until smooth (Image 1). Use a tack cloth to remove any dust. Coat all surfaces with the stain color of your choice following the manufacturer’s instructions (Image 2).
RTR Media

RTR Media
Trace Circle for Top
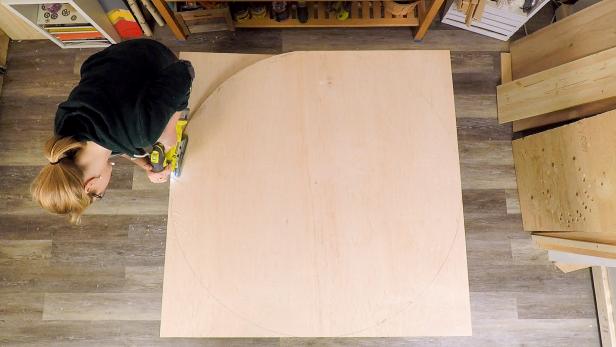
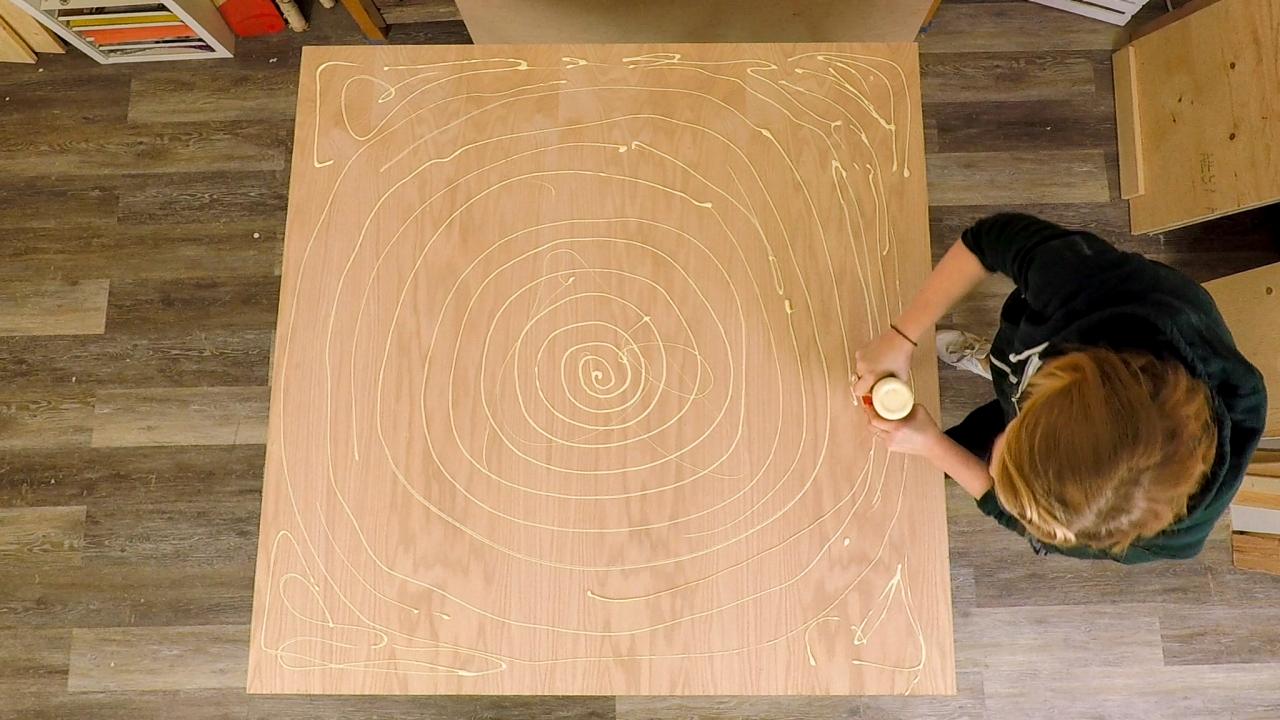
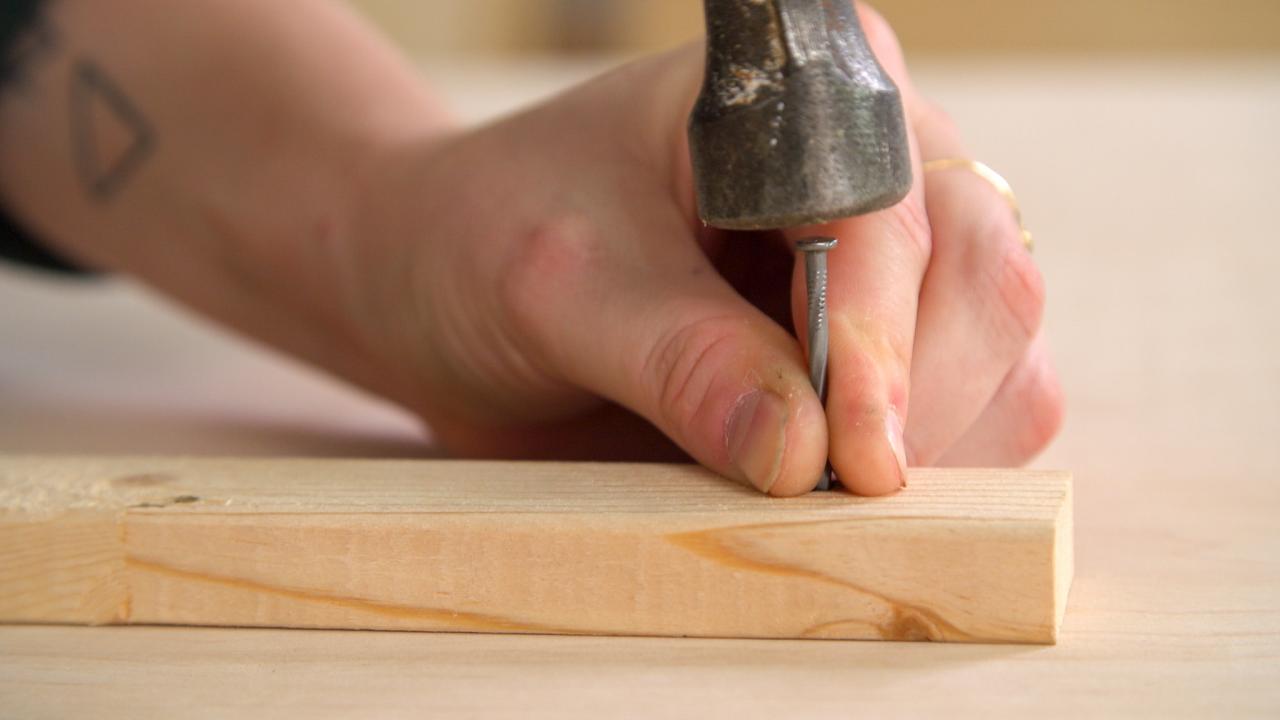
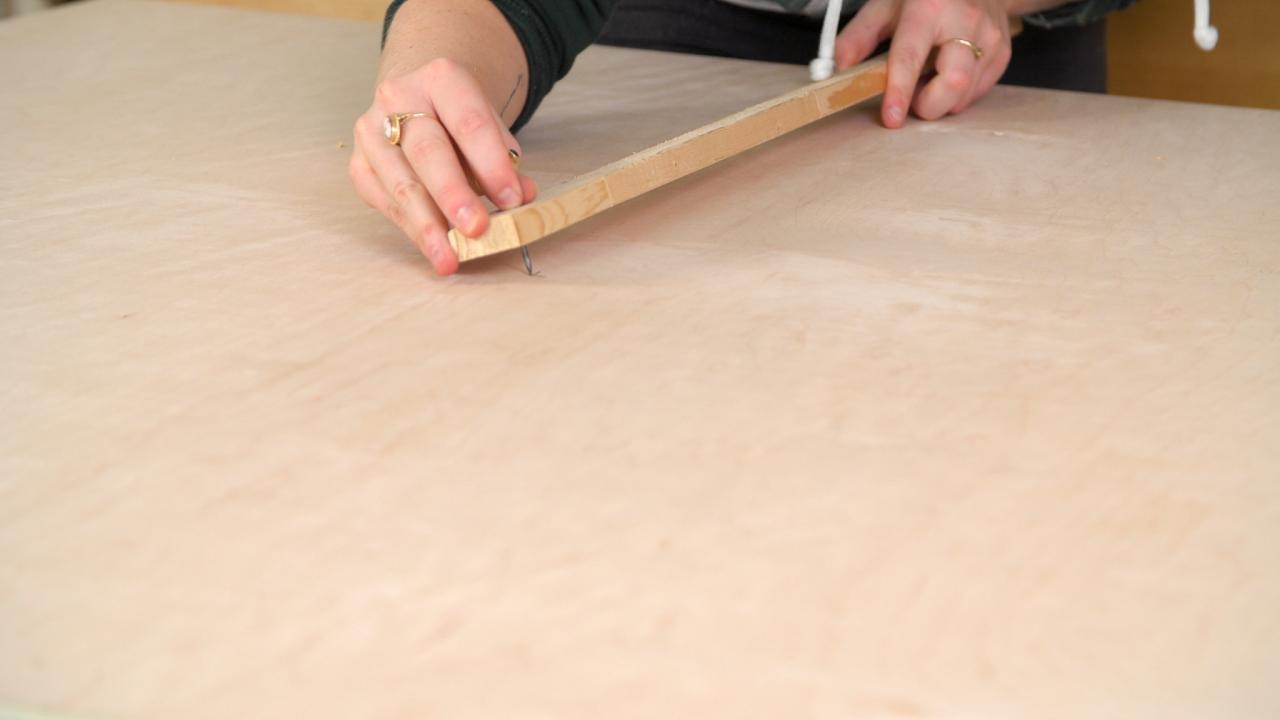
Back to our tabletop! Once the glued plywood has had time to dry, it is time to cut the piece into a circle. To make a perfect circle on your table, find the center point in your table top (Image 1). Determine how big you want your table top to be. Ours is 4x4, meaning half the table is 24 inches. To trace a large circle on wood, you can create a simple compass jig. If your radius is 24 inches, cut a scrap piece of wood to 26 inches. Drill a small hole one inch from each side and drive a nail through each hole (Image 2). Place one nail in the center of the circle and swing the other nail all the way around, scribing a circle as you go (Images 3 and 4).

RTR Media

RTR Media

RTR Media

RTR Media
Cut Circle
Once scribed, use a jig saw to cut your circle and an orbital sander to sand all surfaces until smooth (Images 1 and 2). Using a corner round bit and a router, round off the top and bottom edge your tabletop (Image 3). Sand smooth. Remove dust with a tack cloth.
RTR Media

RTR Media

RTR Media
Finish Tabletop
Prep your tabletop for staining with a pre-stain wood conditioner. This allows the plywood to accept the stain more evenly and prevents blotchiness. Stain your wood and allow to dry according to the manufacturer’s instructions.

RTR Media
Assemble Base
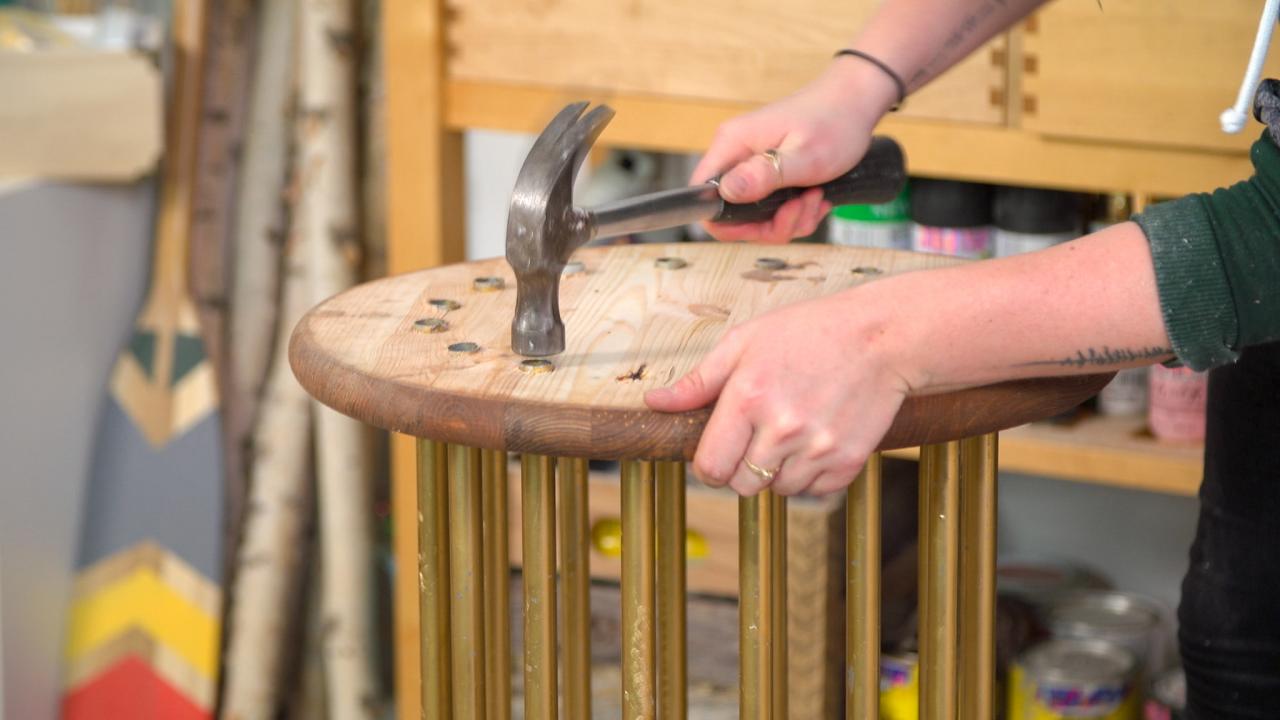
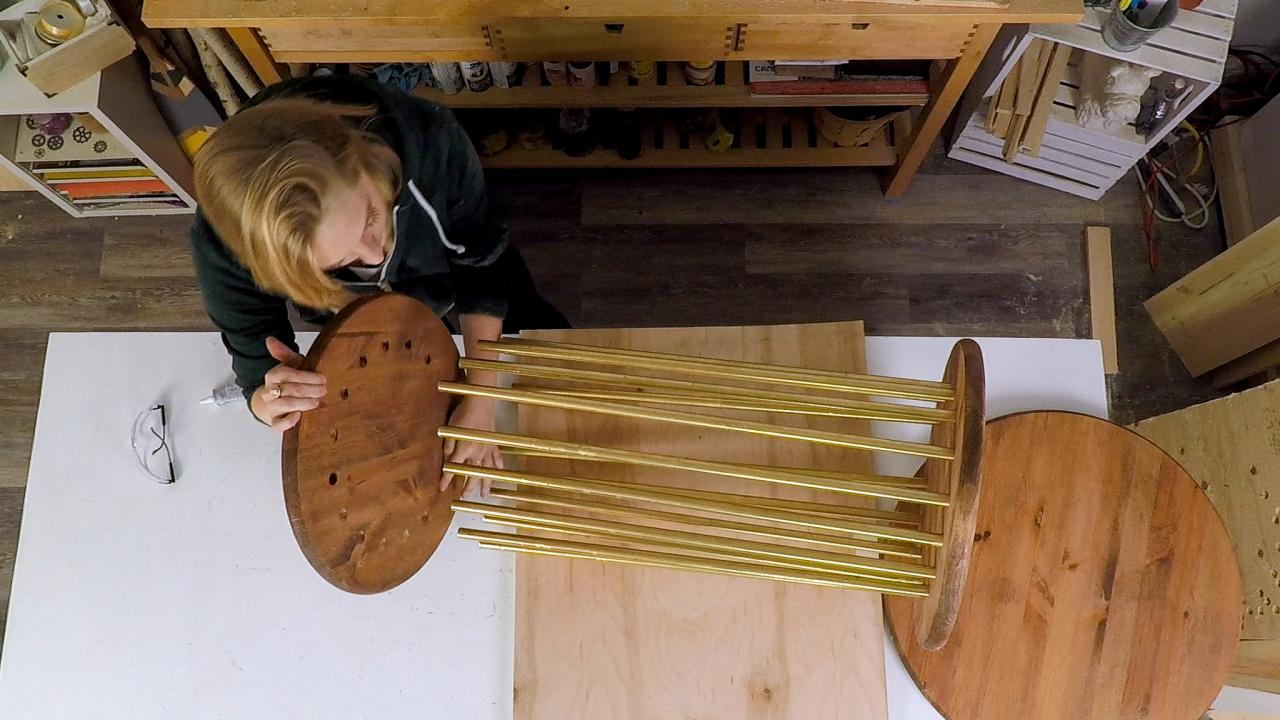
Fitting the pipes should be quite tight. This might take a little finagling, but they will go through (Images 1 and 2). Take the end you’ve decided is going to be your bottom and add super glue adhesive around the fittings of your round (on the bad side) and attach the 24-inch round to the bottom using 2-inch wood screws (Images 3 and 4). Stand your base up and use a hammer to knock the bar flush with the wood top and add strong adhesive glue to the openings.

RTR Media

RTR Media

RTR Media
RTR Media
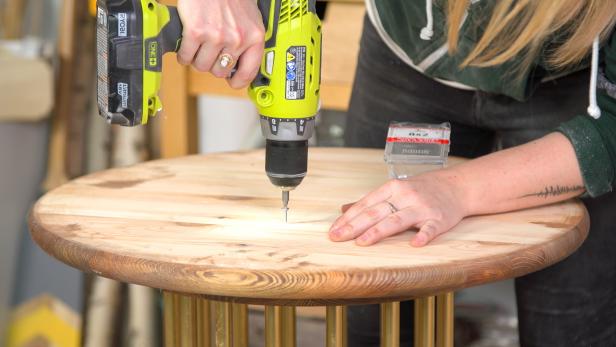
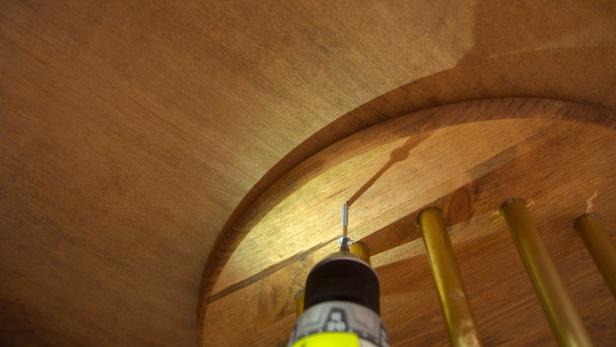
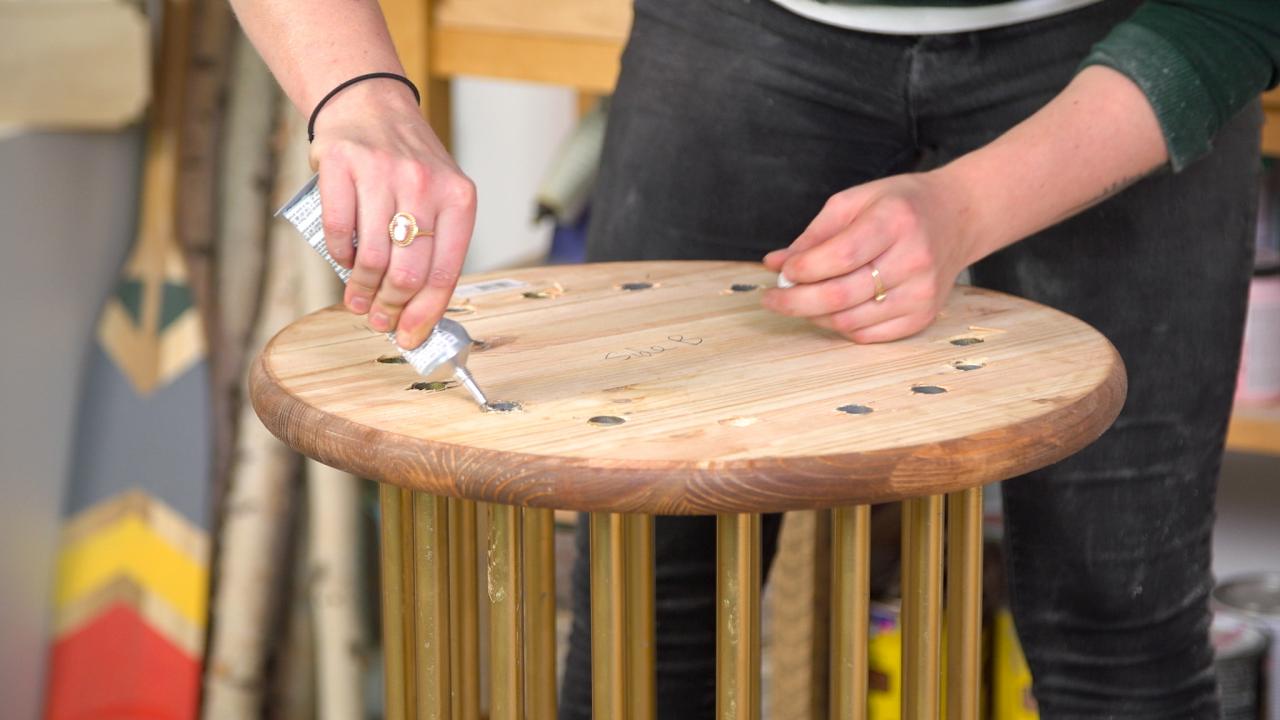
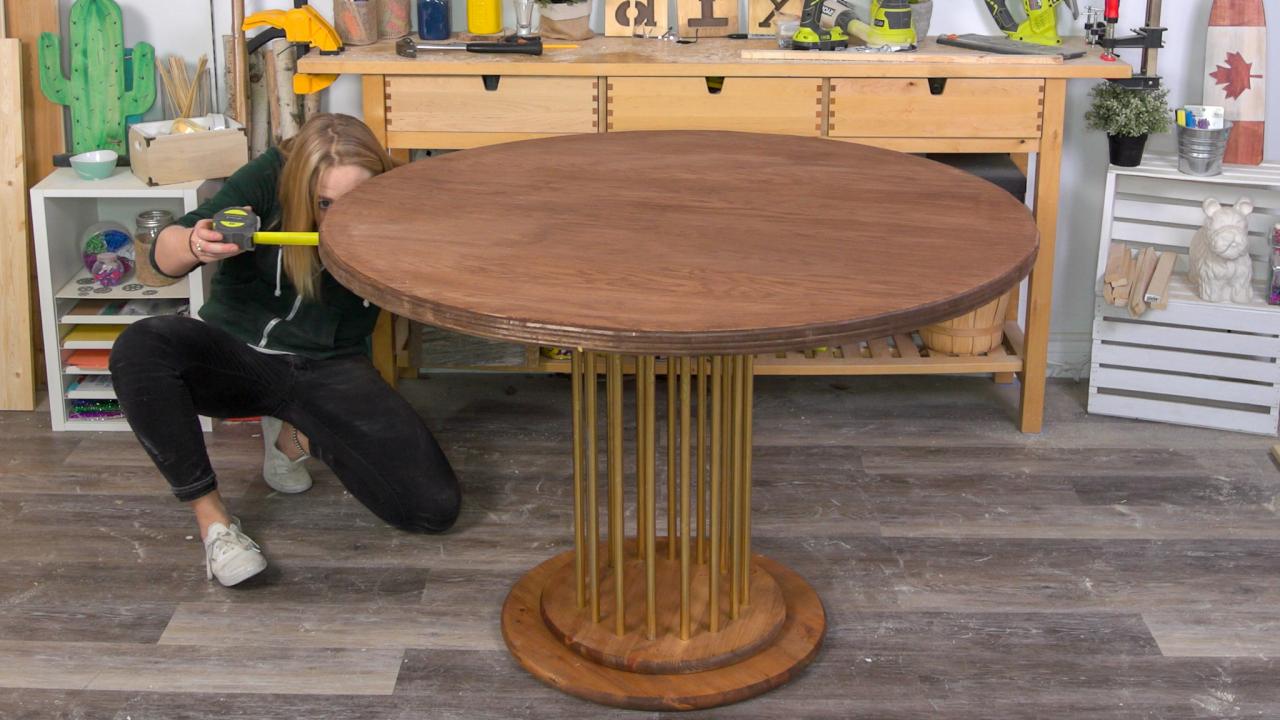
Attach Tabletop
Attach tabletop to the base. This might take a few measurements back and forth to find the middle of your table, but the effort is worth it (Image 1). Attach your tabletop using four 2-inch wood screws around the top 18-inch wood round (Image 2).
RTR Media
RTR Media
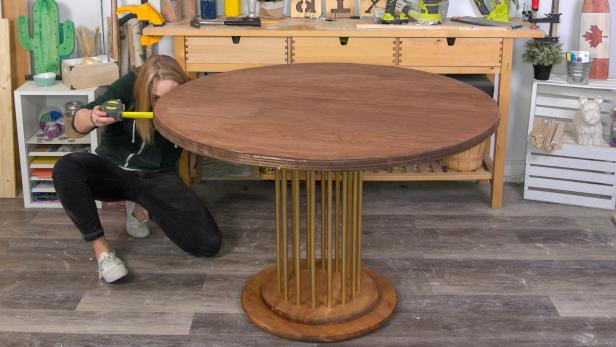
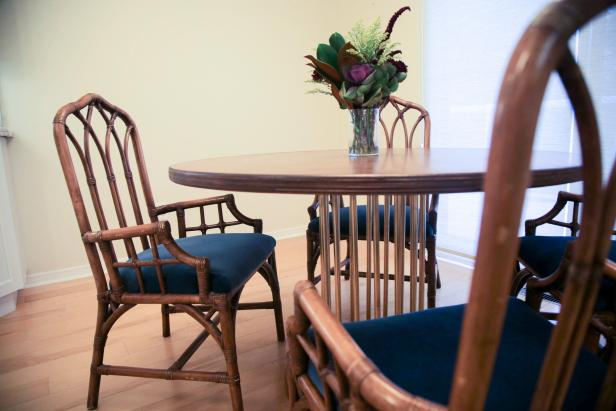
Add Protective Coating
Apply a nice water-based protective finish to your tabletop following the manufacturer’s instructions. Be sure to do at least two coats (sanding between coats) to ensure the finished top is durable and water-resistant. Just like that, you have built your very own dining table by hand!
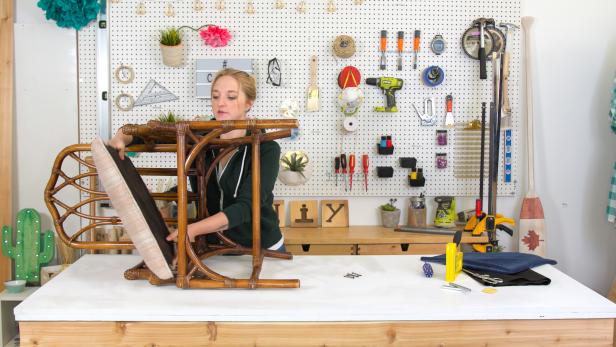
Cut Fabric for Chairs
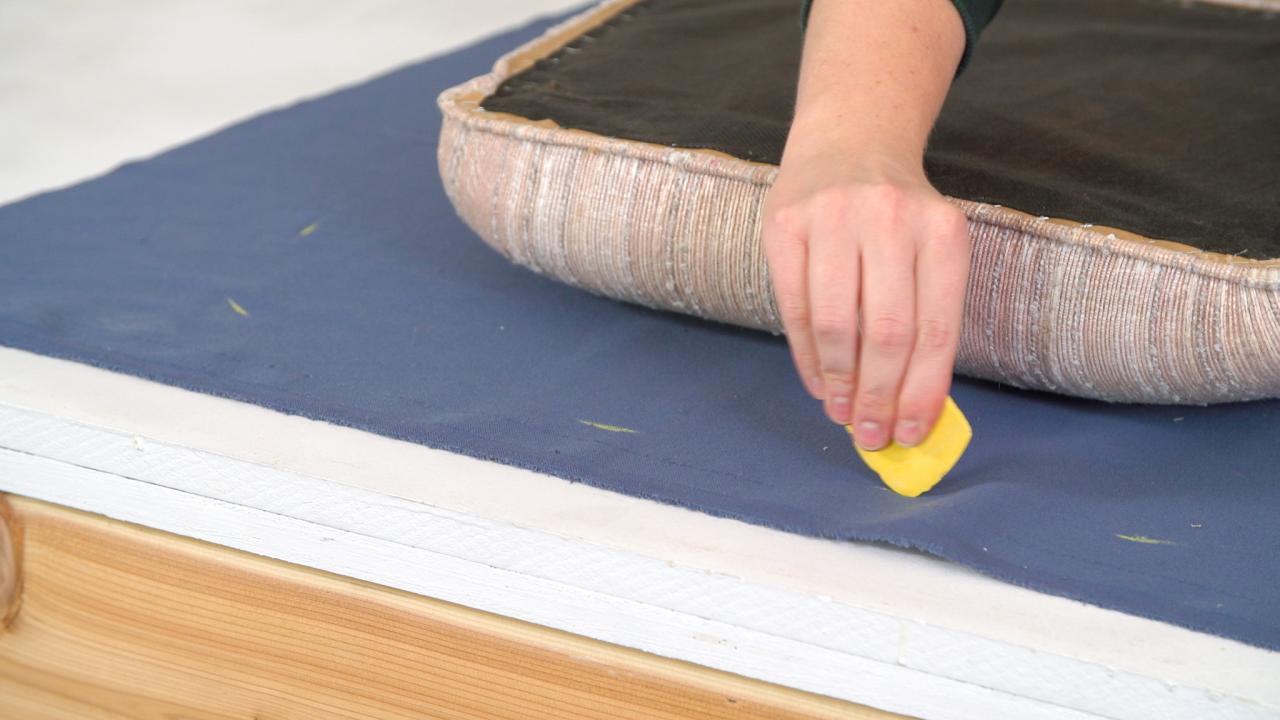
Instead of buying new chairs, we opted to buy thrifted rattan chairs and recover them with a lush velvet fabric. To do so, remove the seat of each chair and set aside hardware for later use (Image 1). Unless absolutely necessary, leave the original fabric intact. Lay the new fabric down and place the cushion on top. If you are using velvet for your project, pay attention to the direction of the velvet's nap (or texture). It is important to mark the bottom of your fabric, so all your seats are covered in the same nap direction. Using tailor chalk and measuring tape, mark 3 inches around the cushion. Use fabric scissors to cut out around the chalk lines (Image 2).
RTR Media

RTR Media
Secure Fabric to Chairs
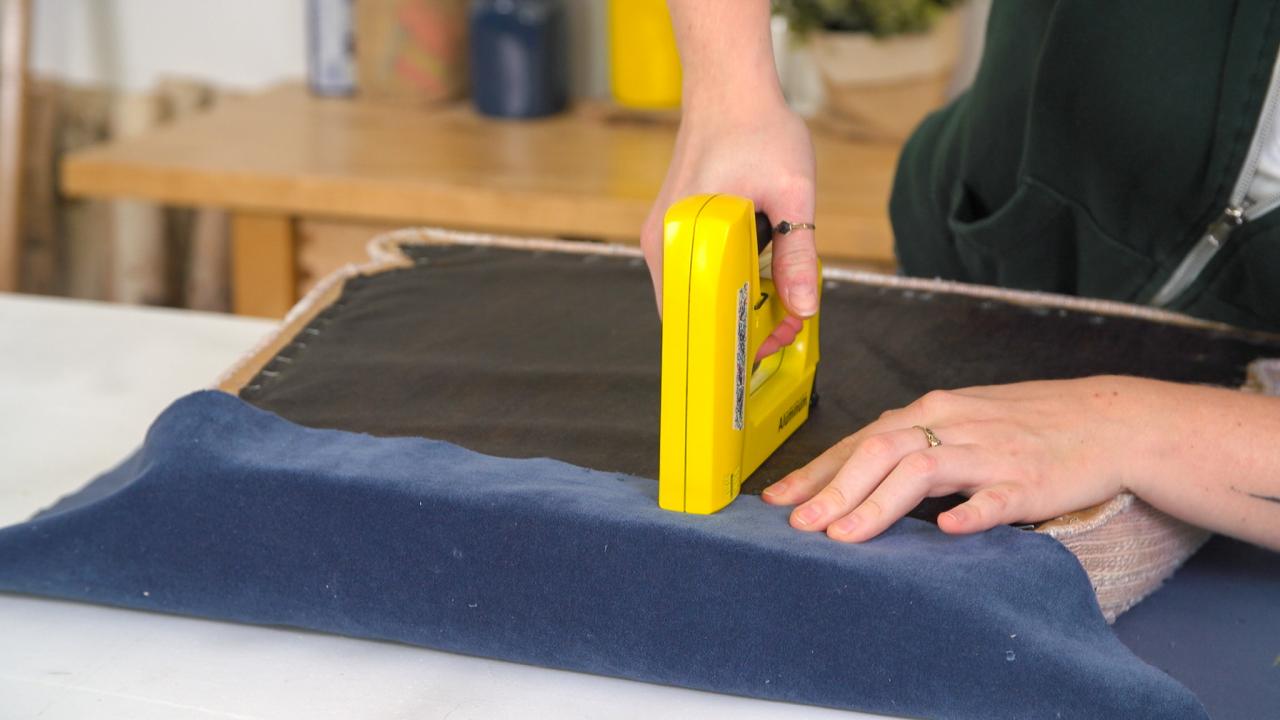
Use a staple gun to secure the fabric to the underside of the seat. Pull tight and make sure not to staple too close to the edge. You want to leave about 2 inches of room. Leave the corners unstapled. Take the unstapled corners and fold the excess fabric over itself. Staple to create a small folded pleat.

RTR Media
Finish With Upholstery Mesh
Give your chairs a professional look by covering the exposed stapled fabric using black upholstery mesh. Lay the upholstery mesh flat on the table and trace the cushion using tailor chalk. Cut out using scissors. Fold the cut edges of your mesh inward to create a clean, smooth edge around your chair. Secure to the underside of your cushion making sure to cover the pre-existing staples. Reattach your cushion to your chair frame using the hardware you set aside from before.

RTR Media
RTR Media


