


How to Make an Inexpensive Grow Stand for Indoor Plants and Seedlings
Don’t have a lot of money or outdoor space to start a garden? Combine a few wood crates and some grow lights to get an instant garden spot anywhere in your home.
Up your indoor garden game with our DIY grow stand. This is especially great for those of us who live in caves or other locations that just don’t get year-round sunshine. Now you don’t have to wait for the weather to work in your favor. Get year-round sunshine for your plants for less than $100 (as opposed to $300+).

Tomas Espinoza
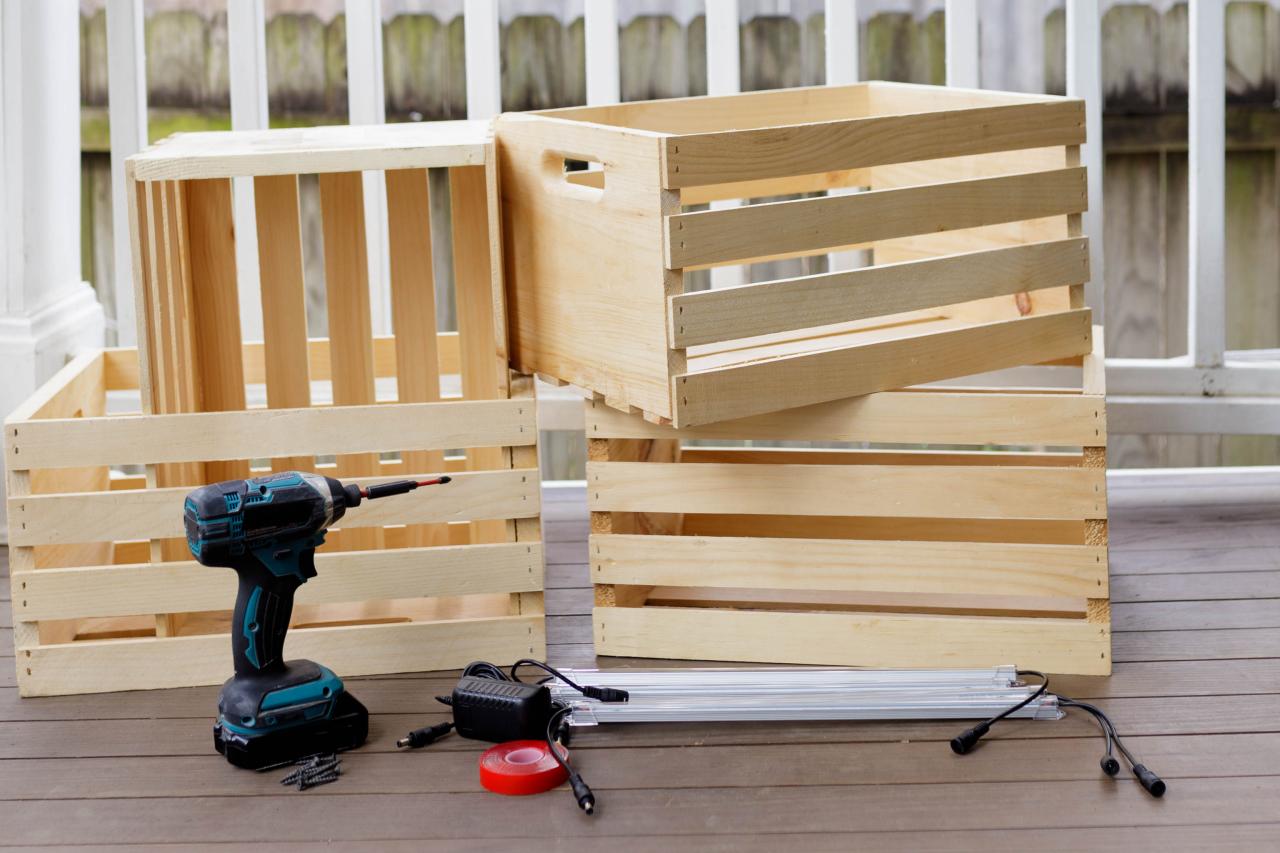
Materials + Tools
- 4 wood crates
- grow lights
- power strip with timer
- drill
- screws
- adhesive strips
- seed starters
- seeds
- seed pots
- small plants
- peat moss
- dirt
- gloves
- hand shovel
- watering can

Tomas Espinoza
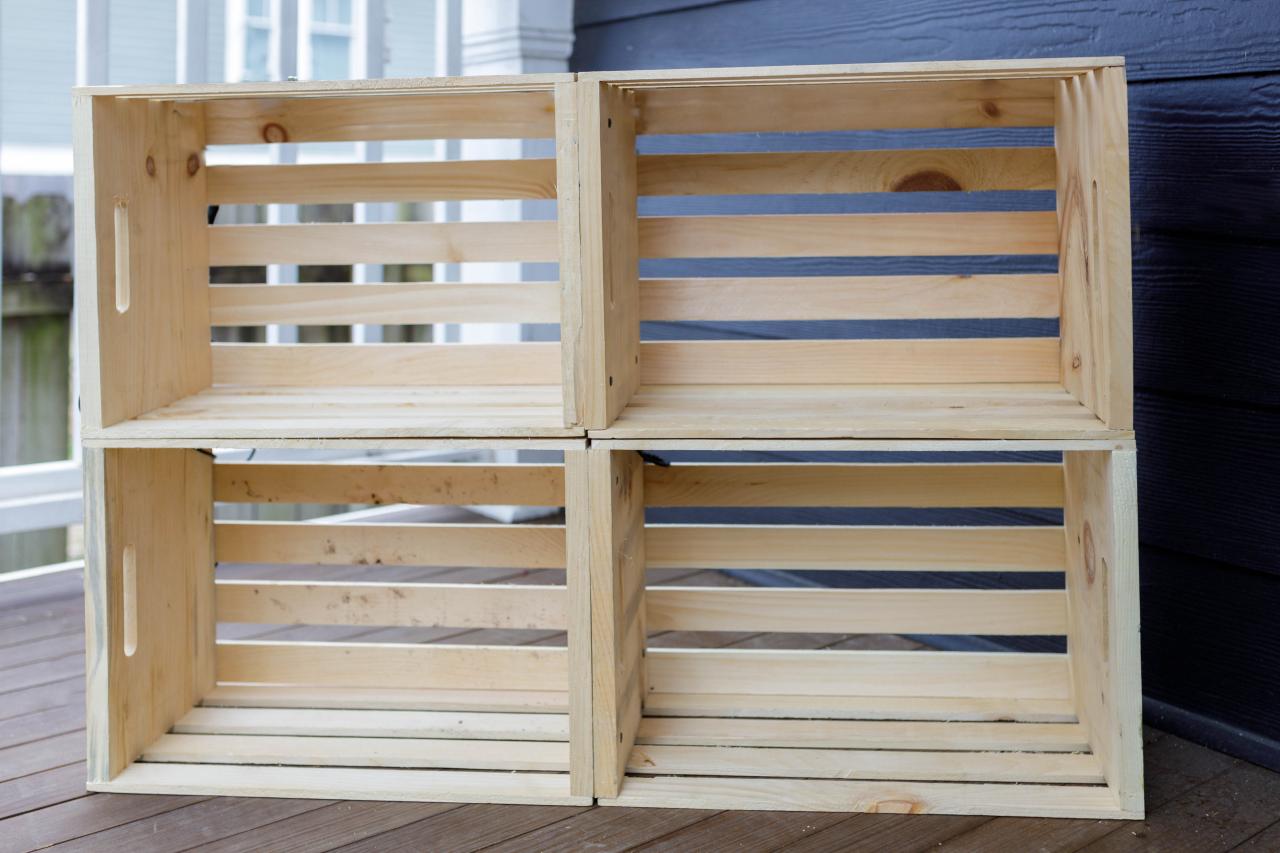
Stack the Crates
Your new, amazing grow stand can be assembled outdoors or indoors depending on where you have the space and whatever makes cleanup easier. Since you have four crates, stack them in a 2x2 quadrant. So easy, right?

Tomas Espinoza
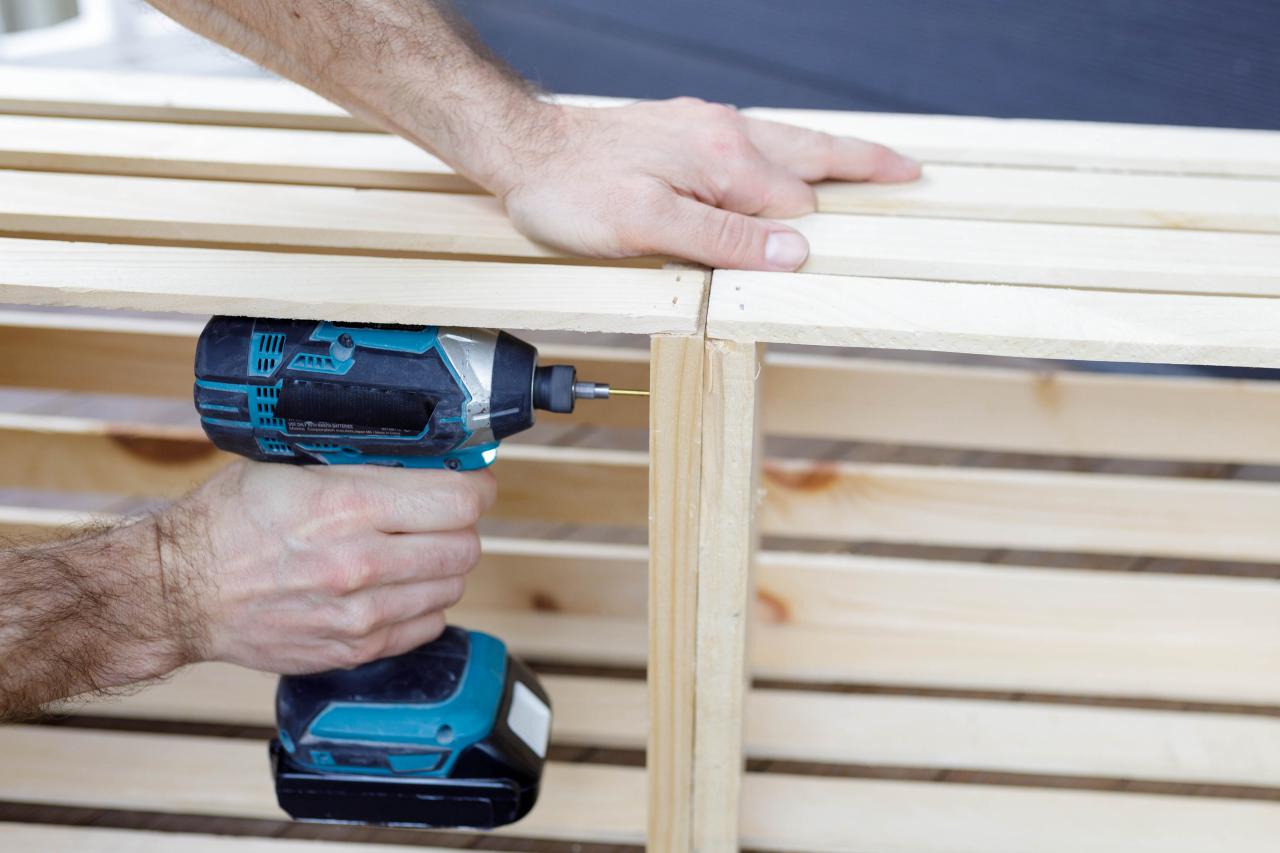
Drill Pilot Holes
You’ll need to attach all four crates with screws. Use a drill to make pilot holes where you’ll be inserting the screws. What’s a pilot hole? Good question! It’s basically a small starter hole so that your wood doesn’t split when you drill in the screws.

Tomas Espinoza
Insert Screws
Now that you’re feeling accomplished, connect all four crates together using your handy dandy drill.

Tomas Espinoza
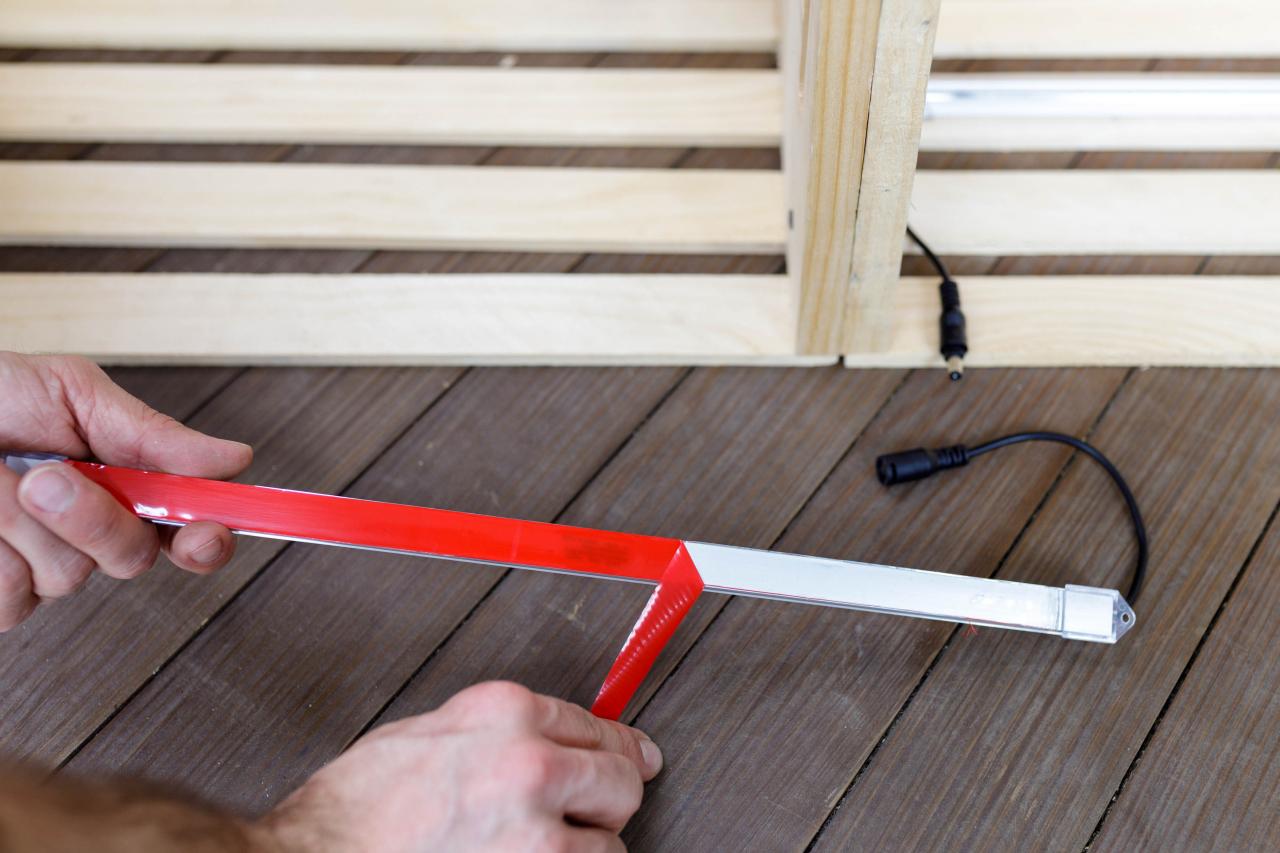
Light It Up
Just because you’re using inexpensive crates doesn’t mean you can’t implement sleek, sexy lighting. Let’s start by adding some adhesive backing to your strip of grow lights.

Tomas Espinoza
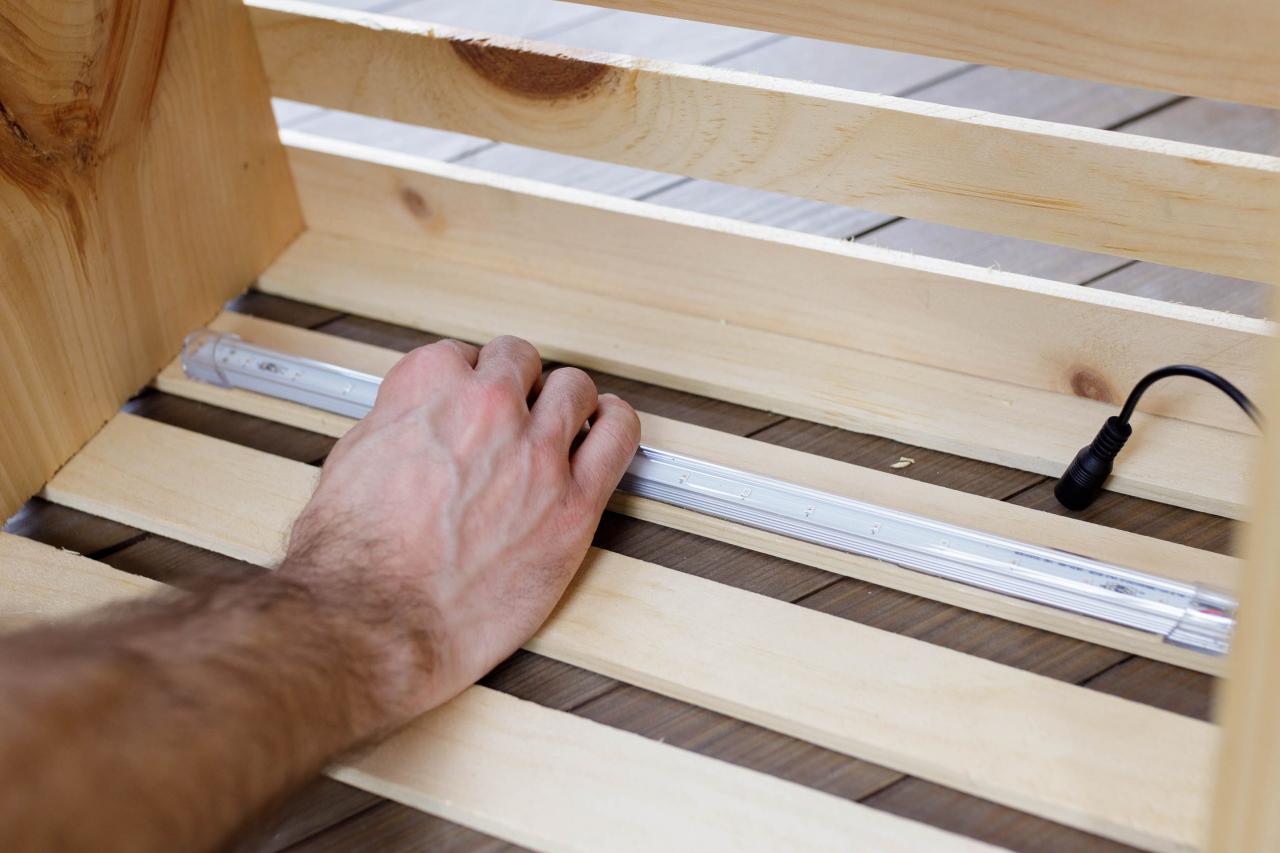
Secure the Light Strips
Remove the adhesive back and stick the light strips to the top interior of the crates.

Tomas Espinoza
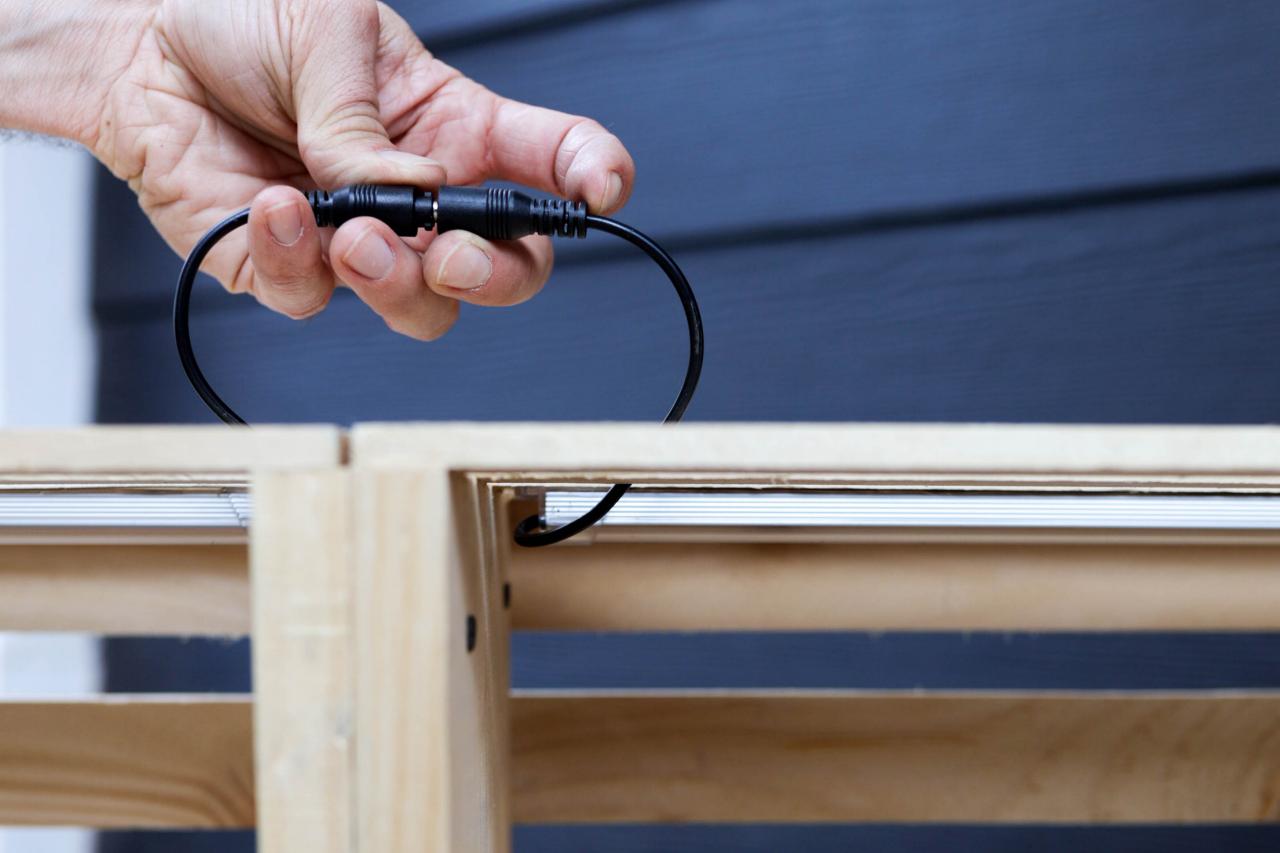
Connect the Light Strips
Connect the two light strips on top two crates together by pulling the cords through a slat at the top of the crate and inserting one end into the other. Repeat for the bottom crates.

Tomas Espinoza
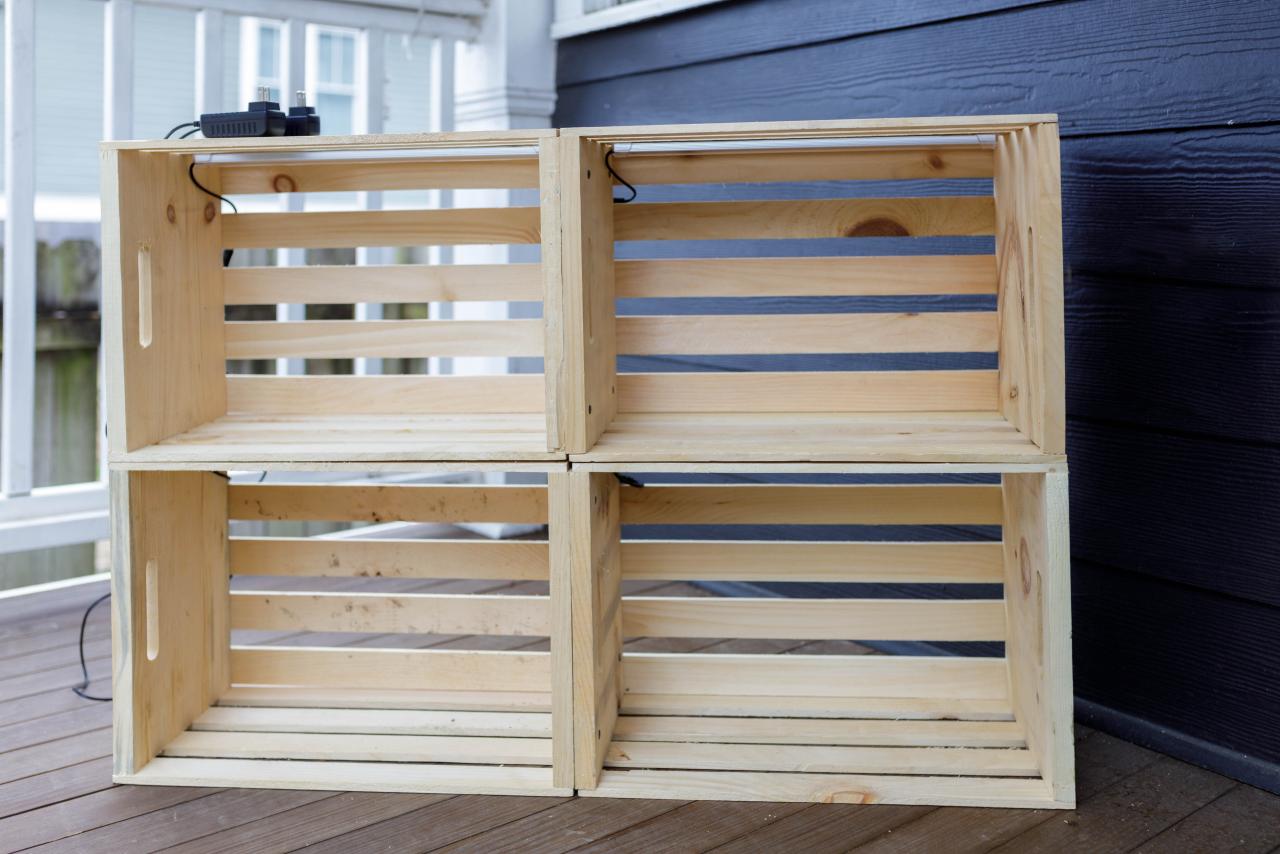
Check In
This is where you can pause and compare your creation with the example pics. Four crates in a 2x2 structure? Check. A light strip fixed to the interior top of each crate, totaling four light strips? Check. Are the light strips connected to each other on each row? Check. Great! Moving on!

Tomas Espinoza
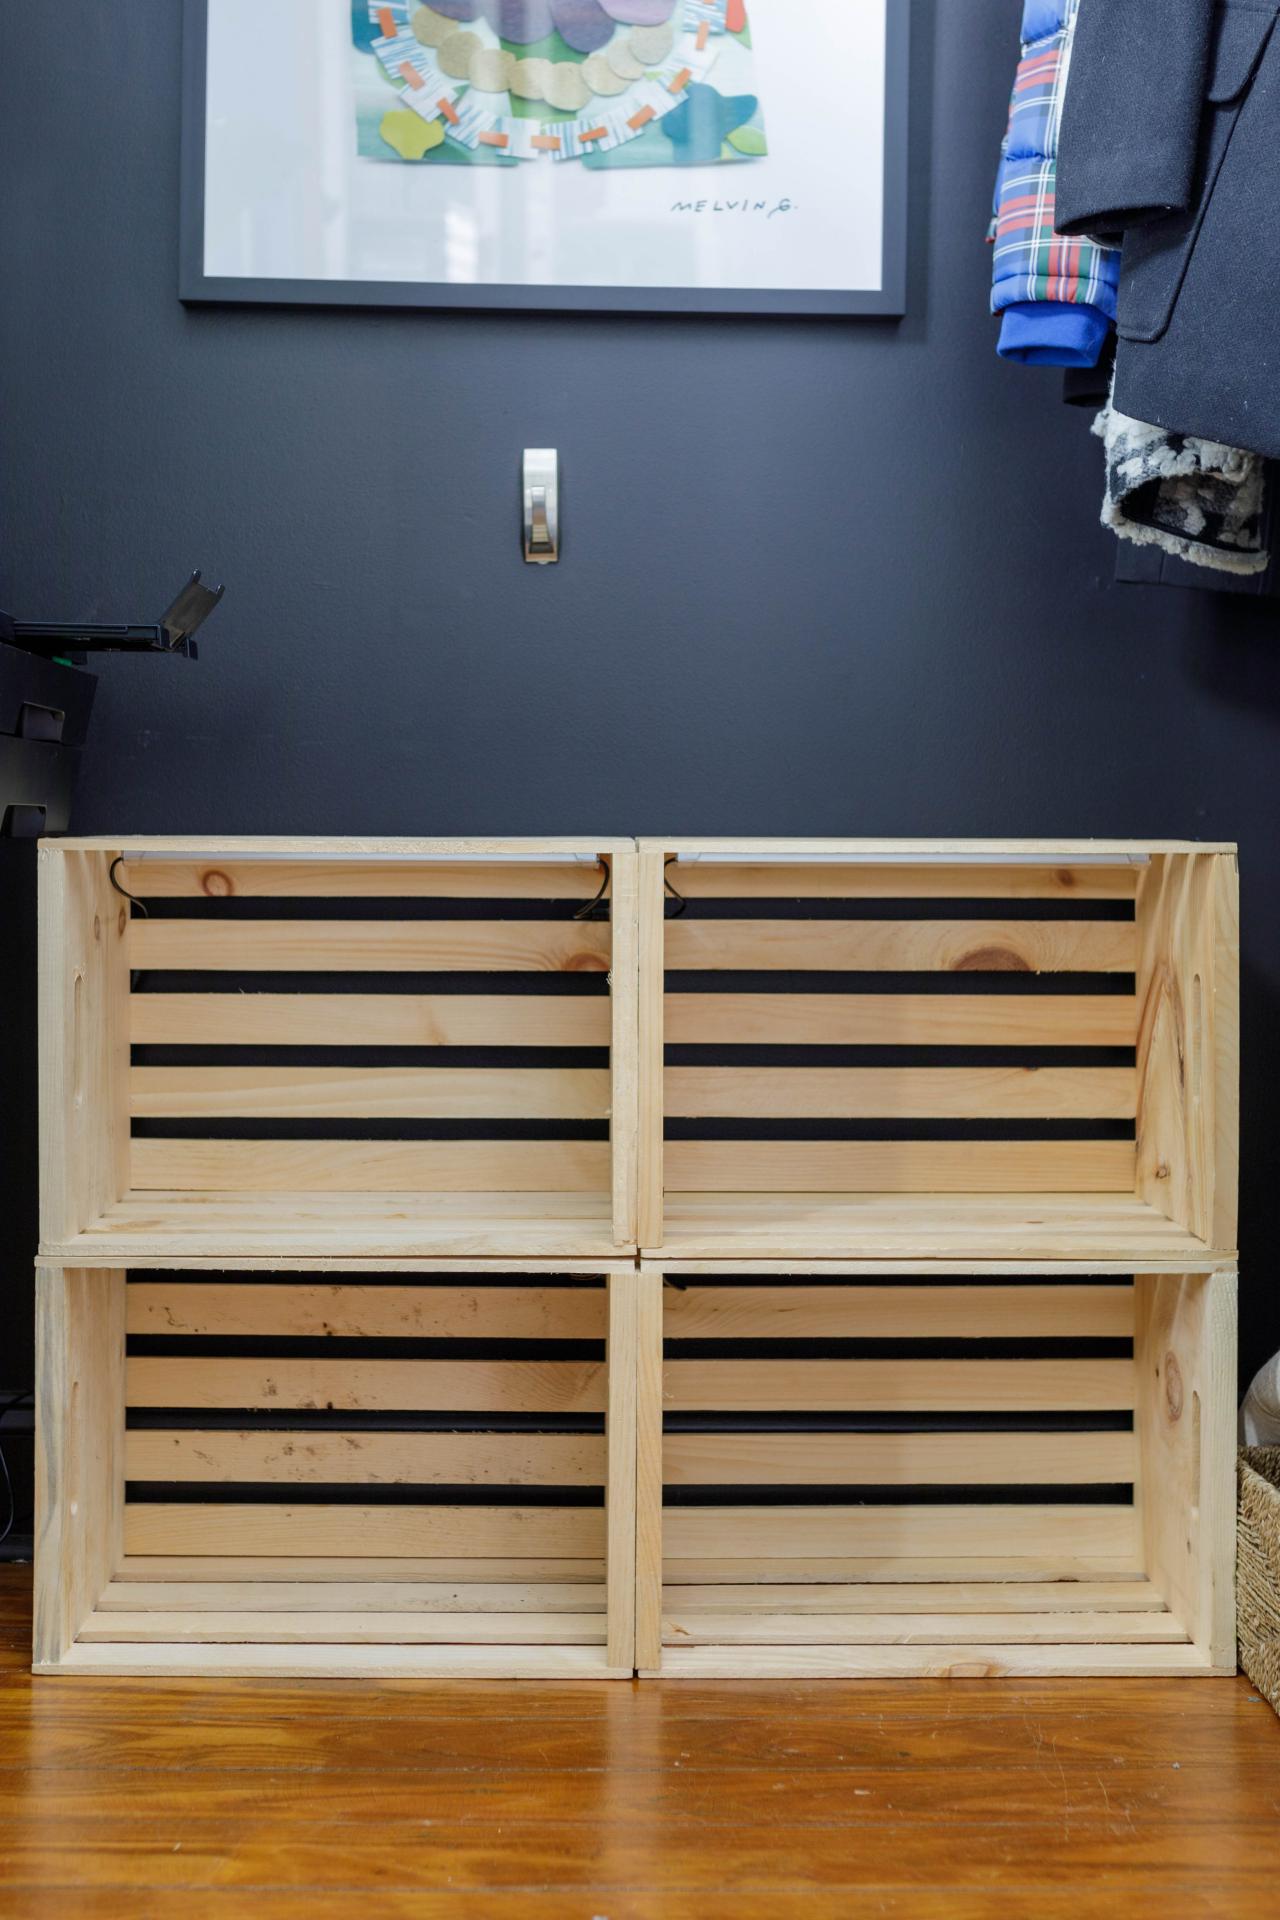
Move It Inside
Now bring your indoor garden inside, because that’s the whole point! We’ve stashed ours in the bottom of a closet.

Tomas Espinoza
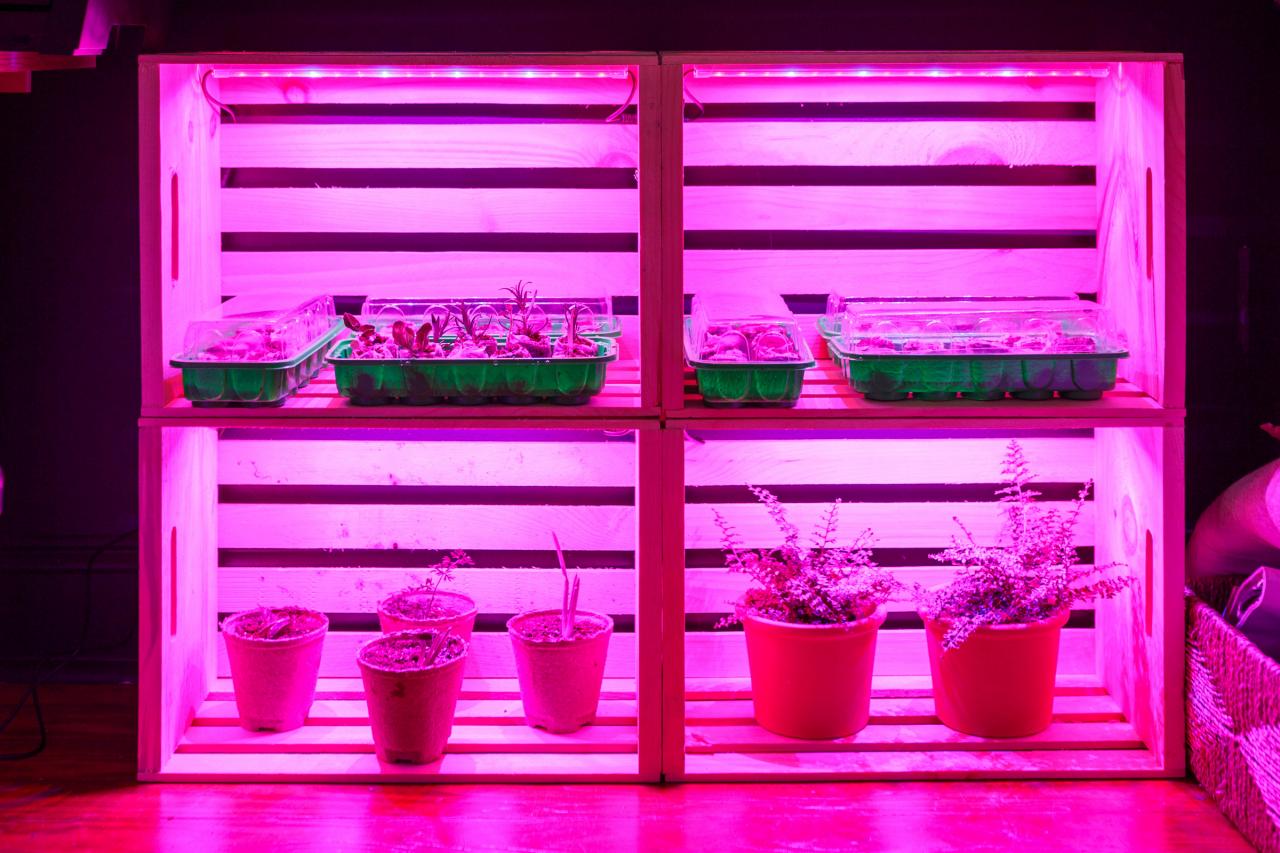
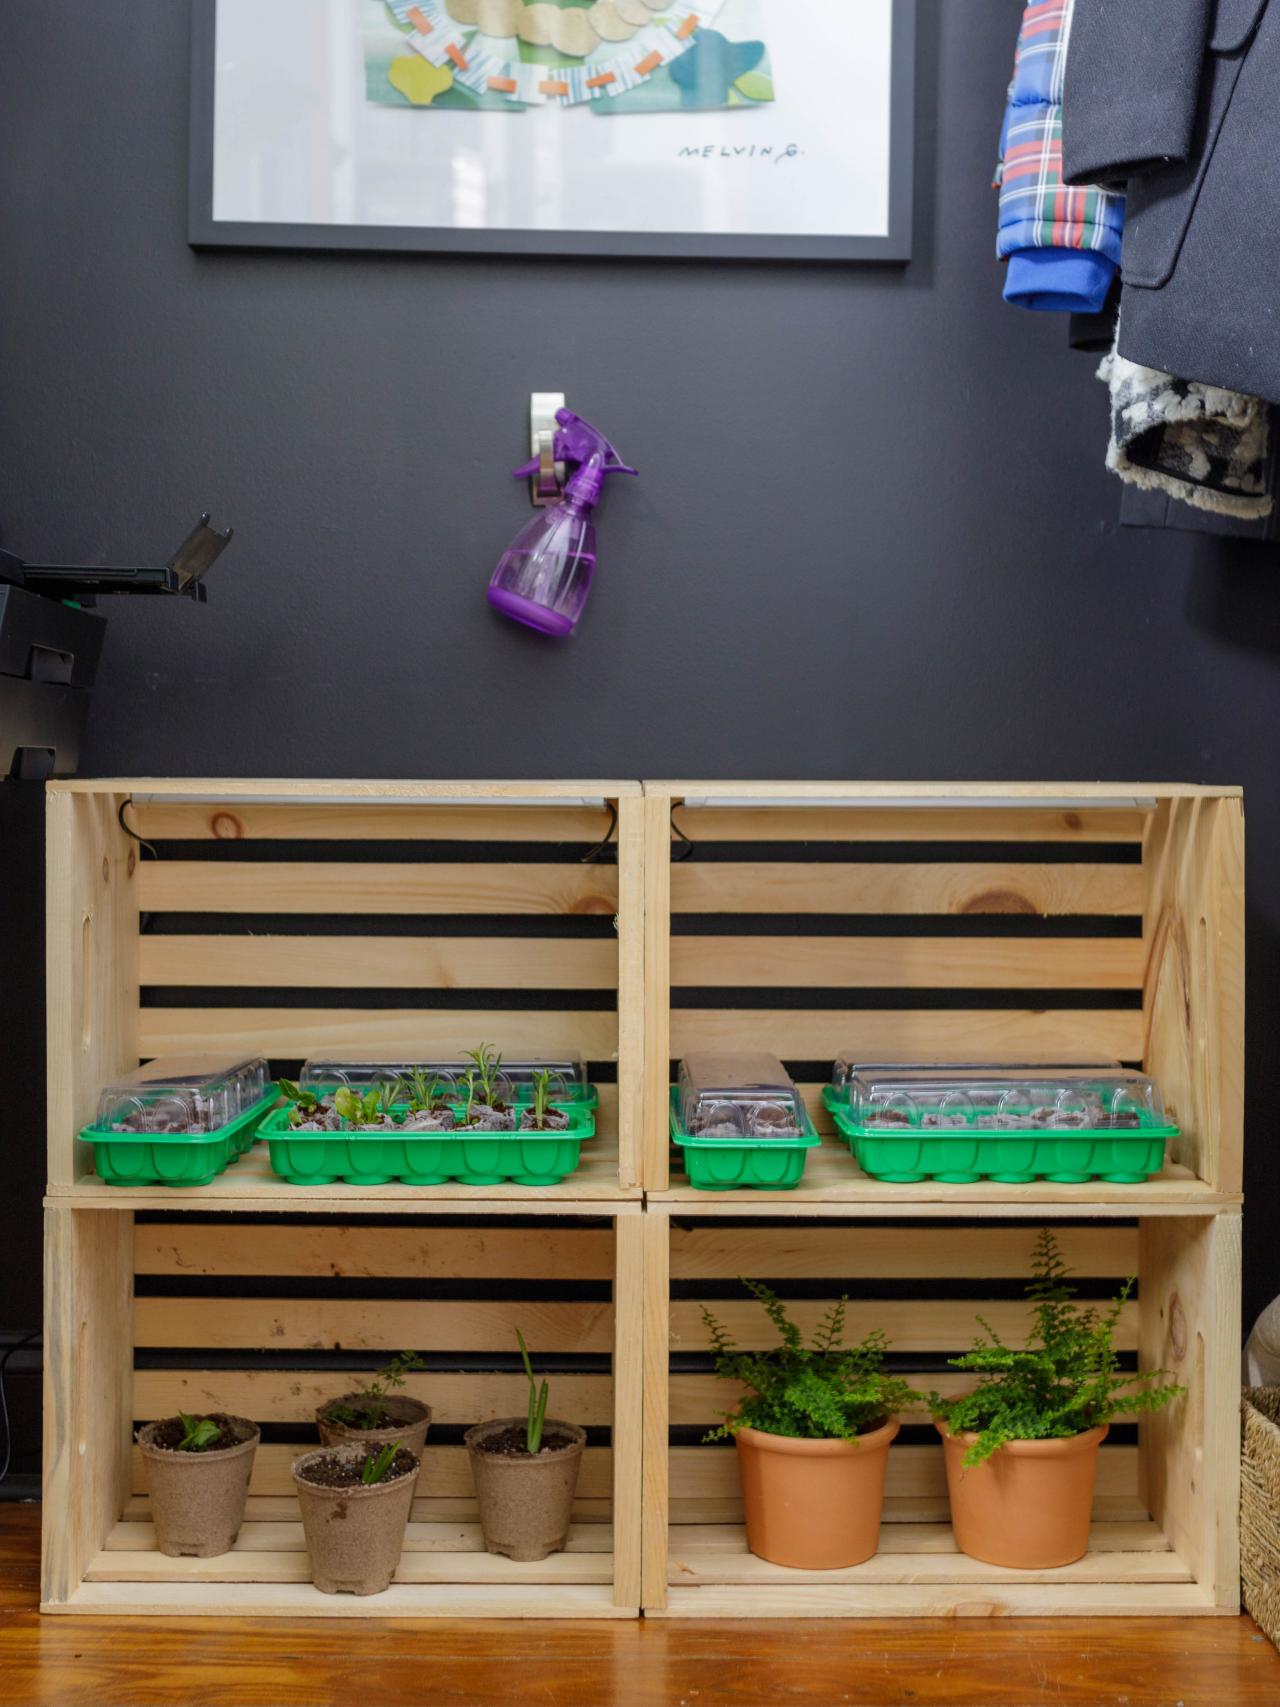
Set It, Forget It
Now, stack the seedling trays on the top crates and the pots below. Set your timer on the power strip for your grow lights. Your work is done here. Do whatever you want now; you’re free to go about your life while these plant babies take root.

Tomas Espinoza


